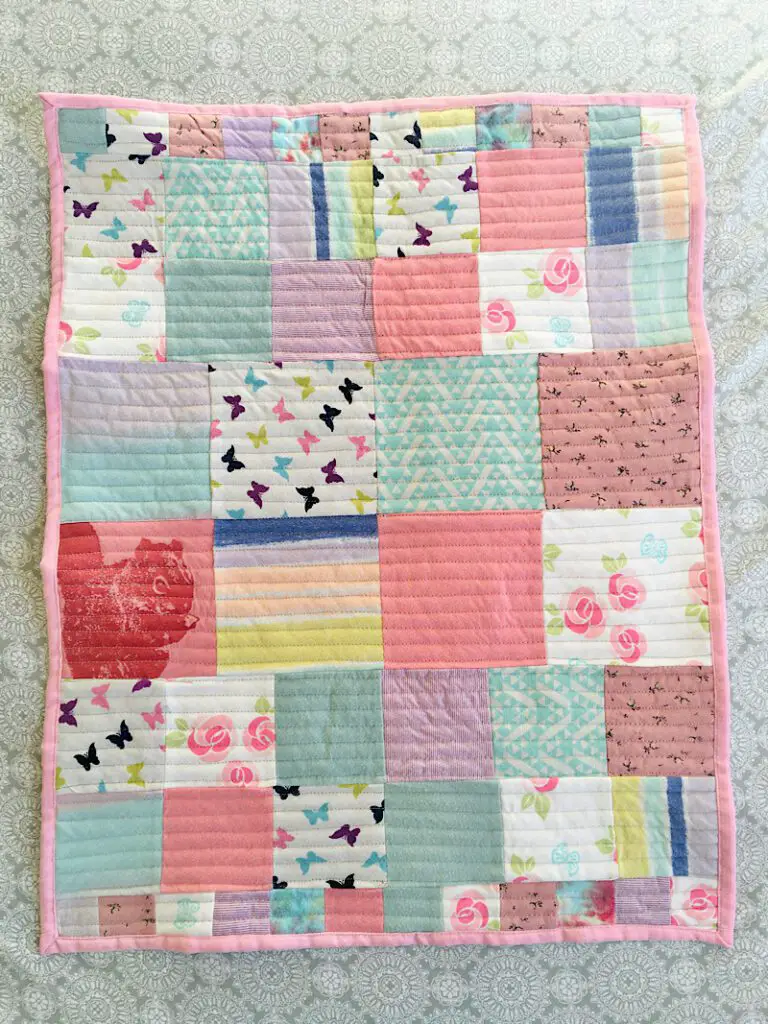
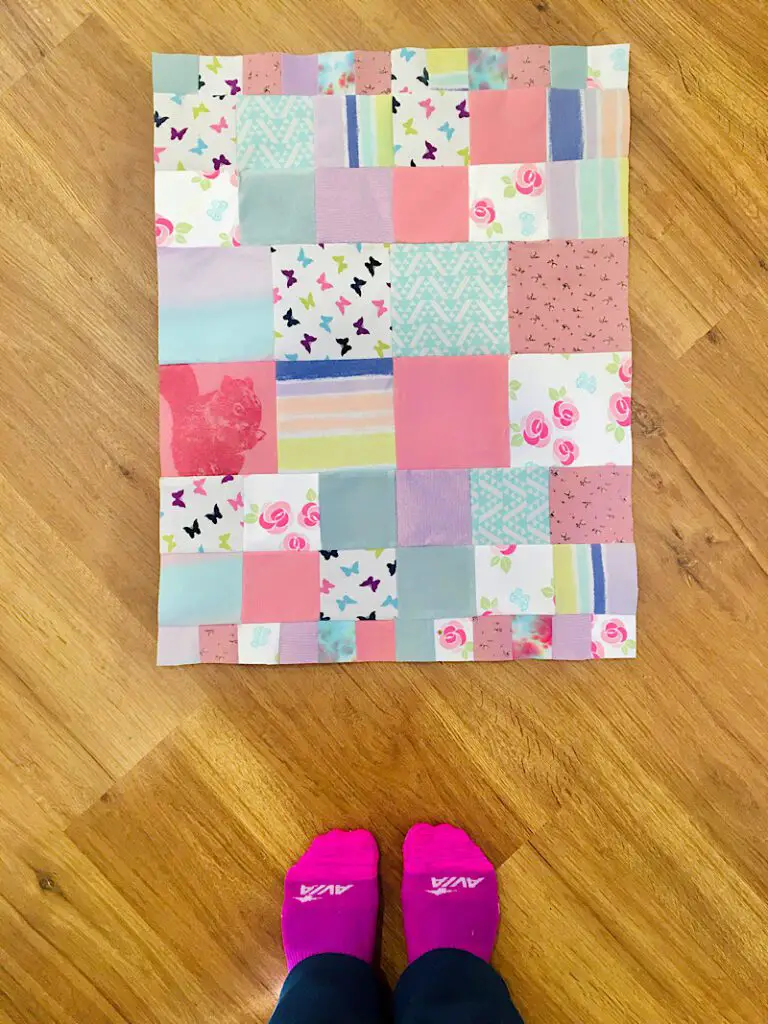
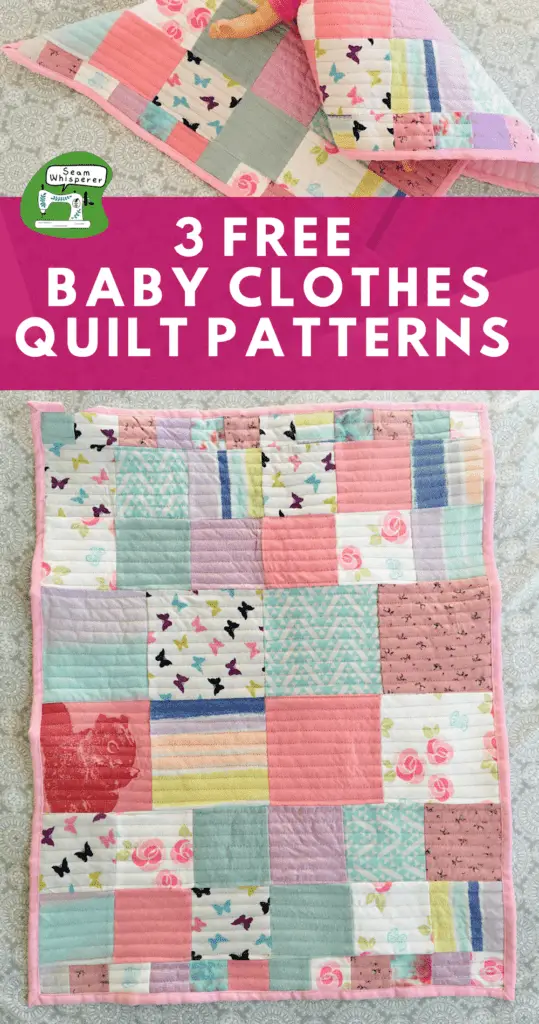
Babies grow out of their tiny clothes far too quickly! Utilize their onesies, dresses, rompers, and jammies to make a darling keepsake baby quilt with these three downloadable patterns. These quilts make great heirloom gifts, and only take a weekend.
Warning, this project might make you sentimental!
This post may contain affiliate links. Read the full disclosure here.
About The Baby Clothes Memory Quilt Patterns
The baby clothes memory quilt pattern is a good project for experienced beginners or intermediate sewists. In my pattern there are only squares, rectangles, and no appliques.
Because many baby clothes are made from stretchy material, a stabilizer is needed to reinforce the back to prevent the quilt from warping. I will show you how to do this in the instructions.
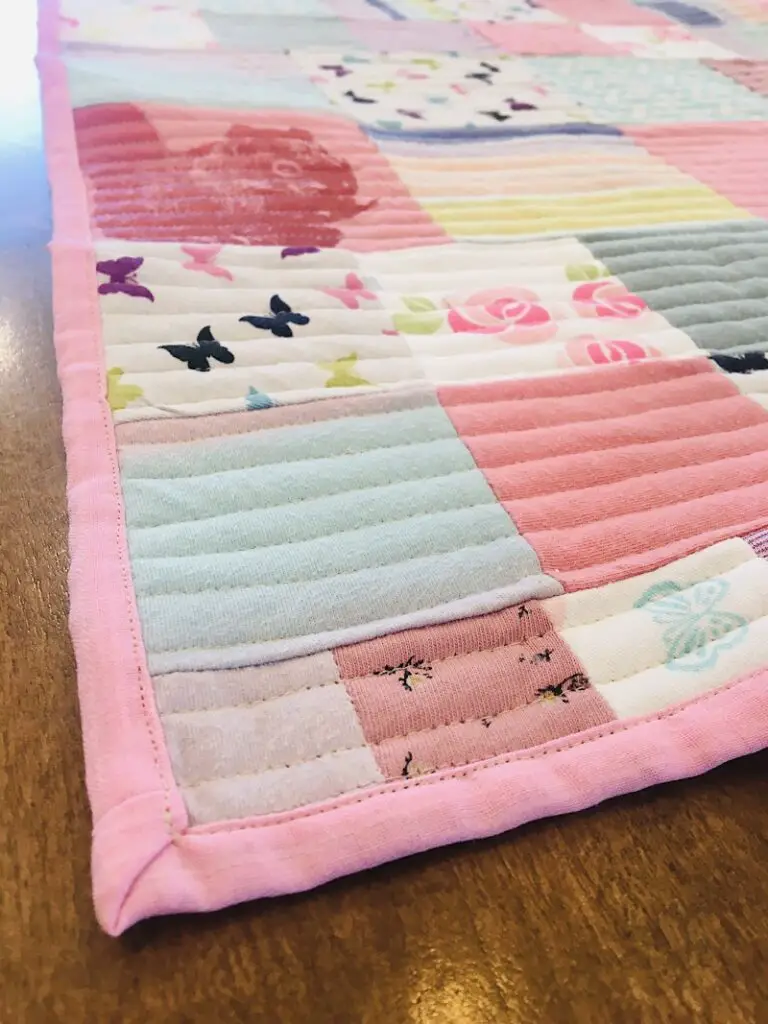
The seam allowance is 1/4 inch, and the quilt is self bound.
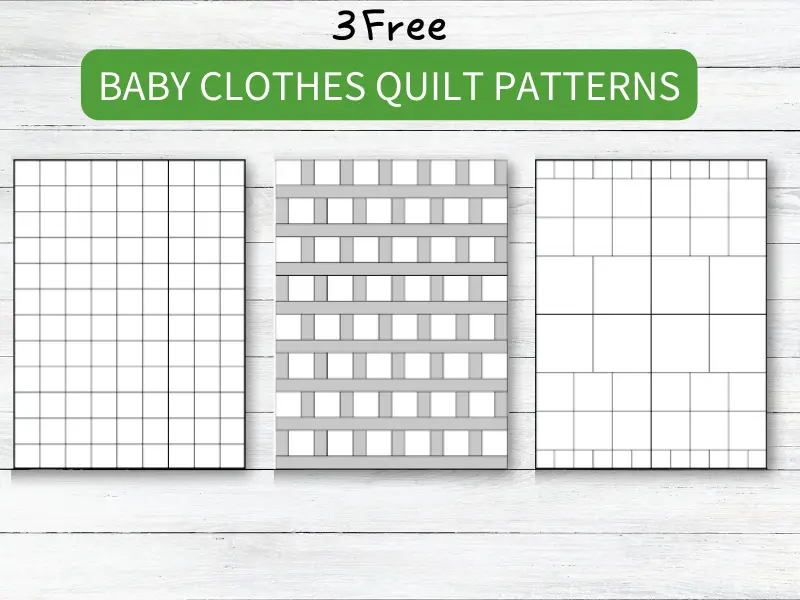
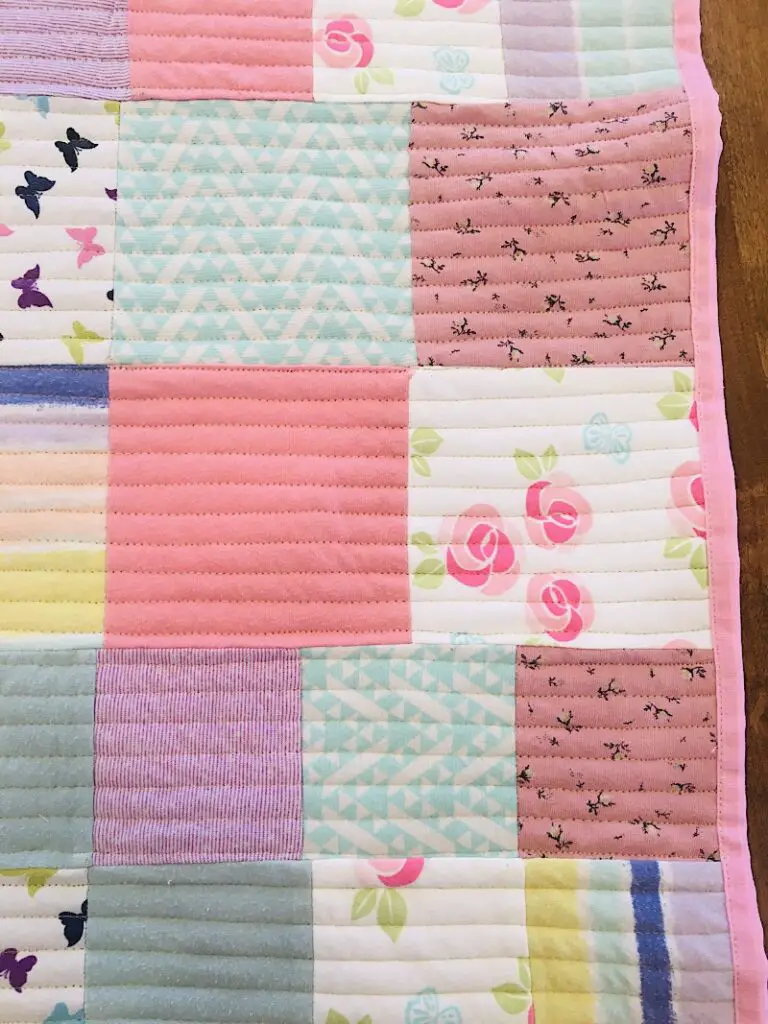
- The “Squares” quilt pattern is good if you have lots of clothing to use
- The “Lattice” pattern is good if you have fewer clothing items, since there are spacers and strips made from a coordinating quilting fabric.
- The “Growing” pattern is good if you have some larger items like dresses or toddler clothes. The cut squares go up to 9.5 inches wide.
How Many Baby onesies do I need to make a quilt?
To make a baby clothes memory quilt out of onesies, rompers, and jammies, you will need about 15-30 items. Use bigger sized items or items with more surface area to decrease the amount needed. If you only want to use the front design on onesies, you will need significantly more.
Supplies Needed
- Sewing Machine
- Sewing Scissors
- Sewing Pins or clips
- Rotary Mat, rotary cutter, and acrylic ruler
- Iron and Ironing Board
- Walking or Darning Presser feet (Optional but they make quilting easier)
Materials Needed
- Baby Clothes (10-20 items for a mini quilt, 15-30 items for a small quilt)
- Quilt Batting (24″x30″ for a mini quilt, 42″x54″ for a small quilt)
- Quilt Backing (24″x30″ for a mini quilt, 42″x54″ for a small quilt)
- Matching Thread
- Featherweight or Lightweight Fusible Interfacing (1/2 a yard for mini quilt, 1 yard for small quilt)
- For the Lattice quilt only: Quilting cotton for the spacers and strips, 1 yard)
How To Download The Pattern
This pattern is a printable PDF with 4 pages. It includes a cut list for the blocks, and the basic overview of the pattern.
To download the pattern, enter your email below and I will instantly email you the pdf file!
After printing the pattern, look over it to choose which quilt and size you will make so you know what materials to prepare.
Basic Overview of Instructions
The basic steps to make each quilt are the same. In this tutorial I make the “Growing” mini quilt to show you the basic method, but you can make any of the quilt patterns following these 10 steps:
- Cut Out The Blocks From The Interfacing
- Disassemble the Baby Clothing
- Fuse The Interfacing To The Backs of The Clothing
- Cut Out The Squares From The clothes
- Sew Together Each Block In A Row
- Sew The Rows Together
- Press And Square Up The Quilt
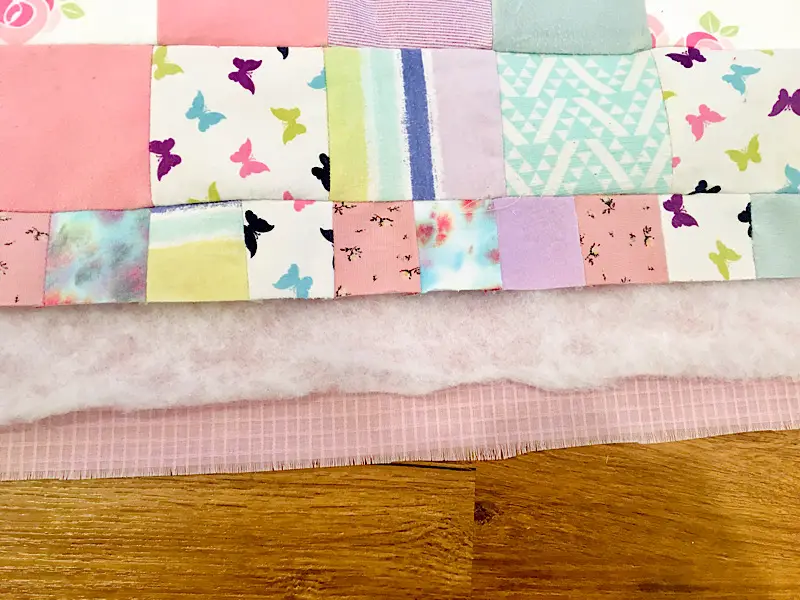
- Layer The Quilt Sandwich And Baste
- Quilt The Quilt
- Trim and Bind the Quilt
Now, lets get to the photos and step by step guide!
How To Make A Baby Clothes Memory Quilt
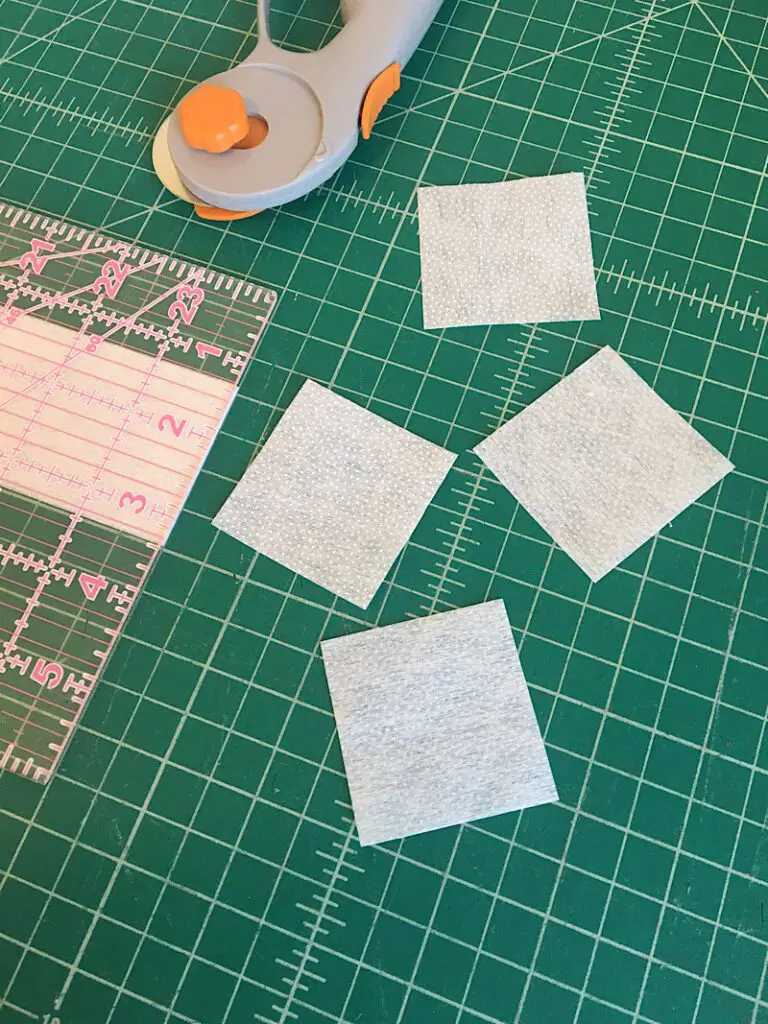
1. Cut Out The Blocks From The Interfacing
Follow the cut list on your quilt pattern and use your rotary cutter to cut out squares from the interfacing. Then set them aside.
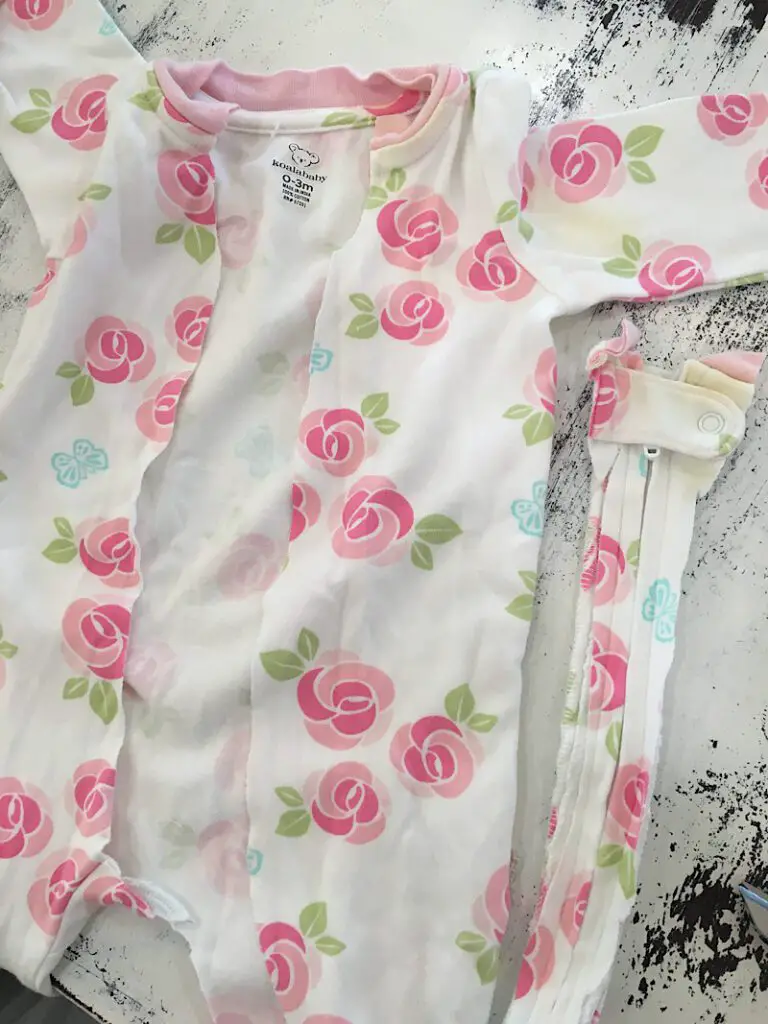
2. Disassemble the Baby Clothing
Cut apart the baby clothing and flatten it out into large surfaces. Here are some examples:
Cut open pant legs and sleeves along the seam to open them.
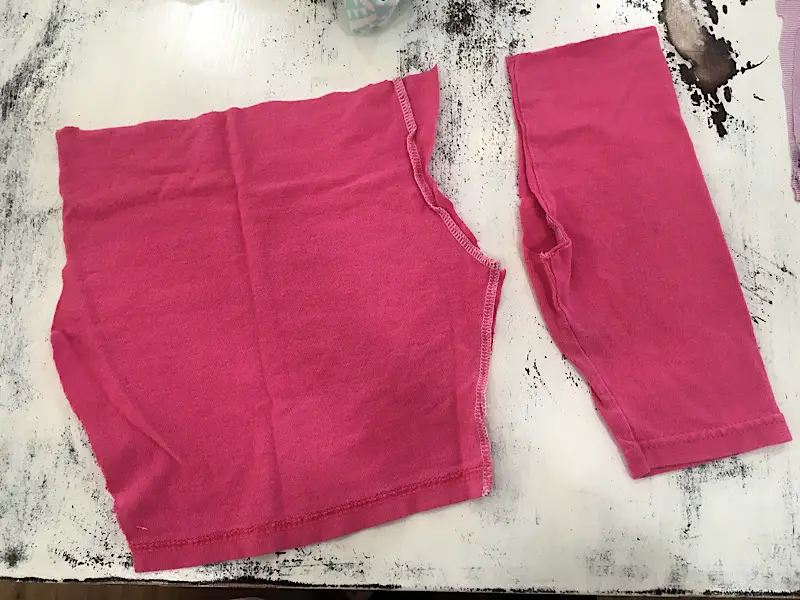
Cut off the gathers of dresses to flatten them out. Cut the front and back of shirts apart.
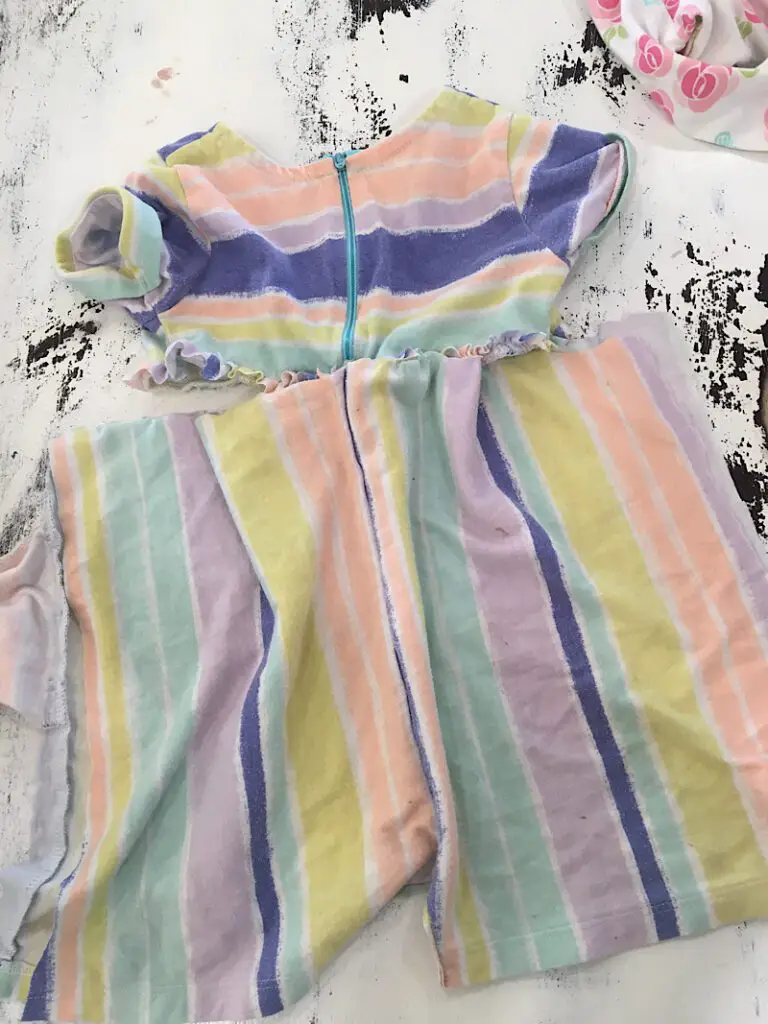
Most importantly you need to cut out zippers and buttons to make sure they don’t get in the way while you sew.
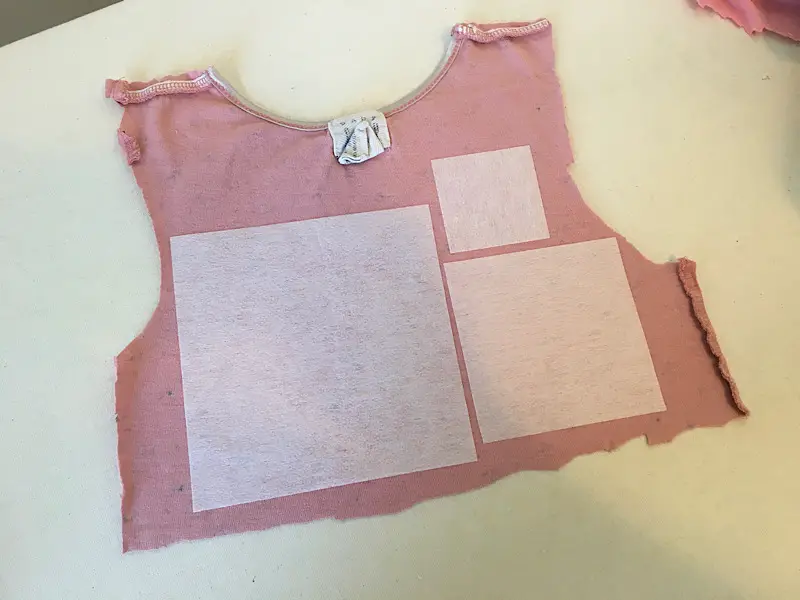
3. Fuse The Interfacing To The Backs of The Clothing
Once your clothing is disassembled, follow the instructions on your interfacing to fuse it to the backs of the clothing.
I tried to center the squares over design elements on the clothing, like flowers or stripes.
If you are making the “Growing” quilt, make sure that there are large, medium, and small blocks made from each clothing item if you can. This will help spread out the designs over the quilt
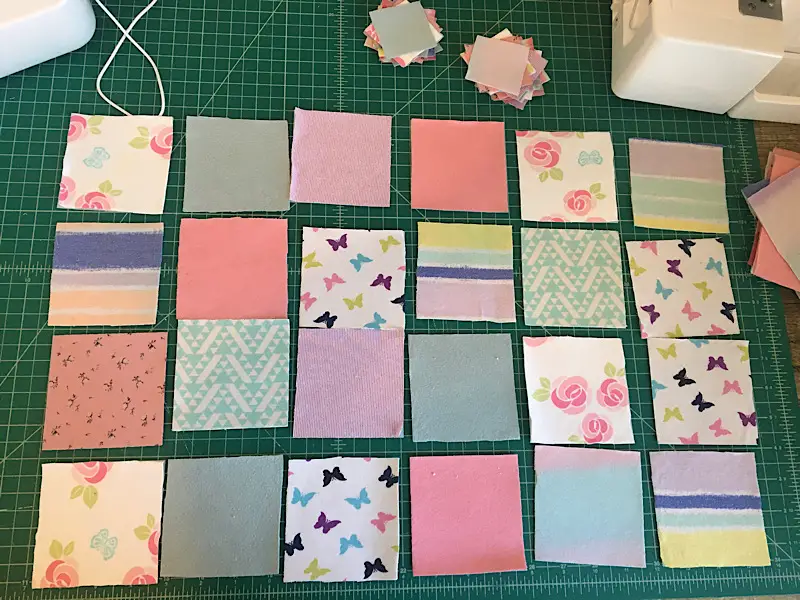
4. Cut Out The Squares From The clothes
After everything has been fused, carefully cut the squares from the clothing. I used both scissors and the rotary cutter for this job.
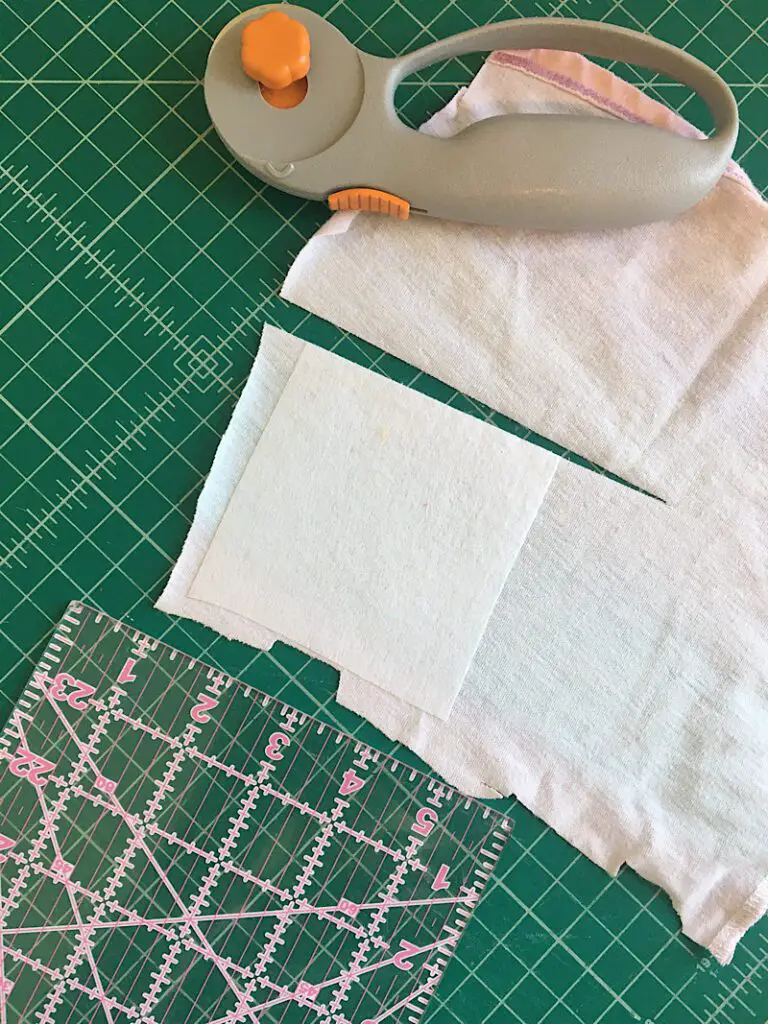
Place the cut squares in stacks according to their sizes.
If you are making the “Lattice” quilt, now you should also cut out the spacers and strips from your coordinating quilting fabric.
5. Sew Together Each Block In A Row
Before sewing, take the time to lay out the blocks on the floor or a large table to arrange them in the order you will quilt them. Try to spread out the colors and patterns around the quilt. Then, stack up each row in order and set them aside.
If you are sewing the lattice quilt, your rows will have spacers in them too, alternating with the blocks.
One row/stack at a time, sew the squares together by putting them on top of each other right sides together and sewing down the right edge 1/4th inch. Then, open the square you just sewed and add the next one the same way.
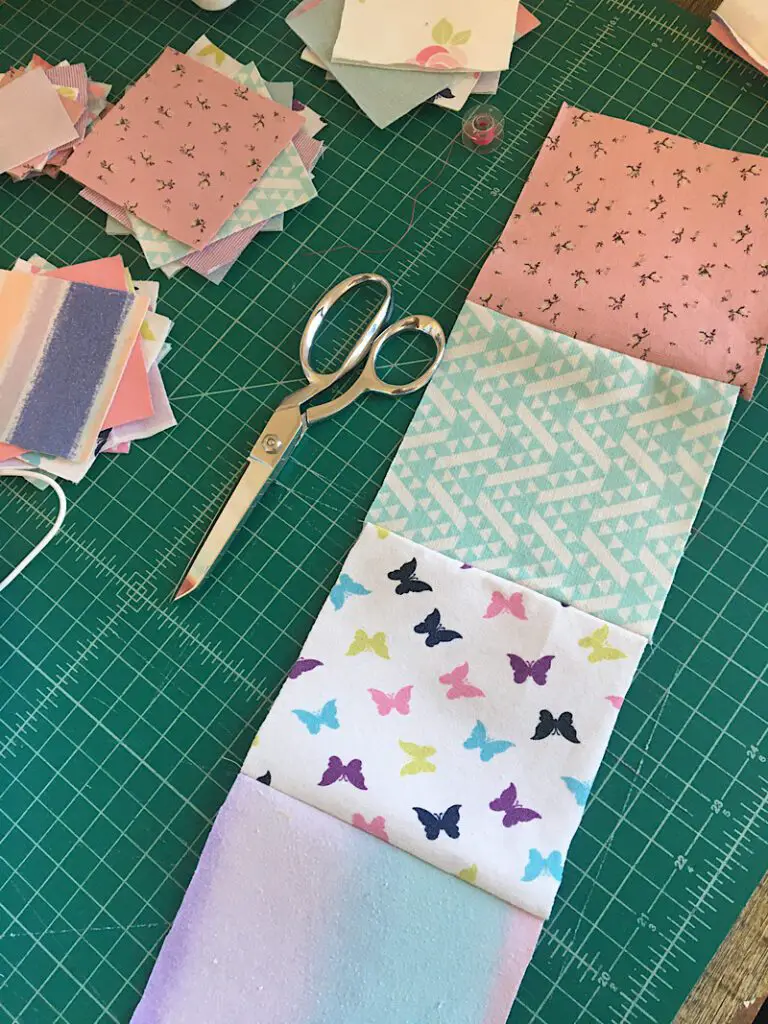
When you finish a row, press the seams to the side and make sure it is all flat.
Assemble all the rows before you sew them together.
The lattice quilt has rows that are just strips, they obviously don’t need to be assembled besides being cut.
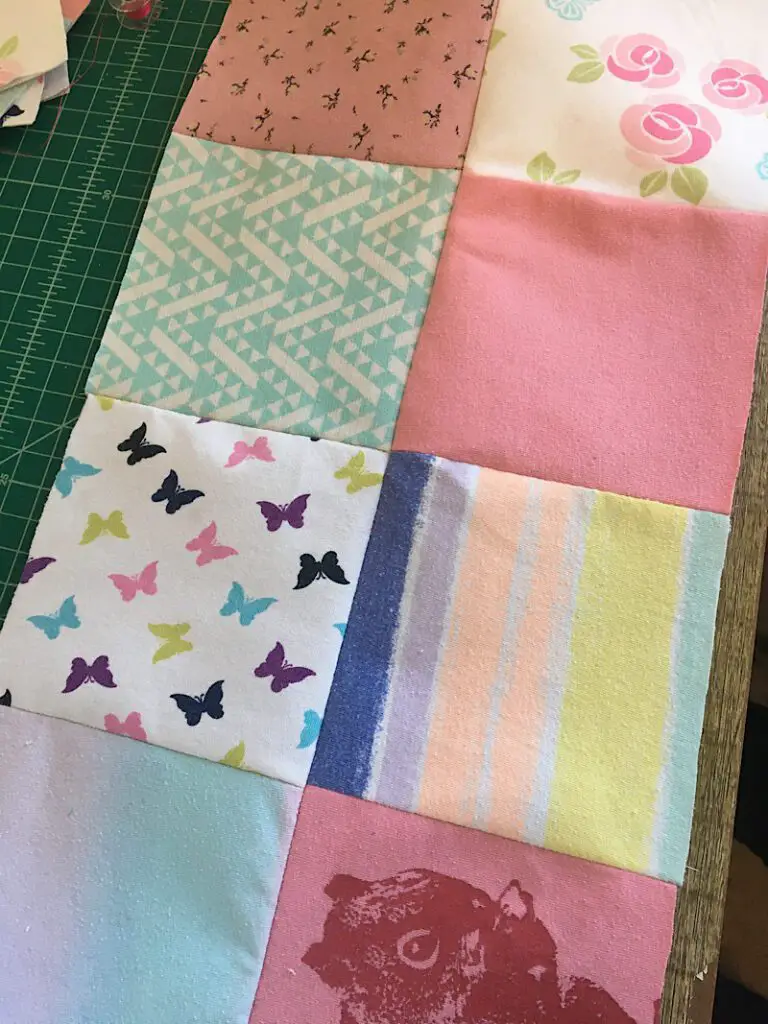
6. Sew The Rows Together
Sew each of the rows together starting with the top row, then the second, and so on. Attach them by laying them on top of each other with right sides facing, then sew down the bottom edge with a 1/4 inch seam allowance.
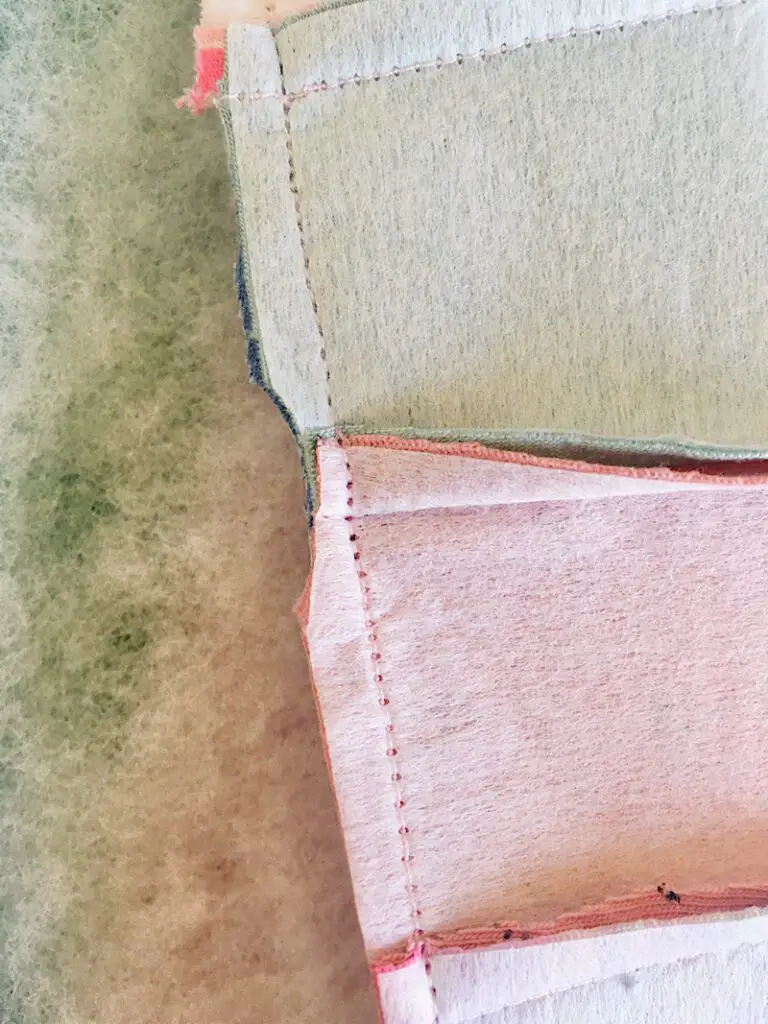
7. Press And Square Up The Quilt
Once all the rows are sewn together, press the seams on the back so they lay flat. Take the time to press your quilt very well, and use the rotary cutter to square it up if it needs to be.)
You can also cut out very small bits of the seam if there are any overly bulky corners. (The interfacing tends to make the corners bulky). Be careful not to cut into the seam.
It’s starting to look like a quilt!
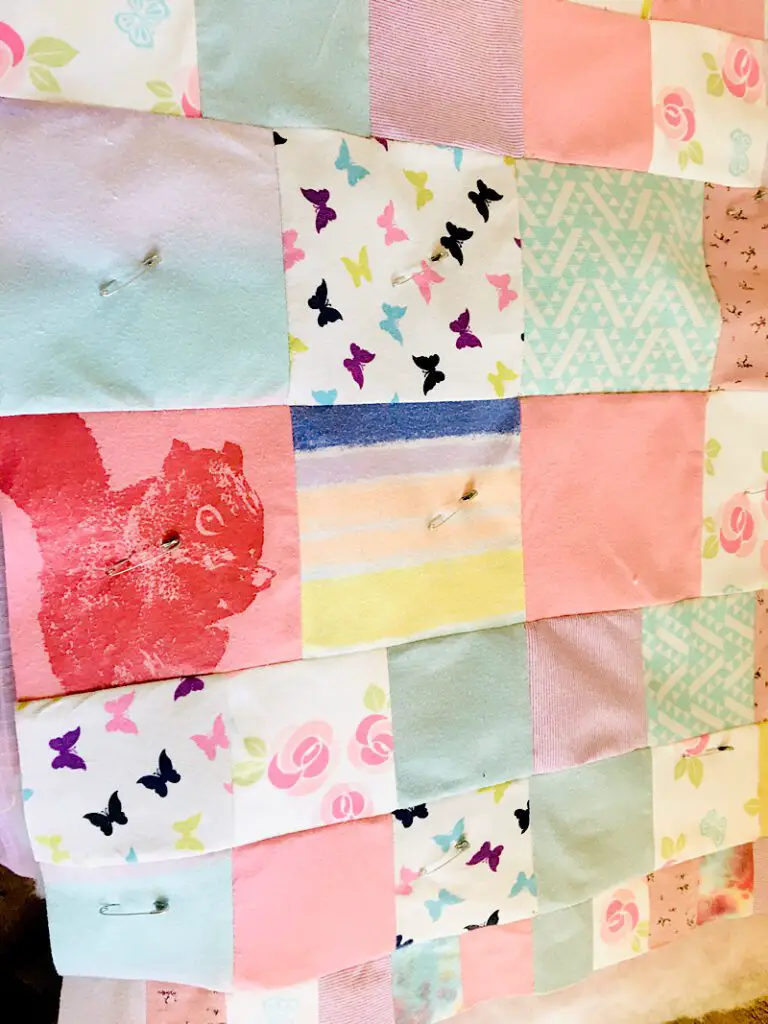
8. Layer The Quilt Sandwich And Baste
Lay your quilt backing on the floor with the right side DOWN. Lay the quilt batting on top. Then, lay the quilt top on top with the right side UP.
The quilt backing and batting should be 3 inches larger on all sides. This makes sure you still have enough overhang even if it shifts a bit.
Use safety pins to baste the quilt every few inches all over. This prevents shifting while you sew.
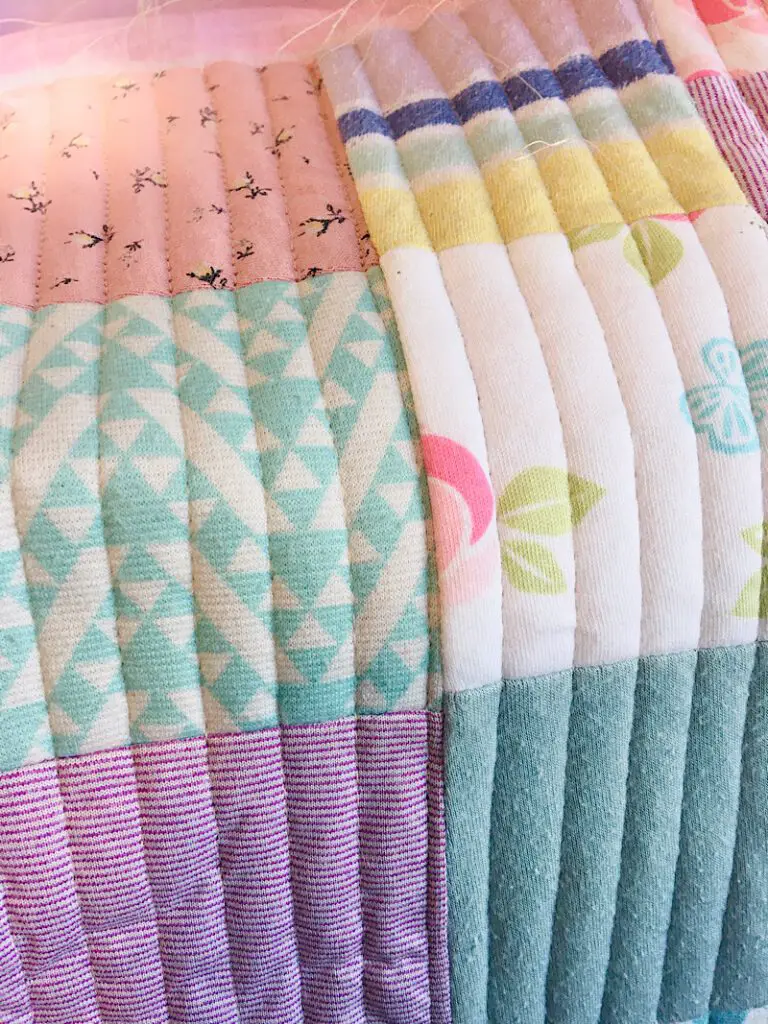
9. Quilt The Quilt
Now it’s time to quilt! There are a few different ways you can do it…
- Sew down the seam of each row (This is called “stich in the ditch” and is the easiest. It leaves the blocks very square and prominent looking)
- Sew Parallel lines down the entire quilt (this is what I did, I simply used the presser foot to measure the next line over)
- Tie it with yarn or string to add a playful look
- freemotion quilt it (probably not a method for beginners)
Make sure not to sew over the edge of the quilt top. If you do, pick those few stitches with a seam ripper.
10. Trim and Bind the Quilt
After quilting, carefully fold away the backing and trim off the excess batting.
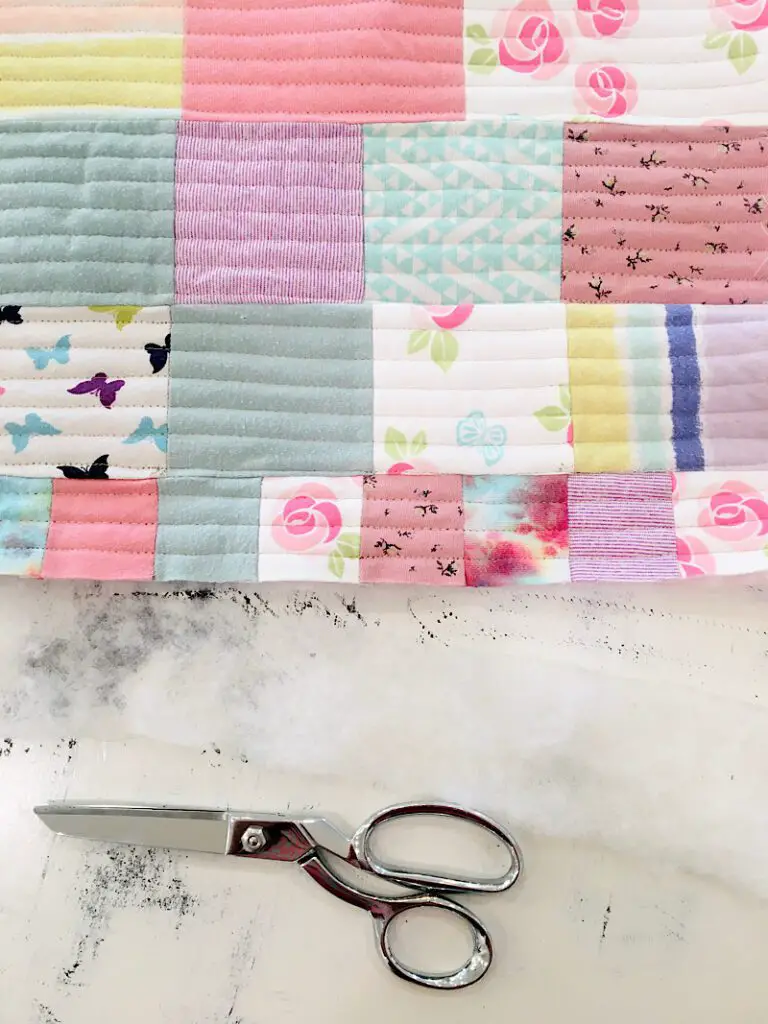
Them use your rotary cutter and ruler to cut the backing so it overhangs 1 inch all around.
To self bind the quilt, fold the backing up a half inch until the raw edge touches the edge of the quilt top. Then fold it up again over the top of the quilt. Pin in place.
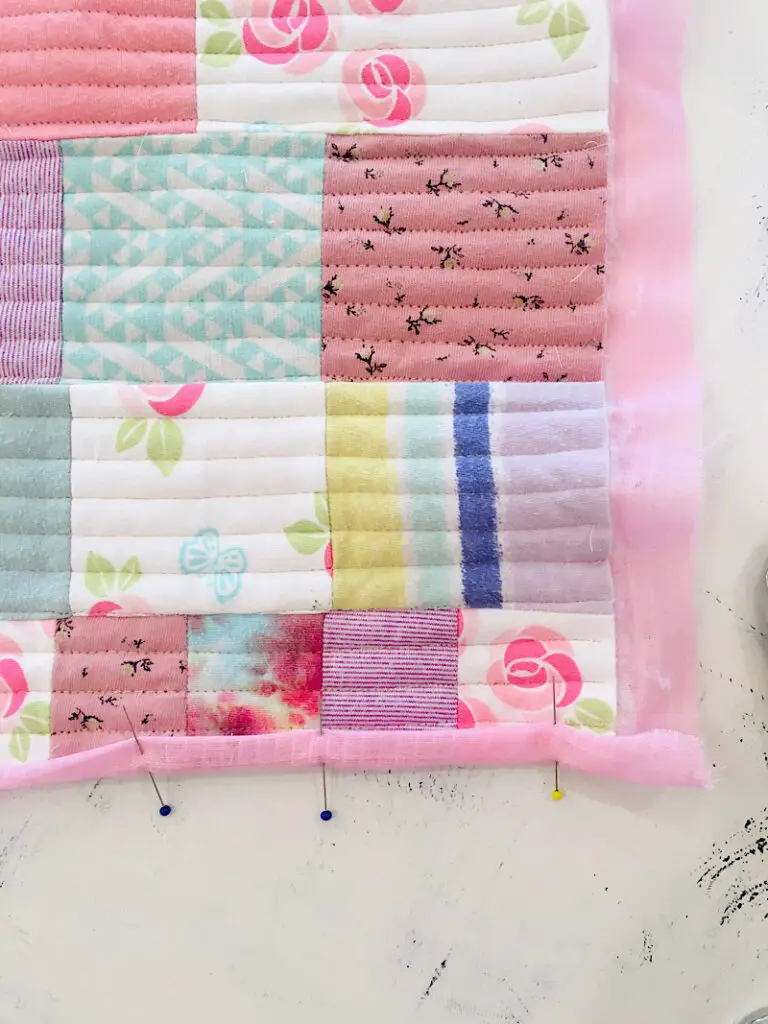
When you get to a corner, fold the corner up into a right triangle, then fold the next side up over the quilt like you did with the first side.
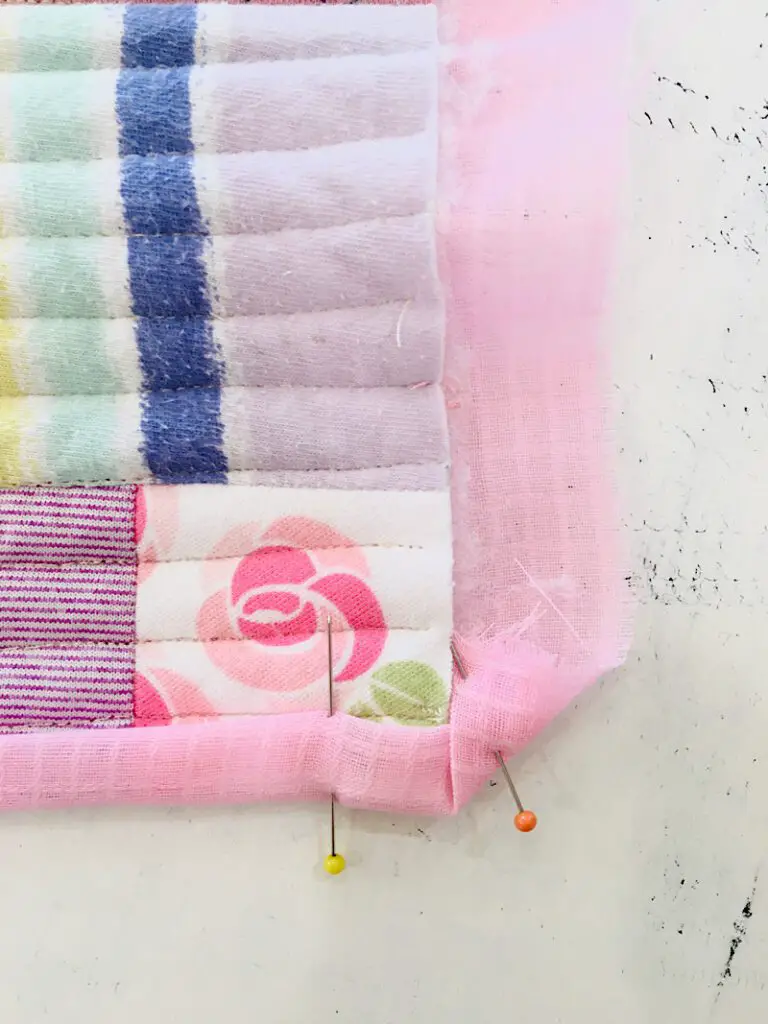
It can be tricky to keep that triangle folded while you fold the rest, my tip is to use a glue stick to glue the corner part down to hold it in place.
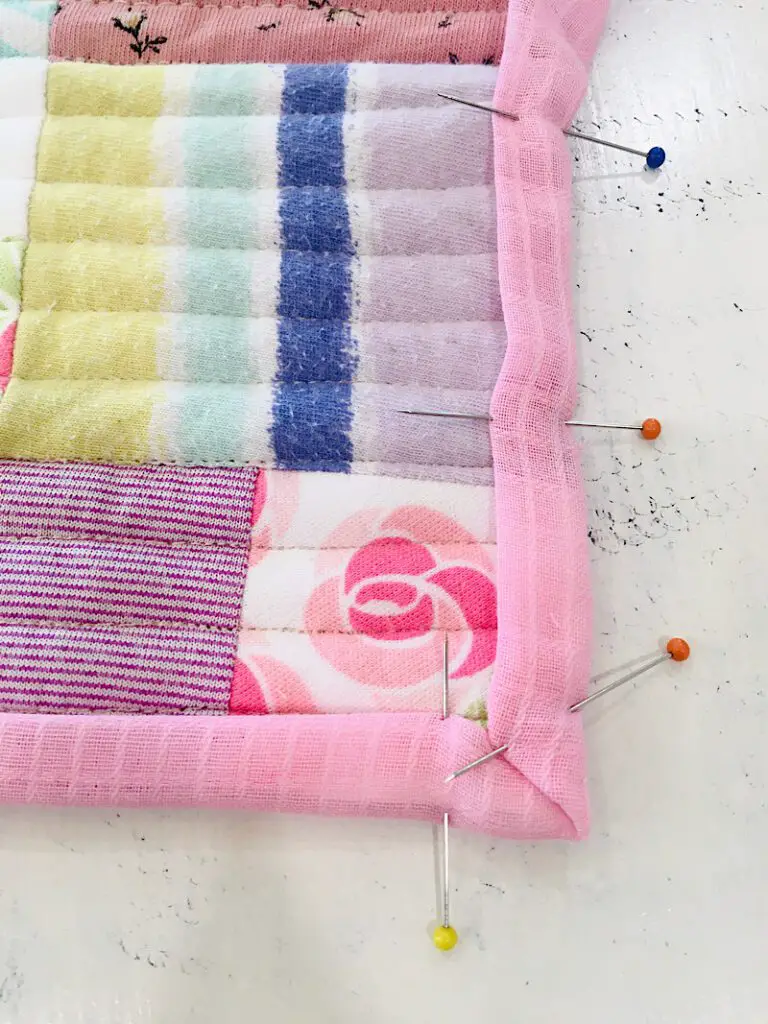
Once you have folded the binding, sew it down near the inner fold.
This finishes your quilt!
Show & Tell
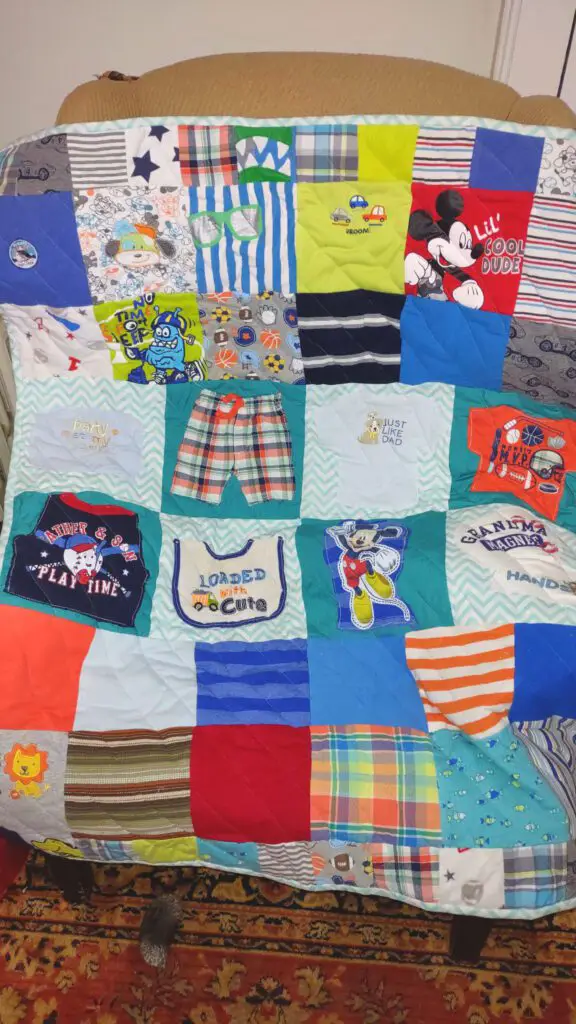
Sandi sent me this photo of her adorable baby memory quilt!
She says: “It turned out so cute. I appliqued little cut out shirts and pants on the 9 1/2″ squares. I appreciate the pattern. I am a novis quilter and didn’t know where to start on the baby clothes quilt. Thank you”
She used my “Growing” pattern. It turned out GREAT!
Conclusion
This project was such a fun one for me to complete, and I only got teary eyed once!
Seriously though, how cute is it to snuggle up with a quilt made from baby clothes? I have such fond memories of days my girls wore these outfits, and now that I have a son I can’t wait to make another!
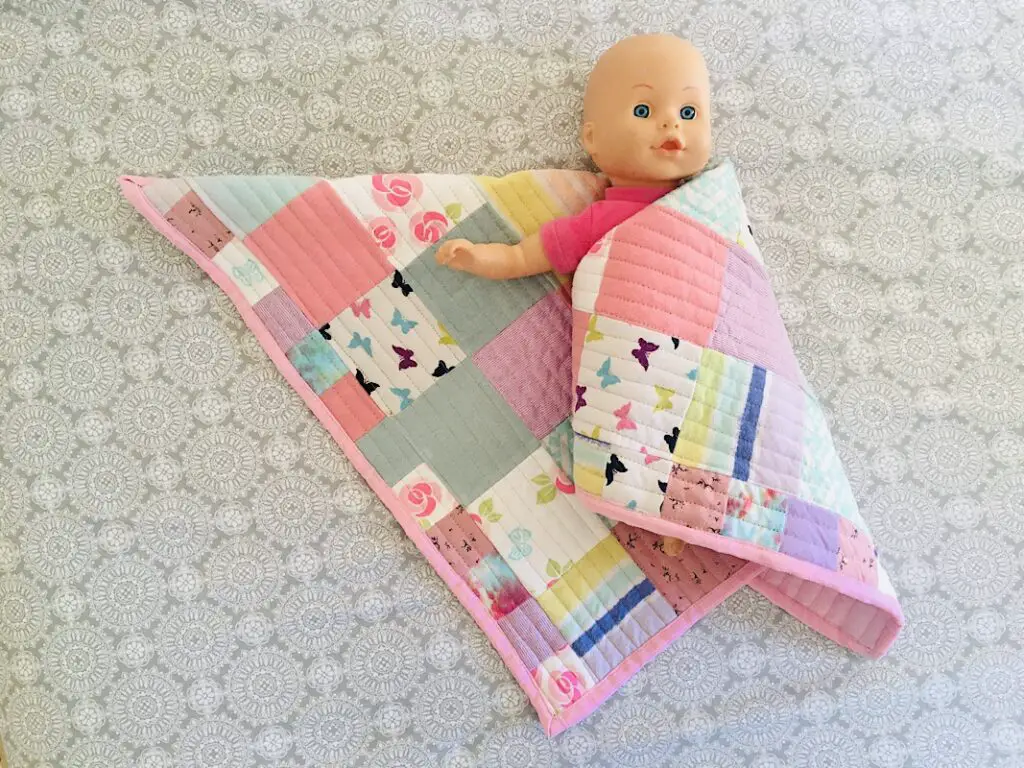
The mini quilts are great for dolls or for hanging in a large frame. The small quilts are great baby quilts for your grandkids one day! The possibilities are endless on this project!
Let me know if you have any questions in the comments below, and if you are looking for more “memory” projects, be sure to check out my free memory bear pattern as well.
Pin this post for later so others can make it too!
Shout out to my new friend Courtney for this great project idea. She is all about bringing history into the home in an accessible way for kids, and what a creative way to preserve your family history than an heirloom blanket made from their very own baby clothes! Thanks Courtney!
I love this post, Rachel! I’m sure I will reference it often as I work on my kids’ memory quilts. I’m planning to do one for each child and then a combined one for me (or let’s be honest, they’re all for me!) from their Christmas clothes to make a holiday quilt.
The holiday one sounds like such a good idea!
Thank you for the free patterns. I’m looking forward to making memory blankets for my daughters
You’re so welcome Francesca! Let me know if you need help. And when you are done with them, I would love to see photos!