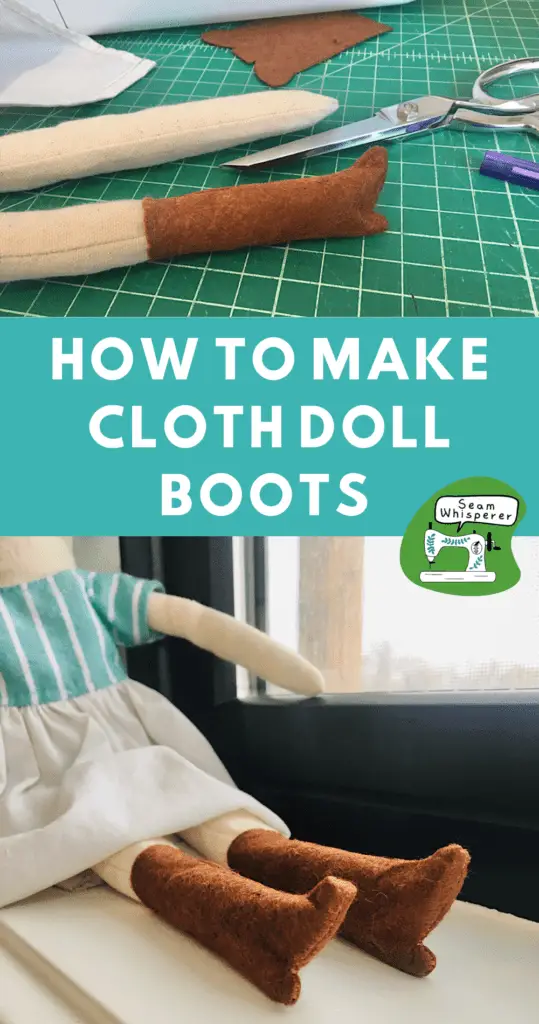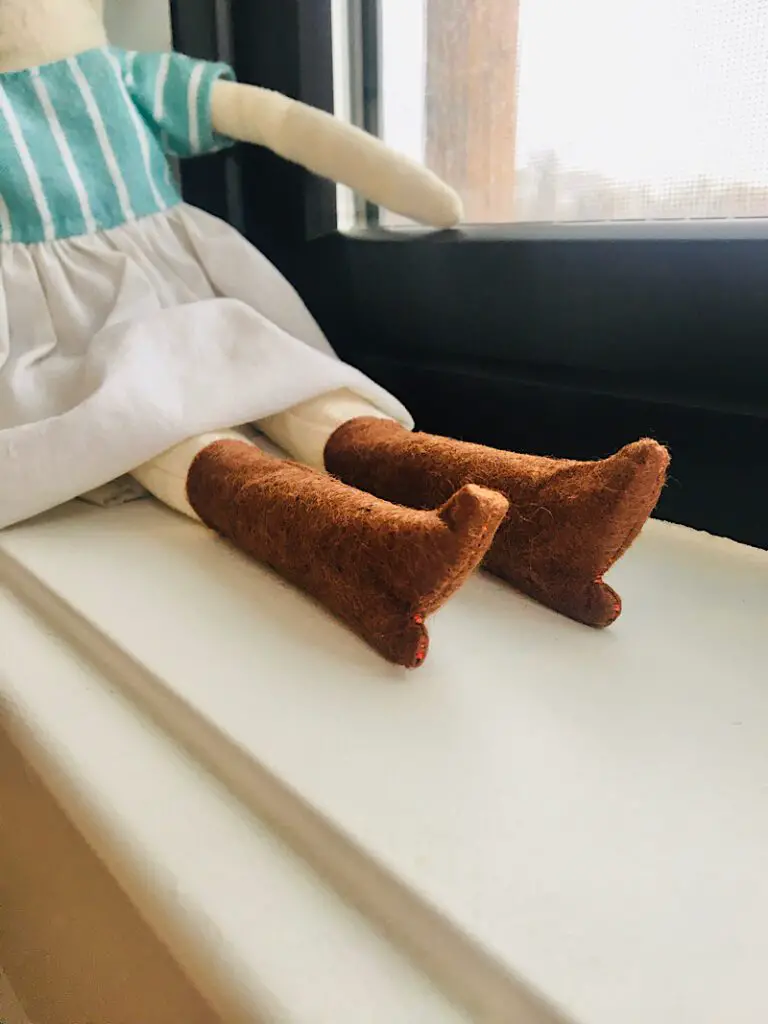
This tutorial will show you how to make realistic and quick boots for ANY size cloth doll! I will walk you through step by step with photos so you can make your own (or download the free pattern).
I love minimalistic cloth dolls because they are easy to sew. But how do you make doll shoes when the doll has no feet?!
These rag doll shoes are surprisingly easy to make and realistic looking, but they aren’t complicated at all. You can use felt or even a thin faux leather.
Let me show you how!
First: Learn my top doll clothes making tips as well as supplies you might need in this guide!
This post may contain affiliate links. Read the full disclosure here.
About This Tutorial
These boots can be made lots of ways. Change up the height, add a button, add laces to the back by cutting a slit, (which would make them easier to get on!), use different colored felt, and more.
This tutorial will show you how to make your own pattern so that you can make doll boots for ANY sized cloth doll. These boots are intended for rag dolls that have rounded “stub” feet, not foot-shaped feet.
You can hand sew these boots, but I used a machine.
Download The Free Boot Pattern
If you would rather download my free boot pattern, you can! The free boot pattern is sized especially for my basic cloth doll body, but may also fit another doll whose ankle circumference is about 2.5-2.75 inches.
Download the pattern by entering your email below and printing it at 100% scaling. Measure the 1 inch test square to make sure it is the right size.
Supplies Needed
- Sewing Machine (or you can hand sew them easily!)
- Fabric Scissors
- Sewing Pins
- Pen and paper to make your pattern
Materials Needed
- Brown Felt
- Matching Thread
- Your cloth doll (to trace)
How To Make Rag Doll Boots
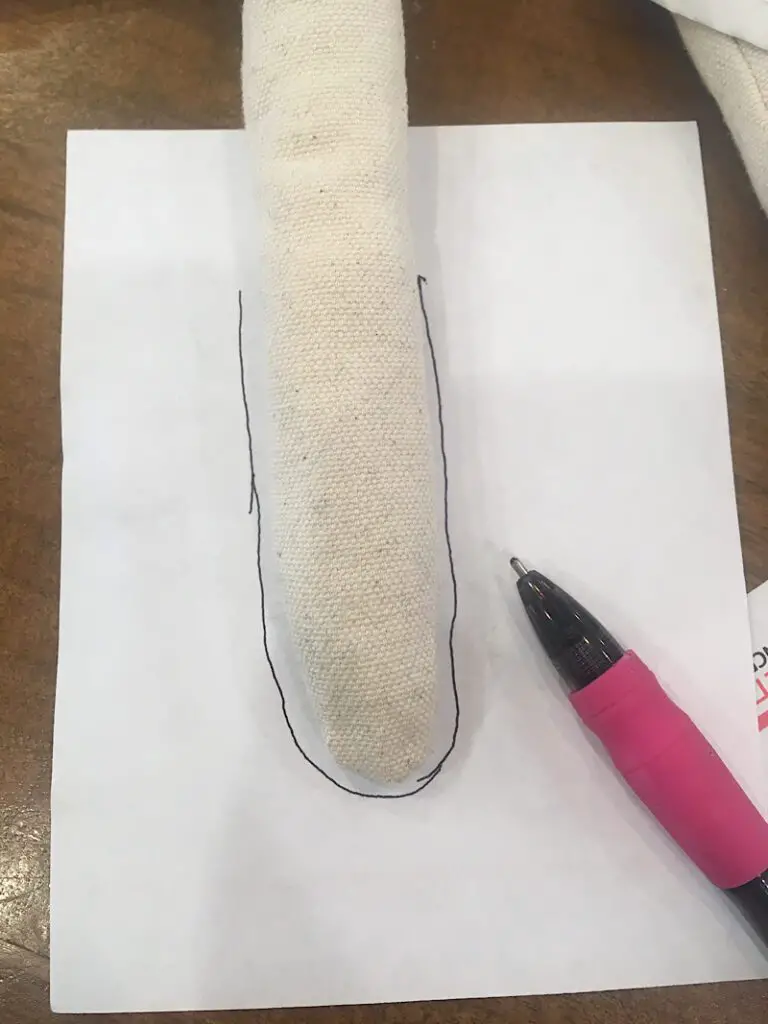
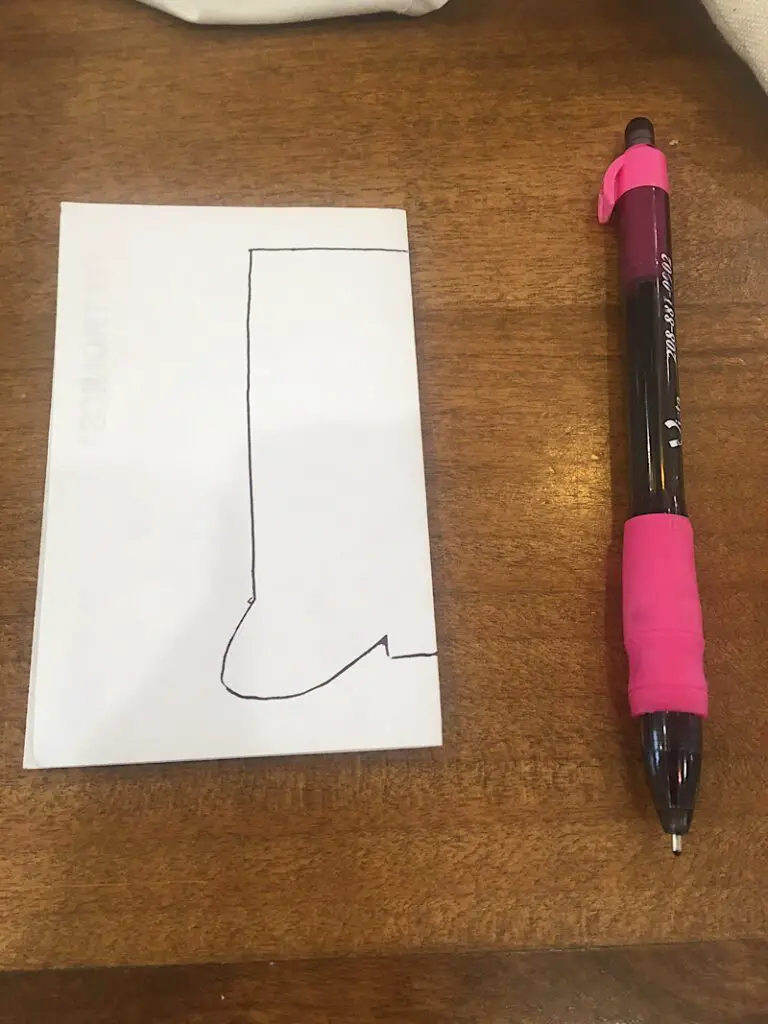
Step 1. Trace Your Doll’s Leg
Place your cloth doll’s leg and foot on a piece of paper. Using a pen, trace around the bottom of the leg. Because the leg is full of stuffing, you want to press the leg flat while you trace so that the finished boot will be able to wrap around it easily. Also make sure to add a tiny seam allowance around the edges, about 1/8-1/4th inch depending on how loose you want the boot to be.
You can also measure around the circumference of the doll’s leg and divide it by two, to make sure your boot pattern is wide enough.
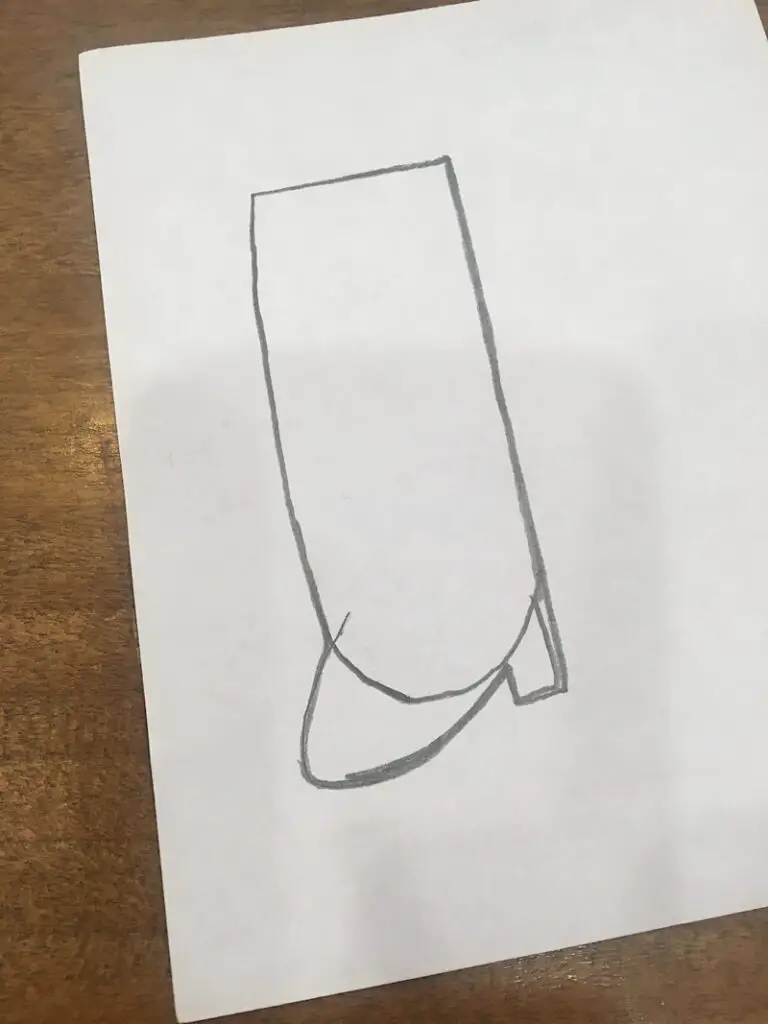
Step 2. Draw A Boot
Now, around the traced leg shape, you will need to draw a boot shape. Make sure to draw around and under the line you traced so the doll’s foot can actually fit inside it.
I added a toe area the one side, and drew a little heel on the back.
Step 3. Cut Out The Boot Pattern
Now, fold the paper in half along the flat side of the boot (the side with the heel). (Or you can cut it out, then trace the single boot on the edge of a folded paper, then cut it out.)
Then, cut it out and open it up.
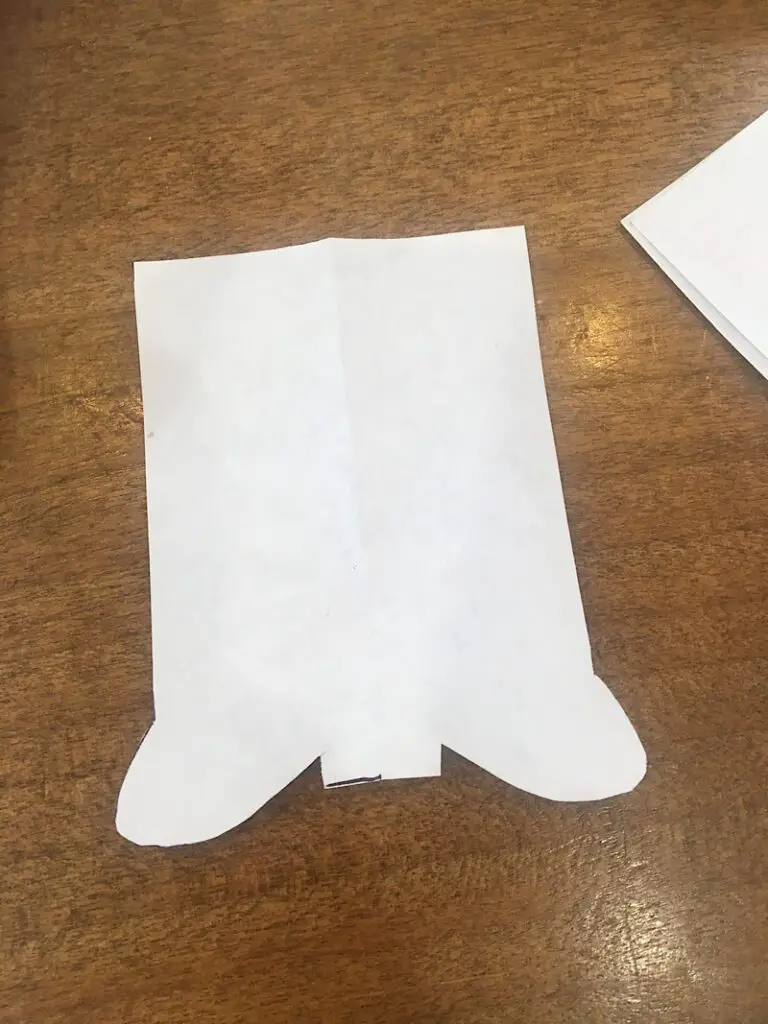
Now you have the front and back of the boot, in one easy pattern piece.
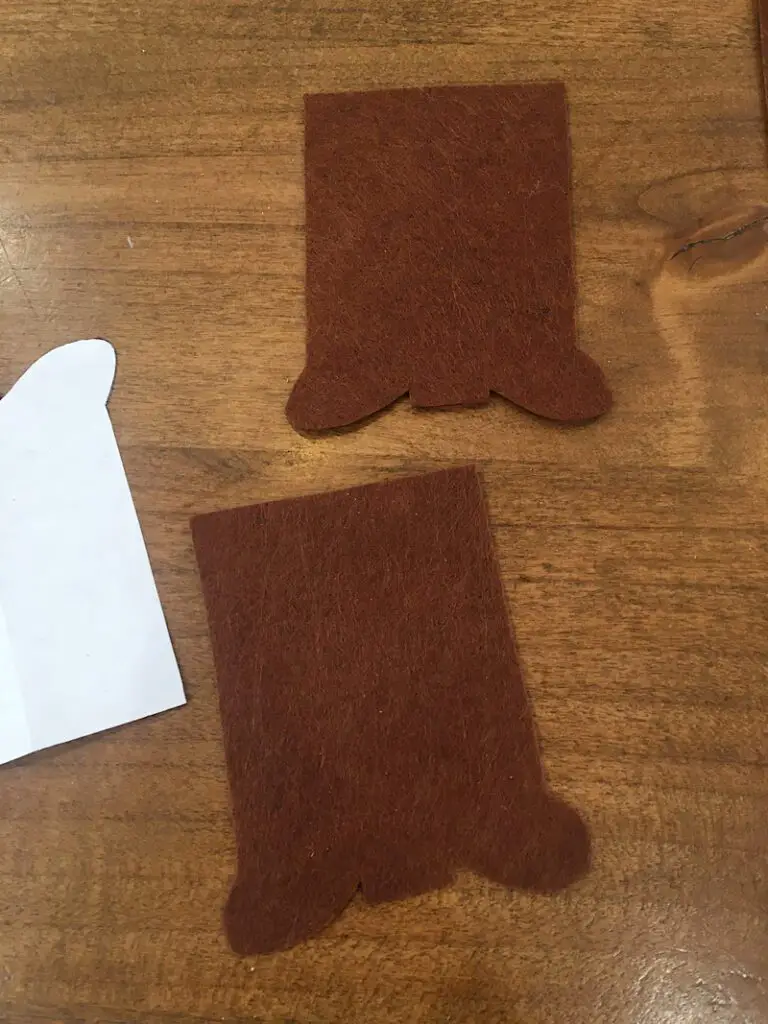
Step 4. Cut Out The Felt
Lay the boot pattern on a piece of felt. Then use a pen to trace the shape onto the felt. You will need two boots of course.
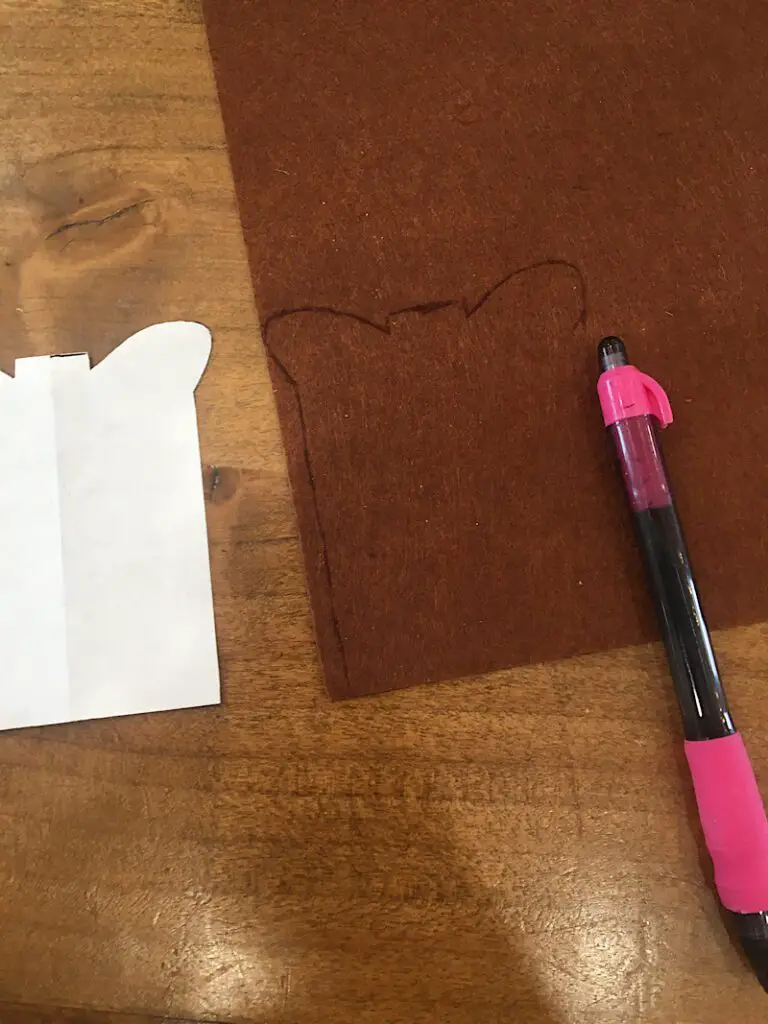
Then carefully cut out the felt.
Step 5. Pin and Sew The Boots
Fold the felt boot in half and pin it down the cut side.
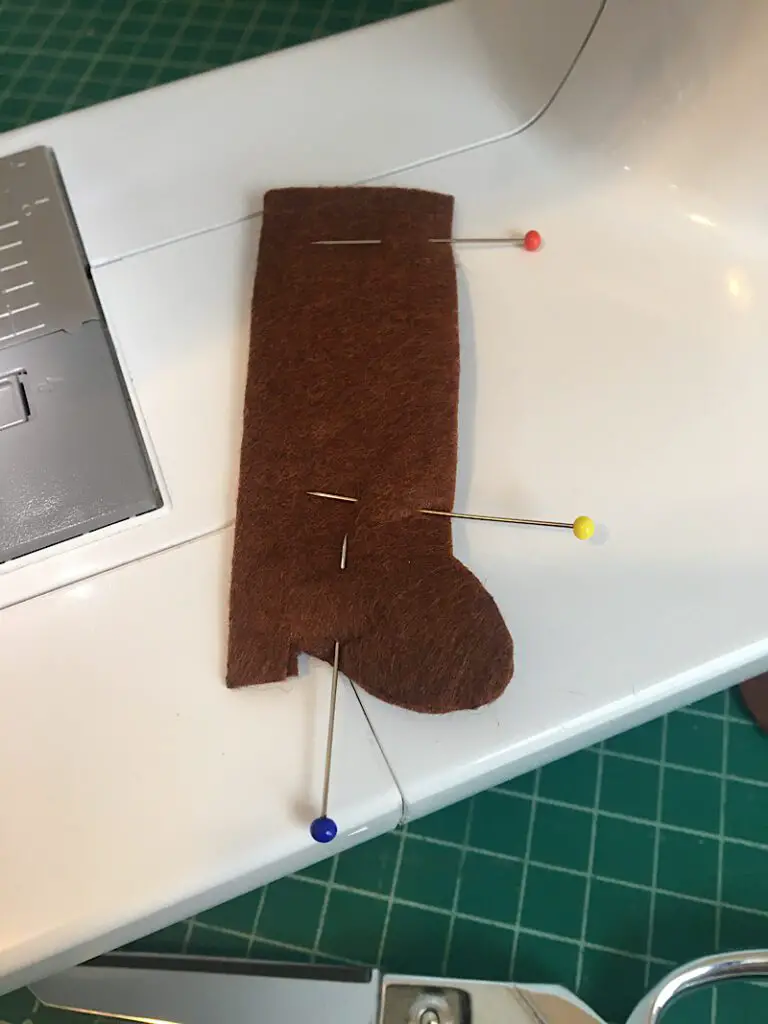
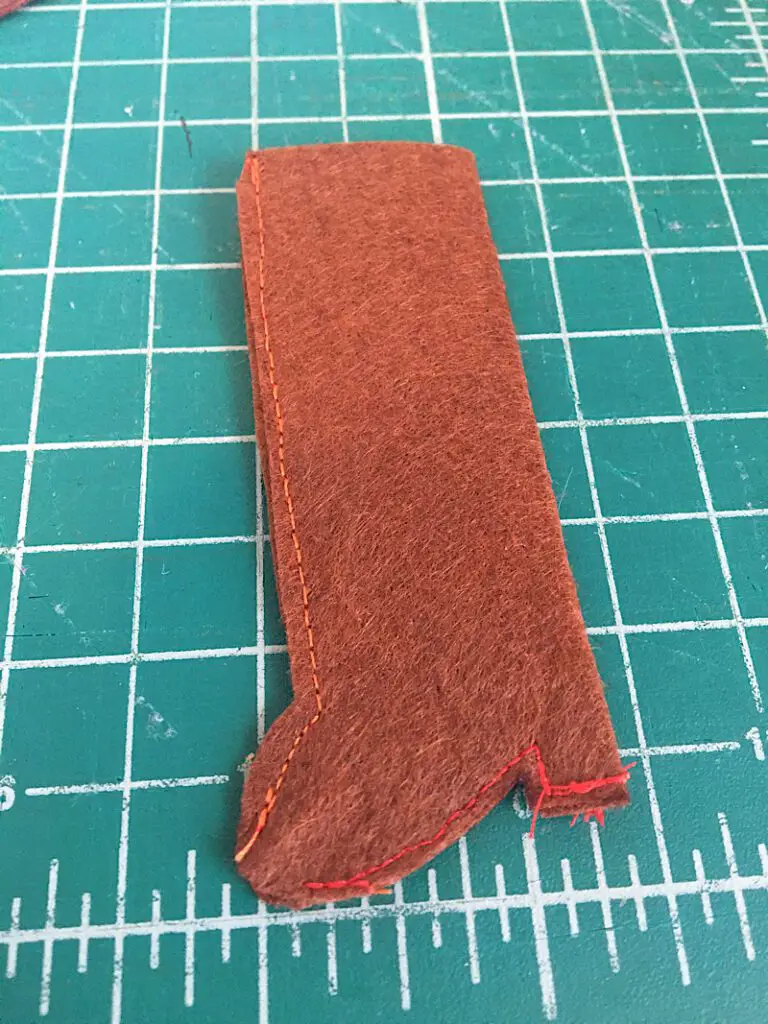
You are now going to sew around the cut edges of the boot about 1/8th an inch from the edge, EXCEPT you need to leave a 1/4 inch gap at the toe area. What I did was sew from the top down to the top “edge” of the toe area, backstitch, then skip about 1/4th inch of the toe area, and start sewing again until the end.
You can hand sew this part if you want, or you can machine sew it. Make sure to pivot well so you really get the curves and corners nice, and go slow so you catch both layers of the boot.
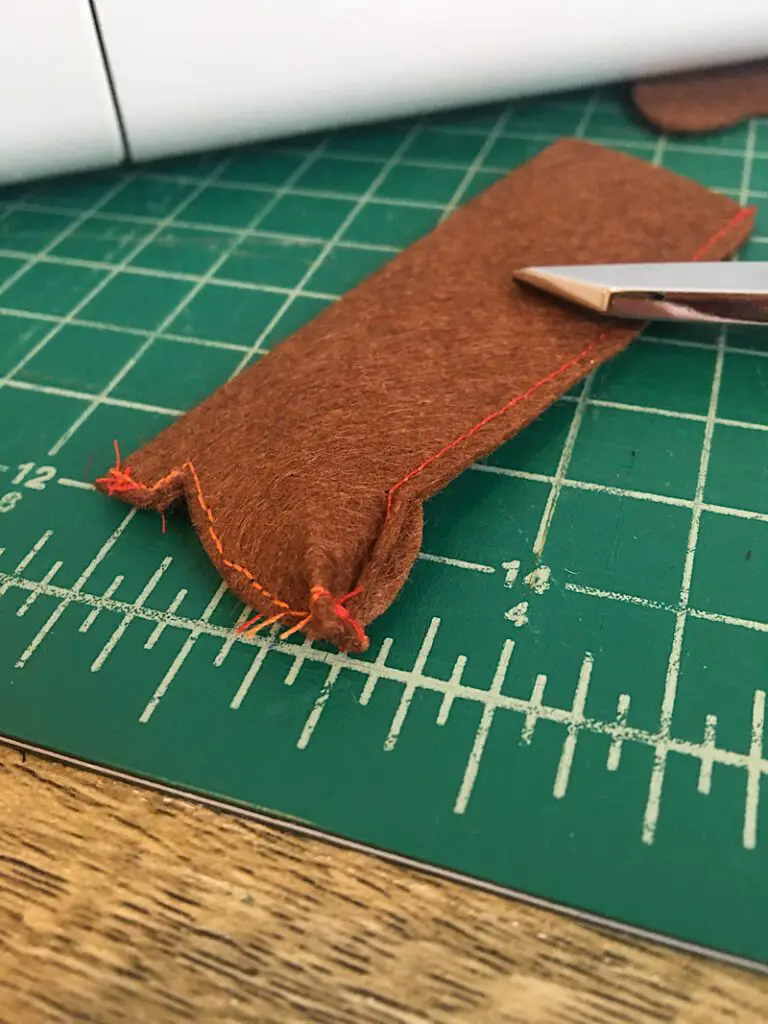
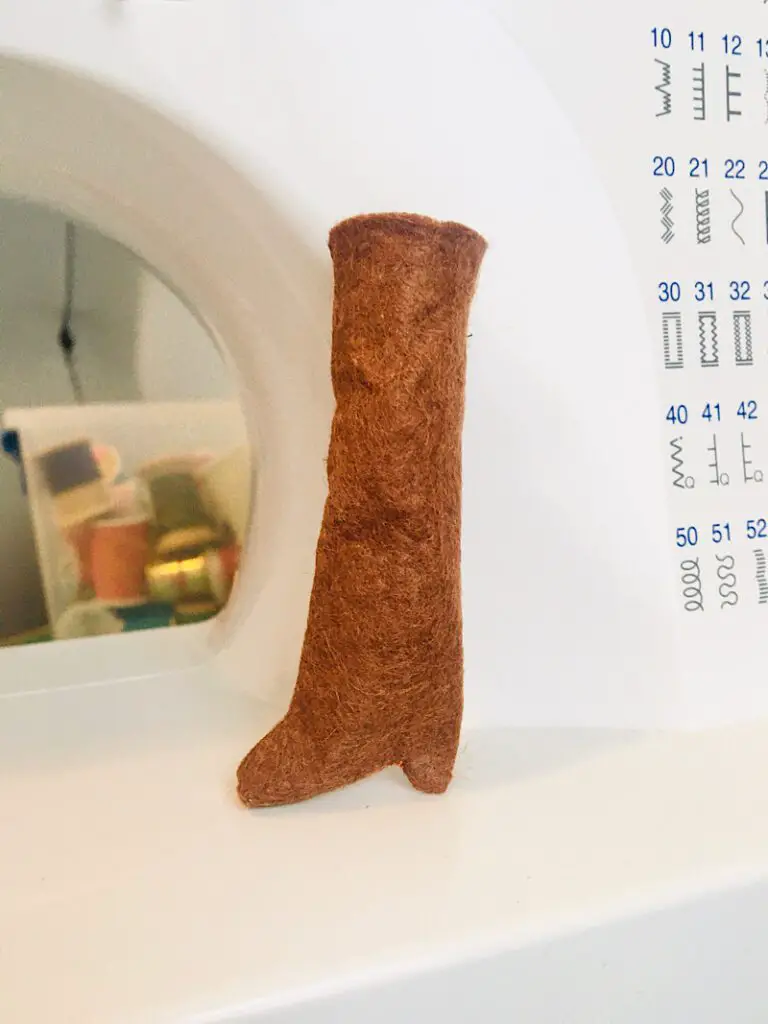
Next, to make the boots look 3D and realistic like in my photos, you need to open up the gap at the toe, and flatten it the opposite way.
It helps to stick a pin in the gap to open it up, then you just need to line up the two stitches on top and bottom and squish it flat.
Then, you will sew across the flat edge you just made.
Here it what it should look like:
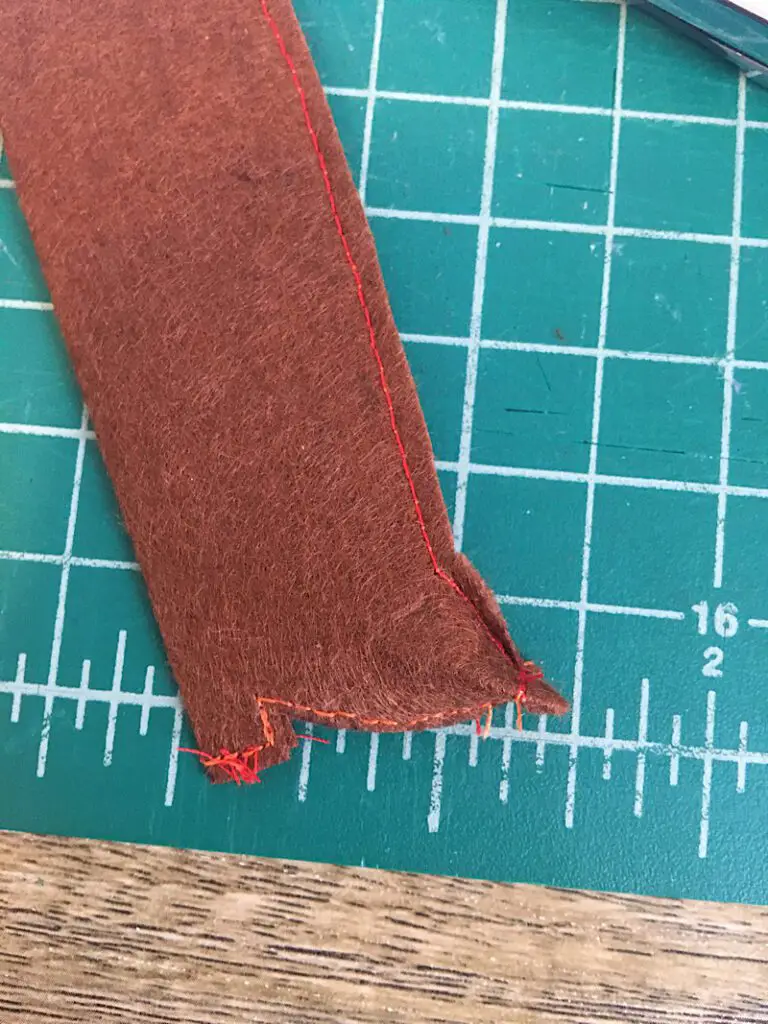
Carefully trim the excess in the toe area away if there is too much bulk.
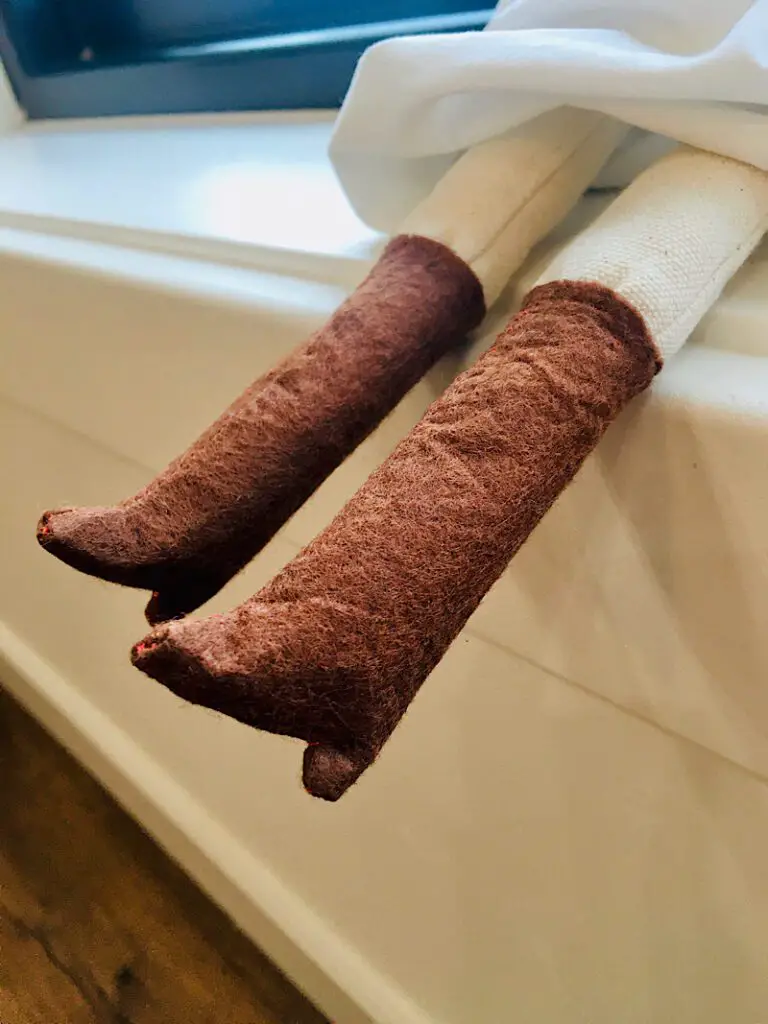
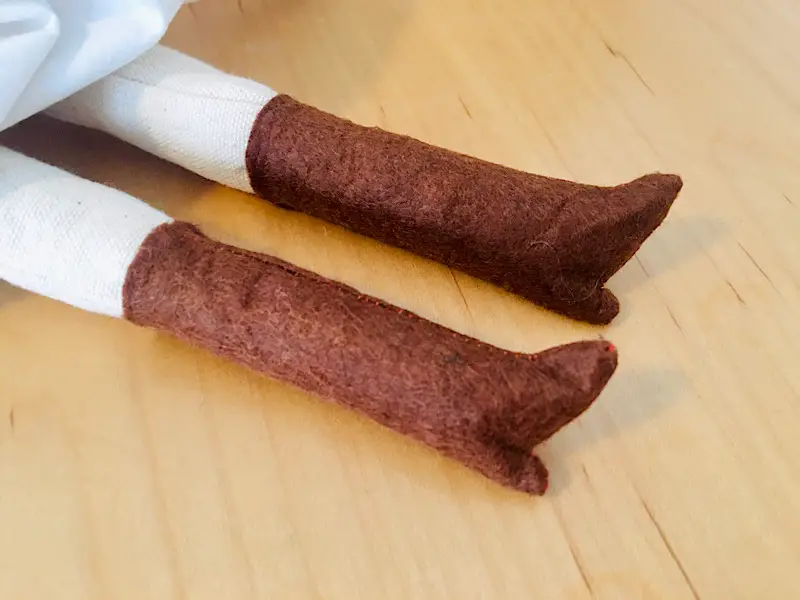
Next, carefully turn the boots right side out, and poke a pen or the end of a knitting needle down into the heel and toe to pop them out. Take a minute to really shape them so they look nice!
Now you need to sew the other boot if you haven’t yet, and you are done!
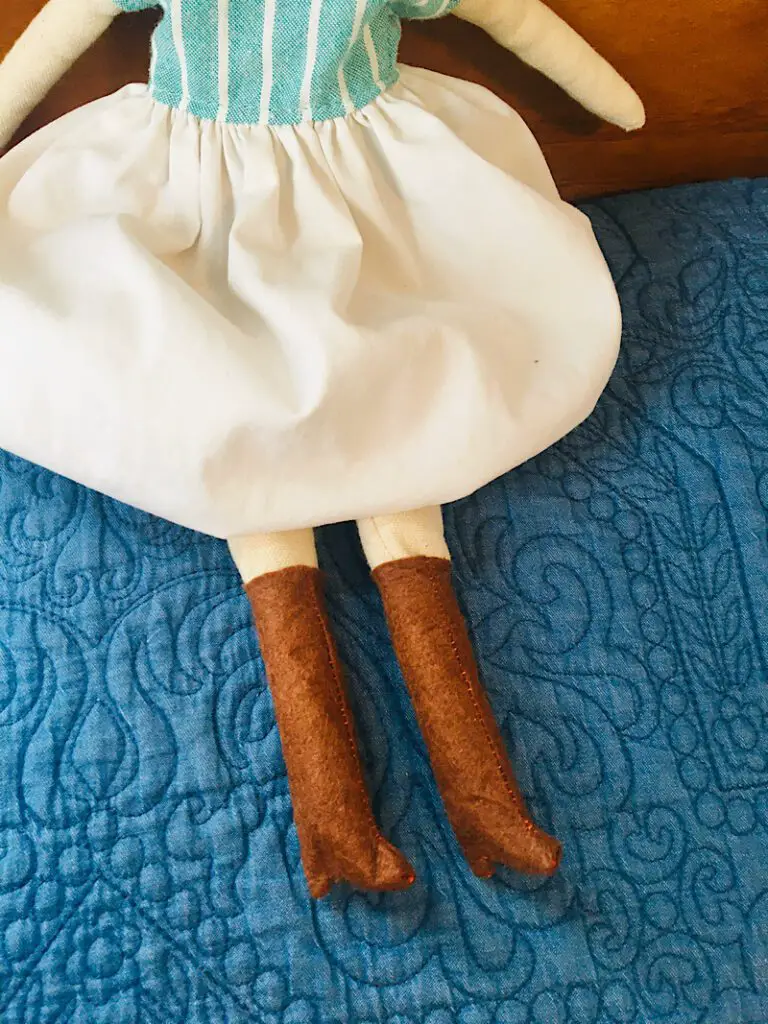
This completes the doll boot tutorial!
You may have to pinch the doll’s legs a bit if you are having trouble getting the feet into the boots, but if you traced enough of a seam allowance around the foot then you shouldn’t have too much of a problem.
Another way to make them easier to put on like I mentioned earlier it so cut a little slit down the back an inch or so, or even more and add ribbon laces.
Conclusion
These boots are so adorable, I can’t wait to make more and customize them differently. Maybe add some fringe around the top? There are many possibilities!
If you had any trouble with any of these steps, please reach out to me and I will help you figure it out. You can leave a comment or sign up for my email list below and shoot me an email!
Pin this post to Pinterest so you can easily find it again later!
Make sure to get the free Rag Doll Body pattern to go with these boots.