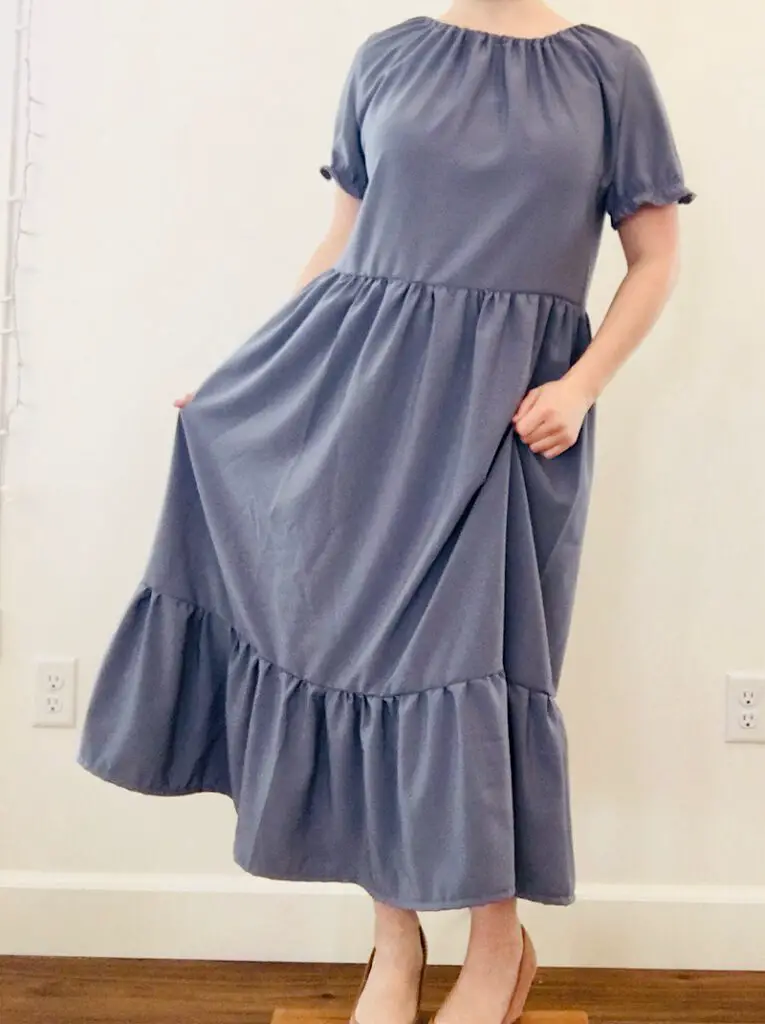
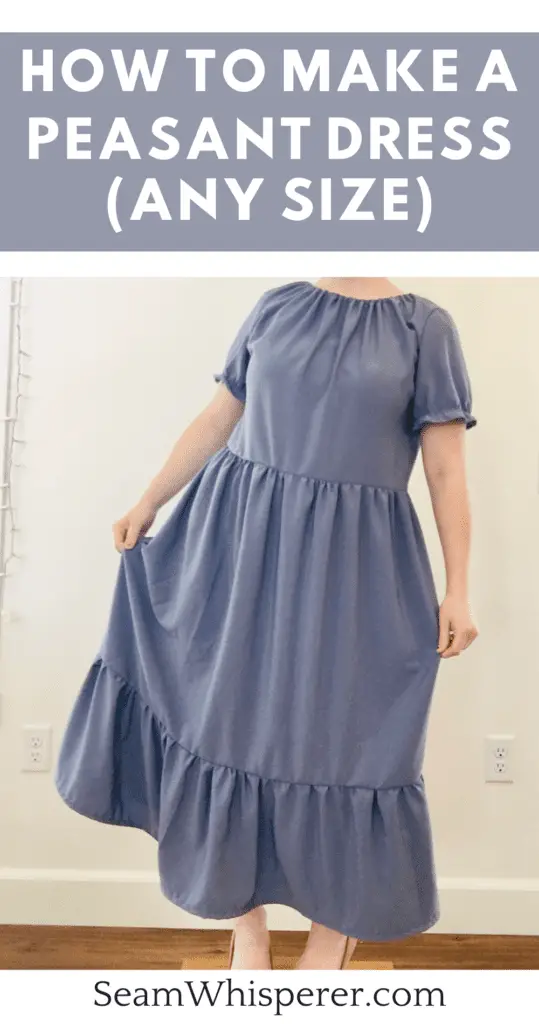
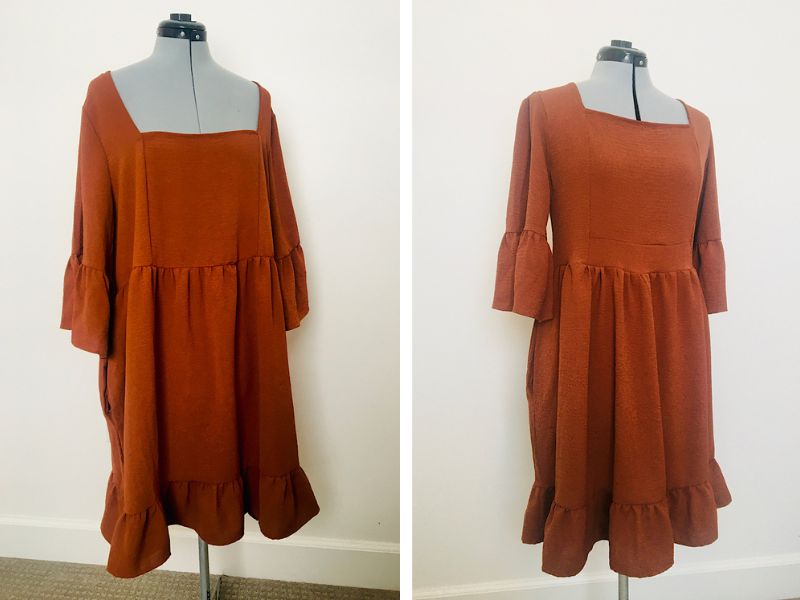
Dressmaking doesn’t have to be hard. This simple peasant dress tutorial will teach you how to make a quick pattern that even inexperienced dress makers can figure out! This dress is fun because you can wear it forwards or backwards.
I first made this pattern for my daughter in a toddler sized dress, but loved it so much I had to make my own!
If you are looking for a free peasant dress pattern for kids, or for women, you are in the right place. Let me show you how to EASILY make your own pattern by tracing a regular shirt you already own. Trust me, this step by step photo tutorial is not as complicated as it looks!
This post may contain affiliate links. Read the full disclosure here.
About The Tutorial
Because this tutorial tells you how to make the dress in any size, I can’t tell you exactly how much fabric you will need. I recommend making your pattern as I show below, then calculating how much material you will need by measuring the pattern, and also taking the skirt measurements.
For my dress, the material was quite wide so I was able to fit it on only a couple yards. For a toddler they may only need a yard of a 45″ wide material.
This is also a really good pattern for a bedsheet upcycle dress!
Supplies Needed
- Sewing Machine
- Serger (Optional)
- Fabric Scissors
- Sewing Pins
- Paper, Pen, and Tape for making the pattern (You can use wrapping paper, newspaper, butcher paper, etc. You will need 3 large pieces, they should be larger than the size of your folded in half shirt.)
- Measuring tape
- A large safety pin or bodkin to thread the elastic.
Materials Needed
- Fabric for the dress (a light/medium weight material that isn’t see through or stretchy)
- Matching Thread
- 2 yards of quarter inch elastic
- A comfortably fitting NON stretchy shirt to trace (it should be a shirt that fits you well, or is a bit loose.)
How To Make A Peasant Dress
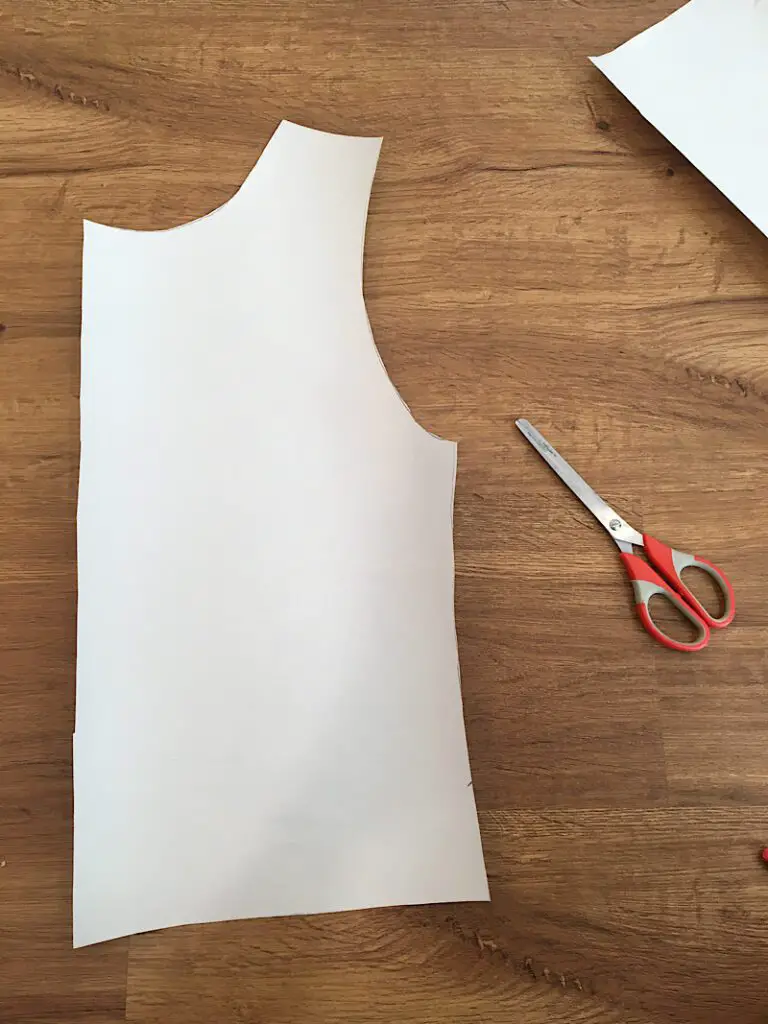
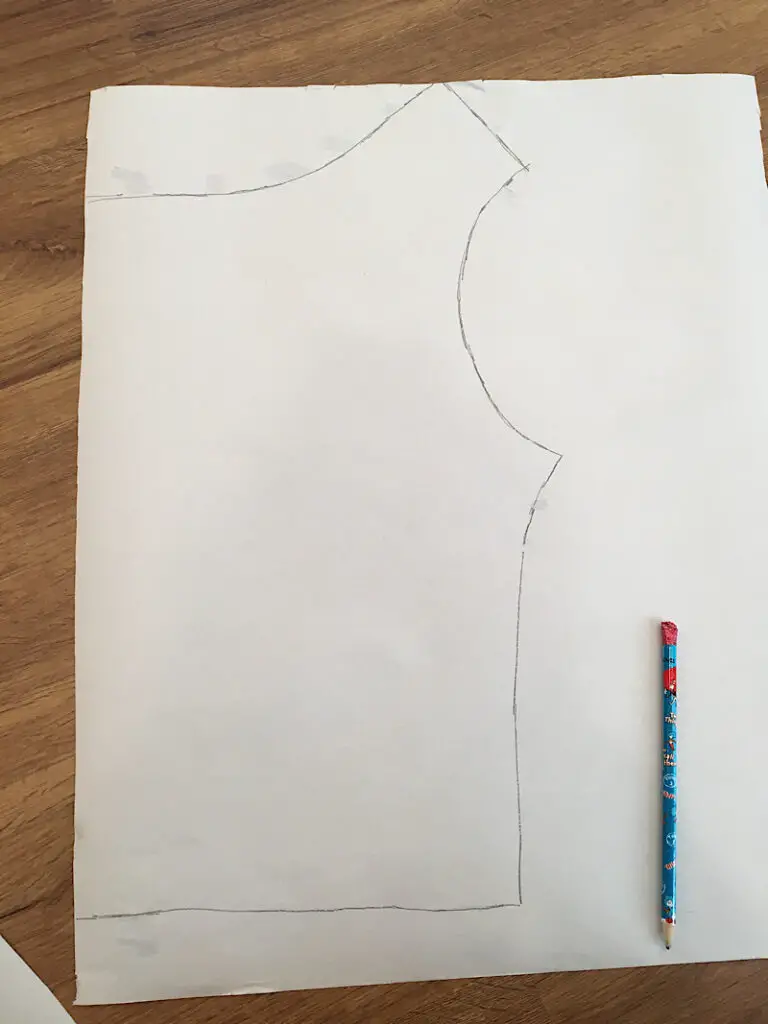
Step 1. Trace Your Shirt
Fold your shirt in half and make sure the corners and edges are well aligned.
Lay it on top of a large piece of paper, with the fold along the edge of the paper.
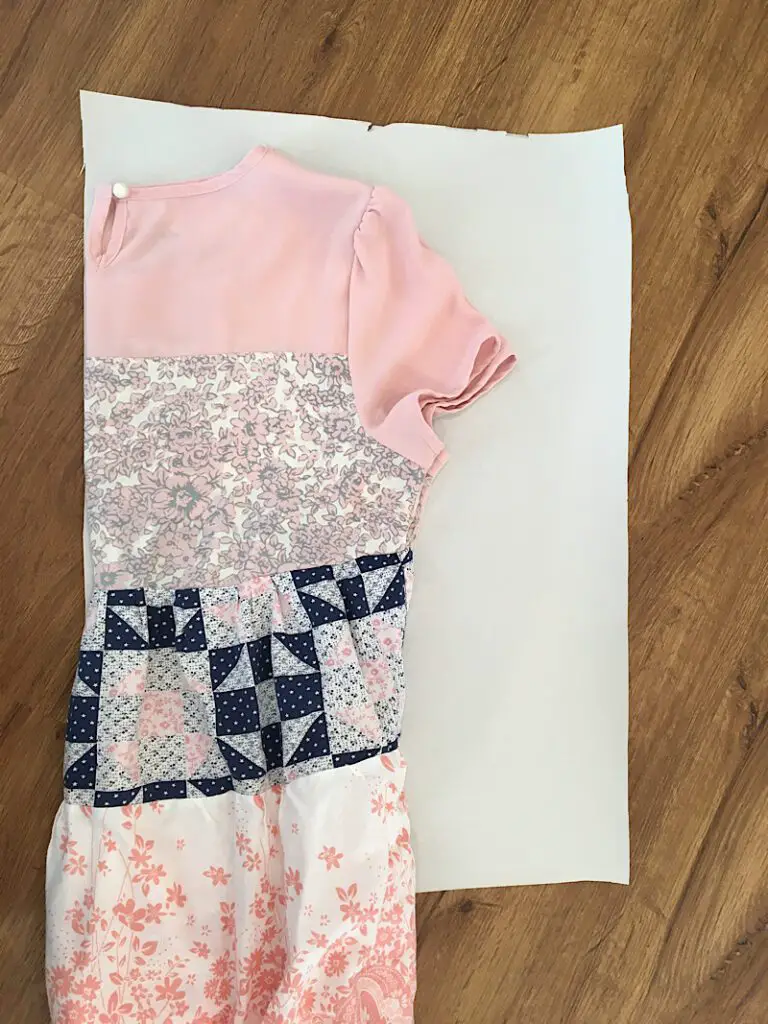
Trace around the shirt, not including the sleeve. You will have to lift the sleeve up a little bit to trace the armhole underneath it.
For the neckline, trace the front of the shirt’s neckline, not the back.
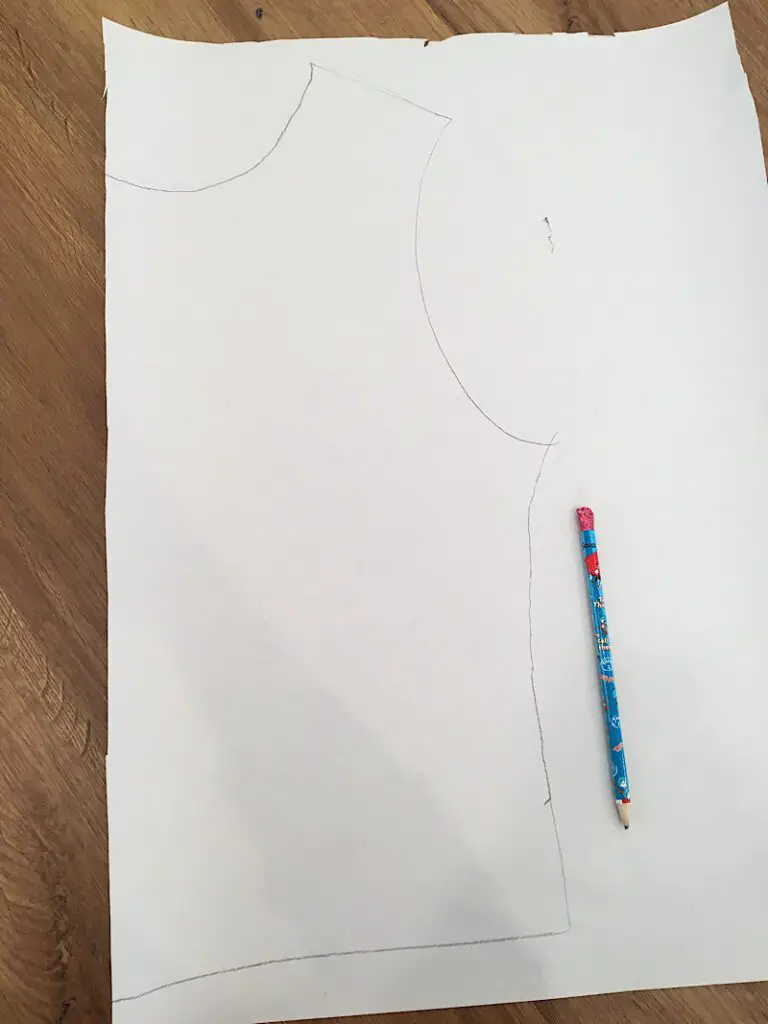
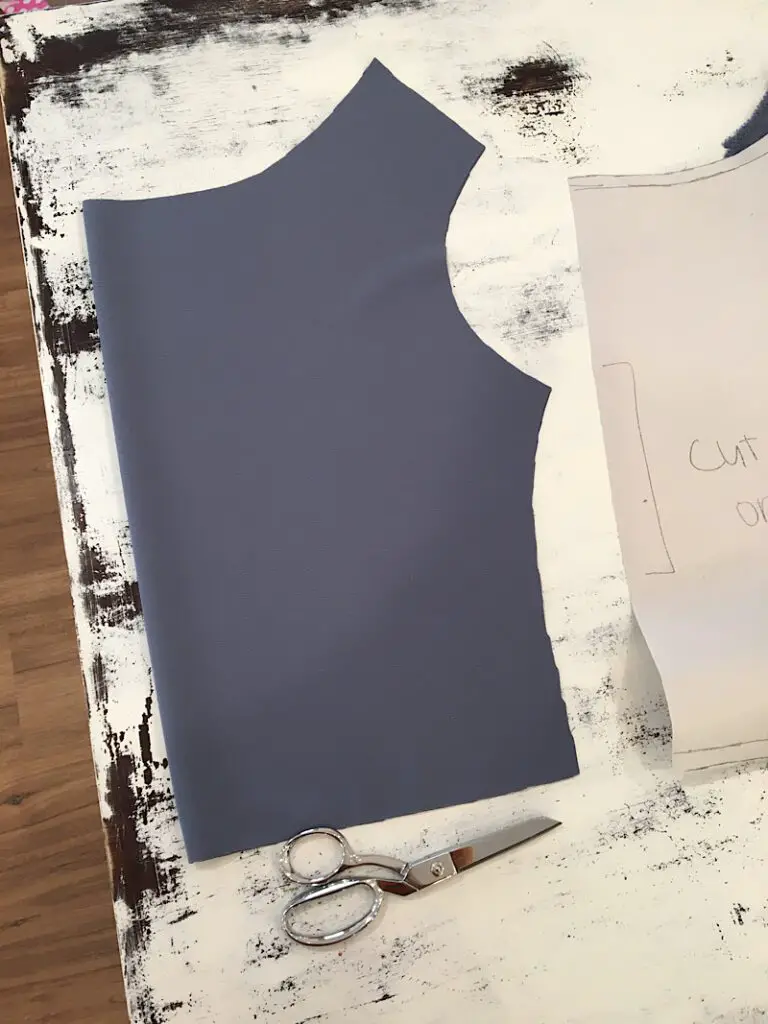
Cut out the traced bodice.
Before continuing, measure the neckline of your pattern, and multiply it by 4. Then cut your elastic to this length plus an inch, for later.
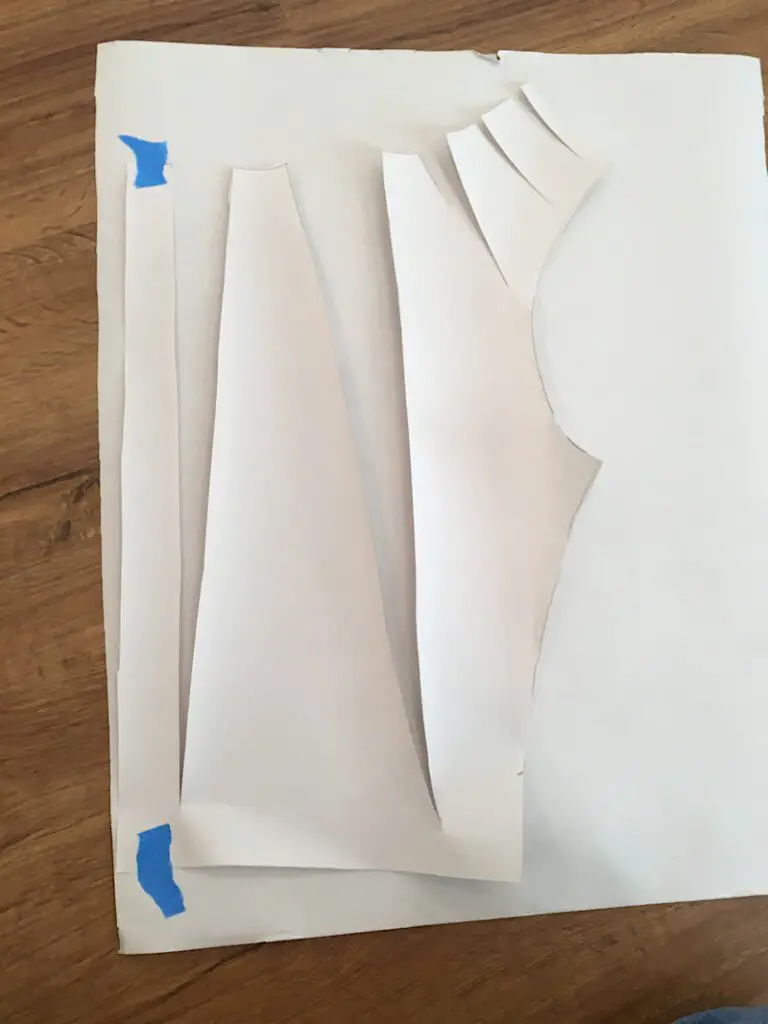
Step 2. Cut The neckline
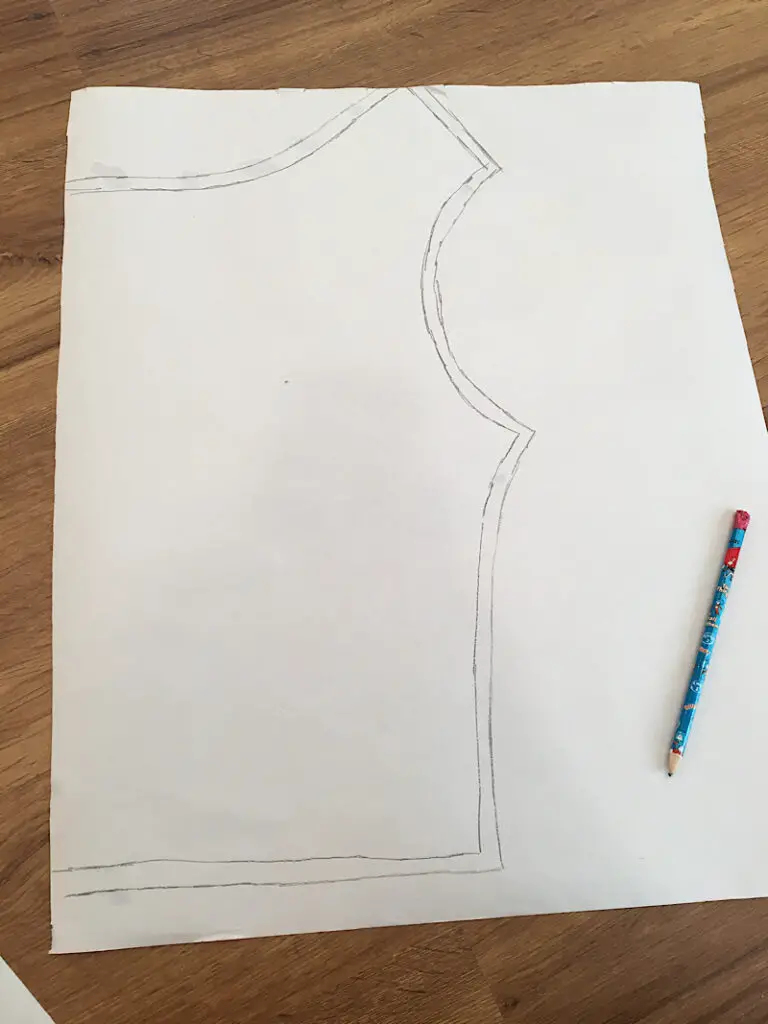
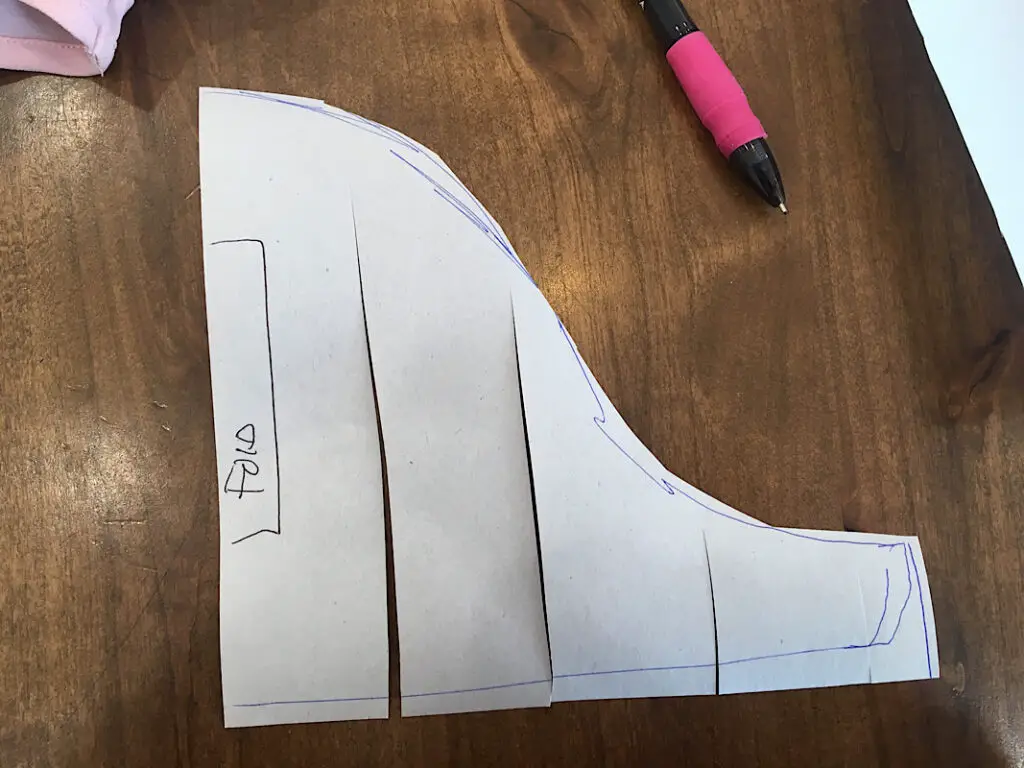
Next, you are going to make several long cuts that radiate out from the neckline. The cut lines should be 1-2 inches apart from each other. I recommend you draw them onto the pattern FIRST, and then cut them out.
When you cut the lines, you want to cut down the bodice almost to the very end, but do NOT cut through the edge. You want the bodice to be able to “open up”, but still be in one piece.
Here is what your cuts should look like:

Step 3. Tape and Retrace The Pattern
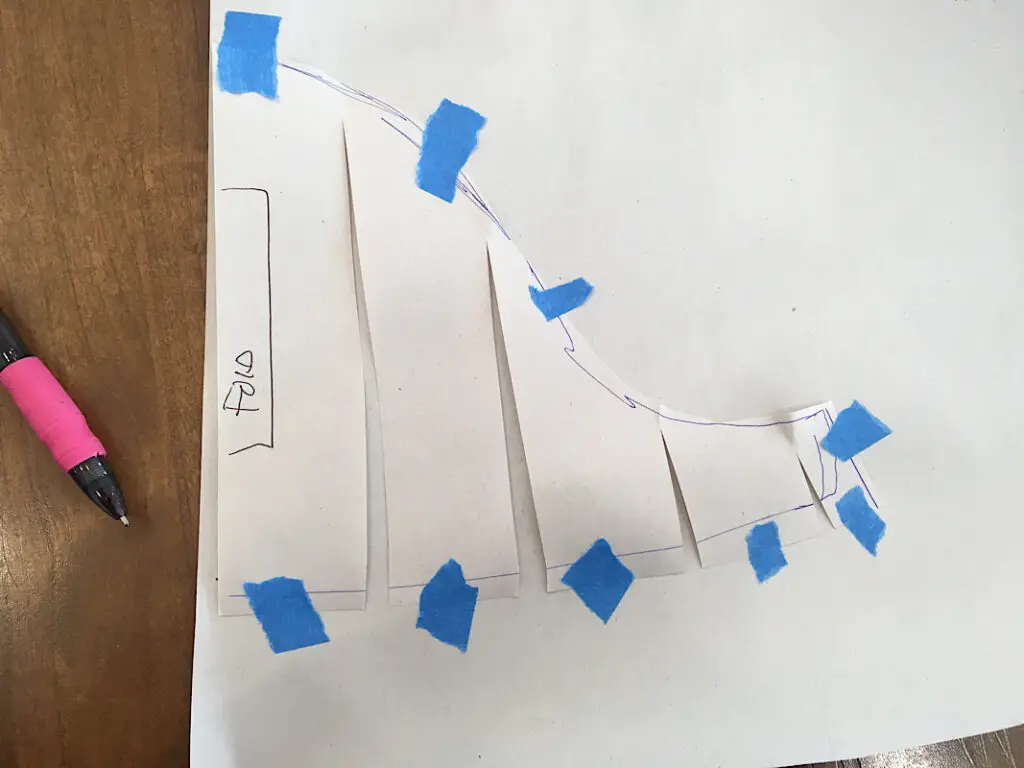
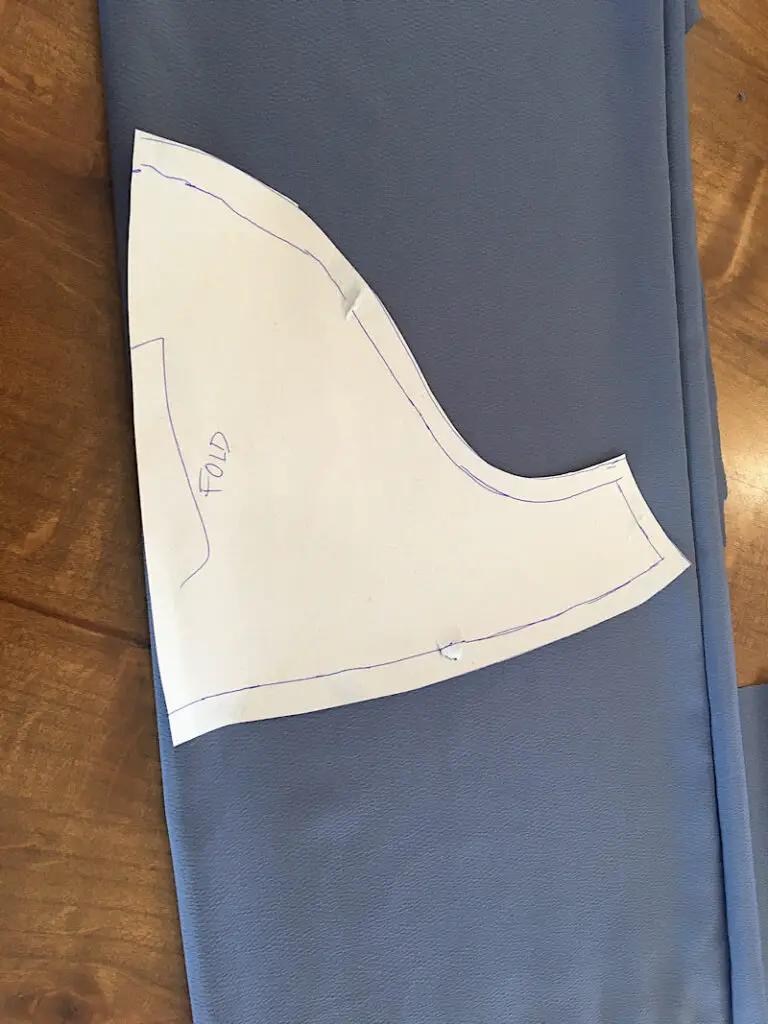
Get another piece of paper. Place the cut bodice pattern on top of the paper, a few inches above the bottom edge, with the “folded edge” of the pattern on the side edge of the new paper.
Then, holding the bottom corner of the pattern in place at the edge of the paper, slightly pivot the neckline of the bodice pattern away from the edge and tape it down as shown in the photo below.
The rest of the cut bodice pattern should be carefully spread out and taped down as flat as you can make it. I spread each piece out so the cuts made about an inch gap.
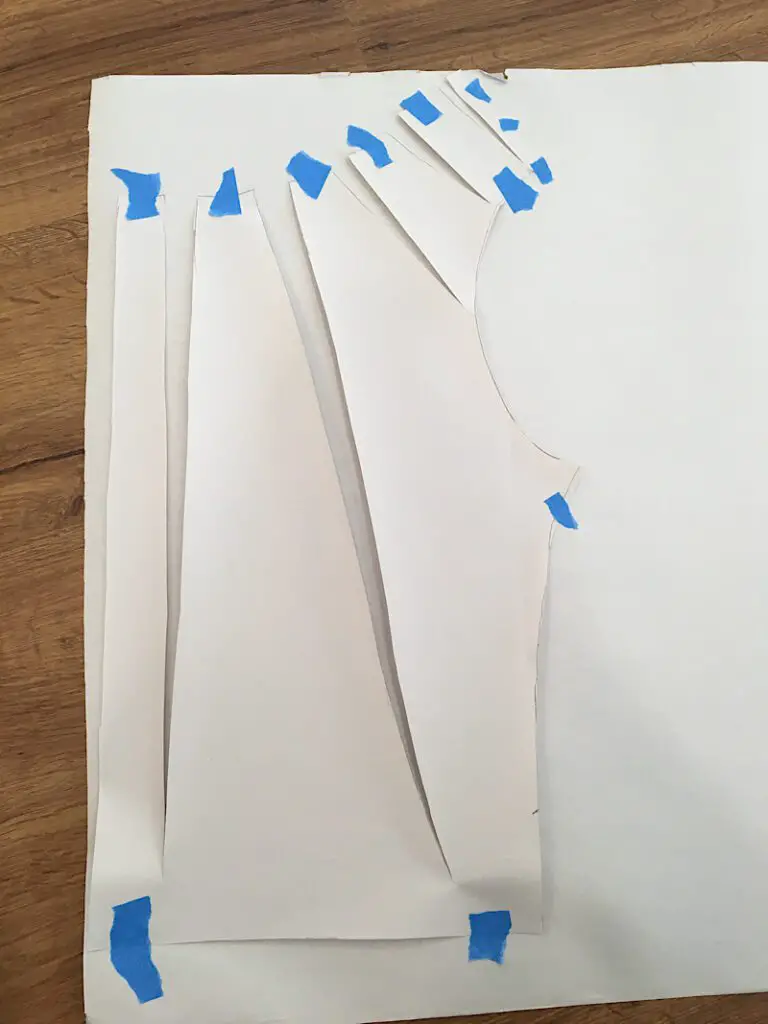
Now, you will trace around the new perimeter your pattern makes on the new piece of paper.
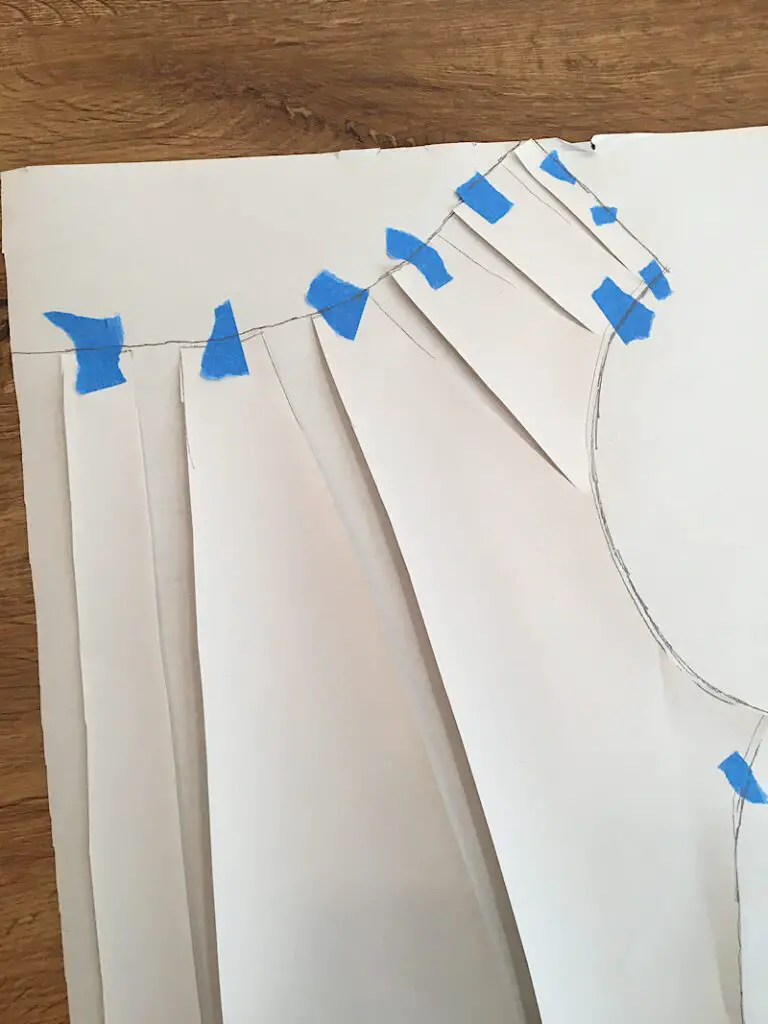
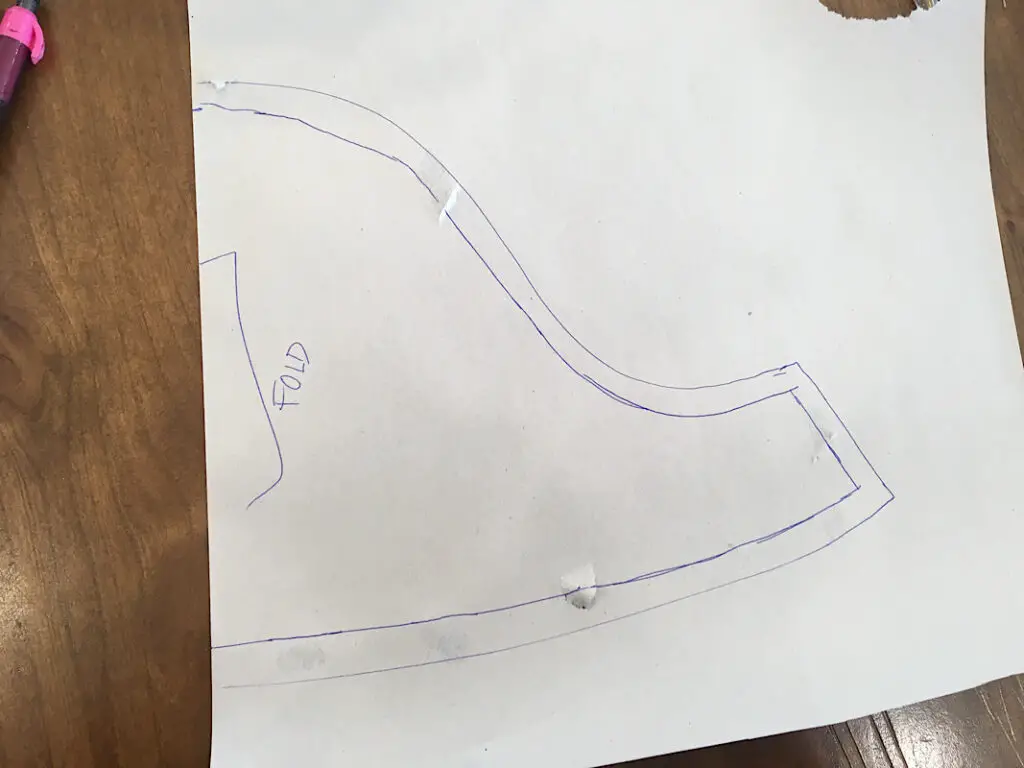
Then carefully remove the cut pattern (you won’t need it anymore) and fill in the gaps the tape left on the line.
Finally, draw a half inch seam allowance around the entire perimeter, then cut it out! (You can measure it if you want, I just eyeballed it.)
I also marked the “Cut on fold” edge.

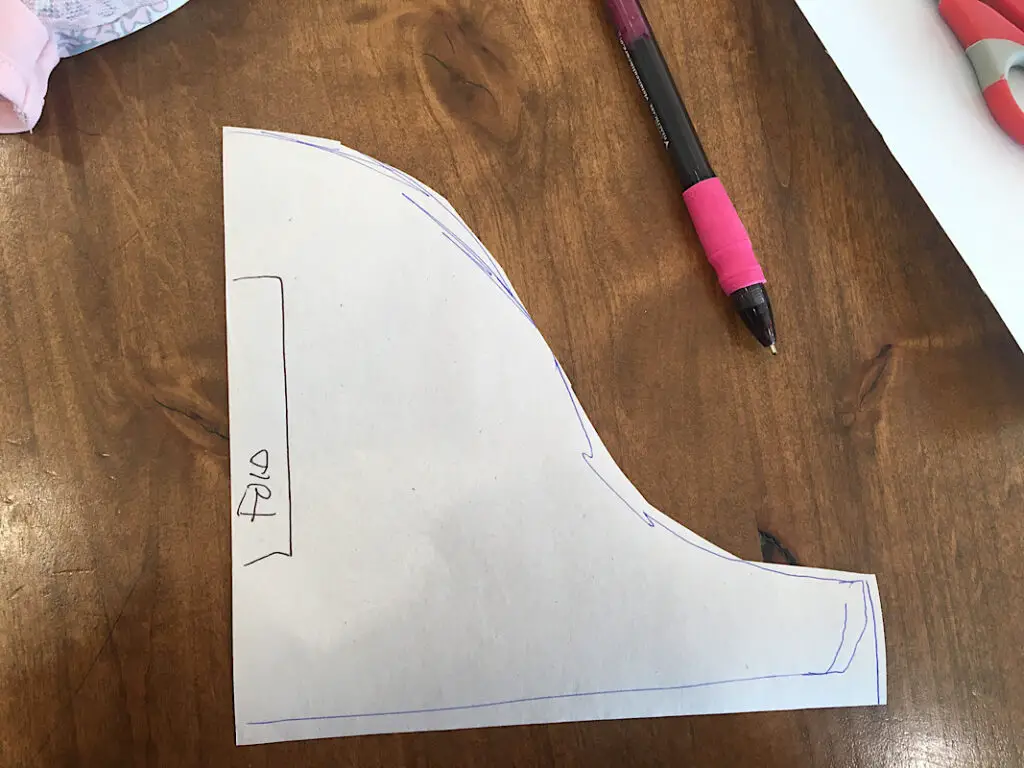
Step 4. Trace The Sleeve Pattern
The sleeve pattern will be made in a similar way.
Place the sleeve of your shirt on the paper with the folded edge of the sleeve on the edge, and trace around it.
This is also the time to add length to the sleeve if you want. If you want your peasant sleeves to be closer to the elbow like my dress, you should add a few inches to the bottom hem of the sleeve when you trace it, if you need to.
Then cut it out.
Before continuing, measure the width of the sleeve from the “fold” edge to the side seam, and multiply it by two. Then cut two pieces of elastic to this length, plus an inch.
Step 5. Cut and Tape The Sleeve Pattern
You will make cuts to the hemline of the sleeve, just like you did on the neckline. Draw them on first if you need to.
The cuts should be from the hem of the sleeve, cut straight up to near the edge of the shoulder seam line, but not through it.
Spread and tape the sleeve just like you did with the bodice, with the fold edge of the sleeve pivoted away from the edge of the paper.
The gap between each cut should be about half an inch this time.
Then trace around the pattern, add a half inch seam allowance, and cut it out.
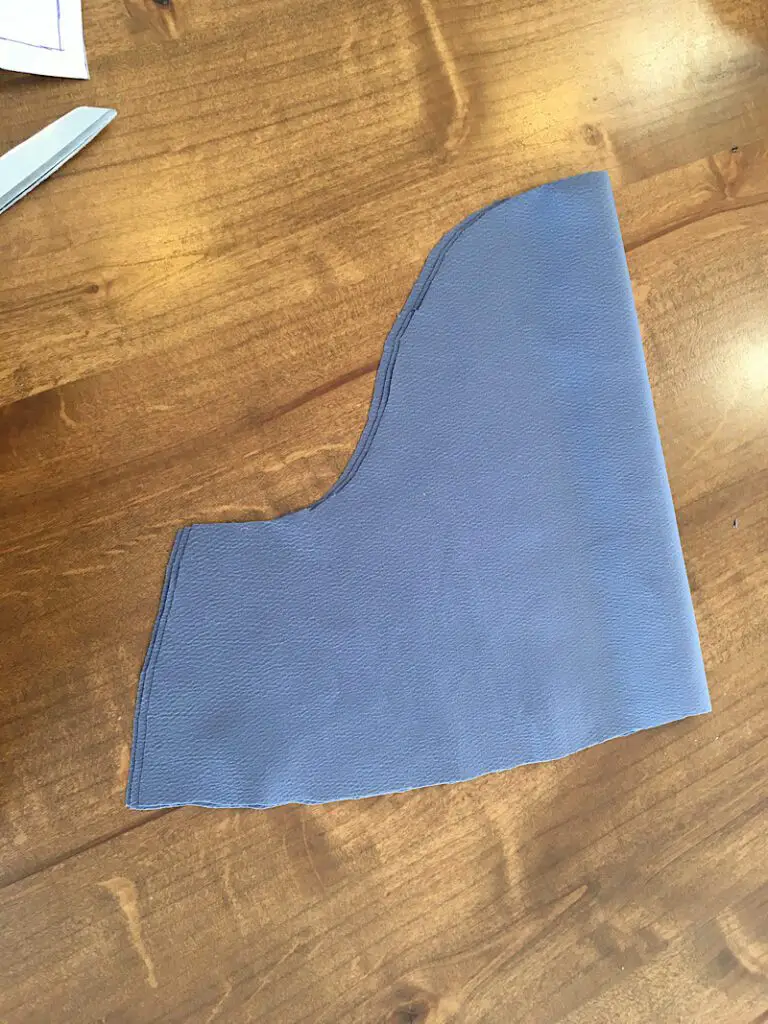
Step 6. Cut Out The Bodice Pieces
Now it’s time to cut out the fabric bodice and sleeve pieces.
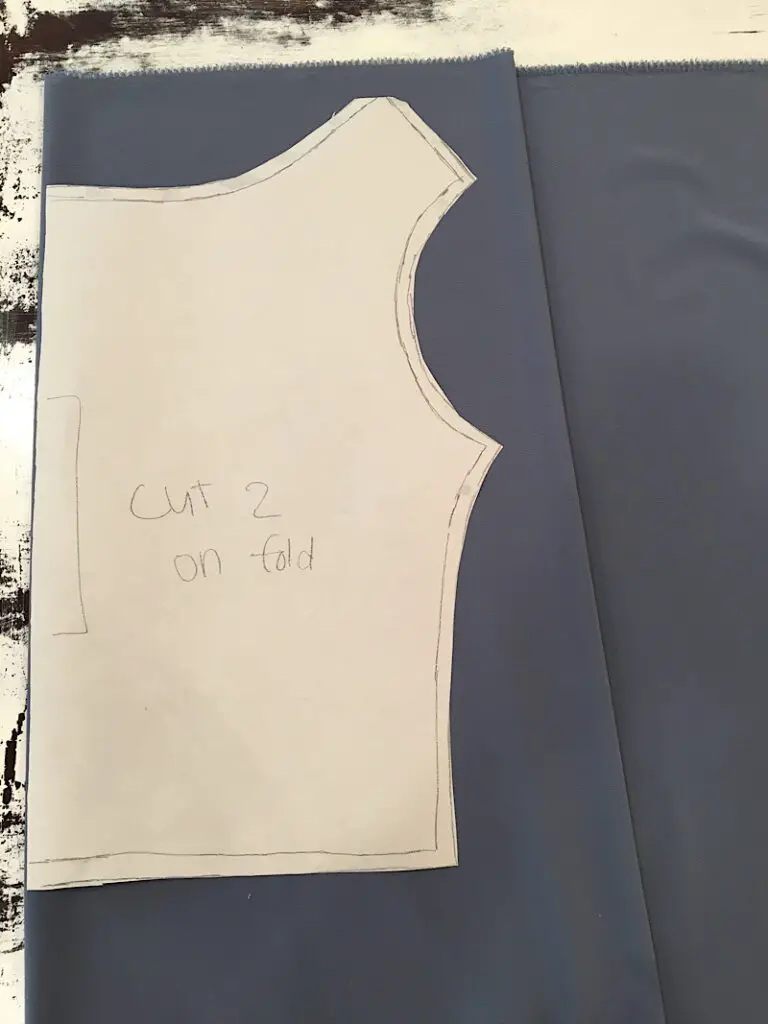
Fold your fabric in half and align the fold with the “fold” edge of the bodice pattern. Pin the pattern to the fabric if you need to, and cut it out.
Cut two bodice pieces.
Fold the fabric in half again, and line up the fold with the “fold” edge of the sleeve pattern, pin it, and cut out two pieces.
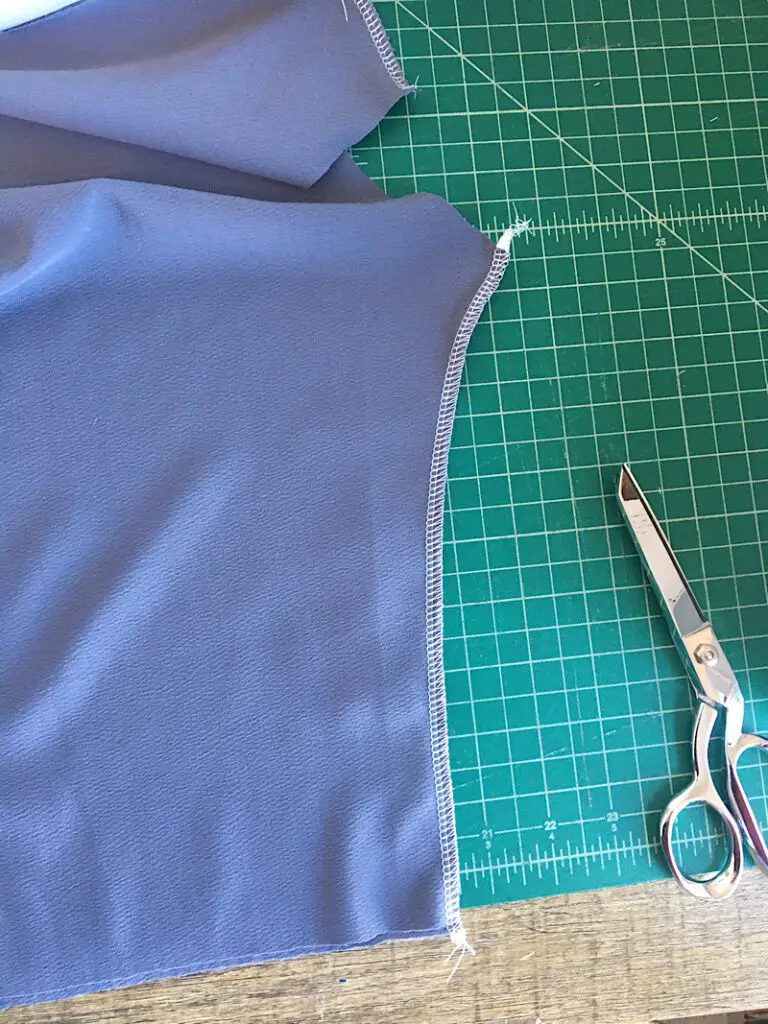
Step 7. Join The Bodice Pieces
Lay the bodice pieces together with right sides facing.
Pin the shoulder seams, then sew them together with a half inch seam allowance. I serged mine, but you can sew them, then zig zag stitch the edge if you don’t have a serger.
Then, pin and sew the two side seams with a half inch seam allowance also.
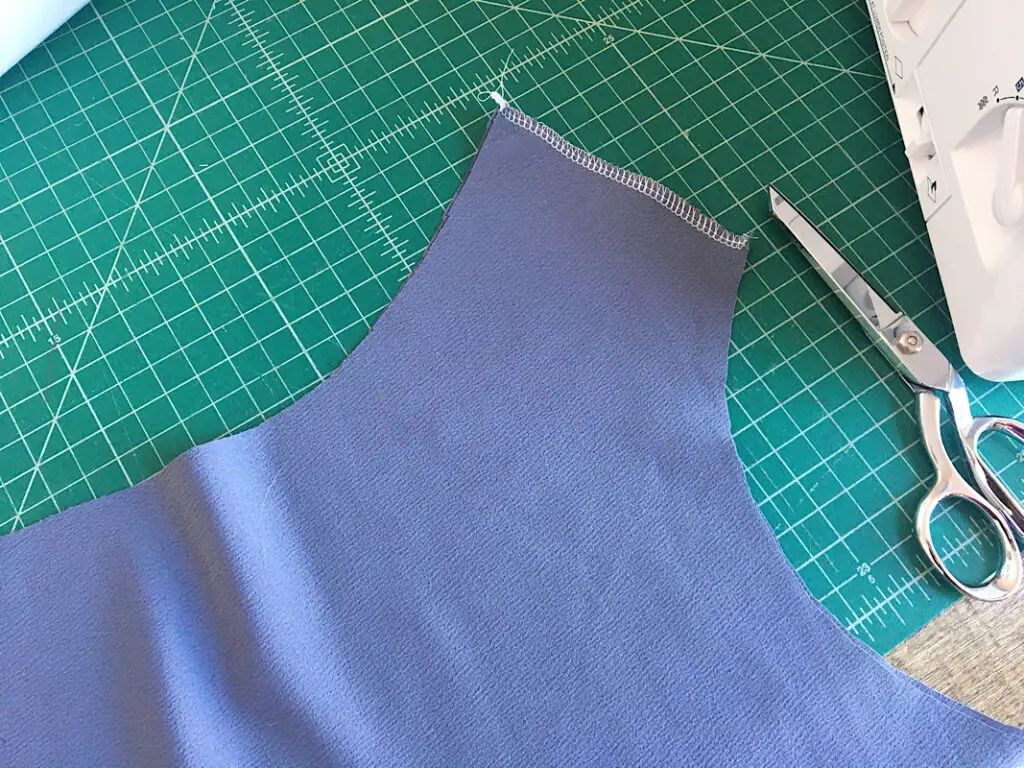
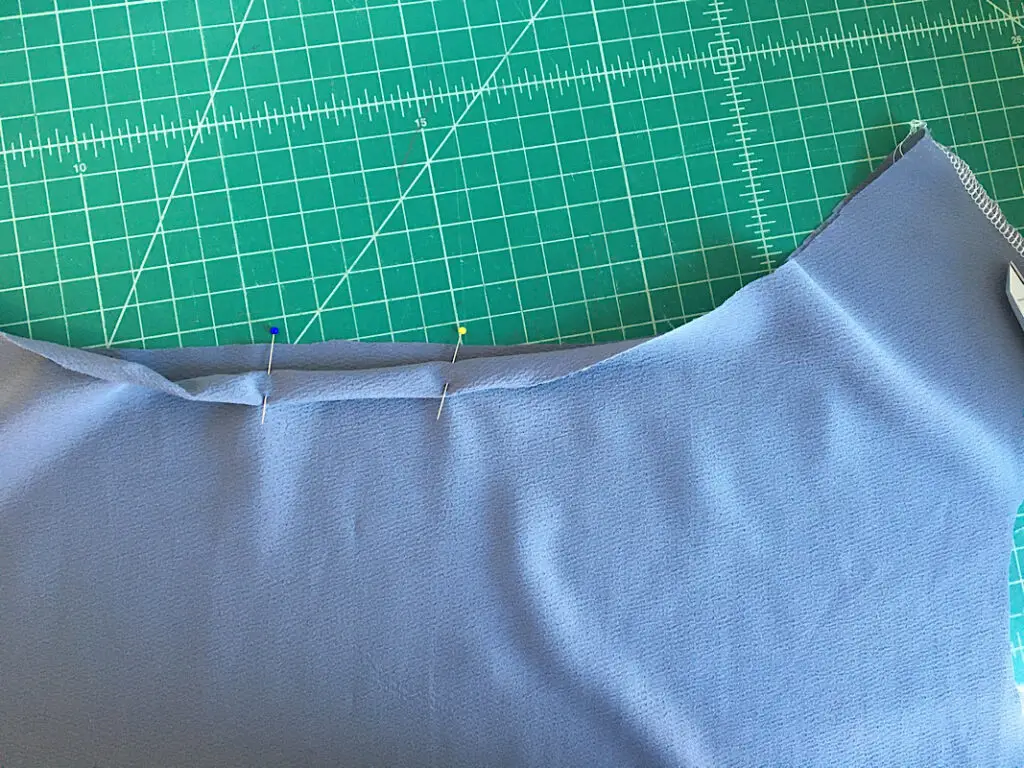
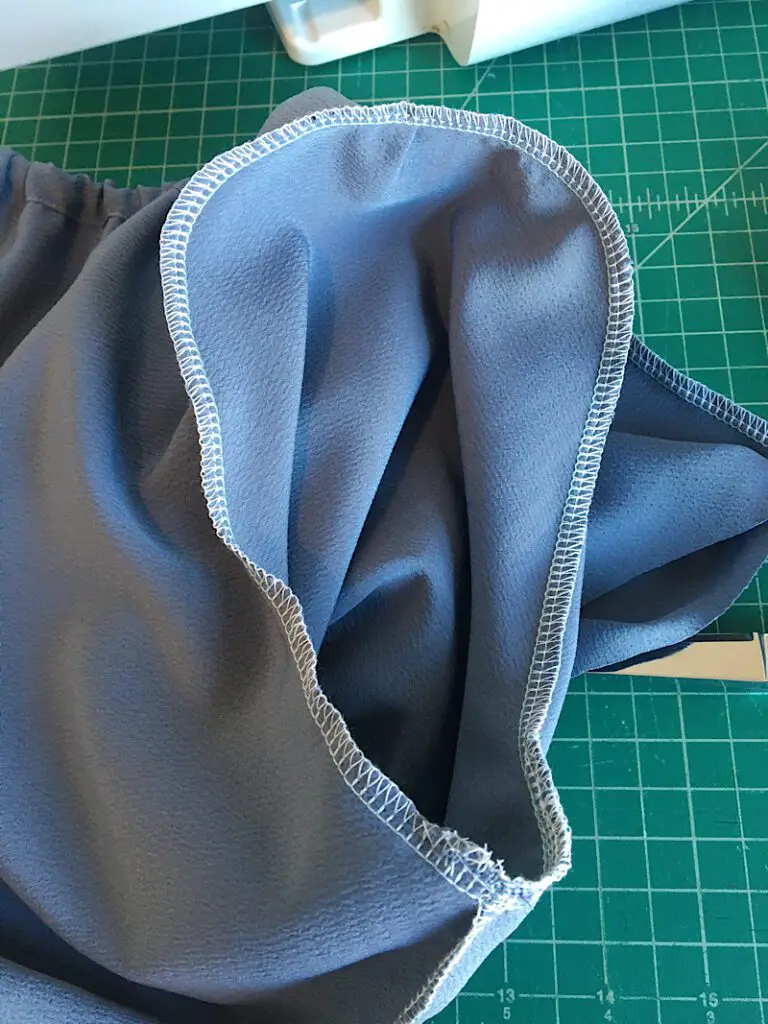
Step 8. Hem The Neckline
Fold the neckline over half an inch, then half an inch again and pin it in place. Do this around the entire neckline.
This is a little tricky since it is curved, so do your best. It doesn’t have to be utterly perfect because the gather will hide a bit of puckering.
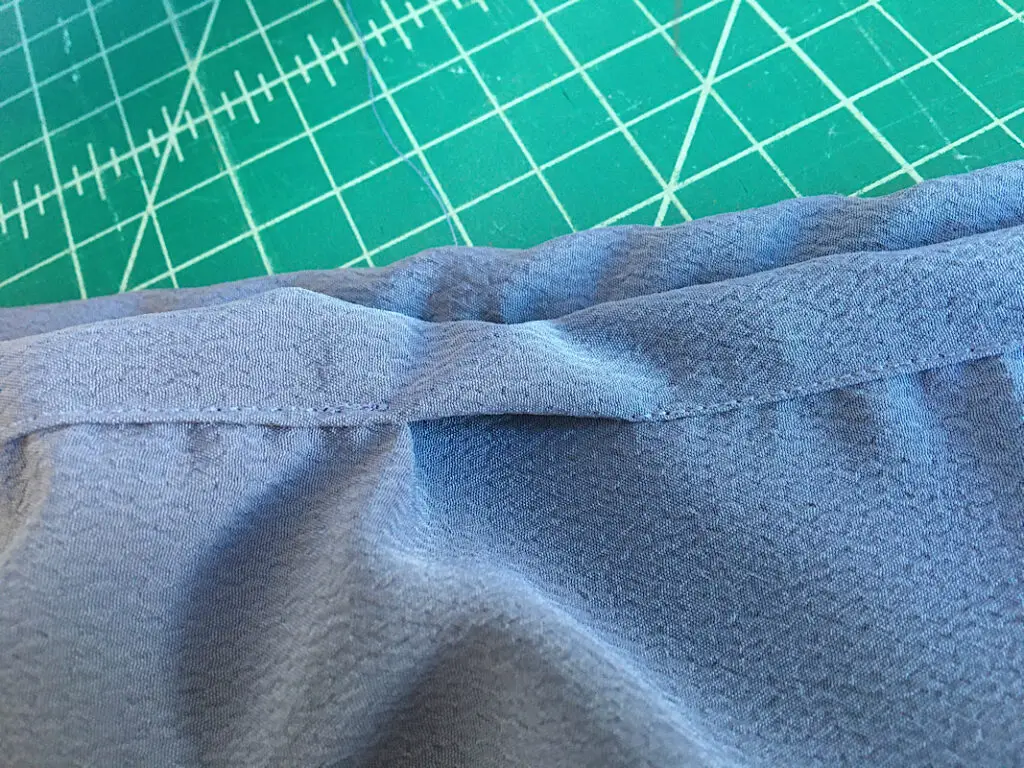
Sew a topstitch near the edge of the folded neckline. You need to make sure to stay close to the edge so that you will be able to thread the elastic through it later.
Stop sewing about 2 inches away from the point you started at, to leave a gap for inserting the elastic.
Step 9. Insert Elastic Through Neckline
You should have already cut your elastic to length in an earlier step.
Feed the elastic through the neckline with your safety pin or sewing bodkin.
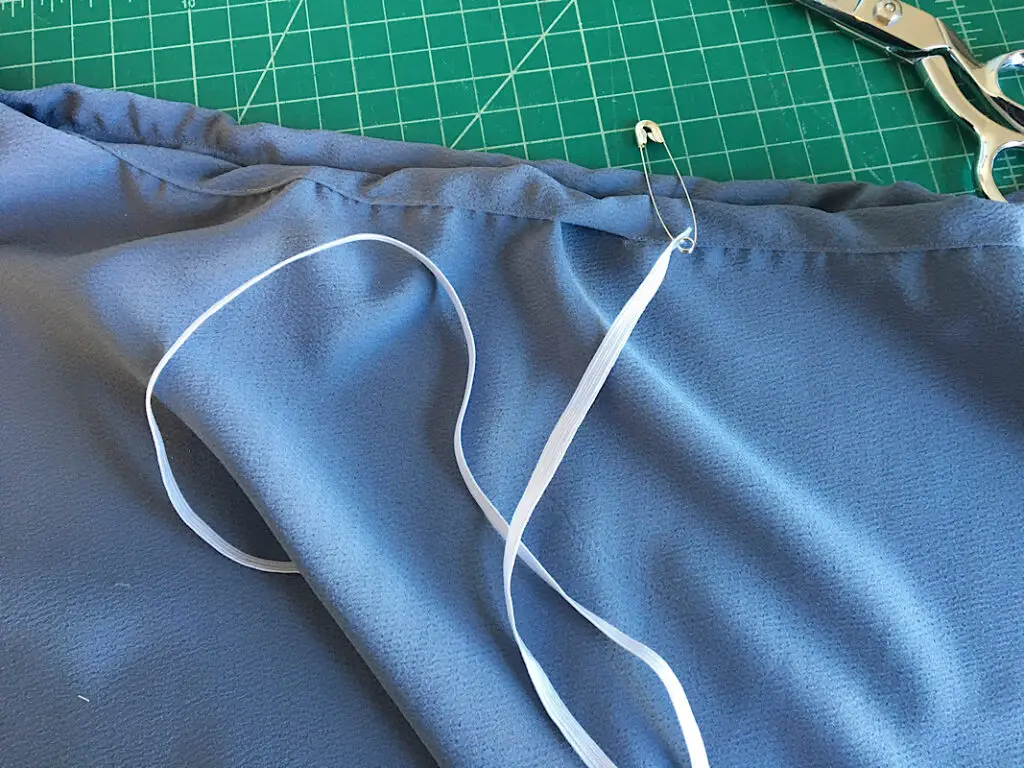
When you come out the other end, pull both sides of the elastic so they stick out far enough from the hole that you can easily sew them.
Lay the ends flat on top of each other, and pin and sew them together.

Then, pull on the neckline to stretch it and pull the elastic inside. Finally, sew the gap closed by moving the gathers out of the way as you sew.
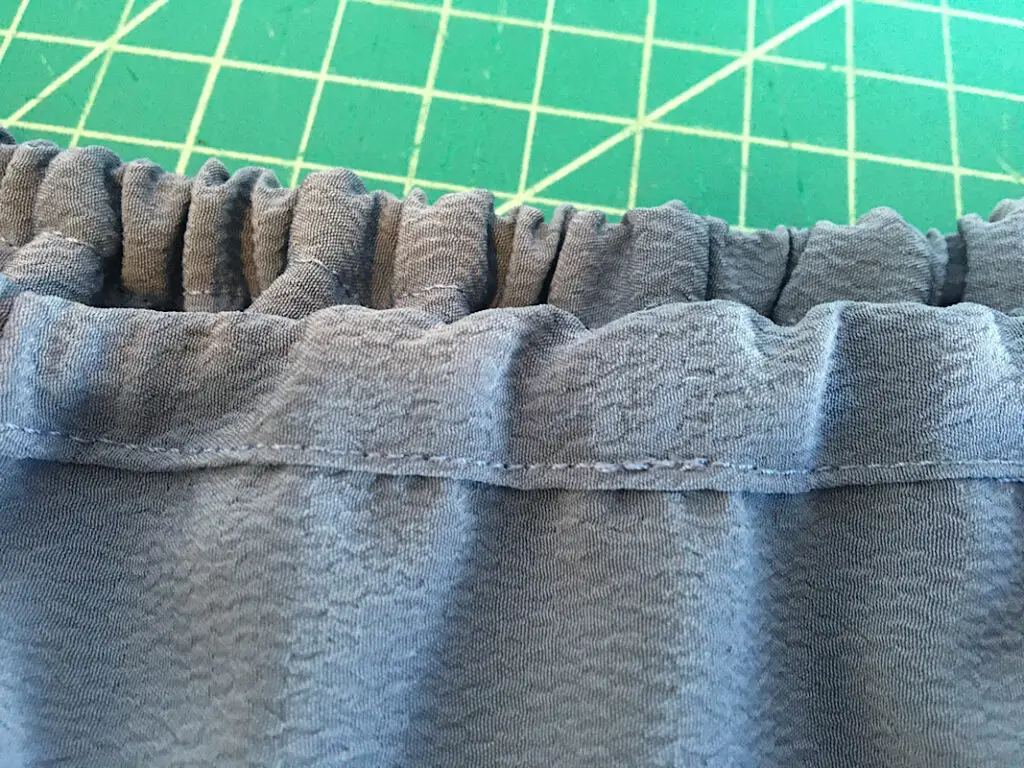
Stretch out the neckline to even it out. It looks great!
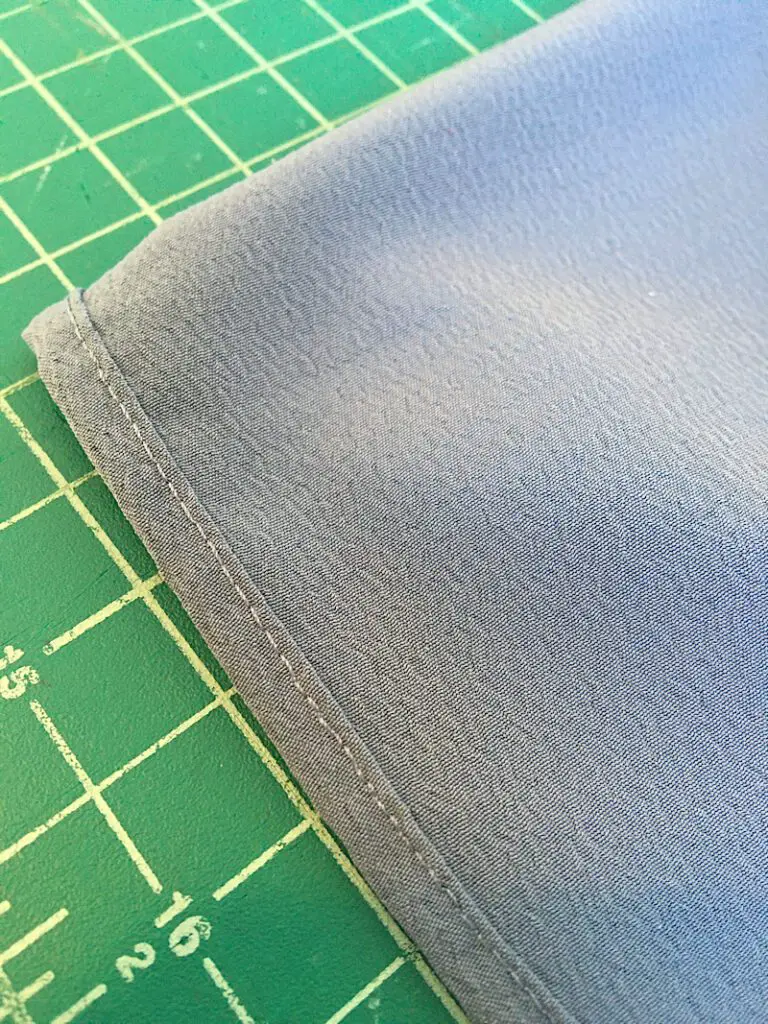
Step 10. Hem The Sleeves
To hem the sleeves, fold over the bottom edge towards the wrong side of the fabric 1/4 inch, then over 1/4 inch again. Pin it in place, and sew it down.
Step 11. Add Elastic To The Sleeves
Get the two pieces of elastic you cut to your sleeve width from earlier.
Find the center of each elastic and mark it with a pin. Also mark the center fold of each sleeve on the hemline.
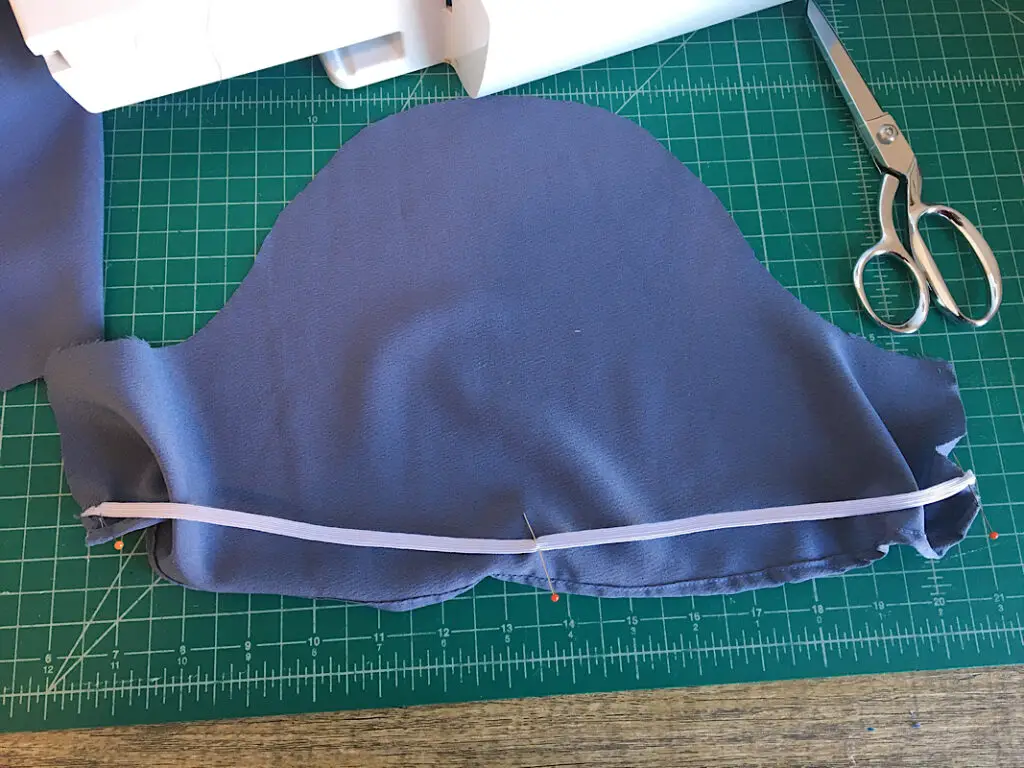
Working on the inside of the sleeve, pin one edge of the elastic to the side seam, about an inch or two above the hem.
Then pin the other edge of the elastic to the other side seam, and pin the middle of the elastic to the middle of the sleeve.
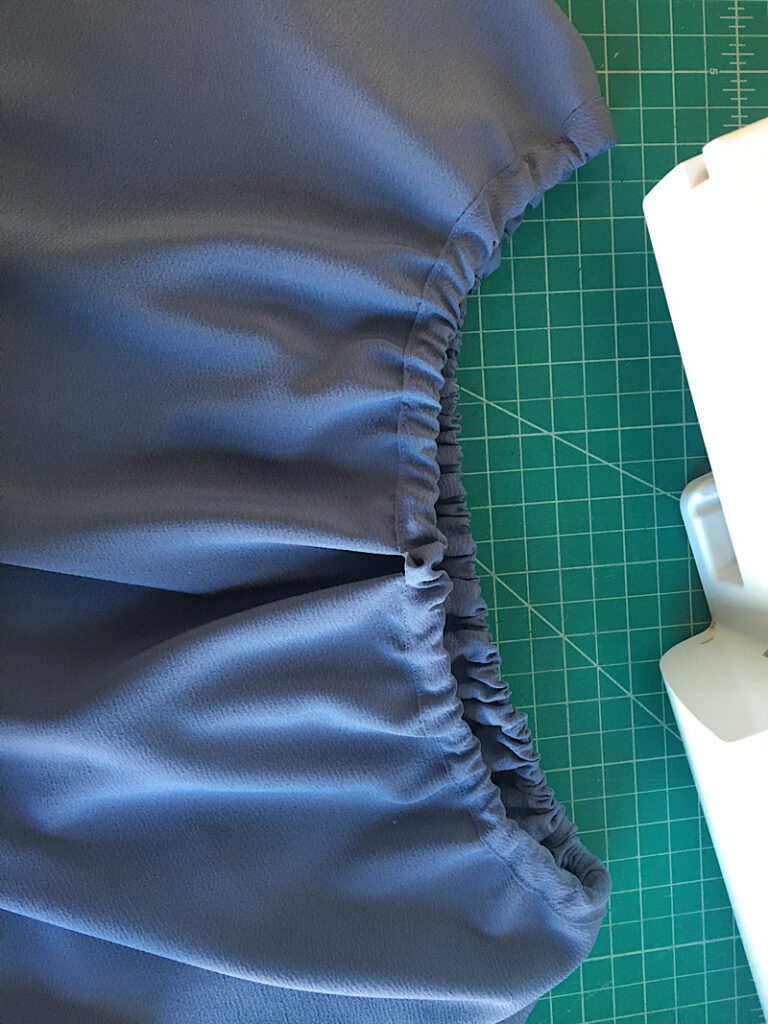
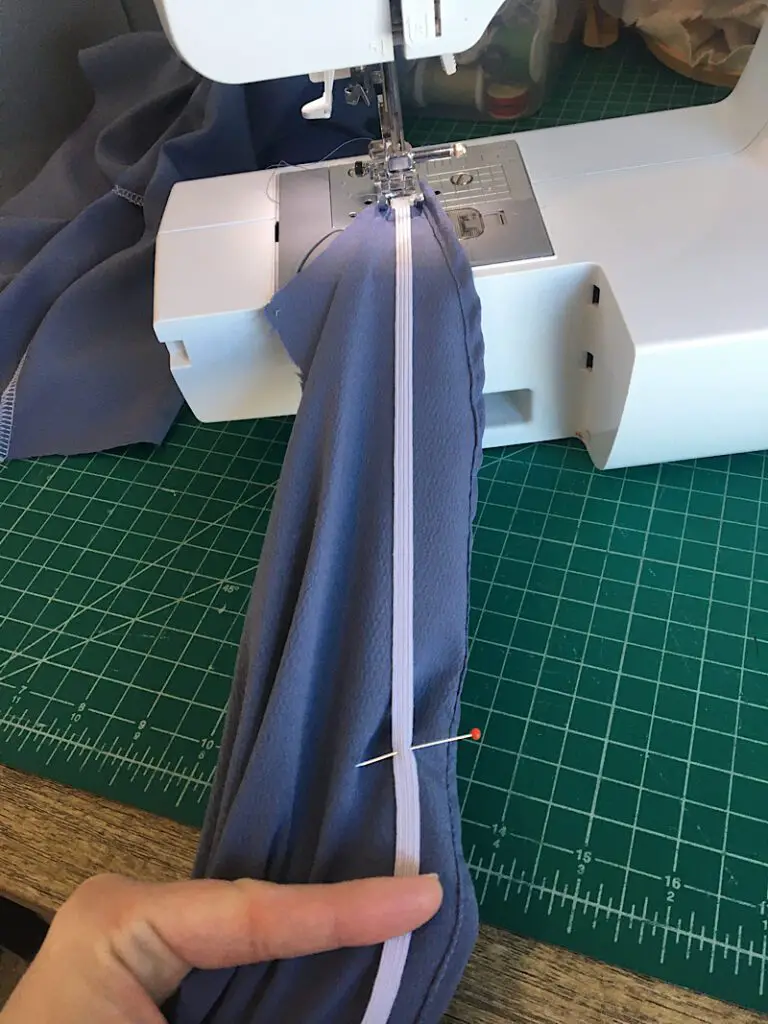
Sew down the elastic with a zig zag stitch, making sure to stretch the elastic as you sew. This can tricky, so go slow, and make sure to keep stretching the elastic so the fabric lays flat.
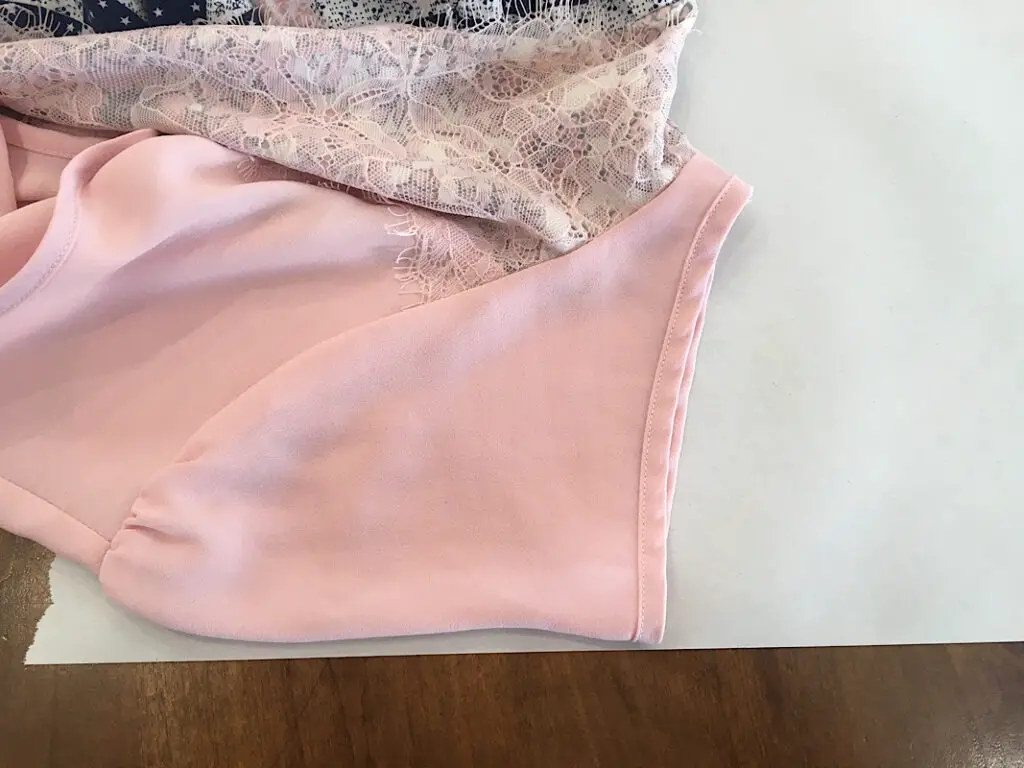
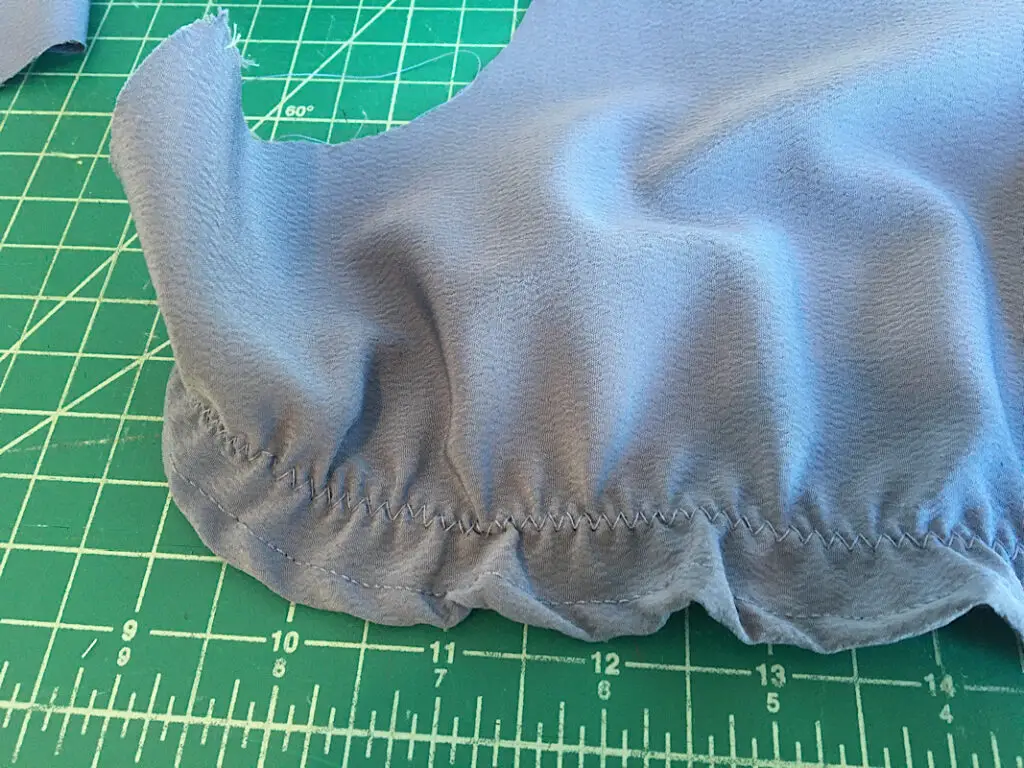
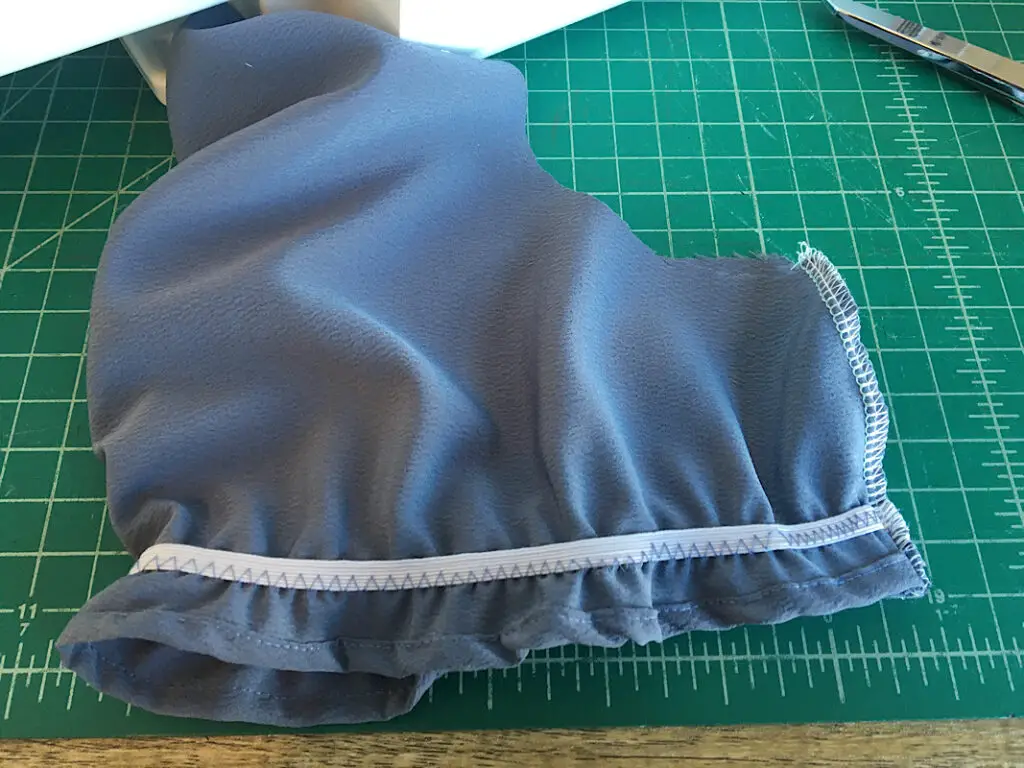
Once you are done sewing, the sleeve will gather like this:
Finally, fold the sleeve in half with the right sides facing, then pin and sew down the side seam.
Repeat these steps with the other sleeve.
Step 12. Set Sleeves Into Bodice
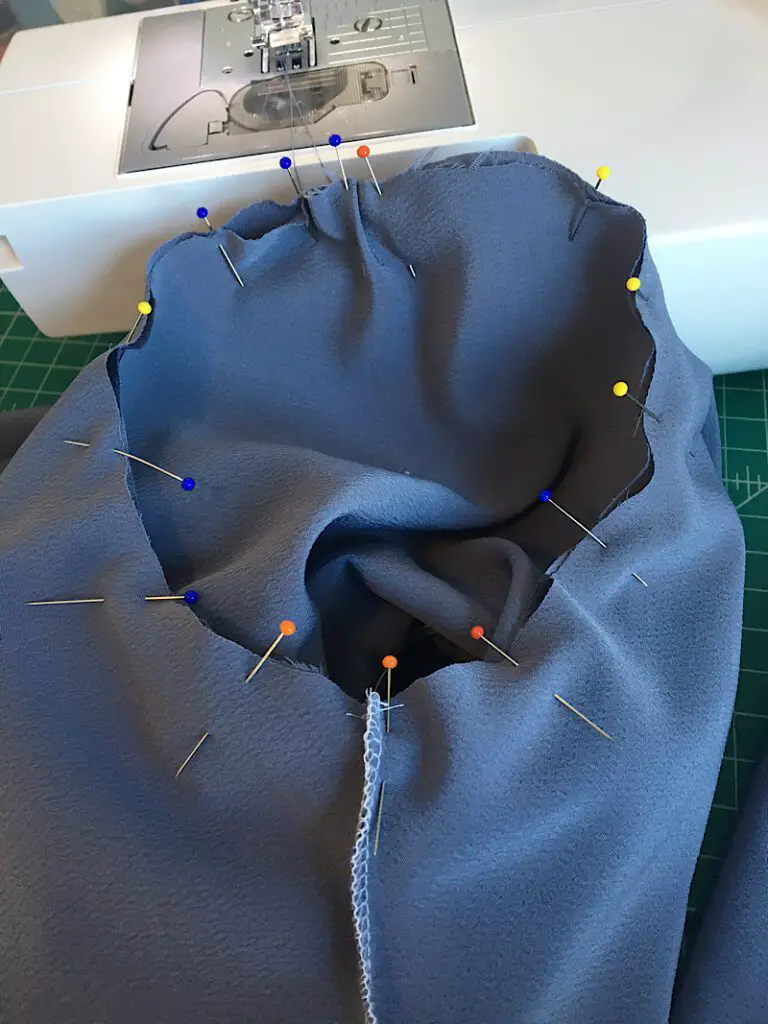
Turn the two sleeves right side out, and turn the bodice right side in.
Place the sleeve inside the armhole of the bodice and align the side seams, then pin them together all around.
If the sleeve ends up being slightly bigger than the armhole, you can gather it a bit at the top by the shoulder seam and it will add a bit of poof to the sleeve.
Sew the seam with a half in seam allowance and then finish the edge.
Repeat with the other sleeve.
Now turn the bodice inside out, and you are done sewing the bodice portion!
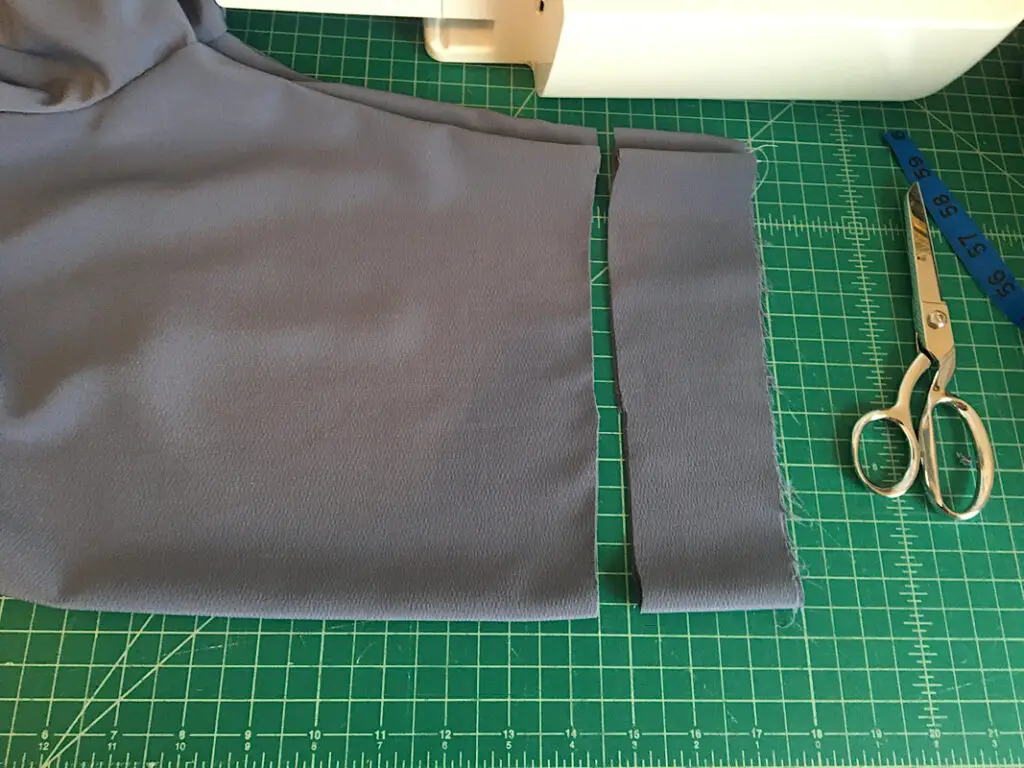
Before moving on, try the bodice on and mark the waistline with a pin.
Lay the bodice on the table and fold it in half. Cut off the excess length so that it is half an inch longer than the waistline you marked (for seam allowance.)
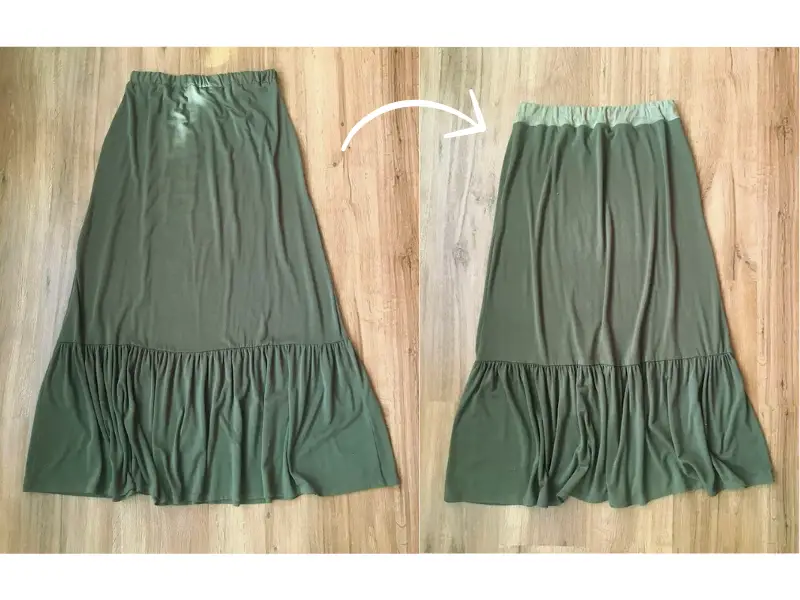
Step 13. Sew The First Tier Of The Skirt
This skirt will have two tiers. The first tier will go to about the knees, and the second tier will go to about the lower calf for a tea length dress. You can make them any length you want, though!
With your measuring tape, measure from your waistline to your knee, then add an inch. This will be the first tier length measurement. Then, measure around your hips and multiply it by 1.5, and add an inch. This will be the first tier width measurement.
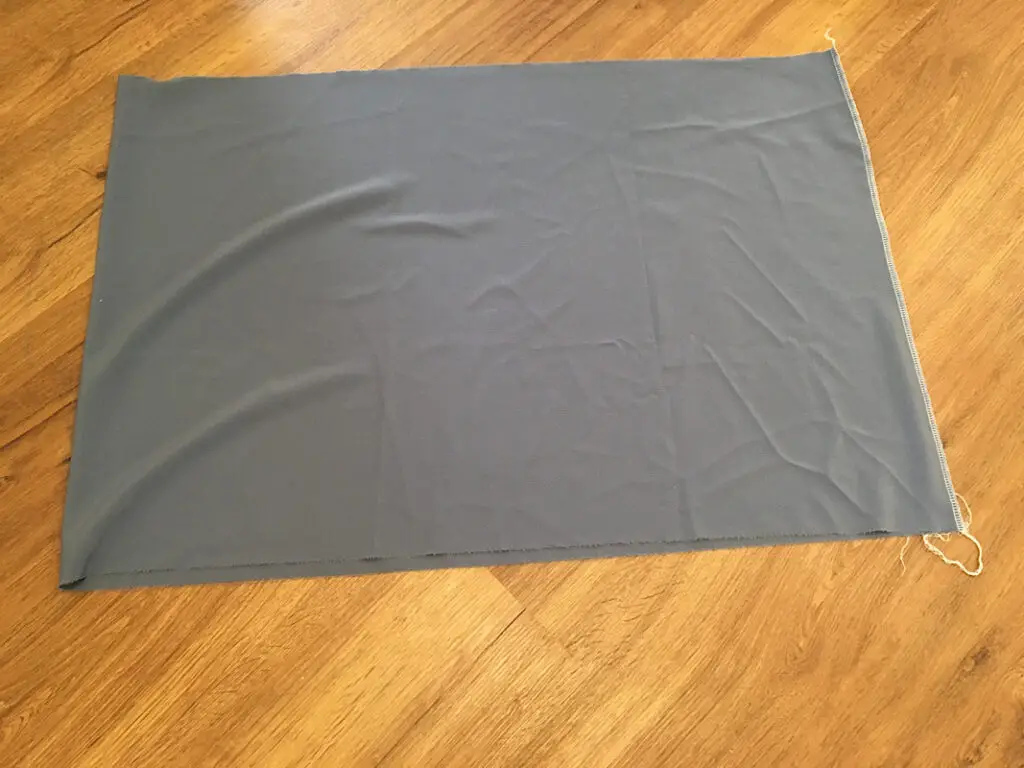
Cut out a piece of fabric that is equal to these length and width measurements.
Fold it in half with the right sides together, and the two short sides lined up. Then pin the side edge, and sew it with a half inch seam allowance.
To gather the skirt, change the stitch length on your sewing machine to the longest it can go, and sew a basting stitch (without backstitching at the beginning or end) around the top edge of the skirt, with about a 1/4 inch seam allowance.
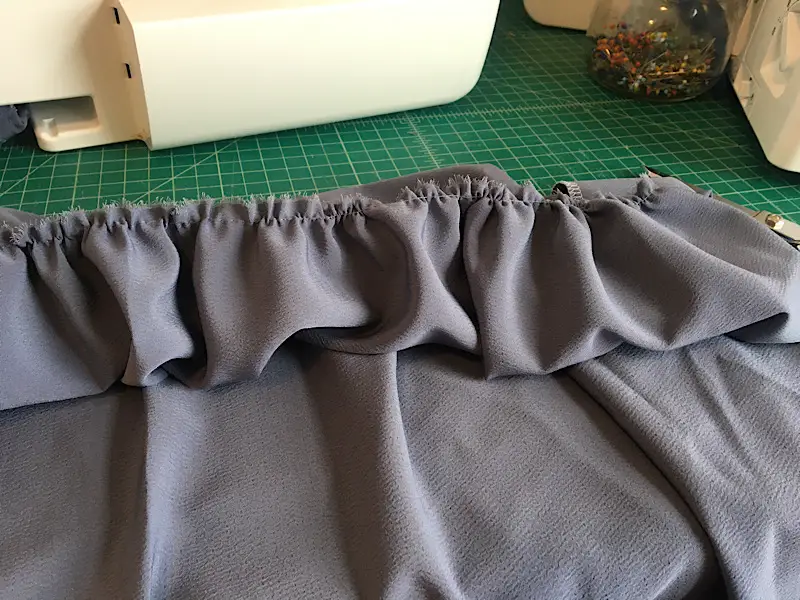
Then, pull on the tail end of the threads to gather the skirt. Carefully push the gathers around the skirt until they are even all around.
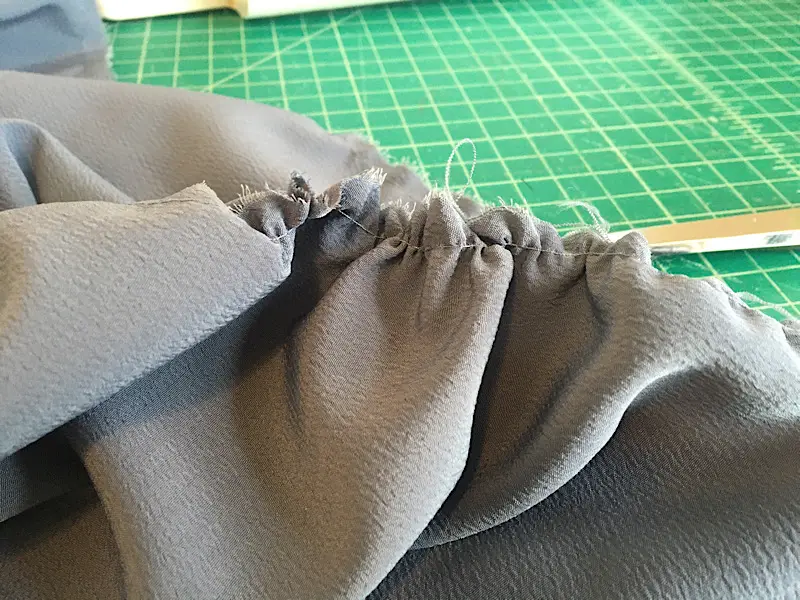
Gather the skirt until it’s circumference matches the circumference of the bottom of the bodice.
Then, with right sides together and the side seam of the skirt aligned with the side seam (or center back if you prefer) of the bodice, pin the first tier of the skirt to the bodice.
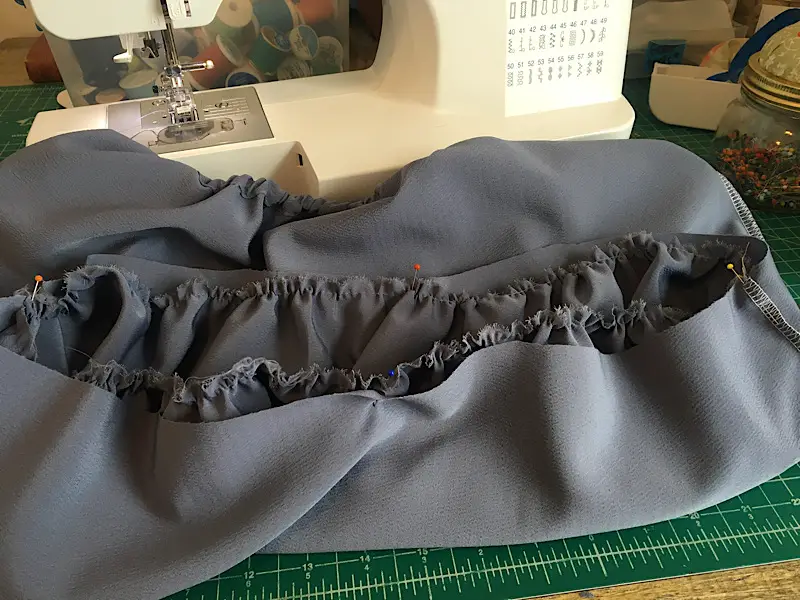
Carefully sew around the edge with a 1/2 inch seam allowance, then serge or zig zag the edge.
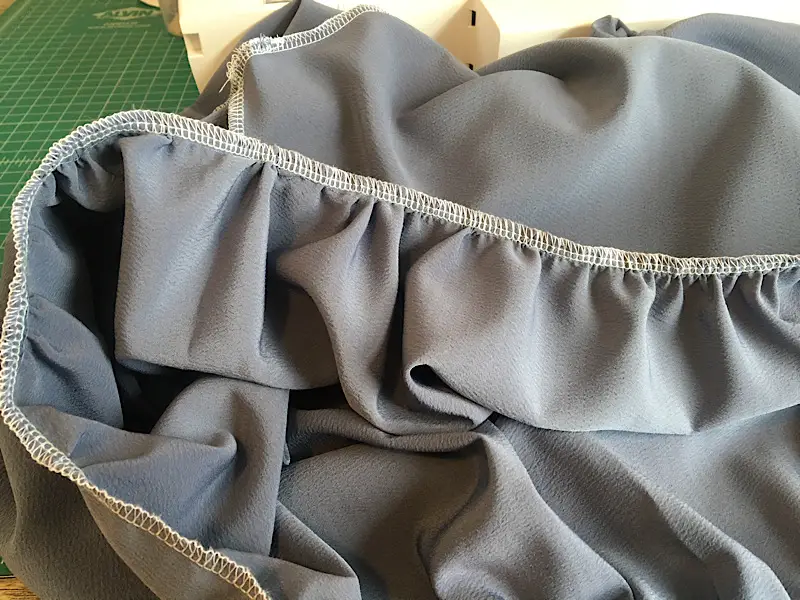
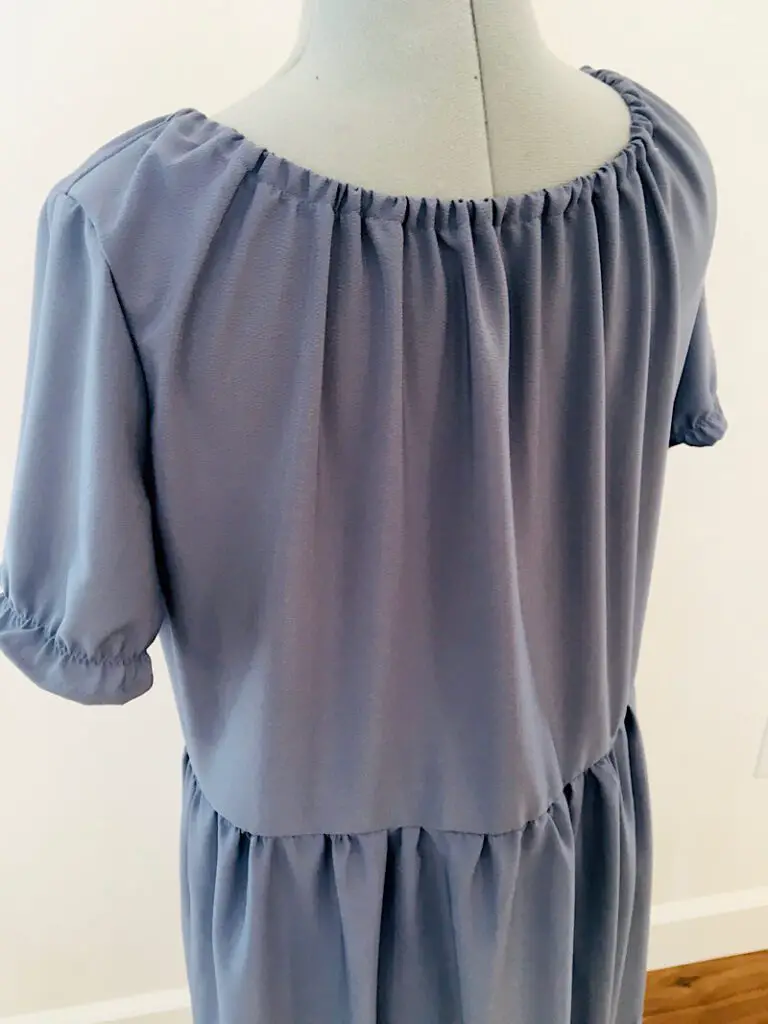
The first tier is done. Here is what it should look like:
Step 14. Sew The Second Tier Of The Skirt
For the second tier, measure the bottom circumference of the skirt and multiply it again by 1.5, plus an inch for seam allowance. This will be the width of the second tier.
Measure from your knee to your lower calf, then add an inch and a half for seam allowance and hem allowance. This will be the length of the second tier.
Cut out a piece of fabric that is equal to these length and width measurements.
Just like with the first tier, fold the fabric in half and sew the side seam. Then gather it, and sew it with right sides together to the bottom of the skirt. Make sure to line up the side seams.
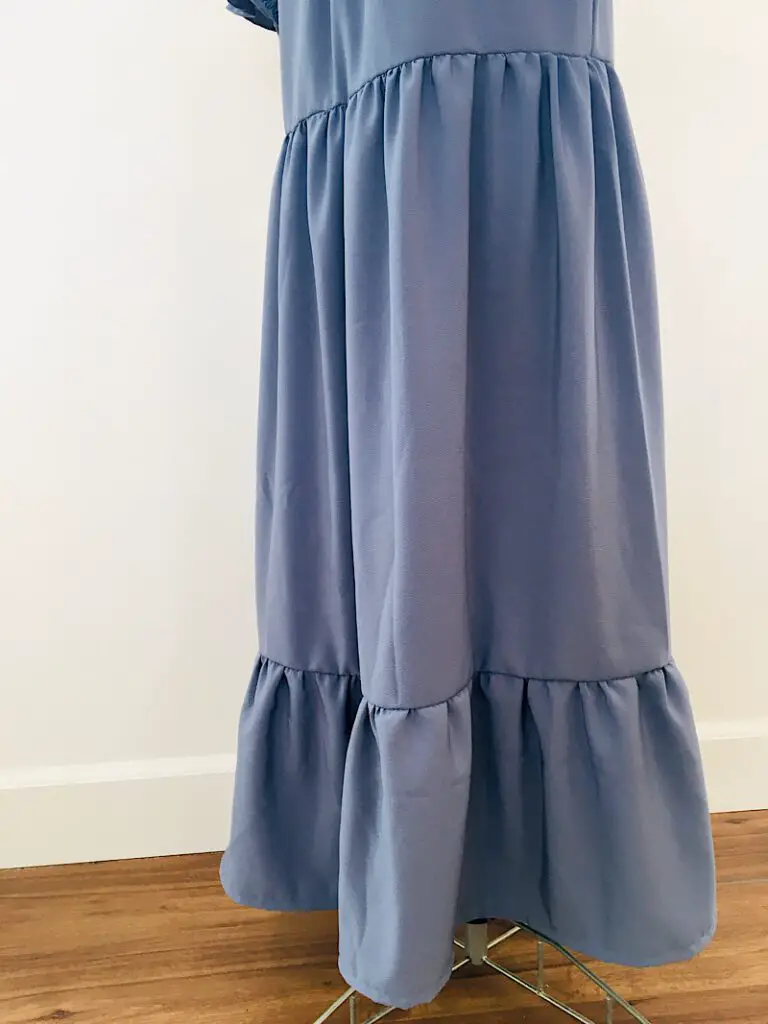
Finally, to hem the bottom of the skirt, fold up the fabric half and inch, then half an inch again and pin in place. Then sew a straight stitch around the edge.

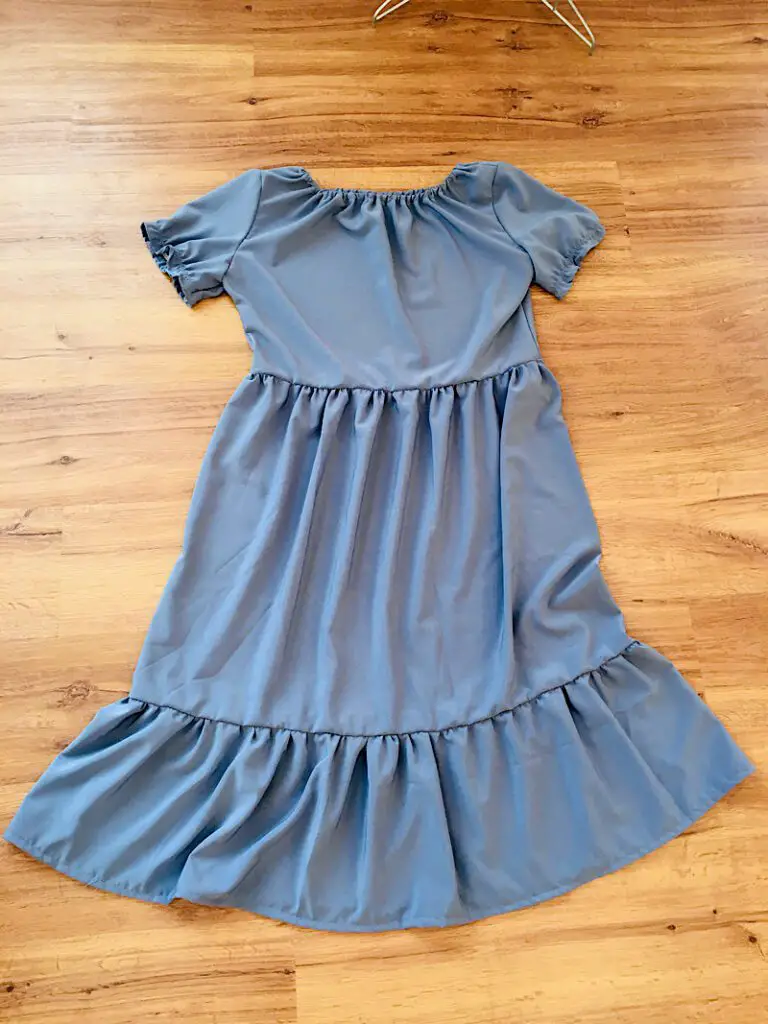
Here is what the finished skirt should look like:
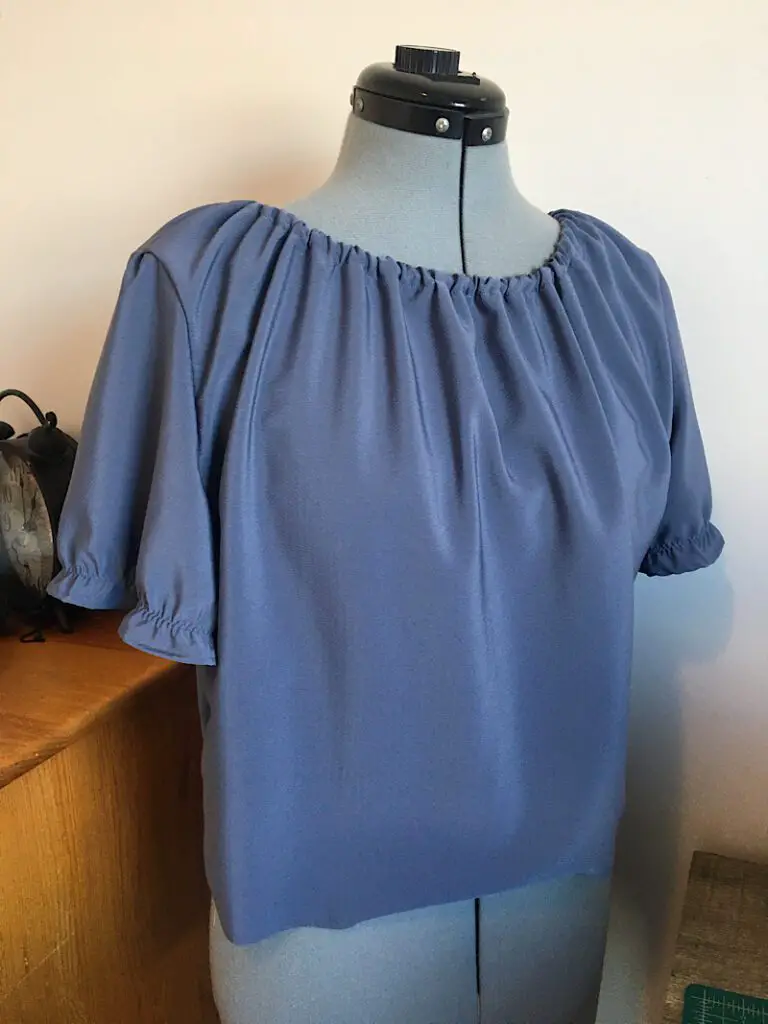
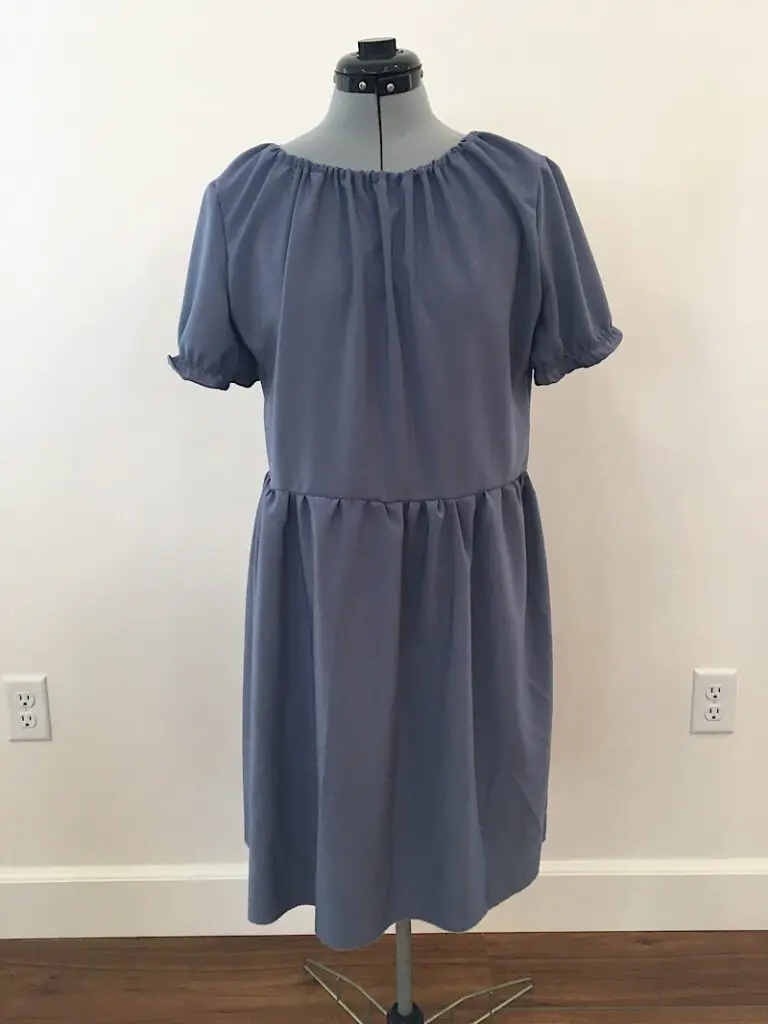
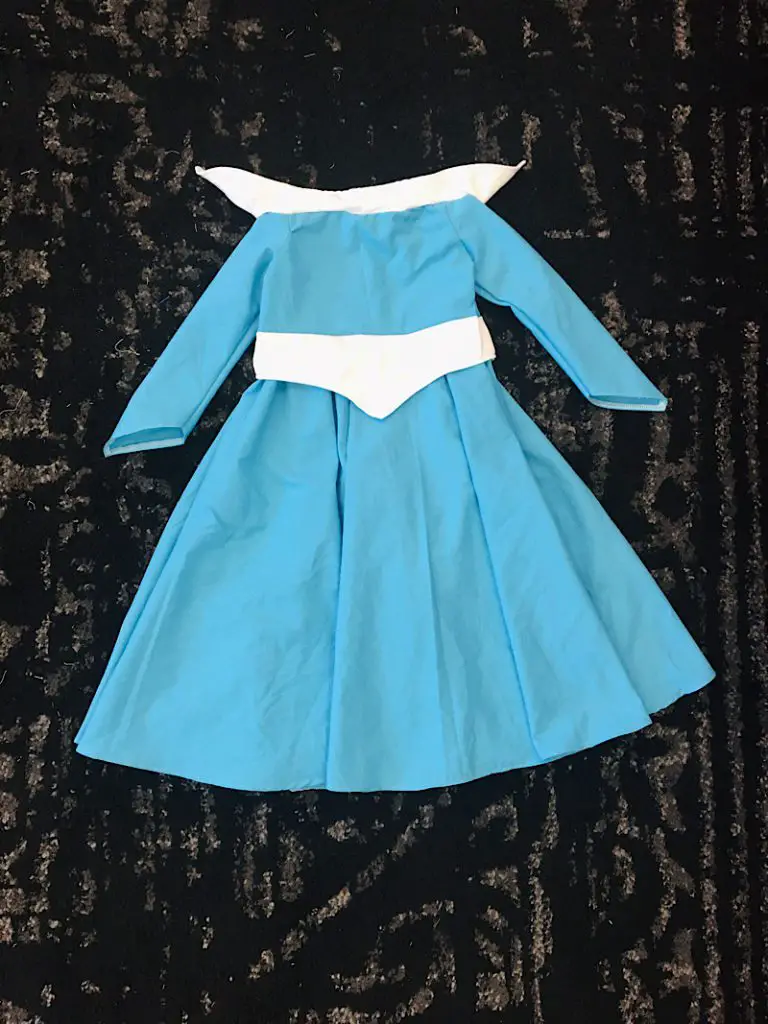
Your peasant dress is now complete!
See, that wasn’t so hard!
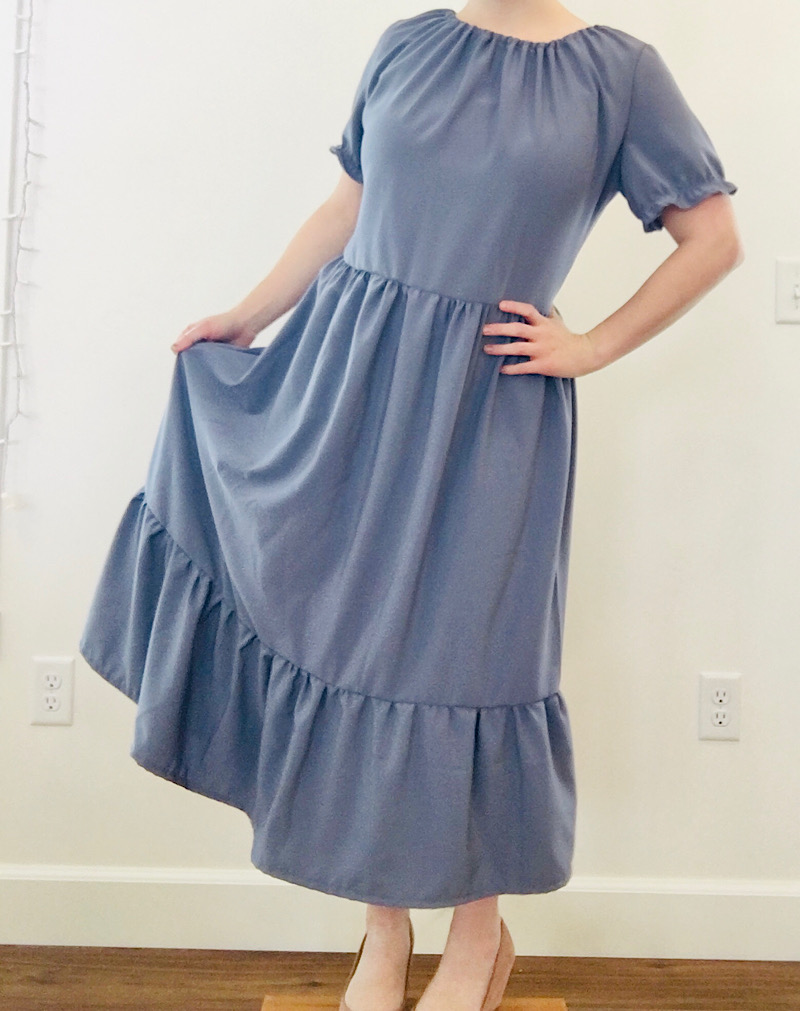
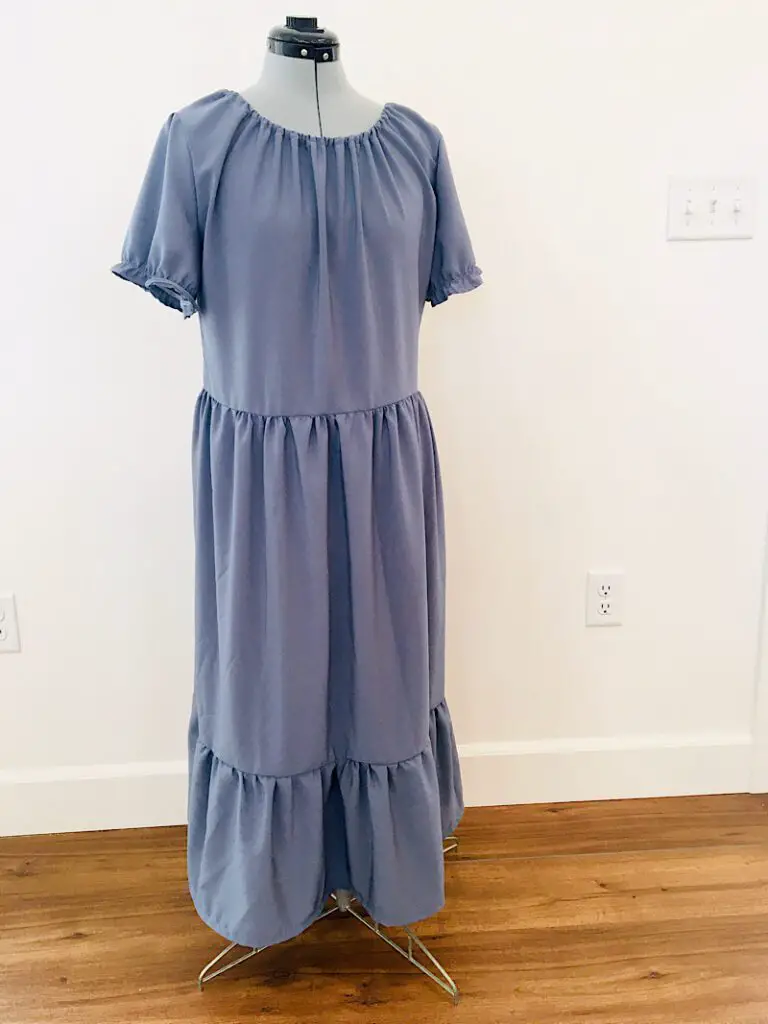
Here are some more photos of my completed dress…
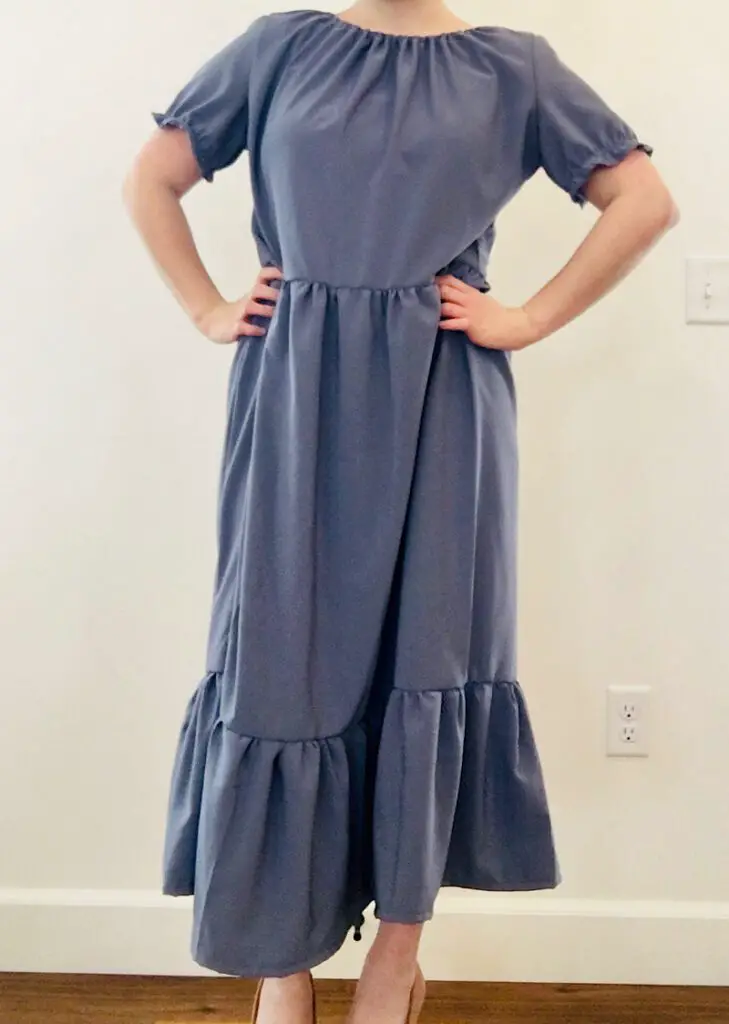
Conclusion
I hope you enjoyed making this dress as much as I did. Now that I’ve made it once, I might need some more in other colors!
As always, if you have any questions about any steps in this tutorial, leave a comment and I will do my best to help.
If you enjoyed this free women’s peasant dress pattern, please consider sharing this post on Pinterest so I can reach other sewers.
Also subscribe to my email list for more tutorials like this one.
Wow! So much detail and so easy to follow. I’m saving this to make my daughter and I matching Easter dresses🥰💕
Jessi, I am so glad you like it. I hope to see your finished dresses!
This is great, thank you! I just made a peasant dress following a different tutorial, it’s ok and wearable but there seems to be too much bagginess under the arms. I’m definitely going to try this method, it looks like it will produce a better fit.
I’m glad you like it Rachel!