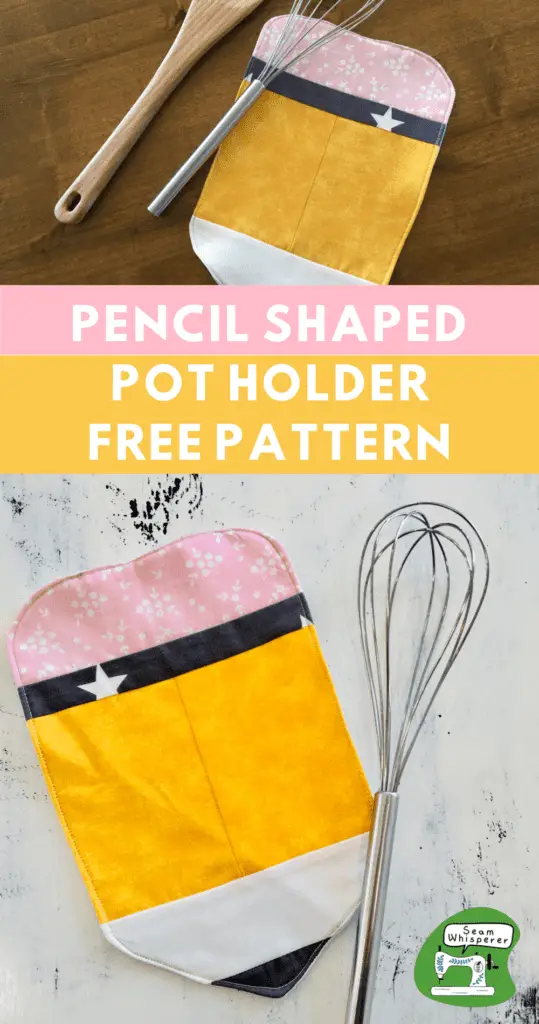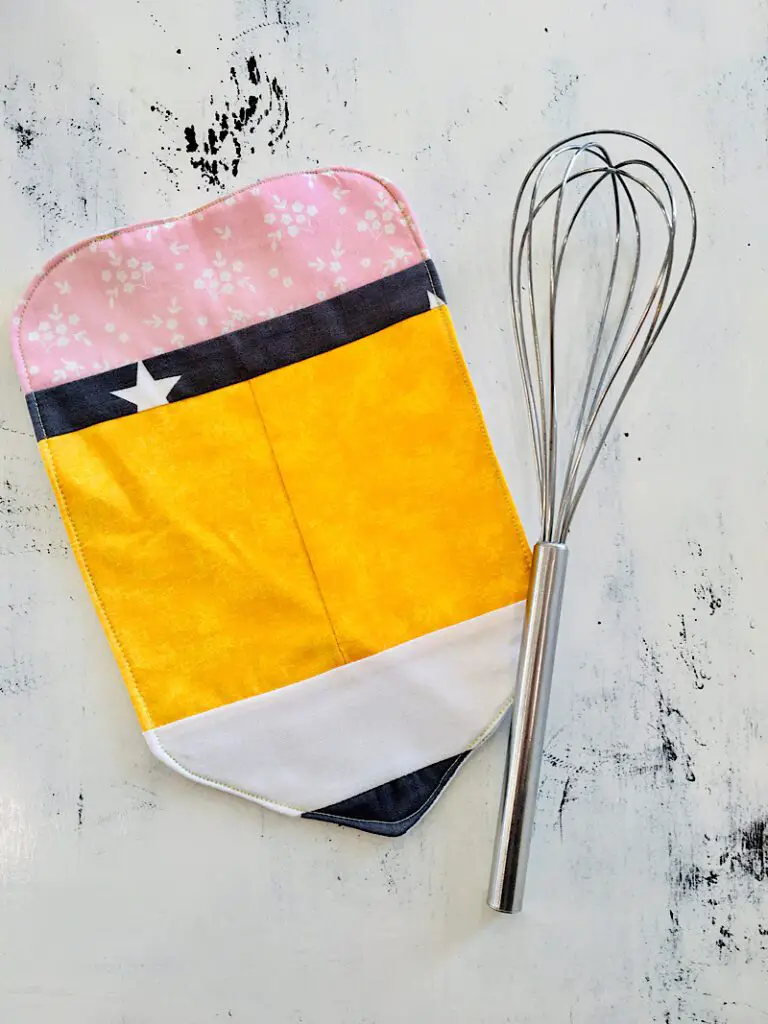
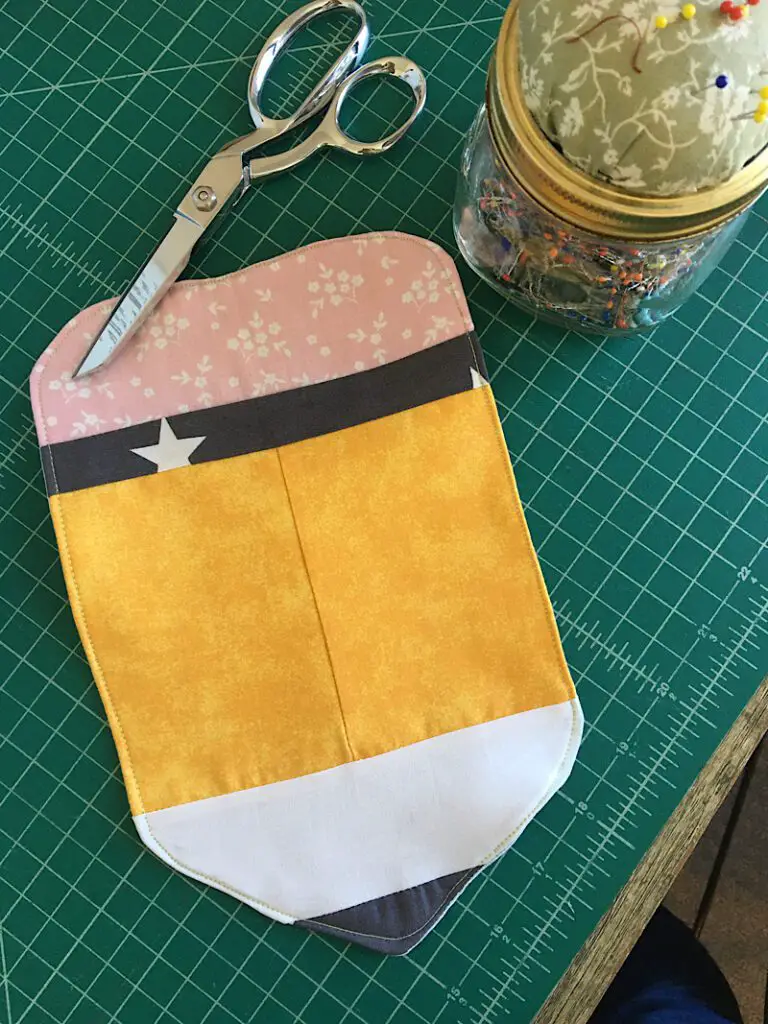
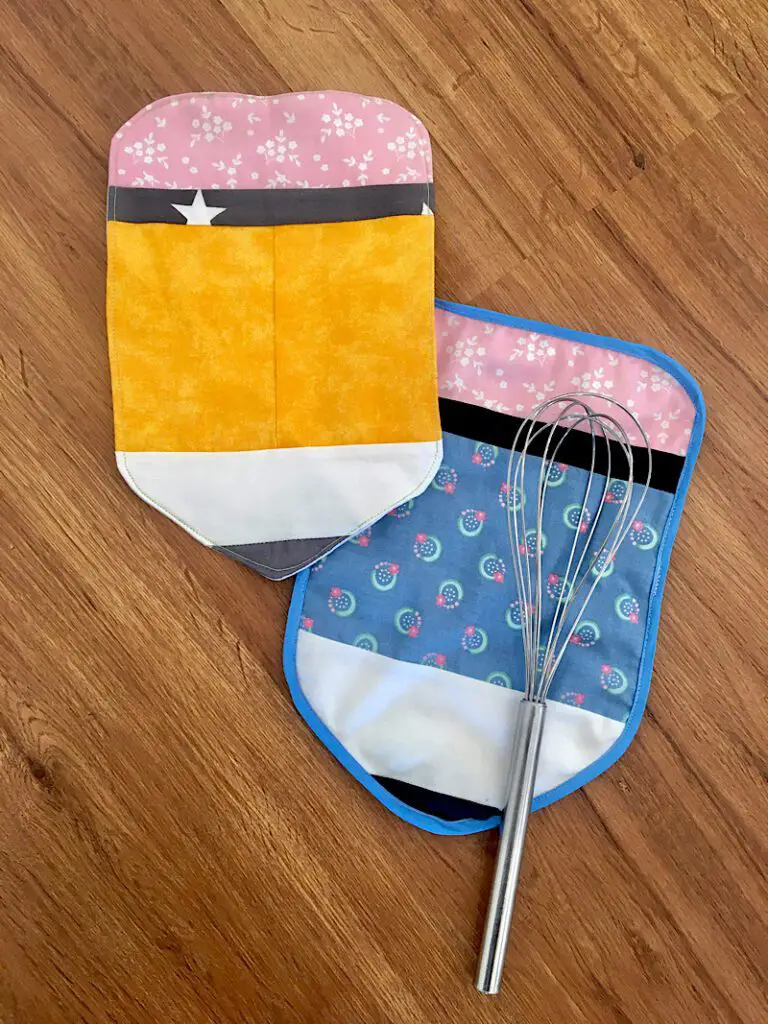
This adorable pencil shaped pot holder is as practical as it is cute! This easy sewing project makes a unique and fun teacher-themed gift.
If you are looking for a fun and unique teacher appreciation craft to make for your kids’ teachers this year, you have got to try this project!
This pot holder is quick to whip up but oh-so-cute! You won’t find this design anywhere else!
Whether for teacher appreciation day, Christmas, or a birthday, this makes a cheap and creative gift for any teacher.
This post may contain affiliate links. Read the full disclosure here.
About This Tutorial
This is an advanced-beginner project.
There are two ways to finish this pot holder, both of which I will show you in this tutorial. You can finish the edges by sewing the pot holder inside out, then turning it and top stitching, or you can add a bias tape binding around the edges.
Both styles are cute, it depends on the look you are going for! I personally like the turning method best.
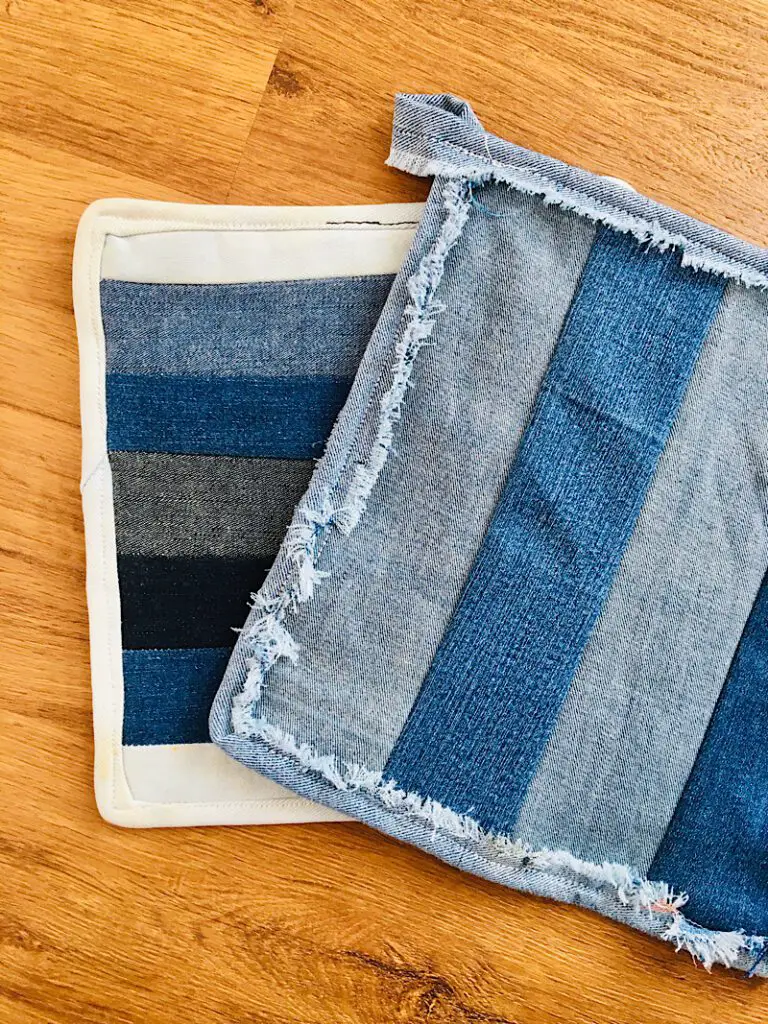
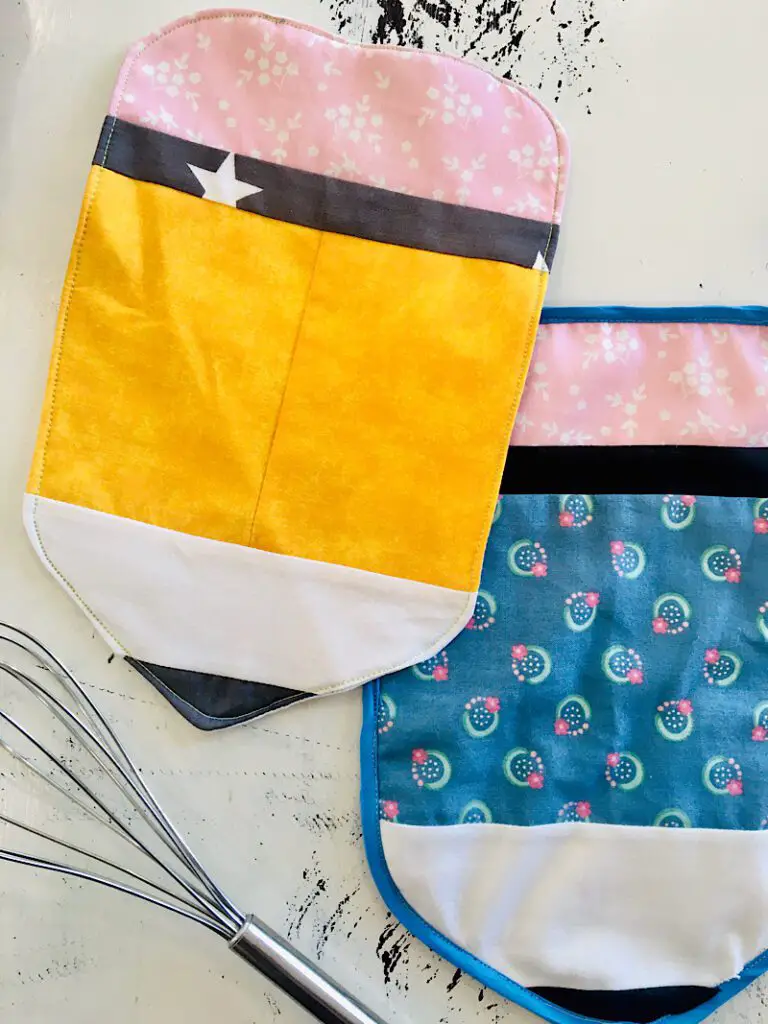
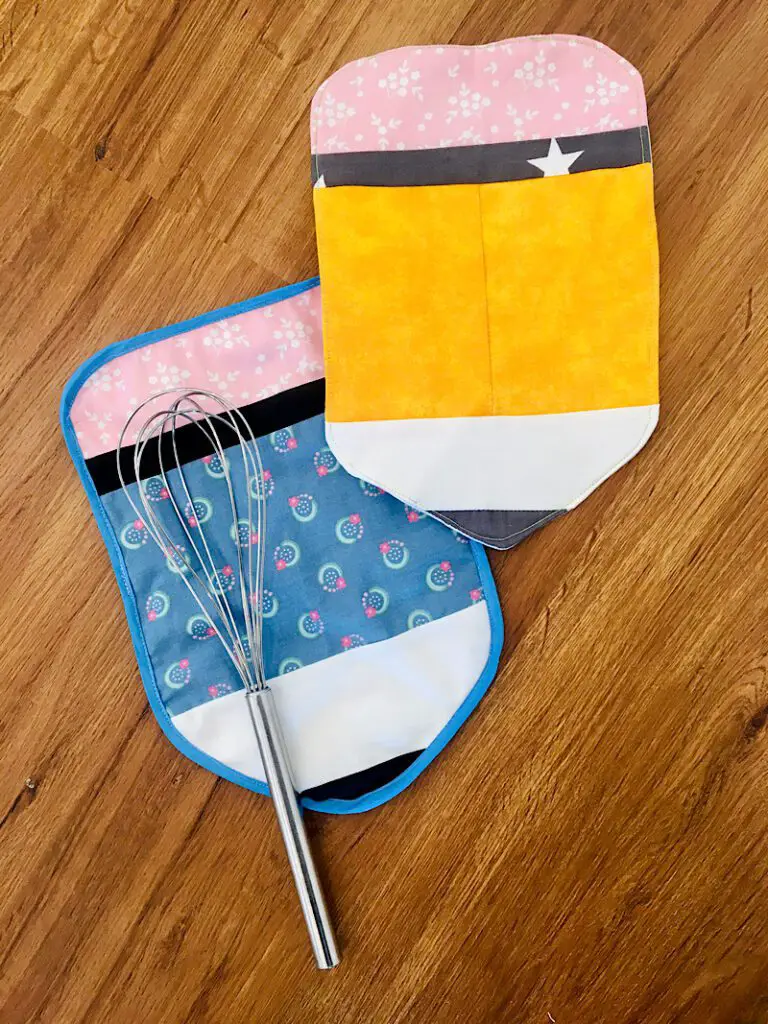
For a traditional colored pencil, you will need orange or yellow fabric for the pencil body, but you can also get creative and use other colors like I did in the blue pencil. Make sure to use 100% cotton since the hot pots may melt a synthetic material!
Lastly, you can make this pot holder double sided if you want, which is a great idea! I just didn’t have enough fabric to do so since I used scraps.
Use 3/8ths inch seam allowances.
Supplies Needed
- Sewing Machine
- Fabric Scissors (My Favorite)
- Sewing Pins
- Ironing Board & Iron
- Pencil Pot Holder Pattern (Download Below)
Materials Needed
- 1- 7″x8″ piece of orange or yellow 100% quilting cotton
- 1 – 4″x8″ piece of pink 100% quilting cotton
- 2 – 2″x8″ pieces of medium grey 100% quilting cotton
- 1 – 4″x8″ piece of white or natural colored 100% quilting cotton
- 1 piece of 8″x12″ white 100% quilting cotton for the back
- 2 pieces of 8″x12″ insul bright or other heat-resistant batting
- 1/2 inch Bias Tape Binding (Optional)
- Matching Thread
How to Download & Print The Free Pattern
This pattern is a multiple page PDF that I will email to your inbox! Print it at 100% scaling, then measure the “1 inch test square” to make sure it printed correctly.

To download the free pattern, sign up for the email list below and I will send the file right away.
How To Make A Pencil Pot Holder
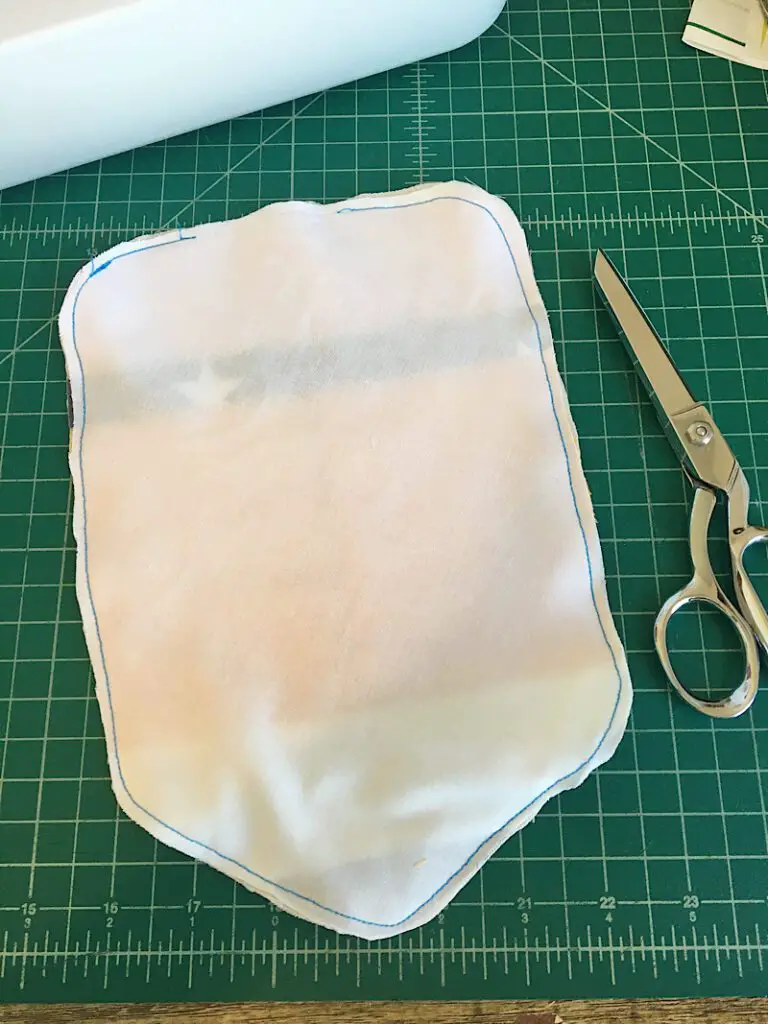
Step 1. Cut Out The Pattern Pieces
Print the pattern and cut out all the pieces on the dotted lines. (These are the seam allowance lines. The solid lines show you what it will look like when sewn.)
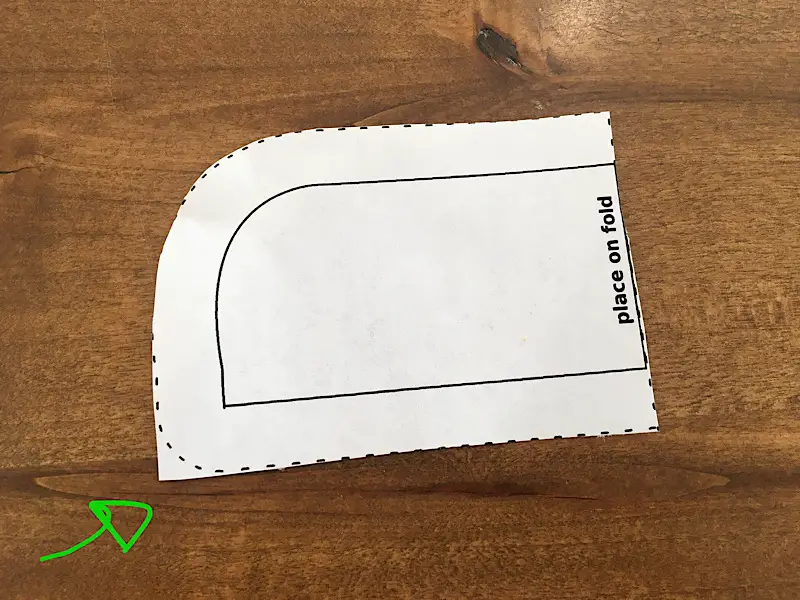
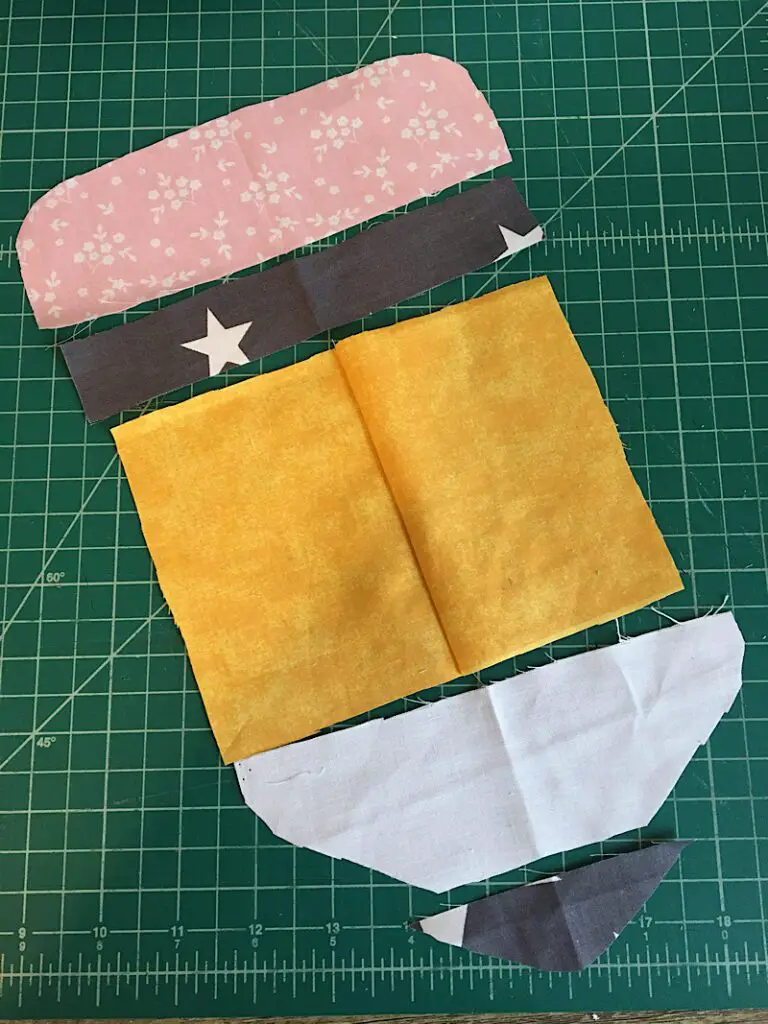
Next, to cut out the fabric, fold each piece of fabric in half and line the folded edge with the flat edge of each pattern piece that says “place on fold”.
Cut out each piece then line them up in order so you can see how it will look.
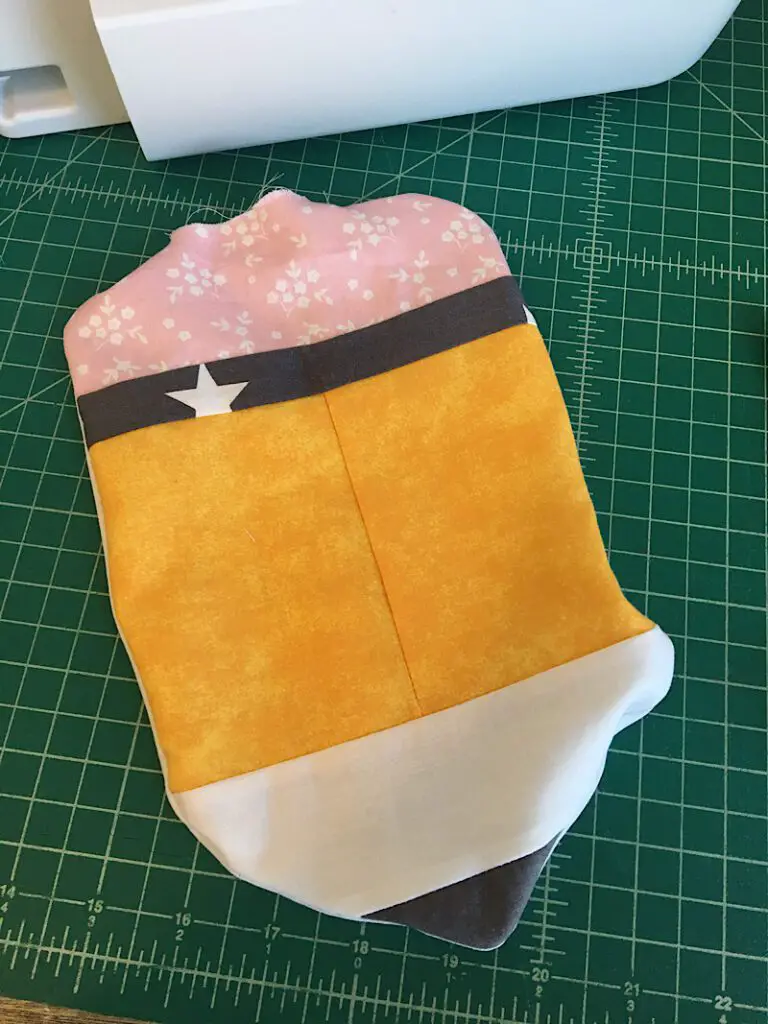
Step 2. Sew The Pencil Together
Now that you have lined up all the pieces, you can see which edges will need to be sewn together to make the pencil shape.
Start with the top two pieces, the pink eraser and the grey “metal” piece that holds the eraser on a real pencil. Place them together with the right sides touching, and sew down the edge with a 3/8ths inch seam allowance.
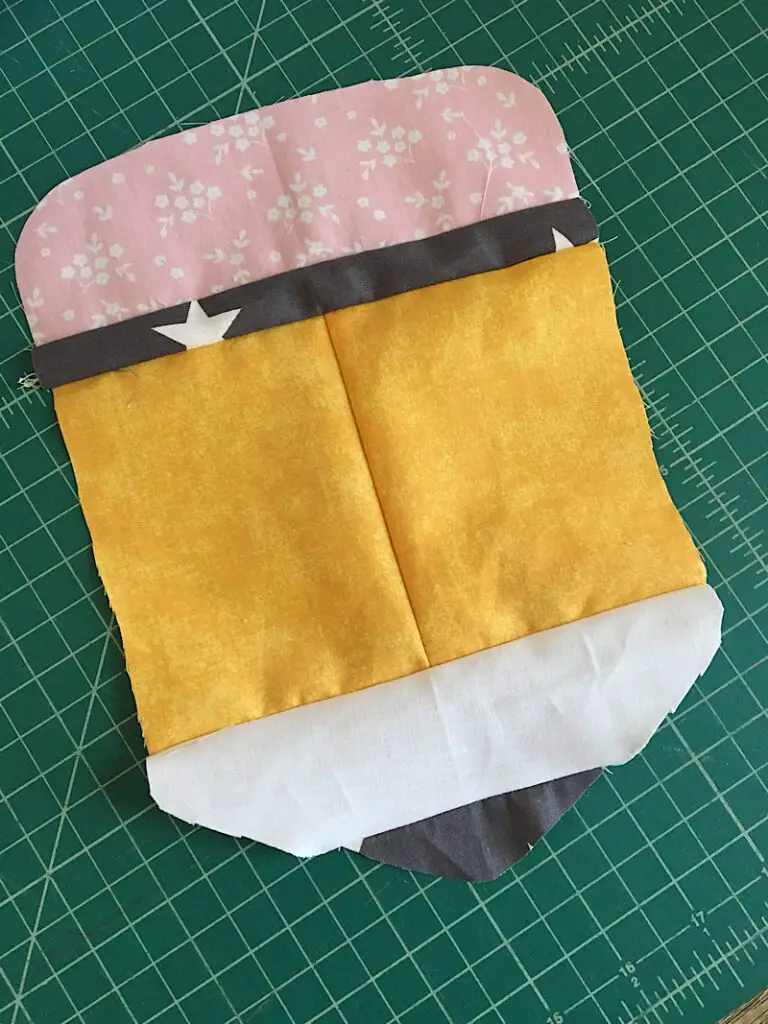
Then, continue by sewing on each next piece of the pencil one at a time.
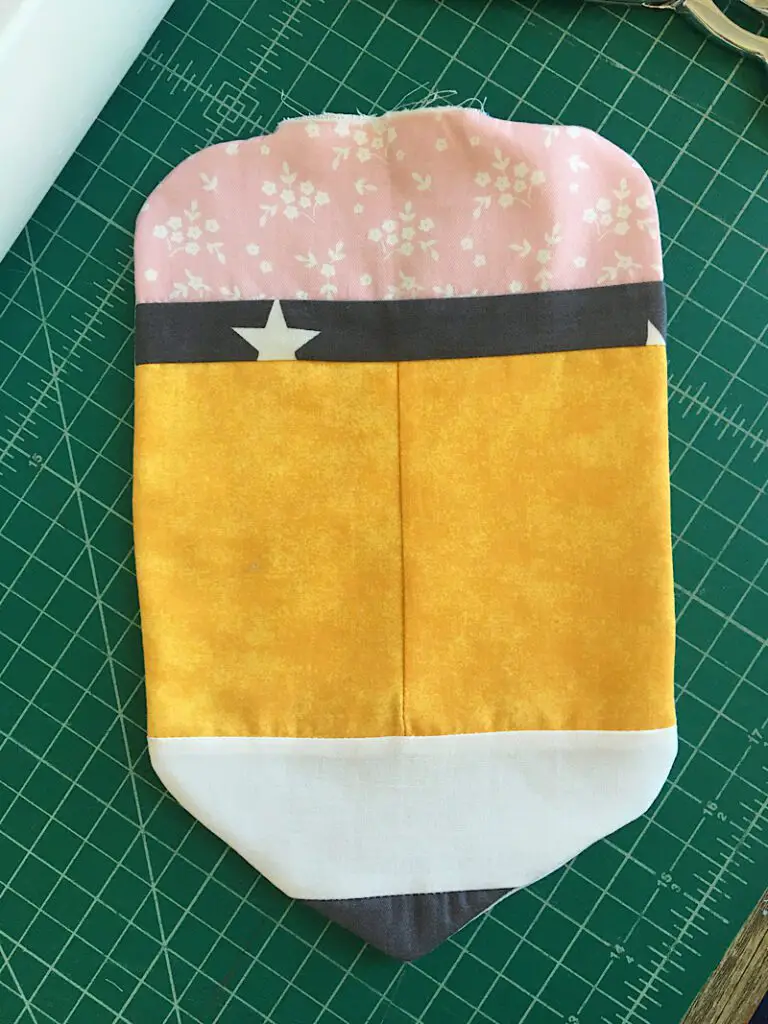
Once you have sewn them all, press the seams flat.
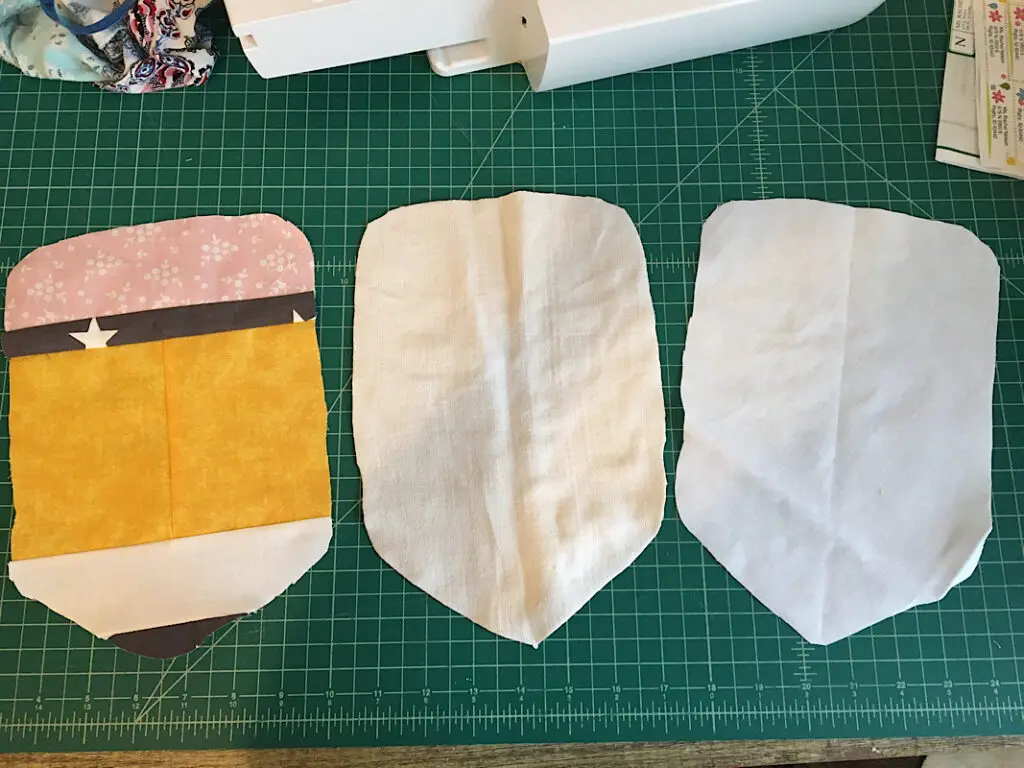
If you are going to make your pot holder double sided, assemble the back side as well.
Otherwise, use the completed front piece to trace a piece of fabric to be the back. I used white for the back of mine.
Also use the pencil shape to trace and cut out 2 pieces of the insul bright batting.
Step 3. Sew The Layers Together
Once you have your pencil shape, the batting, and the back cut out and assembled, it’s time to sew them together.
**If you are going to finish the edges by top stitching, continue on with this step. If you would rather sew binding around the edges, skip tp step 4.
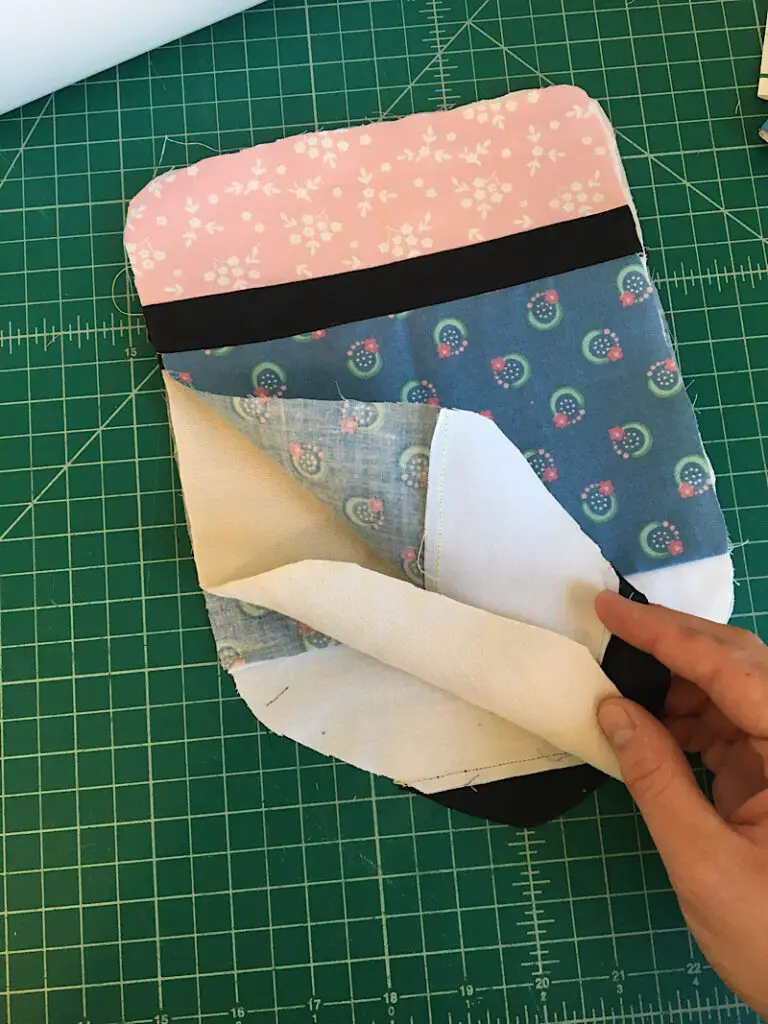
Layer them by placing the pencil front piece on the table with the right side up. Then lay the back piece on top, with the right sides together. Last, lay the insulation on the very top. Pin them all together around the edges.
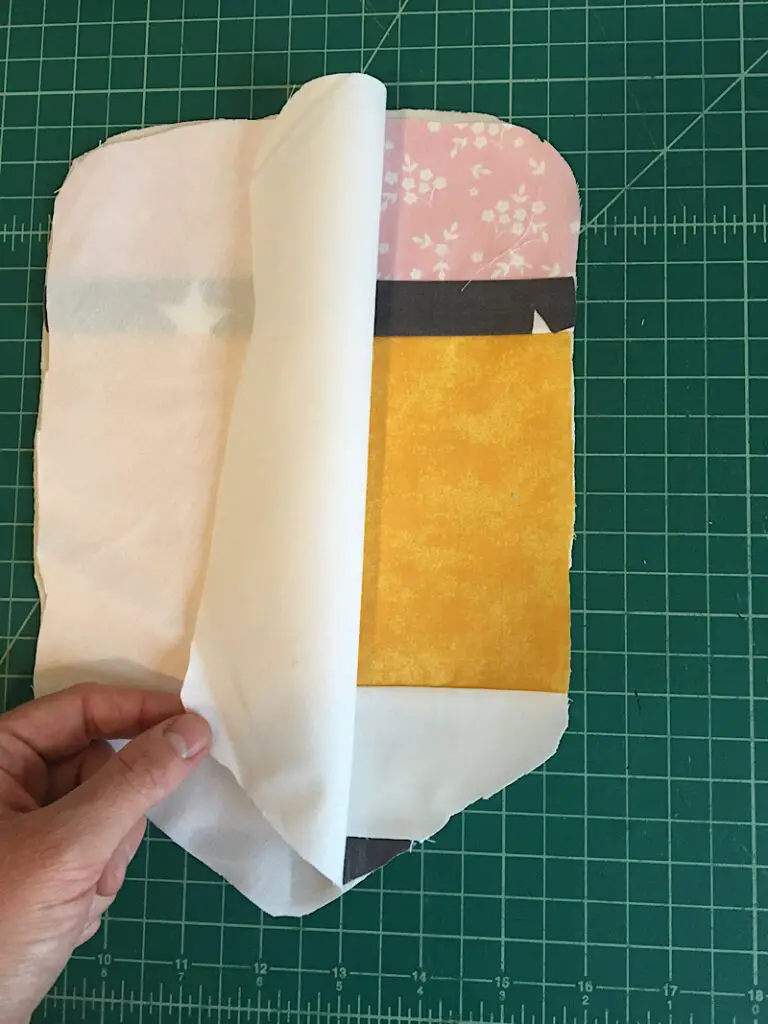
When you sew around the edges of the pot holder, you want to start on the right hand side of the top of the eraser, sew down around the pencil, then end on the top left side of the eraser to leave about a 2-3 inch gap.
Next, turn the pot holder inside out through the gap.
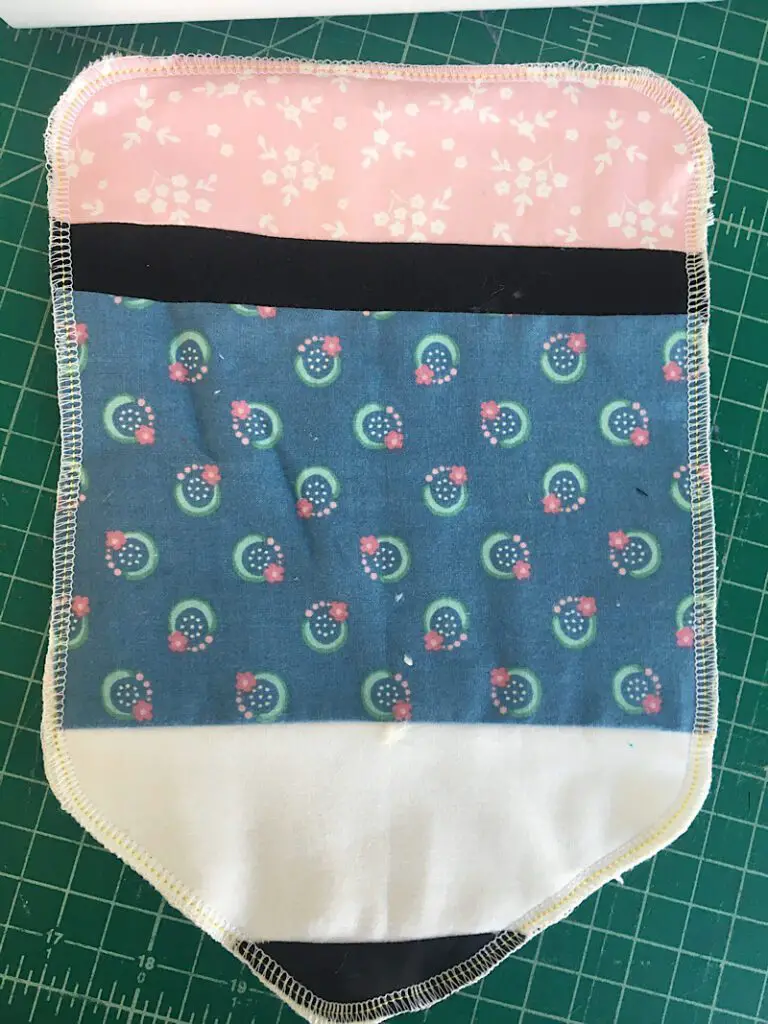
Use your iron to press the pot holder well, including the gap on the top.
Fold the fabric at the gap under to match the seam, and press it and pin it.

Finally, top stitch around the entire perimeter of the pencil to finish the edge.
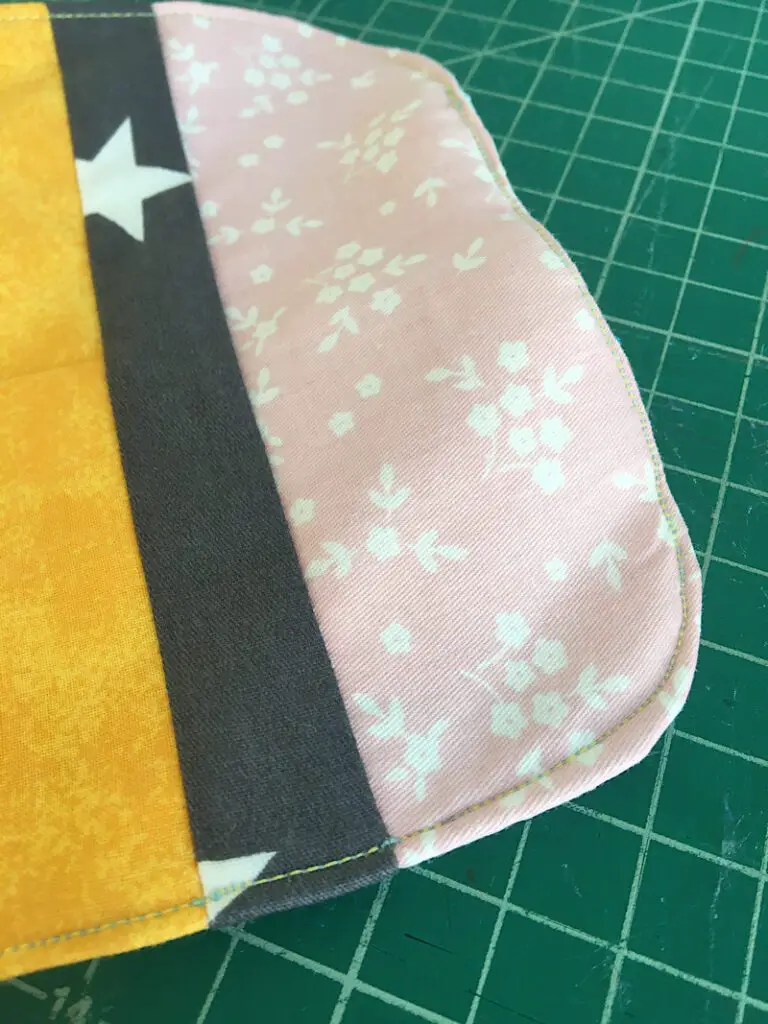
I sewed near the edge with between an 1/8th and 1/4 inch seam allowance.
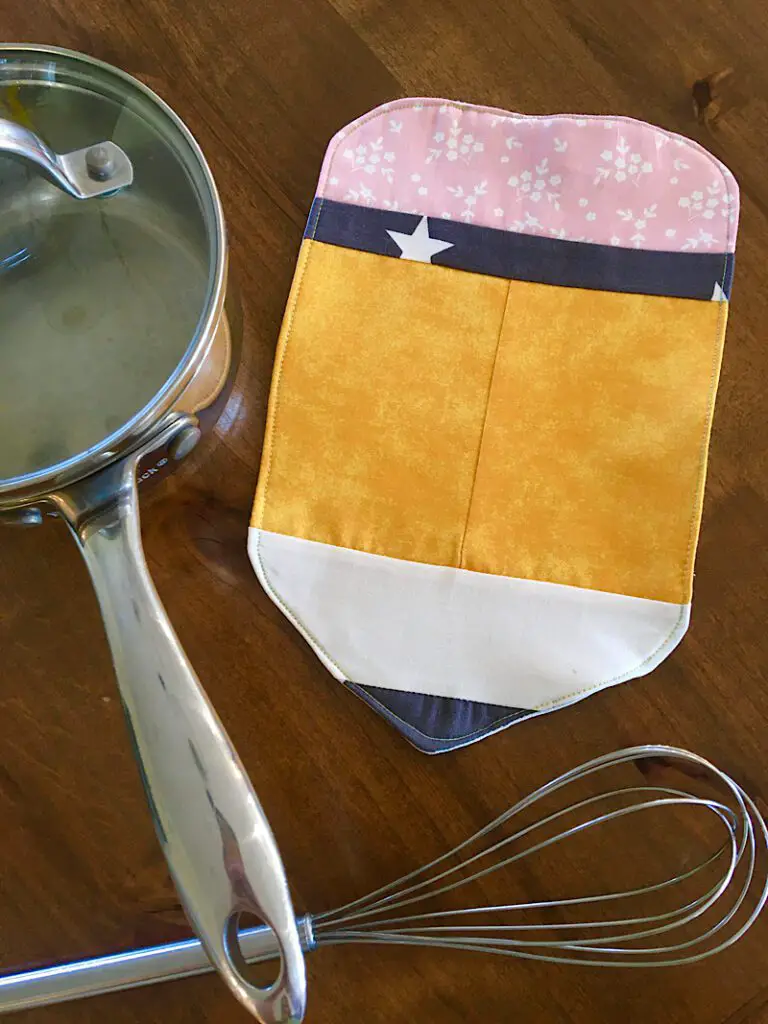
This completes your pencil shaped hot pad/pot holder! It is so cute.
But for those of you who want to add binding, You can continue on to step 4.
Step 4. Sew Binding Around The Pot Holder
** This step replaces step 3 if you are doing binding!
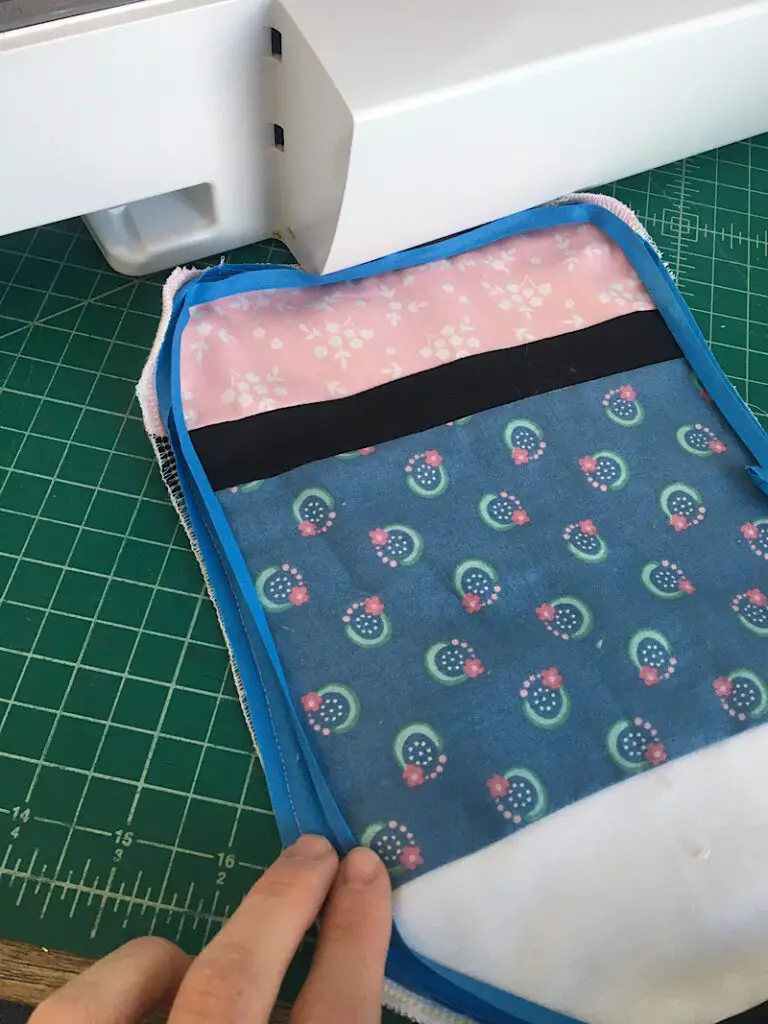
After cutting out and assembling your pieces, layer them together by placing the bottom piece on the table with the right side facing DOWN, then the insul bright, then the top piece on top with the right side facing up.
Then pin around the edges, and sew around the edge about 1/4 inch away to hold it all together. (I serged mine)
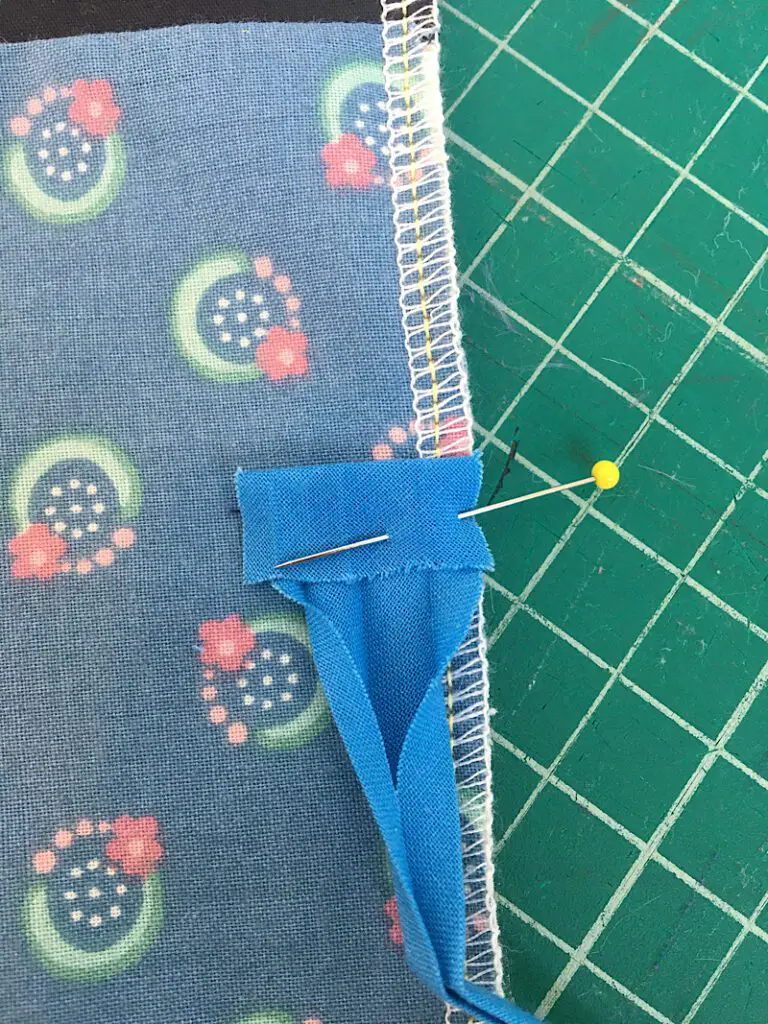
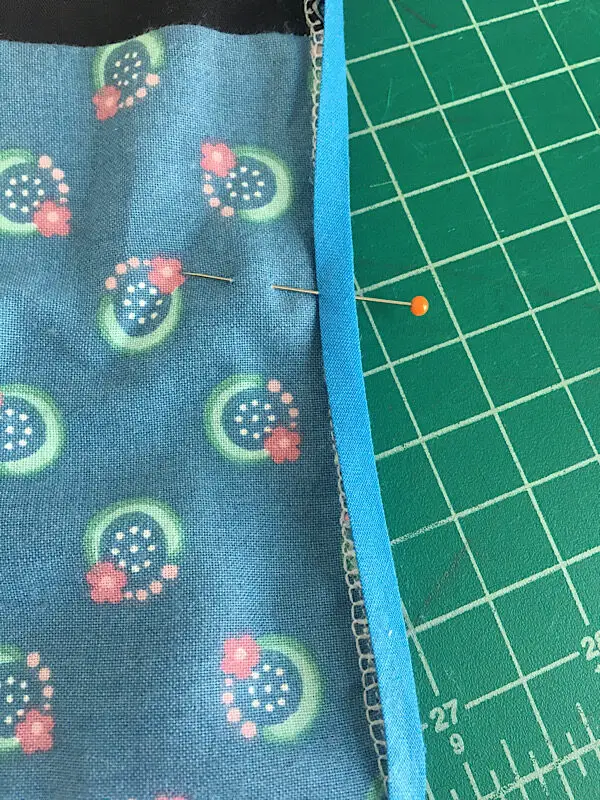
Pin the binding around the pot holder, then sew it to the pot holder by sewing on the first fold line in from the outside edge.
Flip the pot holder over, and stretch the binding over the edge, and fold it down over the stitch line on the back side, then pin it in place.
Sew the binding down by stitching near the inside fold of the binding.
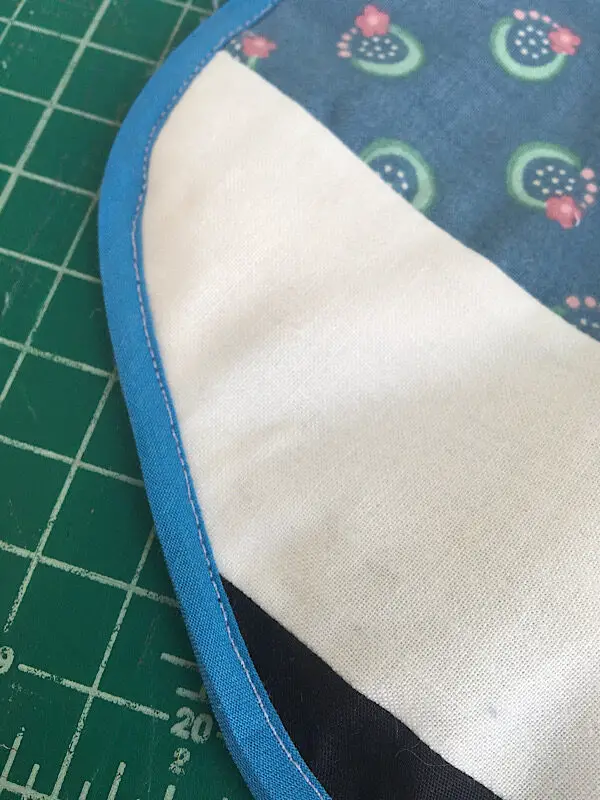
Then your pot holder is done!
Conclusion
Need some ideas on how to gift this pencil pot holder? Here are a few things you could try…
- Pair the pot holder with a whisk, and a bag/box of cookie mix!
- Buy some inexpensive wooden spoons from the dollar store and tie them together with the pot holder with a ribbon
- Make a pencil themed gift basket, with pencils, a pencil sharpener, erasers, and this pot holder.
What other ideas can you come up with? Let me know in the comments below!