Are you looking for a better method for sewing on yarn doll hair? This post will teach you my new favorite way to attach yarn hair to a cloth/rag doll in no time!
Have you ever had a cloth doll whose hair looked good when you held it still, but as soon as you turned it around or played with it, the hair flopped around and looked like… sparse doll hair?
We have so many ugly dolls around this house… They need better hair! I won’t even show you their pictures…
Last night I was laying in bed thinking about all our ugly dolls and suddenly a light turned on! I invented this method in my head and I could not sleep I was so excited to try it out!
There are tons of other ways to make yarn doll hair, but this new method is one that I really enjoy!
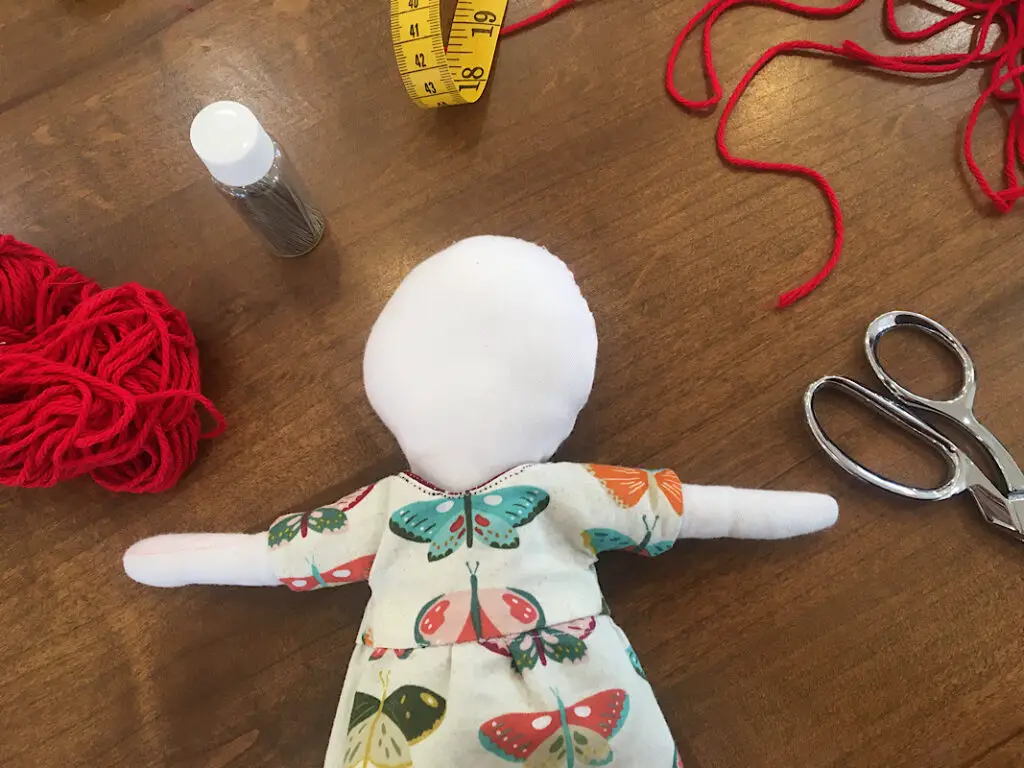
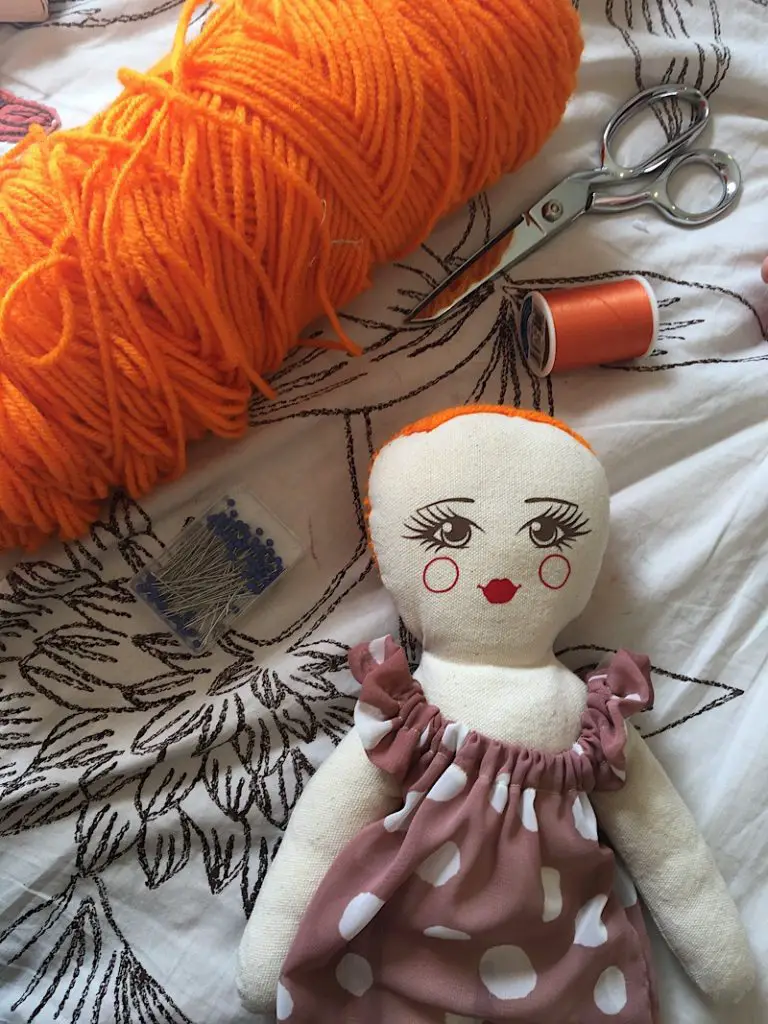
This new hand sewing technique needs only a blank cloth doll body, thread, a needle, scissors and yarn, and your imagination.
This post may contain affiliate links. Read the full disclosure here.
About The Yarn Doll Hair Tutorial
Yard doll hair need not be something to fear. It can look beautiful, natural, and full without complicated techniques or too much time. Here is what I love about this technique:
- You don’t have to pre sew any yarn hair “wefts” on your sewing machine.
- You don’t have to stick pins all over your doll and deal with loops of yarn.
- The hair can’t easily be pulled out. Each strand is secured by the thread.
- The hair can be as full on the back of the head as you want, or you can simplify it by reducing coverage. (Both look good, but one is better for hairstyling.)
In addition to these huge benefits, this method can work with curly doll hair, shorter hair, long hair, multi colored hair, bangs, and hairstyles.
You’ll be able to do buns, ponytails, braids, and more and you don’t have to see huge bald spots.
*An important thing to keep in mind to make doll hair look real is to not treat the top seam of the head of the doll as the hairline, it is much too high. Sew your hairline a bit further down the forehead of the doll to make it look more natural.*
I will show you the basic technique and the hair layout I did for my doll. But you can certainly do it a bit different if you want bangs or a Mohawk for example. Read the steps first so you understand them, then decide what style and length you want.
What is the best yarn for doll hair?
The best yarn for doll hair is acrylic yarn. It comes in many bright colors, and stays soft and smooth. It is durable and inexpensive.
In this tutorial I used 100% cotton yarn because that is what I had in my yarn drawer. But, I have found that over time, 100% cotton yarn gets a bit matted and strongly looking.
I have linked to a great acrylic yarn option below.
Are you convinced yet? Let’s get to it!
Can You Make Doll Hair With Embroidery Floss?
You can make doll hair using embroidery floss with this hand sewing technique, but because the floss is so thin it will take a lot of time and a lot of floss.
But It would make very beautiful results!
Supplies Needed
Materials Needed
- A finished doll
- A skein of Yarn
- Matching thread (same color as the yarn)
How To Sew Yarn Doll Hair
Step 1. Prepare Your Yarn
If you are not using the doll pattern on my website, you will need to take your own measurements to make the doll hair the length that will work for your doll!
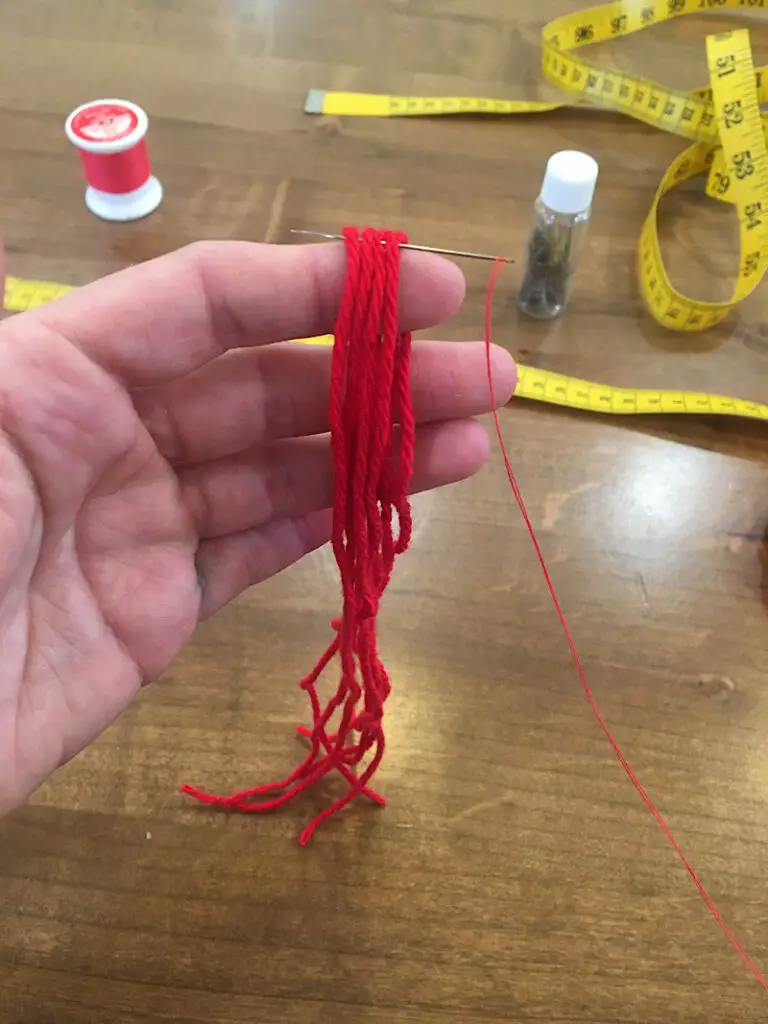
Cut 100 pieces of yarn 20 inches long each. (Or longer if you want very long hair.)
To make this step easier, I found a stool that had legs around 20 inches apart, and wrapped the yarn around it 50 times. Then I cut it down the middle and ended up with 100 pieces.
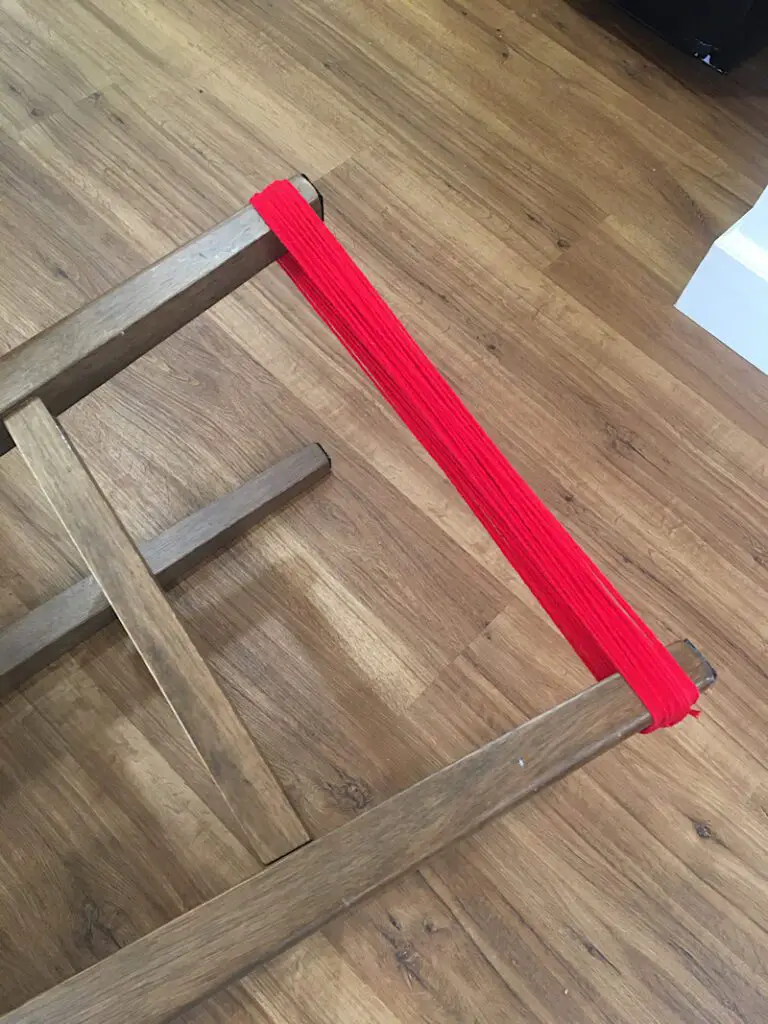
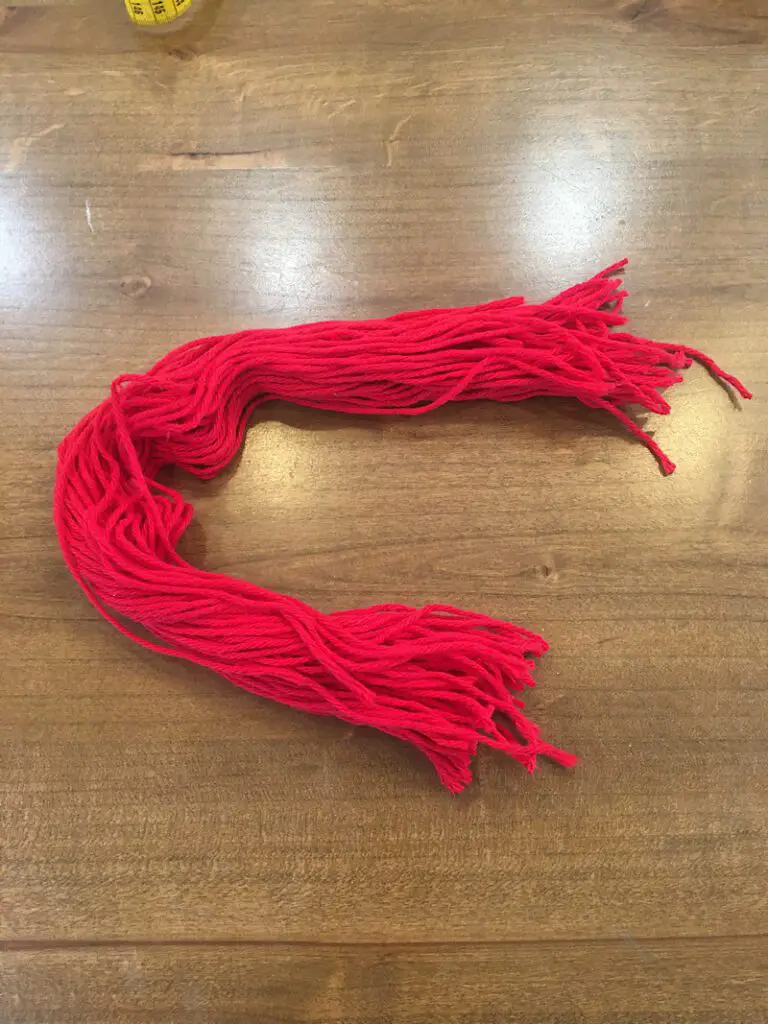
You can cut more yarn later if you need it.
Step 2. Sew The First Stitch
Cut a piece of thread about 40 inches long, thread your needle, and knot the tail end.
The basic idea in this technique is to sew backstitches. You will sew through a few pieces of yarn, then sew back stitches with the yarn on the thread. The catch is to sew two stitches per backstitch. Once to attach the yarn strands to the head, and once to wrap over them and hold them down.
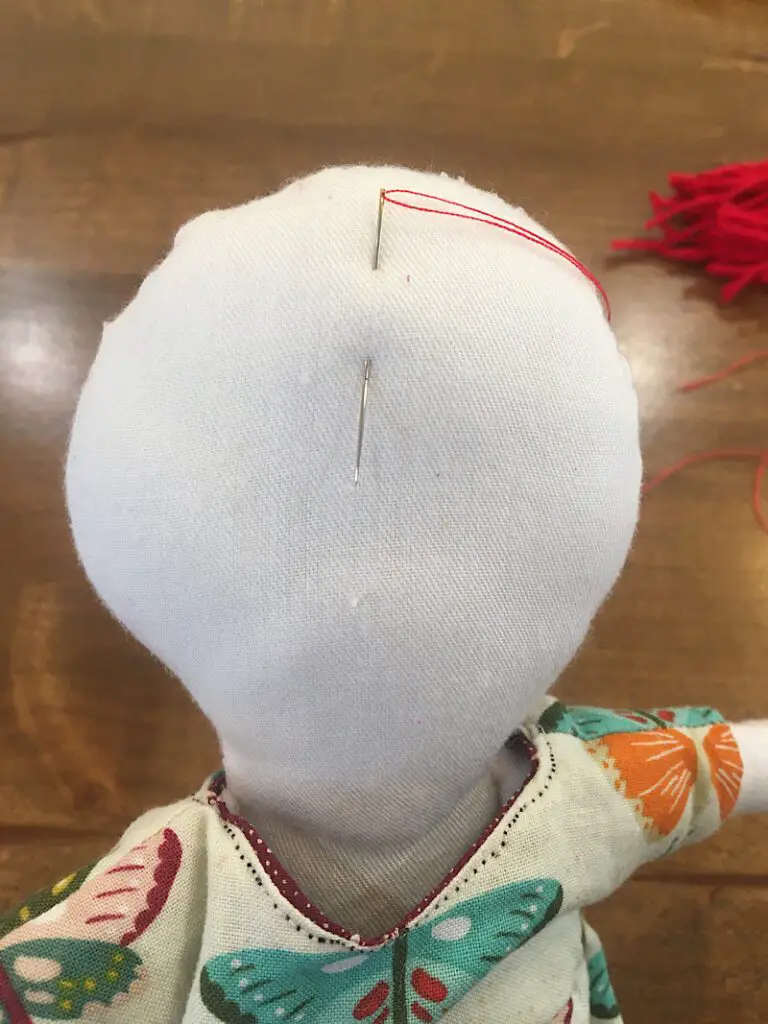
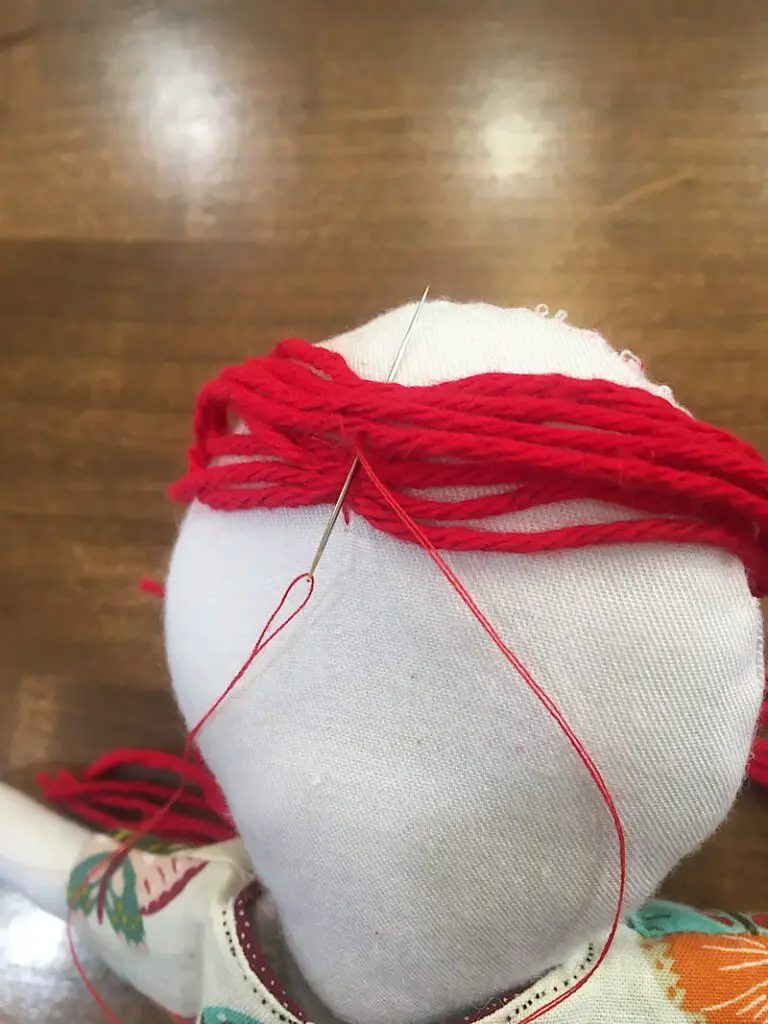
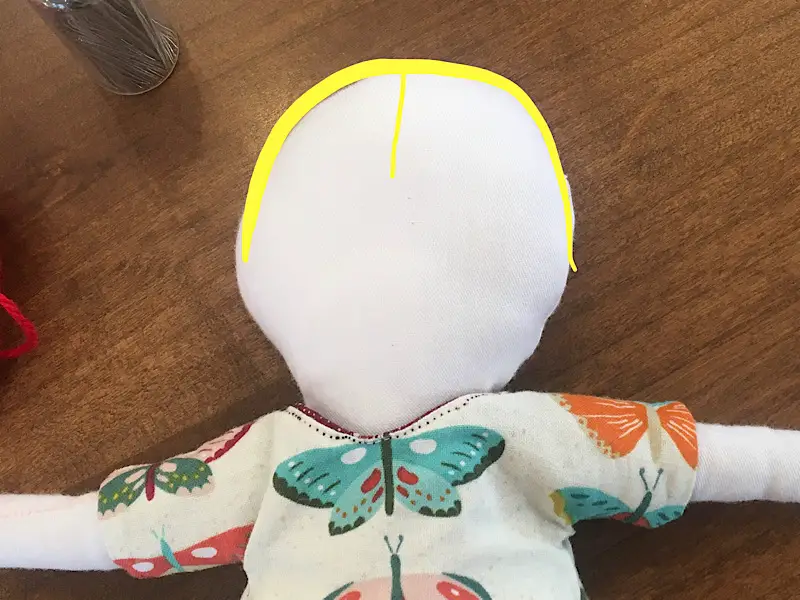
Decide where you want the hairline on your doll to be. Insert the needle into the front center of the head, 4 yarns widths above the designated hairline. Exit the needle below, at the hairline.
Pull the thread through until the knot stops it.
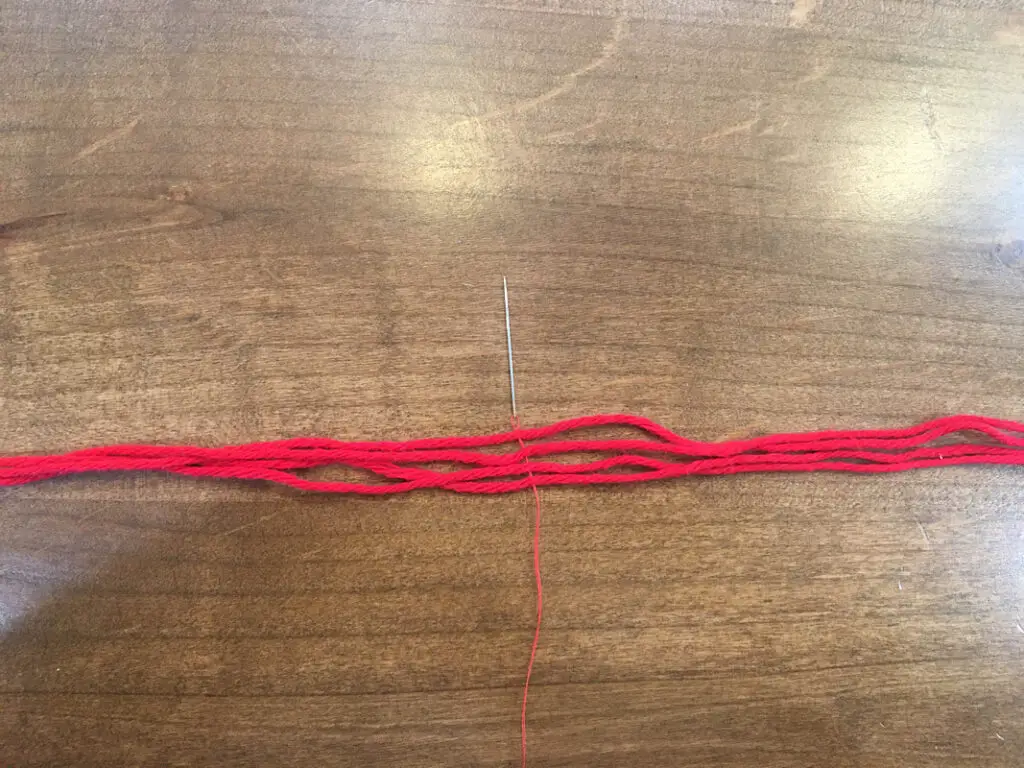
Sew through the midline of four pieces of yarn.
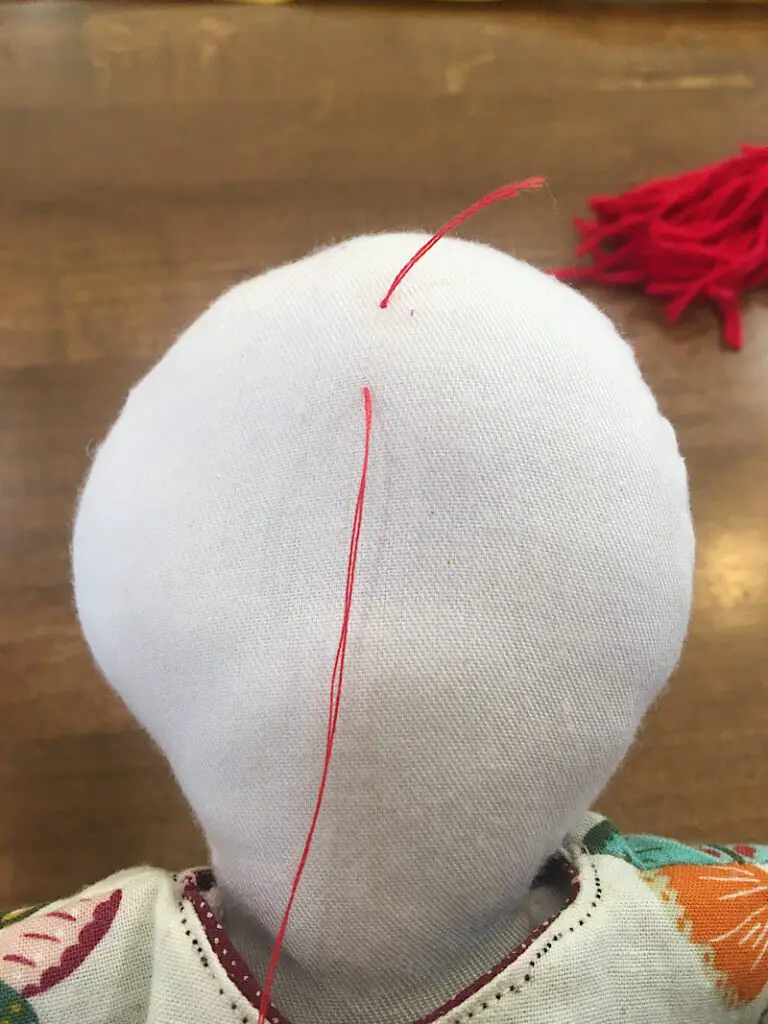
Insert your needle through the first point you started at, and exit the needle down below at the same exit point as before (or near it). Pull it through until the yarn lays flat on the dolls head.
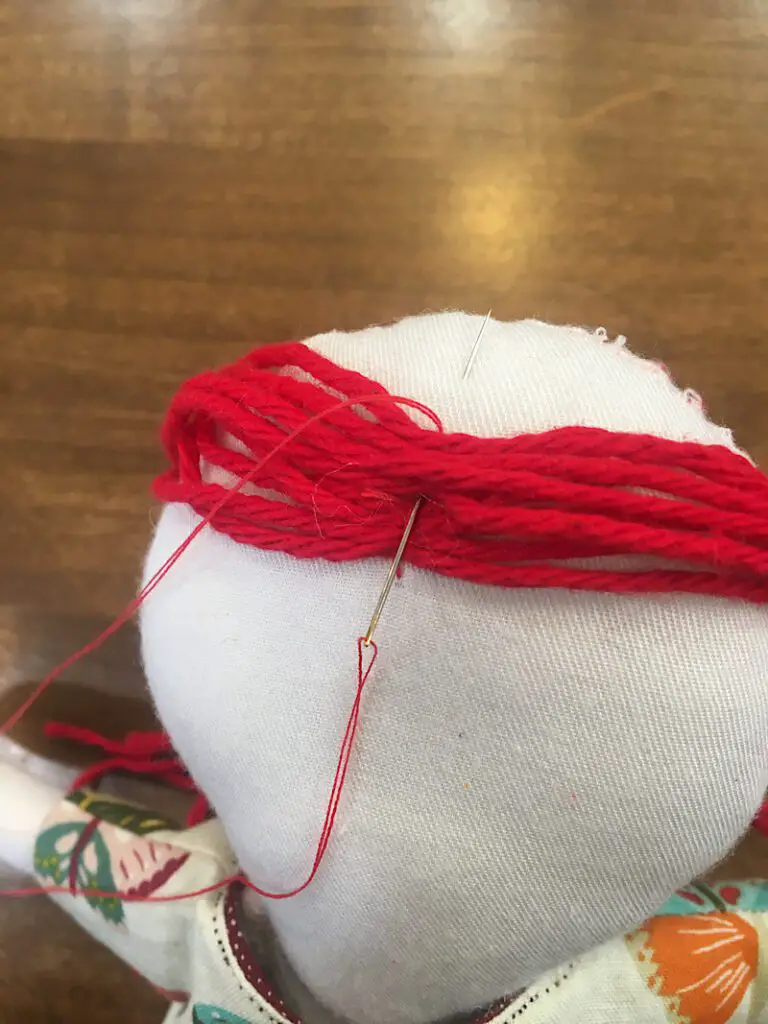
Now, insert the needle once again at the first point you started at, but exit the needle a distance of 4 strands of yarn above.
This completed the first preparatory stitch in the backstitch line, and you will complete the rest like normal backstitches (Enter the needle down through point “1”, then exiting above at point “3”.), however you will do each stitch twice (Which turns the pattern into “enter at 1, exit at 2, enter at 1, exit at 3.) This makes one stitch to attach the yarn to the thread, and once to wrap the yarns with a stitch.
Step 3. Complete The Left Side Of the Center Part
Continuing off where we left at the left step, we will now finish the rest of the hair’s center part.
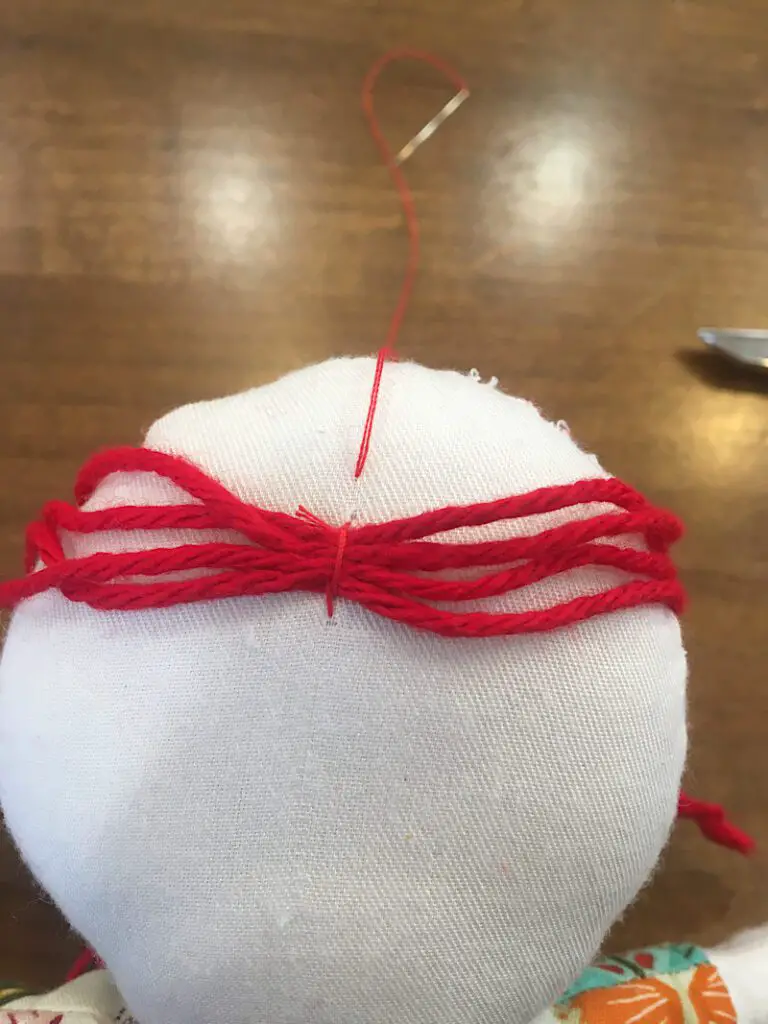
sew the needle through 4 more pieces of yarn. To easily and quickly sew through the center of the yarn, I draped them in half over my finger which helped hold them while inserting the needle
Then insert your needle under the yarn, and exit above the 4 strands of yarn and pull the thread through until the yarn lays flat.
Then sew a backstitch around those 4 strands by inserting your needle below them again, and exiting the needle 4 strands above them.
Repeat this step until you reach the top seam on the doll’s head.
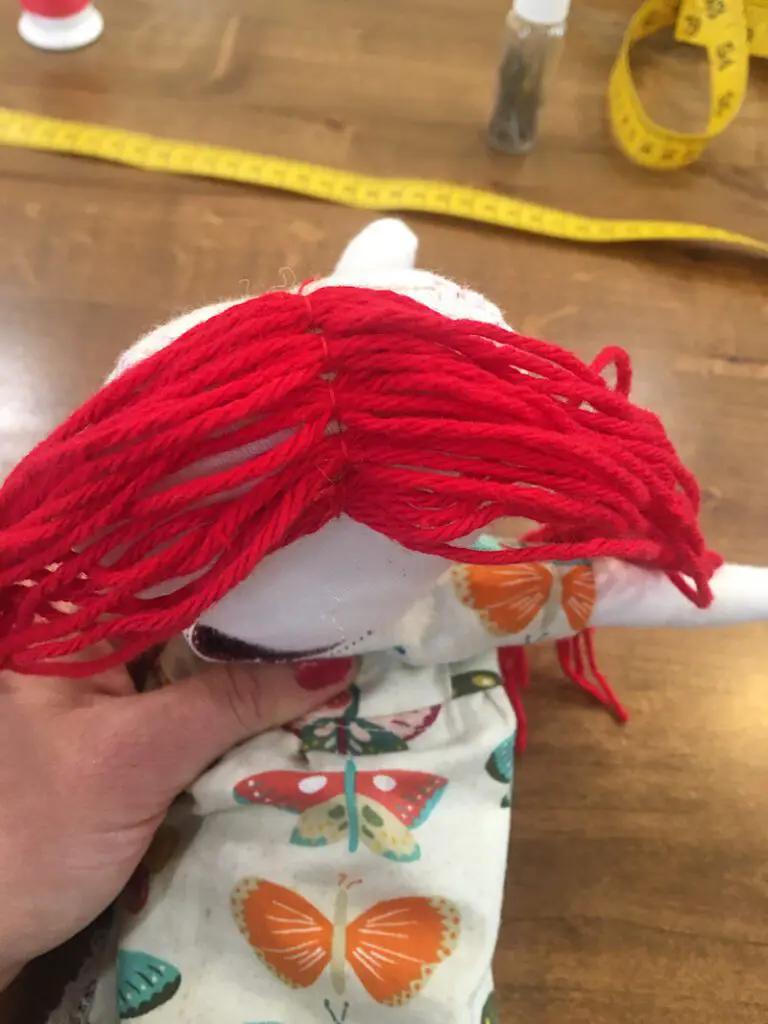
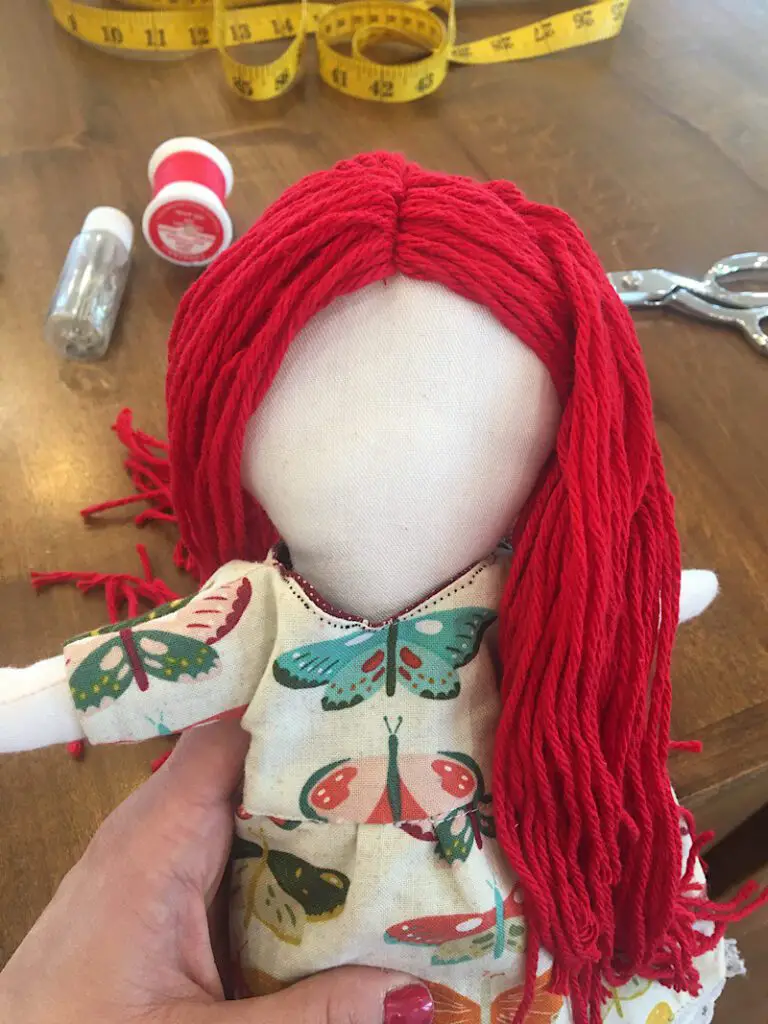
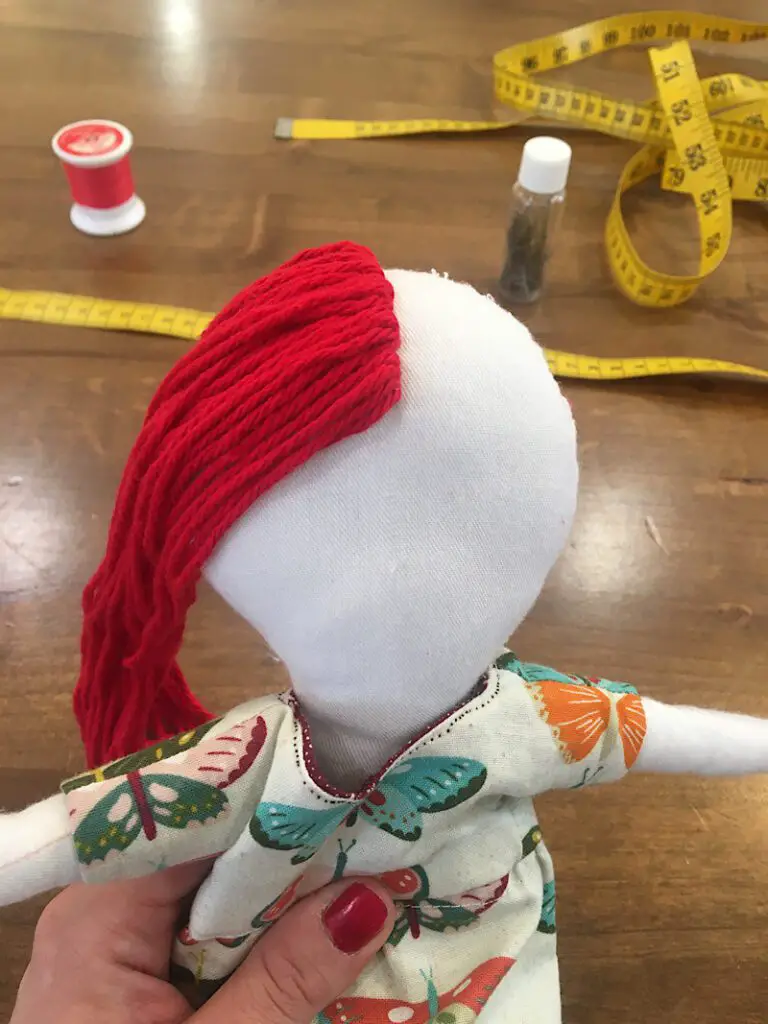
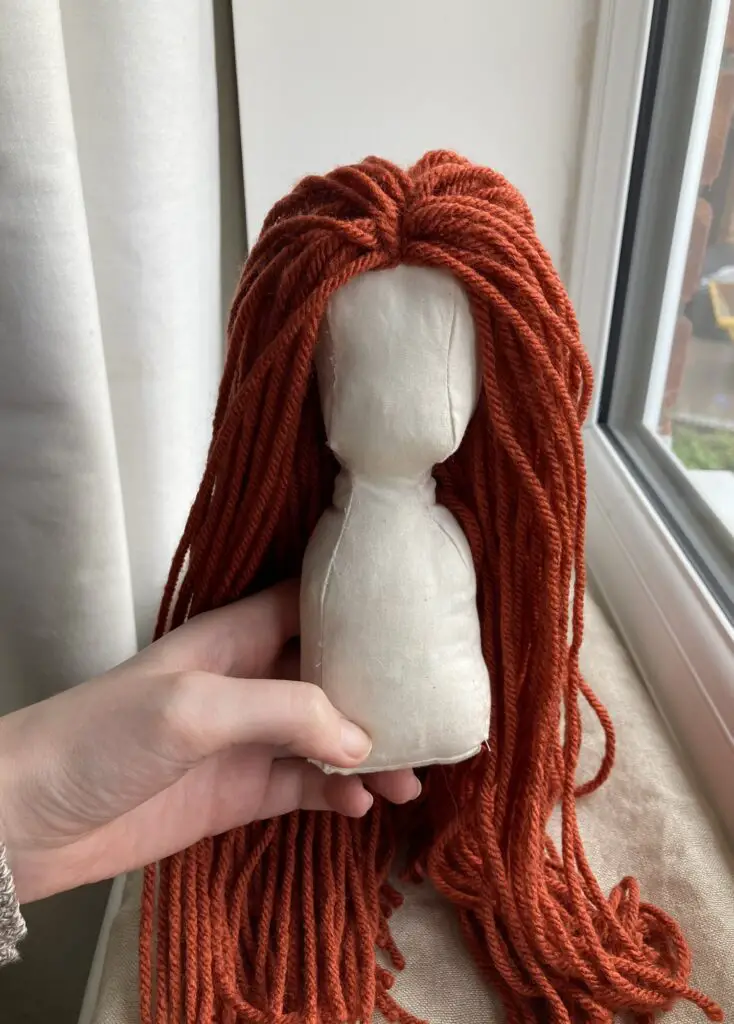
Once you have sewn the yarn to the seam, flip all the hair over to the left side. This completes the left side of the center part.
Step 4. Sew The Right Side of the Center Part
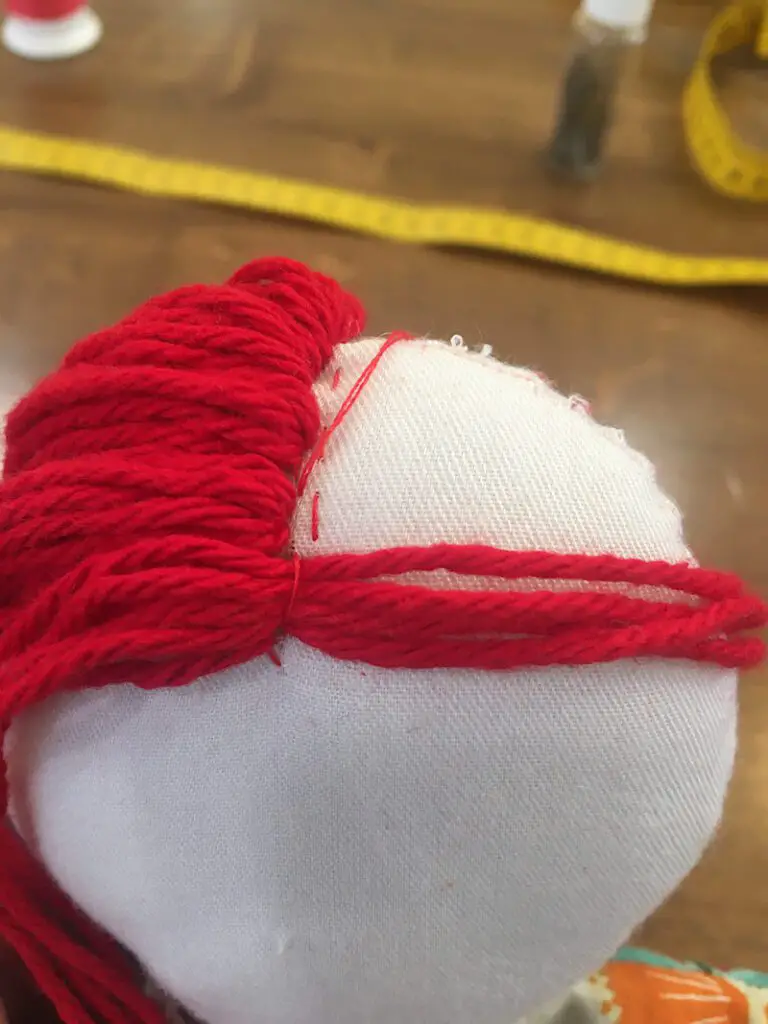
Your needle is now at the top seam of the rag doll’s head. To get it back down to the hairline, make several running stitches right beside the center partline.

Sew the right side of the doll’s front hair part the same way you did before. Place your stitches as close to the other side’s hairline as possible. This will make sure there are no gaps between both sides of yarn.
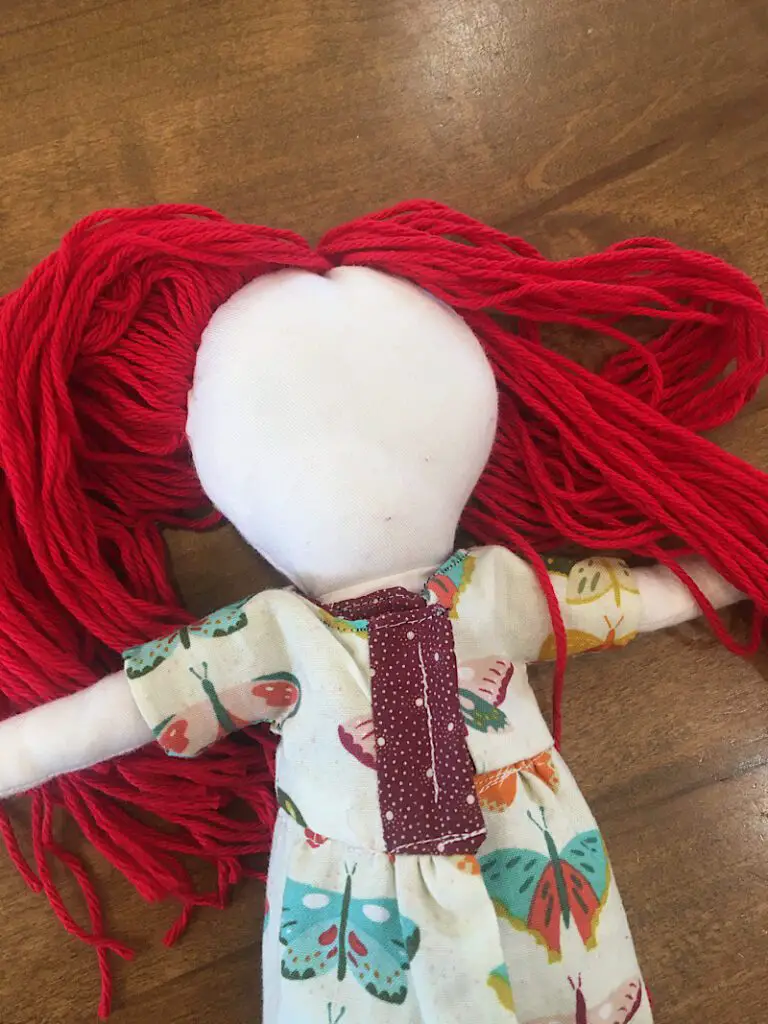
Once you have completed the right side, fold the yarn you just sewed on, over to make both sides even.

You can now tie a knot and trim the threads, and the thread will hide underneath the rest of the yarn we sew on later.
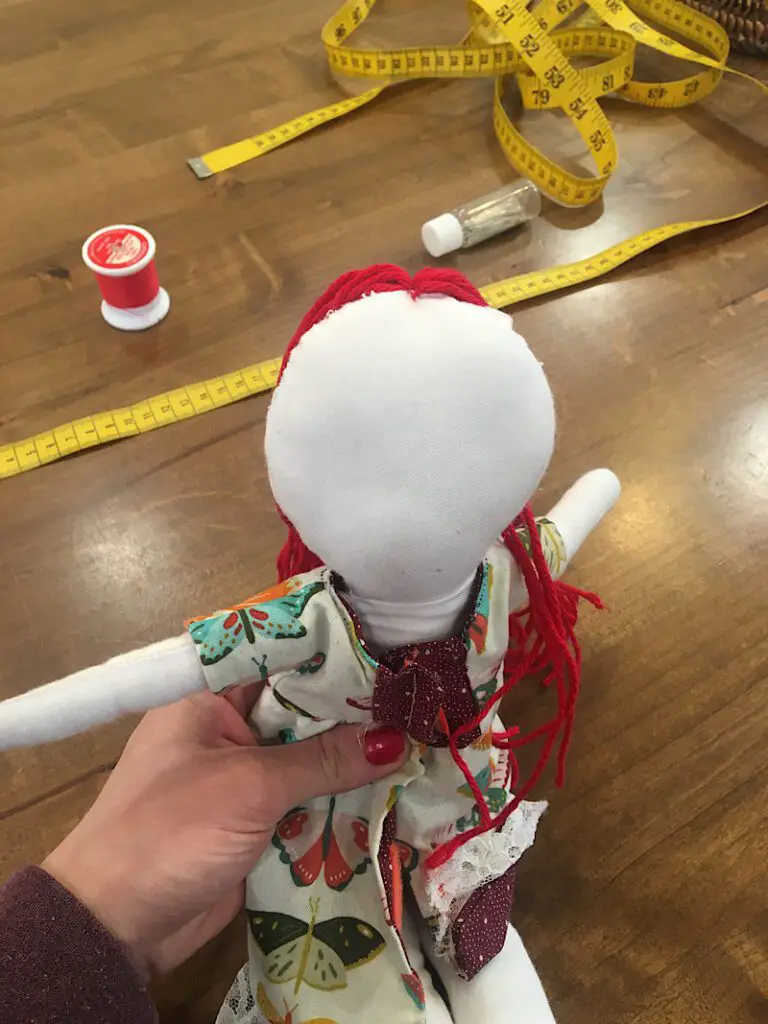
Here is what the back looks like at this point.
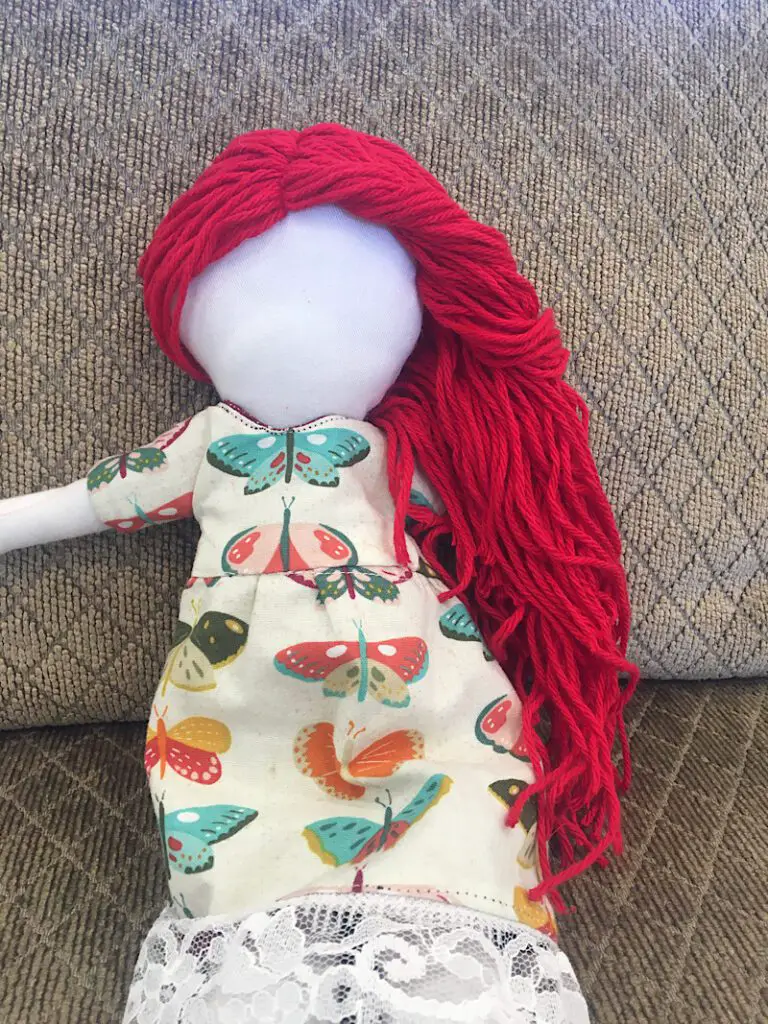
Step 5. Fasten The Hair Around The Face
At this point, the hair on the front of the head looks good when it is held still, but if you turn the doll over it flops all around.
To fix this, you should sew it down to frame the doll’s face.
Smooth out the doll’s hair to make sure it is flat and laying where you want it. Then, at the side of the face near the side seam, sew the yarn down with regular backstitches. The smaller the stitches you use, the more they will blend in and the more strength they will have.
You can see in the image below, the right side has been sewn down, the left side has not.
When you turn the doll upside down, it still looks good!
Repeat this step to sew the yarn down on the left side of the face as well.
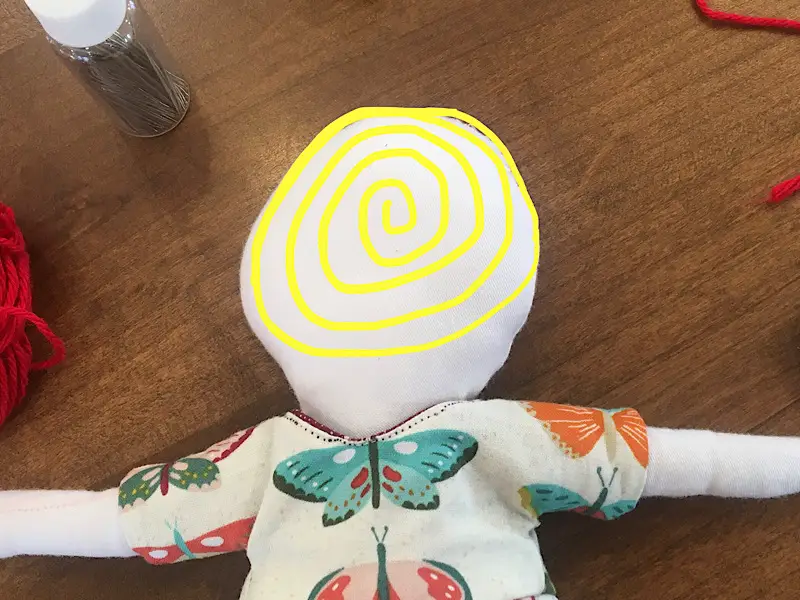
Step 6. Sew The Yarn To The Back Of The Head
You now have the basic idea of how to sew on yarn doll hair with backstitches.
To complete the back of the head, you will sew the yarn on the same way, but following a circle shape around the crown of the head, down to the base of the “skull” and back up. Then, you will fill in the circle with a spiral shape. Here is an example of where you should sew.
Start by sewing the top curve of the hair, along the side seam from where one ear would be, over to where the other ear would be.
Then, continue the curve along the back of the head where the base of the skull would be, and fill in the spiral as you go, working from outside to inside. When you get to the center, tie a good knot and trim the yarn.
Then, your doll is done!
Here is what it looks like from the back, nice and full and totally styleable.
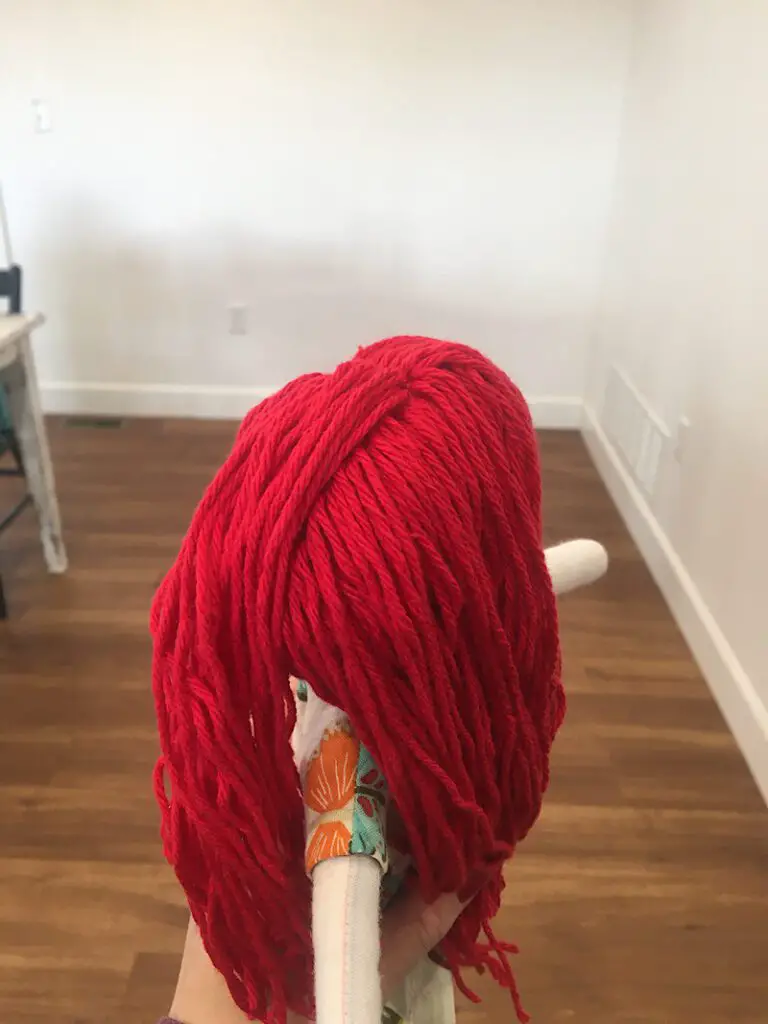
If the ends of the yarn are uneven, you can trim them up to tidy them up.
There you have it!
Show & Tell

Rosalind sent me this photo of her absolutely gorgeous in-progress doll that she made using this technique.
She says: “Now that I can do the hair easily, I reckon I can do the next doll hair in an hour. Thanks so much! All the other sites I’ve tried to follow, and even the doll book I’m reading, make the hair seem so complicated that I was dreading doing it. But actually it’s really easy and quite relaxing!!“
This doll hair looks great, great job Rosalind!
Conclusion
I hope this method was useful for you. I have tried multiple different doll hair ideas, and so far this is my favorite way to do yarn hair.
If you have questions or need me to clarify a step, let me know in the comments below.
Now you are ready to make a doll face if you haven’t already! Download a free face template from my cute collection!
Please pin this post to Pinterest to help others find it as well, and sign up for emails if you want more doll sewing content!
I think this website is quality based stuff.
Thanks Meridith!
You are extremely generous in sharing this quality information, thank you so much. Only one problem I have is that I am unable to understand the back hair instructions…but that is just me I will keep on trying. Thank you.
For the back of the hair you continue sewing with the same method as the front, but in a spiral pattern as I have illustrated in the post. I hope that helps!
This is amazing, I’ve just completed my first head of doll hair from your instructions. Very clear and helpful, thank you so much for sharing this!
Hi Rosalind, I am so happy to hear that, Thank you so much for your kind comment!
Awesome guide! I’m a complete novice at sewing and have very clumsy hands, yet I was still able to give my little doll a luxuriant head of hair… maybe too much of it, I went a little crazy. 😅
Thank you so much for such an awesome resource, this wisdom is very hard to find on the bot-dominated new internet. Much love.
I am so so glad to hear that! Thank you for your awesome comment. If you want to email me a picture of your doll, PLEASE do! I will add a picture of it here!
I just completed the body and face of a big doll for my granddaughter. I have been dreading doing the hair and have been reading a lot of posts about it. Today, I decided to get on with it but looked on the internet one more time when I found your post. This makes more sense than any other methods. Thank you for sharing this. I wish you could offer these directions in PDF form that could be printed along with your pictures.
Thank you carol! There are several methods which I have tried, different ones are good for different dolls. I appreciate your comment, maybe I will get around to making a PDF version some time. When you are finished with your doll, id love to see a picture!
Hello again. Just had a couple of comments – keep in mind I’m pushing 80, have always been a rule-follower, and am slightly ADD. Trying to follow the instruction to the letter caused me to go slightly astray (totally my own fault.) I read your instructions several time to grasp all the steps. One piece of information that I think might be beneficial to others is the size of the doll you were working on. When you mentioned the length to cut the yarn, I glossed over your added comment of “or longer if you want really long hair.” The doll I made is 41 inches tall, so the 20 inch pieces of yarn were barely a bob. I didn’t want to waste all that yarn, so I just went with it, and luckily, my granddaughter likes it that length. I still have to do the spiral back of the head, so I’ll try to send a pic when finished. Thanks again for your great idea.
Absolutely! Yes this is based off of the doll pattern on my website. Thanks for your suggestion.