In this post you will learn all about what happens when you serge with 3 threads in a 4 thread overlock, can it be done? Are there any tips to make it work? Find out below!
If you are new to using a serger you might be overwhelmed with all the threads! Threading a serger is decently complicated, and messing up one little part can make the whole thing stop chaining.
A 2-needle model serger has space for 4 thread cones, but did you know that it is actually totally possible to serge with only 3 threads? I tested it out on my very own serger and took photos so that you could see what happens! Let me share the results with you!
This post may contain affiliate links. Read the full disclosure here.
Why Does an Overlocker have 4 threads?
Before we jump in I need to quickly clarify something highly relevant to this topic: there are multiple types of overlocking sewing machines, and they can be made to use 2, 3, 4, or even 5 threads! As you can imagine, I can’t get into the details of all these different models in one short post.
So why do many overlockers have 4 threads?
An overlocker has four threads that are used for the following: two threads for the needles that make two straight stitches, and two threads for the upper and lower loopers. All four threads chain together to make a strong and stretchy serged stitch that finished the edge of your material.
Using 4 threads makes a wider and stronger stitch that can withstand more wear and tear, but there are lots of times when using 3 threads is desirable too.
3 Thread Overlock Vs 4 Thread Overlock
The difference between a 3 thread overlock and a 4 thread overlock is in the number of needles and straight stitches. A 3 thread overlock has only one needle that makes a single straight stitch, and a 4 thread model has two needles and makes two straight stitches. Both types of overlock machines have both an upper and lower looper thread.
Bernina puts it this way:
The 3-THREAD OVERLOCK is the same stitch as the 4-thread overlock, but uses only one needle. As a result, this stitch has a bit more flexibility, and is perfect for seaming light to medium weight fabrics or knits where you desire a less bulky seam.
So there you have it, the very basic difference between a 3 and 4 thread model of serger. In this post I will be talking about a 4 thread serger, specifically the one I personally own and use, a Brother 1034D.
Do you have to use all 4 threads on serger?
Now that we know the difference between a 3 and 4 thread serger, we have to ask the follow up question! Can a 4 thread serger be used with only 3 threads? Do you have to use all 4 threads to overlock? Here’s the answer:
No, you do not have to use all 4 threads on a serger. You can use 3 threads as long as two of the threads are threading the two loopers.
On a two needle model of serger, as long as both the upper and lower loopers are threaded, you can choose either needle to leave empty, and the stitch will chain just fine.
So yes, you CAN get away with only using 3 spools of thread, but you must know that it matters which of the 3 threads you use on the machine!
Whether you want to use 3 threads on purpose, or in a pinch, here is how to do it.
Serging with 3 Threads In A 4 Thread Overlock
Here is my 4 thread serger, equipped with different colors so you can easily see which thread makes which part of the stitch.
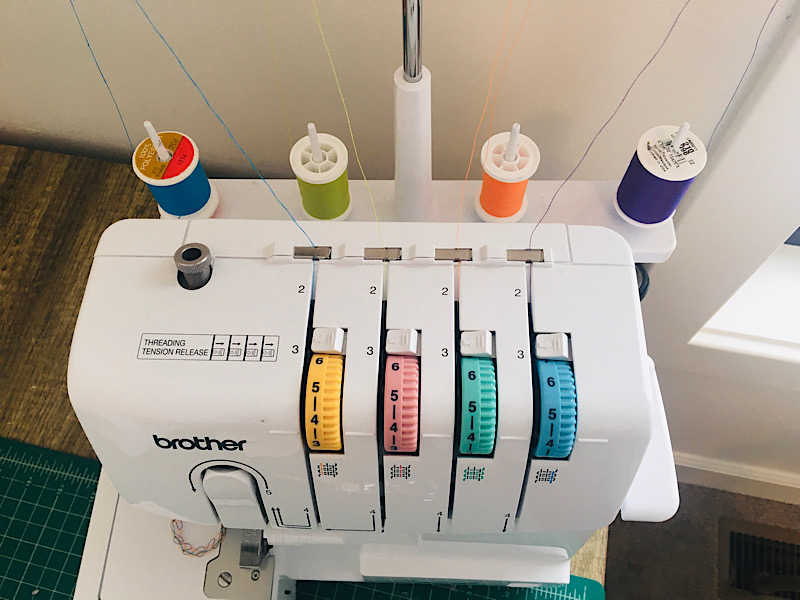
- The leftmost thread (Blue) is for the left needle, and makes the leftmost straight stitch.
- The second thread (Green) is for the right needle, and makes the right straight stitch.
- The 3rd thread, (Orange) is for the Upper Looper, and makes the loops on the top of the fabric.
- The 4th thread (Purple) is for the Lower Looper, and makes the loops on the bottom of the fabric.
Here is what a regular serge looks like close up:
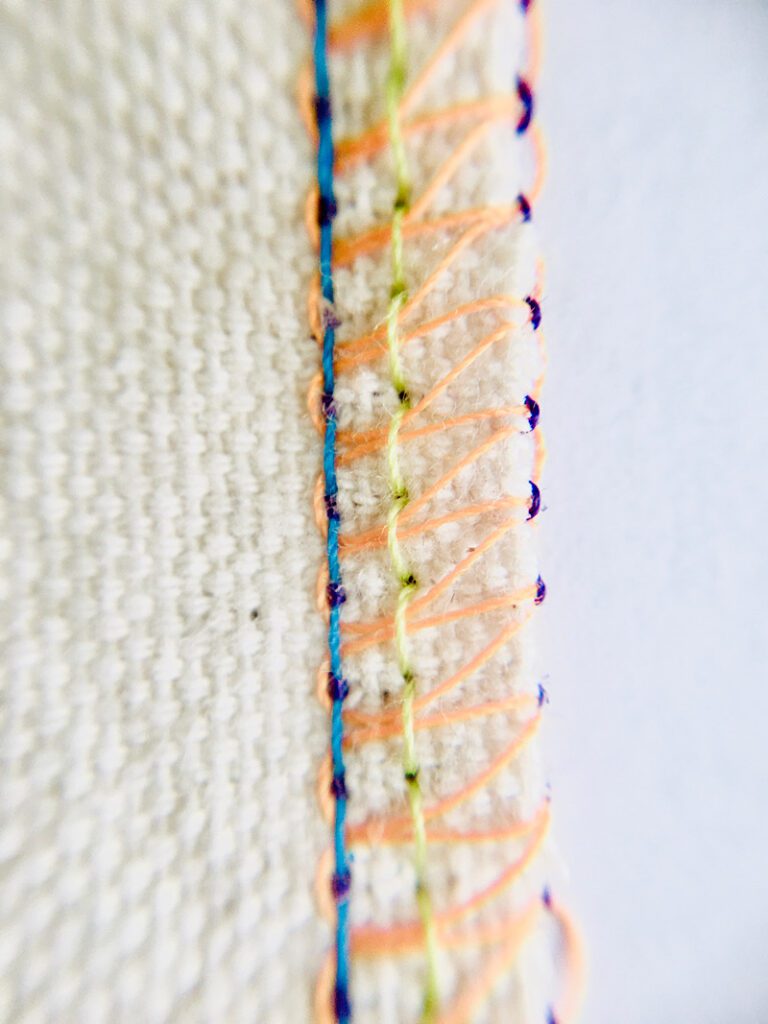
Notice that the two straight stitches are going in and out of the same loops, and essentially doing the same job, just at different locations.
Let’s see that happens when we remove the blue thread on the left.
Serging With Only The Right Needle
To serge with only the right needle, I simply unthreaded the left needle but did not remove it (although you can and do for specialty stitches). I took the left thread spool off the machine.
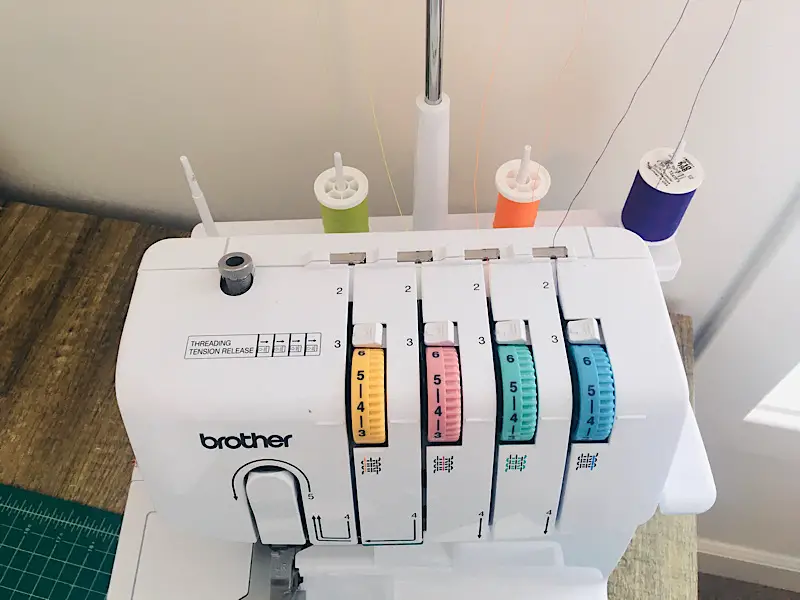
You can see in the photo below that even with only one needle, the threads formed a chain when I started sewing.
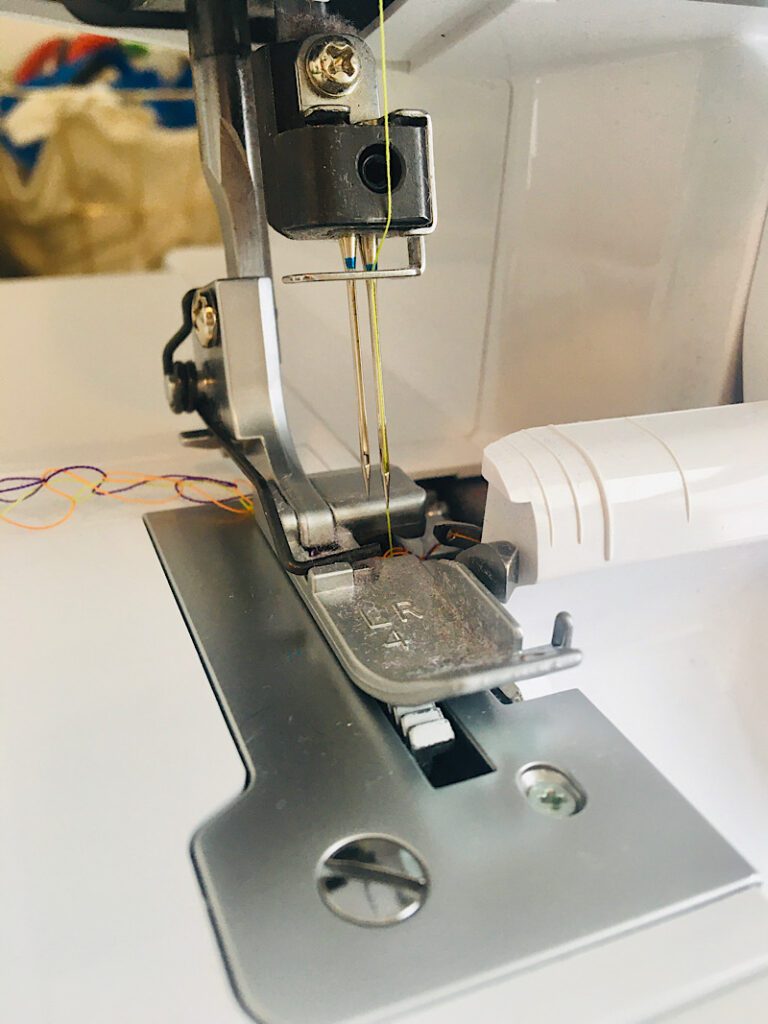
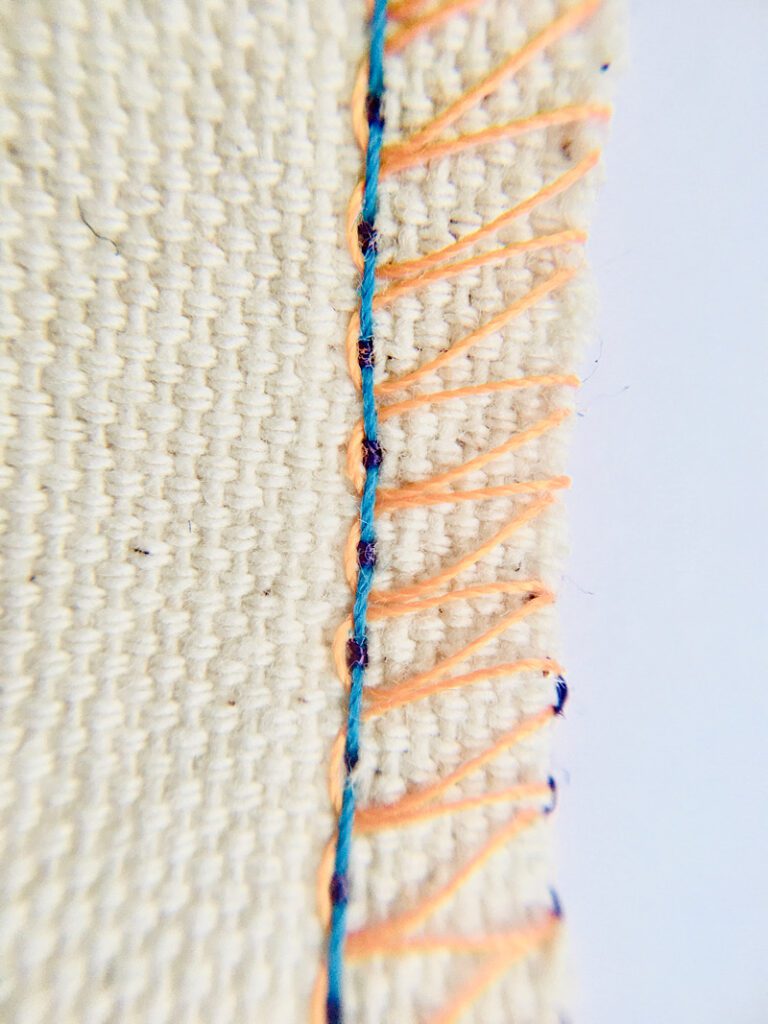
When I serged a piece of canvas using only the right needle, here is what happened:
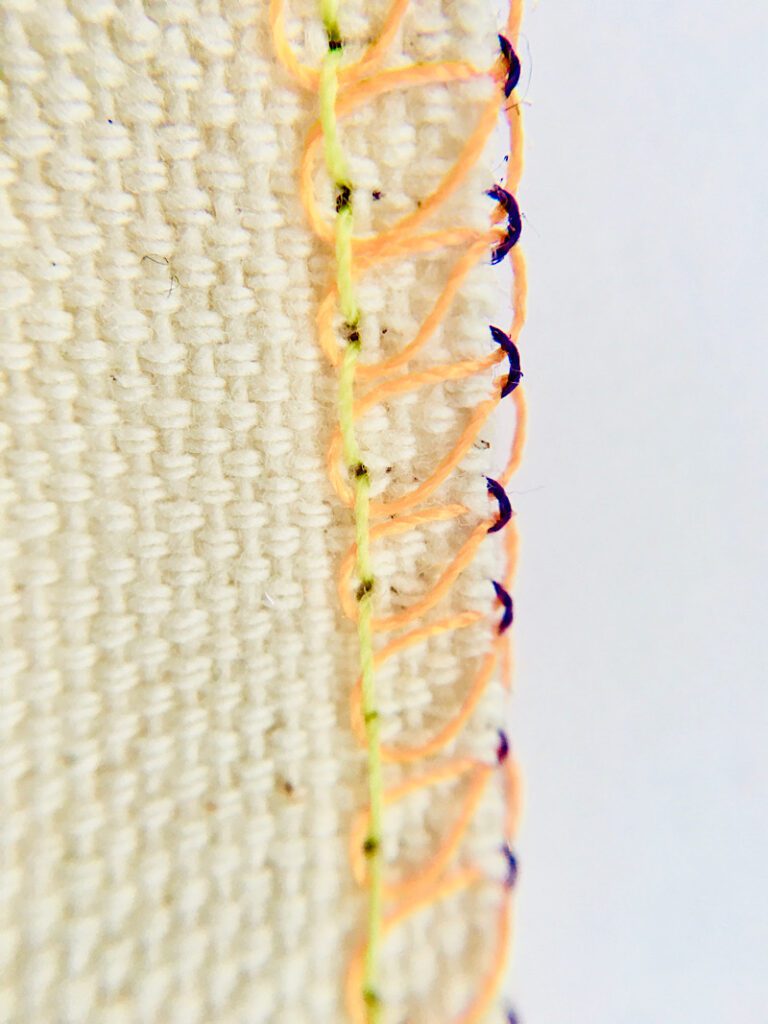
The stitch became a bit looser and lost width, but still worked fine! If I would have adjusted the looper tension settings, the loops would not have been quite so floppy.
Serging With Only The Left Needle
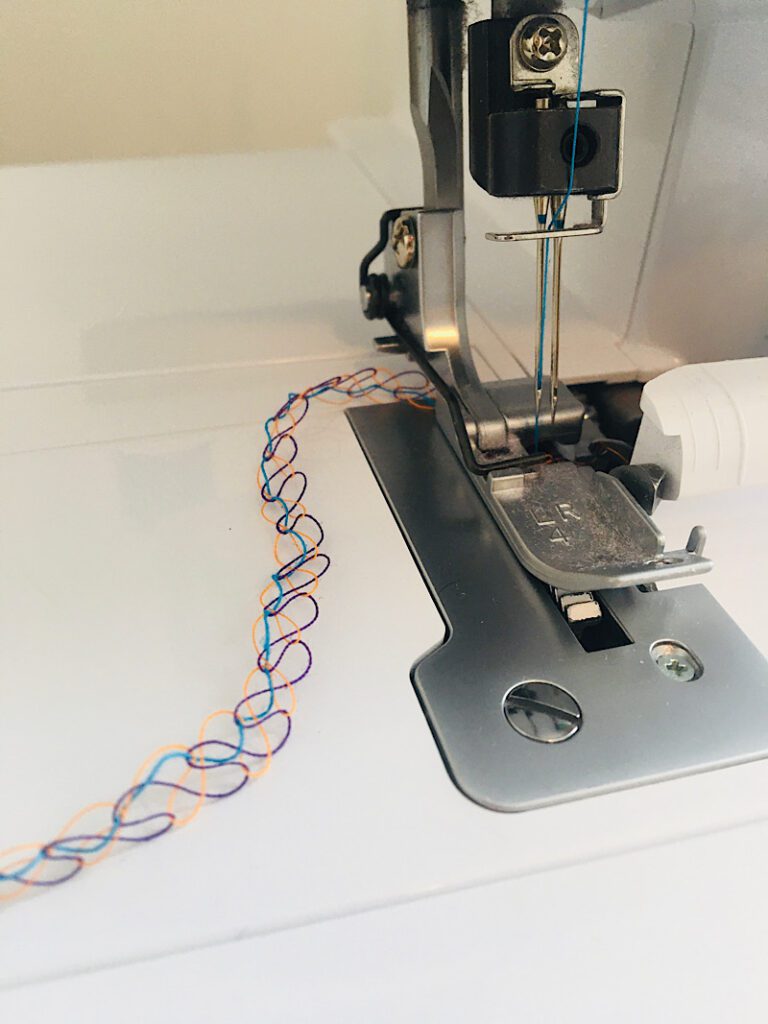
For the experiment with the Left needle, I did the same thing. I threaded the left thread into the left needle, but kept the right one in place. I used the first thread spool “spot” and removed the second spool.
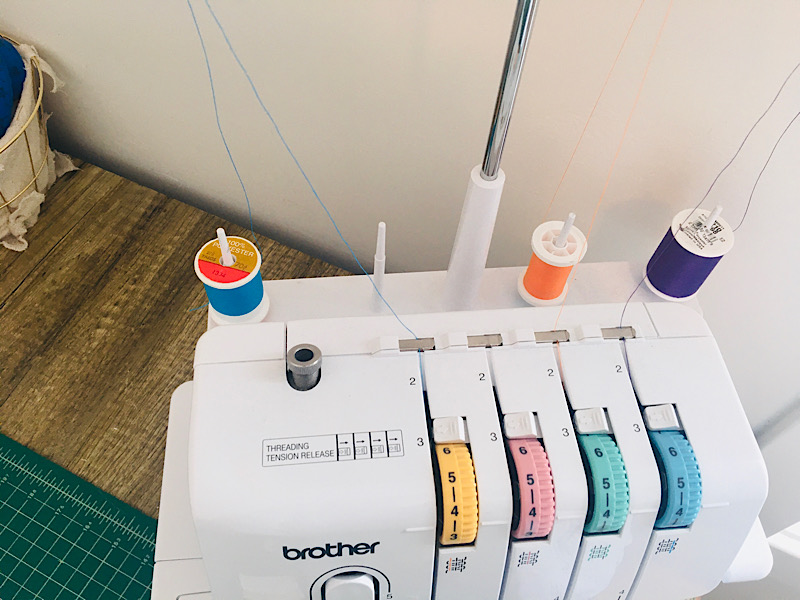
You can see in the image below that the threads again formed a chain when I started to sew
Here is what the serged stitch looked like only using the left needle:
Can You Serge Without One of the Loopers?
Now to the logical next question in this experiment, what happens if you serge with 3 threads, but the missing thread is one of the loopers?
I knew right away it would not work, because when I re-threaded the machine with both needles and only one looper, of course it wouldn’t make a chain!
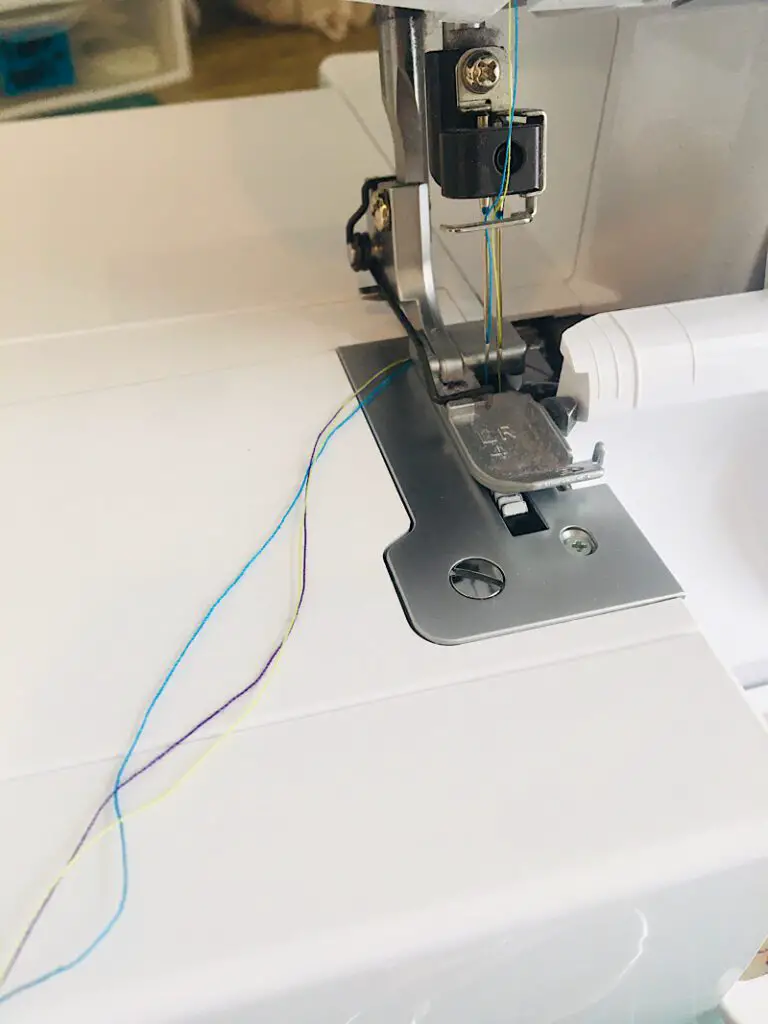
So you can see that yes, it does matter which three threads you use!
Conclusion
This post showed you what happens when you don’t use all four threads in your serger, and proved that you can use either needle!
There are times when you actually purposely remove the left needle to make a special three-thread stitch called a narrow hem, or a narrow rolled hem. In this experiment I didn’t adjust any of the tension or feed settings, but if you do, you will learn to love the narrow rolled hem for finishing ruffles!
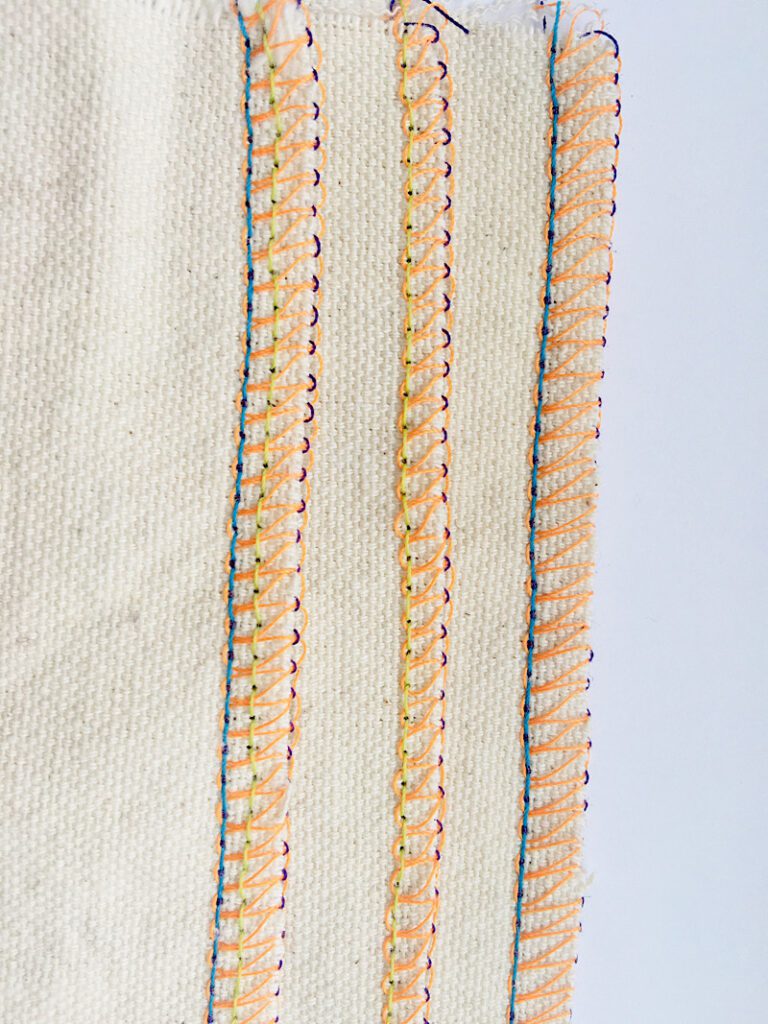
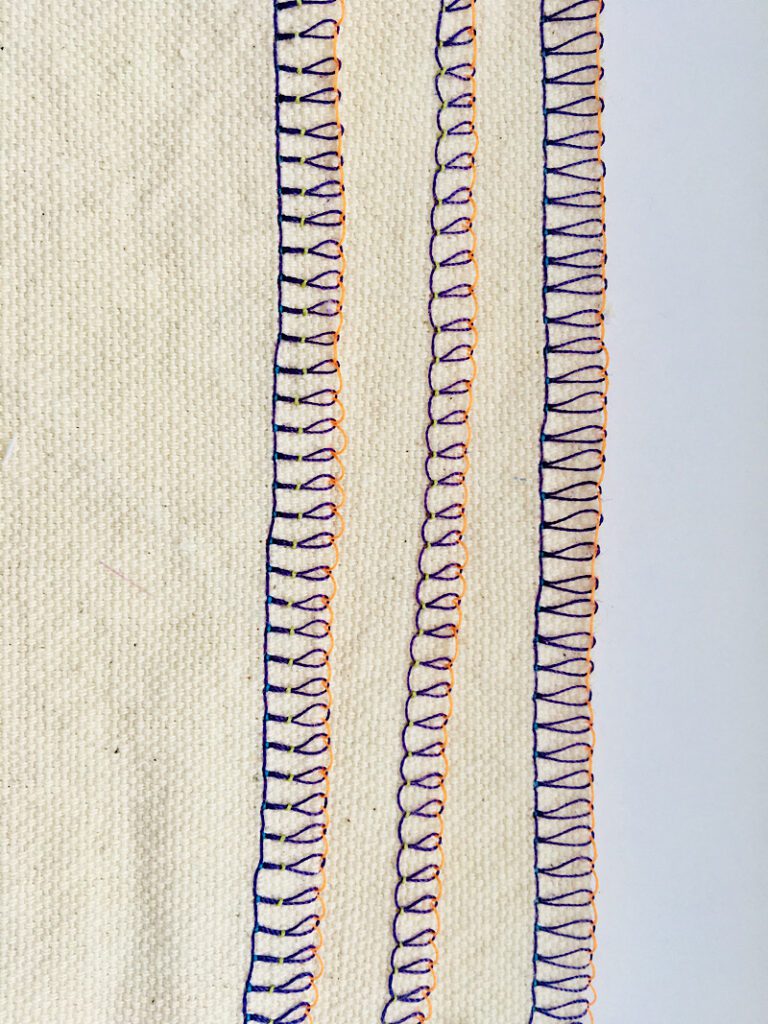
Finally, I wanted to show you the side by side of all three stitches I made in this experiment.
The first photo shows the front of each stitch, and the second photo shows the back of each serged stitch.
They are in order as follows:
- Regular overlocked stitch
- Right Needle Only
- Left Needle Only
I hope this post answers your question, and if it didn’t, please comment below what I am missing and I will be sure to try and help you out!
You can read more of my serger tips and tricks here such as:
- 7 Reasons Your Serger Needles Keep Breaking
- 10 Reasons Your Serger Is Skipping Stitches
- 4 Reasons Why Your Serger Is Bunching Up
Sign up for my newsletter for more great fun and sewing tips.


