Are you experiencing loose stitching on your sewing machine? Here are 5 causes and how to fix it!
Loose stitches, whether on the top of the fabric, or on the bottom of the seam, are typically caused by a tension issue on your sewing machine. However, there are other issues that can cause loose stitching as well.
Here is the quick fix you can try to solve this problem:
If you can see the bobbin threads from the top, and the stitches are loose on the bottom, your upper thread tension is too tight. Loosen the top thread tension by turning the tension dial to a lower number.
If you can see the top thread poking out of the bottom of the fabric, and the stitch is loose on the top, then your top thread tension is too loose. Fix it by tightening the top tension to a higher number on the tension dial.
Proper thread tension will result in flat stitches that are smooth and even on both sides of the fabric. The chain made by the top and bottom threads will hide in the middle of the fabric.
Remember, if you are experiencing loose stitching, puckering of the fabric, or uneven stitching where both threads are visible on one side, you likely have a thread tension issue.
If this doesn’t solve your problem, try one of the other solutions below.
Causes Of Loose Sewing Machine Stitches
1. Machine Is Improperly Threaded
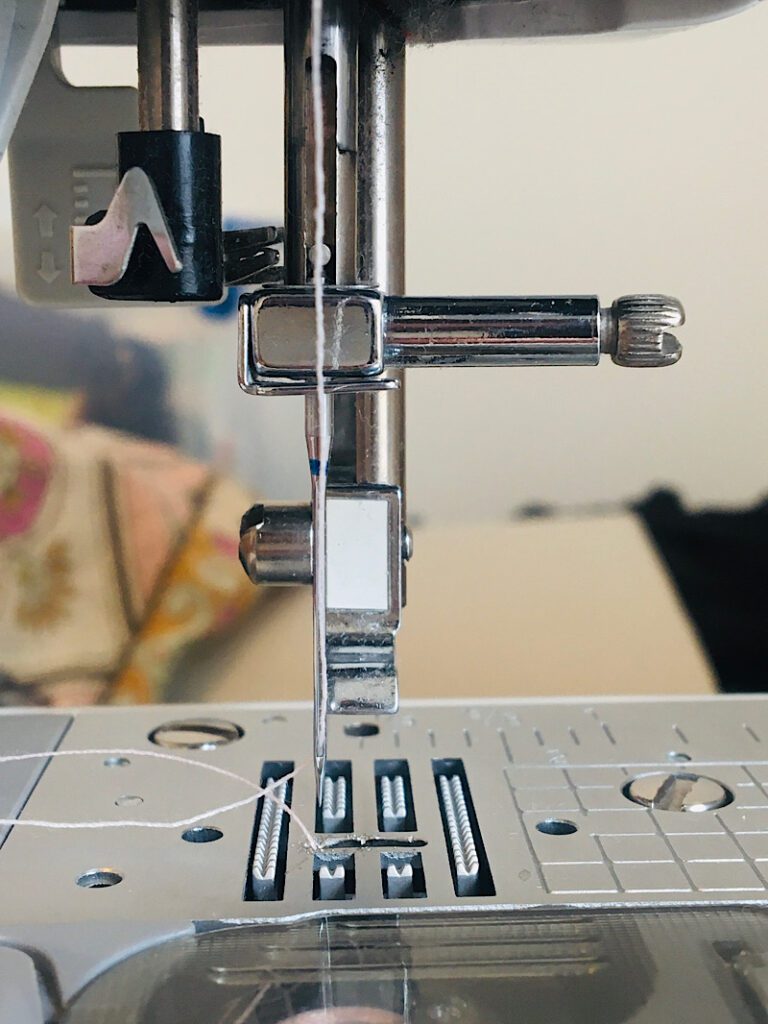
The first thing to check when you are having loose stitches is that your upper thread is threaded properly.
When threading your machine, it should pass through the tension disks and through the thread path with the needle in the highest position and the presser foot raised.
This ensures that the tension disks are correctly opening up to grip the thread and not restricting it or catching it in any way.
You should also check that the thread is not wound around the needle, sometimes that happens to me!
Completely remove the thread from your machine, and re-thread it. Remember:
- Presser foot raised
- Needle in highest position
2. Upper Thread Tension Issue
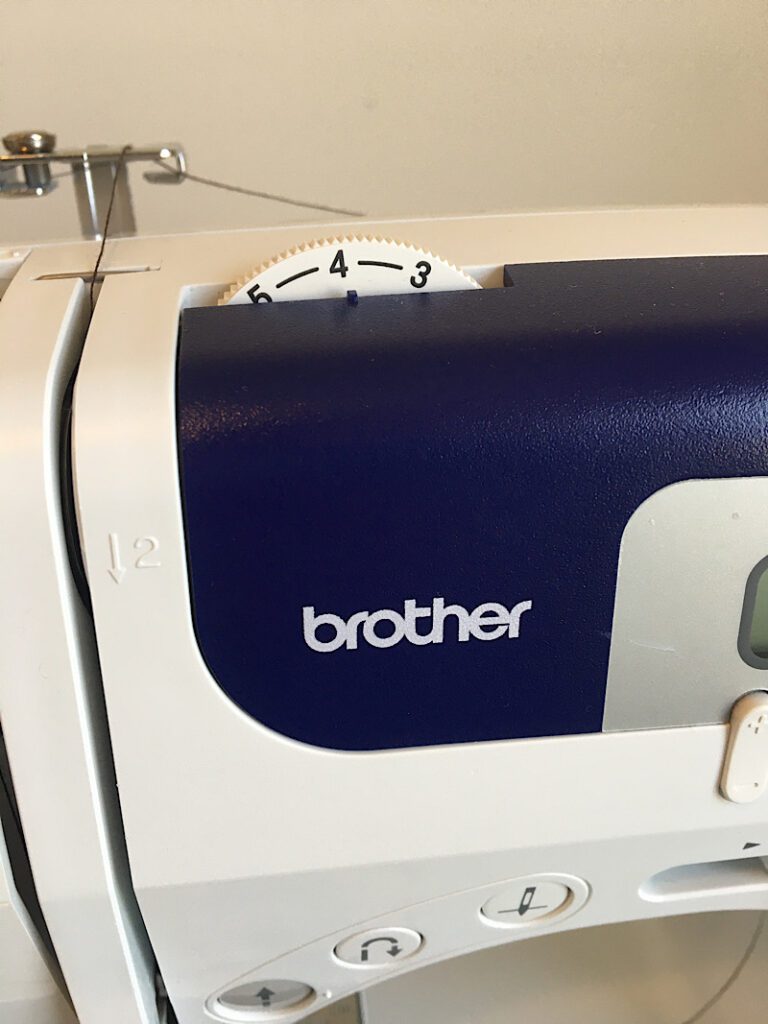
The next thing to check is that the tension dials of the upper thread are at their normal/appropriate setting. On my machine, the default setting is marked between 3 and 5.
Depending on your fabric and thread, you may have to adjust the tension setting, but for most projects the default setting is probably fine.
My kids sometimes twist or bump the tension dial without my knowledge, so it is always good to just check on it every now and then!
Before sewing a new material, try a test swatch first to perfect your tension settings before embarking on the real deal!
3. Bobbin Inserted or Wound Incorrectly
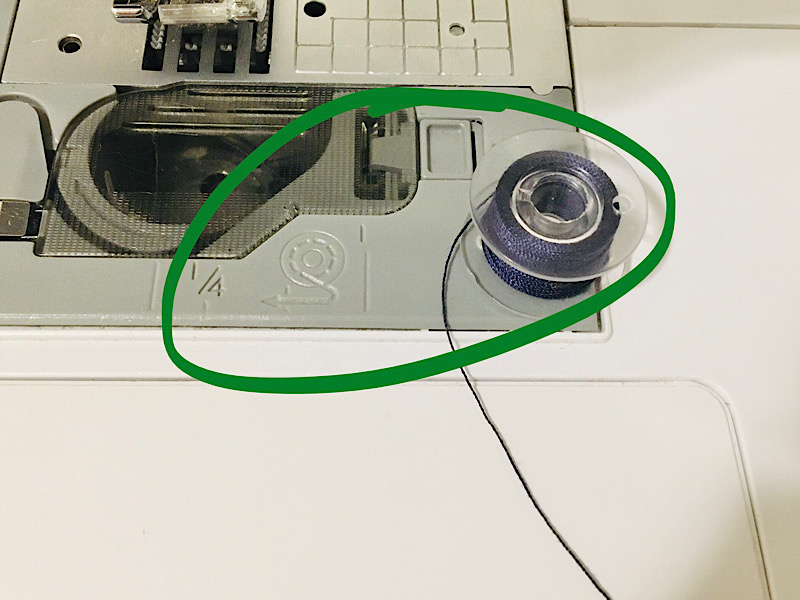
There are several things you can check with the bobbin to fix loose stitching whether on the top or bottom of your project. Here are a few things to look for:
- Make sure the bobbin is wound correctly (not too tight, not too loose, not uneven)
- Place the bobbin into the case in the correct orientation (my top inserting bobbin has to have the threads falling down the left side like the letter “P”.
- Double check that you are using the right size of bobbin. Some bobbins are taller or wider than the bobbins made for your particular machine, and the incorrect size can prevent them from unwinding smoothly.
- Also make sure that the bobbin thread is wrapped around the shuttle path (race) correctly and not getting caught anywhere
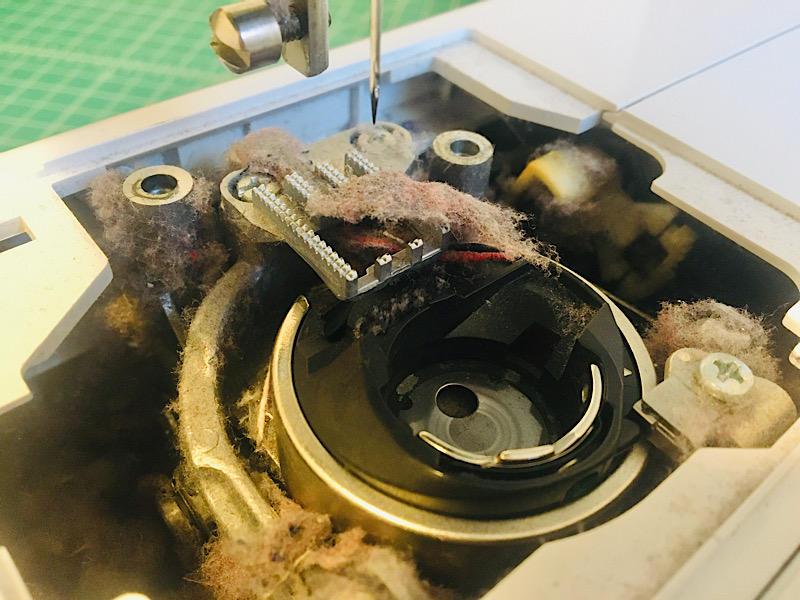
- Finally, check that there is no lint around the bobbin case. Take off the needle plate and clean out the lint build up! (See how messy it can get in the photo below)
4. Incorrect Sewing Needle
When sewing different fabrics you have to use different needles. Thick or dense fabrics can prevent the needle from piercing all the way through if you are using one with a blunt tip or that is to small, short, or thin.
Knit fabrics require a rounded tip needle, and woven and thick fabrics use a sharp needle of varying thickness.
Most sewing machine manuals should have a guide that helps you pick the proper needle, thread, and fabric combinations.
If the needle is too short, the upper thread may have trouble interlinking correctly with the bobbin thread, but this usually produces skipped stitches, not loose stitches.
5. Bobbin Tension Is Loose
Bobbin tension is something that is usually fine left alone, (in fact some people are taught never to touch the bobbin tension screw for fear of ruining it,) but if you try everything else and are still having problems than it is possible there is an issue here.
To adjust the bobbin tension, you need to gently turn the screw on the bobbin case in quarter turn increments. (12, 3, 6, and 9 on a clock.)
Over many years, a bobbin screw can become loose on it’s own, but newer machines typically won’t have this problem.
If you are sewing with particularly thin or thick thread, then that is another time the bobbin tension may need adjusting.
Conclusion
If your sewing machine is making loose stitching, the first thing to check is how the machine is threaded (this is usually the first thing to check with ANY sewing problem!)
If that doesn’t help, you can move along down the list of other solutions. This issue is most often caused by tension issues.
Comment below if this post helped you! And if you need more help, join the community group and post a picture to see if we can help solve it for you!



Thank you very much for your step by step instructions on how to set my tensions because I’m getting loose stitches under my bottom seam.