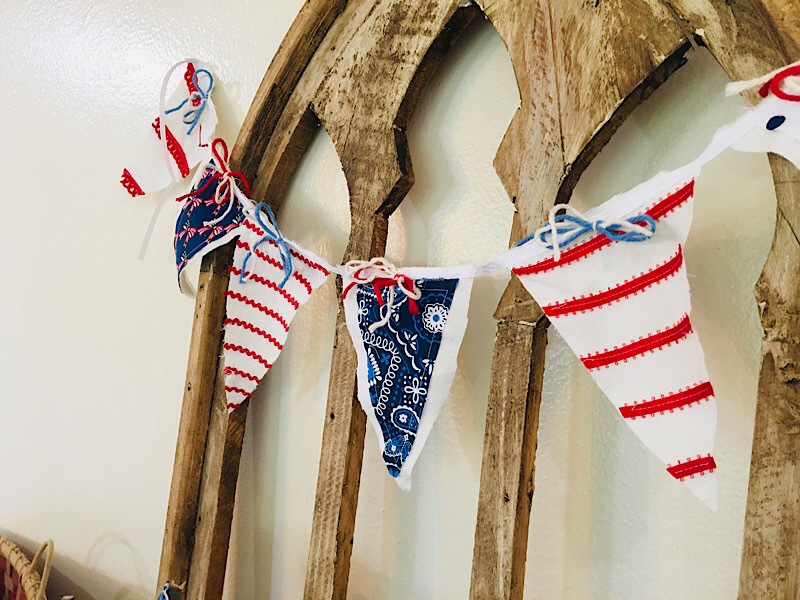
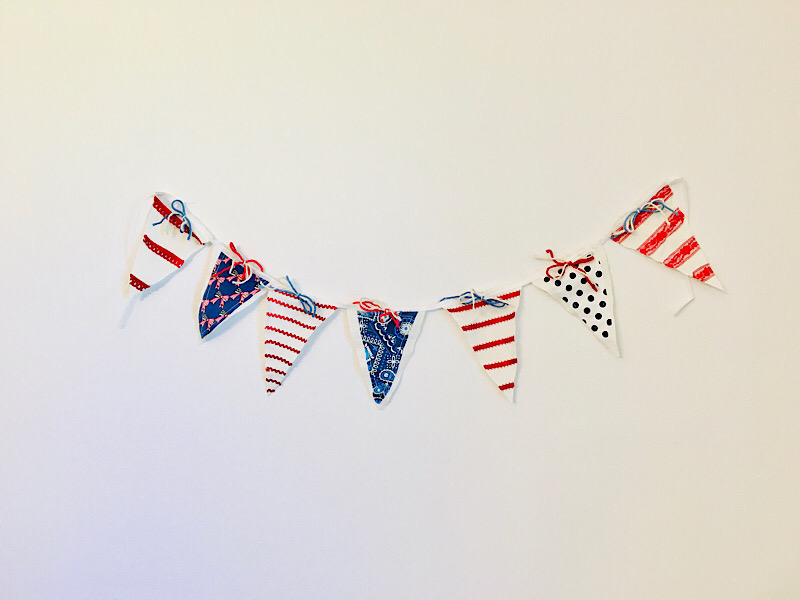
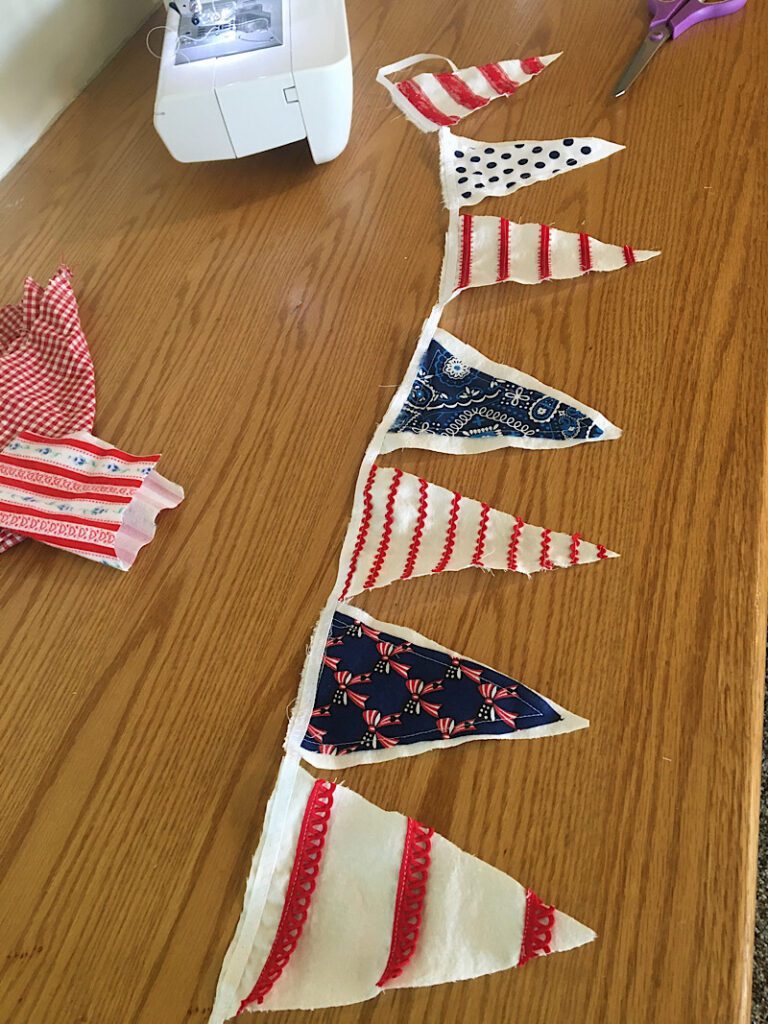
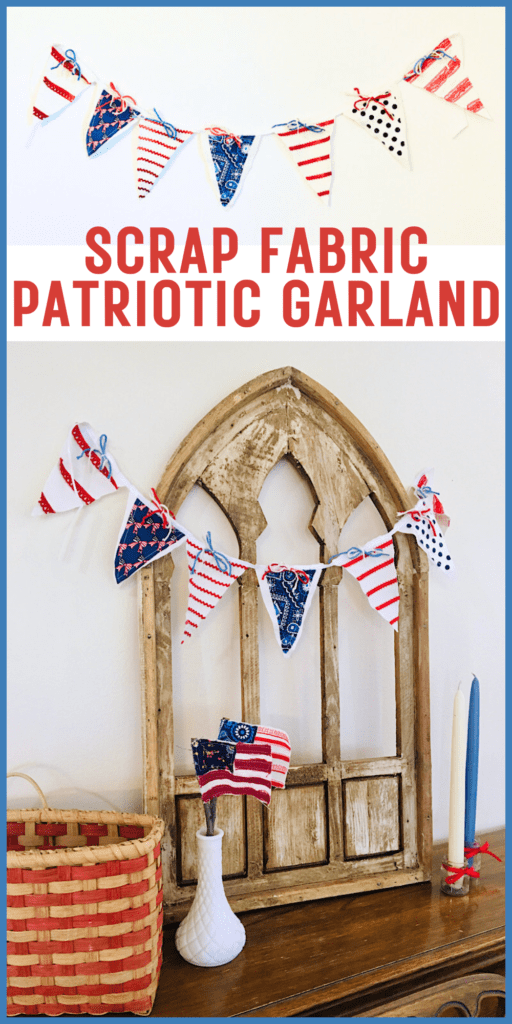
This scrappy pennant bunting is so cute to sew for an easy DIY 4th of July decoration!
I am ALL about easy, rustic, and cute holiday crafts and this patriotic bunting is no different!
You can make these as long or as short as you want, and make the triangles any size too. Use up your fabric scraps in style this Independence Day!
Let me show you how I made it.
Supplies Needed
- White Ribbon – As long as you want your bunting (mine was ~3 feet)
- White or cream fabric for the triangle bases, canvas works great
- Red ribbons of different types (patterned, lace, ric rac, etc.)
- Blue scrap fabric
- Red, white, and blue cotton string or yarn
- White Thread
How To Make A Scrappy Patriotic Garland
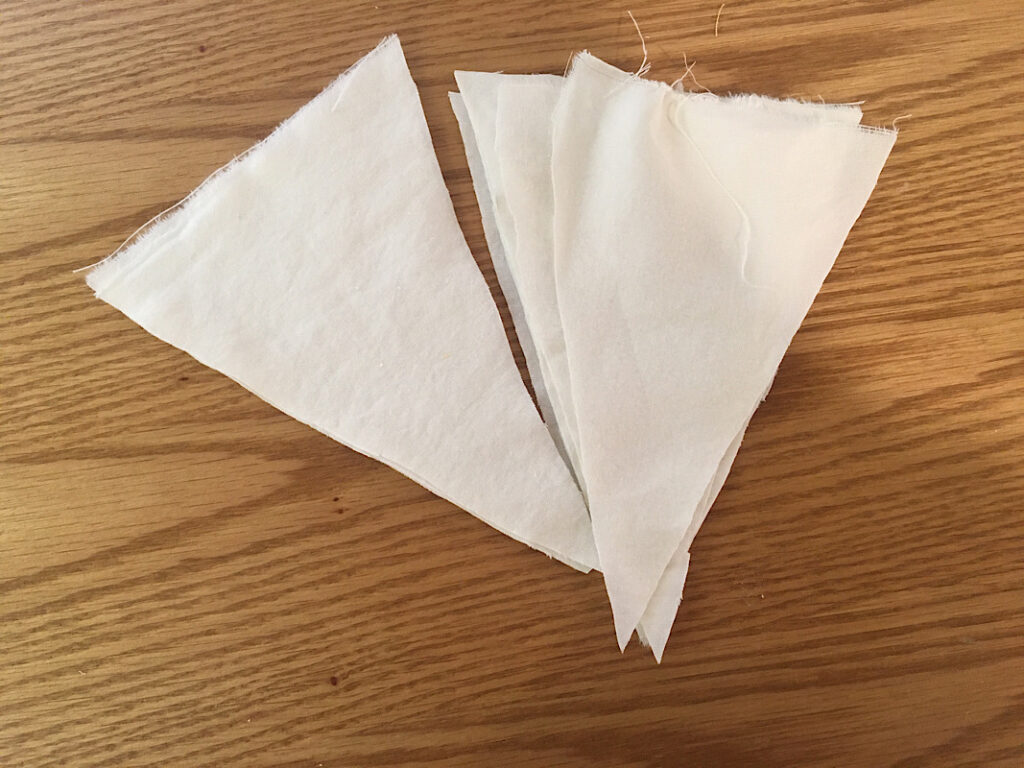
Step 1. Cut The Triangles
First you need to decide how big you want the triangle pennants on your bunting to be. I didn’t measure mine, I just eyeballed the first one to be a good size, and then used it to cut several more the same size.
You can make the triangles any size, I thought it looked best for them to be tall instead of equal on all sides.
Cut your triangles out of the white base fabric.
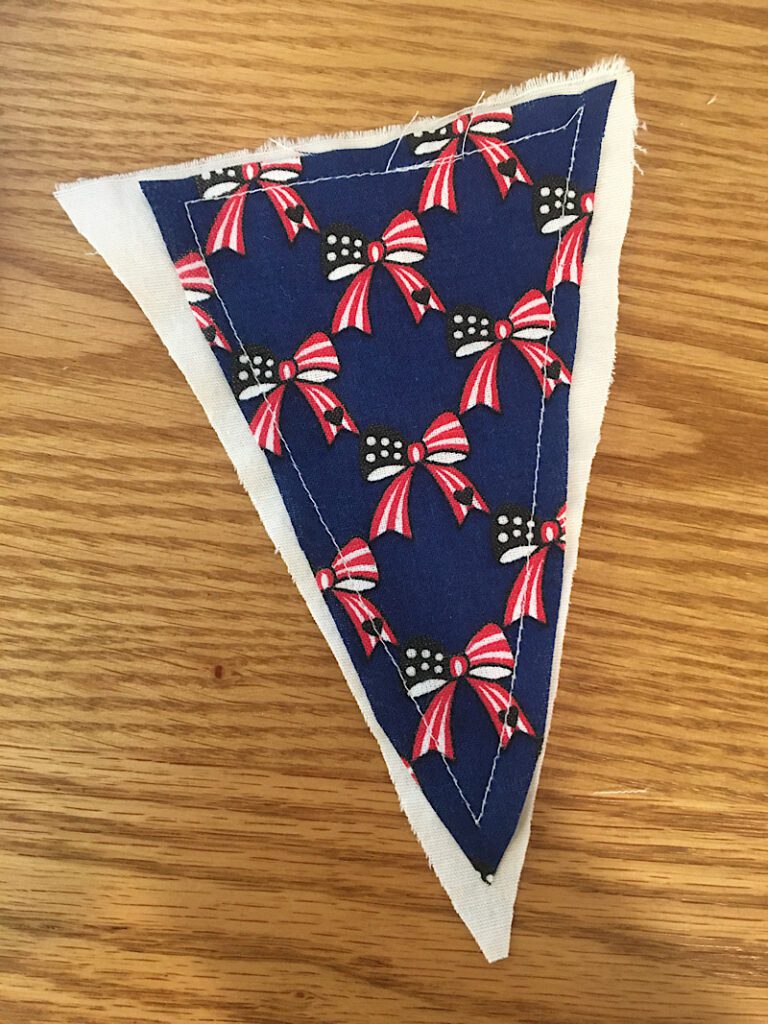
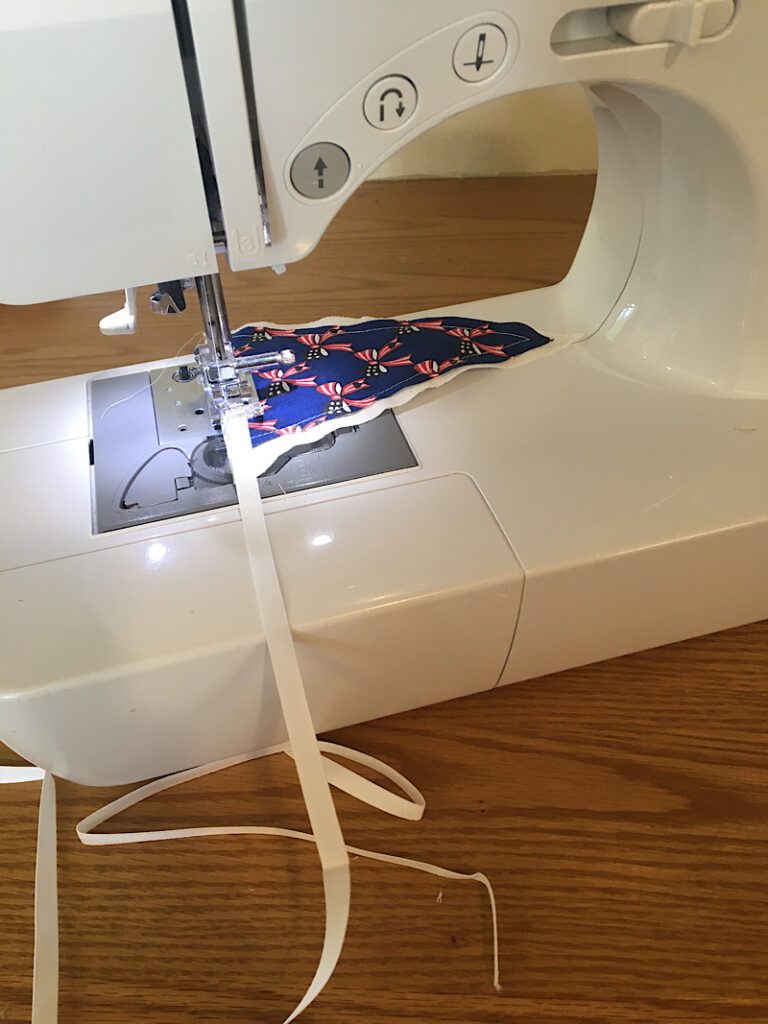
Step 2. Make The Striped Pennants
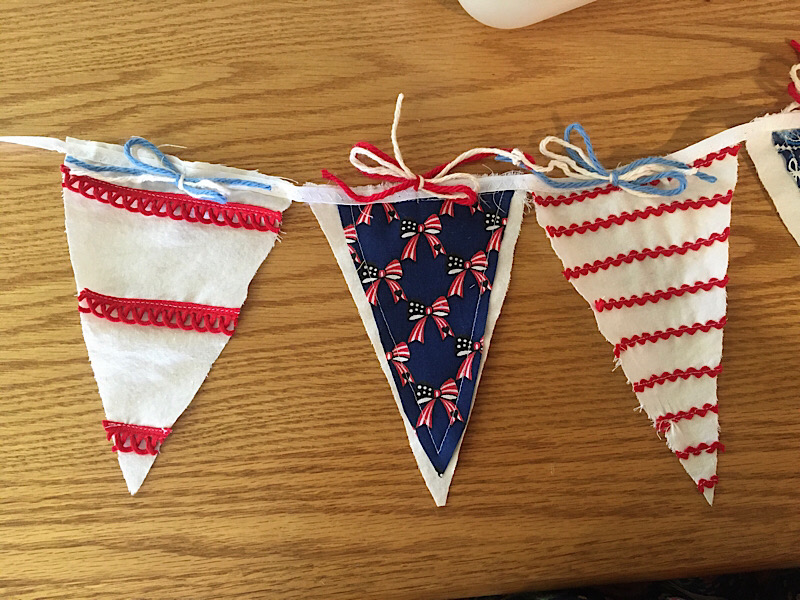
I used one type of red ribbon for each triangle, but you could even mix and match the stripes if you wish.
Instead of precutting each ribbon stripe, I found it was easier to lay the ribbon across the top of the triangle, then sew it to the triangle with a straight stitch. Then, trim the end of the ribbon from the side of the triangle, and move on to the next stripe.
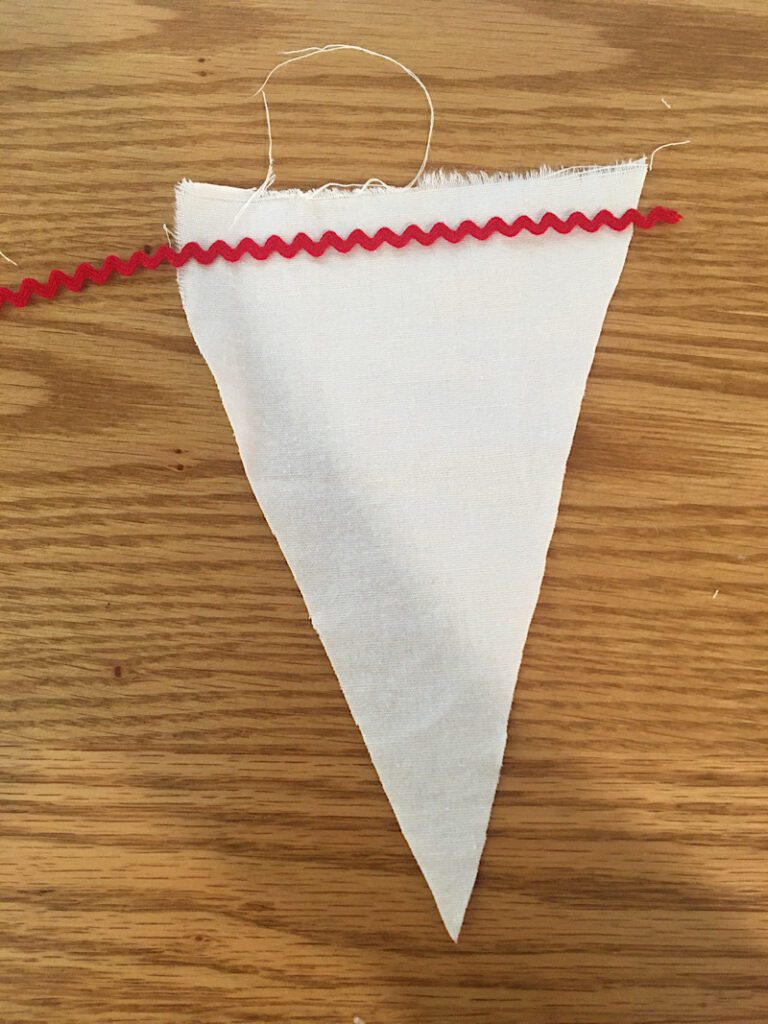
You can space them close together or far apart.
I did some triangles with many stripes, and some with only a few. Whatever you think looks best!
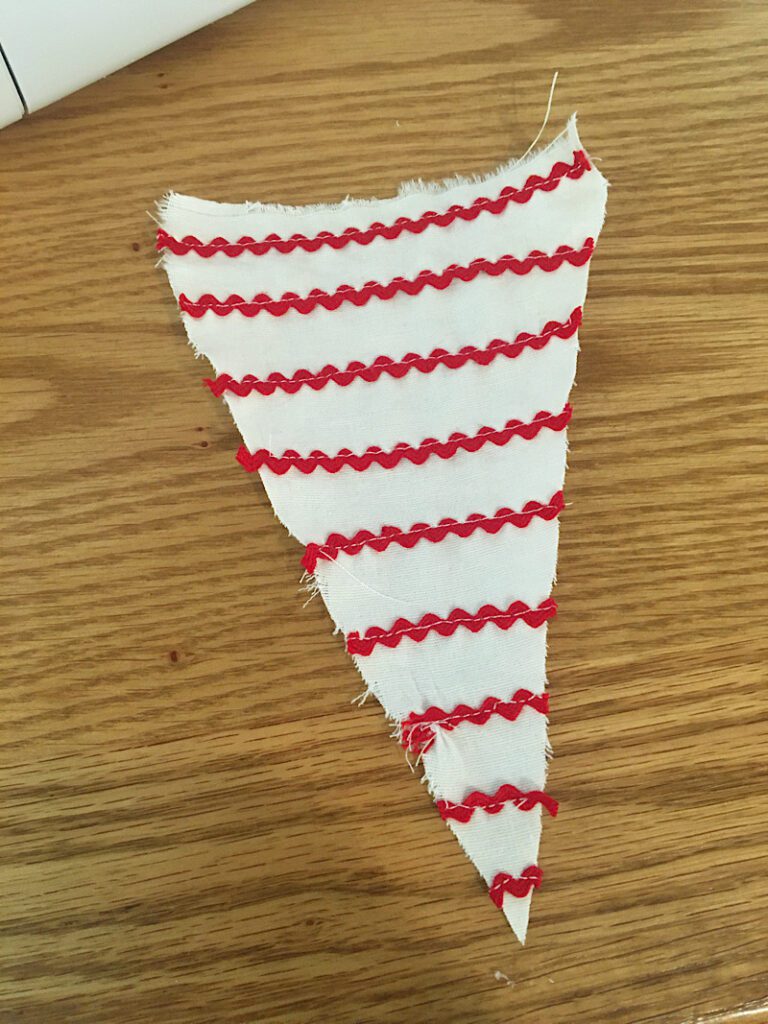
If you have a thick ribbon, you can sew across both long edges of the ribbon instead of just in the middle. On some I also sewed down the right and left sides to make sure it was attached well enough.
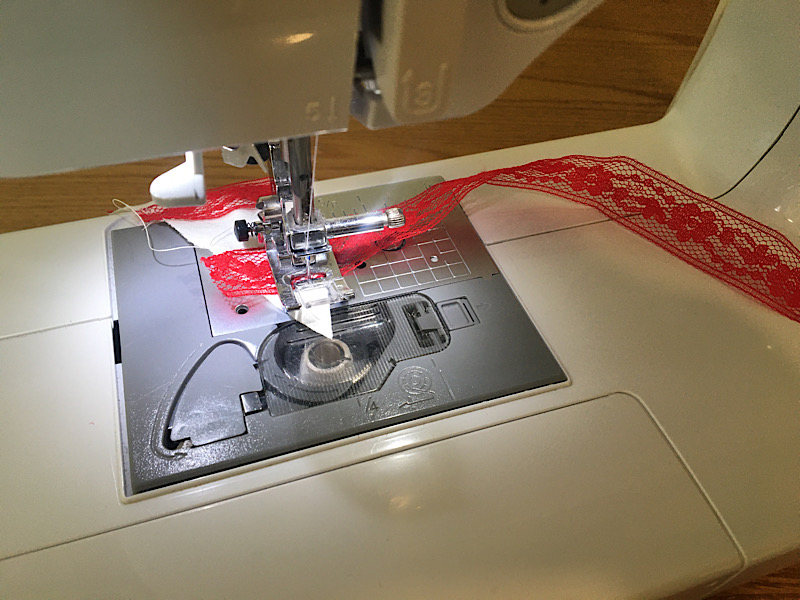
As you can see, there isn’t a right way to do this! Repeat these steps for all the red triangles you want to make.
Step 3. Sew The Blue Pennants
For the blue pennants, cut out some blue fabric triangles to be generally the same shape as the white base pieces, but a little bit smaller.
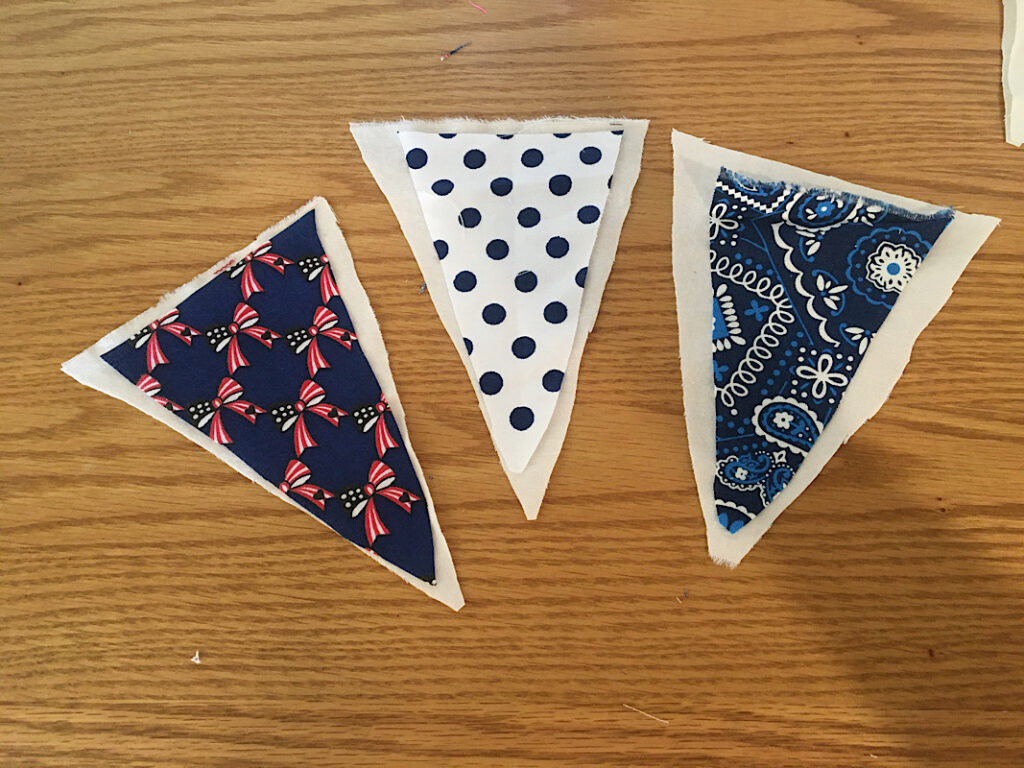
Place a blue triangle on top of the white triangle, and sew around the perimeter to attach it.
Repeat this step for all the blue triangles.
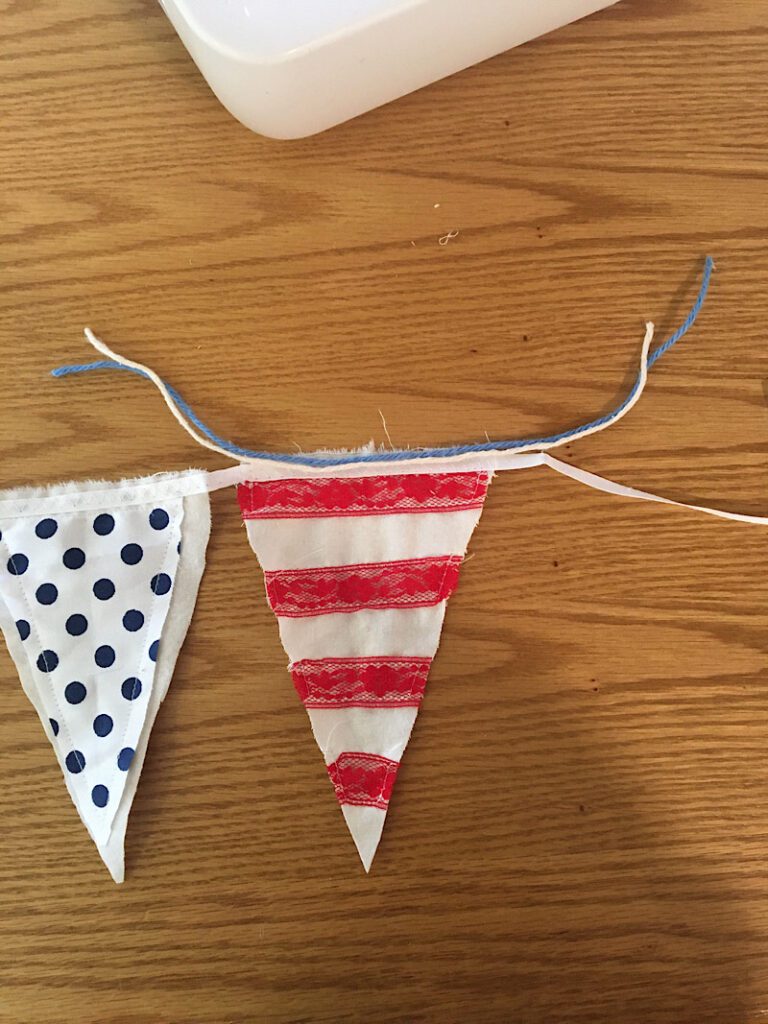
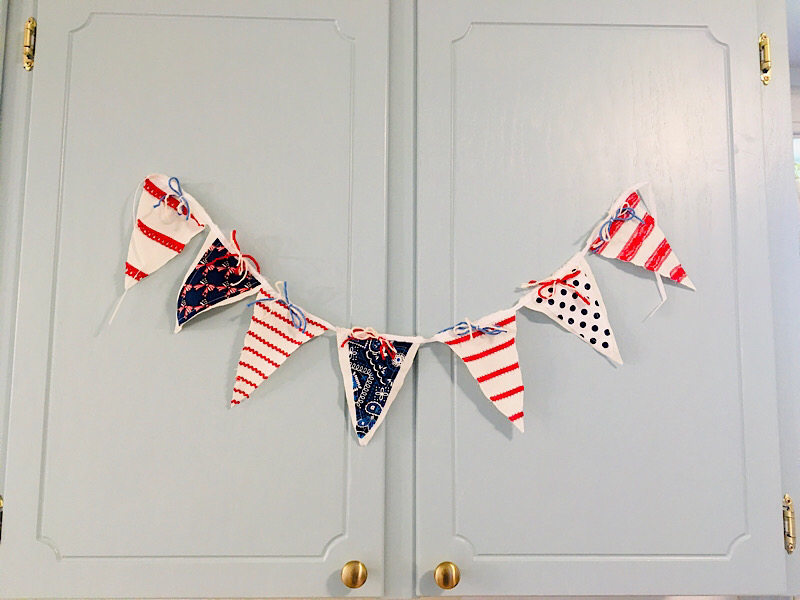
Step 4. Attach The Hanging Ribbon
Cut a length of ribbon that is long enough for all the triangle pennants you made, plus several inches at the beginning and end to hang it from.
To attach the triangles to the ribbon, start several inches in from one end and place the ribbon on the top flat edge of the triangle. Sew the ribbon to the triangle. I used a zig zag stitch to make it look more scrappy, but you can also just use a straight stitch.
When you get to the end of the triangle, place the next triangle under the ribbon, about an inch away, and continue sewing.

Continue on this way, alternating red and blue triangles until you have several inches left at the end of the hanging ribbon.
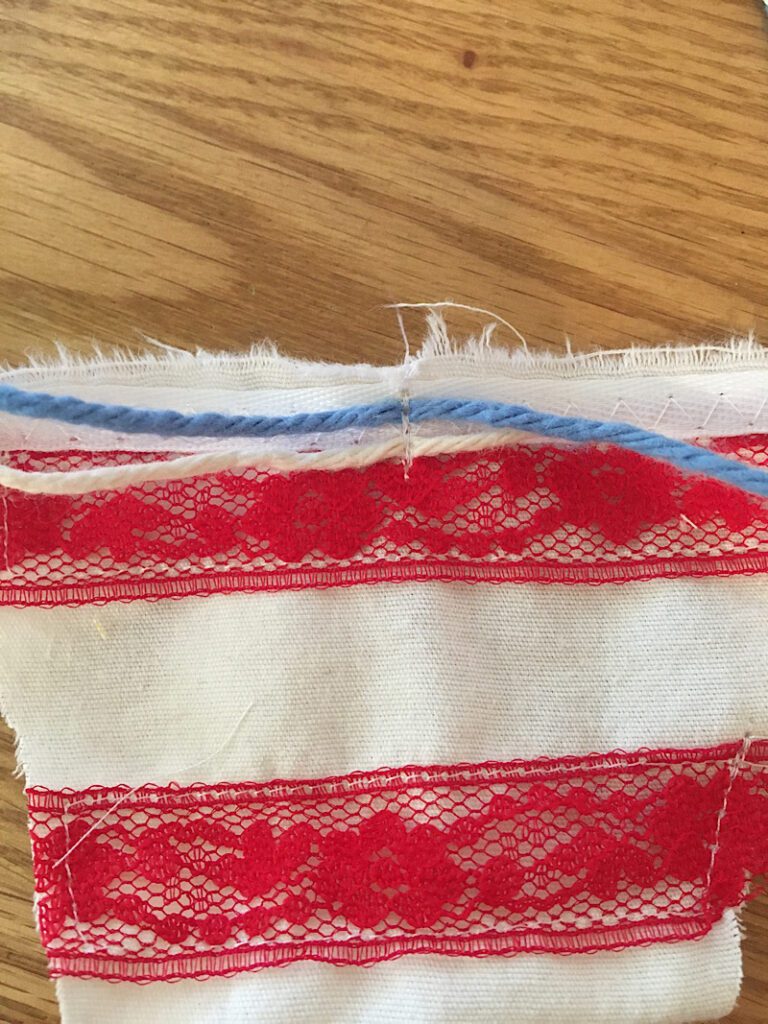
Step 5. Add Yarn Bows
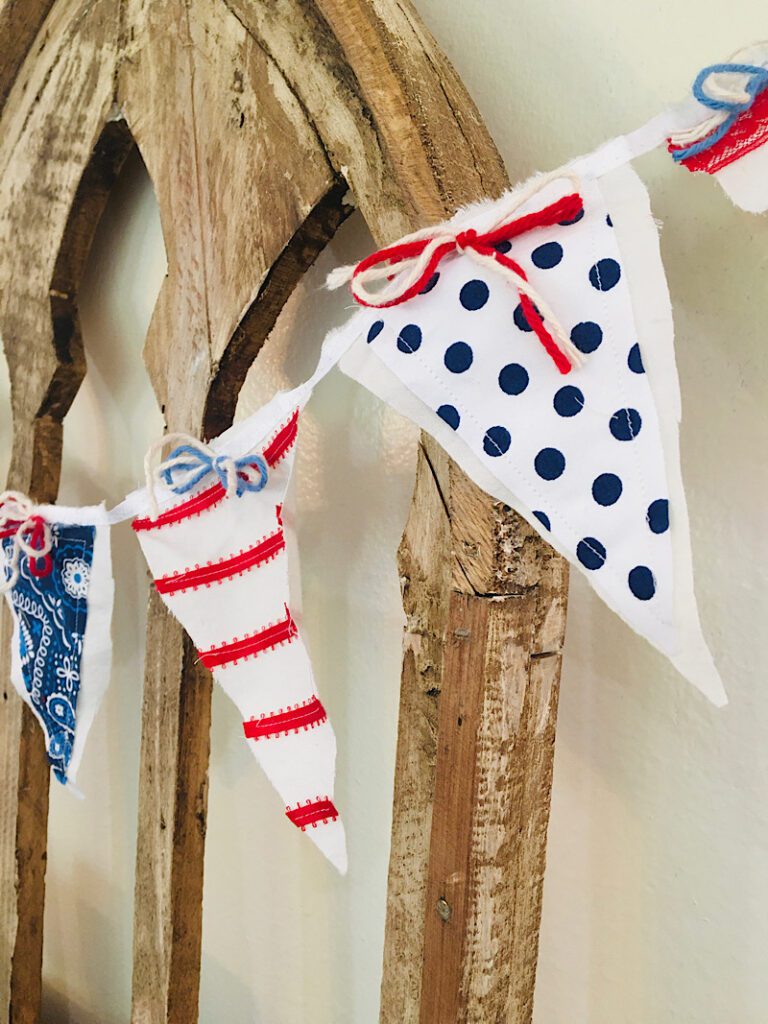
For the final touch, I added little yarn/string bows to the top of each triangle. I used a red and white string over each blue triangle, and a blue and white string over each red triangle.
Cut out enough strings about 10 inches long each, for the number of triangles you made.
To attach, align the centers of the strings over the center of the top of the triangle, on the ribbon.
Sew beck and forth over the strings a few times to make sure they are secure.
Then, tie the strings into a bow and trim the ends to make them neat.
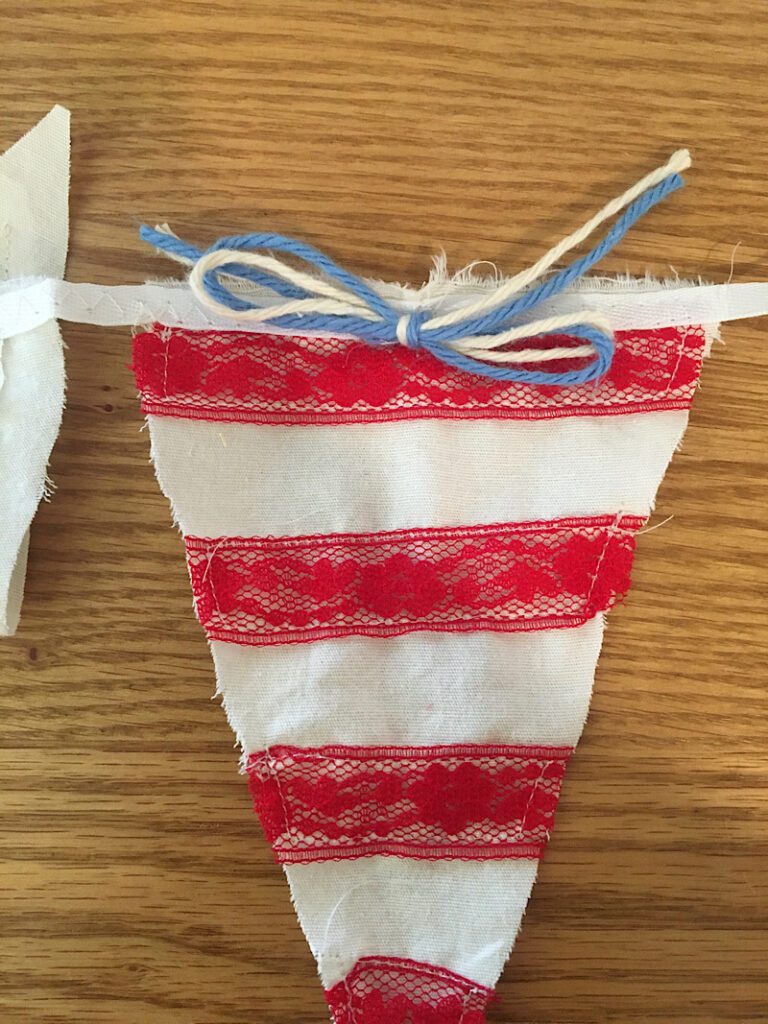
Continue to sew the bows over each triangle, alternating colors.
Then you are done!
I am happy with out mine turned out! I tried hanging it a few places to see how it looked but I eventually hung it over my piano with my other patriotic decorations. You can learn how I made those super cute flags in this tutorial!
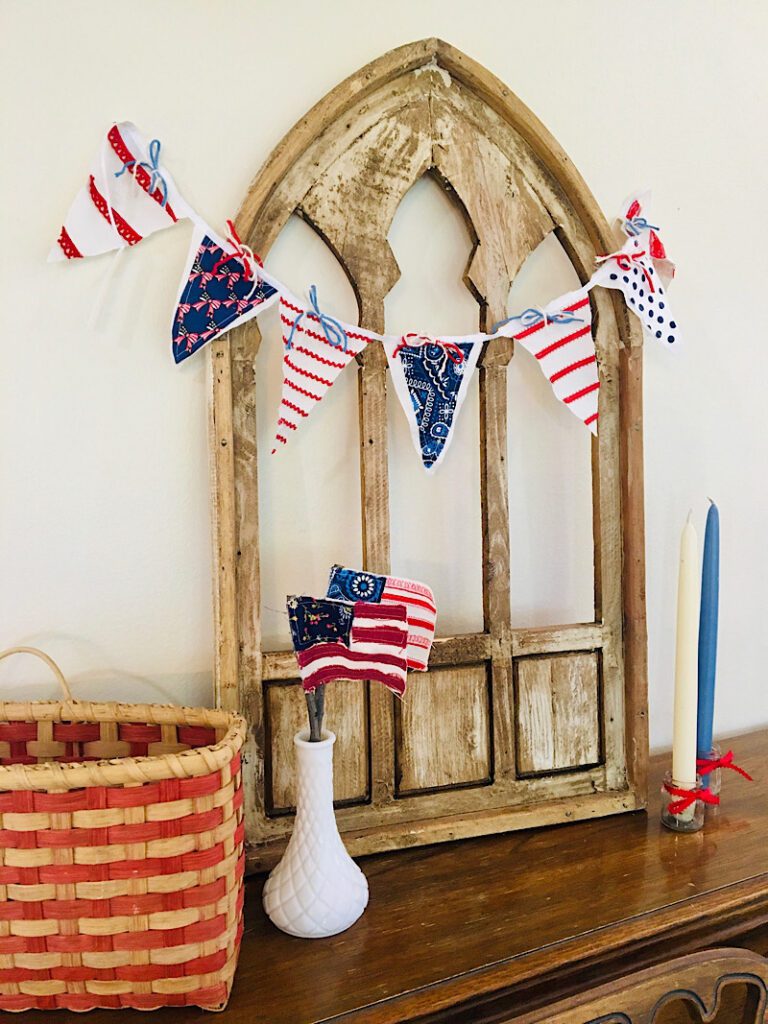
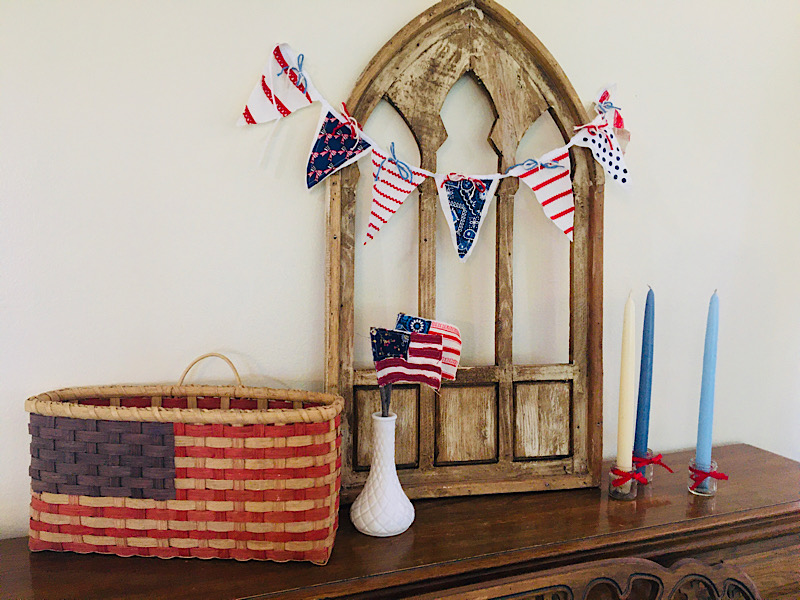
This bunting is very stringy and rustic. I love the “homemade” look because it adds softness and charm to the room.
Here is a close up of the garland:
I hope you liked this easy tutorial, if you have questions don’t hesitate to ask!
Pin this post to Pinterest! I can’t wait to see what you make!
Check out my other patriotic decor tutorials here: