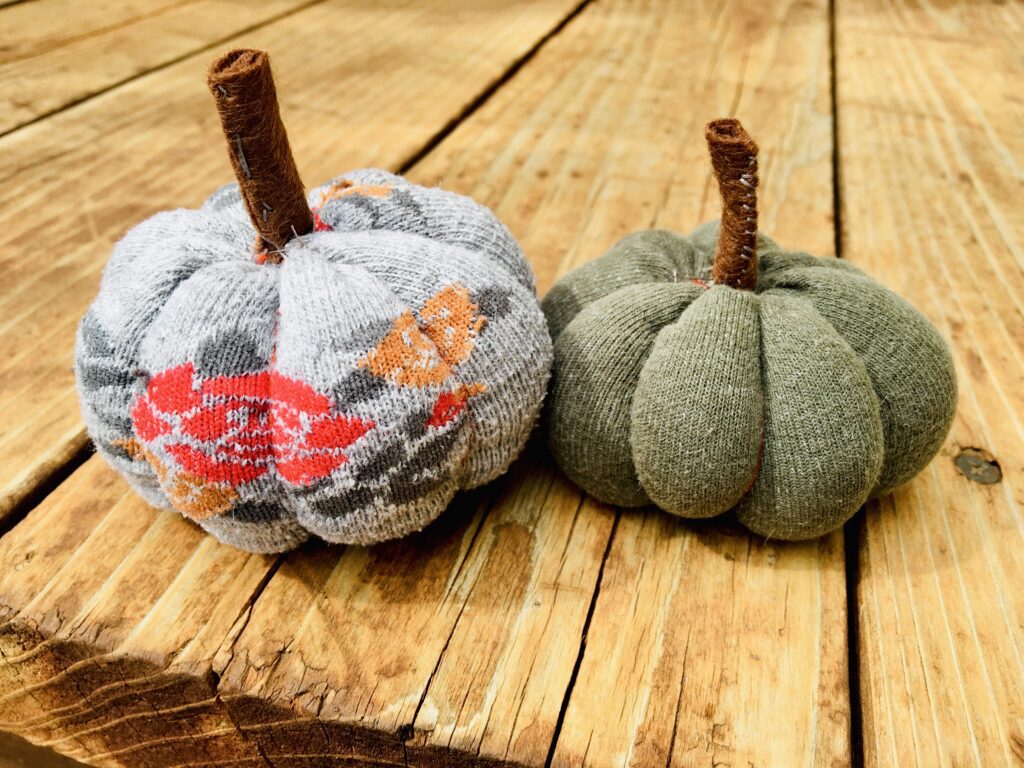
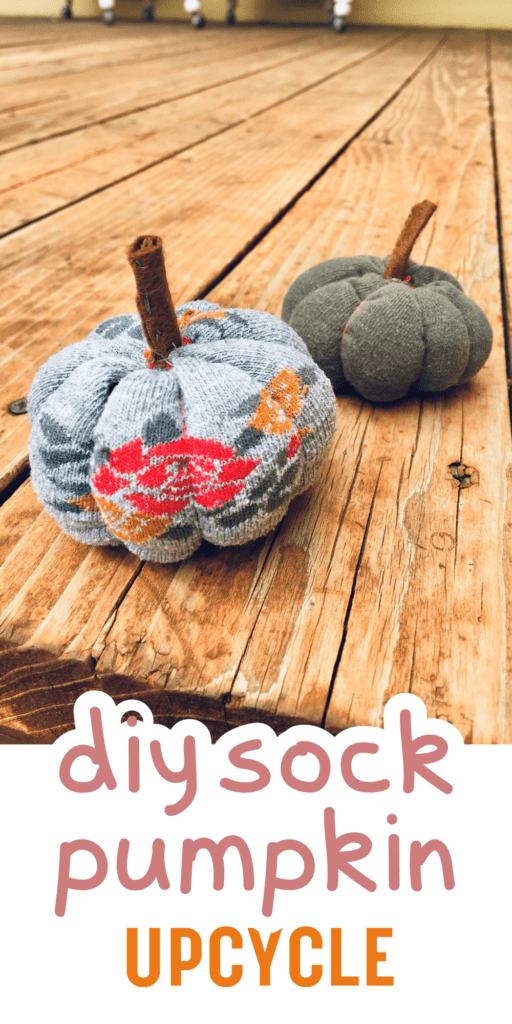
Turn your old socks into cute stuffed pumpkins with this easy hand sewn upcycle!
Cute socks are one of my guilty pleasures! I have a fall birthday, so I often find myself adding some cute floral socks to my wishlist.
When my (or my kids) socks get holes, I put them in a bag to use for something fun later!
I’ve made some sock bunnies, sock fish, and plenty of sock pumpkins. They are so easy, you will love them!
Supplies
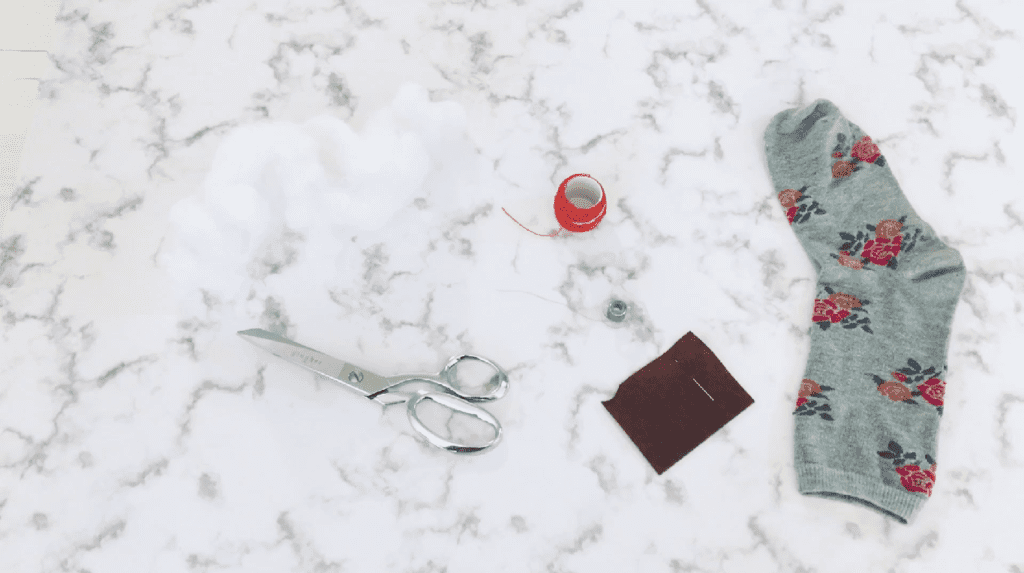
- Sock
- Matching Thread
- Stuffing
- Brown felt
- String, yarn, or embroidery floss
How To Make Sock Pumpkins

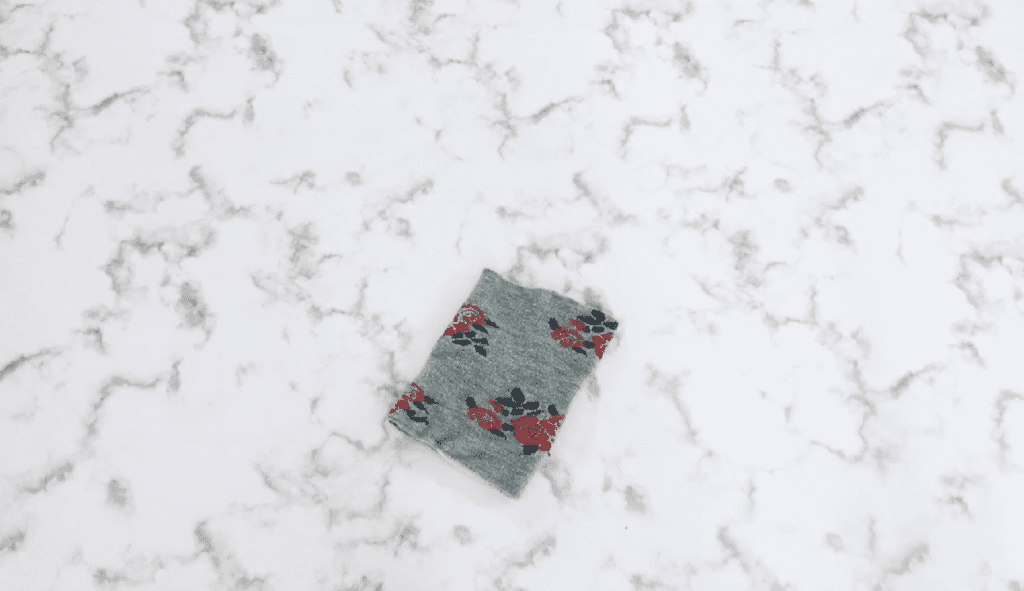
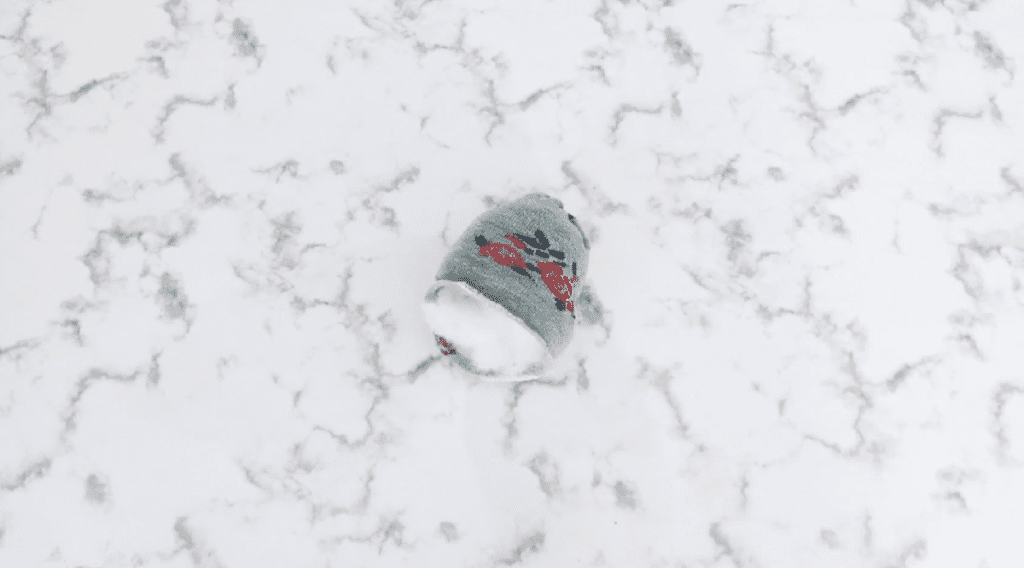
Step 1. Cut Your Sock
Cut your sock into a tube shape around 4-7 inches long. The longer the tube, the taller the pumpkin. The shorter the tube, the shorter and wider the pumpkin.
You can use the foot area by cutting off the toes and heel, or the ankle area.
Step 2. Stuff The Sock
Turn the tube inside out. Bunch up one end, and tie it closed by wrapping thread around it several times and tying it off.
Turn the sock right side out, and stuff it very full with stuffing. I’ve gotten creative and used plastic grocery bags as stuffing before!
Step 3. Close The Pumpkin
Sew a running stitch (a basic up and down stitch) around the top edge. Then, tighten it to close.
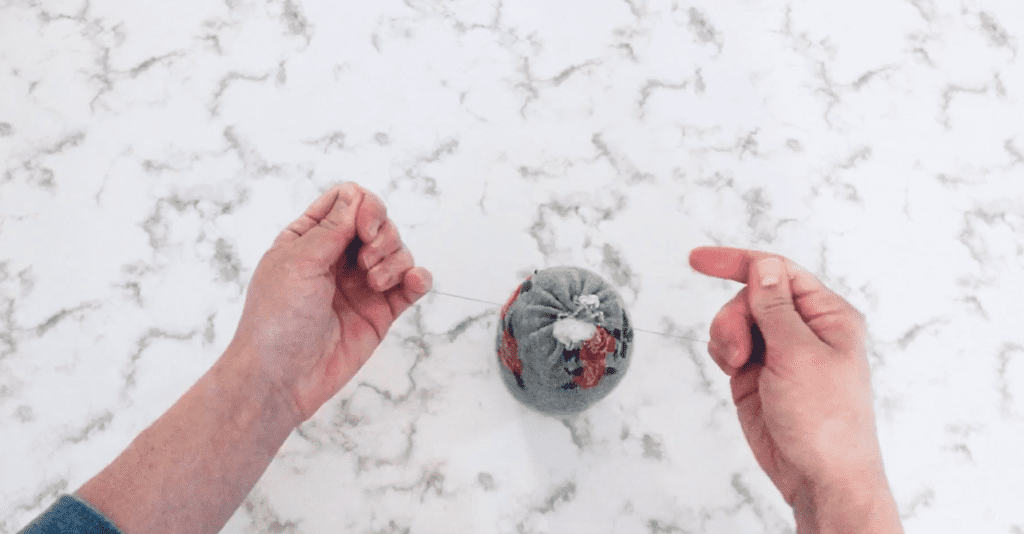
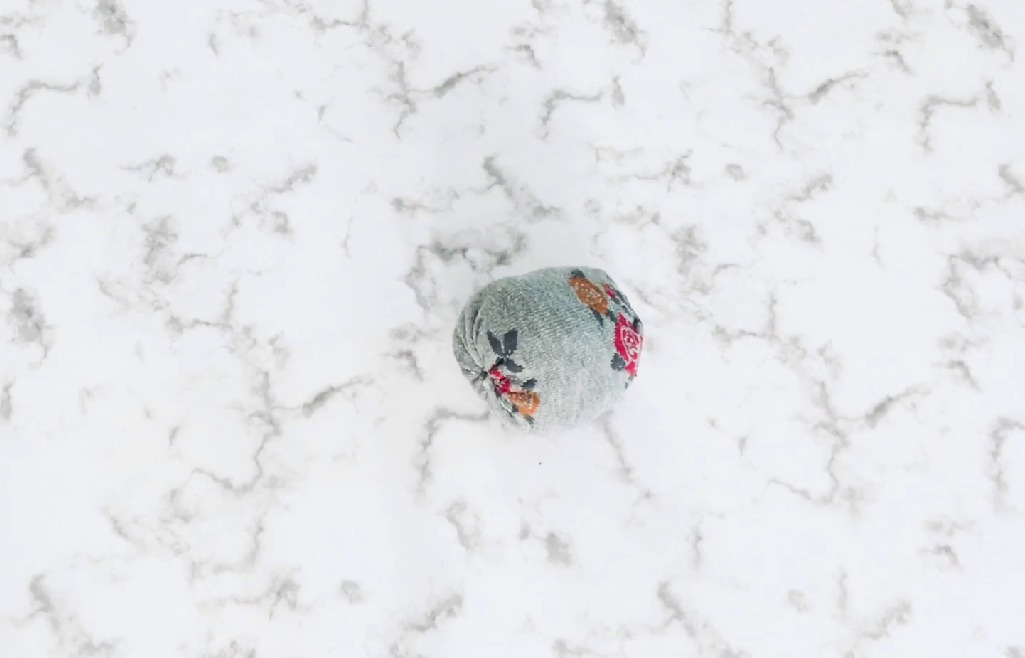
When you are pulling it closed, push the raw edges into the center of the pumpkin to hide them. Then tie it closed. Now you have a sock ball.
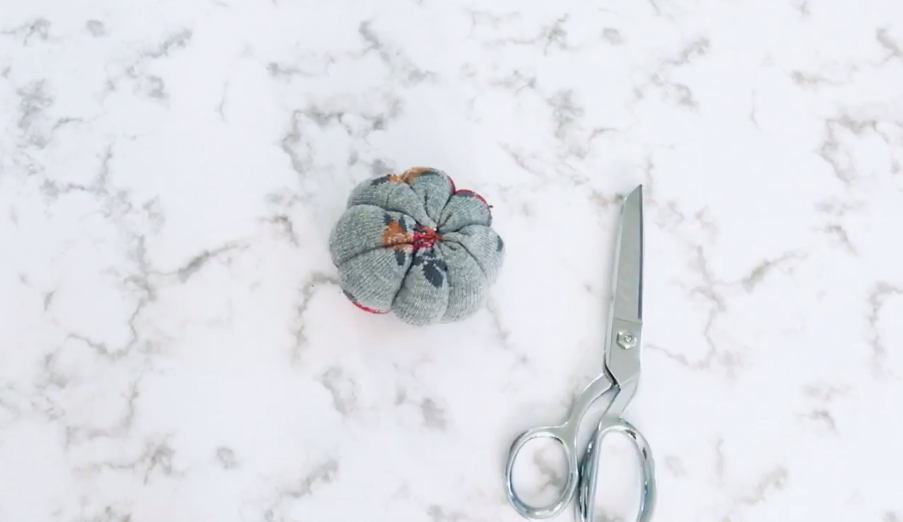
Step 4. Wrap The Pumpkin With String
Now you will create the sections of the pumpkin. You can make 4-8 sections depending on how many times you wrap the string around. I usually wrap string around 2-4 times to make 4, 6, or 8 sections depending on what looks good.
Cut some string, and place the center of the string over the top of the pumpkin. Then wrap both ends of the string around the pumpkin to the bottom. At the bottom, tie the string tightly.
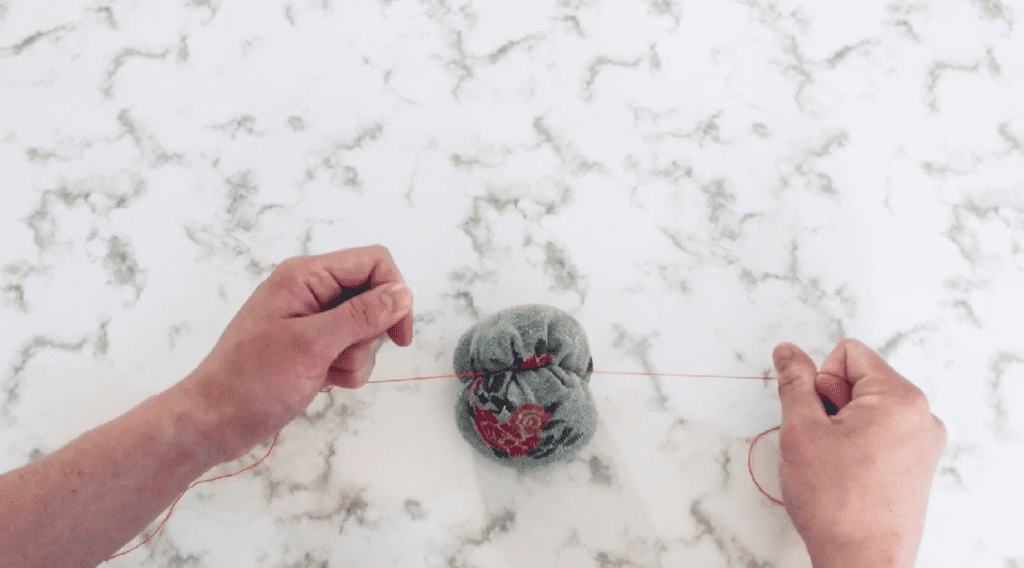
Then repeat this process for however many sections you want to make.
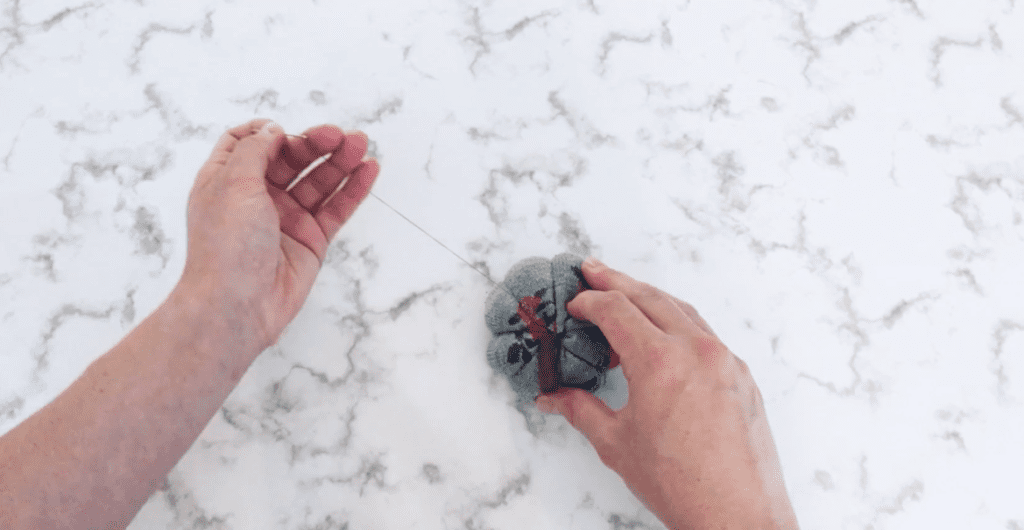
Step 5. Add A Stem
Cut a square from the brown felt. Roll it up and sew it closed.
Sew the base of the stem to the top of the pumpkin several times to secure it well.
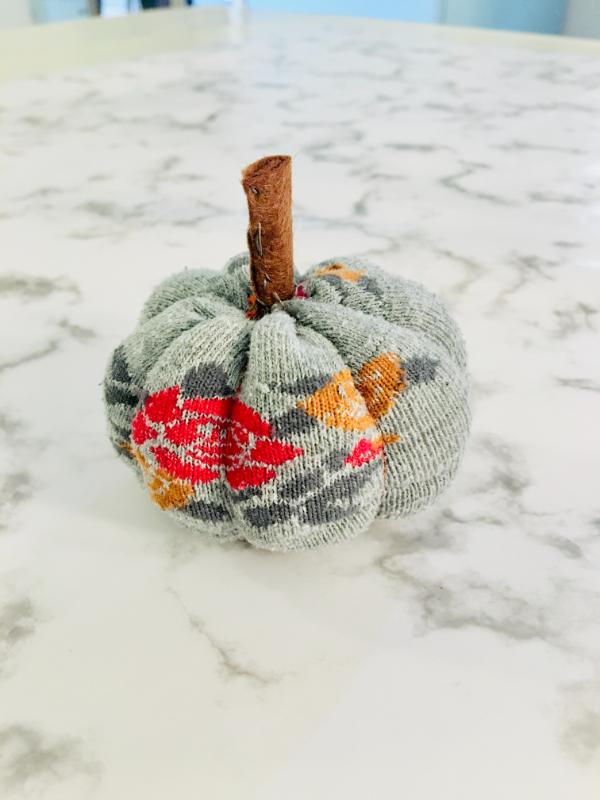
Then your sock pumpkin is complete!
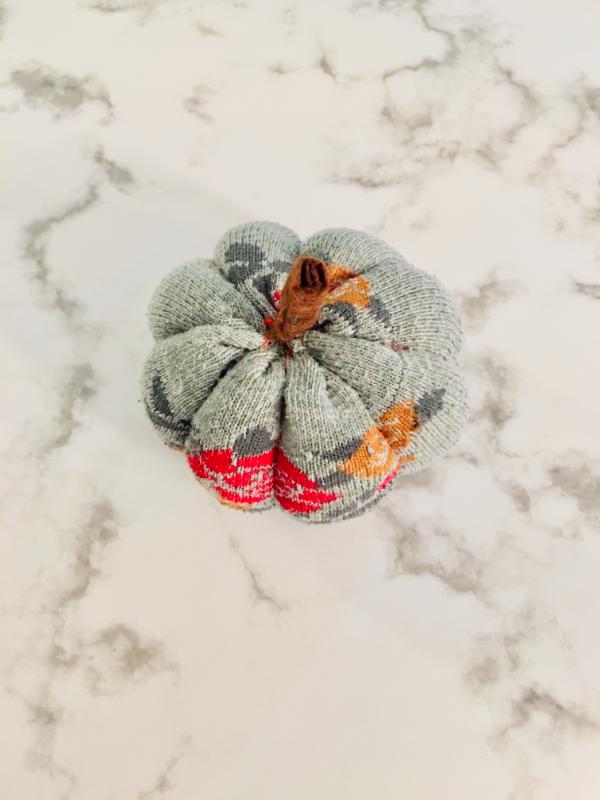
Here is the top view. Love those stuffed sections that make it look so real!
These pumpkins are the perfect size to fit in a fabric cornucopia.
I hope you liked this quick sewing tutorial, if you have any questions let me know!
I also have a video tutorial for this project If you learn better by watching!
Pin this post to Pinterest if you want to say “thanks!”

this article is very useful, thank you for making a good article