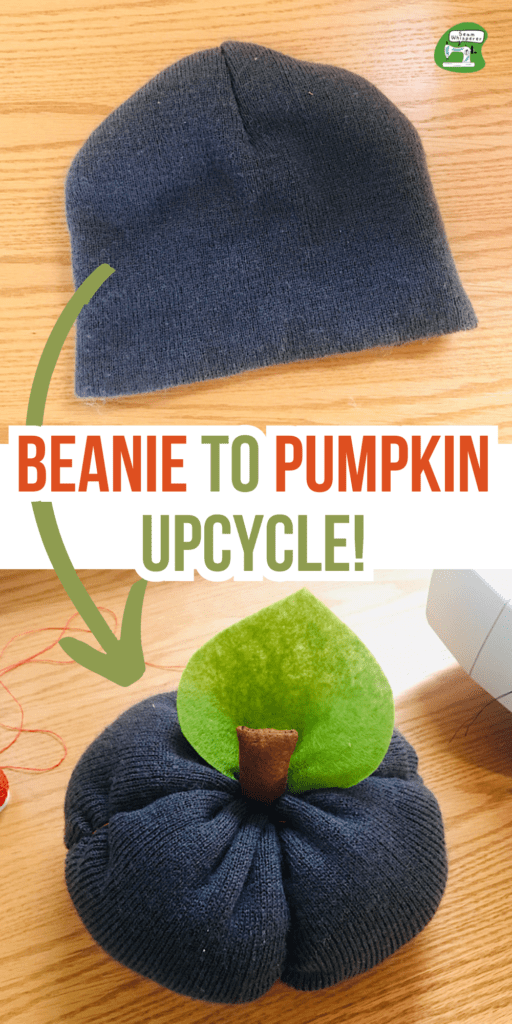
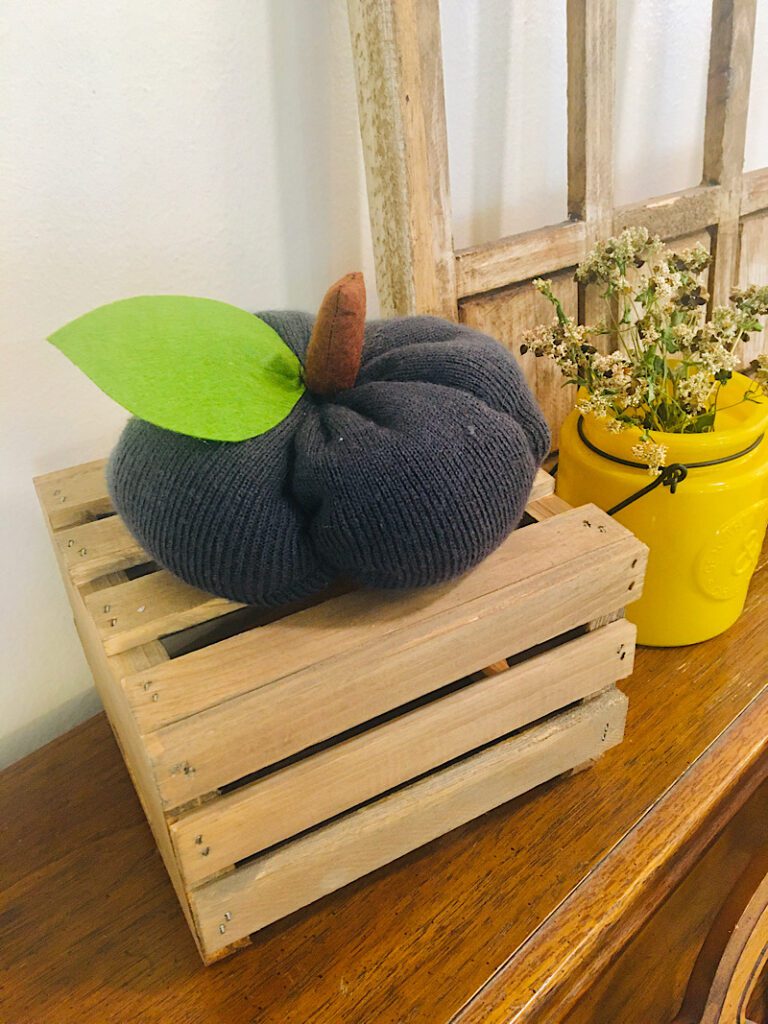
No, this isn’t cinderella, this is upcycling! Turn an old beanie into a cute stuffed pumpkin with this easy tutorial!
I’ve made all sorts of fabric pumpkins. (Coastal pumpkins, Doorknob hanging pumpkins, I’ve even made pumpkins out of socks!) But today I am trying something new and making pumpkins with an old beanie!
I love this project because you get the knitted look without knowing how to knit! Also, you can totally un-sew it and use the beanie later if you want, which I did! Ha!
Here’s how to make it…
This post may contain affiliate links. Read the full disclosure here.
Supplies
- Beanie Hat (The dollar store is a great place to get these)
- Stuffing (I used some from an old pillow.)
- Embroidery floss or strong thread, and needle
- Brown and green felt
How To Make A Pumpkin From A Beanie
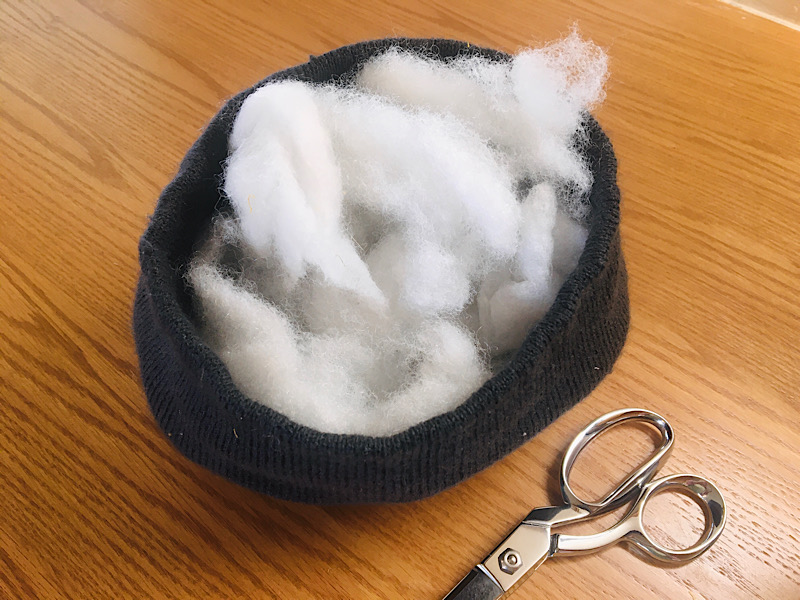
Step 1. Fill The Beanie
Fill the beanie up with your stuffing nice and full.
Then, sew the beanie closed by stitching around the edge of the hat with a running stitch (a basic in-and-out stitch).
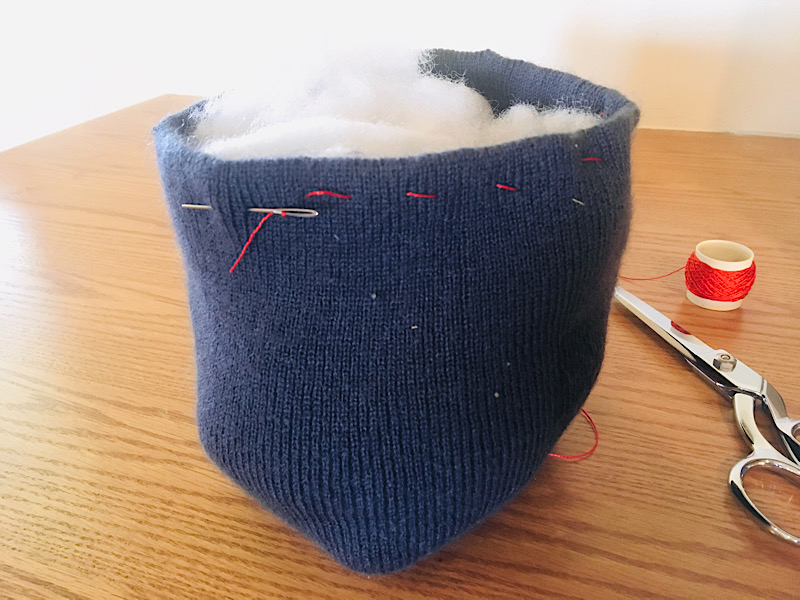
Once you sew around the whole hat, pull the ends of the thread tight and tie it closed. If you can’t get the hole all the way closed, don’t worry. Just make it as small as you can.
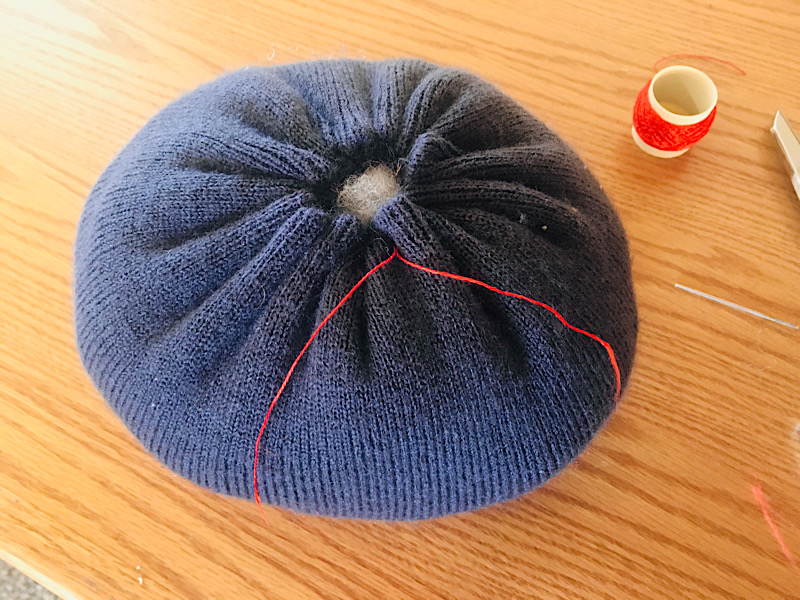
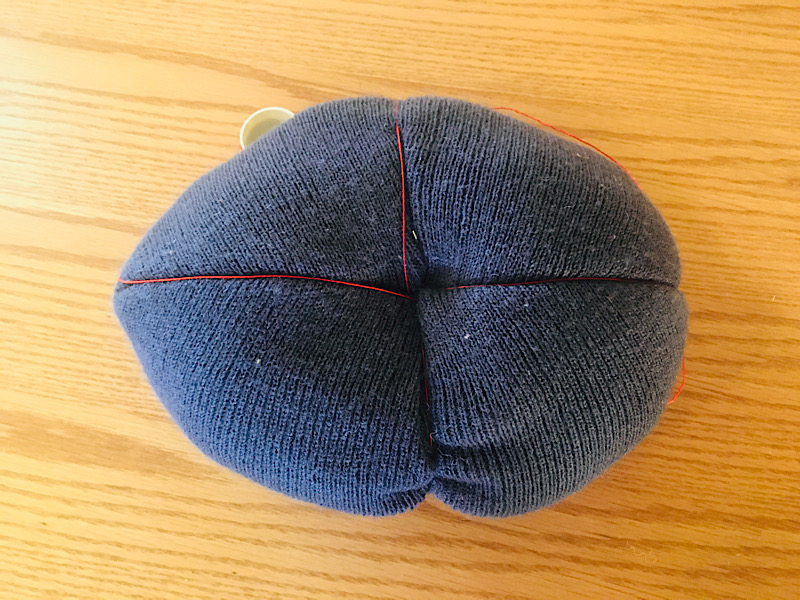
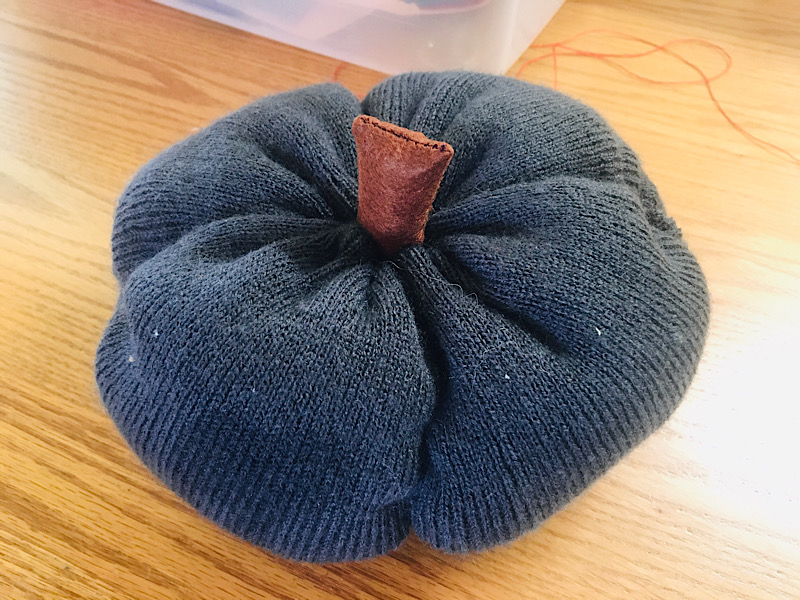
Step 2. Sew The Pumpkin Sections
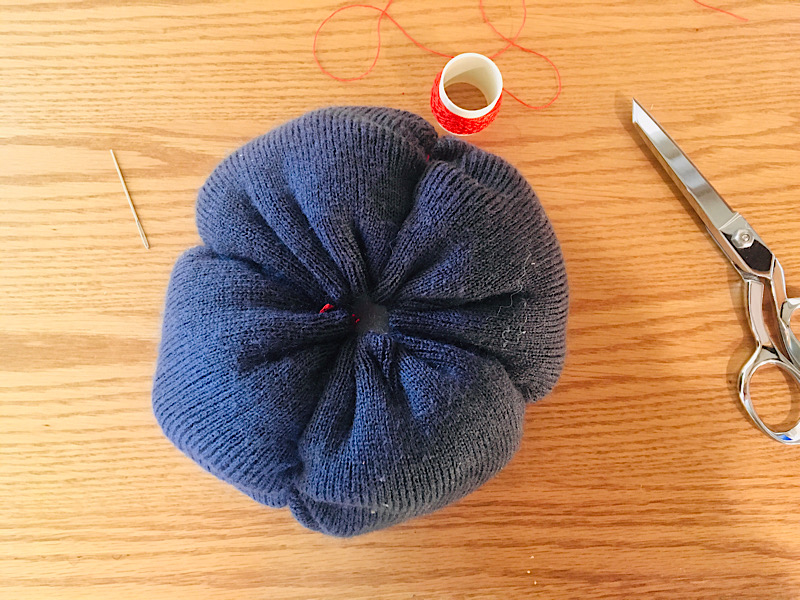
To make the sections of the pumpkin, insert the needle through the center top hole of the beanie, all the way through and out the center bottom of the beanie. Wrap the thread around the side, and then sew through the pumpkin again.
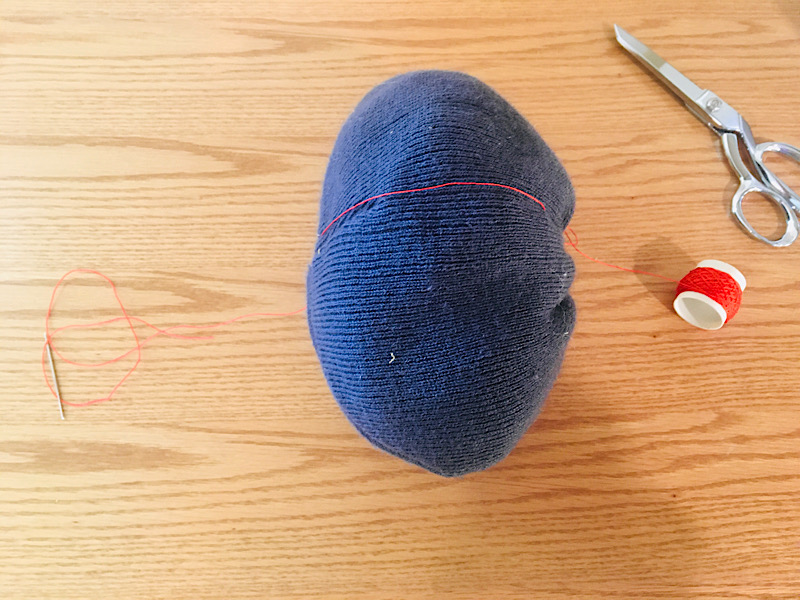
Do this 4 times and pull tight to make the squished sections look more realistic. Then tie it off.
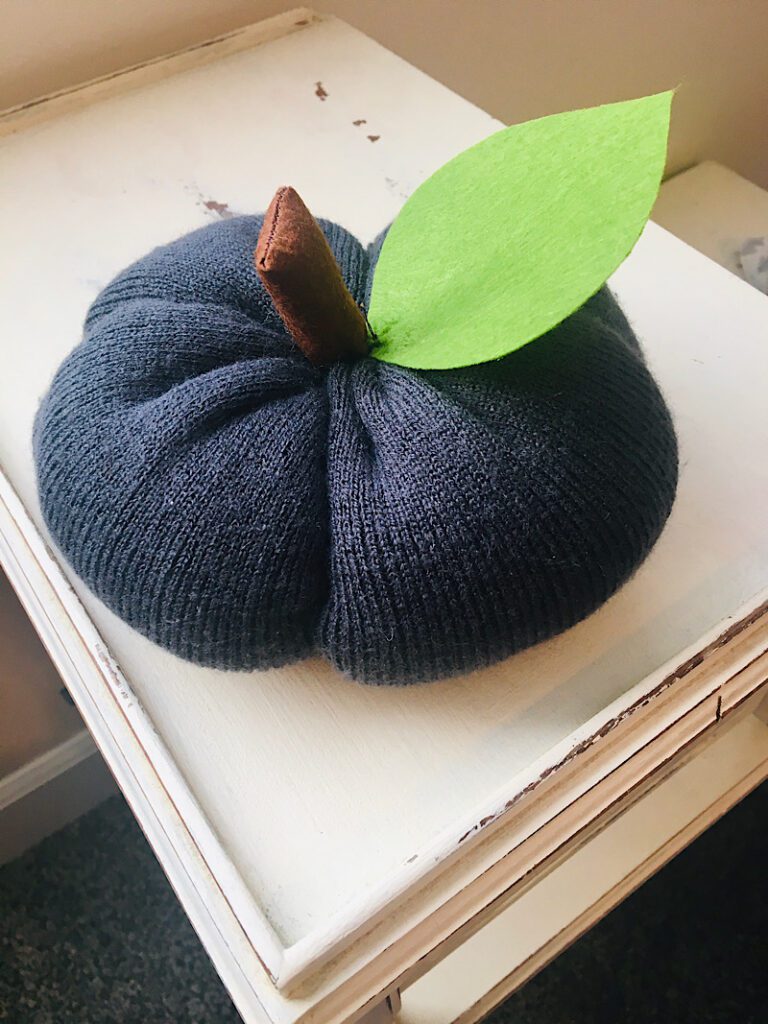
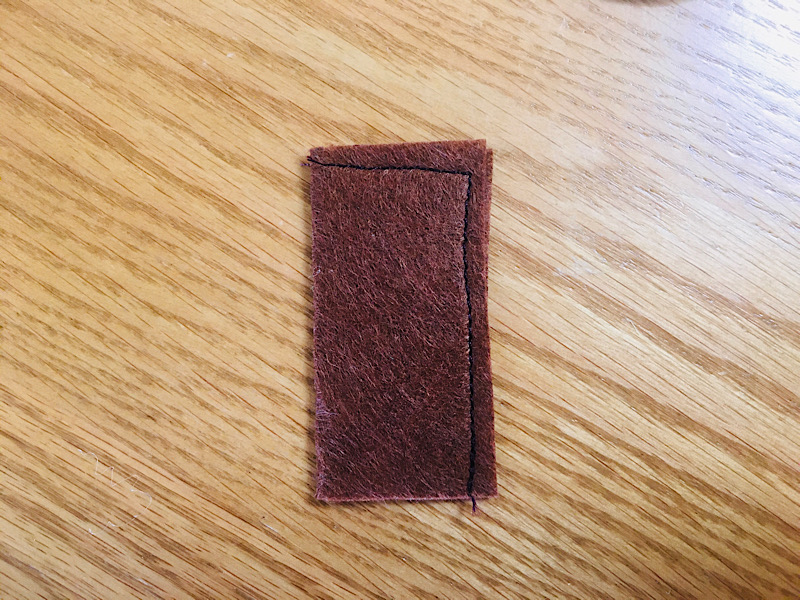
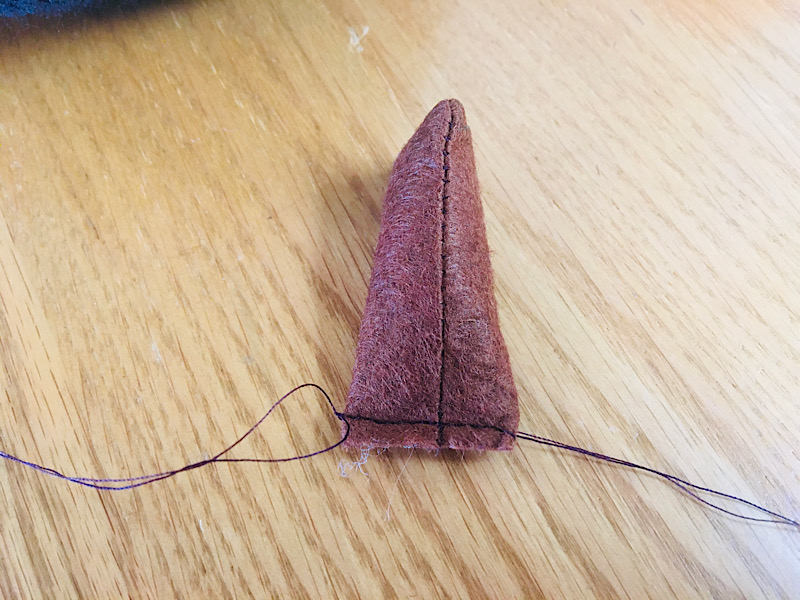
Step 3. Add A Stem
Cut out a 3×3 inch piece of brown felt. Fold it in half and sew the top and side closed.
Turn the stem right side out, and fill it full of stuffing.
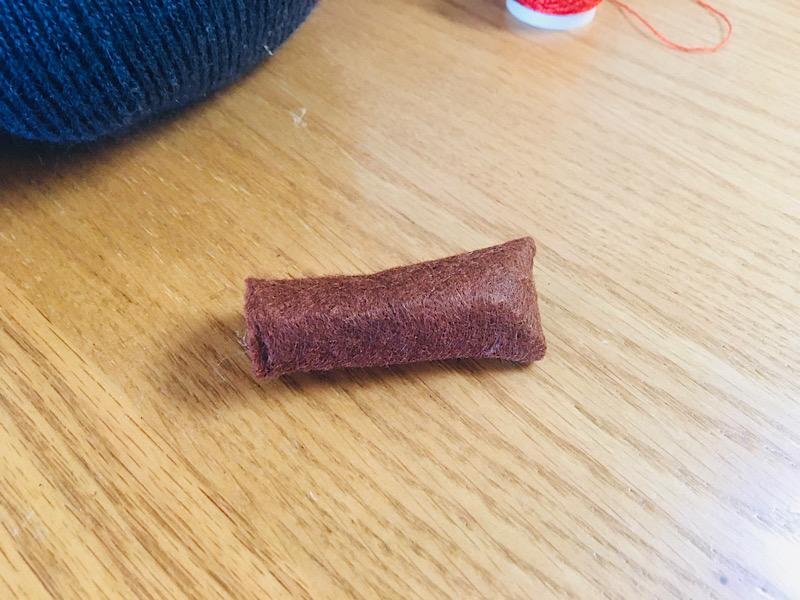
To close the bottom, pinch flat the bottom opposite of the direction the top is sewn. (The seam will end up in the middle of the flat side.) Then sew it closed.
Step 4. Attach Stem and Leaf
Sew the stem to the top center of the pumpkin over the hole. You can insert it into the hole slightly if you want!
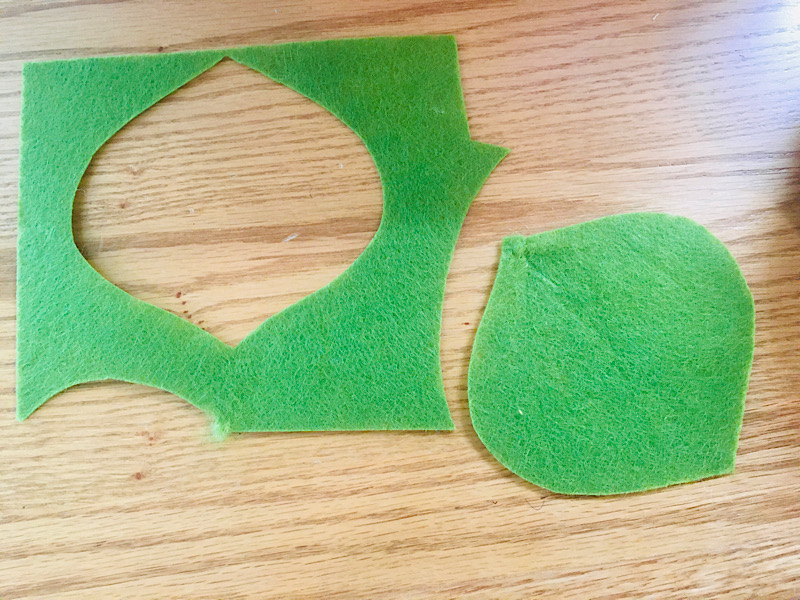
Using your green felt, cut out a leaf shape. I just cut a general leaf shape, but you can make a more pumpkin-y looking one by printing and cutting one out on paper first to trace.
Finally, sew the leaf to the base of the stem!
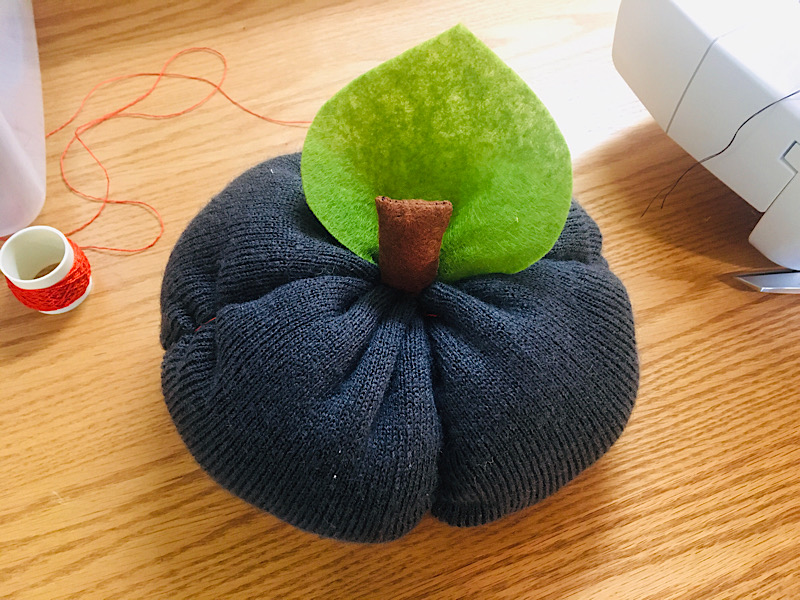
Now you’re done!
It turned out so cute, and what a cheap upcycle! This is a great dollar tree decor hack!!
I also have a short video showing me sew this pumpkin quick:
Let me know if you have any questions, and please pin this post to Pinterest if you want to say “thanks”!