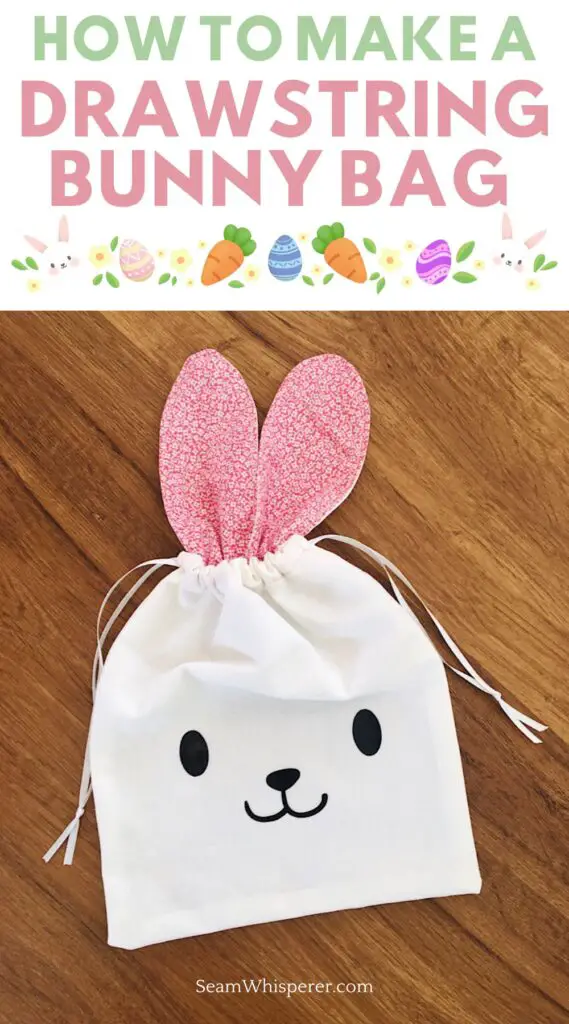
Learn to make an adorable bunny drawstring pouch in two different ways with this free tutorial!
This year for Easter I wanted to try something a little bit different, so instead of Easter baskets I whipped up these adorable little bunny bags for my kids! I made the face of the bunny with heat transfer vinyl using my Cricut machine, but don’t worry, you can also embroider or draw the face if you want!
These bags are easy to make, and very customizable.
This post may contain affiliate links. Read the full disclosure here.
About This Tutorial
These bunny drawstring bags are super cute and are a great way to change up your Easter basket situation. You can make them any size you want, a giatnt bag would be super cool! Today I will show you how to make a medium sized pouch that will fit several little eggs or little gifts.
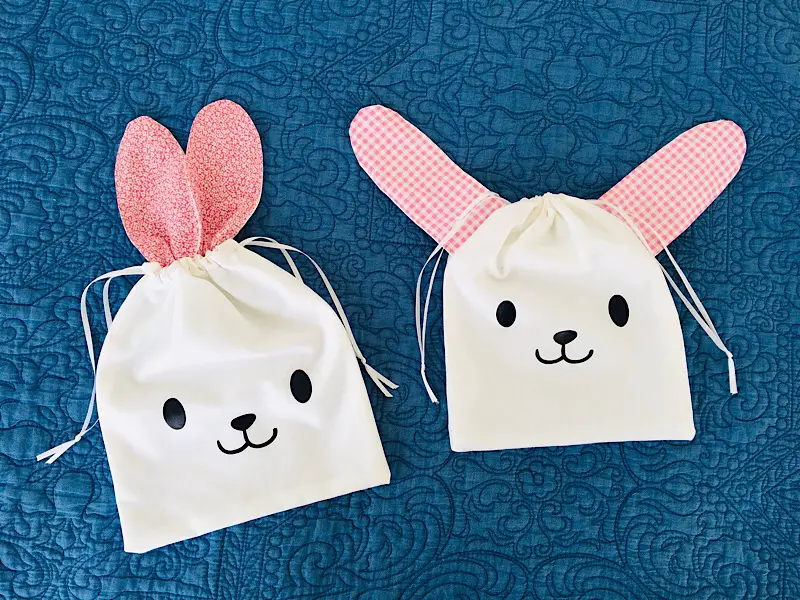
There are two ways to make the ears. You can make them come out of the top of the bag so they bunch together when you pull the drawstrings, or you can make them come out of the top side of the bag. They care both cute, it just depends on what look you like best!
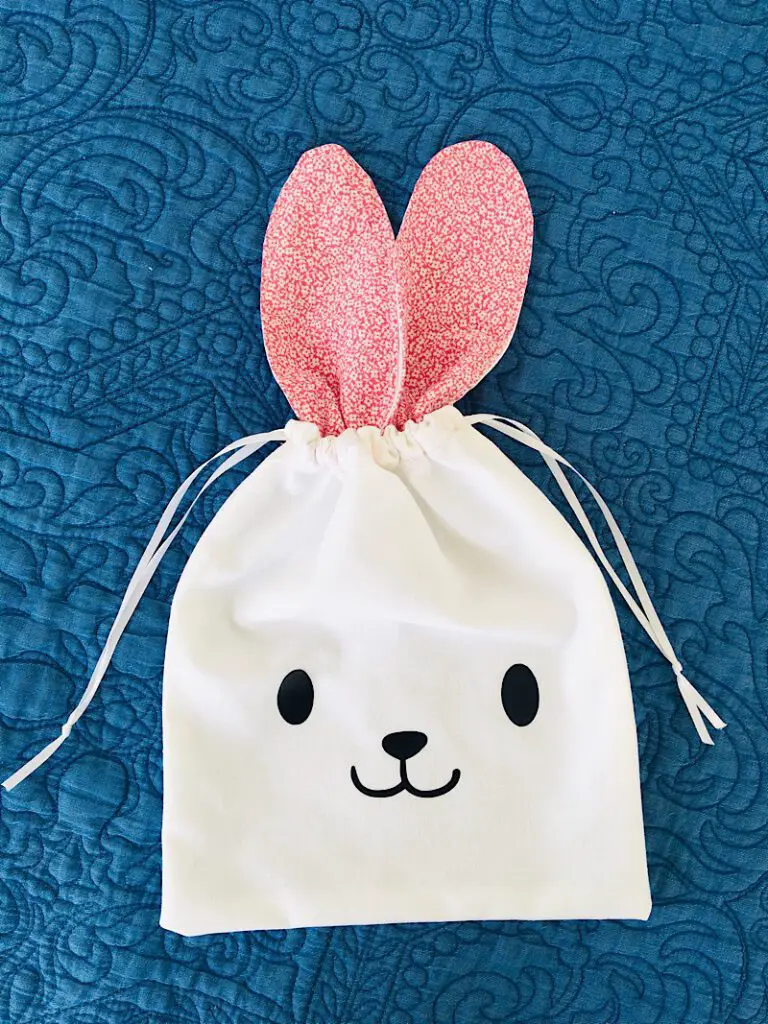
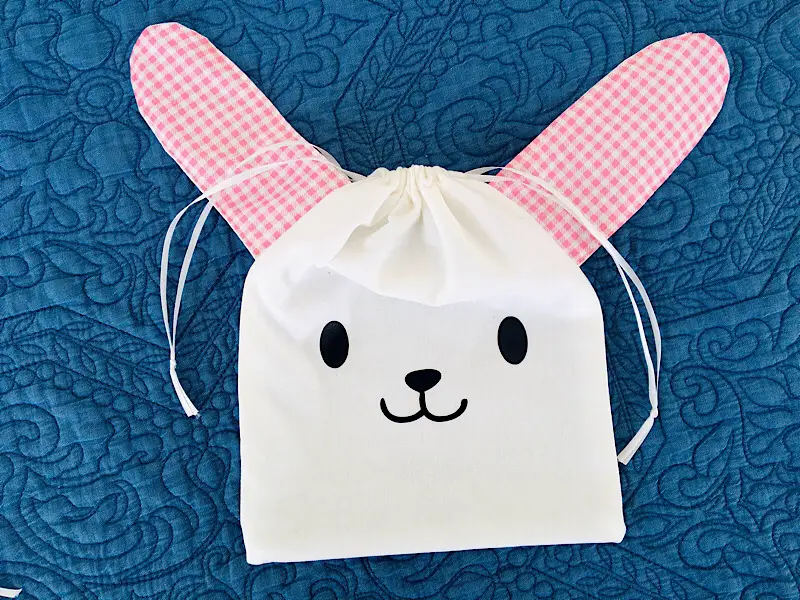
Make sure to read all the instructions before you start to sew, so you can decide which ear style you want.
If you don’t have a Cricut machine and you still want to do the iron on face on your bunny bag, you can order a custom cut vinyl piece. They are inexpensive and lots of Etsy sellers will do it for you! (Here is one option.)
Supplies Needed
- Sewing Machine
- Fabric Scissors
- Rotary Cutter, Mat, and Acrylic Ruler (Optional but recomended)
- Iron
- Safety Pin (To thread the string)
- Cricut machine (Optional, depends on how you want to do the face!)
- Free Bunny Bag Pattern (Download below)
Materials Needed
- Two 8″x10″ pieces of fabric for the bunny bag (white, cream, whatever color you want. I recomend using a mid weight cotton material)
- Two 3″x6″ pieces of the same fabric for the back of the ears
- Two 3″x6″ pieces of pink fabric for the inside of the ears
- A 6″x6″ piece of Black HTV for the bunny face (heat transfer vinyl, also known as iron on vinyl. This is my favorite brand.) You can also buy custom Iron on vinyl if you don’t have a Cricut, here is an example of one place you can buy it from) (OR you can embroider it, draw it, use felt, etc.)
- 2 pieces of string or thin ribbon, 24″ long each
- Matching Thread
Download the Bunny Bag Pattern
You can design your own bunny face if you want, or you can use the one I made! To download it, simply save the image below to your computer. You can then use it to make vinyl or trace it.

How To Make A Bunny Drawstring Bag
Step 1. Cut Out The Fabric
Cut out your materials so there are two 8″x10″ bag pieces, two 3″x6″ ear pieces, and two pink 3″x6″ ear pieces.
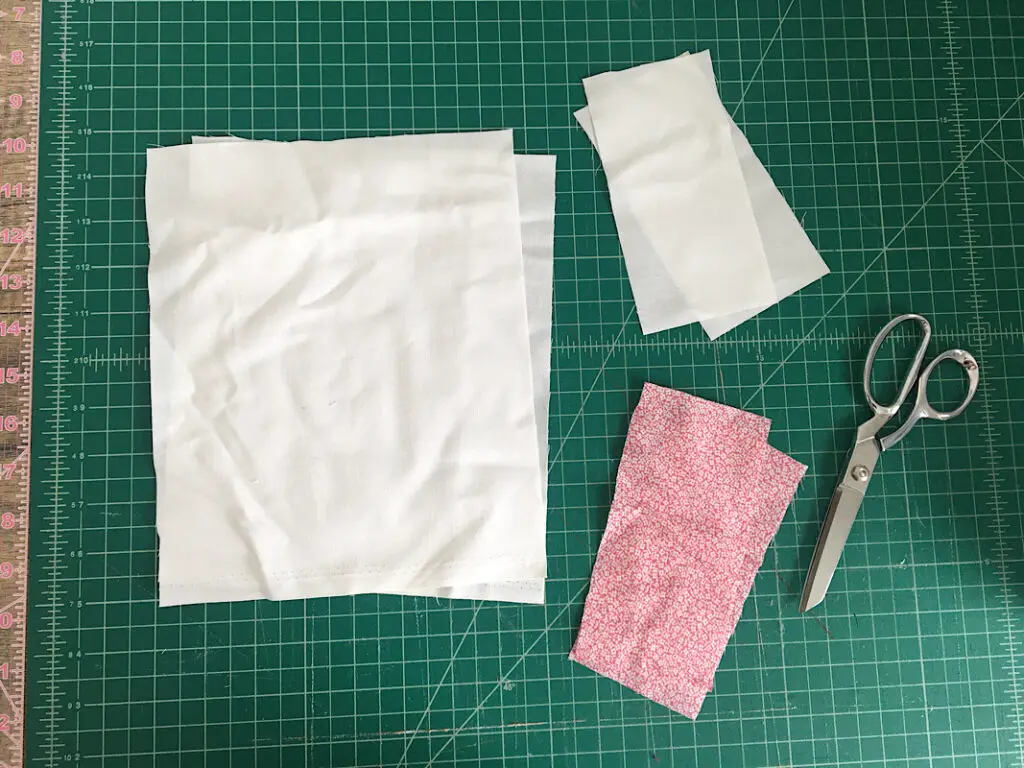
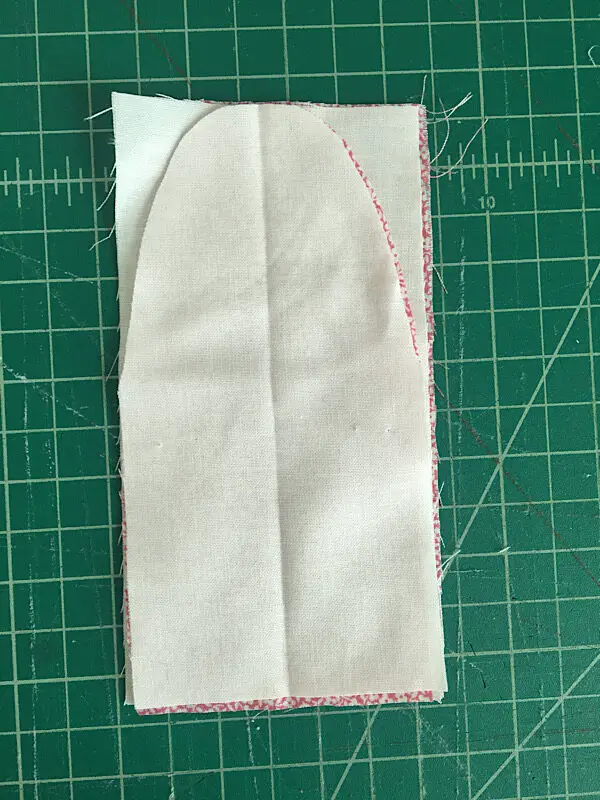
Layer one pink and one white ear fabric together with the right sides toghether. Then, fold it in half so it is tall and skinny. Pin the side if you want.
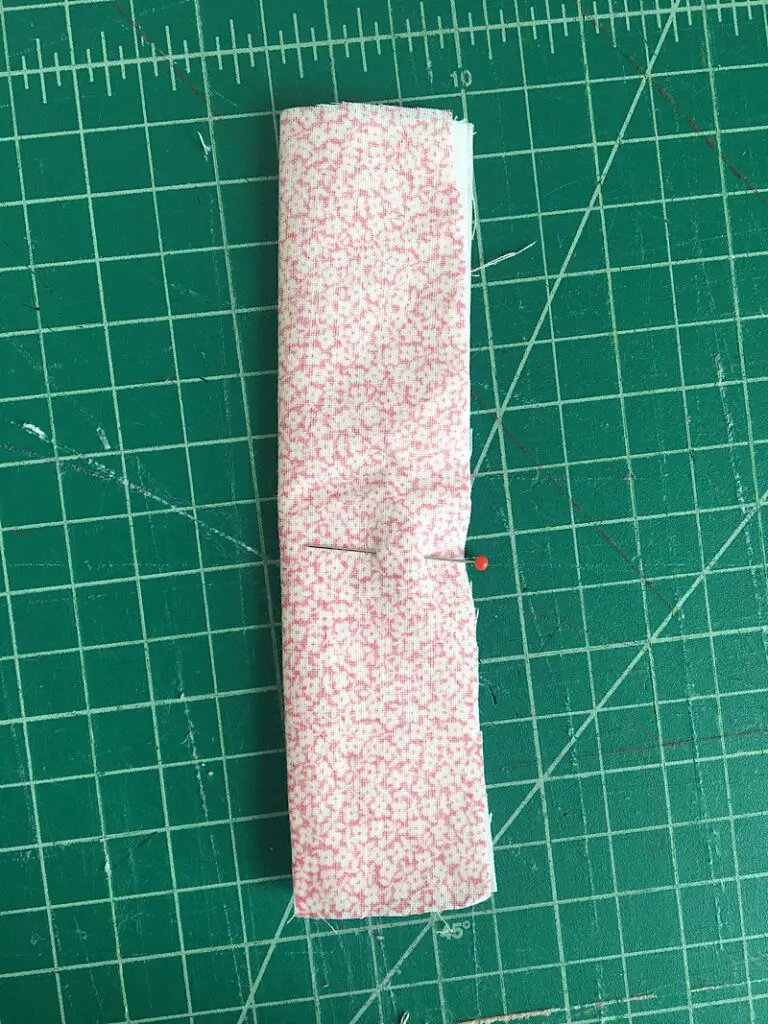
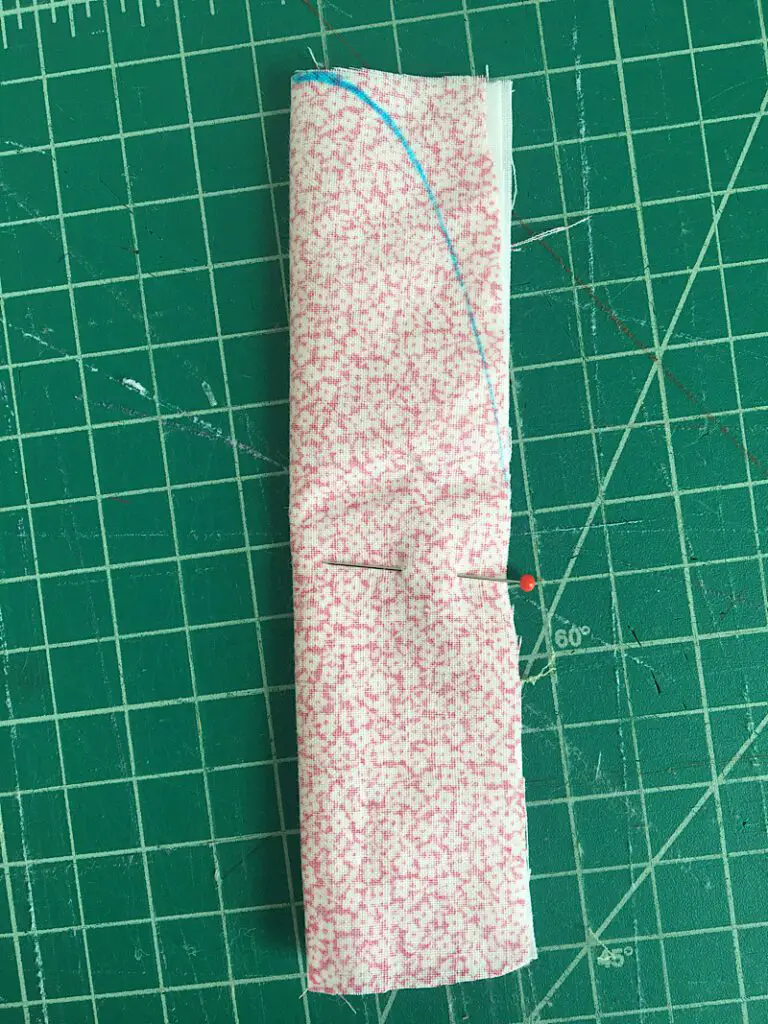
Then, cut along the line.
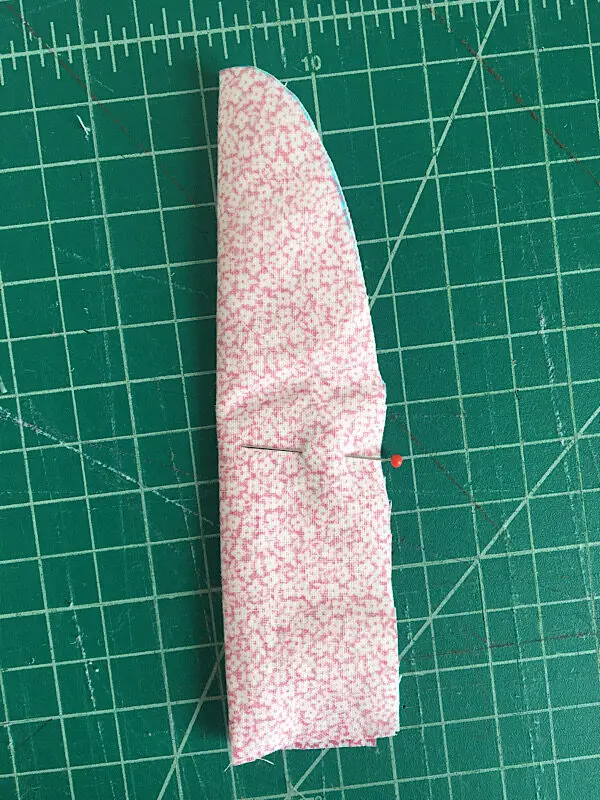
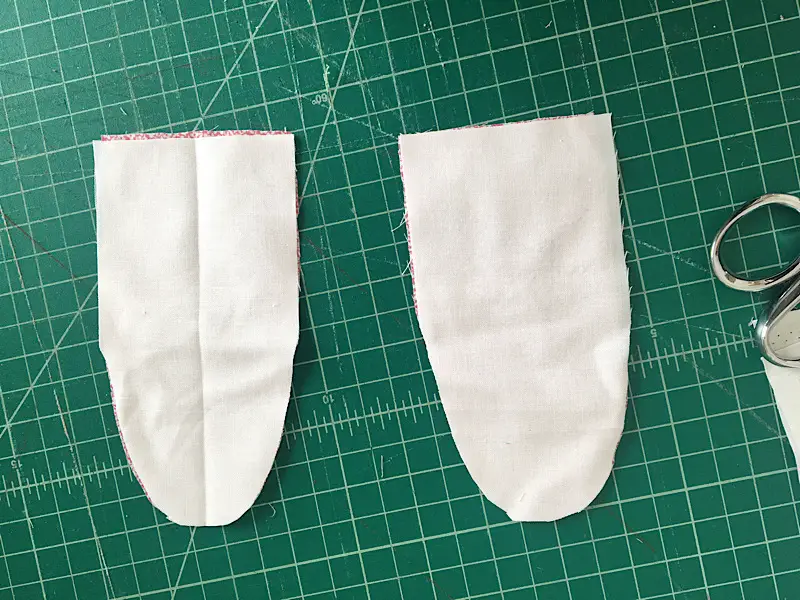
Remove the pin and unfold the fabric, you now have your ear shape.
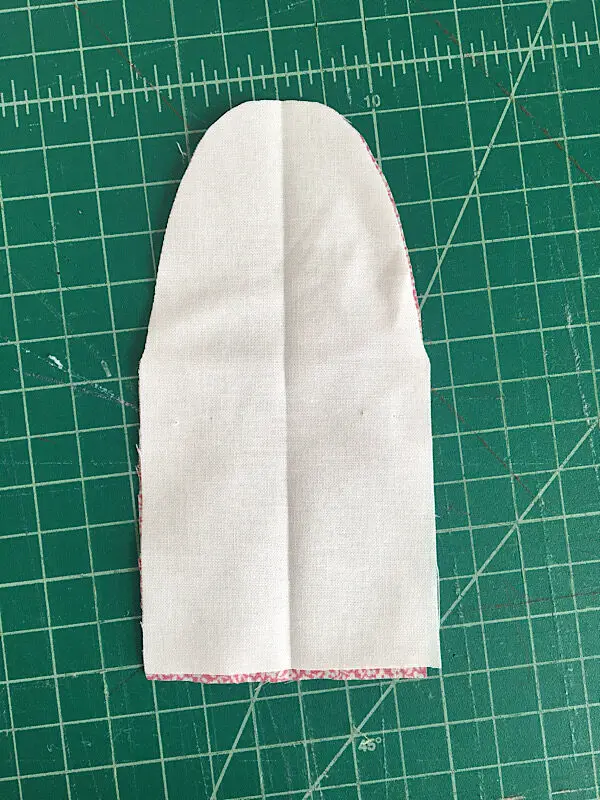
Layer the other two ear pieces with right sides together, and then use the cut ear shapes to trace on the other rectangle fabric pieces to cut out the other ear pieces.
You will then have 4 cut ear pieces that are all the same.
Step 2. Sew The Bunny Ears
Your bunny ears should both be layered with one white and one pink piece, with right sides together. Pin them so they don’t shift as you sew.
Sew around the curve of each ear with a 3/8ths inch seam allowance.
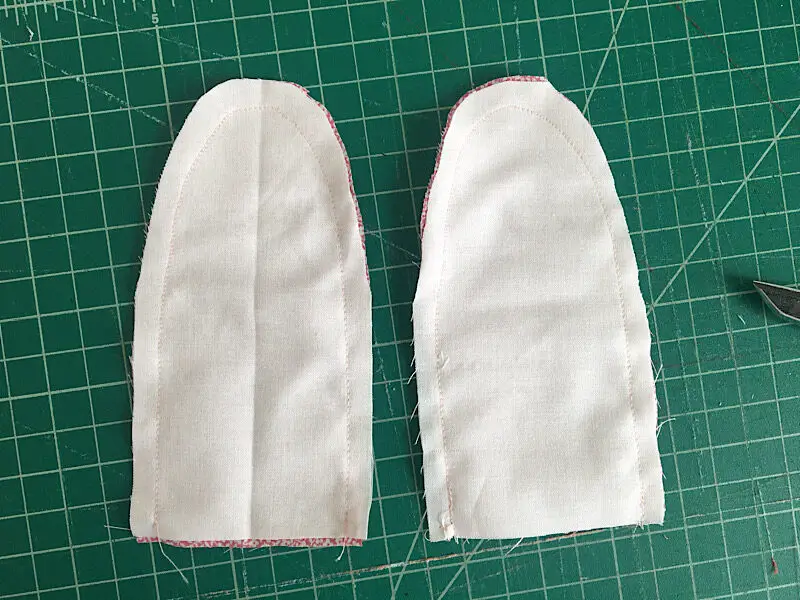
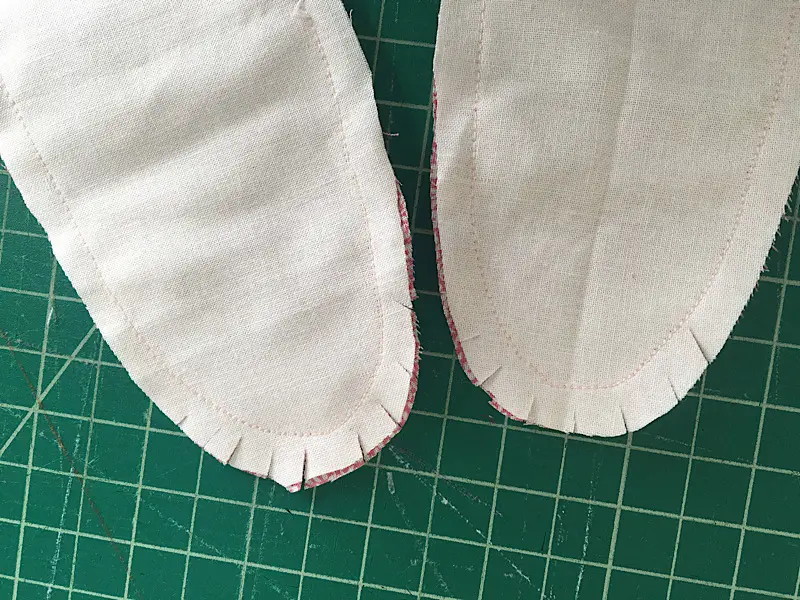
Then, clip and notch along the top curve of the ears to make them easier to turn later.
Turn the ears inside out. Insert a long blunt object to shape the ears and smooth out the seams.
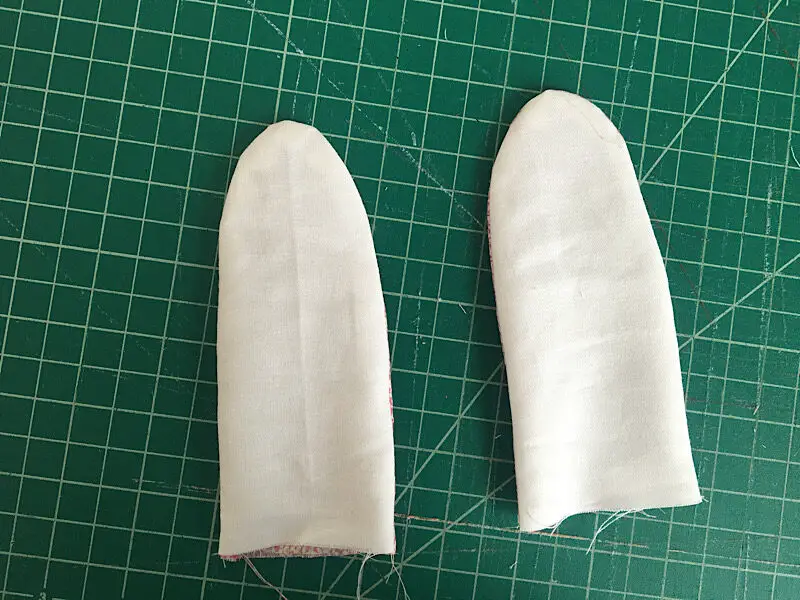
Then, sew a topstich along the edge of the ears with a 1/8ths seam allowance.
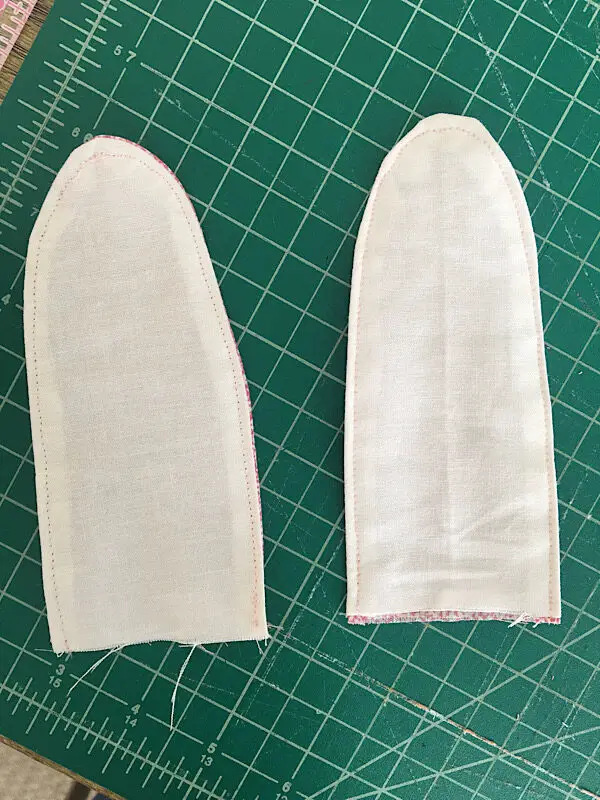
** IMPORTANT NOTE: If you intend to make the bunny’s face with embroidery or applique, then you will need to add the face BEFORE you sew both sides of the bag together. If you are going to draw it on or use HTV like I did, then proceed as follows and add the face after the bag is sewn.
Step 3. Sew The Bag Together (With Ears On Top)
This step will show you how to sew the bunny bag style with the ears on TOP. If you want your ears on the side, skip to step 4.
Layer the two bag pieces of fabric together with the right sides together, and pin them together.
From both top corners, measure down 1.4 inches and make a mark.
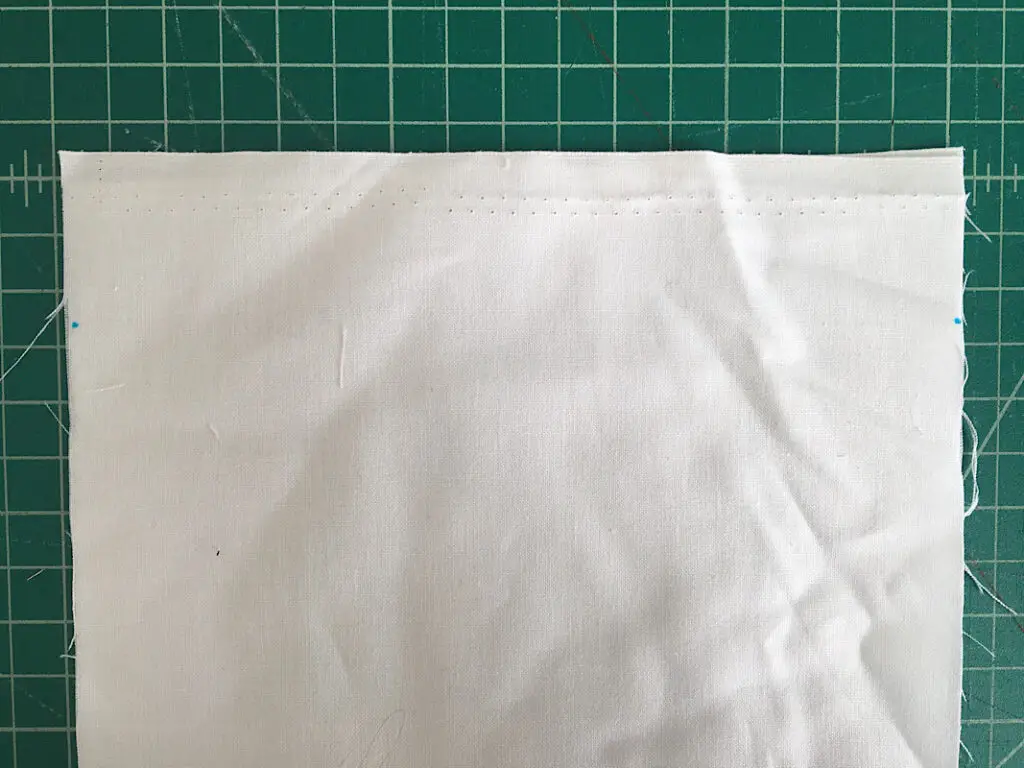
Sew the sides and bottom of your bag with a 3/8ths inch seam allowance. Start at one of the marks you made, sew down the side, pivot at the corner to sew accross the bottom, pivot again at the next corner, and sew up the other side, stopping at the second mark.
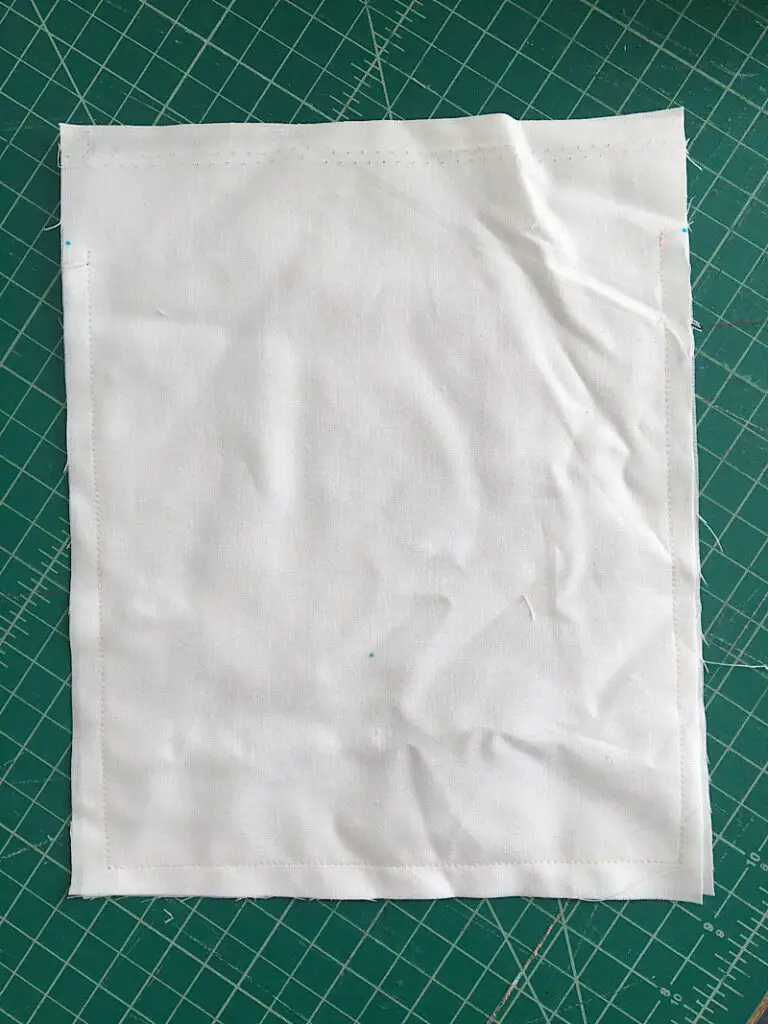
Carefully clip into the edge of the bag at each mark, only about 3/8ths inches in. Don’t cut your stitch line.
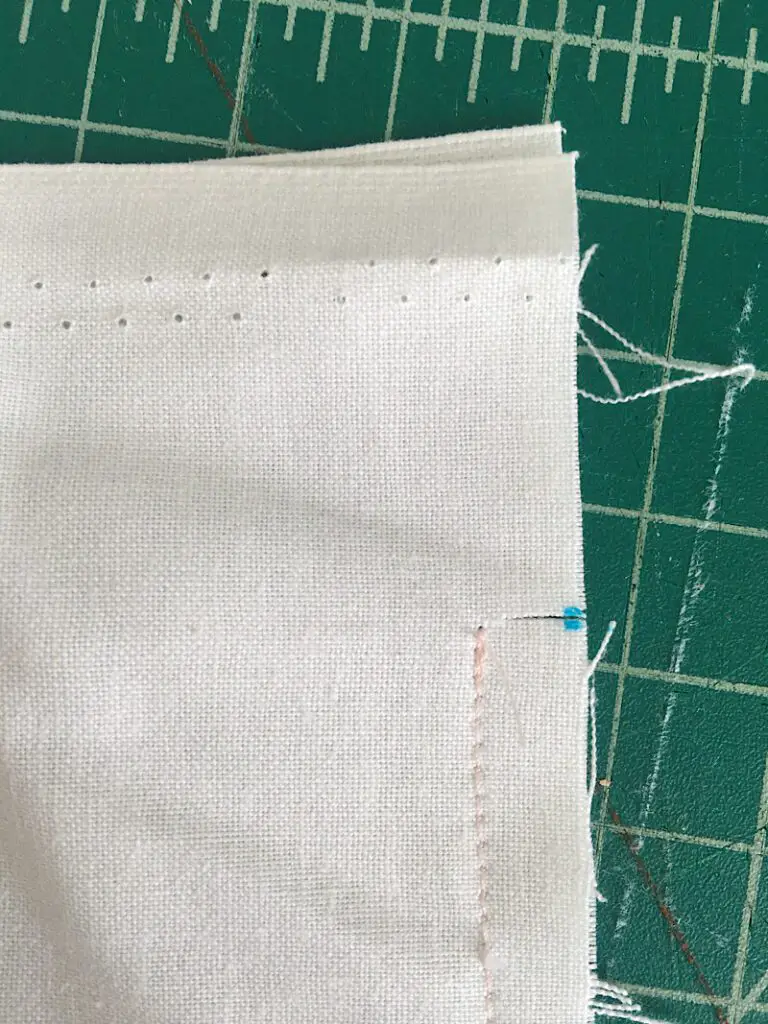
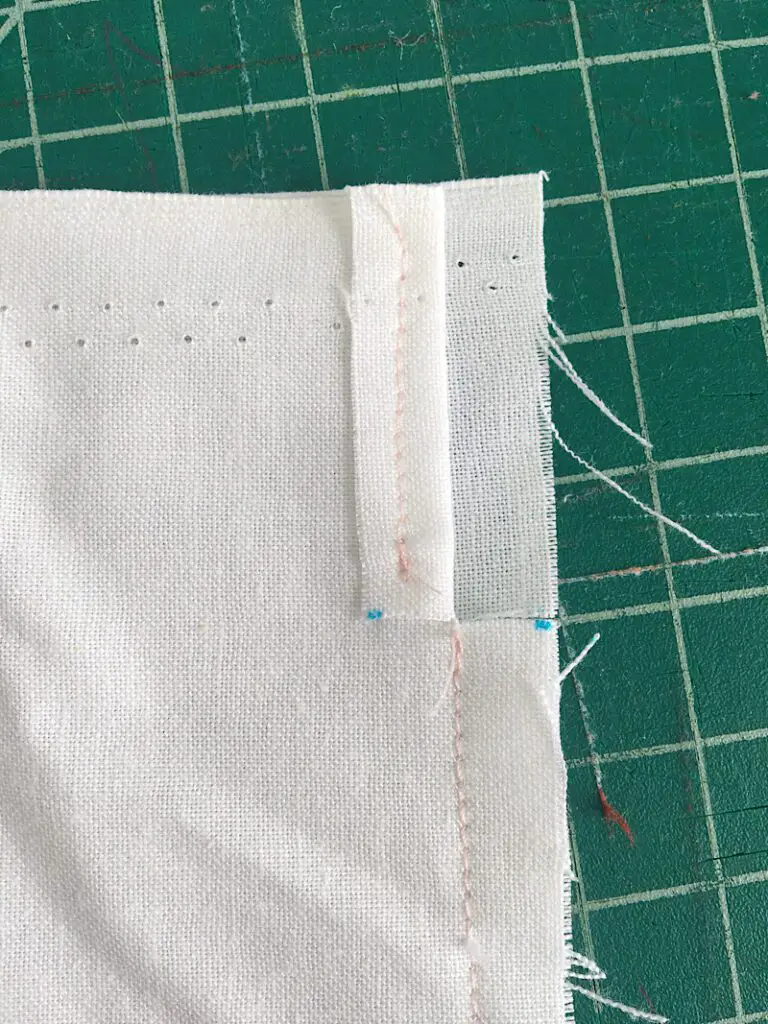
Repeat this with the other 3 flaps until your bag looks like this:
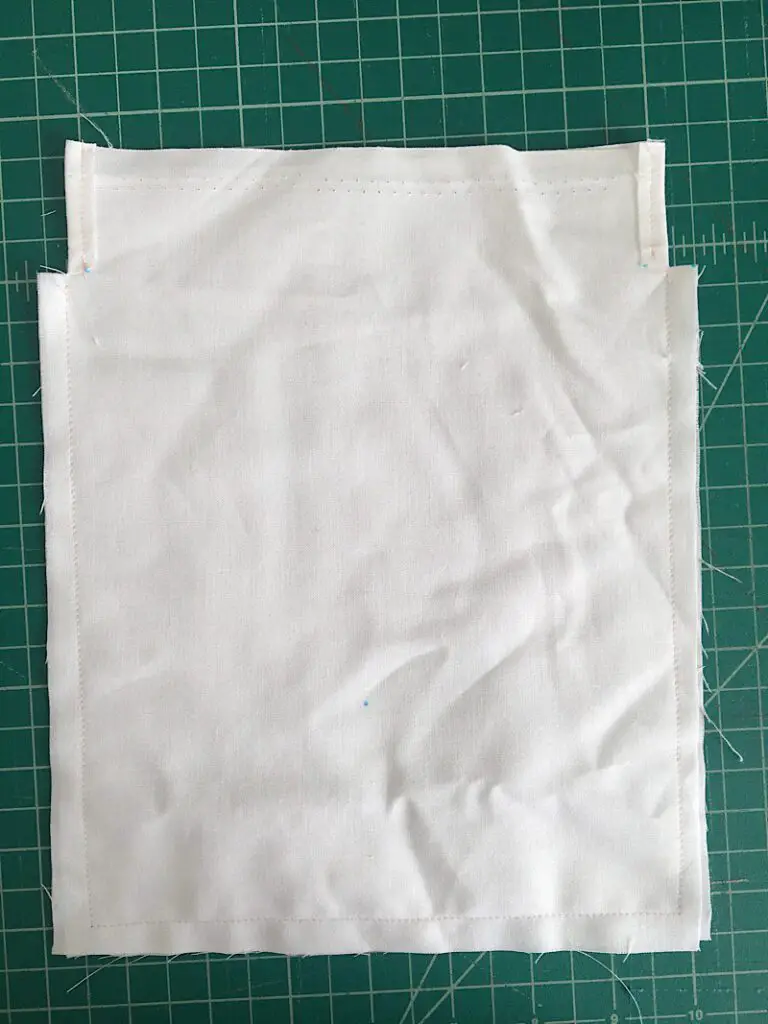
To finish the top edge, fold it down about 1/4 inch, and then again half an inch or so, to hide the raw edge inside the fold. The bottom of the fold should stop right at the top of the side stitch line. Pin it in place.
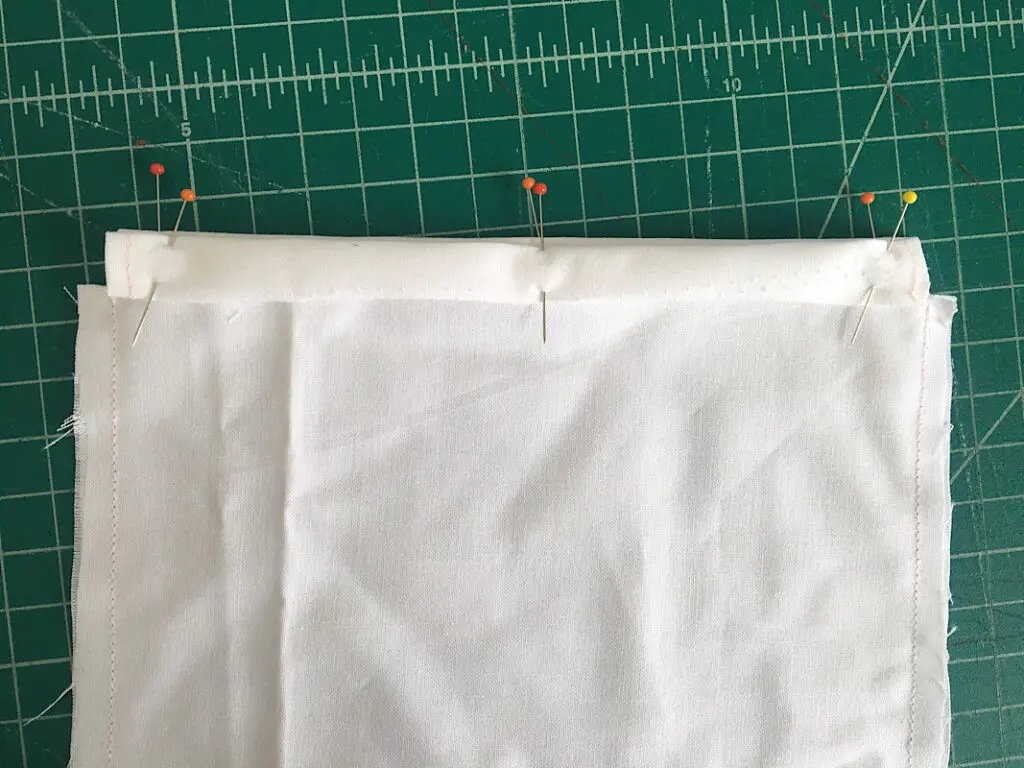
Next, carefully insert both bunny ears under the fold you just made. Make sure the ears are pushed all the way up. It doesn’t matter which way you face them, just make sure they are both the same. Then pin the ears and the fold in place.
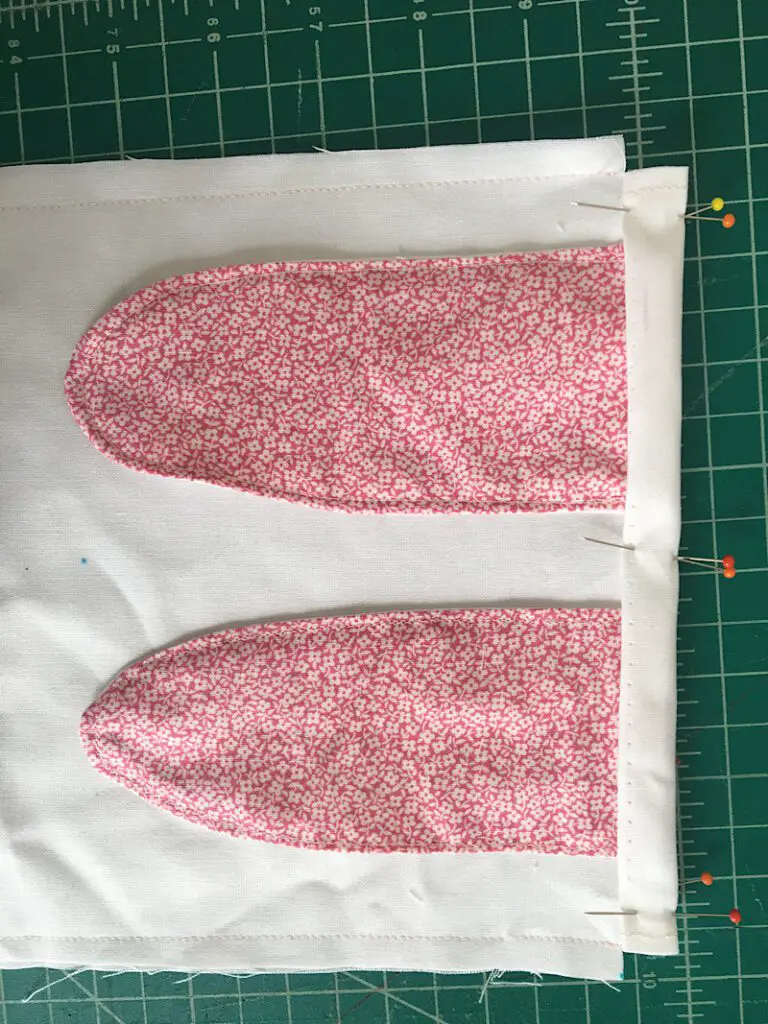
Then, sew along the bottom edge of the fold to close the fold and attach the ears. Also sew along the fold on the other side without the ears.
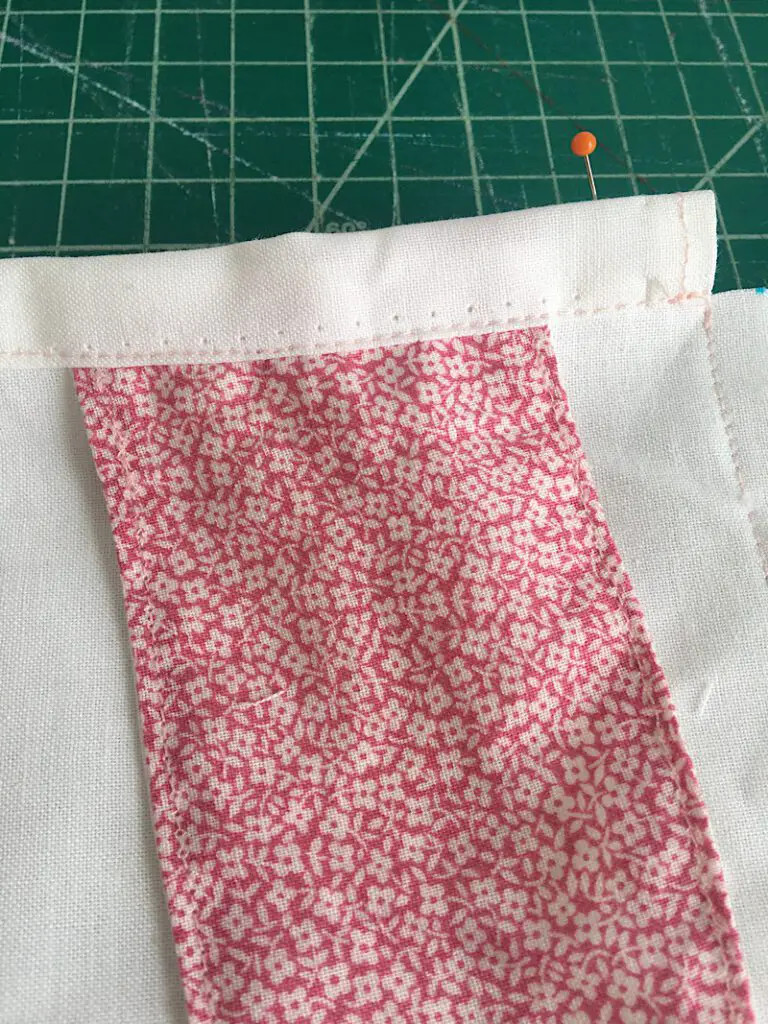
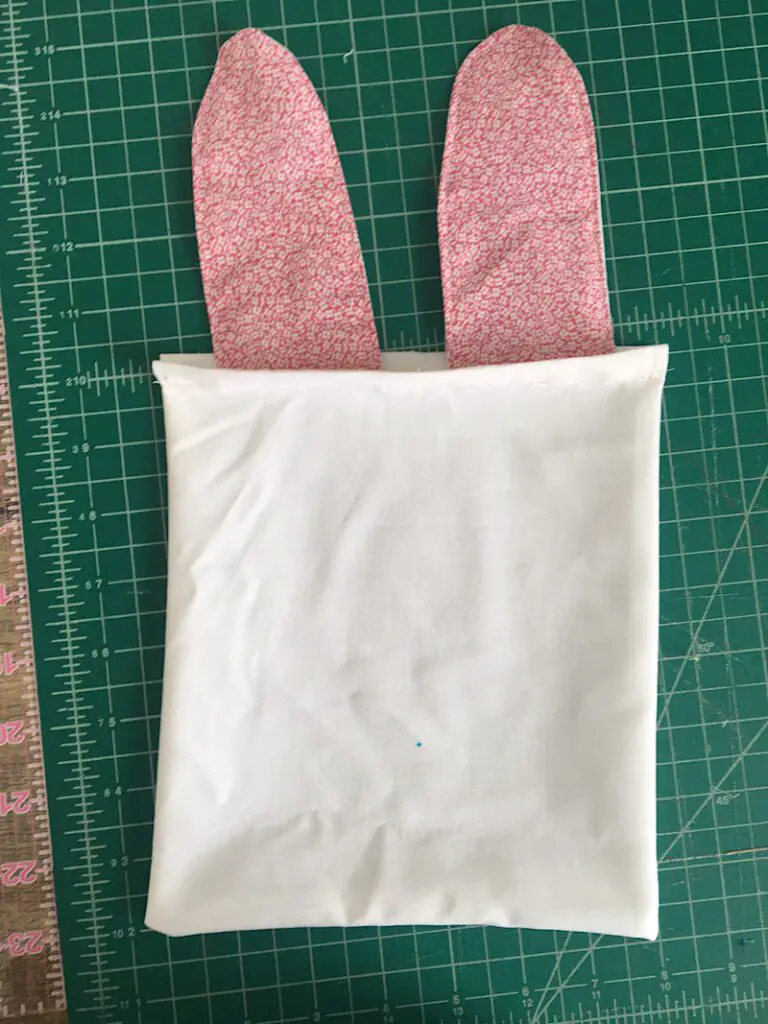
Turn your bag right side out, and pull the ears out so they are pointed up!
Step 4. Sew The Bag Together (With Ears On The Side)
This step will show you how to sew together the bag with the ears on the sides. If you already made the ears-on-top style, you can skip to step 5 to insert the drawstring.
Layer the two bag pieces of fabric together with the right sides together, and pin them together.
From both top corners, measure down 1.4 inches and make a mark.

Fold down the top piece of fabric, and lay each ear horizontally with the raw edges lined up with the two sides of the bag, right below where the marks would be.
Fold up the top layer and pin it all together.
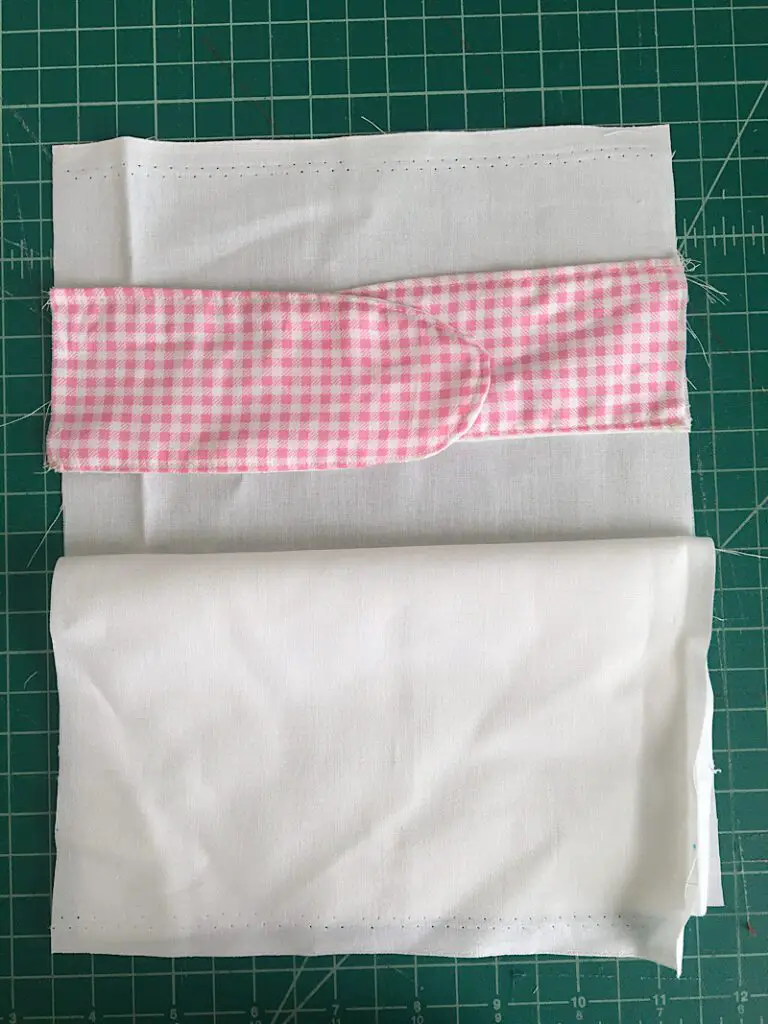
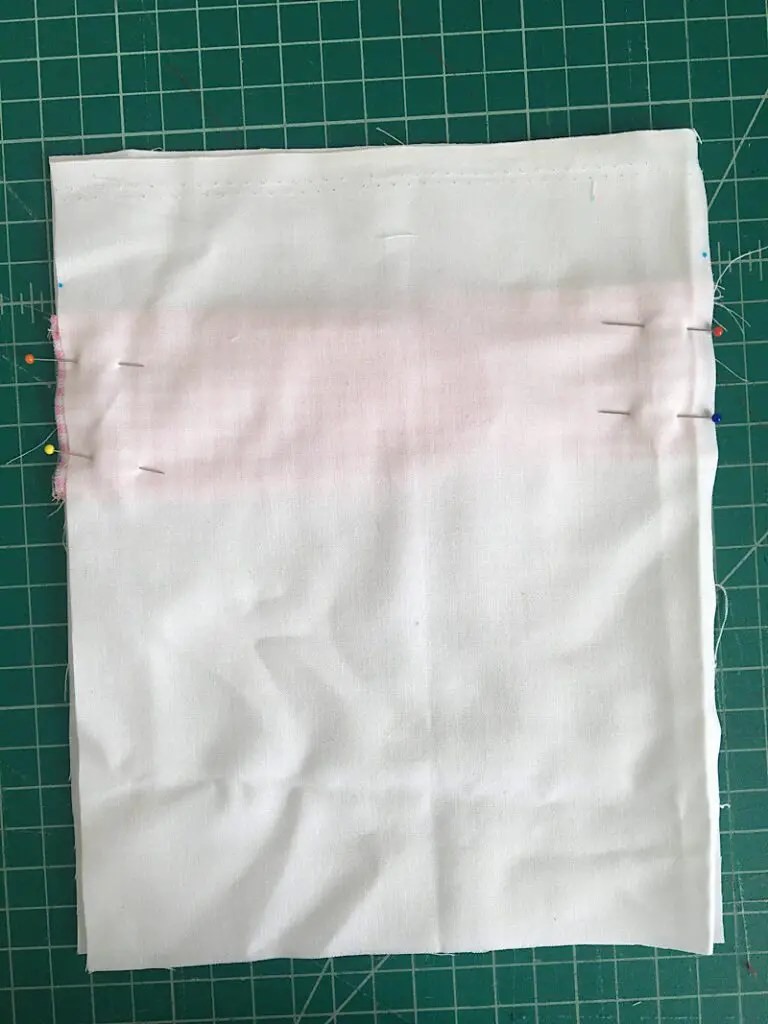
Sew the sides and bottom of your bag with a 3/8ths inch seam allowance. Start at one of the marks you made, sew down the side, pivot at the corner to sew accross the bottom, pivot again at the next corner, and sew up the other side, stopping at the second mark.

Carefully clip into the edge of the bag at each mark, only about 3/8ths inches in. Don’t cut your stitch line.


Repeat this with the other 3 flaps until your bag looks like this:

To finish the top edge, fold it down about 1/4 inch, and then again half an inch or so, to hide the raw edge inside the fold. The bottom of the fold should stop right at the top of the side stitch line. Pin it in place.

Sew along the bottom fold on both sides of the bag. Then, flip the bag right side out to see how the ears look.
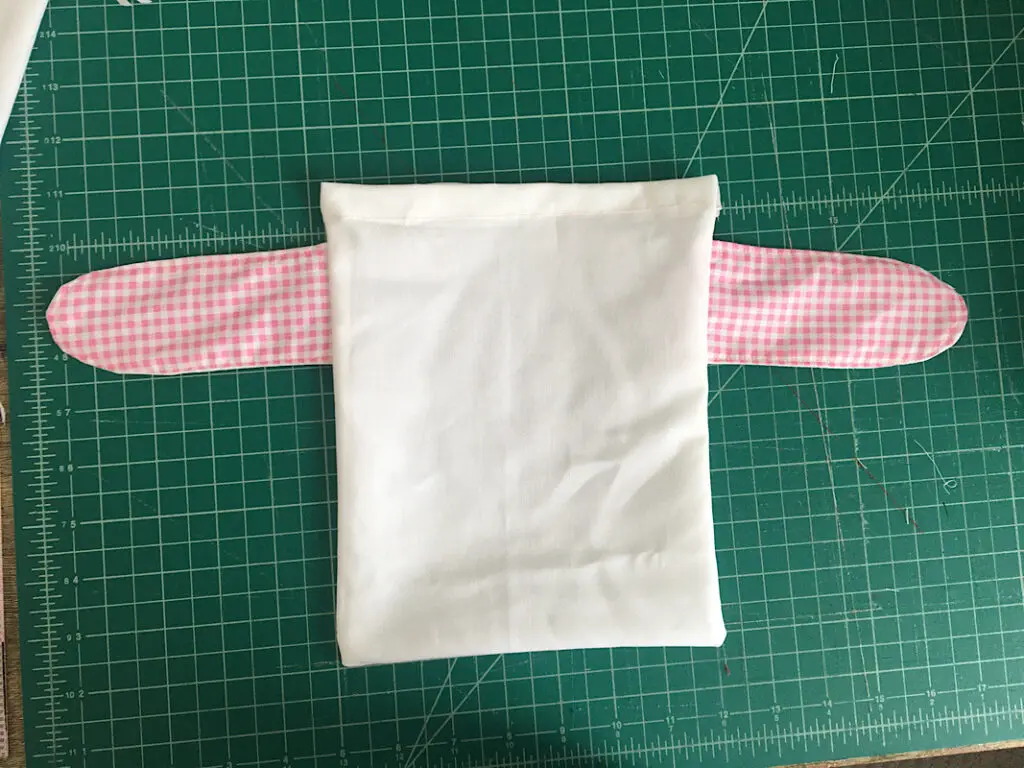
Now you are ready to insert the drawstring!
Step 5. Insert The Drawstring
No matter which style of bag you made, the drawstring is made the same way.
Attach a safety pin to one end of the string. Insert the string through one side of the bag, around and back through the other side. Both tail ends of the string should end up on the same side.
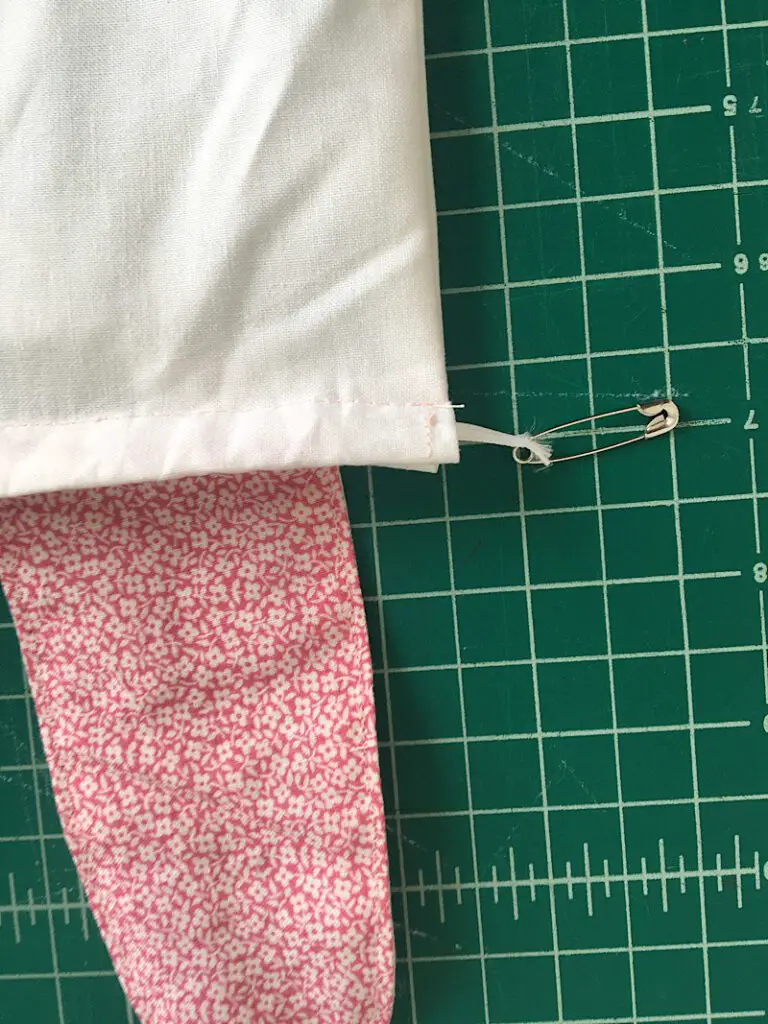
Make sure your bag is flat and not bunch up at all, then tie both the string ends together in a knot.
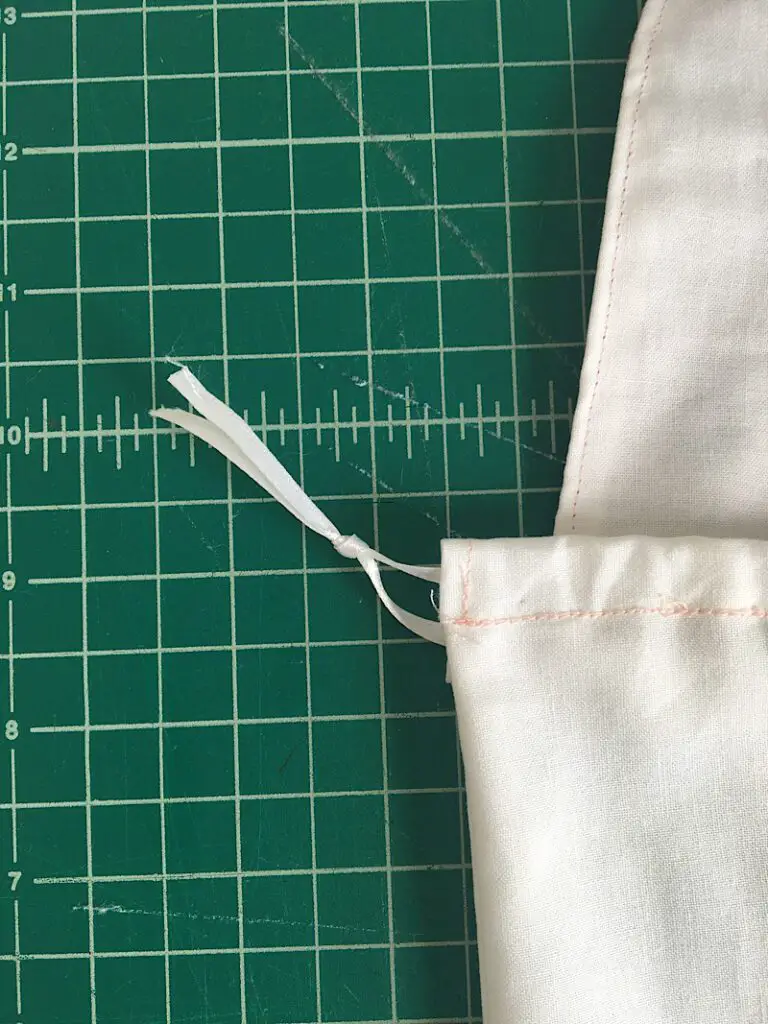
The second string is inserted the exact same way, but the tails of the string should end up on the other side of the bag.
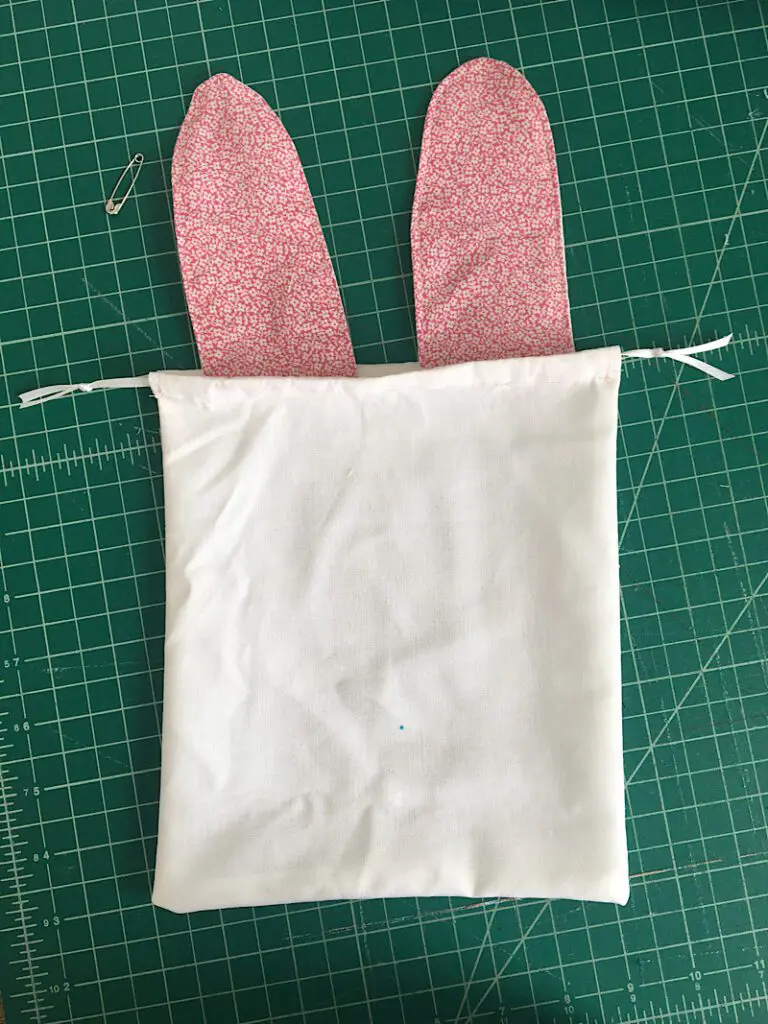
You can trim the ends if you need to.
Then, when you pull the strings the bag cinches closed and looks like this!
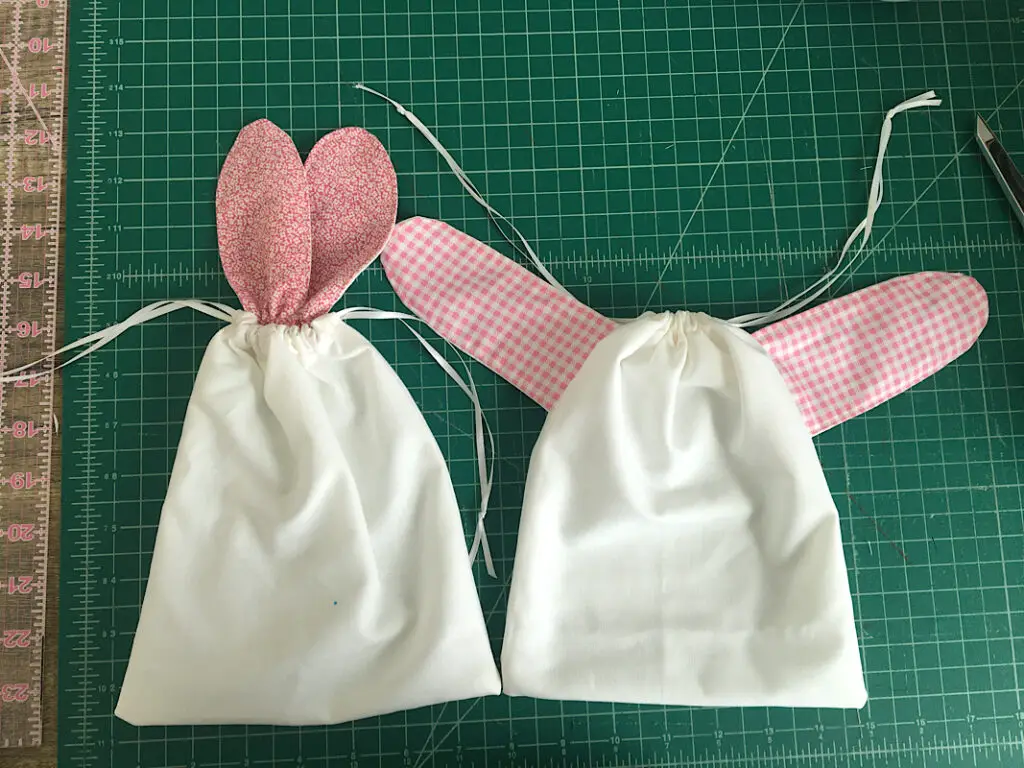
So cute!
The last step is to add the iron on face!
Step 6. Iron On The Bunny Face
Open up the bags and flatten them out on an ironing board.
Cut and prepare your iron-on vinyl according to it’s specific directions. If you haven’t downloaded the bunny face, you can find the image at the beginning of this tutorial.
Center the bunny face on the bag, a little bit towards the bottom. Make sure the shiny side of the vinyl (the backing) is facing up.
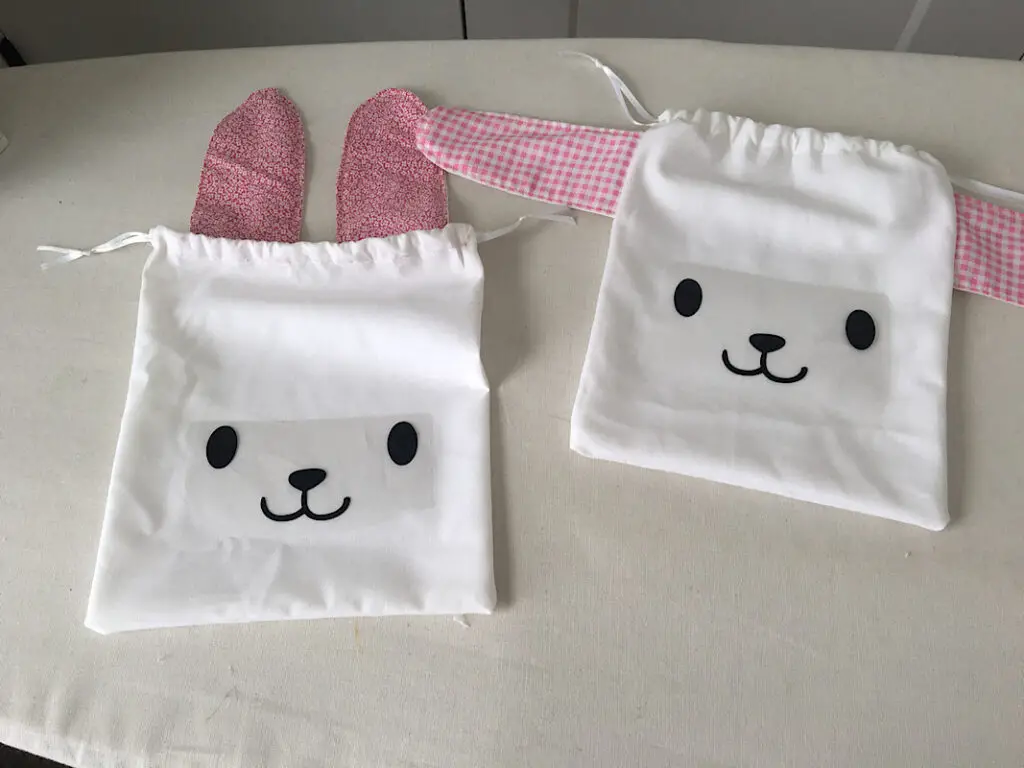
Then, iron on the vinyl according to it’s directions. Peel off the backing to reveal the completed bunny face!
Conclusion
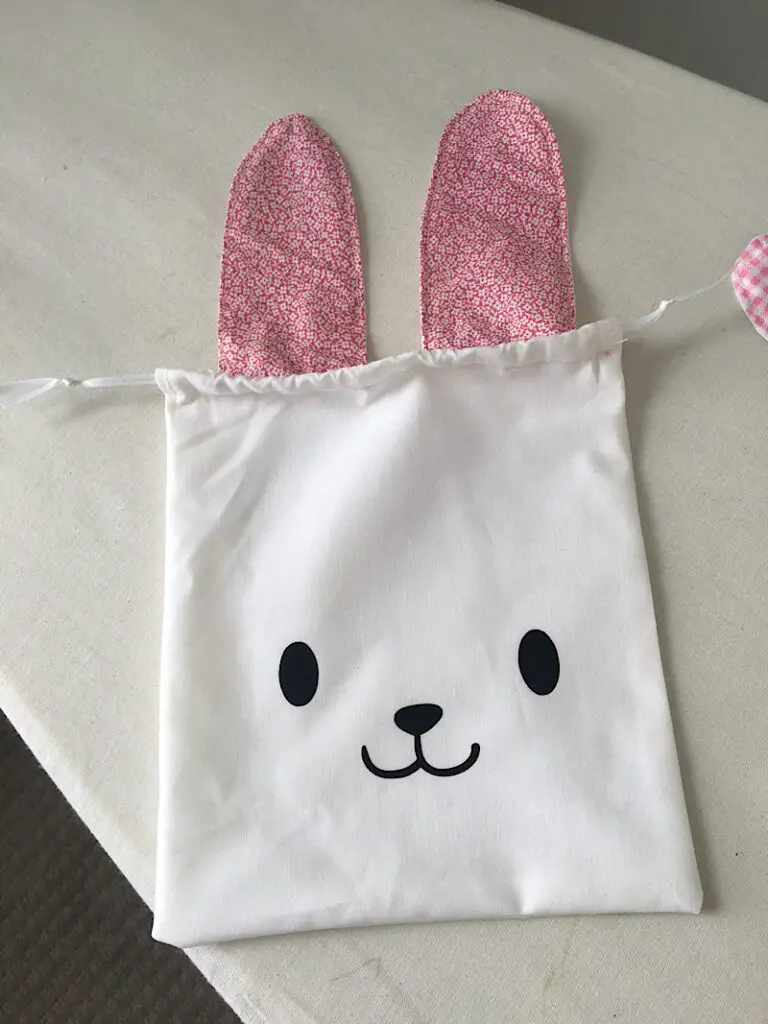
This completes your bunny drawstring bag! Let’s see how they look when they are done…
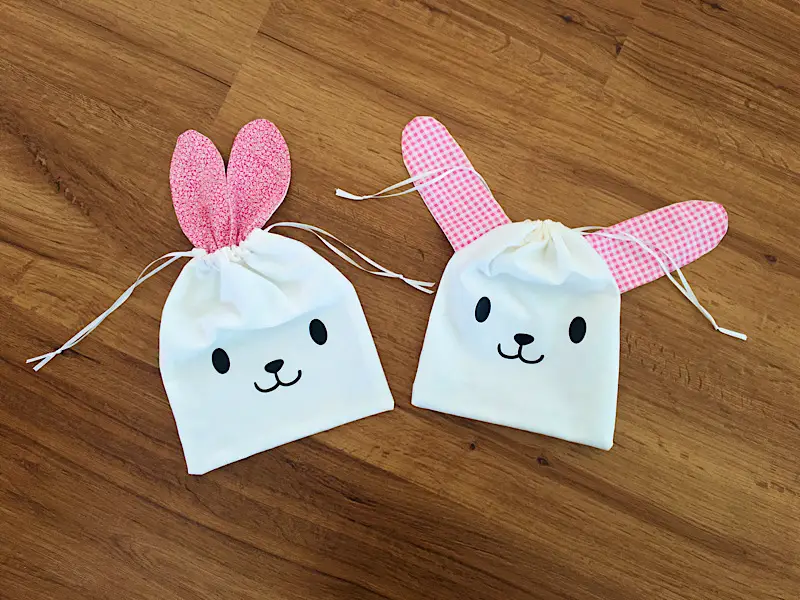
I am so obsessed with how they turned out, the are so cute!!
These bags are so easy, you will be getting all sorts of ideas of how to customize them. Here are a few ideas I had:
- Add a pom-pom tail to the back of the bunny
- Use a velvetty material for the inside of the ears
- Use spring colored fabric to make a pastel bunny
- Add whiskers and a pink nose
- Making a large backpack version!
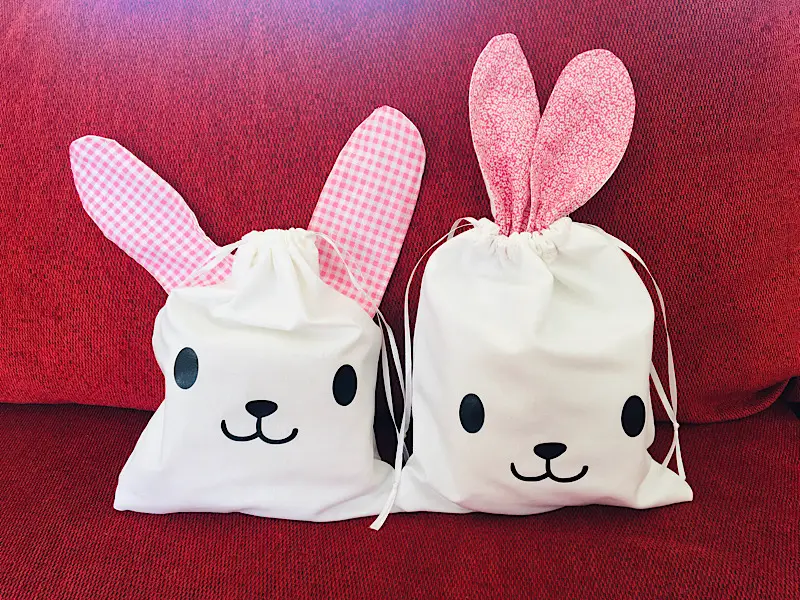
Which version of the bunny bag do you like best? One of them almost looks like a sheep to me… that would be a cute easter bag too!
Pin this post if you loved it, and make sure to sign up for my email list for more free sewing content.
