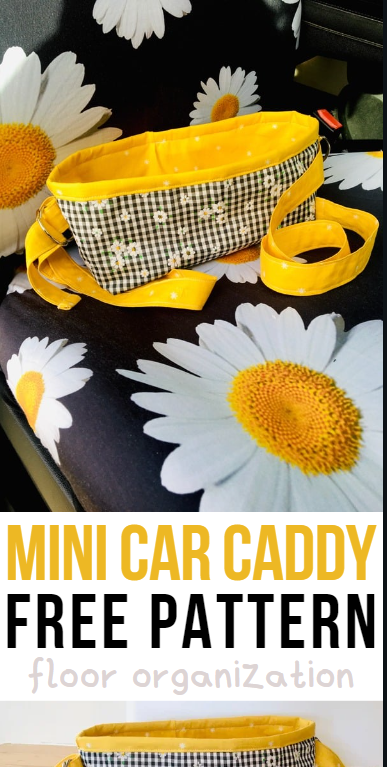
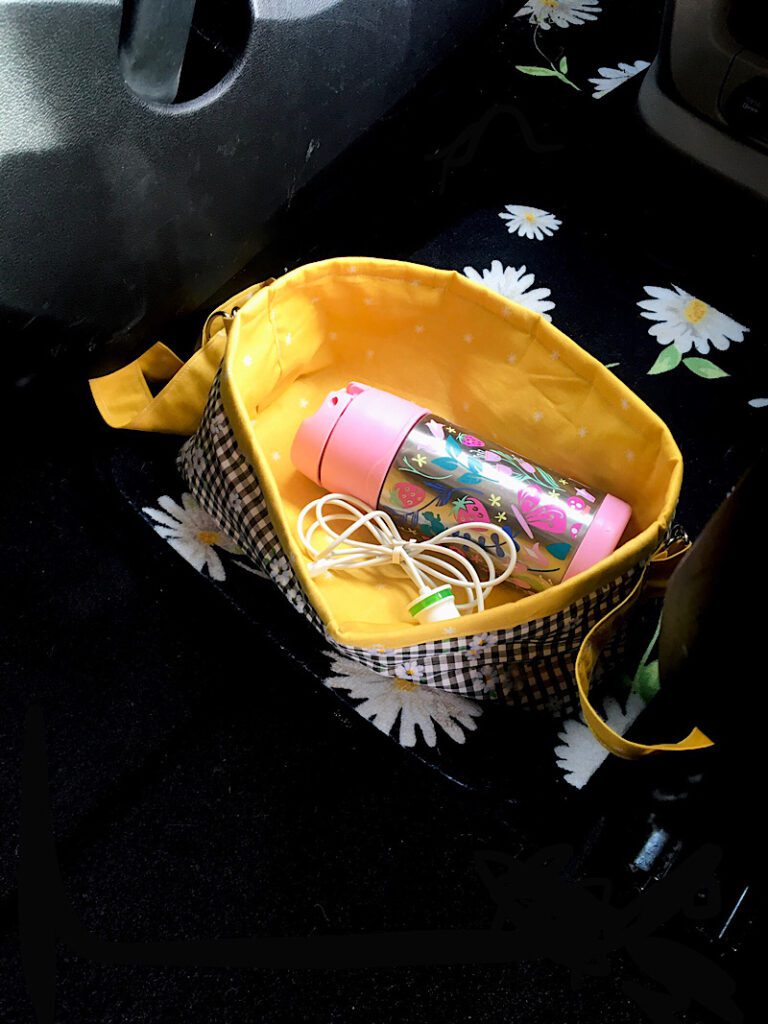
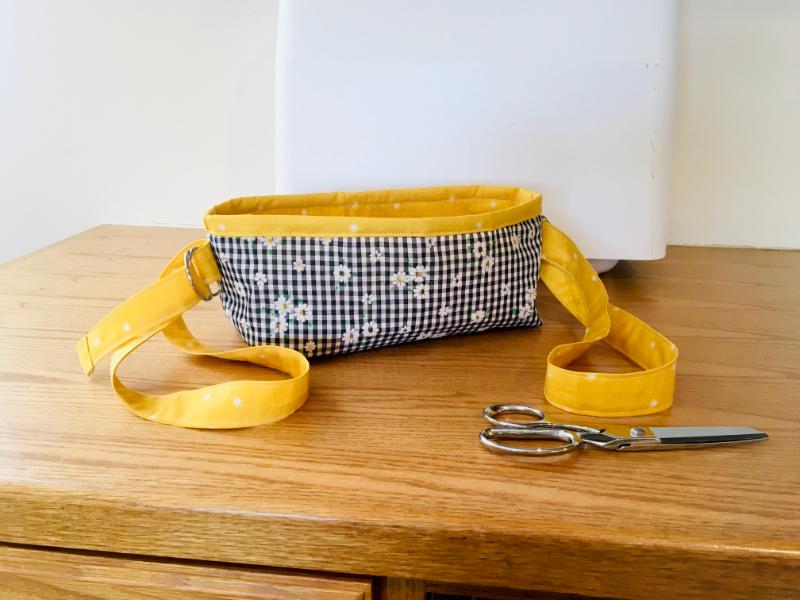
Need more storage space in your car? Learn how I made this cute mini sized car caddy to organize my odds and ends while looking adorable!
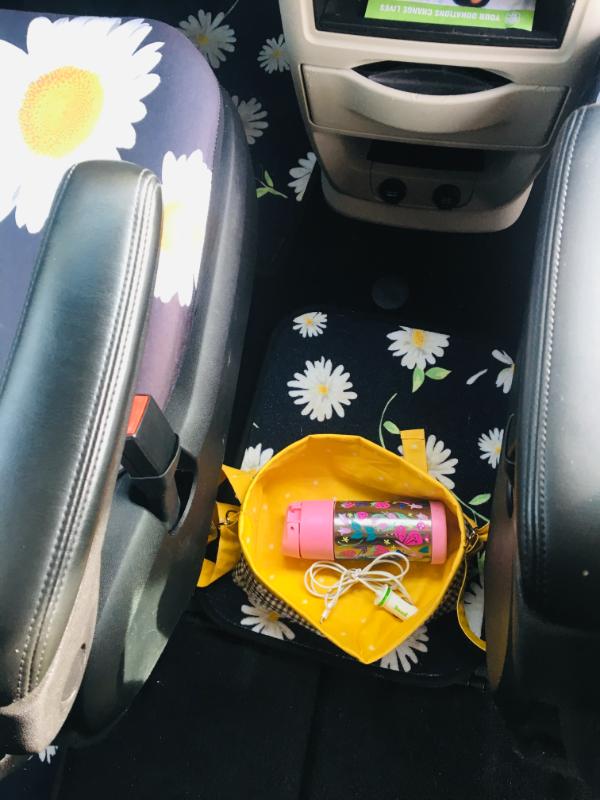
My minivan doesn’t have a center console, which has been driving me slightly crazy when I want to place a cord or scrunchie somewhere close without it sliding all over the floor….
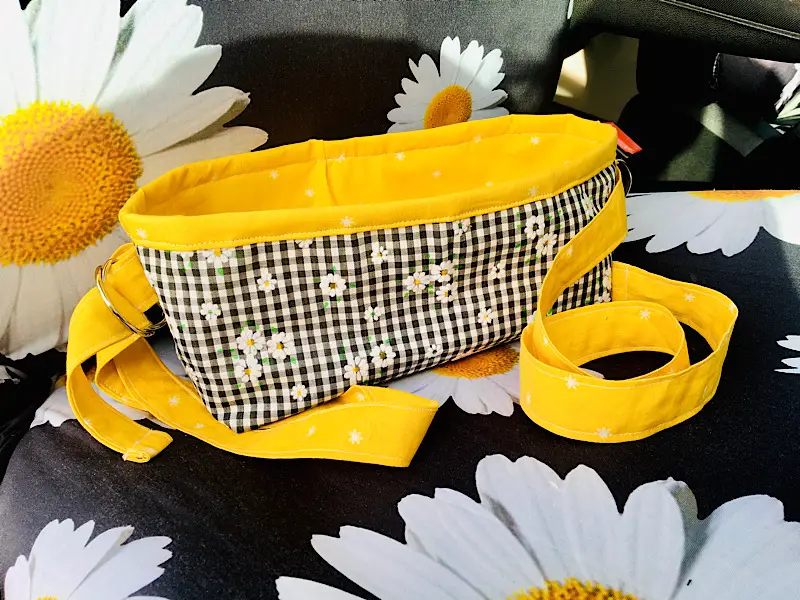
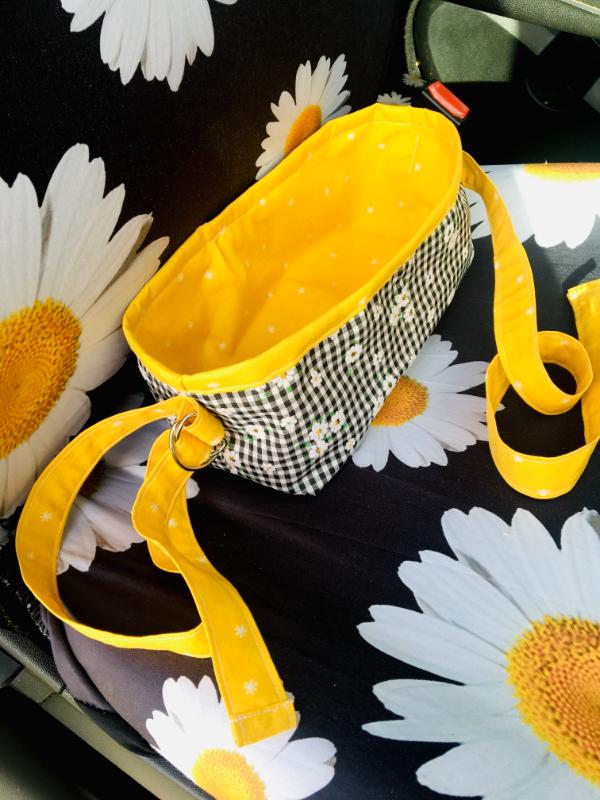
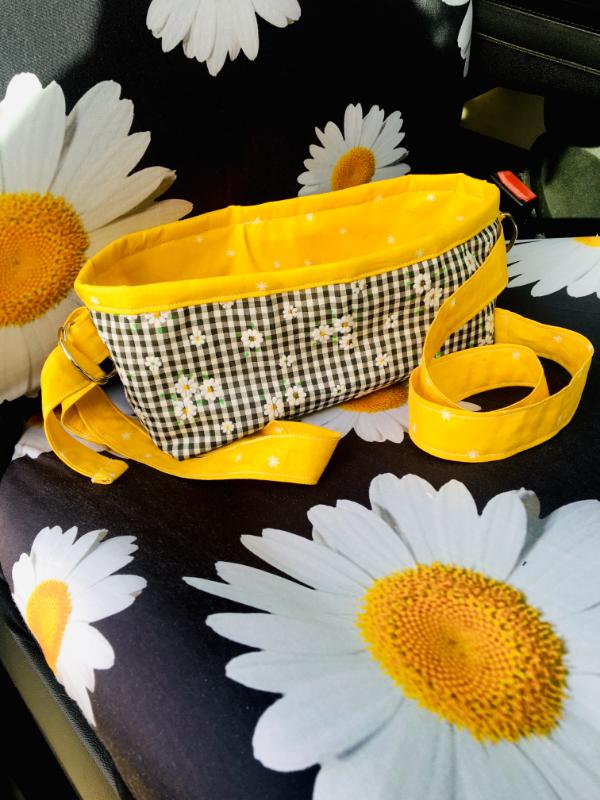
I didn’t need something huge, and I still wanted floor space to put my purse, so I came up with this ADORABLE mini sized little caddy basket! It has straps on both sides which allow it to be fasted to the seats on either side to keep it in place!
You could totally add a zipper to the top, or alter the dimensions to make it bigger, or even add dividers or pockets! This pattern though, is just the basic cute little version I made today.
Let’s make it!
This post may contain affiliate links. Read the full disclosure here.
Supplies Needed
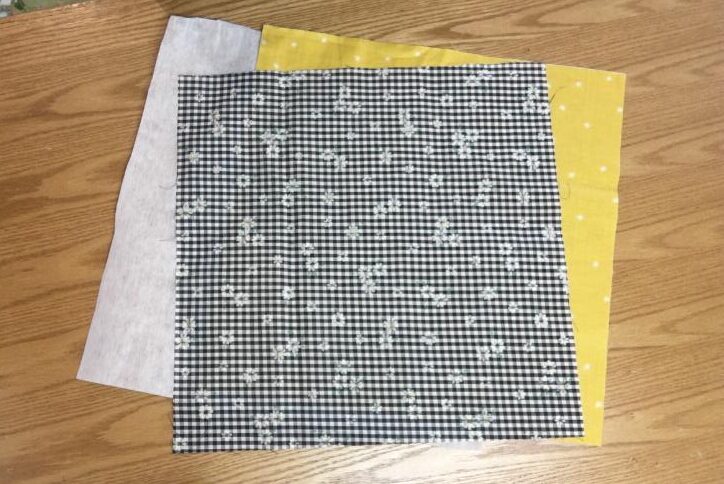
- 15″x15″ square of two complimentary cotton fabrics, for interior and exterior of caddy
- 15″15″ square of heavy weight interfacing to give the basket some body. (I used a sew-in stabilizer, since that is what I had on hand. You can use iron on, or whatever you wish. )
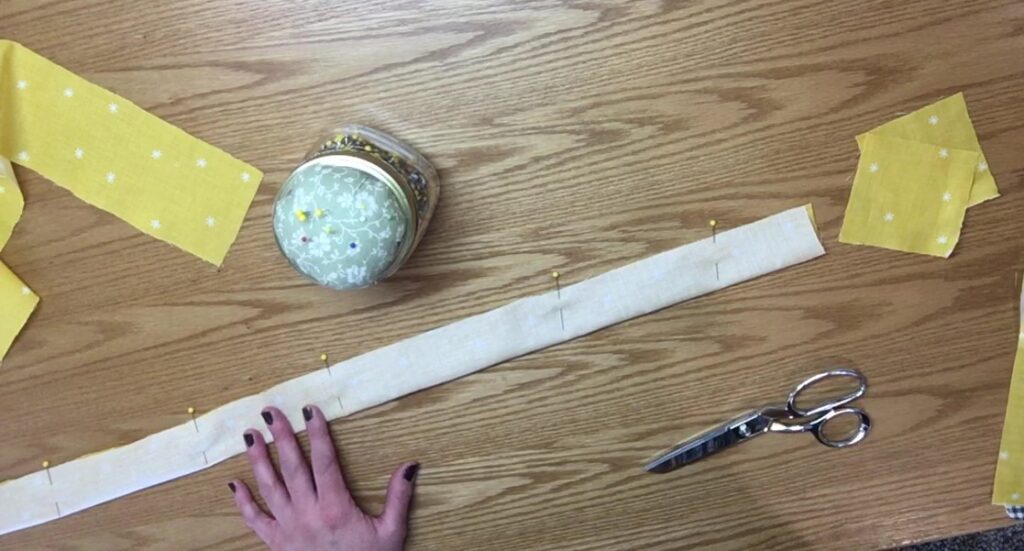
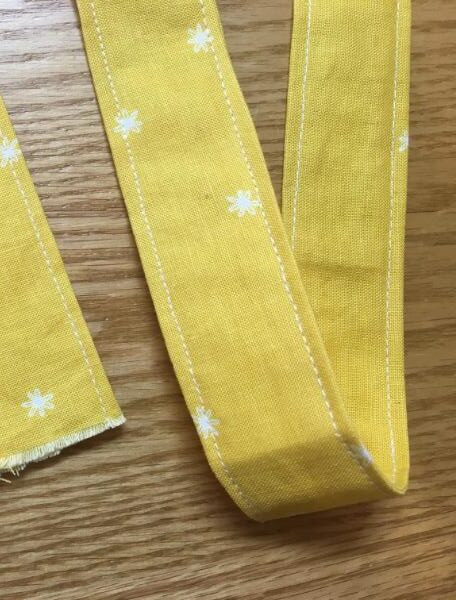
- 2 – 3″x30″ strips of cotton for the straps
- 4 – 1.5″ metal d-rings (Like these or similar)
- Iron and Ironing board
- Matching thread
- Sewing Pins, scissors, etc.
How To Make A Car Organizer Caddy
Step 1. Cut Out Fabric
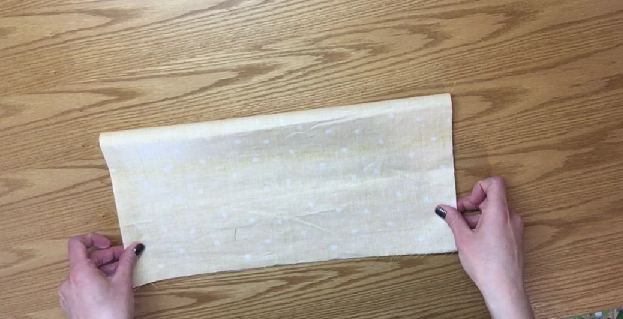
Cut out two pieces of fabric for the interior and exterior of your caddy basket, each should be 15″x15″ in size. Also cut out a 15″x15″ square of interfacing/stabilizer.
Also cut out two strips that are 3″x30″ in size for the straps.
Step 2. Make The Straps
Fold the straps in half lengthwise with the right sides together, and pin them down the long edge.
Then, sew down the raw edge with a 3/8ths inch seam allowance.
Turn the straps right side out with your favorite turning method. I used a large safety pin, attached it to one layer of one short side of the strap, then inserted it inside the strap and fed it through. Then, pull it out the other side to turn the strap.
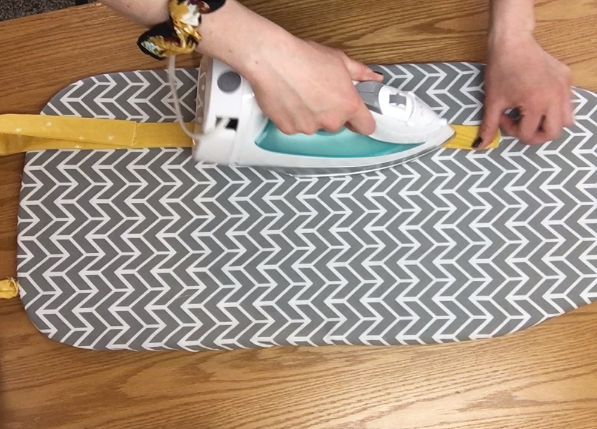
Press the straps with your iron.
Then sew a top stitch down both long sides with a 1/8ths inch seam allowance.
Then set the straps aside for now!
Step 3. Sew The Basket
Place one of the squares (it doesn’t matter which) onto the table and fold it in half, with the right sides together.
Pin and sew down both short sides with a 3/8ths seam allowance, leaving the top open.

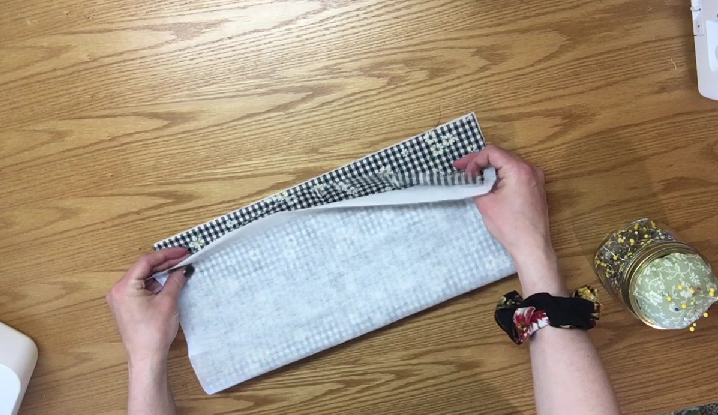
Next, place the stabilizer down, with the second square on top of it, with the wrong side of the fabric facing the stabilizer, (or, iron the interfacing to the back of your fabric if that is the kind you have), then fold both pieces in half together, pin, and sew down the sides the same way you did with the first square piece.
“Stand” the placemat up on the folded edge, and bring the top edge of the two side seam together to meet. Then push them down flat to fold it into a diamond shape. Try to align both sides evenly so the seams are lined up.
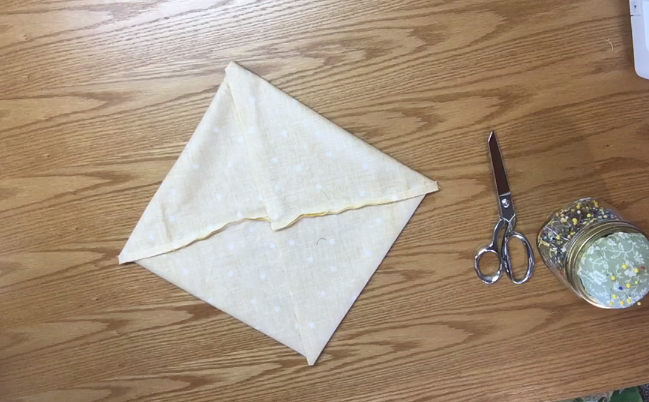
Measure 2 inches in from both side corners (the corners with the seam) and mark a vertical line. You can pin across the line if you wish.
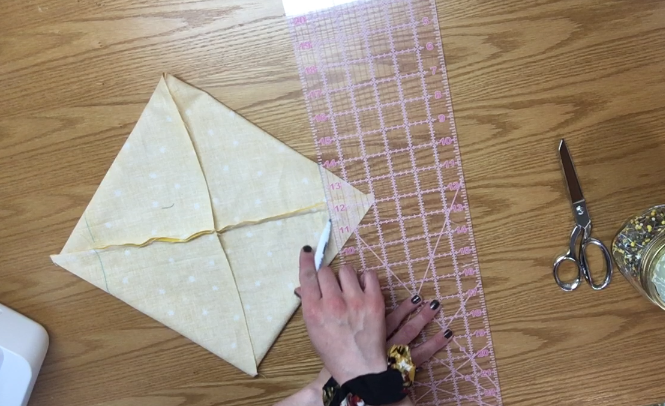
Sew down the line you marked, then trim away the excess fabric on the outside of the seam by clipping off the corner.
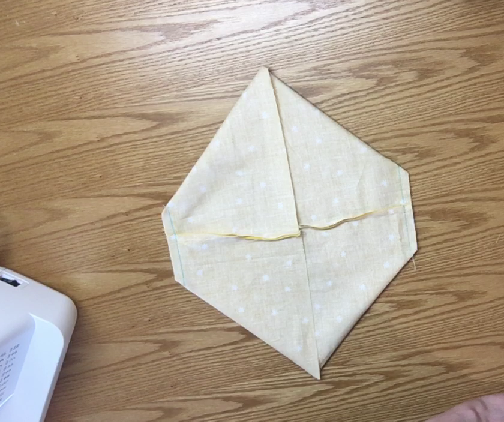
When you have sewn both corners, you will be able to open up the basket and shape it into a rectangle.
Repeat this step with both pieces until you have two basket shapes.
Step 4. Hem The Basket
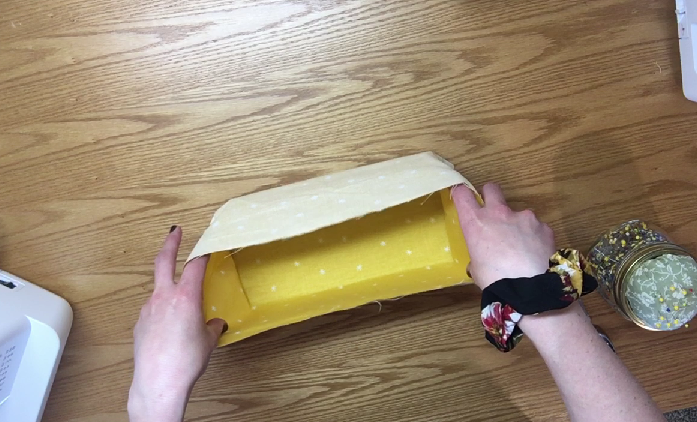
Align the two basket pieces together with the wrong sides touching, so one is on the inside and one on the outside. Pin around the top edge.
Sew around the top perimeter of the basket with a 3/8ths seam allowance. Then, fold the top edge over towards the outside of the bag, twice, and pin it in place.
Sew around the fold to hem the top edge.
Step 5. Attach The D Rings & Straps
Slide two d rings onto one end of a strap. Fold the end of the strap over twice half an inch, and pin it to itself to surround the d rings.
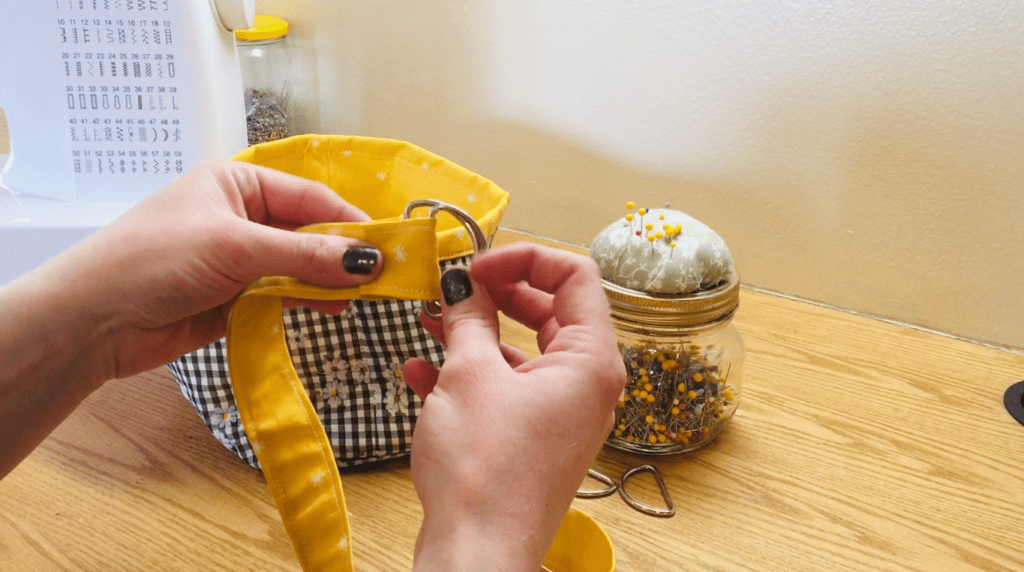
Position the strap onto the short side of the basket along the seam line, and pin it in place.
Then, sew a vertical line through the folded strap layers to attach it to the basket. Now the d rings will stick out on one side, and the long strap on the other side.
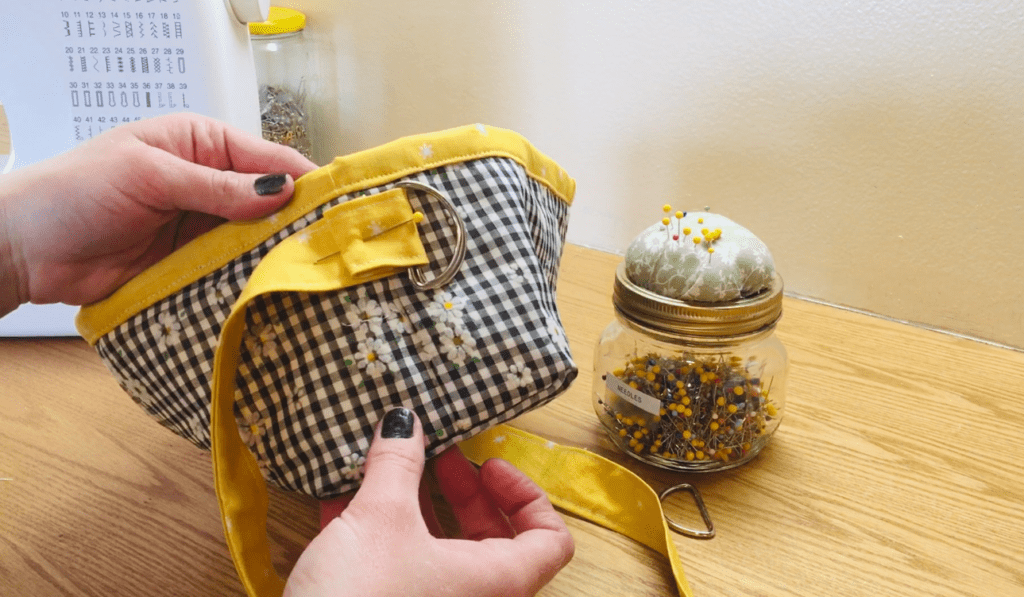
To hem the other end of the strap, fold it over twice half an inch, and sew along the fold.
Repeat with the other strap.
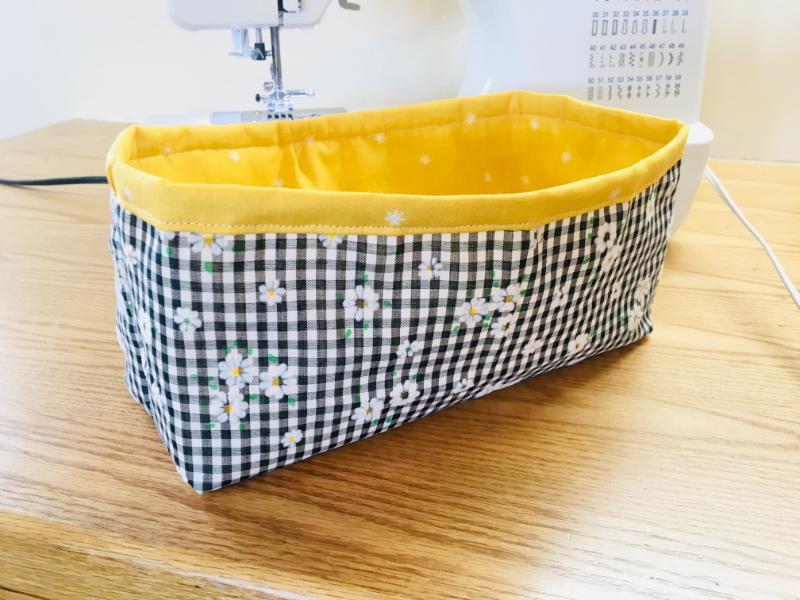
Then, you are done!
To use your basket caddy, you can place it on the floor between seats or under or behind a seat, and use the side straps to hold it to a safe part of the seat or car so it doesn’t slide or fly around.
I hope you liked this post and I can’t wait to see what customizations you come up with!
Pin this to Pinterest if it helped you, and as always leave a comment if you need help.