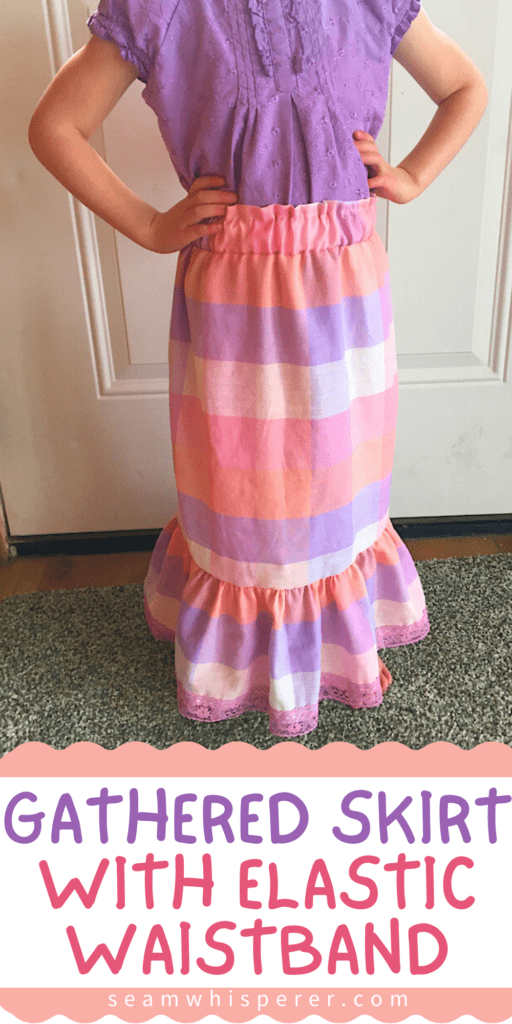
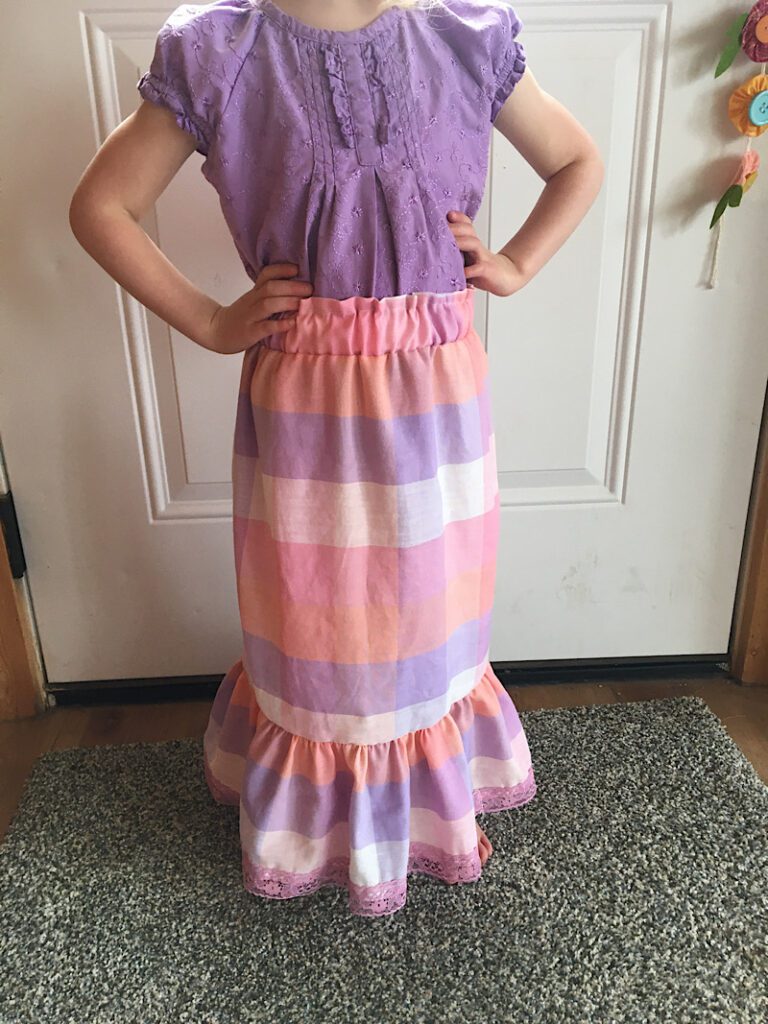
Want to learn how to make a simple gathered skirt? This tutorial is GREAT for beginners because it uses simple shapes and is made without a pattern!
My 4 year old asked me to make her a cute skirt the other day and I was happy to oblige! Then her sister wanted one too.
There are multiple ways to make gathered skirts (each with their own pros and cons), but in my opinion this is the EASIEST method, which makes it a great beginning sewer project and also really quick! Plus, it doesn’t require a pattern!
I will teach you how to measure and figure out how much fabric you will need, OR you can use my handy Gathered Skirt Calculator!
This post may contain affiliate links. Read the full disclosure here.
Supplies Needed
- Fabric of your choice for the skirt (Determine the amount by completed Step 1. of the tutorial, below.)
- Elastic – one inch wider than your waist circumference
- Trim or lace for the bottom of the skirt if desired
- Matching Thread
- Sewing Pins and a large safety pin or bodkin
- Serger (optional)
How To Make A Gathered Skirt
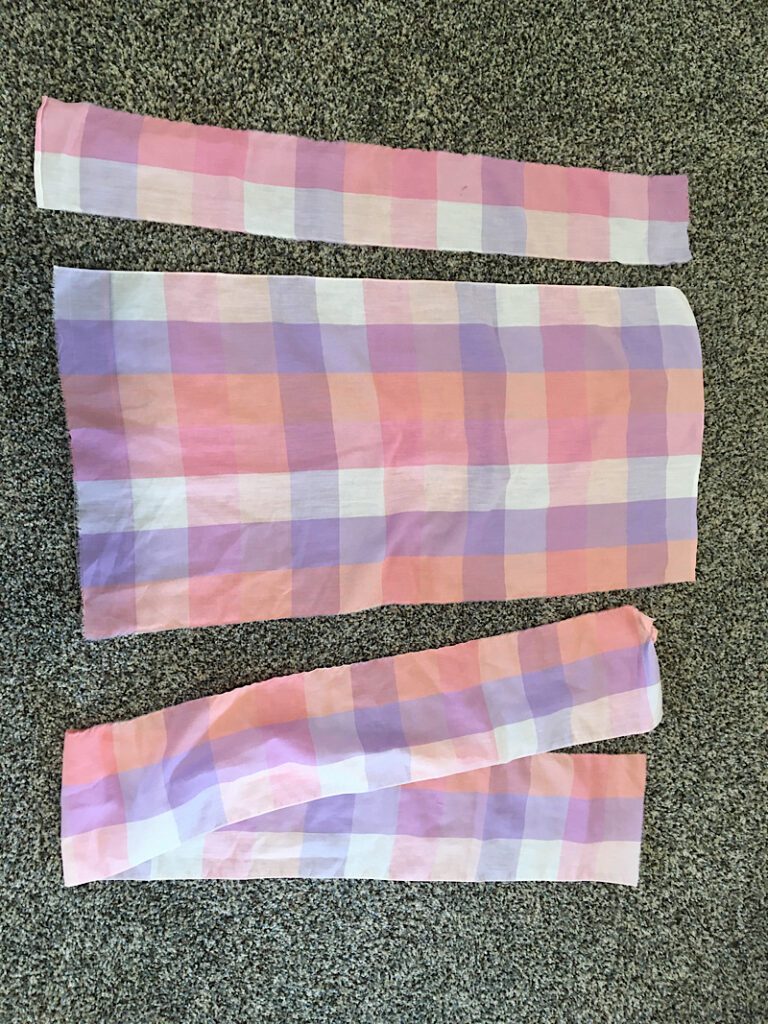
Step 1. Determine How Much Fabric You Will Need
A note on gathered skirt densities:
Most gathered skirts are made by measuring your hip or waist circumference and then multiplying it by a certain number to achieve the density of gather you desire. Anywhere from a 2.5-4X gather is typical. A 1.5X the HIP circumference is possible, but extremely minimal and can be difficult to walk in. Anything more than a 4X requires very lightweight fabric (like chiffon or tulle). For most skirts, a 2.5 or 3 X is sufficient! The thinner /softer the fabric, the higher multiplier it can potentially handle.
If this is your first skirt, you should use a 2.5X for this tutorial. I used a 1.5 since it was a dress up for toddlers.
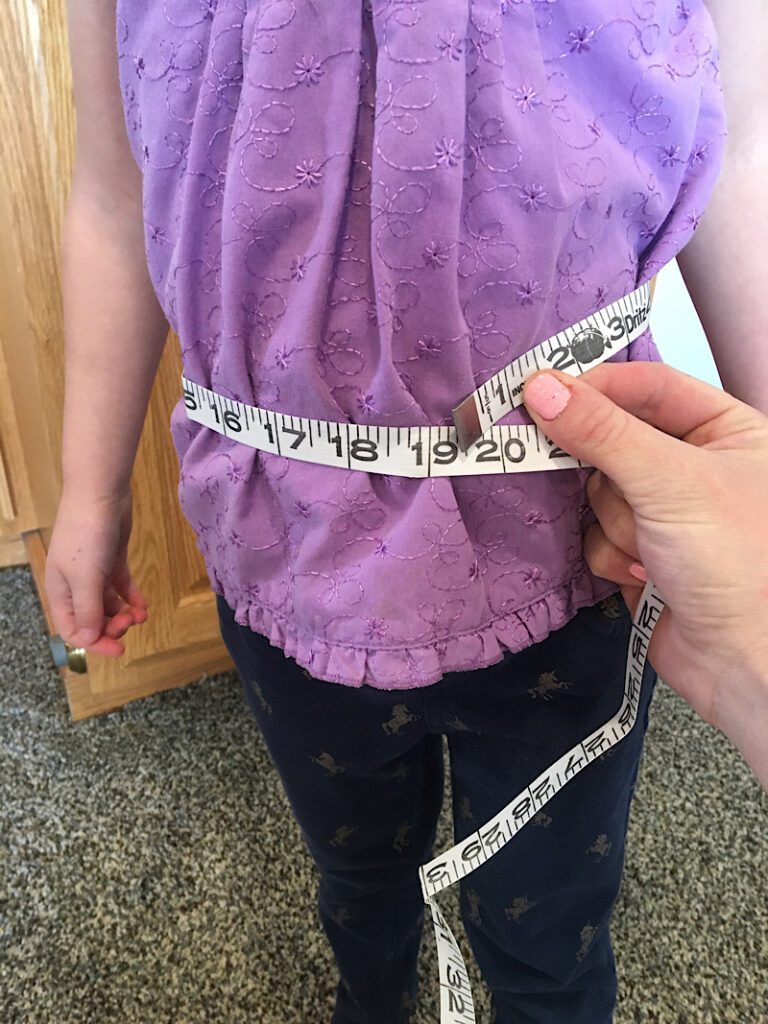
Take the following measurements for the person the skirt will be made for:
- Waist Circumference (where the skirt will sit)
- Hip Circumference
- Desired Skirt Height (from waist to knee, for example.)
- Note the elastic width you will be using (1.5 inch, for example.)
- Also determine if you will add a ruffle to the bottom of the skirt.
Now use the measurements you took to calculate the fabric amounts:
The length of your waistband should be 2.5X your hip circumference.
The length of your skirt fabric should also be 2.5X your hip circumference.
The length of a ruffle added to the bottom should be 2X the length of the skirt fabric.
The height of the waistband should be 2X the elastic width, plus 1 inch.
The height of the skirt fabric should be your Desired Skirt Height MINUS the height of the waistband fabric.
** If you are adding a ruffle to the bottom, you should subtract it’s height from the height of the skirt fabric as well.
Got all your measurements? If not, try out my Gathered Skirt Calculator!
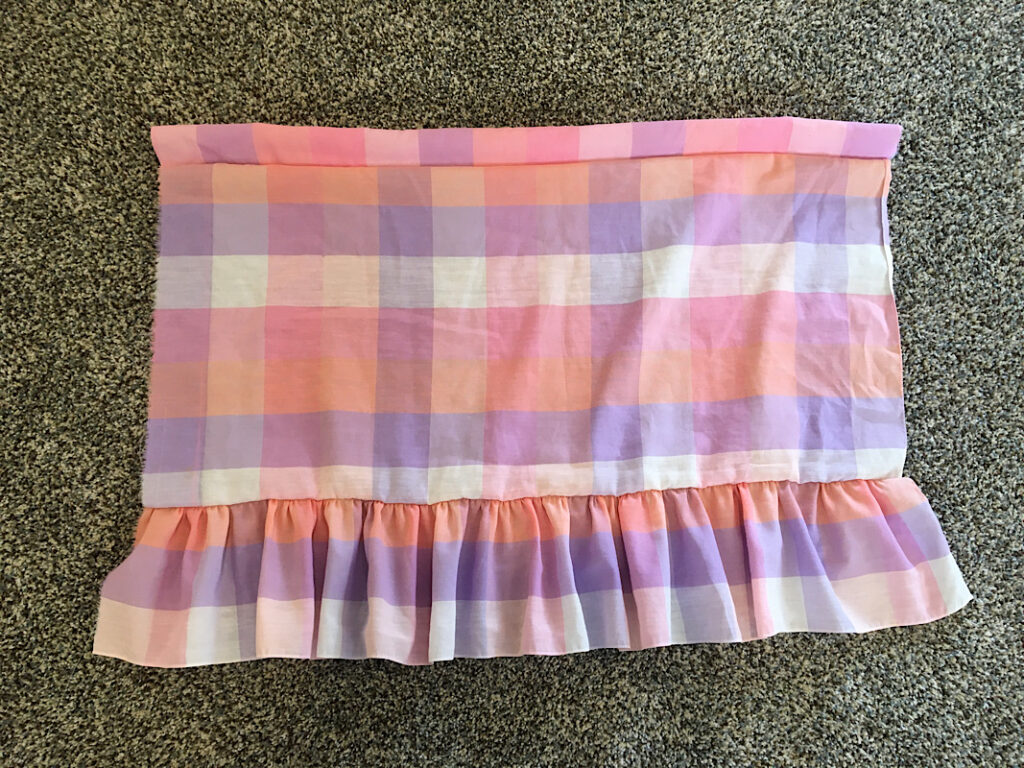
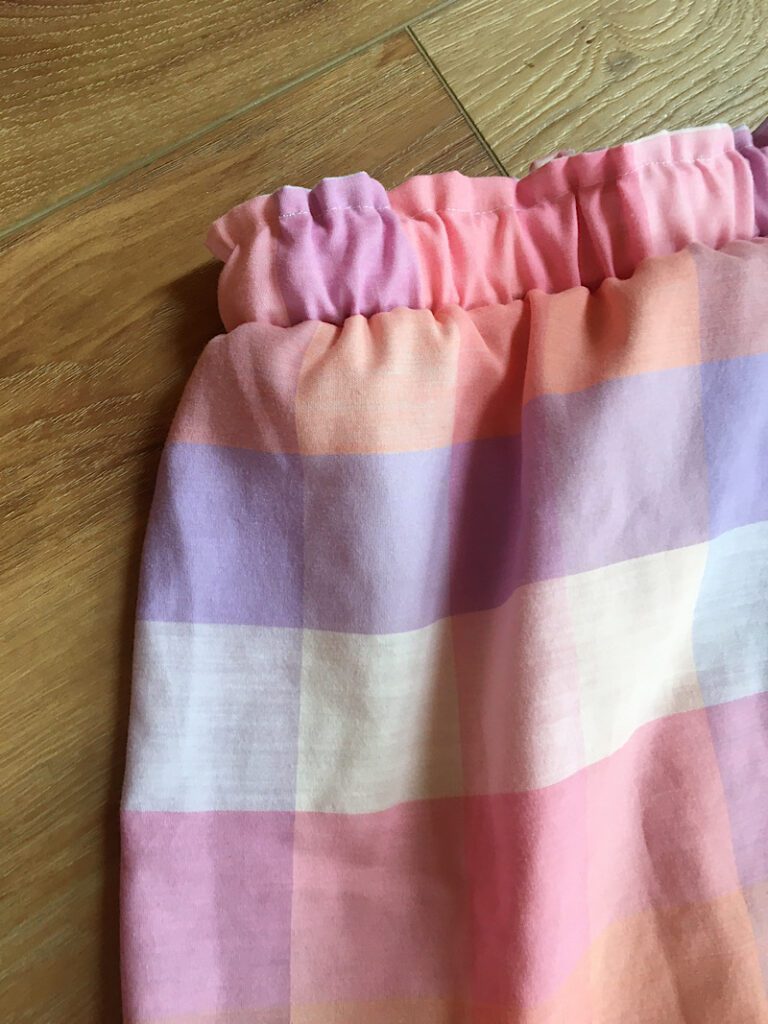
Step 2. Attach Waistband To Skirt
Fold the waistband in half lengthwise, with the wrong sides together.
Pin it to the top right side of the skirt fabric, aligning the raw edges.
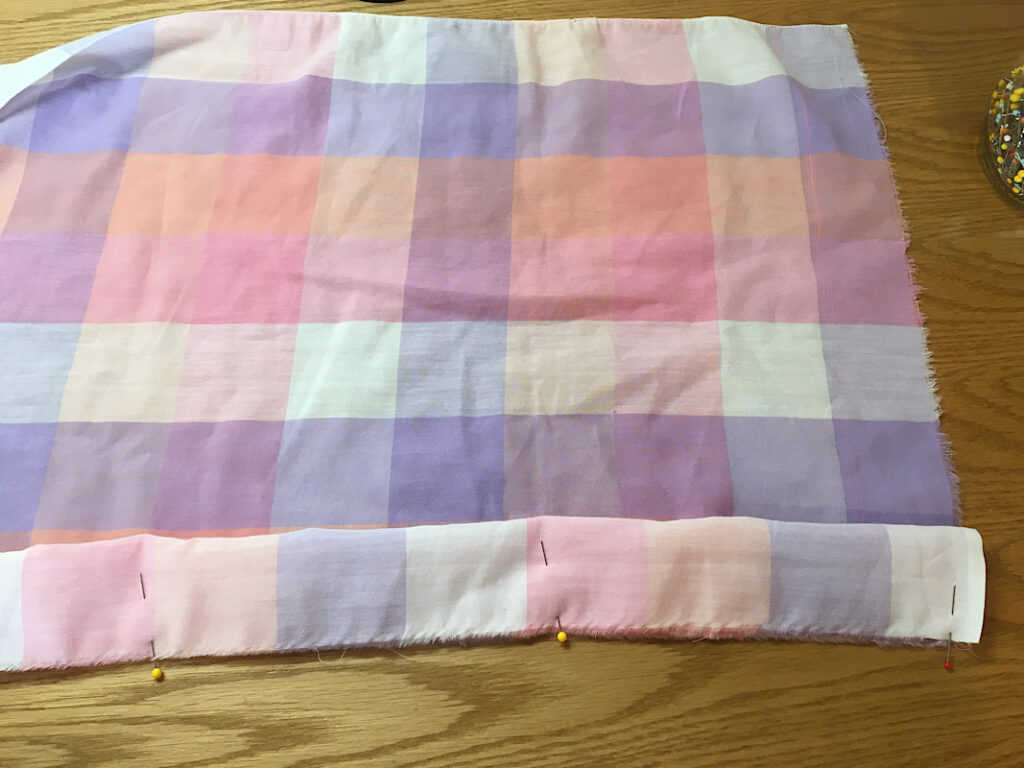
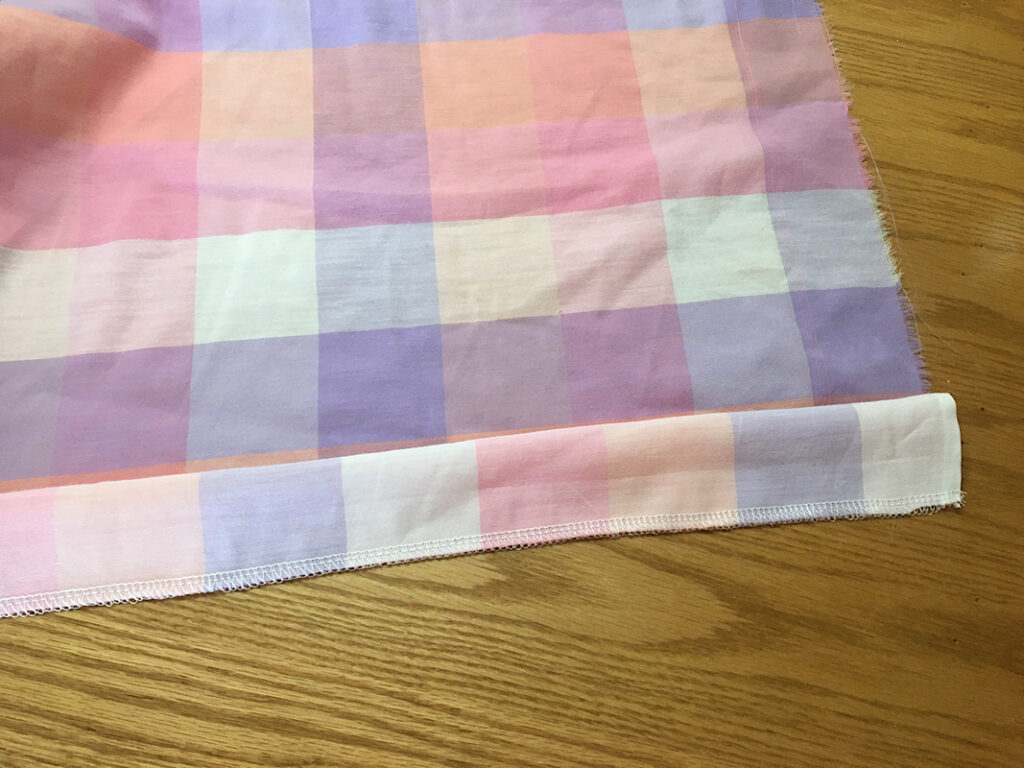
Sew across the raw edge with a 3/8ths inch seam allowance. Then, serge or zig zag the edge.
Step 3. Make And Attach Ruffle
If adding a ruffle to the bottom of the skirt, you first need to gather it.
Sew a basting stitch (the longest stitch length your machine can make) along one long edge of the ruffle fabric WITHOUT backstitching at the beginning or end.
Then, gently pull on one of the threads to bunch of the fabric. Continue to pull the same thread along the length of the fabric to push the fabric together into a gather the same length as the skirt fabric.

Pin the gathered hem to the bottom of the skirt, with the right sides together. Align the gathered edge of the ruffle with the raw edge of the skirt.
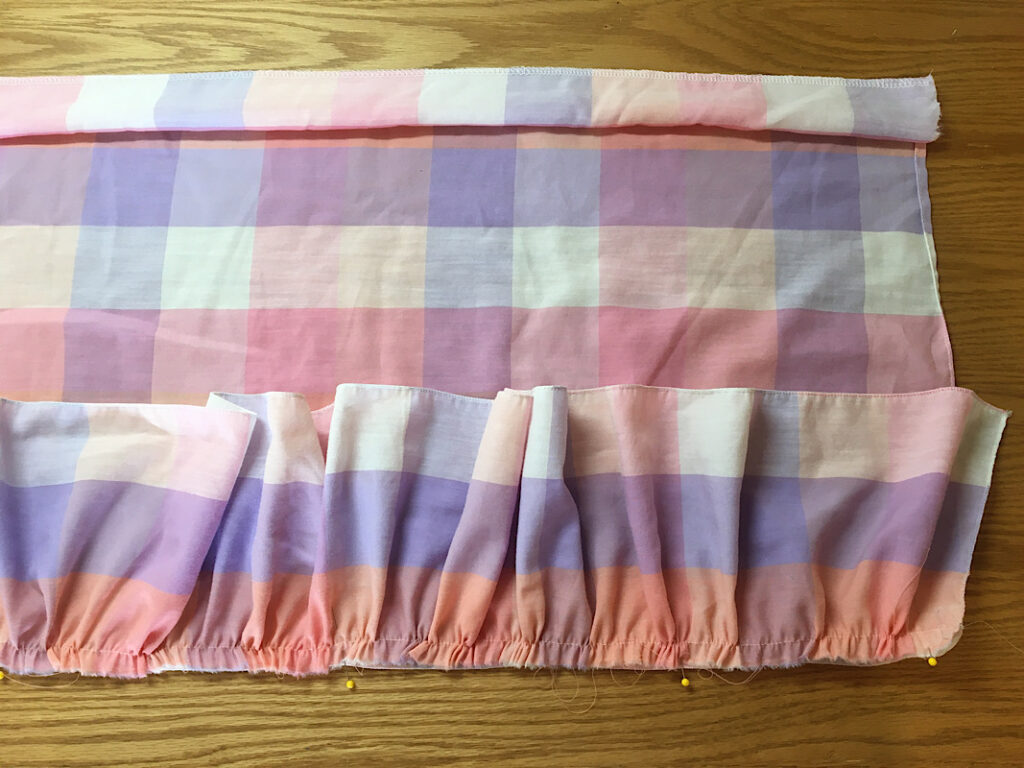
Then, sew the gathered ruffle to the skirt, and serge or zig-zag the edge.
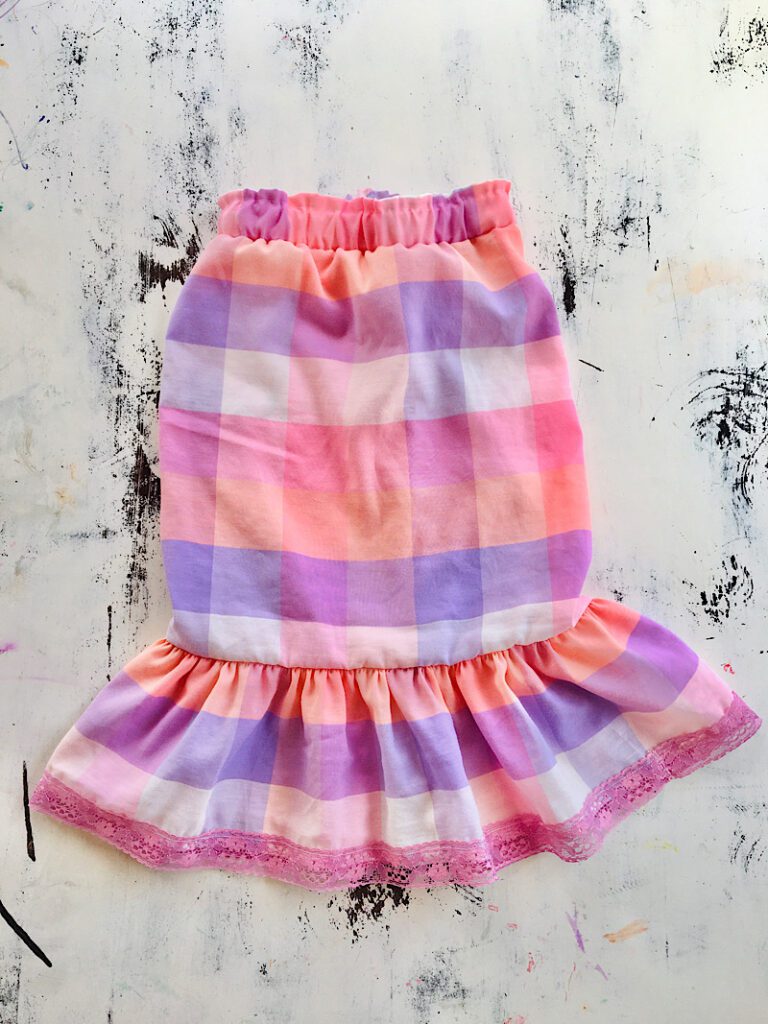
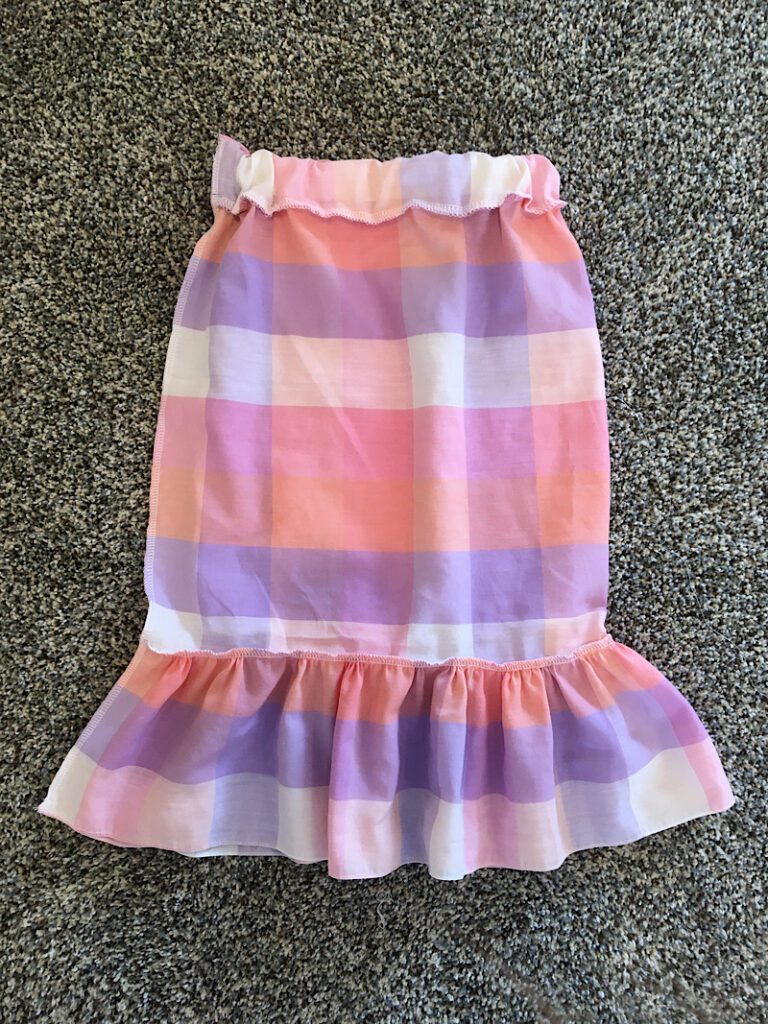
Now you have a waistband, a skirt, and a hem all in one piece!
Step 4. Insert The Elastic
Attach the end of your elastic to a large safety pin (or bodkin if you are fancy!)
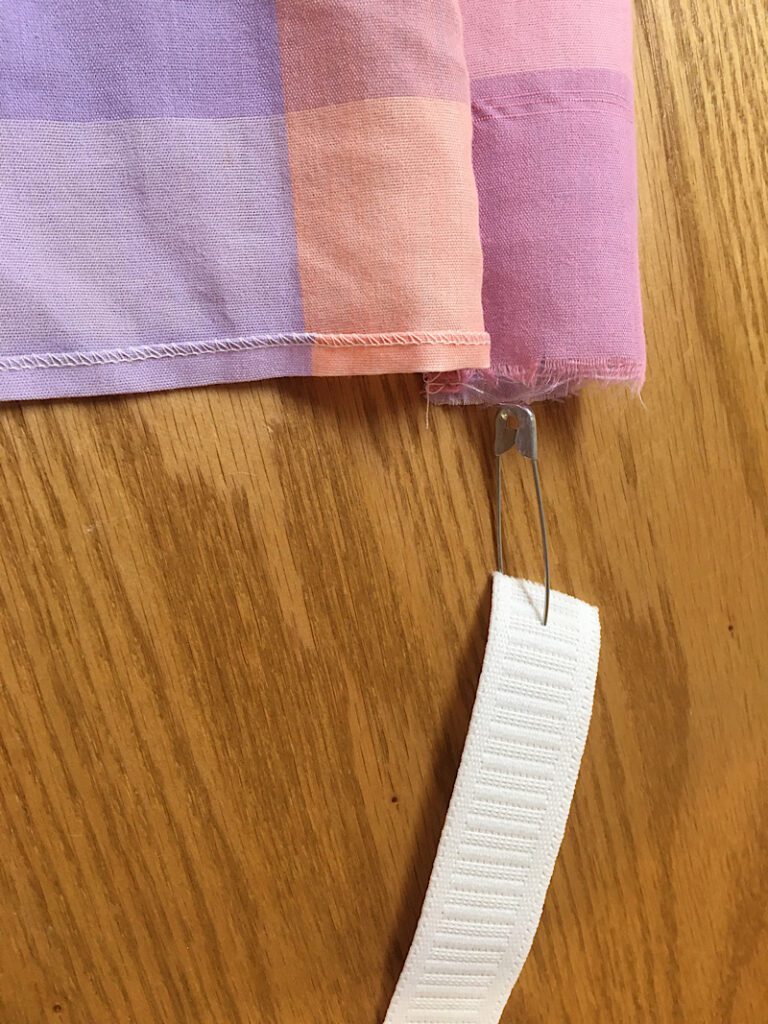
Feed the safety pin and elastic through the waistband. Be careful not to pull the other end of the elastic all the way through. Pin the other end of the elastic to the end of the waistband so that it stays in place as you thread it through.
Once you reach the end, carefully pin the end to the waistband and remove the safety pin.
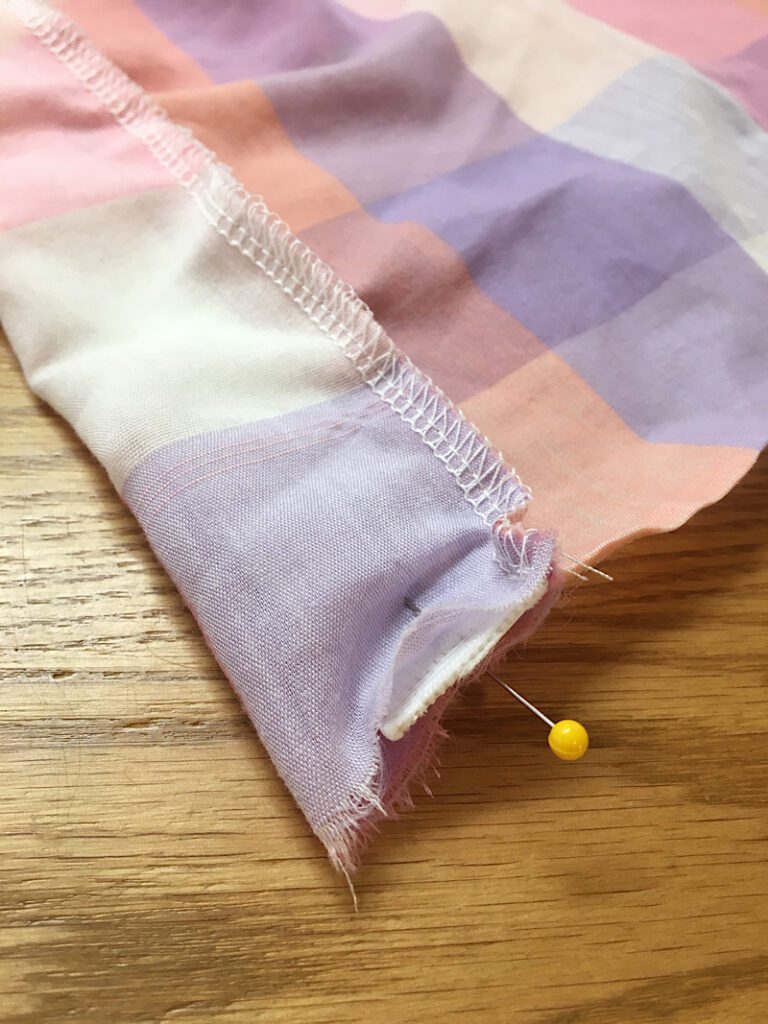
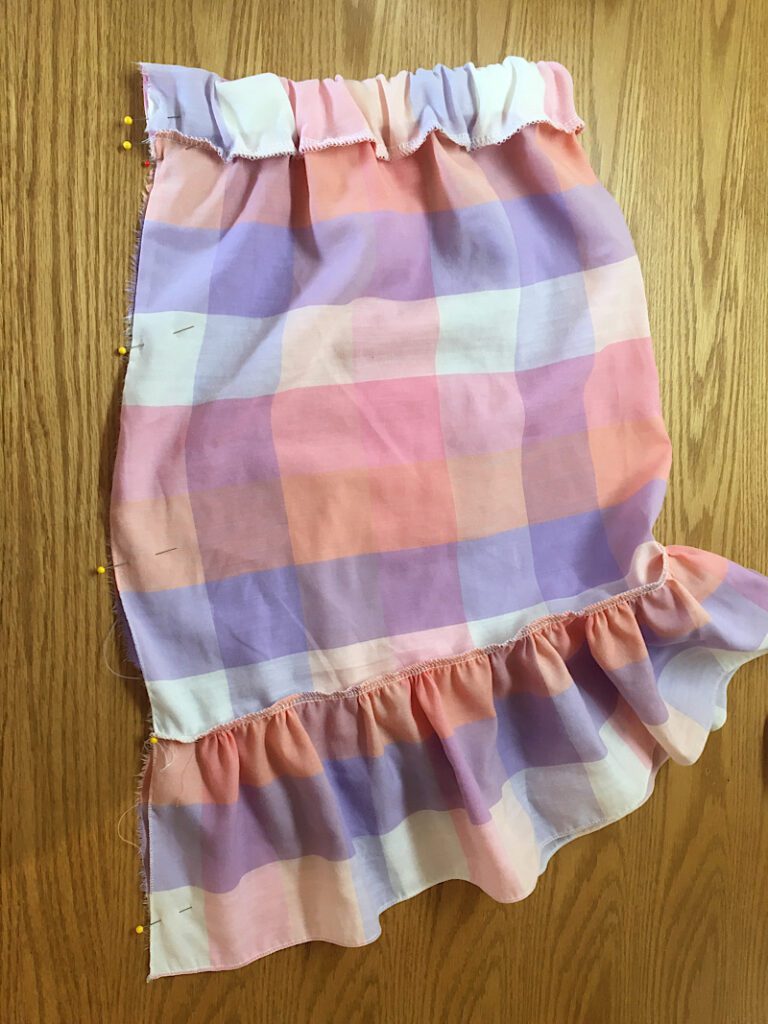
Step 5. Sew The Skirt Closed
Fold the entire skirt in half to align the two side edges, with the right sides together. Pin down the side and make sure your seams on the ruffle and waistband are aligned.
Sew down the side of the skirt making SURE to sew through both sides of the elastic.
Then serge or zig zag the edge!
Finally, hem the bottom by folding it towards the inside half an inch, twice, and sew along the fold.
Turn the skirt right side out, and you are done!
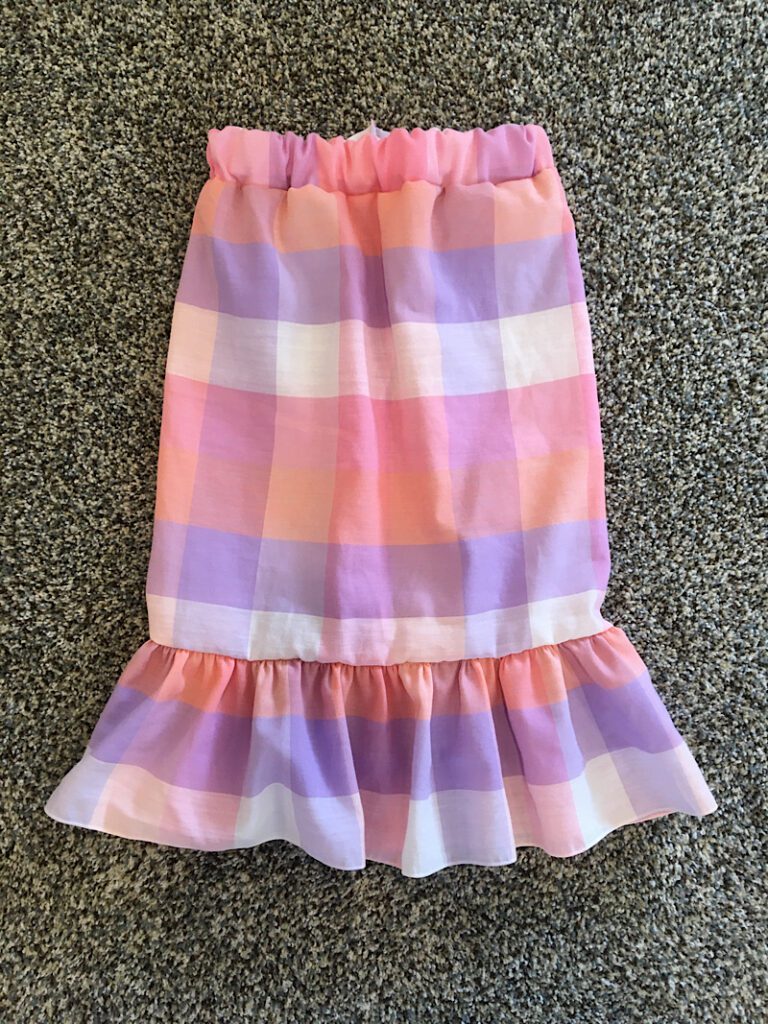
You can customize the skirt in so many ways. Lace, trim, a bow on front at the waistband, or topstitching on the fabric above the top of the waistband to make it a “paper bag” style, which is what I did! I also added some lace to the bottom of the ruffle for fun.
See how easy and quick that was? You can also get fancy and divide up the skirt to make tiered layers!

Now that you have made a basic gathered skirt, you can try making one with lace, try out a peasant dress, or even advance to a circle skirt.
Let me know if you have any questions, and happy sewing!