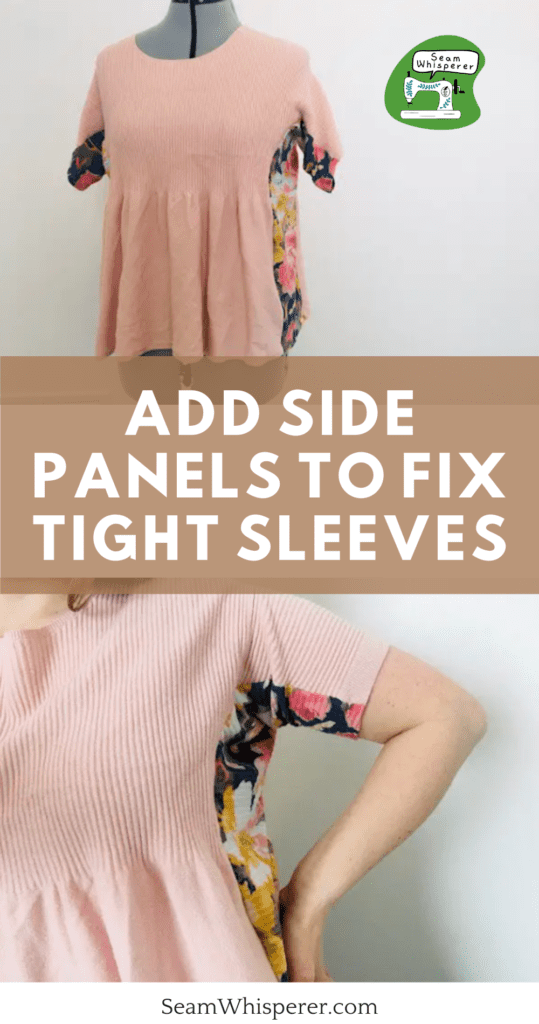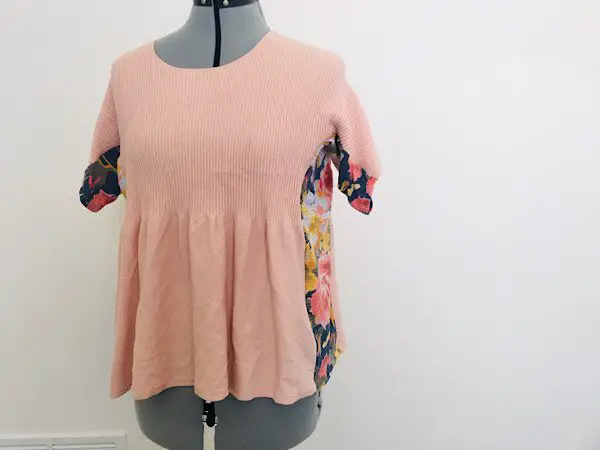
Do your sleeves and shirt feel too tight? In this post I will show you a simple way to add side panels to make the shirt a bit wider. This problem will fix a tight sleeve problem, as well as a tight bust/shirt problem!
I tend to have large arms (I hear it’s a mom thing) which means a good deal of my shirts have tight sleeves, even if the rest fits okay.
And then I have some shirts that are just a bit to small, but I really want to keep!
This side seam panel technique adds a bit of fabric to the shirt to loosen it up and bring you comfort again!
If this isn’t quite the tight sleeve fix you looking for, make sure to read through my entire guide on “5 Techniques to fix tight sleeves” to find the solution that works best for you.
This post may contain affiliate links. Read the full disclosure here.
About This Tutorial
This is a beginner/intermediate tutorial, but if you have never done shirt alterations then you might want to pracitce first on a shirt you won’t be sad about messing up!
The basic technique is simple, essentially what you will be doing is cutting the side seam of the shirt open, and inserting a strip of fabric to add some width to the shirt, and sewing it back together.
It is fun to use a different fabric to add a pop of color to your shirt, but you can also add something that matches if you want it to blend in more.
Ideally the panel fabric you use should be a similar thickness, streticheness, and texture.
Supplies Needed
- Sewing Machine
- Serger (Optional, but makes a much more professional finish. Read my review of my serger here.)
- Fabric Scissors (These are my favorite brand)
- Seam Ripper (Optional)
- Rotary Cutter, Mat and Ruler (Optional but makes cutting panels much easier!)
Materials Needed
- A Shirt with tight sleeves
- A complimentary fabric to make the panels with
- Matching Thread
How To Make Tight Shirt Wider & Fix Tight Sleeves By Adding Side Panels
Step 1. Measure Your Arm
Measure around the widest part of your upper arm, where your sleeve is tight, to find your arm circumference. Mine was around 12.
Then, determine what you want your new sleeve circumference to be. I decided I wanted a finished sleeve that was about 13.5 inches. It would still be kind of form fitting but not super squeezy.
Step 2. Take Apart The Sleeve Seams
Locate the inner seam on your sleeve, the one that goes all the way up your arm, down your armpit, and down the side of the shirt.
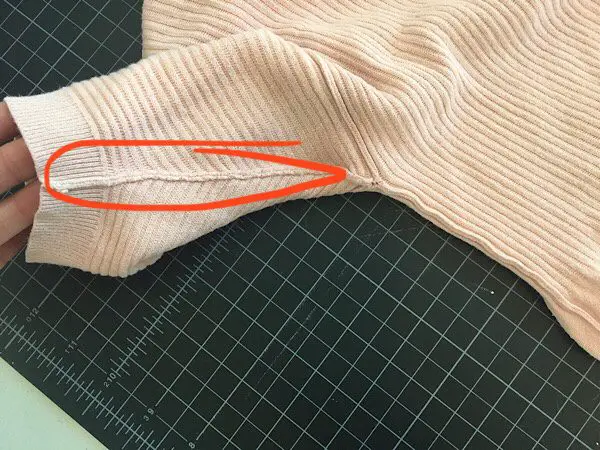
Then, carefully cut it open as close to the side seam as you can, from the bottom hem all the way up to the end of the sleeve hem.
(You could also unpick it if you want, but that will take longer.)
Repeat this step of the other side of the shirt as well.
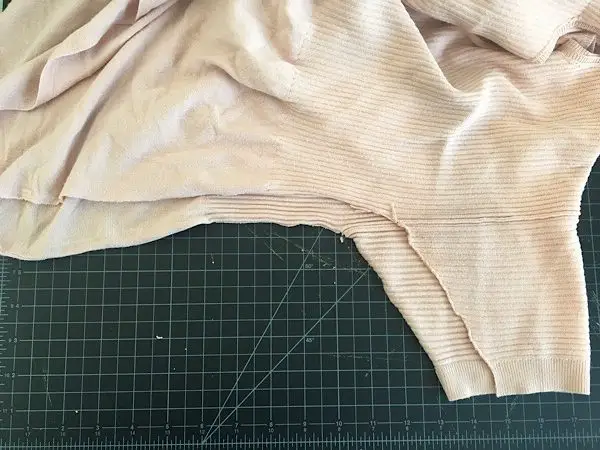
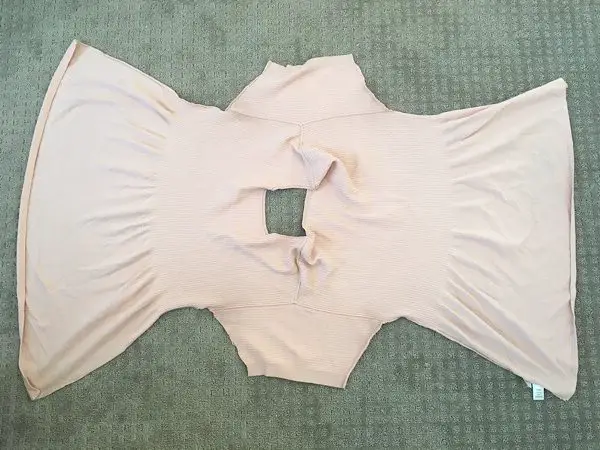
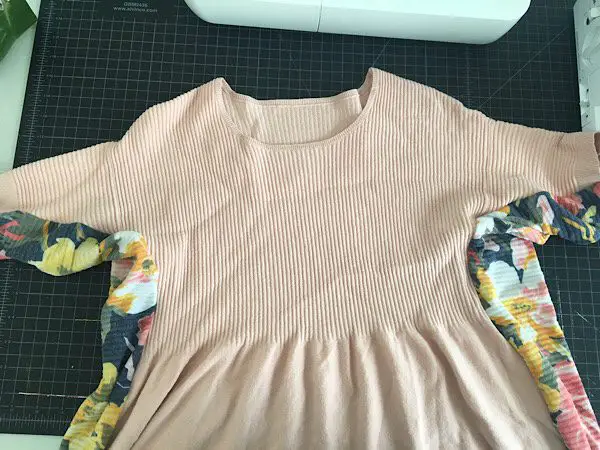
Once you shirt is cut open on both sides, it should be connected by the shoulder seams and look something like this:
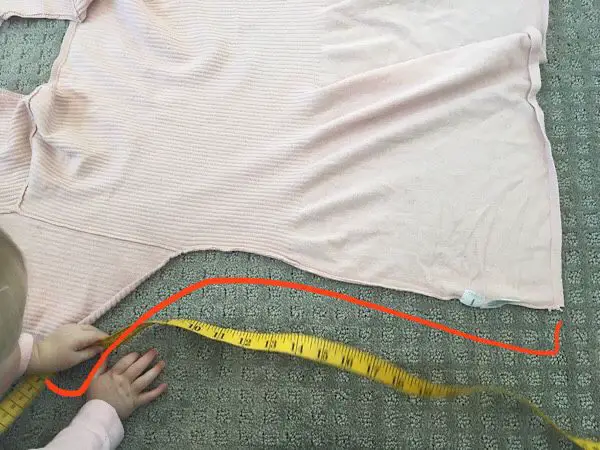
Step 3. Measure The Cut Sleeve Width
Lay your shirt flat, and measure across the sleeve.
(You should measure where it is tight, if you have a long sleeve then measure at the tight part, not at the hem. Since my sleeve is short, I just measured at the hem.)
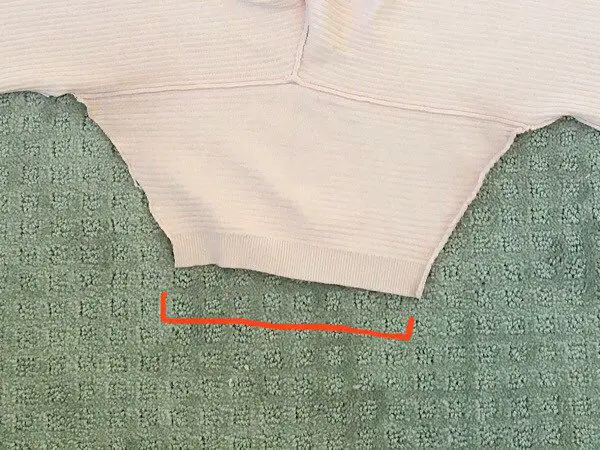
Figure out how many inches of fabric you will need to add to get to your desired new sleeve circumference. Remember to add seam allowances.
My sleeve hem was 6 inches long. I want the new circumference of the sleeve to be 13.5 inches, which means I needed to add 7.5 inches of fabric.
Remembering to include two 1/2 inch seam allowances, I had to cut a piece of fabric that was 8.5 inches wide.
Step 4. Measure The Length Of The Seam
Measure the length of the seam you just cut open, to find the length you will need to cut your new fabric.
Add several inches to this measurement on both sides to make sure it is not too short when we hem it later. (Mine was about 25)
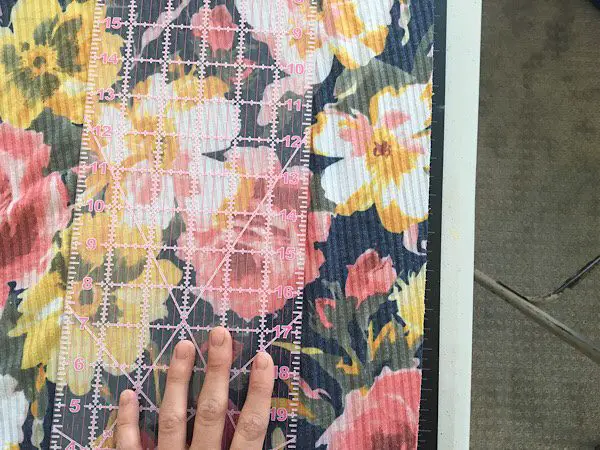
Step 5. Cut The Panels
Cut two fabric strips out of your complimentary fabric.
Mine was about 8.5×25 inches wide
Step 6. Pin The Panels To The Shirt
With right sides together, pin one fabric strip to the edge of the shirt seam you cut open.
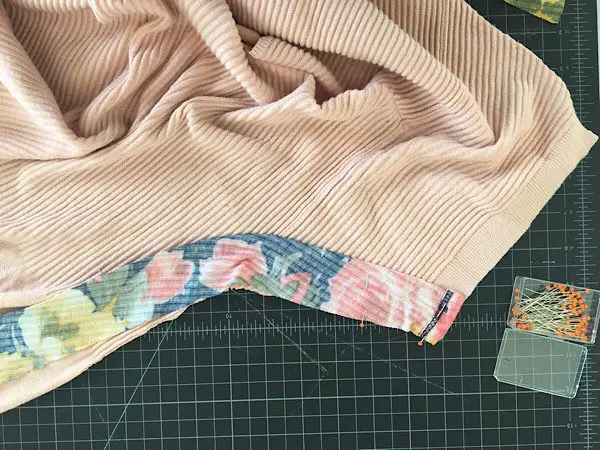
Pin the right side of the fabric to the right side of the shirt seam edge
Pro tip: you can cut your fabric strip off the bottom of a skirt and keep the original hem, line it up with the hem of your shirt, that way you won’t have to hem it later. Or you can just let the fabric panel strip extend over the shirt hem edge a few inches, and I will show you how to hem it later.
Step 7. Sew The Panels To The Shirt
Once the fabric is pinned to the shirt, sew them together along the edge you cut open.
I used my serger for this, but you can use a regular machine.
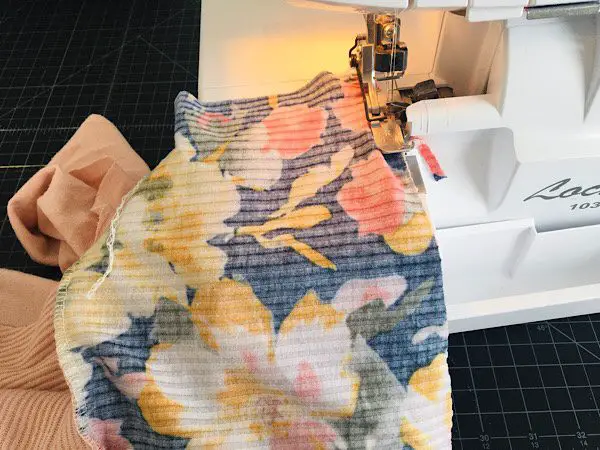
Make sure that if you are sewing stretchy fabric on a regular sewing machine you use a stretch stitch such as a small zig zag stitch.
After you finish sewing the first side, it will look like this:
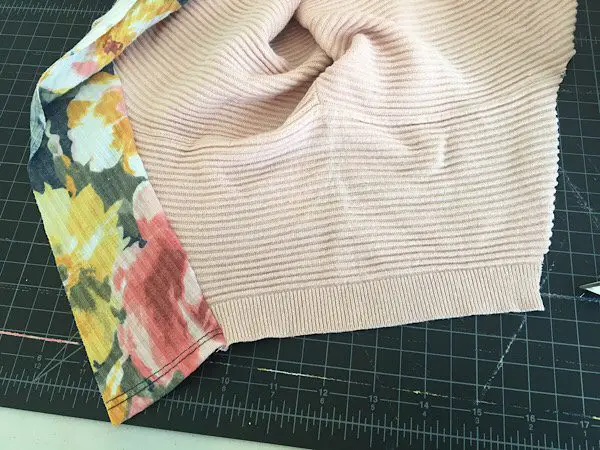
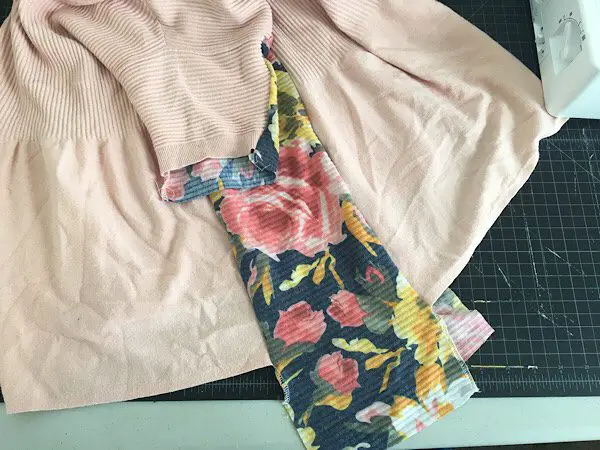
Once you have sewn one side of your first panel onto the shirt, pin and sew the other side of the fabric to the other side of the same sleeve, with right sides together.
After sewing the second side, your sleeve will have a bit of the panel hanging over the edge waiting to be hemmed like this:
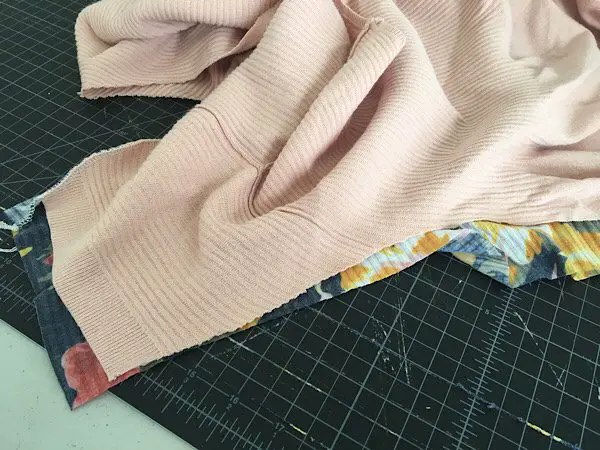
Then, repeat this step with the other panel and sleeve as well.
Finally it is starting to look like a shirt again!
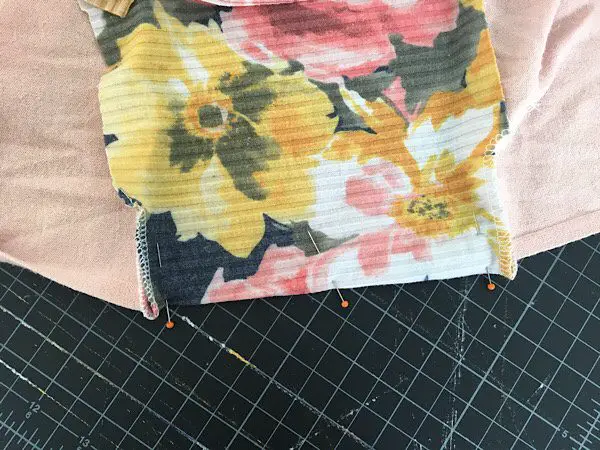
Step 8. Hem The Panels
At this point, the panels are sticking over the hems of the shirt by several inches.
To hem them, turn the shirt inside out.
Cut off the excess fabric so there is only about 2 inches of it extended over the edge of the shirt.
Then, fold the excess fabric up an inch, and then again so the hem of the folded panel lines up with the hem of the shirt. Pin it across.
Sew along the upper fold to secure it. You can try to line up the stitch line with the stitch line on the original shirt if you want.
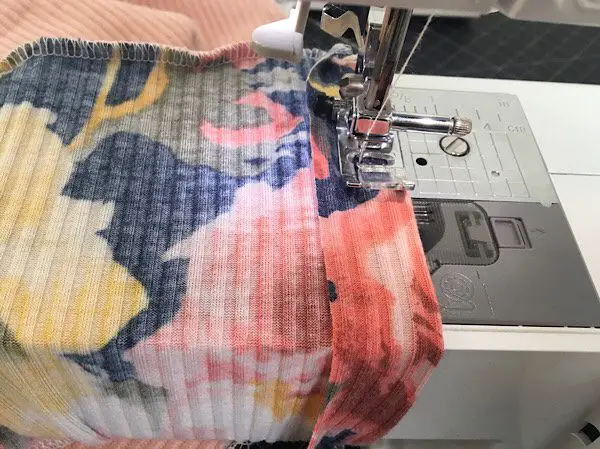
Then repeat this with the other hems on the shirt!
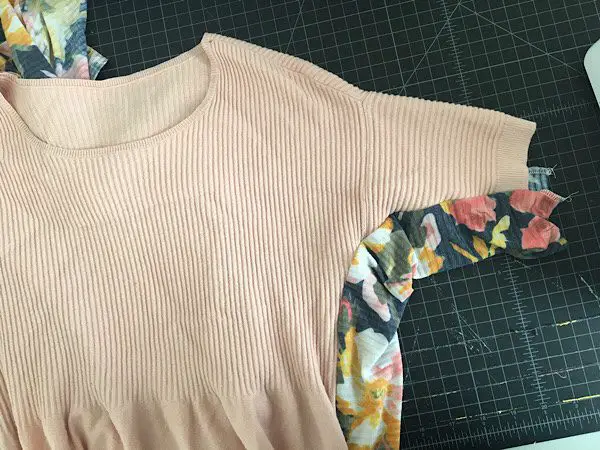
Step 9. Finish The Shirt
Turn your shirt inside out and you are done!
When you lay it flat, the excess fabric looks kind of interesting and floppy…
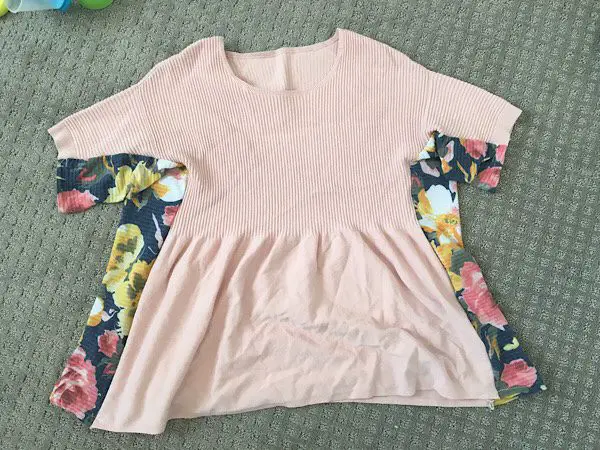
But when it is worn, it looks great! I think it adds a really cute little pop to the shirt, and you’d never know it wasn’t designed that way.
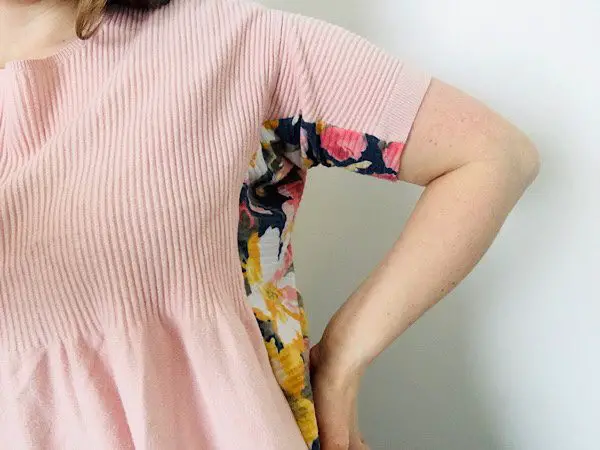
But the best part is that I can lift up my arms again!
Conclusion
Now you know how to widen your shirt and fix tight sleeves by adding extra fabric panels to the side seams!
Who knew such a simple alteration could make such a big difference!
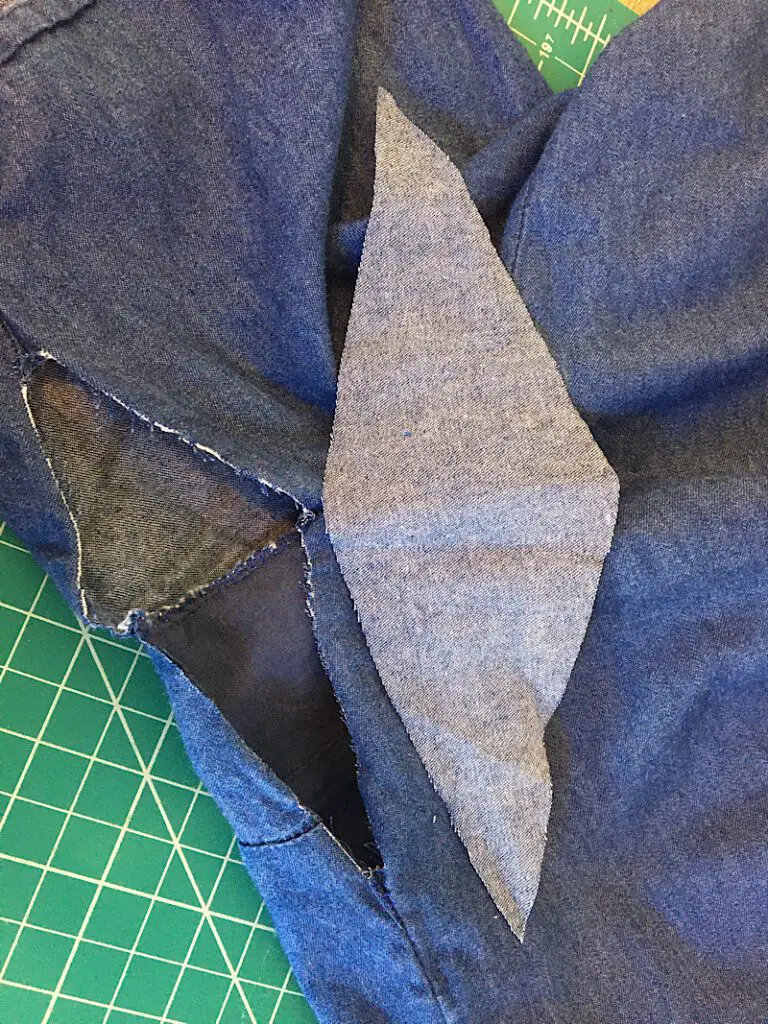
This method works with woven shirts as well. If you have a long sleeve shirt, you can taper the panels to the wrist hem also (Or, perhaps a diamond or triangle underarm gusset would be better! Check out my other methods for fixing tight sleeves.)
If this tutorial helped you, or if you need help understanding any of the steps, leave a comment and let me know.
Pin this post and make sure to sign up for my email list to stay in touch!