Total beginner in freemotion quilting? Learn how to set up your sewing machine to free motion quilt in this simple tutorial, plus beginner tools and tips!
I am not a great quilter, BUT I do love the scrappy, textured look a nice quilted material gives a project!
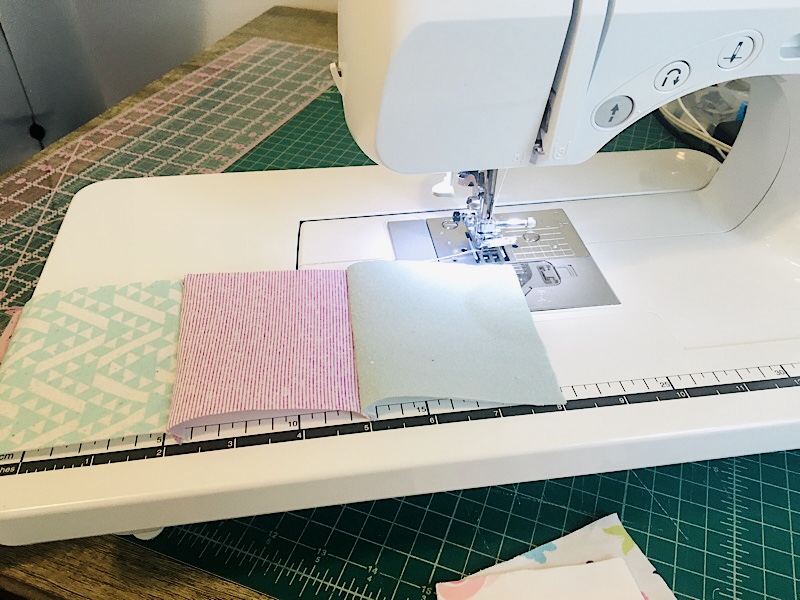
This week I sewed a little zippered bag for my daughter’s birthday (she requested a new book case for her scriptures) and I thought I would make it special with a scrappy quilty design!
I used my Brother sewing machine to free motion a swirly design on the patched fabrics, and she LOVED it. Let me show you the basic set up and tools you will need to get started in freemotion quilting!
This post may contain affiliate links. Read the full disclosure here.
Supplies Needed
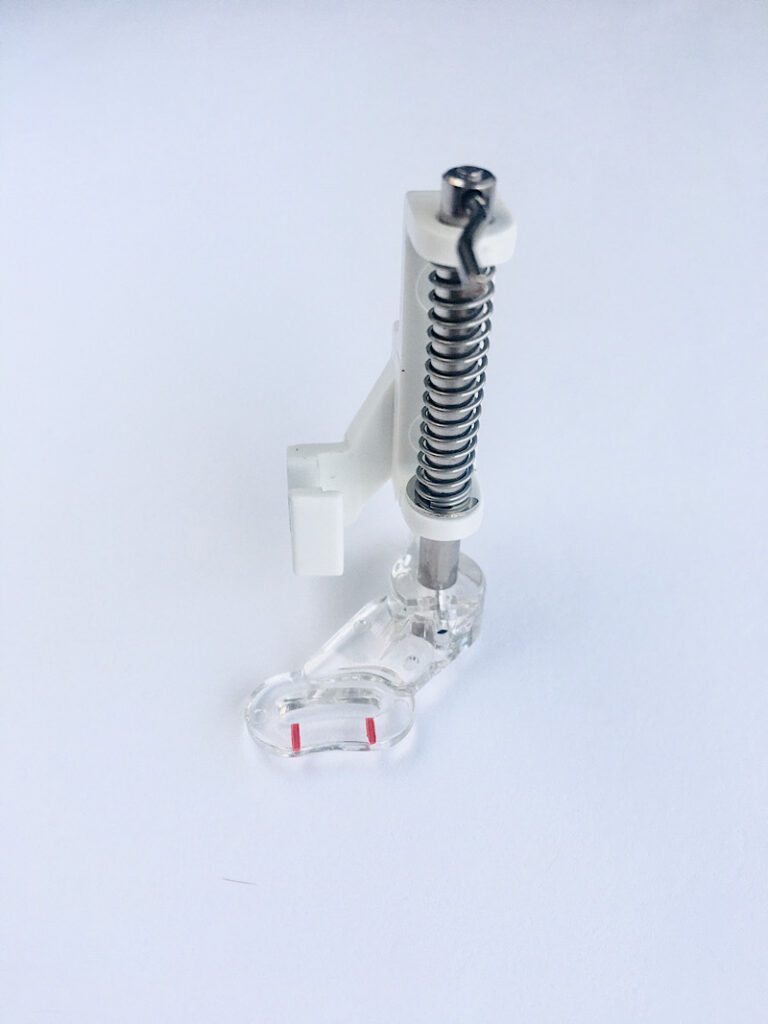
- Quilting foot (also called a Hopping Foot or Darning Foot)
- Sewing machine screwdriver (to remove presser foot)
- Embroidery hoop (optional)
- Quilt or material to practice on
How To Free Motion Quilt For Beginners
Step 1. Attach The Quilting Foot
A free motion quilting foot is fun to use! It “hops” when you sew, which holds down the fabric as the needle goes through, and then raises up out of the way to allow you to move the fabric freely.
Here is how to attach it:
Use the flat head screwdriver to remove the presser foot holder (and the presser foot) from the presser bar.


Position the quilting foot onto the presser foot bar. Make sure the metal pin on top of the quilting foot (above the spring) is positioned ABOVE the needle clamp screw. You can lower the needle housing with the hand wheel if you need to lower the needle clamp screw.

Use the screwdriver to tighten the screw and clamp the quilting foot in place.
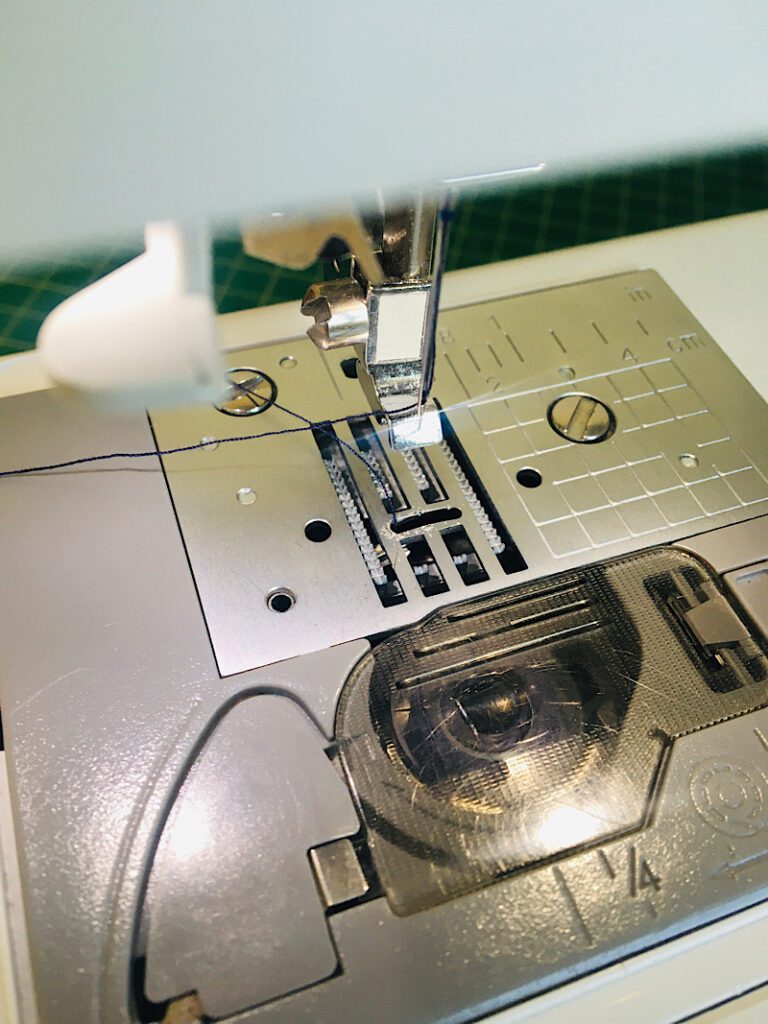
Step 2. Drop The Feed Dogs
Freemotion quilting requires YOU to move the fabric through the machine, not the feed dogs! (This is why it is called free motion! You can move the fabric any direction you want, whereas the feed dogs only move backward.)
On the back of your machine, locate the lever that raises and lowers your feed dogs. Switch it to the “dropped” position. (On my machine, the dropped position is on the left, with the triangles under the line.)
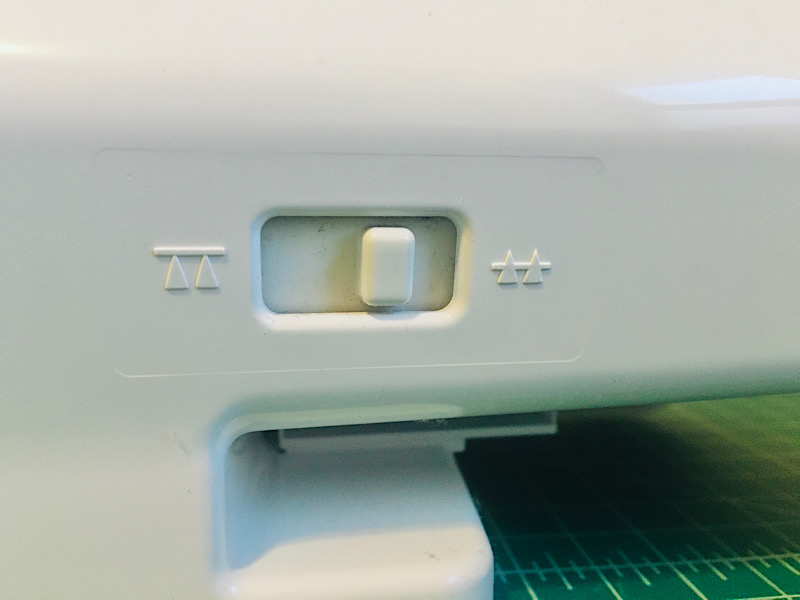
You should not be able to see or feel the feed dogs on the plate of your machine when they are dropped.
Step 3. Select a Stitch & Use An Extension Table
Turn on your machine and select a stitch. You can keep it on a straight stitch to start with or experiment with another stitch like a stippling stitch (43 on my machine) if your machine has one!
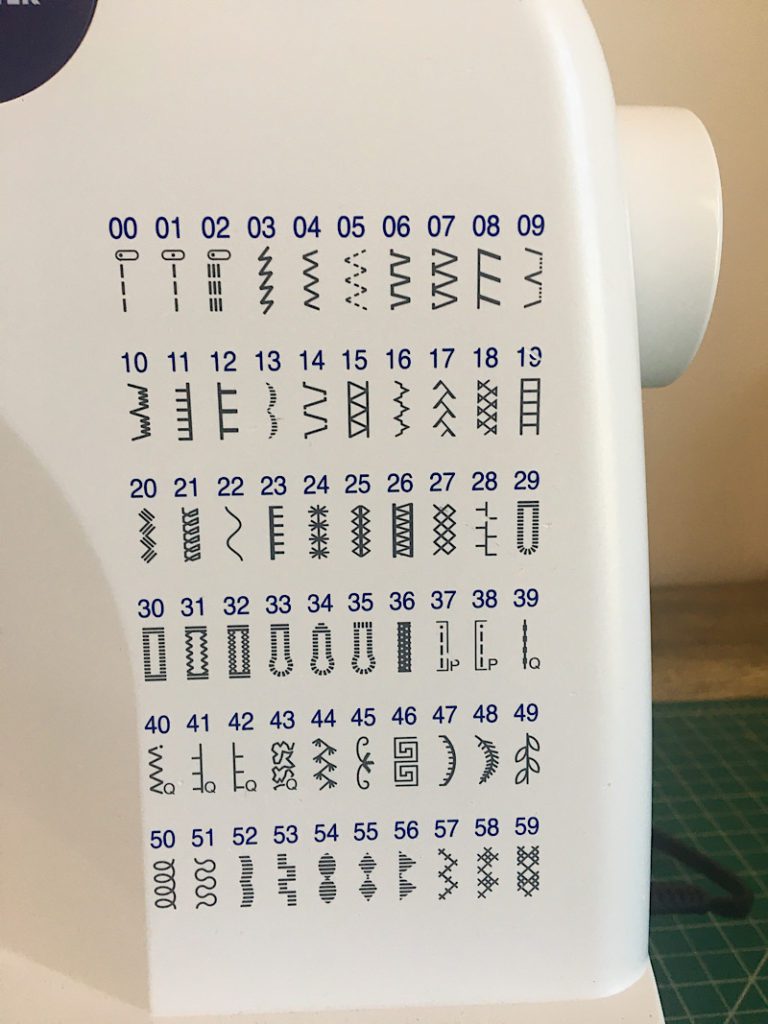
A straight stitch will be the easiest to start with. Remember when your needle lowers, the presser foot will lower and “hop”. It takes some practice to get used to!
If you have an extension table for your machine, it will help SO much when you quilt. My Brother cs6000i has a removable extension table that makes more space for quilts.
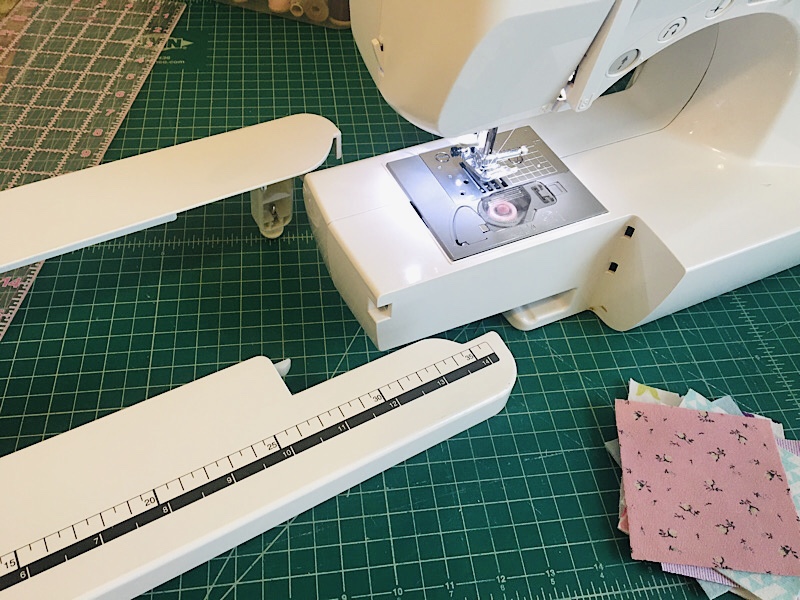
I have also seen custom made extension tables for sale online.
Step 4. Hold The Fabric Taut
As in any quilting project, you want to make sure the quilted top, batting, and backing are all held together well. You can use a spray fixative (also called a basting spray) that is made for quilting, or plain quilting safety pins that you remove before sewing that area.

When freemotion quilting, position your fabric under the needle and hold two hands flat on both sides of the fabric. The manual for my sewing machine has this illustration to show you the proper hand placement:

Sometimes the fabric is slippery under your hands and hard to hold taut. A popular way to combat this problem is special gloves that are made for quilting. The gloves have rubber grippers on the palms (like on the bottom of toddler socks) to prevent slippage.
Another way you can make sure your fabric is taut is to place it into an embroidery hoop. This is a fun hack that is great for smaller quilts or detailed areas. This can help you practice moving it bit easier, BUT it isn’t great for large quilts because you would have to move the hoop around the quilt too often.
To try the embroidery hoop hack, place your quilt into the hoop upside down, so the quilt is laying flat on the table when upside up.


Then raise the foot and slide the hoop under to start sewing.
Step 5. Begin To Sew
Start by sewing in the same spot for a moment to reinforce the start of the stitch. Then, use your hands to slide the fabric freely around to make your design. You can move your hands together in a sliding motion to move or rotate the fabric where it needs to go.
You will want to practice making even stitches, which an be tricky without the feed dogs helping you. The key is to move the fabric at an even and consistent pace. If you move it too fast, the stitches will look too long. If you move it too slow, the stitches will be quite tight.
One tip is to lower your machine speed to 50% or less, then press the foot pedal all the way down. This helps you to sew slowly without thinking about how hard you are pressing the pedal. Try a few practice stitches on a piece of fabric to move the material at the same speed as the needle.
You can start and stop to readjust your fabric or hands.
At the end, reinforce the stitch at the end, as well.
You can use a pattern to free motion quilt certain designs, or you can make up your own. Beginners could utilize a disappearing ink marker to pre-draw the design you want to follow, and when you wash the quilt or get it damp, the marker will disappear.
There are also all kinds of quilting guides and rulers that you follow with your presser foot to make designs that stay consistent and evenly spaced. Here is an interesting “meander” template, a cute flower template, and a guide that has 6 different designs built in.
For my project I did a simple loop pattern, and I didn’t care if it was even. (I used this quilt to make a bag with later.)

When you are done quilting, remember to raise the feed dogs and replace the presser foot!
That is the basic overview of freemotion quilting for beginners! If you want to learn more, here is a great video I found that shows you the free motion quilting in action, with more beginner tips.
I hope these simple tips help you on your way to learning to free motion quilt! I am still learning too, so don’t be afraid to just jump in!
I have several patterns on my site that would lend themselves well to free motion quilting, check them out!