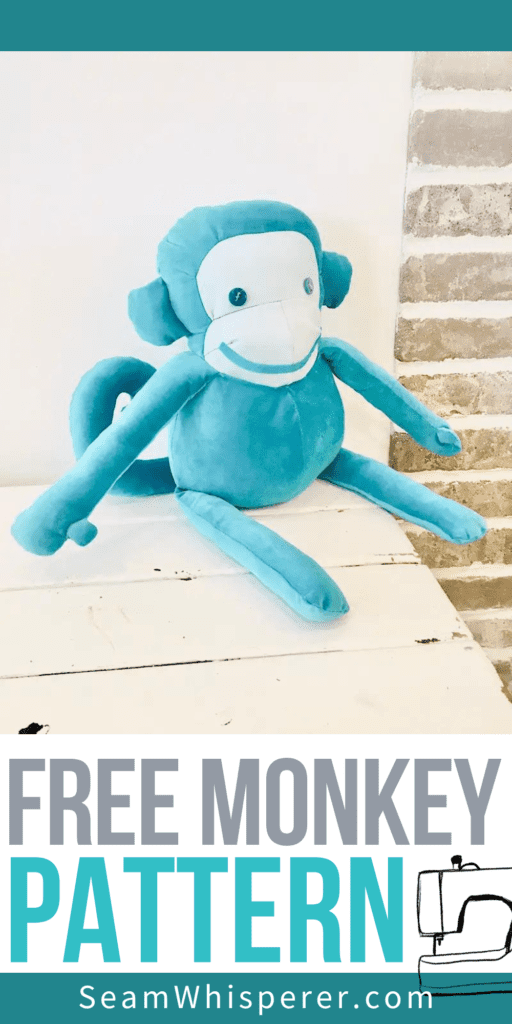
Looking for a free sewing pattern for a large stuffed monkey? This plushy is so cute with a fat head and body, and long legs and arms. Plus, he can actually hang by his tail!
One thing that I want to get better at sewing is stuffed animals. I have only made a handful, so I am always on the lookout for more to try!
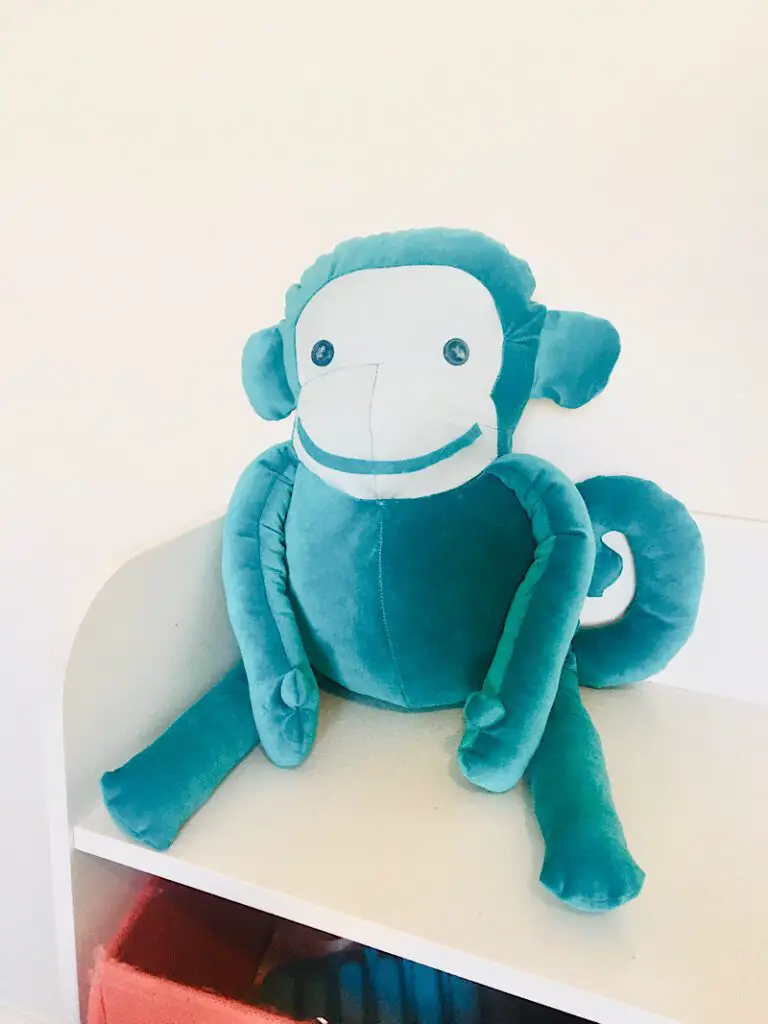
Today I am introducing this new free pattern, Paulie Monkey! He is so cute, a nice large size of over 18 inches tall from head to foot, and has some customizable options.
He is not a perfect monkey, but he is cute and the kids like him!!
This is an intermediate/advanced sewing pattern because it does get a little tricky at the end (sewing stuffed limbs can be a fun challenge!)
This post may contain affiliate links. Read the full disclosure here.
Supplies Needed
- 3/4 yard of Main Fabric – medium weight woven material of your choice. (I used a slightly velvety type material with no stretch.)
- 9″x12″ scrap piece of Face Fabric – another medium weight woven material in a lighter complimentary color.
- Matching Thread
- Buttons, plastic snap safety eyes, felt, or embroidery thread for the eyes and nose. (These eyes would be so cute)
- Embroidery thread or felt for the mouth
- Fiber fil stuffing
- Sewing Pins, scissors, hand sewing needles, pinking shears.
How To Sew A Stuffed Monkey

Step 1. Download The Free Pattern
The template for this stuffed monkey pattern is available totally free for my email subscribers. (Email me a photo when you’re done!)
To get your copy, sign up below and I will email it right away.
The instructions for this pattern are located here in the blog post, starting on step 2!
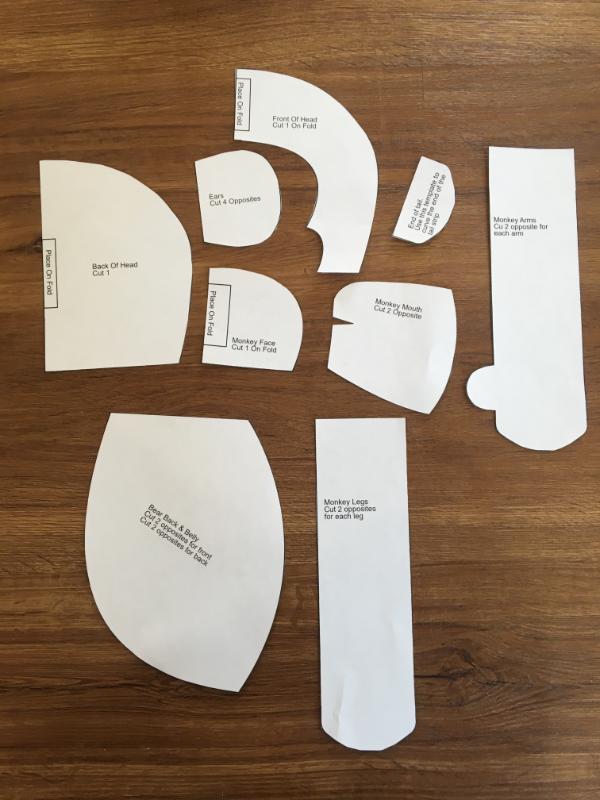
Step 2. Print & Cut Your Pattern
This pattern is a 5 page PDF printable pattern. After you download it, make sure to print it at 100% scaling so nothing gets cut off. You can measure the “1 inch test square” on page 1 to make sure it printed correctly.
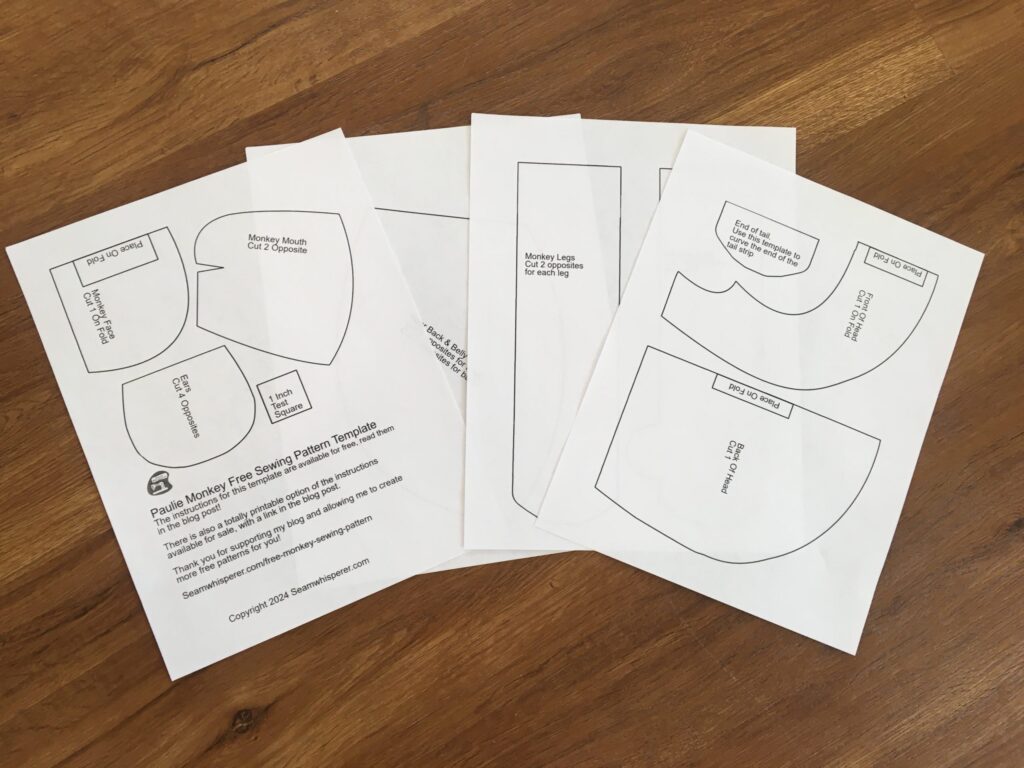
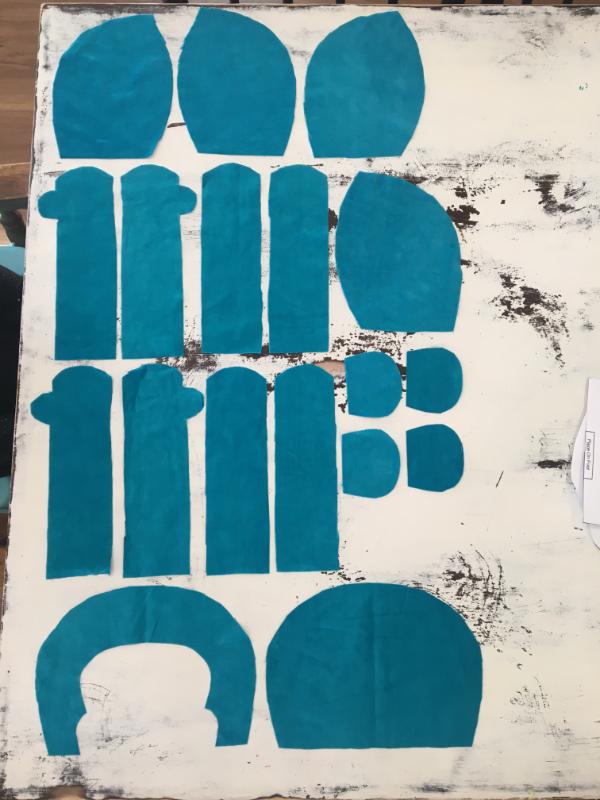
Cut out all the pieces and you are ready to cut them from the materials, as labeled on each piece.
The seam allowance for this pattern is already included, so don’t add any!
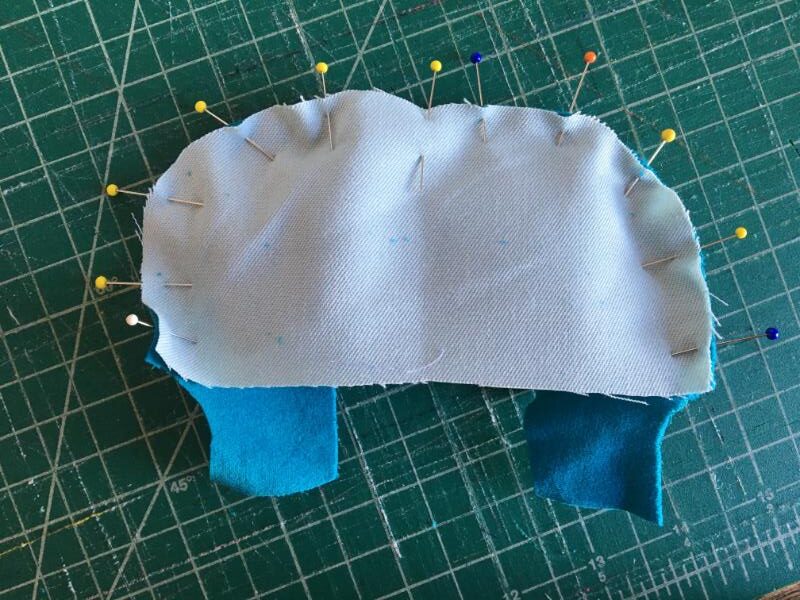
Step 3. Assemble The Face
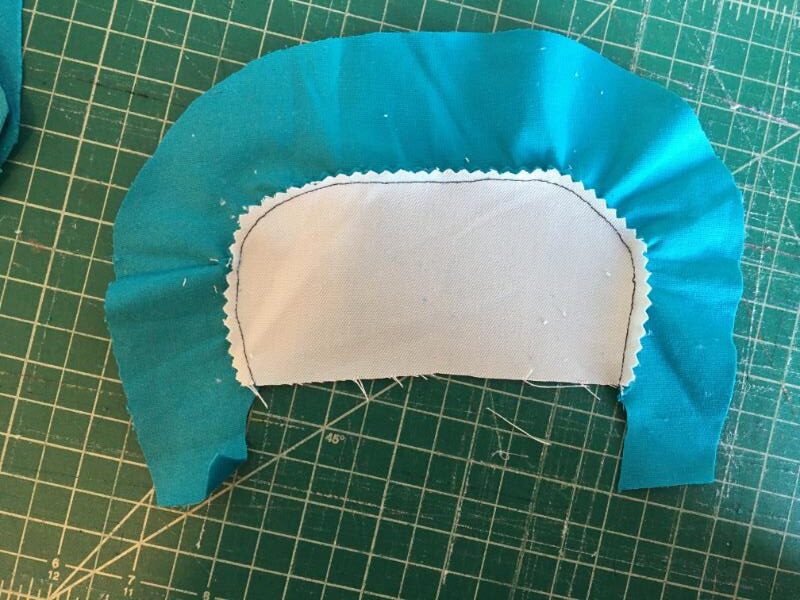
Lay the “Front Of Head” piece of fabric on the table with the right side up. Lay the “Monkey Face” piece on top, with the right side facing down. Align the raw edge of the middle point of the “Monkey Face” curve, to the raw edge and middle point on the curve of the “Front of Head” piece.
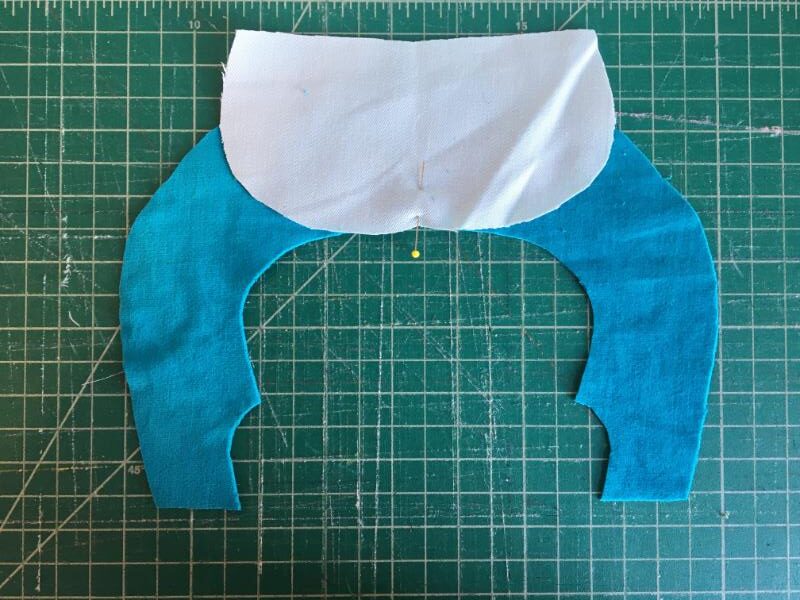
Continue pinning the two curves together, manipulating the “Front of head” fabric so that it curves around the edges of the face piece.
Here is what it looks like on the other side:
Carefully sew around the curve to attach both pieces together, with a 3/8ths inch seam allowance. Remove the pins as you go and try to flatten out the fabric as good as you can to prevent wrinkles.
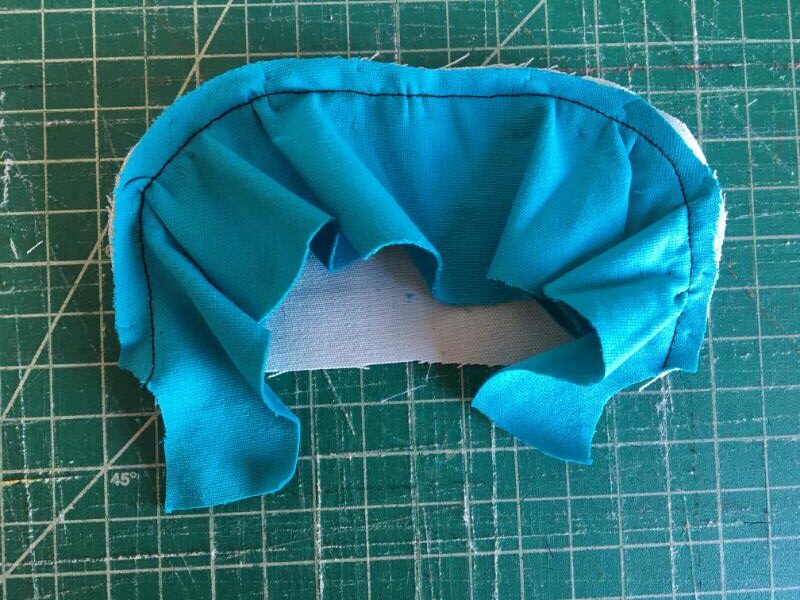
Then, pink or notch around the curve to remove the excess fabric.
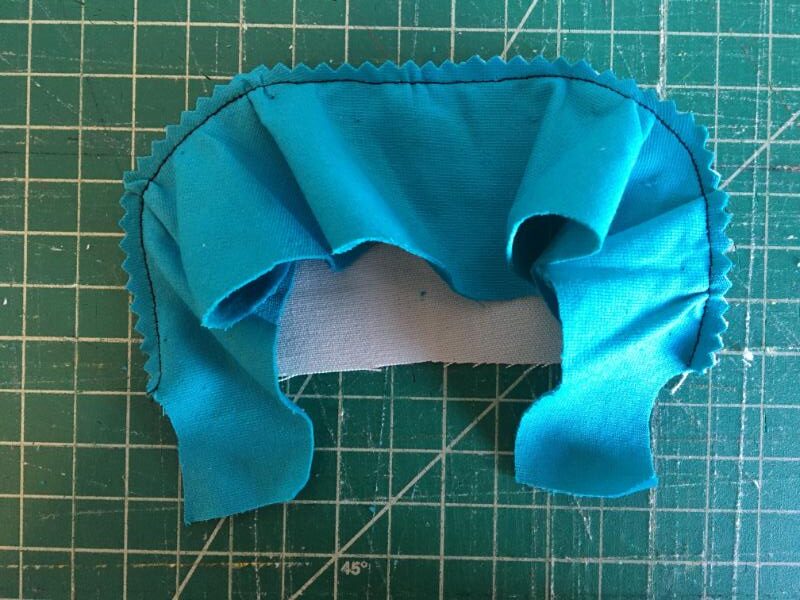
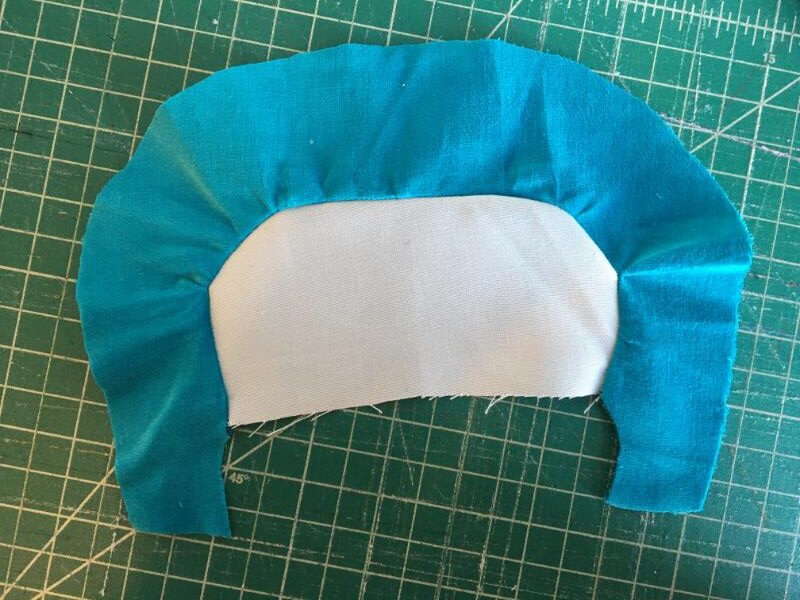
Turn the face right side out and flatten it out to see how it looks. You can also press it.
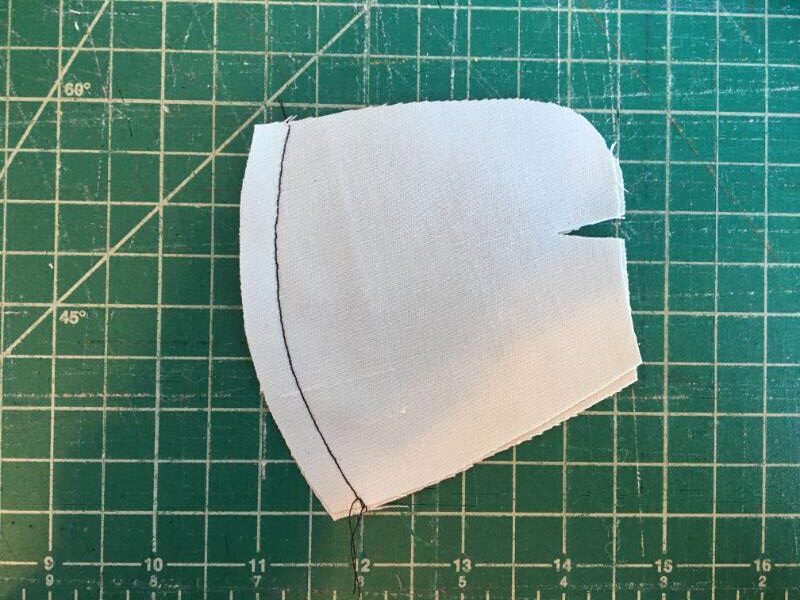
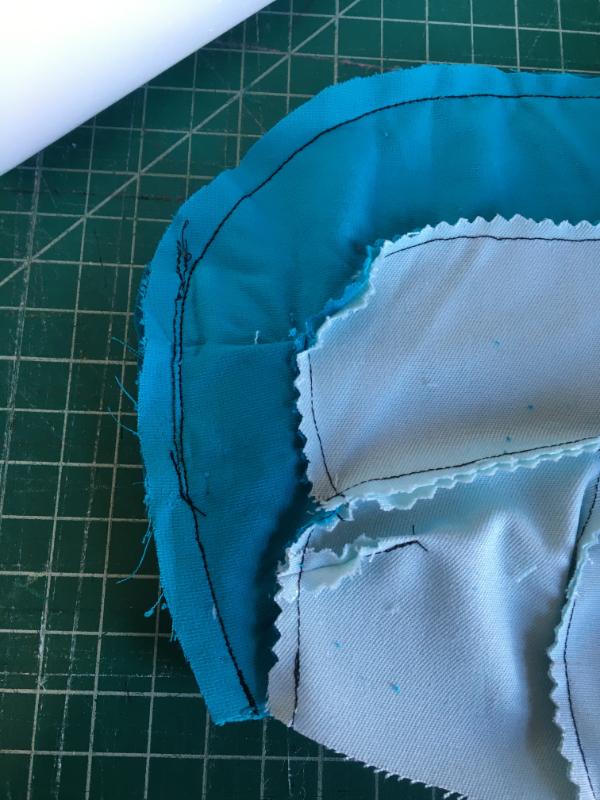
Step 4. Attach the Mouth Piece
Lay the two mouth pieces on top with right sides facing. Sew down the curved side opposite of the notched side. Then pink the edge.
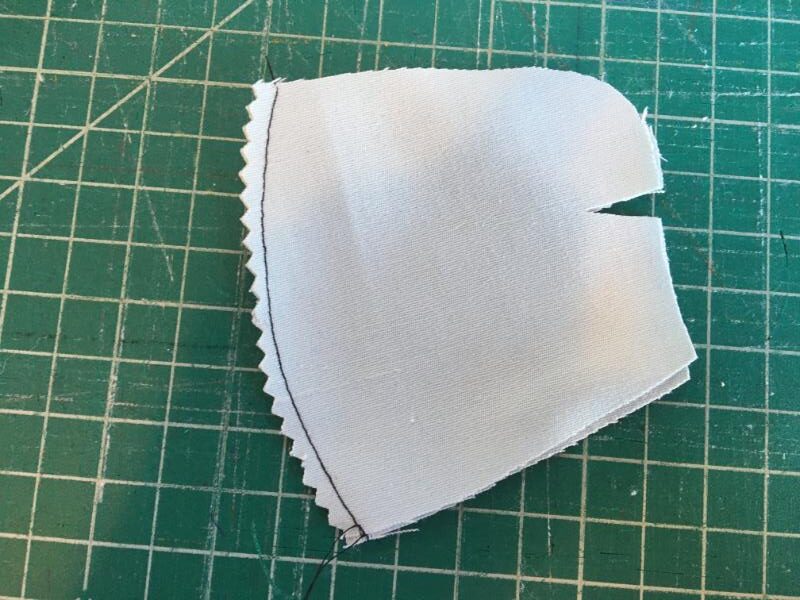
Next, fold the fabric so the two edges of one dart line up with right sides facing, and pin in place. Then sew along the dart’s raw edge with a 3/8ths seam allowance.
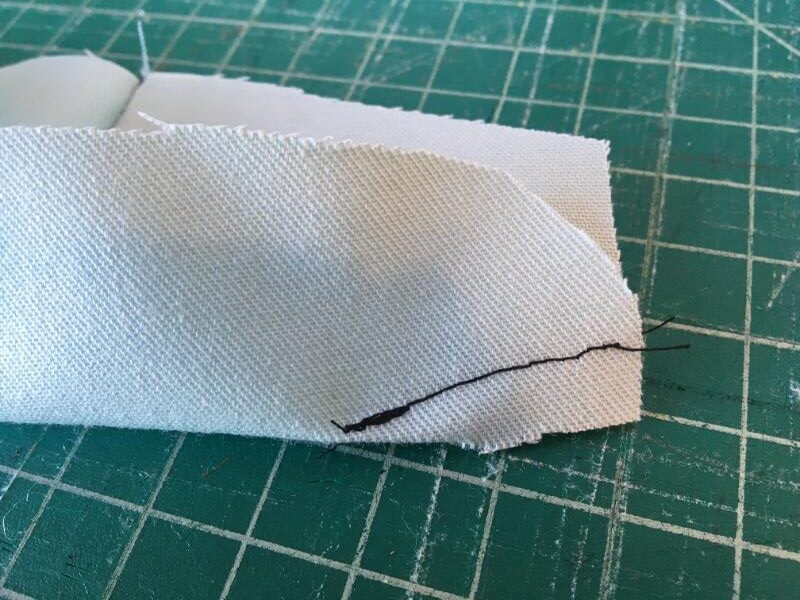
Repeat for the other dart. This is now the completed mouth piece.
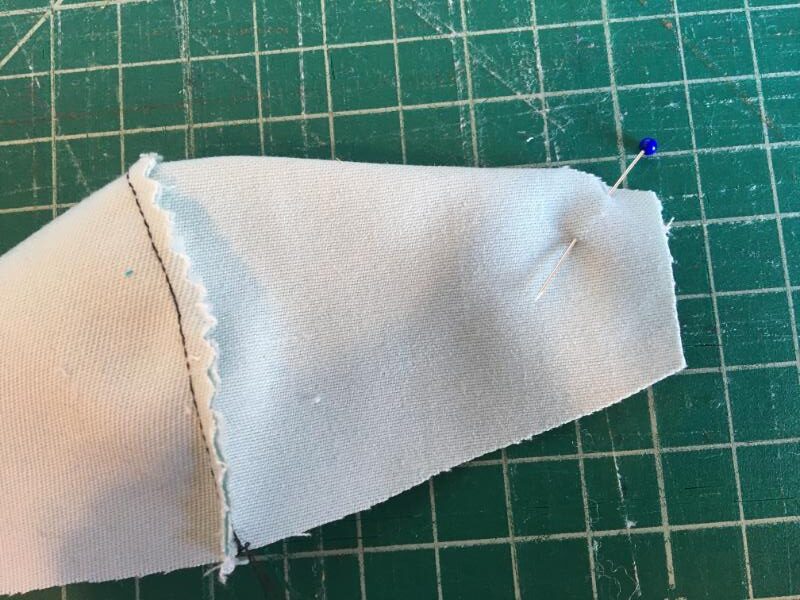
Align and pin the mouth piece to the curve on the monkey’s face, with the raw edges aligned and right sides together. (Similar to how you pinned the face in the previous steps.) Start in the middle, then pin outwards toward the ends of the fabric.
Then sew along the curve with a 3/8ths seam allowance.
You can see that my mouth is a bit longer than the dark blue head material, that is fine, it can be trimmed later. Do the best you can on this part and if it isn’t perfect, don’t fret!
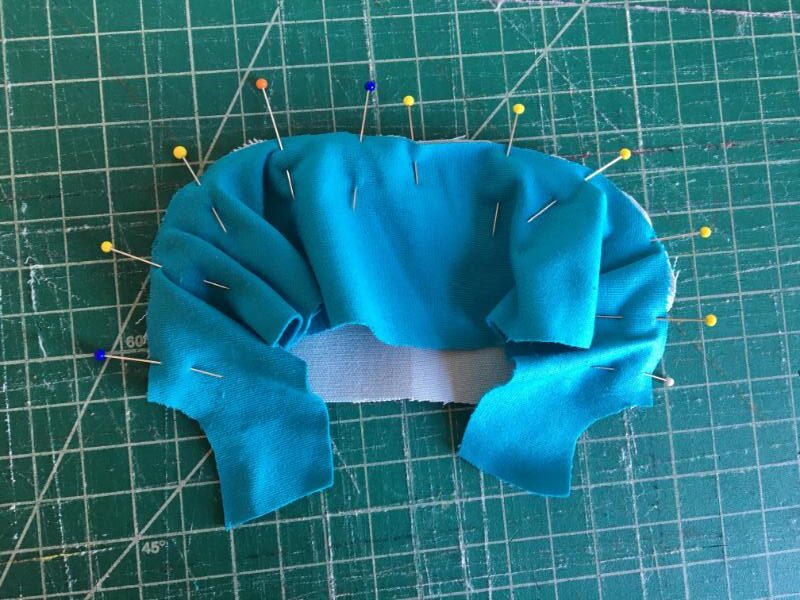
Step 5. Sew The Ears & Head
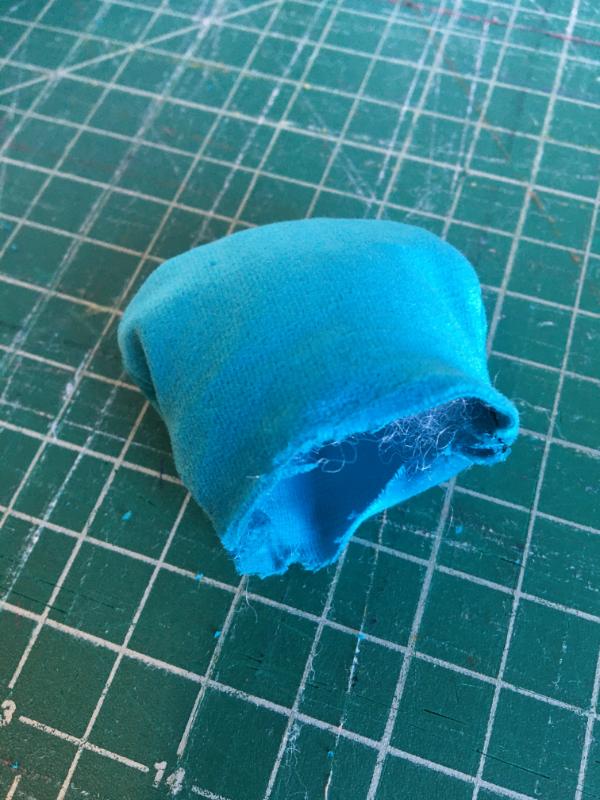
Layer the two ear pieces together with right sides facing. Sew around the entire top curve, leaving the flat bottom open. Notch or pink the edges, then turn right side out.
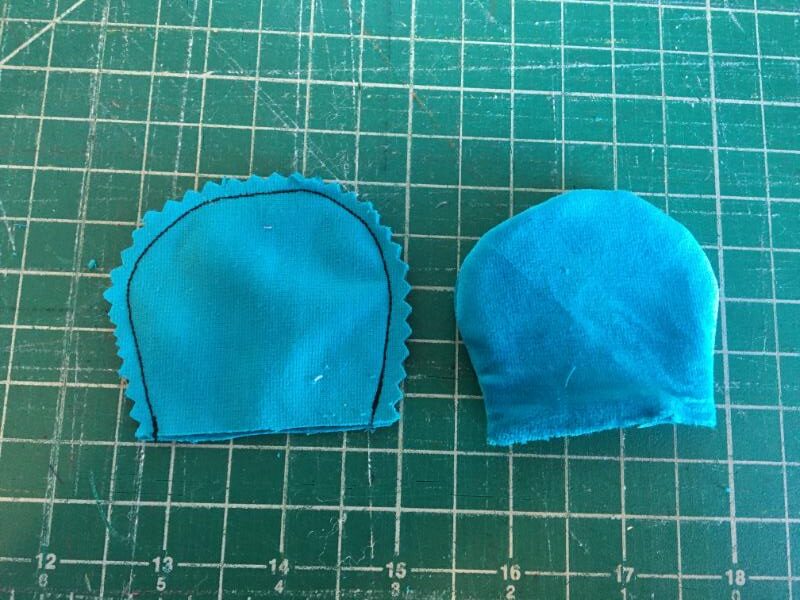
Then, stuff each ear with stuffing just a little bit. Enough to give them some shape but not so full that they turn into balls.
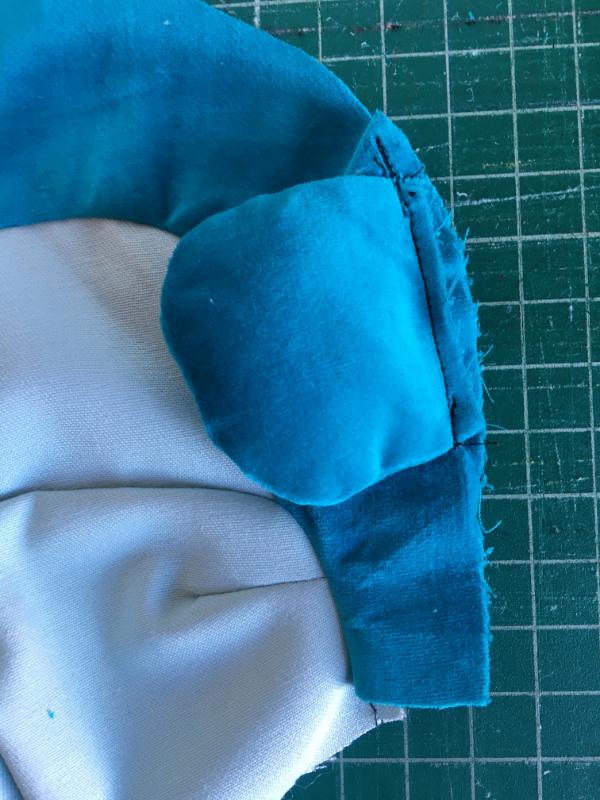
Position each ear on the sides of the monkeys face where you think they look nice, with the raw edges of the ears aligned with the raw edge of the head. And pin them in place.
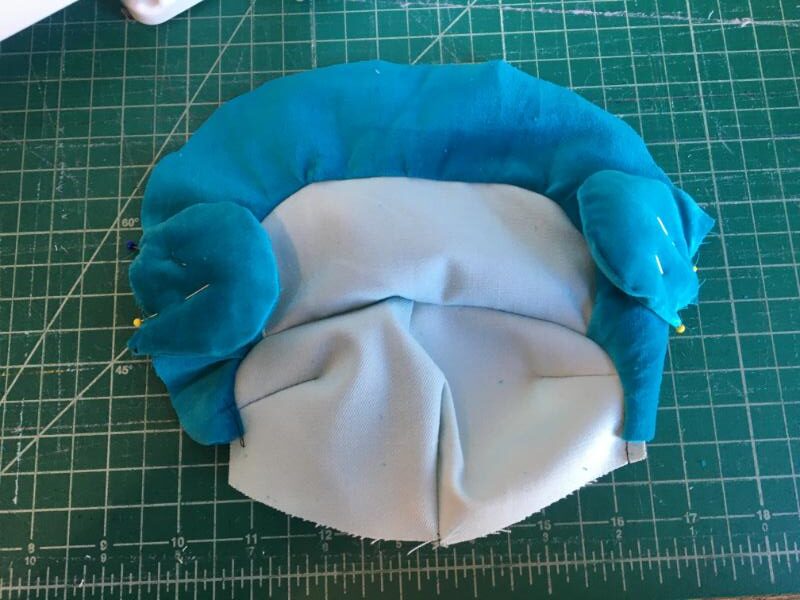
Sew each ear down, with a 1/4 inch seam allowance.
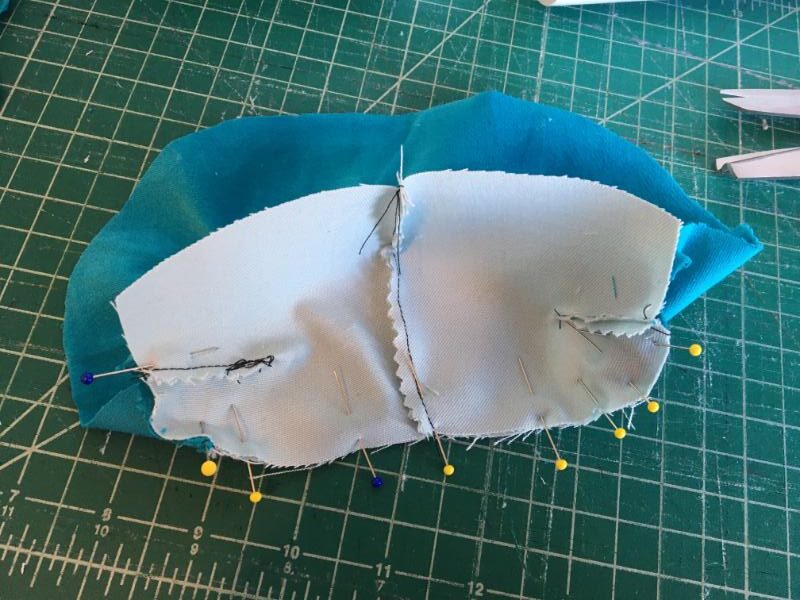
Keep the ears facing into the center of the face, then lay the “Back Of Head” piece on top, with the right sides together, and pin around the edges.
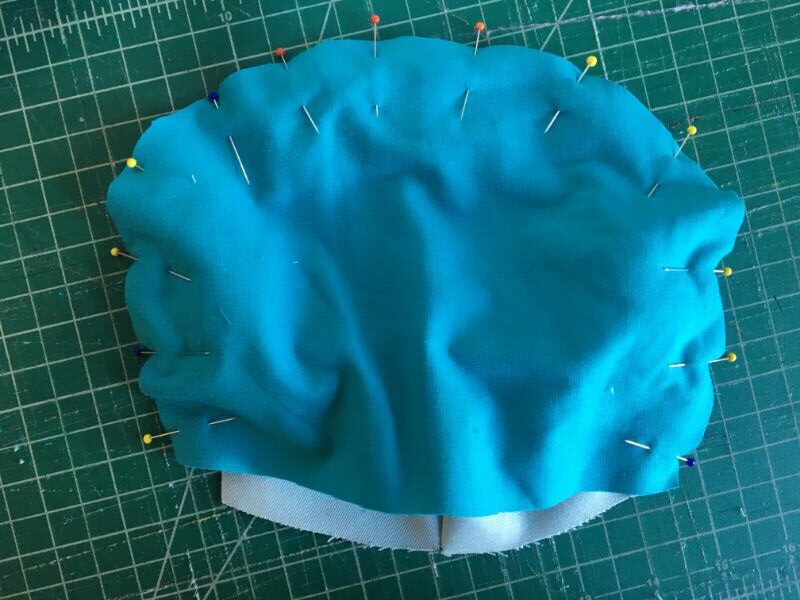
Sew around the top curve of the head with a 3/8ths inch seam allowance, leaving the bottom open. Pay special attention when you are sewing through the edges of the ears.
Pink or notch around the curve.
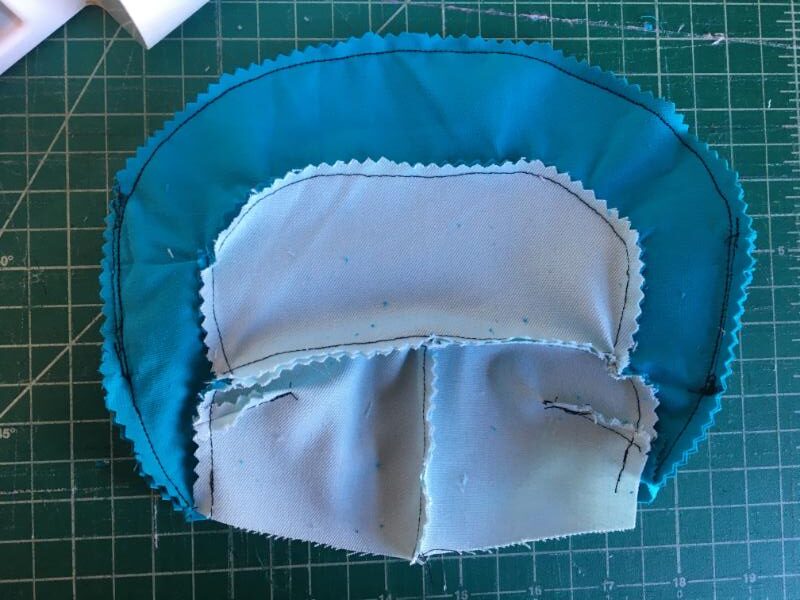
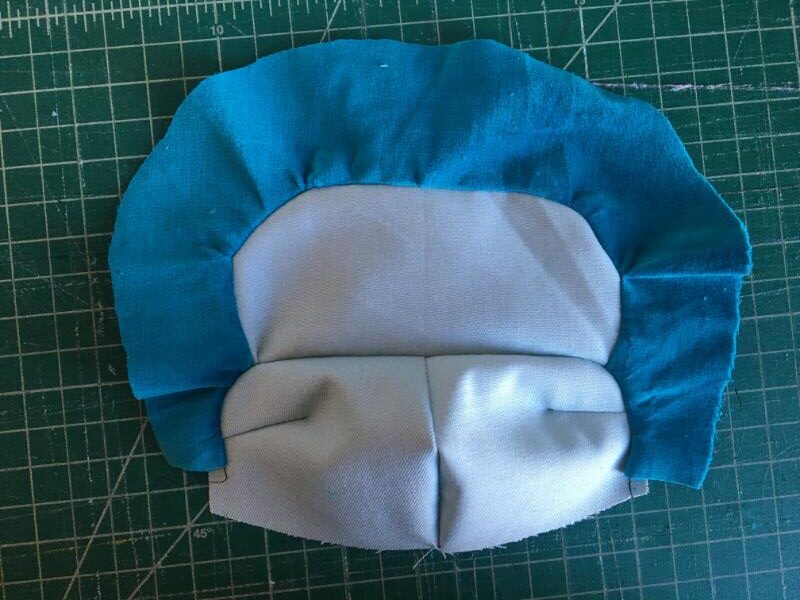
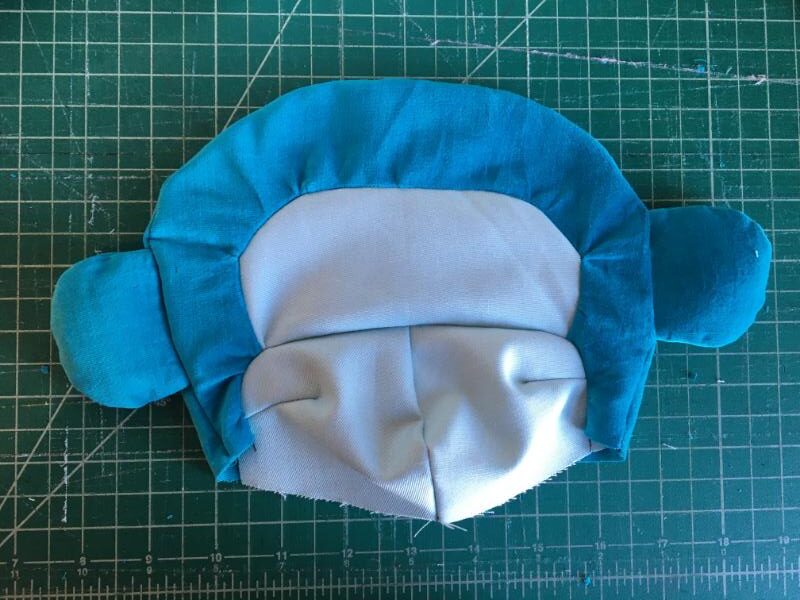
Finally, turn the head right side out and see how its turning out! If you need to trim the bottom of the mouth area so it is aligned with the rest of the head, do so now.
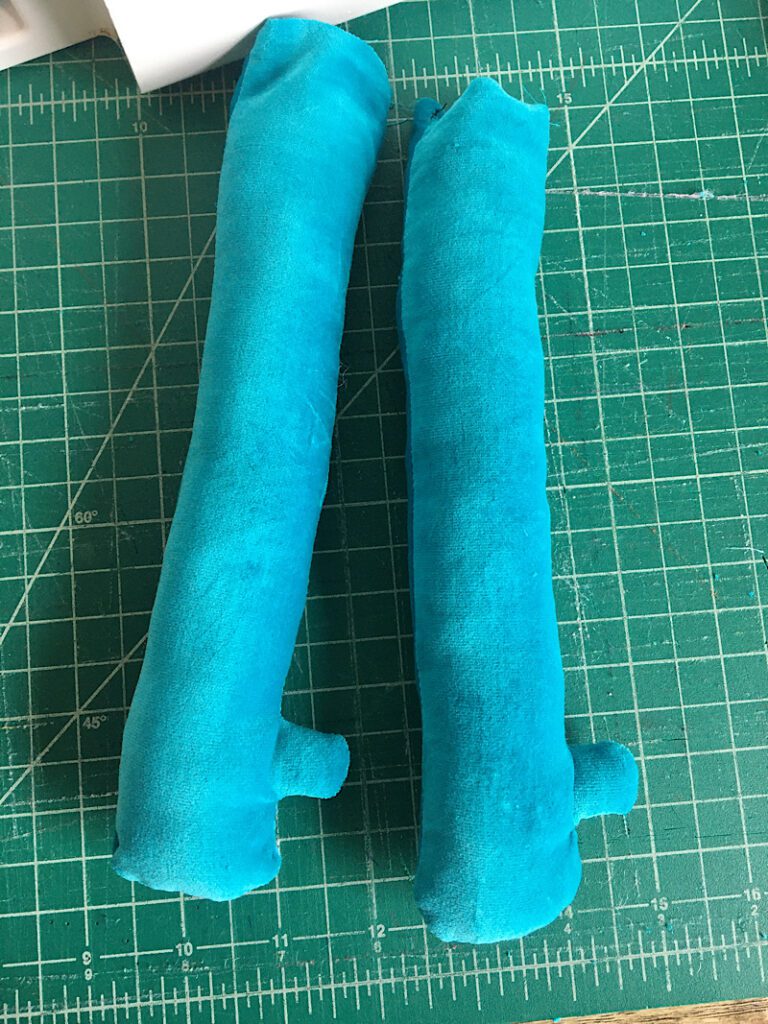
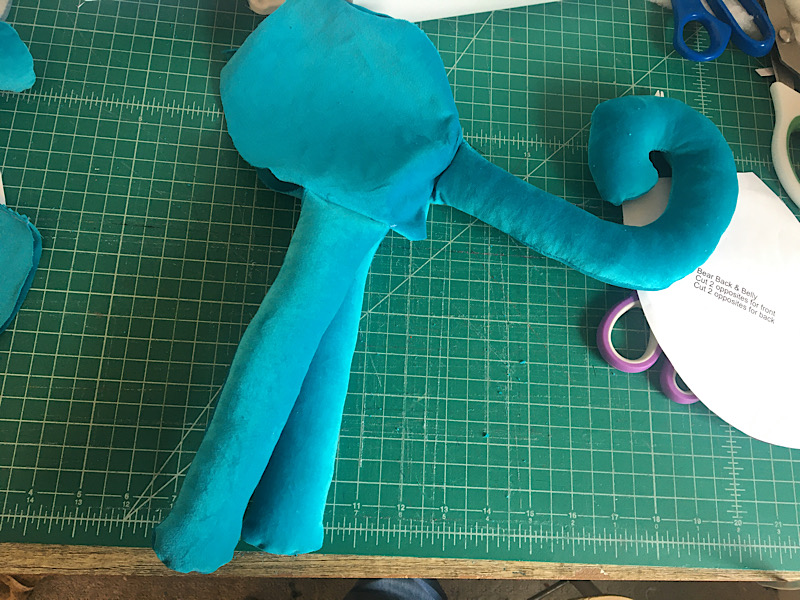
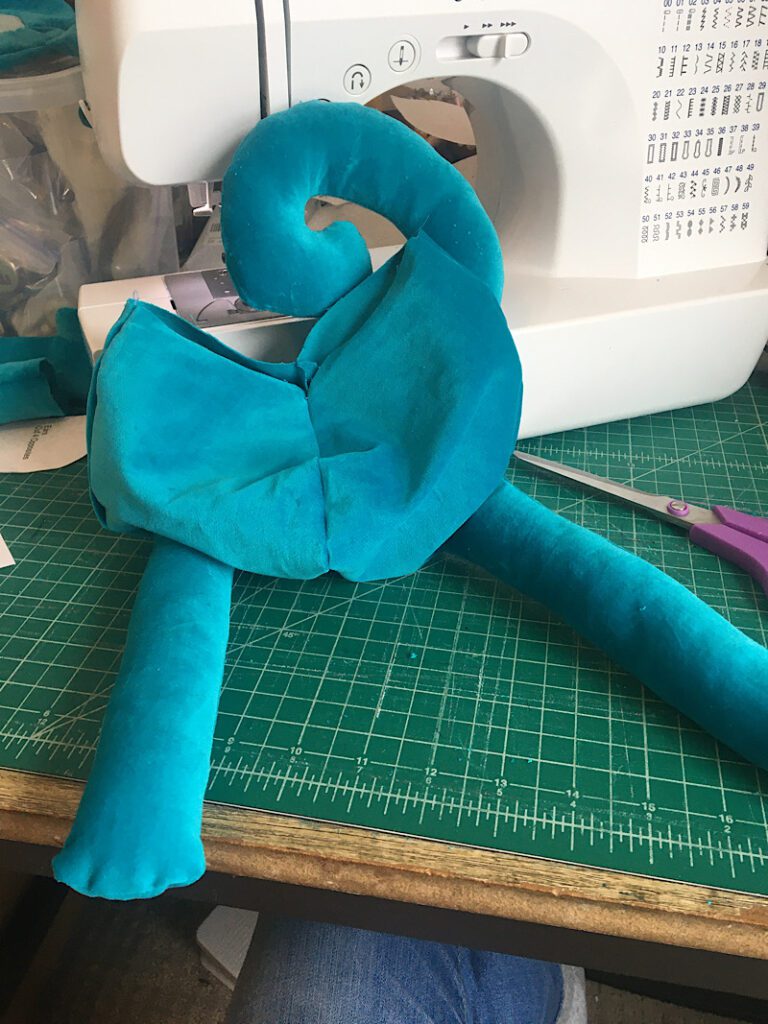
Step 6. Assemble The Limbs
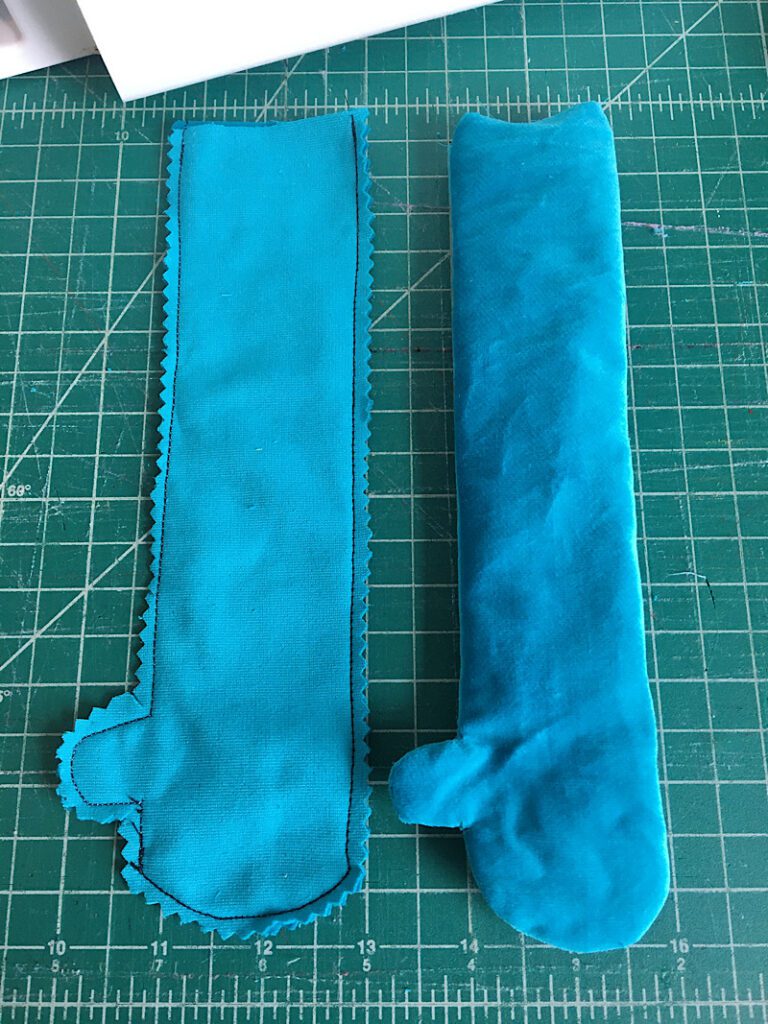
Lay two leg pieces together with the right sides together. Sew around the sides and bottom, leaving the top flat side open.
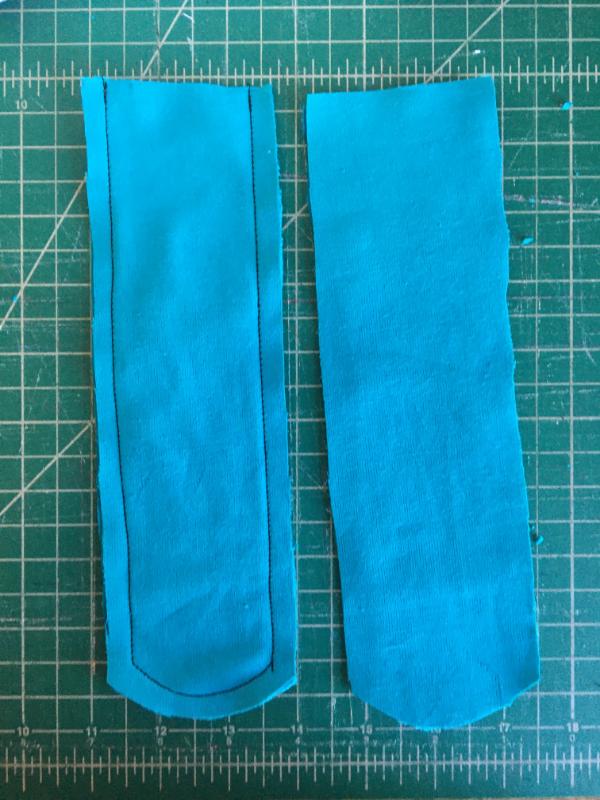
Then, pink or notch around the edges and turn it right side out. Repeat these steps with the other leg.
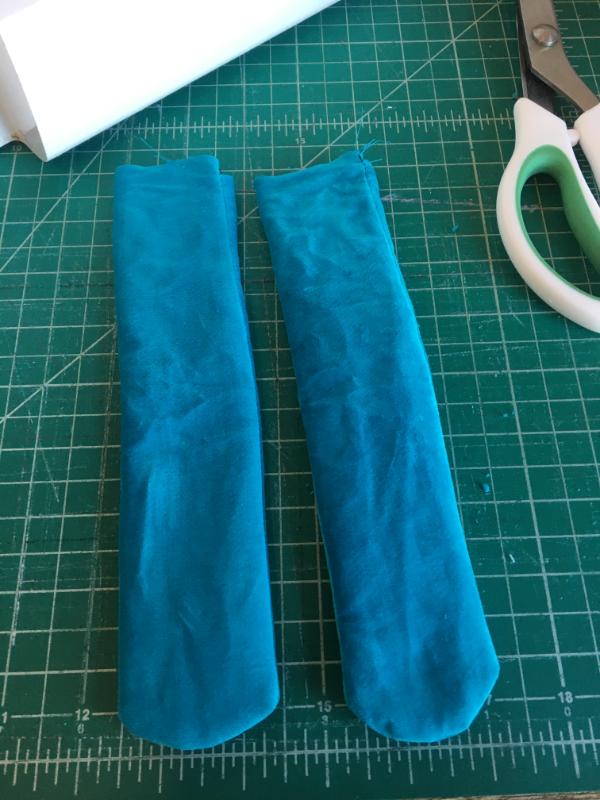
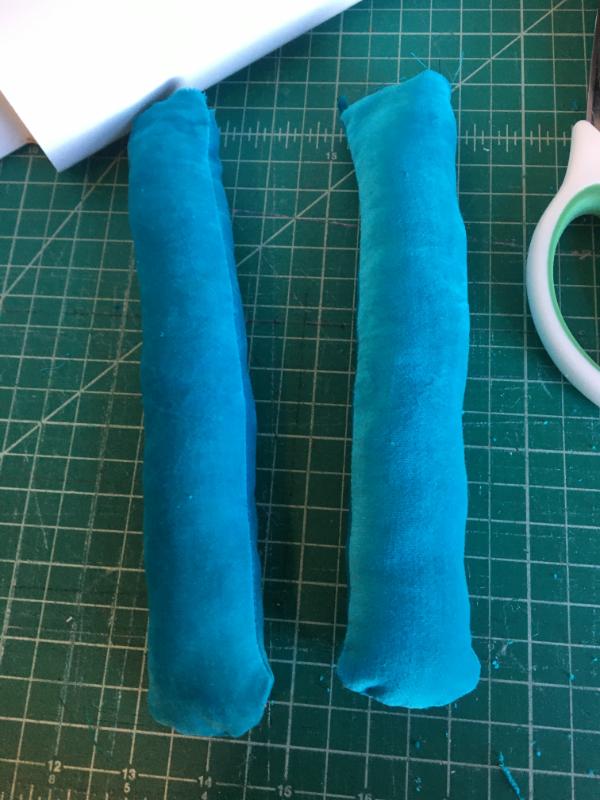
Stuff both legs nice and full with stuffing, leaving an inch gap on the top.
Assemble the arms in the same way, sewing with a 3/8ths inch seam allowance. Go slow and don’t be afraid to stop and pivot the material when sewing around the thumb.
Pay special attention to notching or pinking around the thumbs. You should also cut a slit on both interior corners near the thumb, being careful not to cut through the seam.
Turning the hands right side out is a bit harder. You can use a long blunt object to stick inside and help poke the thumb out.
Then, stuff the arms. Start by stuffing the thumb tightly, then stuff the rest. Leave a 1 inch gap at the top.
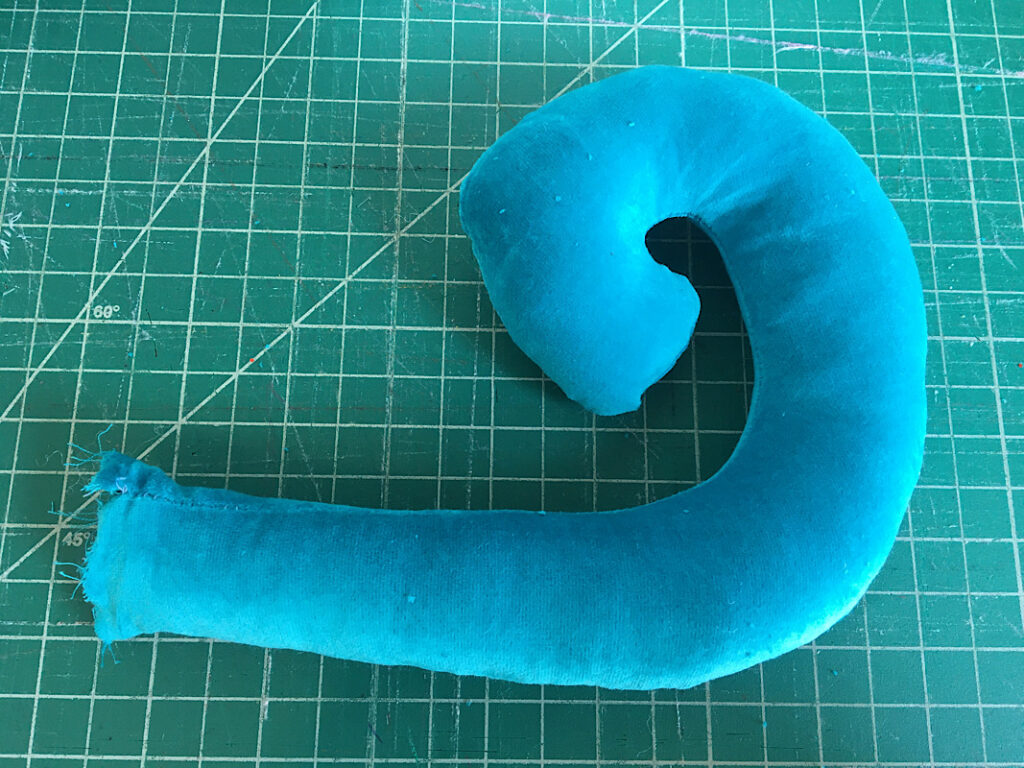
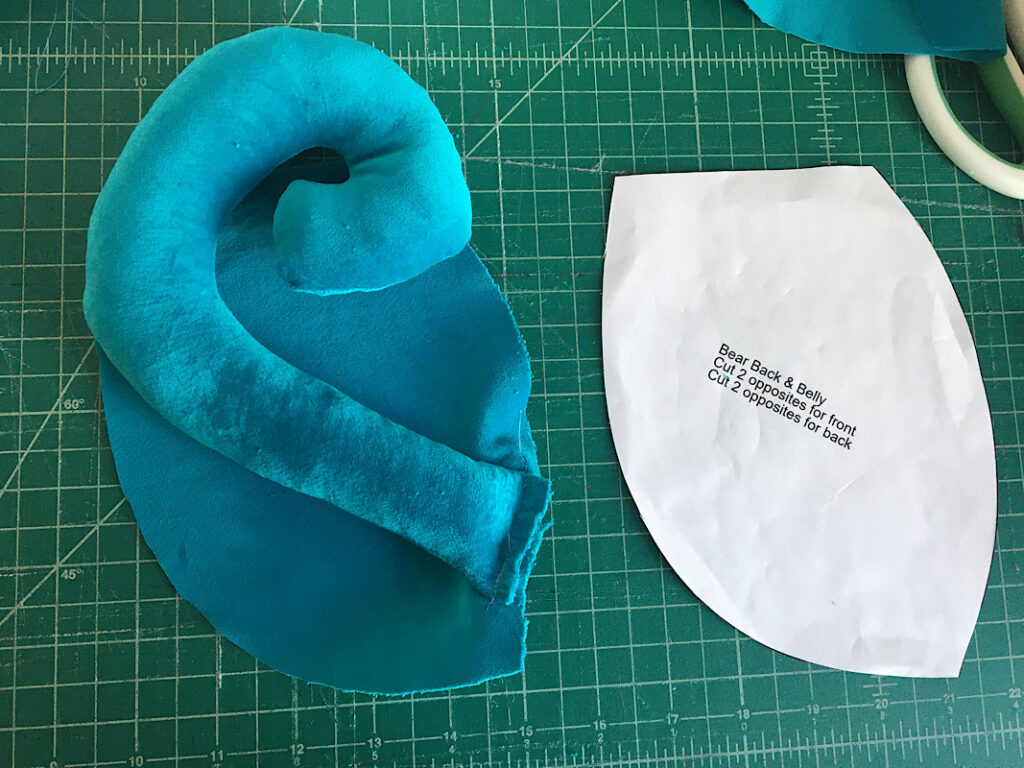
Now, do the same to assemble the tail. Lay both pieces together with right sides touching, and pin around the edges really well to prevent it from shifting.
Sew around the perimeter, leaving the flat end open.
Pink around the edges, turn, and stuff.

Now, set aside the limbs until you need them again.
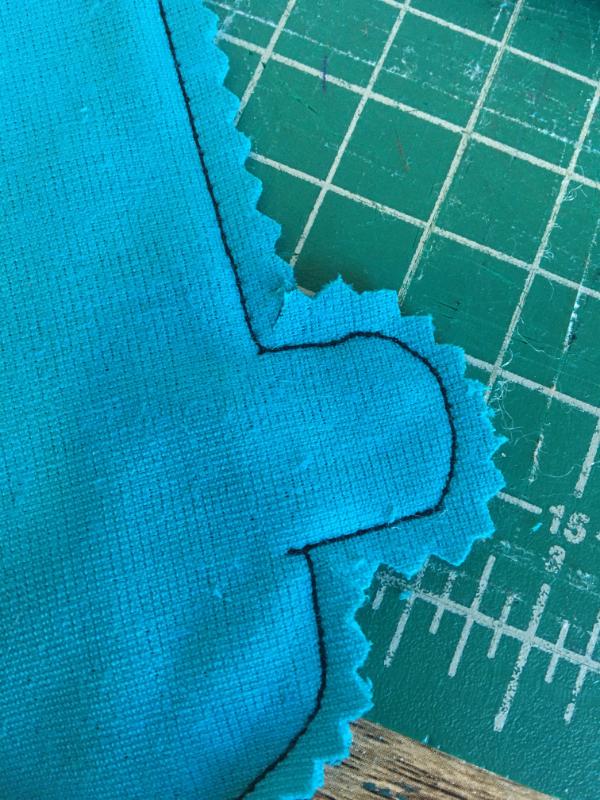
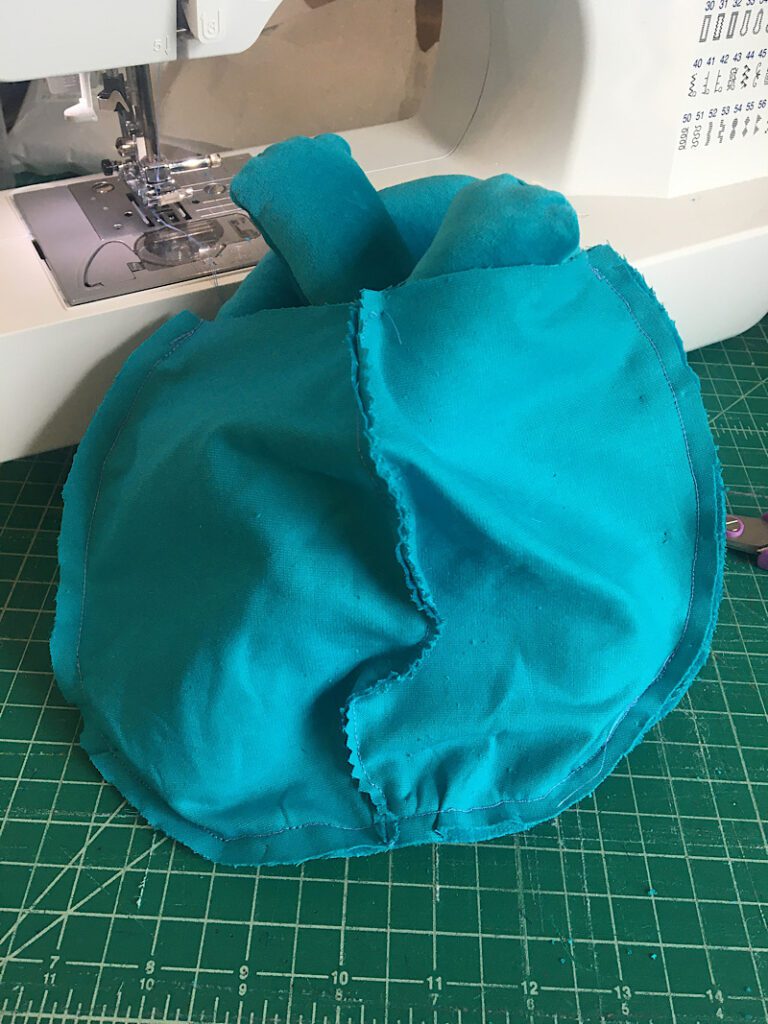
Step 7. Sew The Monkey’s Body
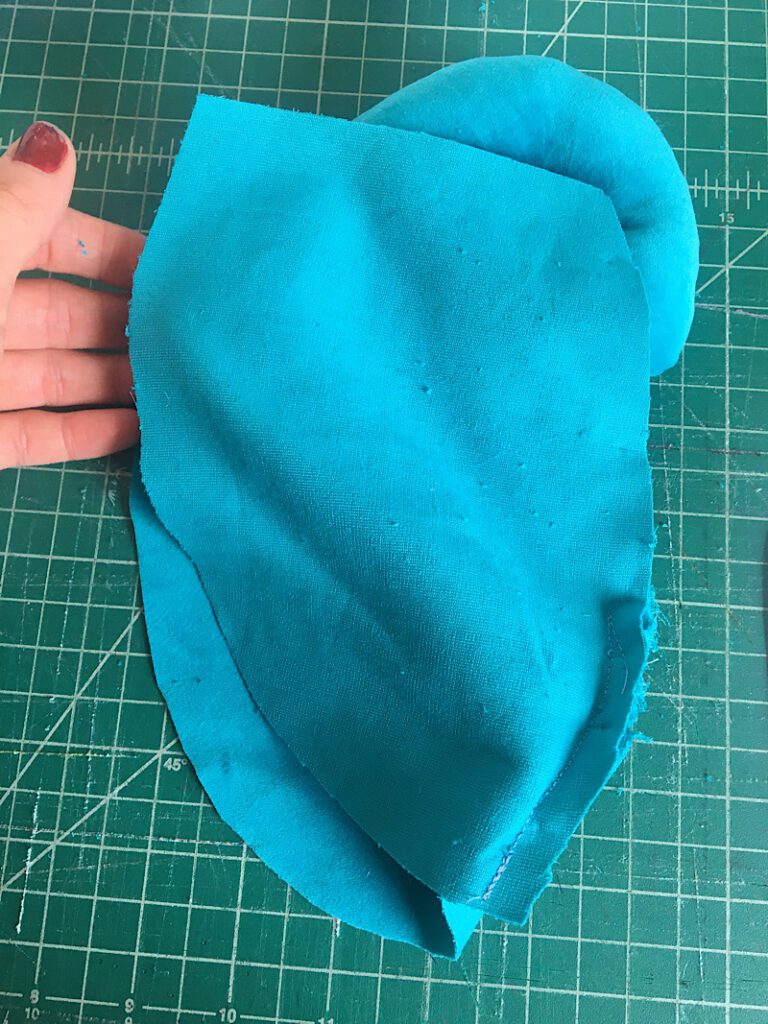
Lay two of the “Monkey Back and Tummy” pieces together, right sides touching. Sew down only the less curved side, as in the image below. You can use the pattern piece to help you orient which side to sew, it should be the right hand side then the fabric is laying how the pattern piece lays.
This will be the tummy.
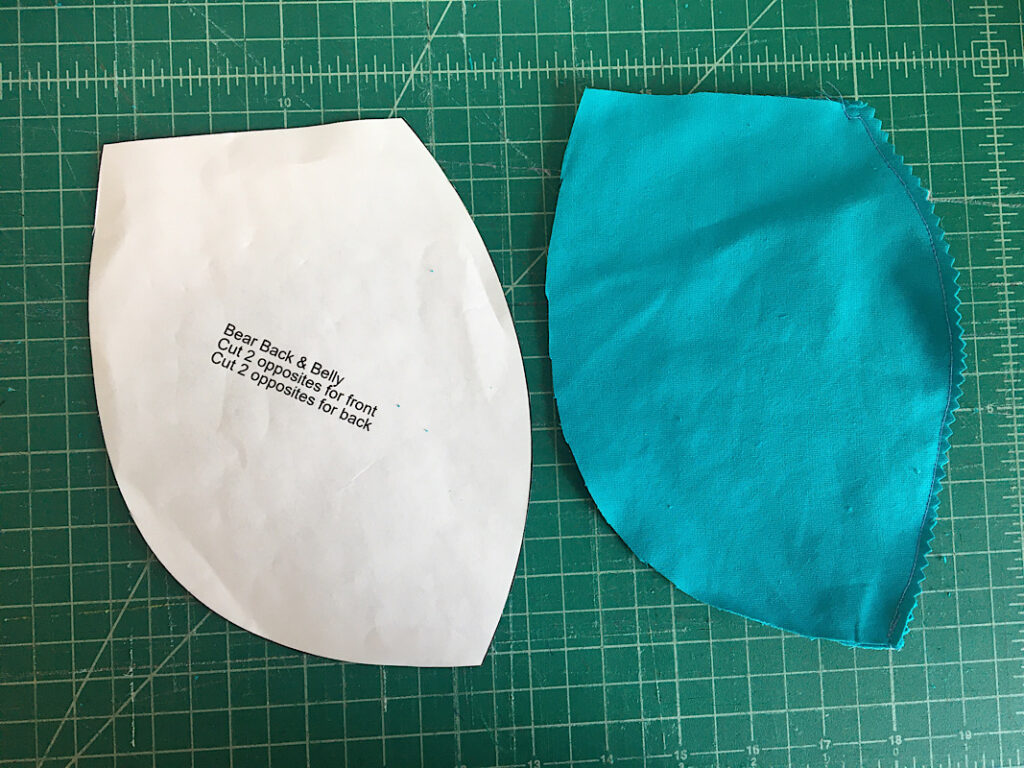
The pattern in these photos says “bear back and belly”, it is supposed to say monkey, as it does in the pattern you downloaded.
Now, lay another piece down with the right side facing up. Position the tail about an inch away from the bottom point on the right hand edge of the fabric. Pin it in place.
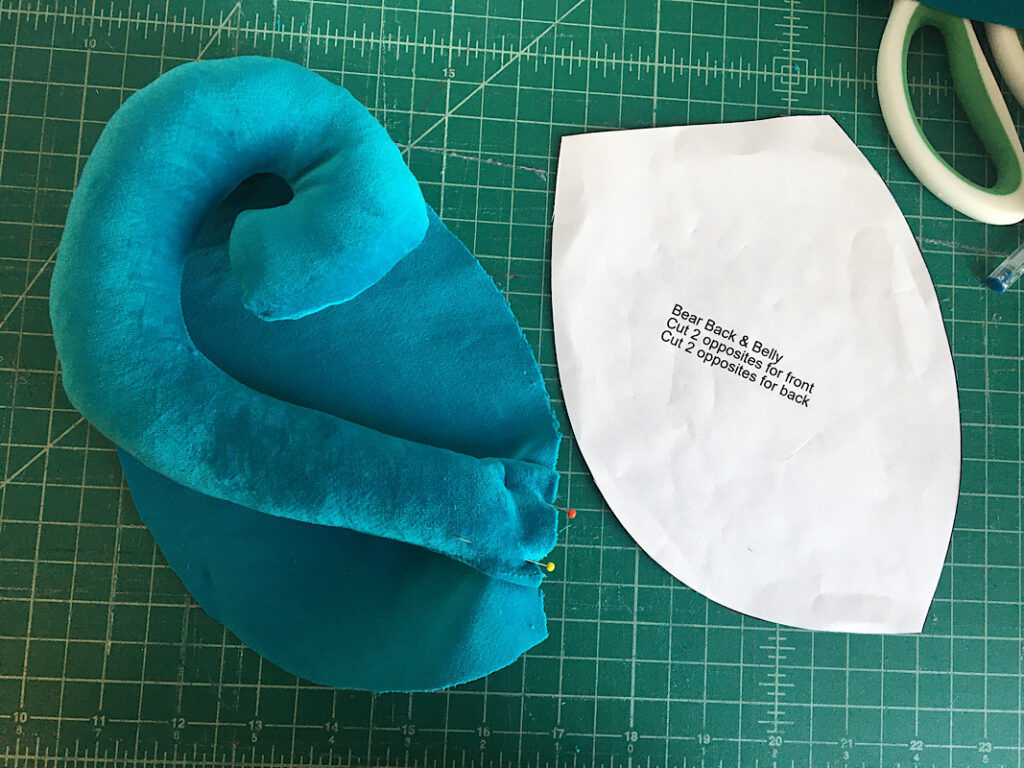
Sew the tail to the fabric with a 1/4 inch seam allowance.
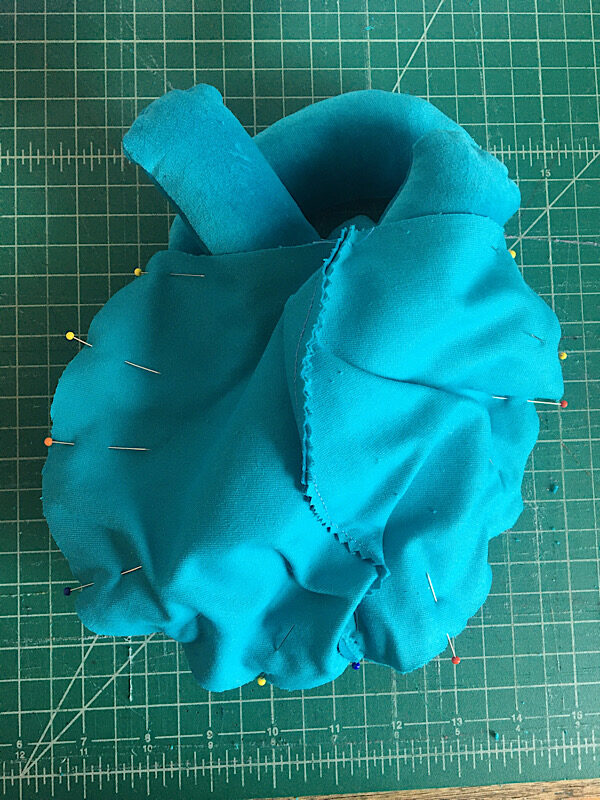
Lay the other “back” piece on top, with the right side facing down, and pin along the right side edge.
Instead of sewing along the entire right hand seam as before, only sew about an inch’s length at the top, and a half inch above the tail down to the bottom. This will leave a gap down the center of the back for you to stuff the monkey with later.
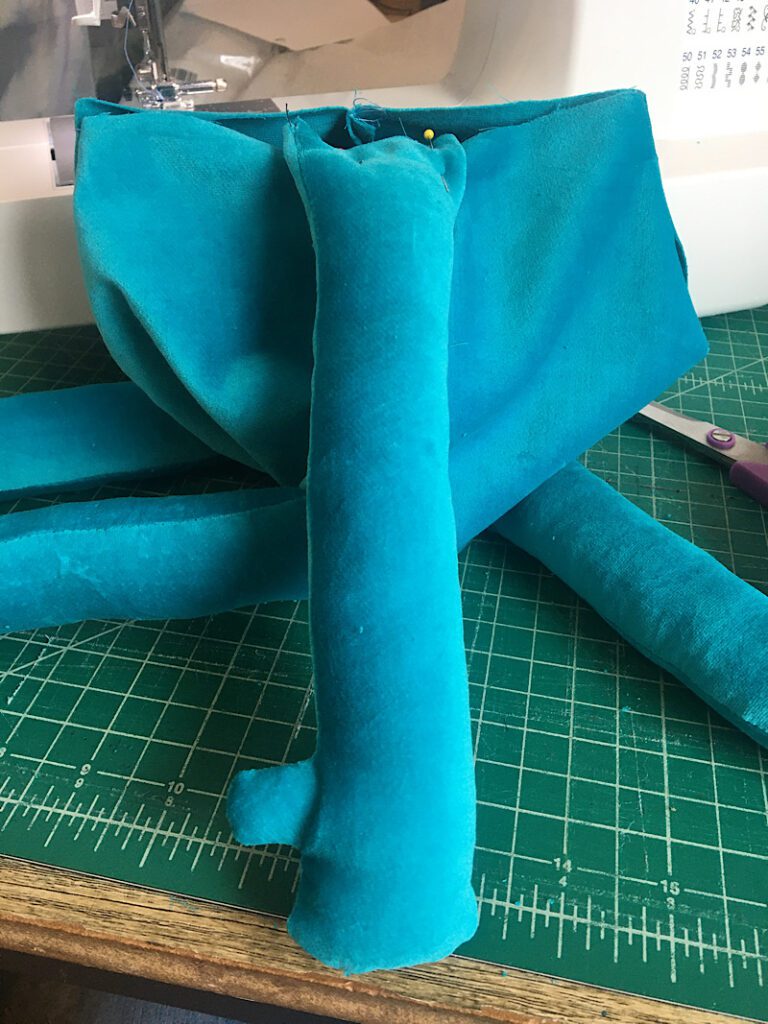
Next, open up the back piece and pin the two legs to the bottom, about 2 inches away from the sides of the tail.

Sew the legs to the body, with a 1/4 inch seam allowance.
Then, the completed back portion should look like this when you are done!
Now we will attach the tummy to the back.
Flatten out the back piece on the table as best as you can. Position the legs upward so that the raw edge is down and flat.

Open up the tummy piece and lay it on top, with the right side facing down. Line up the center seams on the bottom, and pin, then pin around to the two top edges.
This is a little tricky because of the tail and legs, so take your time to line it up.
Now, carefully sew around the perimeter with a 3/8ths inch seam allowance, leaving the top open.
Then notch or pink the edge, and turn it right side out! It’s starting to come together!
Step 8. Attach The Arms & Head
Now you will attach the arms! Pin the arms right on the sides of the top of the monkeys body, over the seams, making sure the thumbs are facing to the front.
Sew each arm onto the body with a 1/4 inch seam allowance.
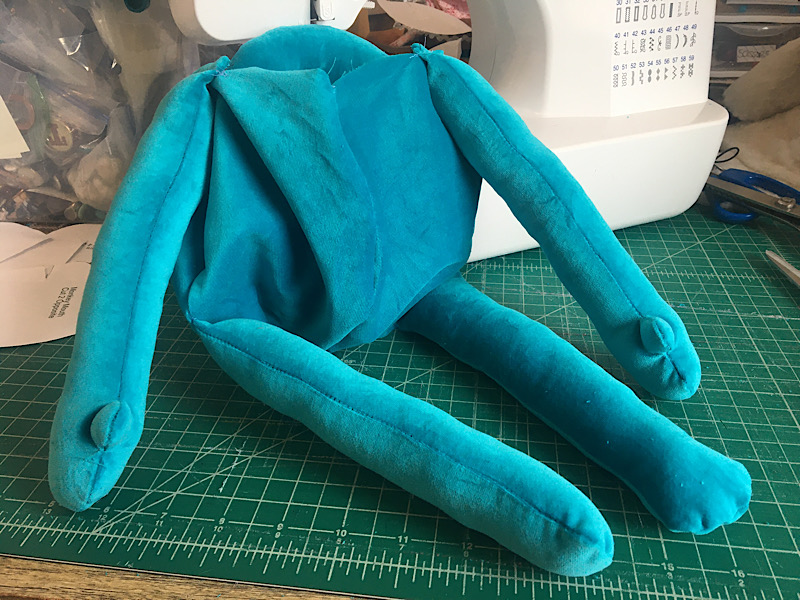
Now, attaching the head is a little bit tricky because the arms and legs can be in the way.
Turn the body inside out. Carefully poke the tail and legs out of the gap on the back to make room for the arms inside.
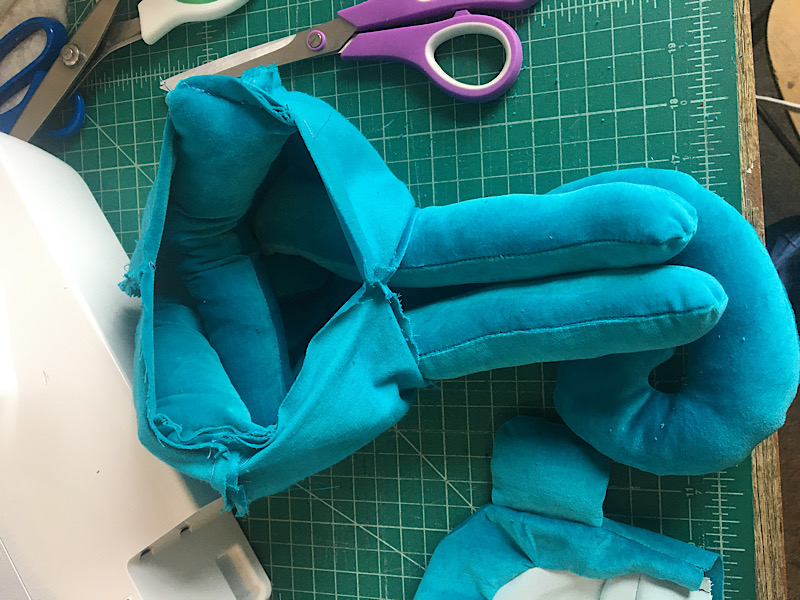
Turn the monkey’s head right side out, and place it upside down inside the neck. Align the side seams and front middle seams. Pin all the way around the edge.
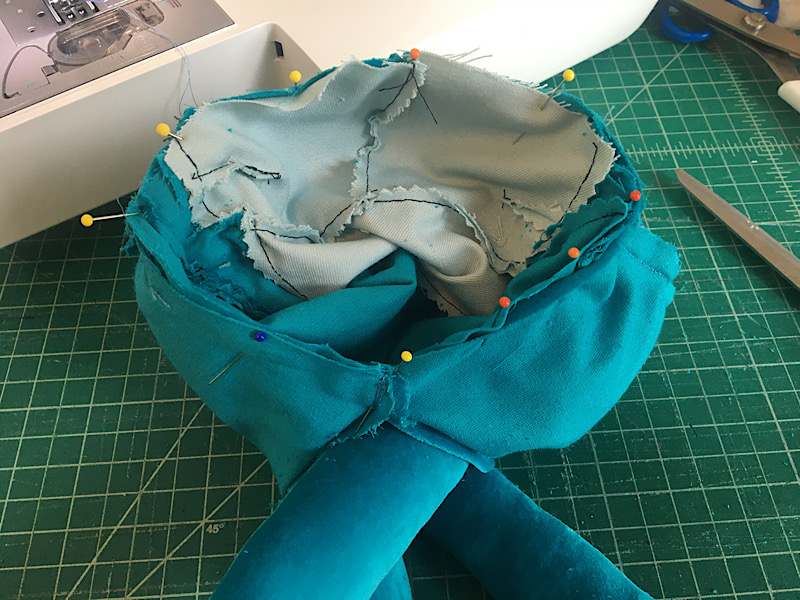
Now sew around the entire neck with a 3/8ths inch seam allowance. You will probably have to stop and reposition your fabric a few times to move limbs out of the way. That is okay! Go slow.
Once you have sewn around the neck, you can use the gap in the back of the monkey to turn it right side out. It looks like a monkey!!!
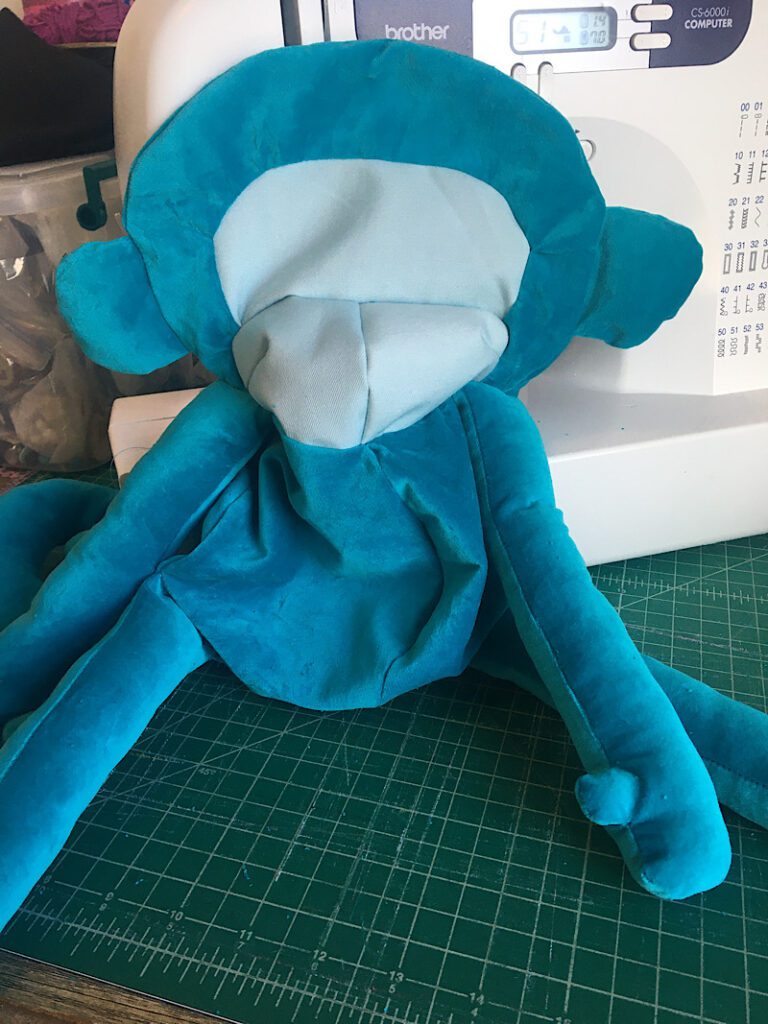
Step 9. Stuff The Monkey
Decide if you need to attach the monkeys facial features before or after stuffing it. If you are using safety snap eyes it will need to be done before stuffing. I sewed on buttons and glued on a felt smile, so I decided to wait until after it was stuffed. You can embroider the eyes, mouth, and nose, before or after.
Stuff the monkey really full with stuffing! Start with the head then work your way down.

Once you are done, you will need to sew up the back to close it. I used an invisible stitch, also called a ladder stitch.

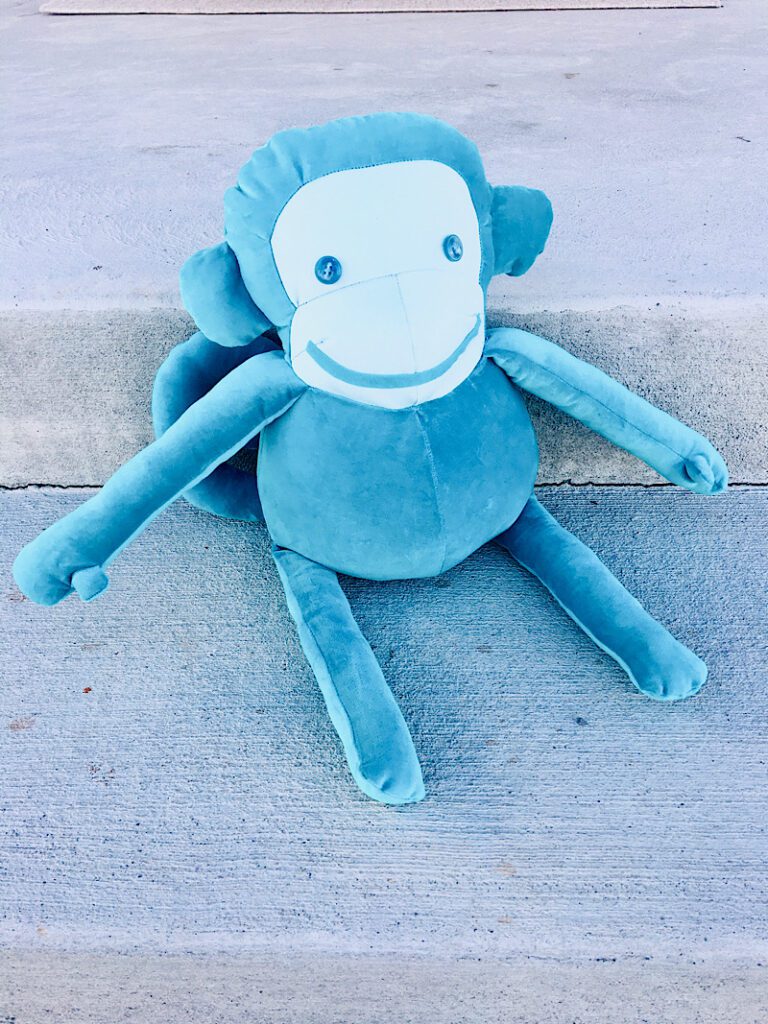
Now the monkey is done! It is looking so cute!
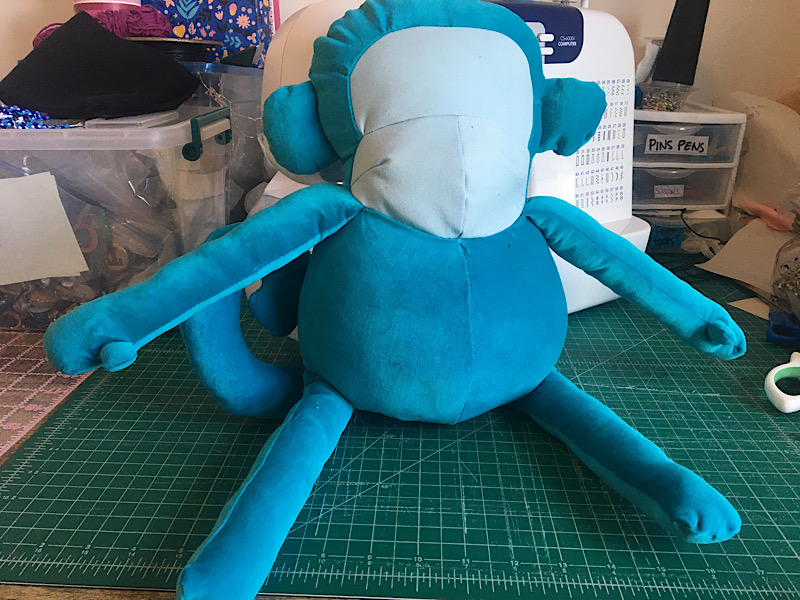
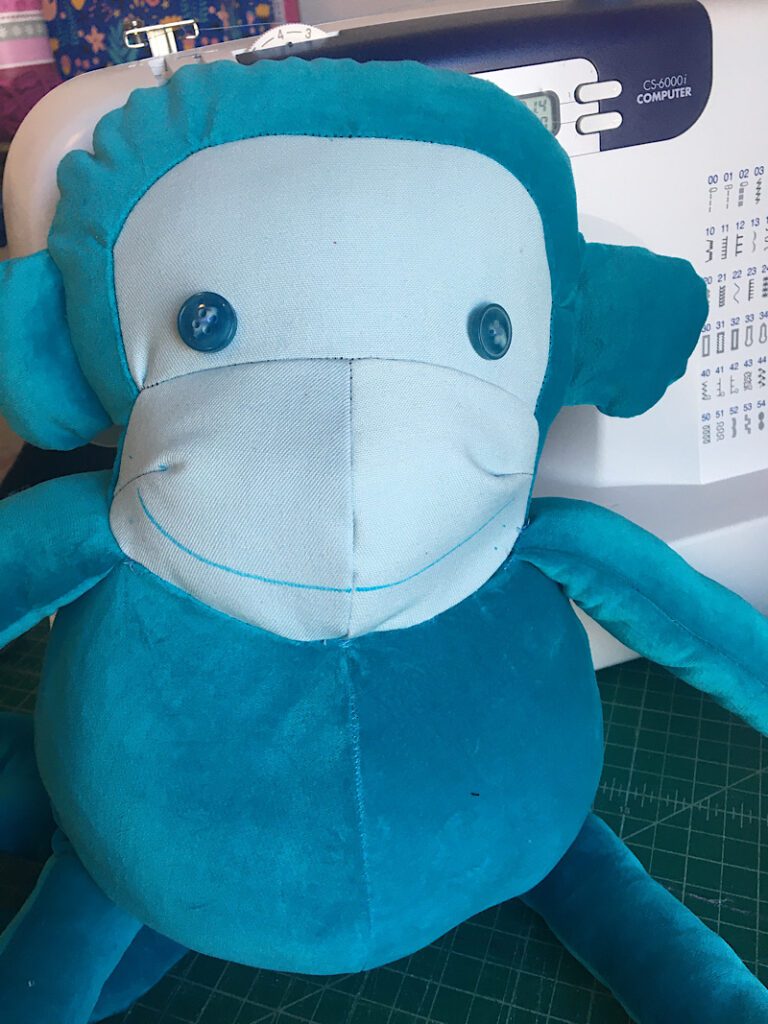
Now I added my monkey’s face by sewing on two buttons for eyes, and drawing a line for the smile, then hot gluing on a felt smile. I forgot to add a nose, but my kids didn’t care so I didn’t worry about it. 🙂
Now the monkey is done!

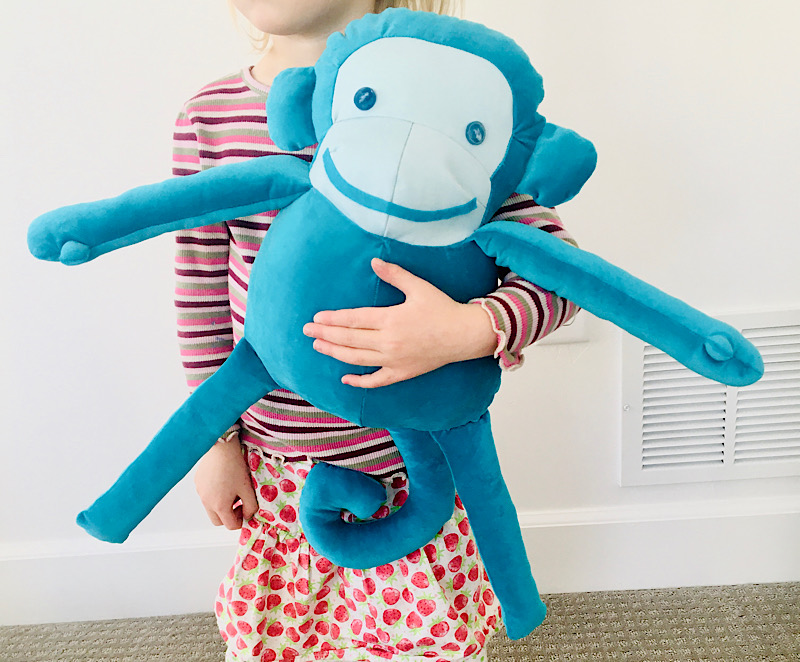
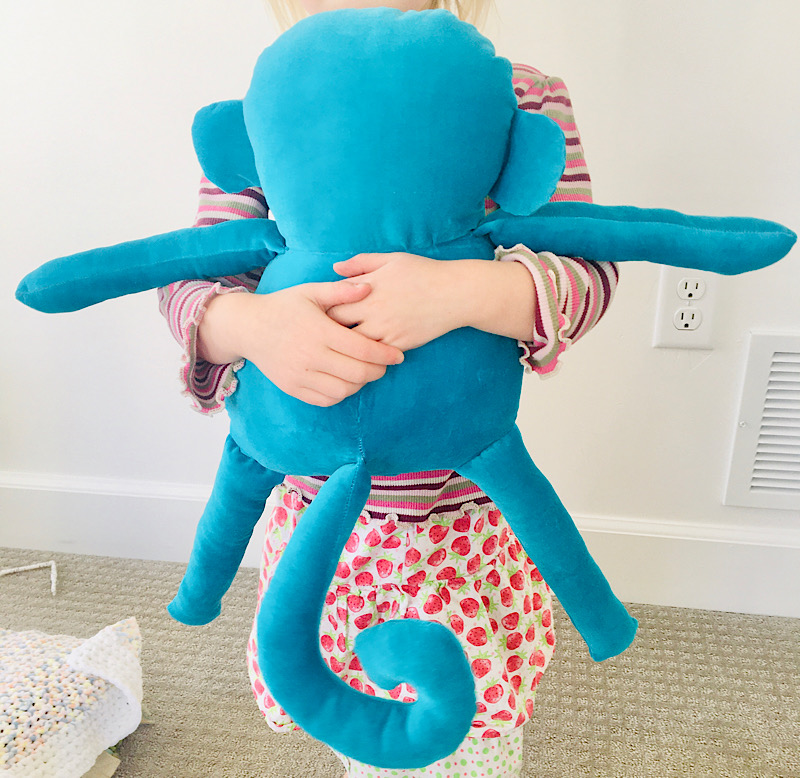
I love the long limbs on this cute monkey, and it is such a fun size for kids to tote around. It can even hang from it’s tail!

This monkey would be really fun to make in different scraps of fabric for a memory monkey, or a rustic style monkey!
You could also tie a bow around it or make it an outfit.
Maybe sometime I will make a baby version!
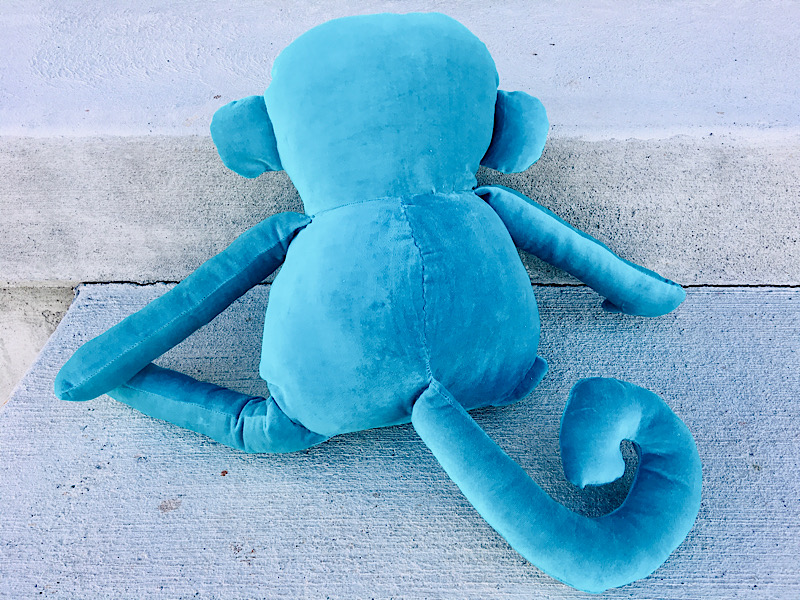
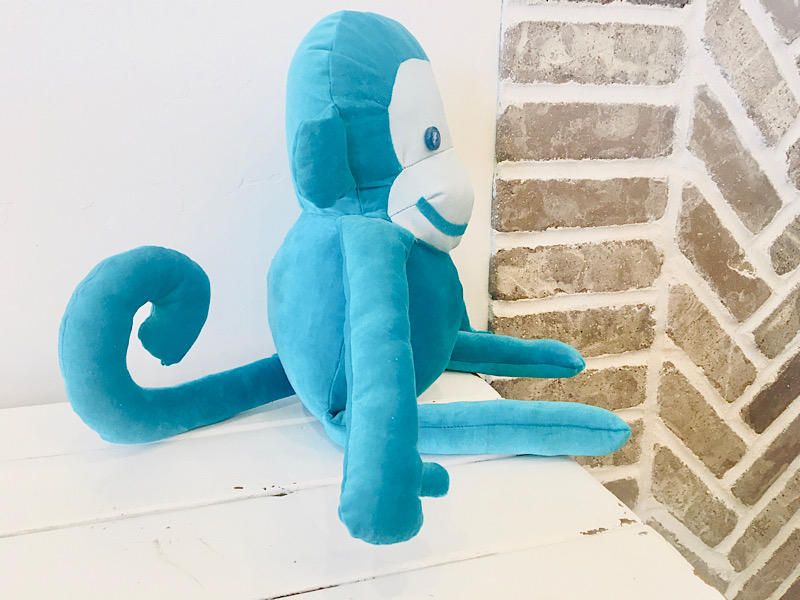
Here are the front, back, and side views one last time.
I hope you enjoyed this tutorial! Let me know in the comments or an email if you need help, and send me a photo when you are done.
Pin this post to pinterest, it helps my blog a lot!