Learn how to make the cutest quilted DIY laptop sleeve from fabric scraps, for any size laptop, with this free pattern. No PDF needed!
I recently got a new laptop and needed a new sleeve, so I made a super cute one out of coordinating floral fabric scraps and I just LOVE how it turned out! It is playful, vintage, rustic, country, all in one.
This tutorial will teach you how to measure your own laptop or tablet to make your own case in any size. It is super easy, let me show you how!
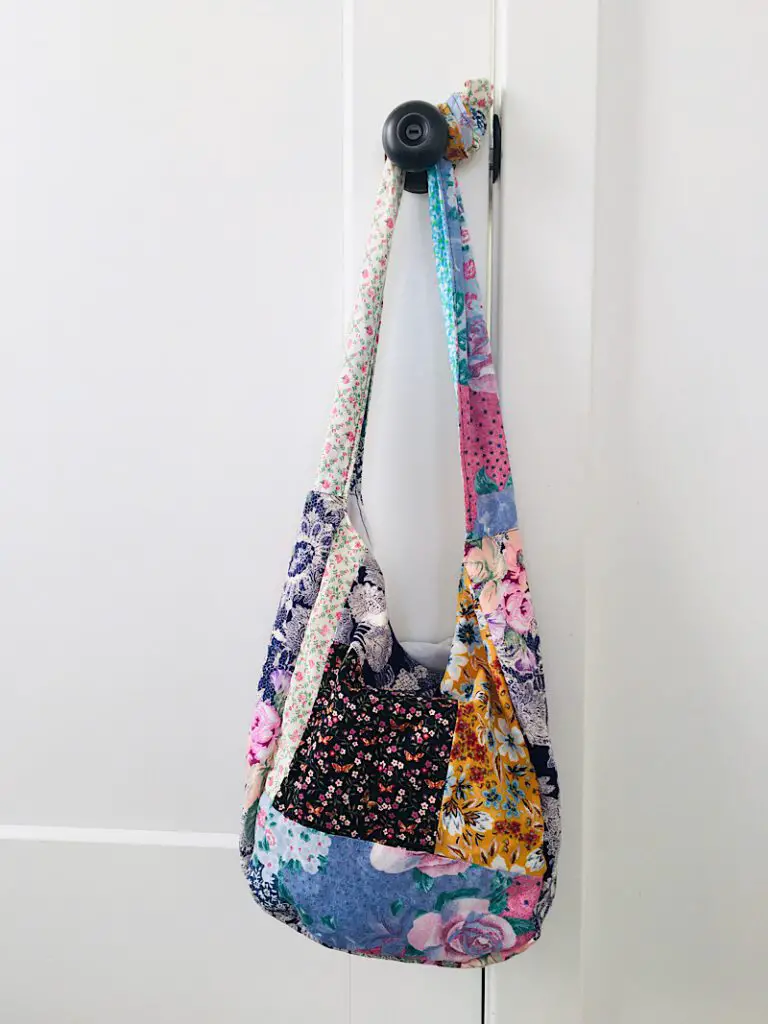
PS. If you LOVE the look of this laptop sleeve, you have got to try out my easy Boho bag tutorial also!
This post may contain affiliate links. Read the full disclosure here.
Supplies Needed
- 1 yard total worth of fabric (I used fabric strips for the exterior, and a solid piece for the interior)
- 2 yards of 1/2 inch double fold bias tape binding
- 1/2 a yard of batting
- 2 D-rings for the closure (Or you can use snaps, a button, velcro, ties, whatever you want.)
- Iron & Ironing Board
- Sewing Pins
How To Sew A Custom Laptop Sleeve!
Step 1. Measure Your Laptop
Measure around the circumference of your laptop lengthwise and widthwise, then divide each measurement by 2. Add 2 to each measurement to find your final width and length measurements.
Length is the long side of the laptop, width is the short side.
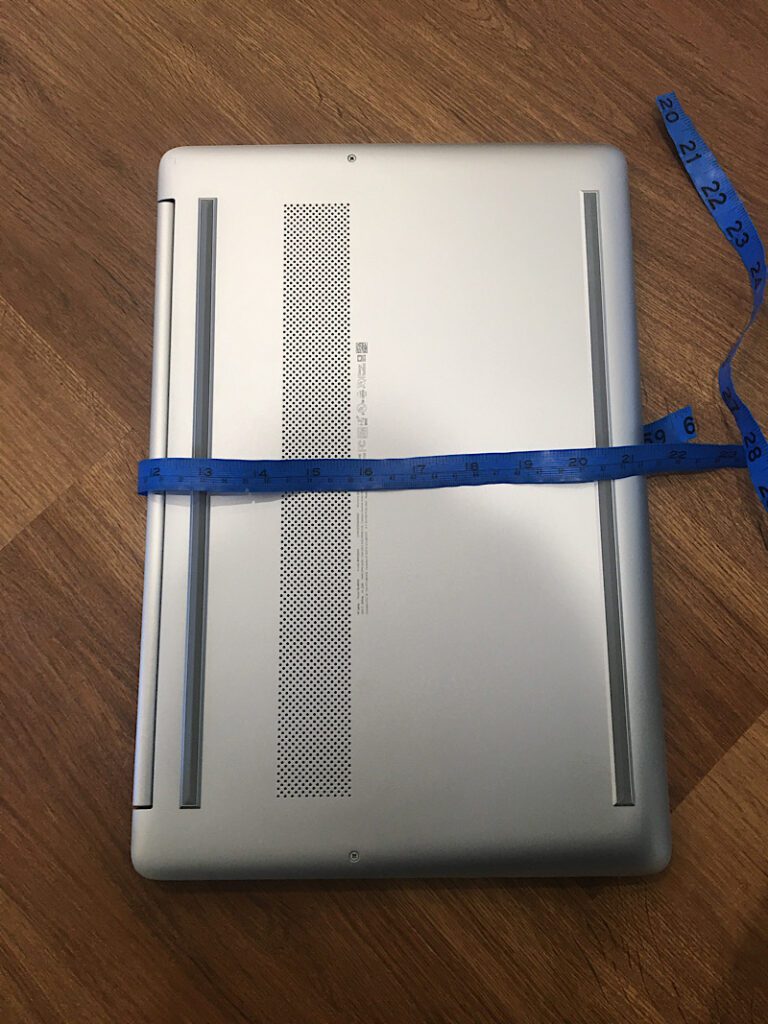
My laptop was 21″ around widthwise, so I divided it by two (10.5) and added 2 (12.5) for my width measurement.
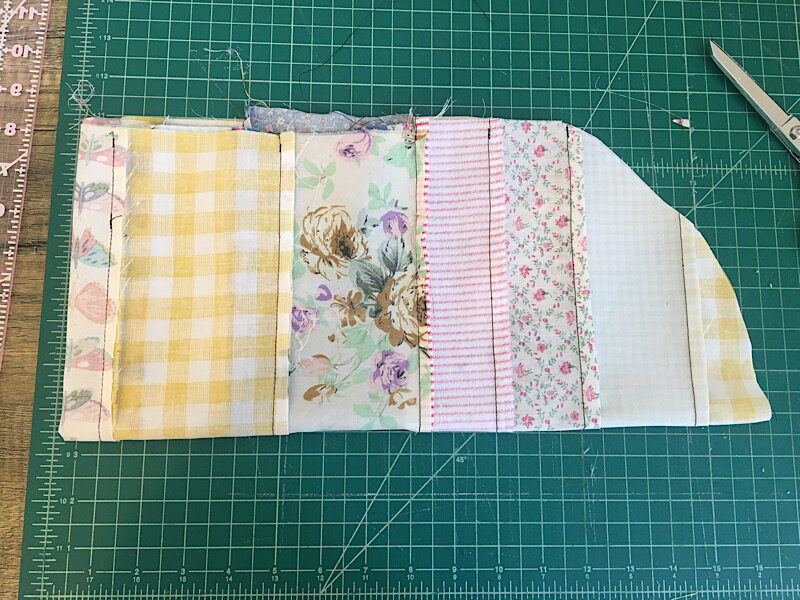
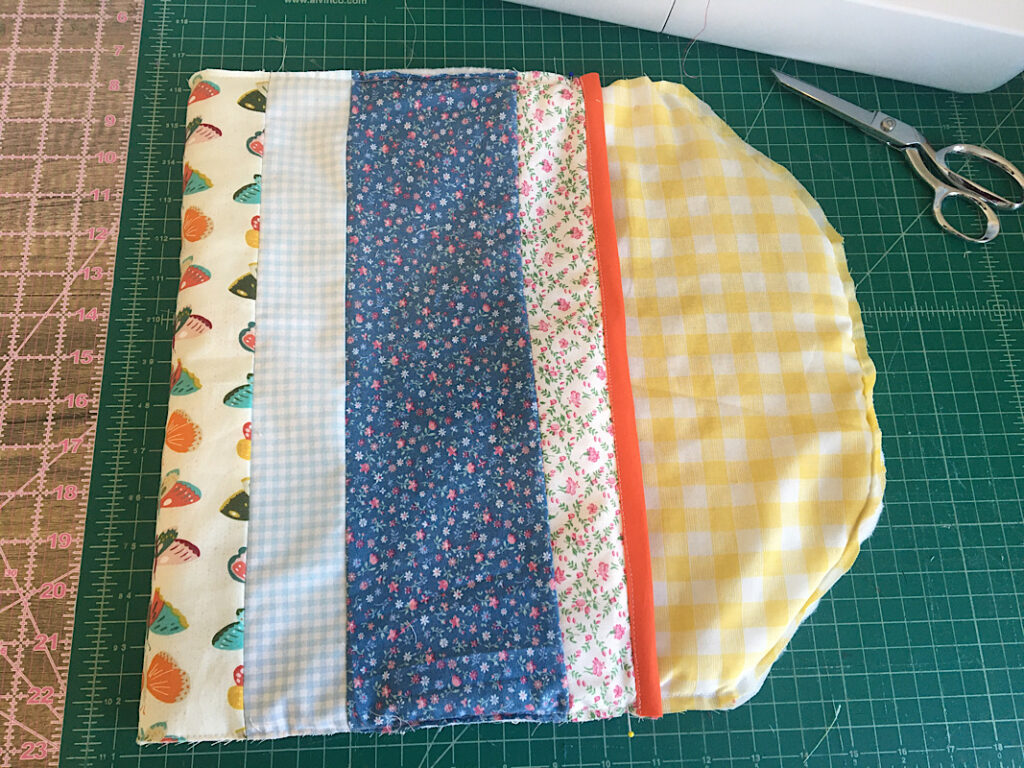
Step 2. Piece Together The Fabric Scraps
Cut the fabric into many strips at least as long as your Length measurement.
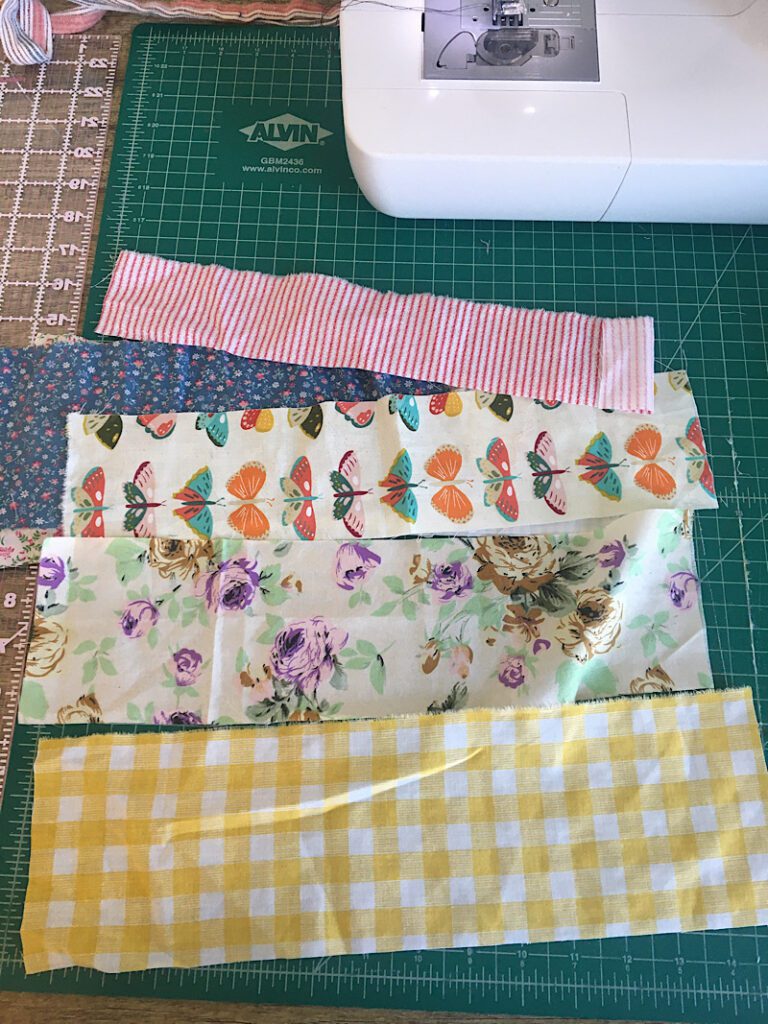
Sew them together with the right sides facing, until you make a rectangle that is as tall as 2.75 times your width measurement. Press the seams flat.
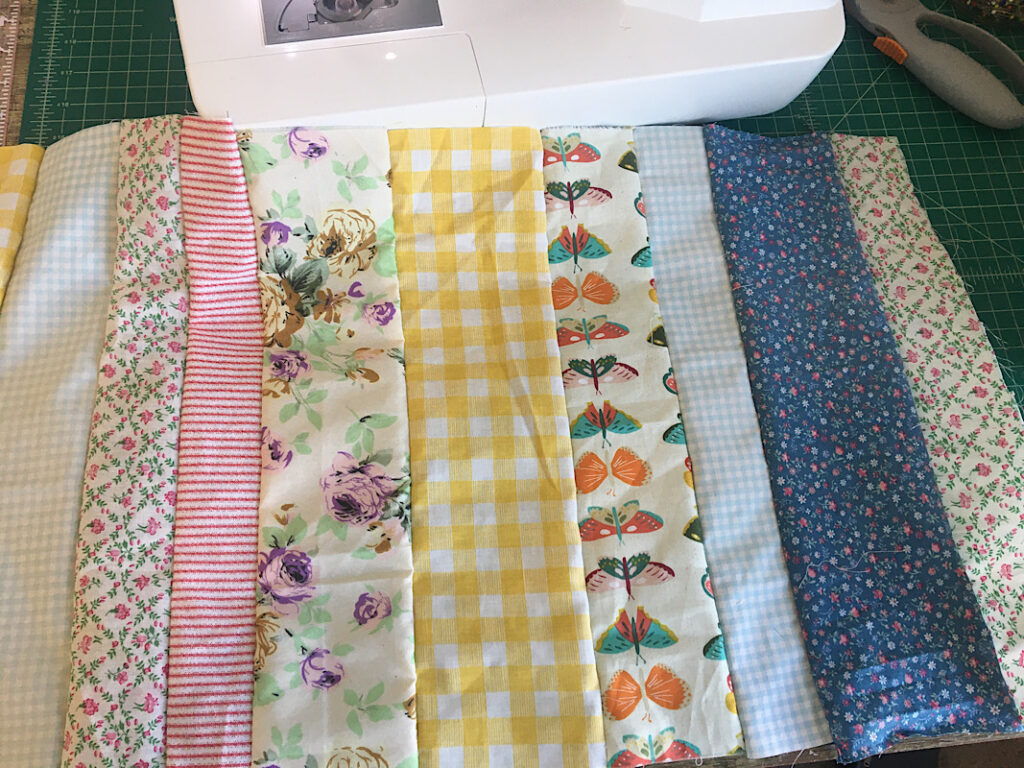
Press the seams flat. Your scrappy rectangle should now have the dimensions of Length X 2.75Width (yay math).
Step 3. Cut The Sleeve Shape
Fold the rectangle in half lengthwise, with the right side together.
One one end of the rectangle, round off the corner to create a gentle curve, without taking much off the total length. When you open it back up, it should look like an arch.
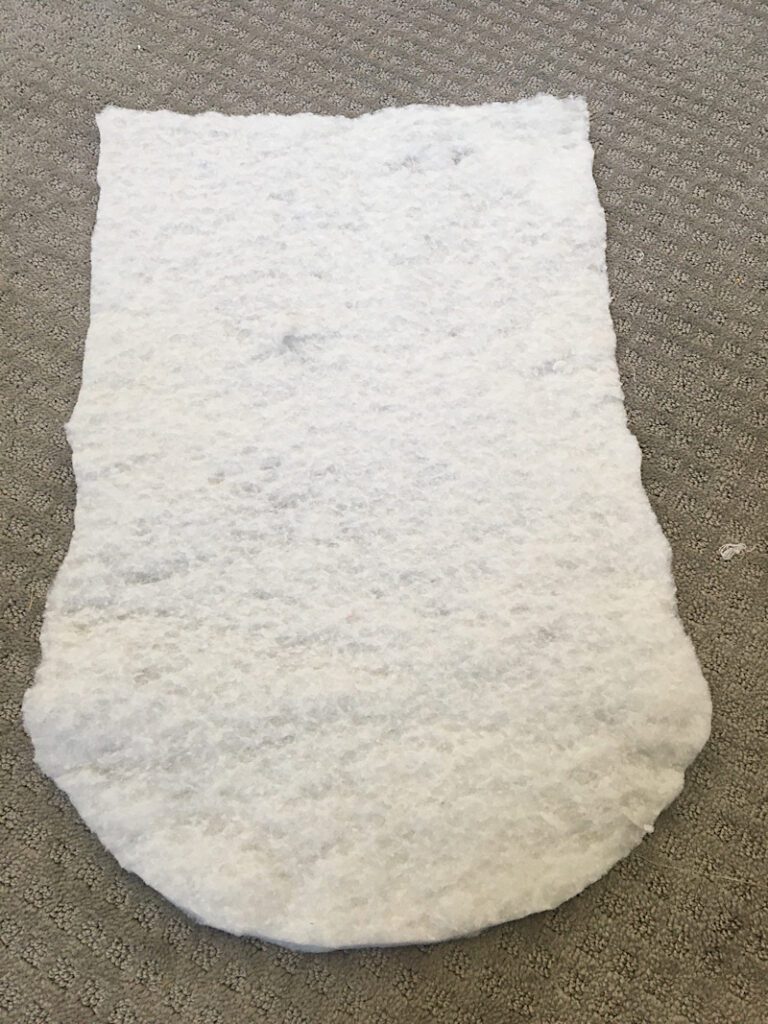
Now, open up the rectangle, and use it to trace the same shape onto the batting and cut it out, as well as the interior lining of the laptop sleeve.
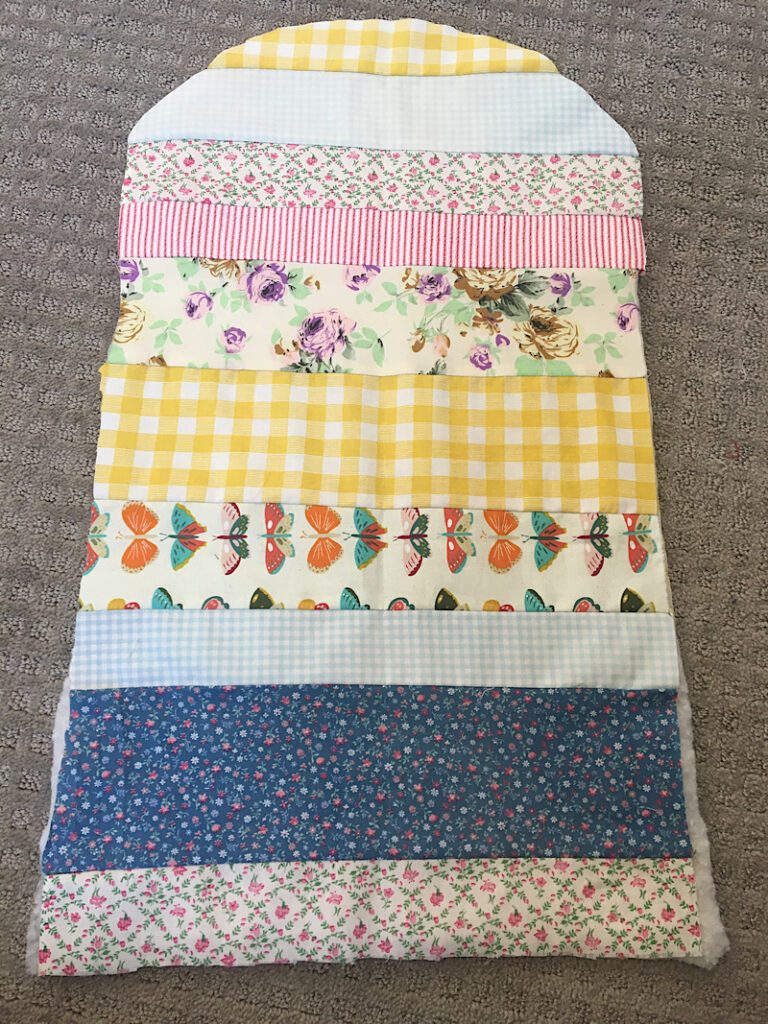
Step 4. Sandwich The Layers
Now you are going to make a “quilt sandwich” with all your pieces. First place down the interior piece, with the WRONG side facing UP.
Then lay the batting on top. Then lay the exterior piece with the RIGHT side facing Up. Pin the layers together around the edges.
You should see the right sides of the fabric on both sides of the sandwich, with the batting in the center.
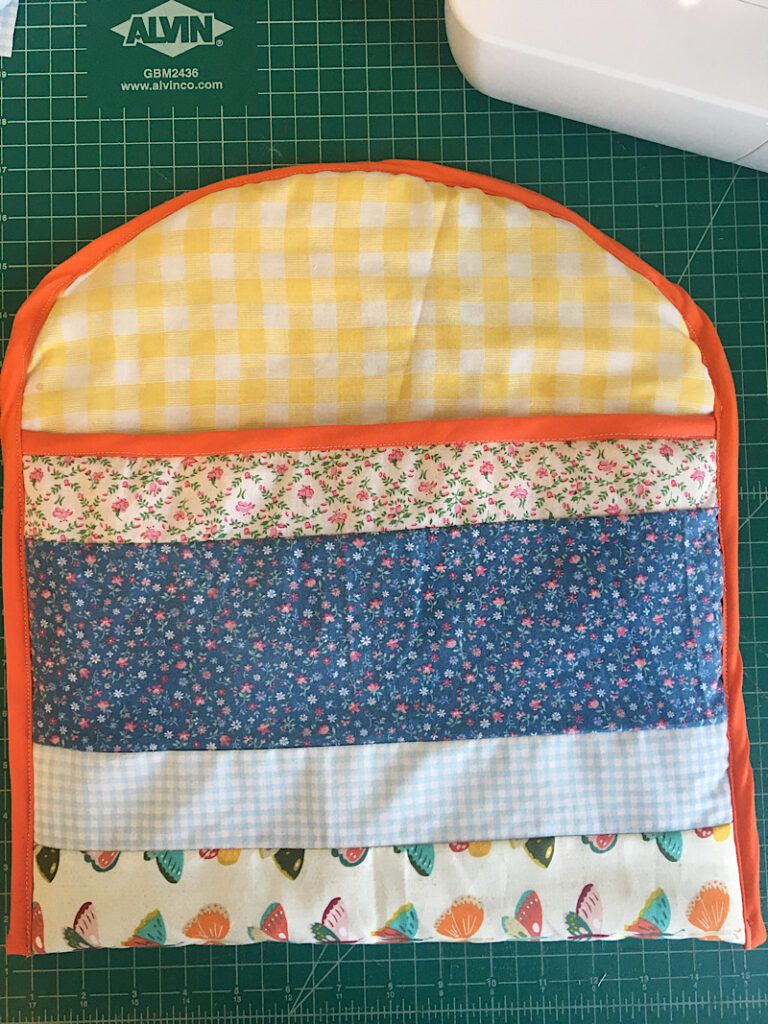
Step 5. Sew The Bottom Binding
You are now going to apply binding ONLY to the bottom flat edge of the quilt sandwich.
Open the binding and align it with the edge of your fabric, and pin it. Sew the binding to the fabric by sewing a straight line in the closest fold line on the binding.

Then, fold the binding over the raw edge and around to the other side.
Pin in in place, and sew along the fold to stitch it down.
Now, you have binding attached to the bottom flat edge to give it a nice finish!
Step 6. Fold And Bind The Laptop Case
Next, with the right side out, fold the bottom flat edge of the laptop case up (like you are folding it into thirds) equal to your width measurement.
You can slide your laptop in to see how it fits before moving on.
Pin the side edges, and sew up one side, around the top, and down the other side to hold it all together.
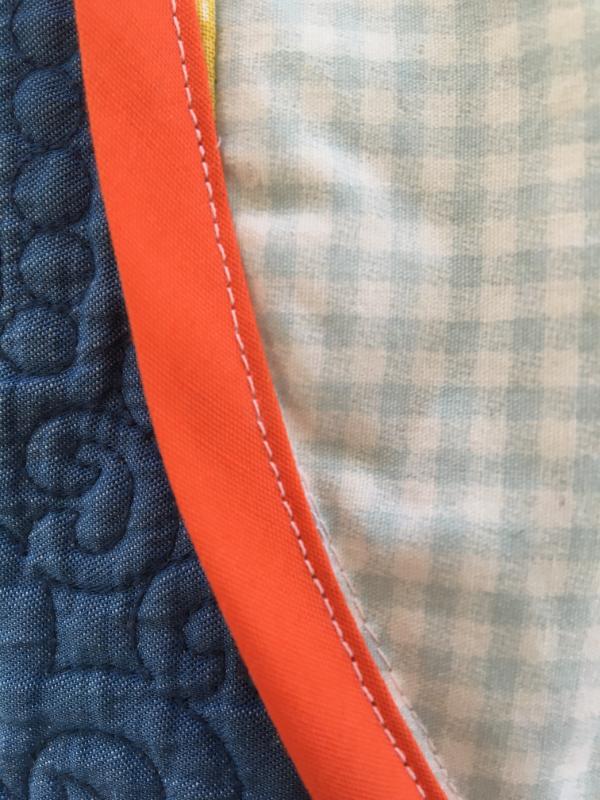
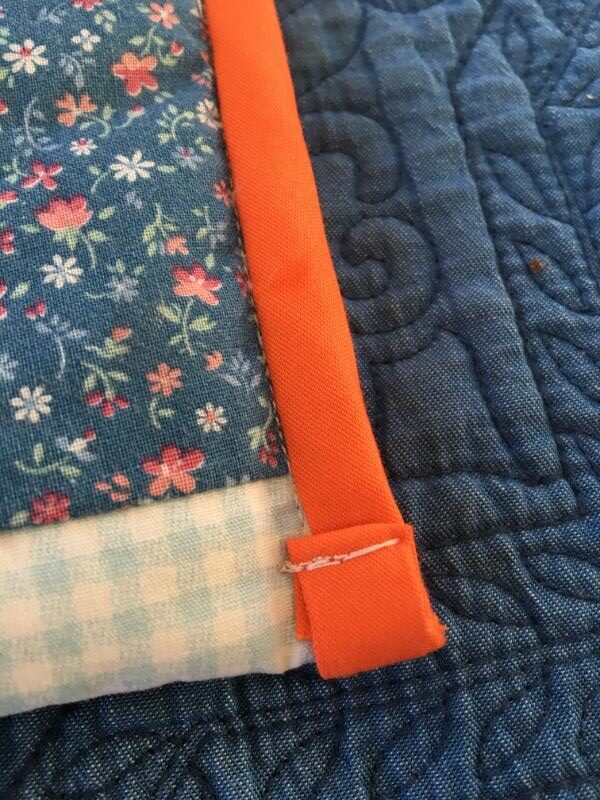
Next, you are going to attach more binding on the raw edges of the case. Start on the bottom corner, and leave a 1 inch tail at the bottom so you can fold it up to finish it later.
Attach it up and around the curve, and back down the other side, the same way you attached the binding before, by opening the binding and sewing in the line closest to the edge.
Then fold the binding over the edge, and sew along the fold.
On the back side of the laptop case, fold up the binding “tail” half an inch, then half an inch again, then sew it down to hem it.
Step 7. Attach The D-Rings
The final step is to attach the strap and D rings. I forgot to take a good picture of this part, I apologize!
Make a strap of fabric about 8 inches long and 1 inch wide (or as wide as the interior of your D ring) by cutting a strip 4 inches X 8 inches, and folding it in half twice until it is 1 inch x 8 inches, then sew down both long edges near the edge.
Fold one short side of the strap over half an inch, twice, then sew the edge down.
Fold the other side down half an inch, and pin it to the back of the top curve of the laptop sleeve. Then, sew it to the laptop sleeve by sewing a square shape on the strap to securley attach it.
To attach the D rings, make another strip that is 5 inches long. Then, slide both D- Rings on it. Form it into a loop, and fold both short edges together, under. Pin it to the front of the laptop sleeve, where the top strap is able to meet it and thread through the rings.
Then sew the looped strap to the laptop sleeve.
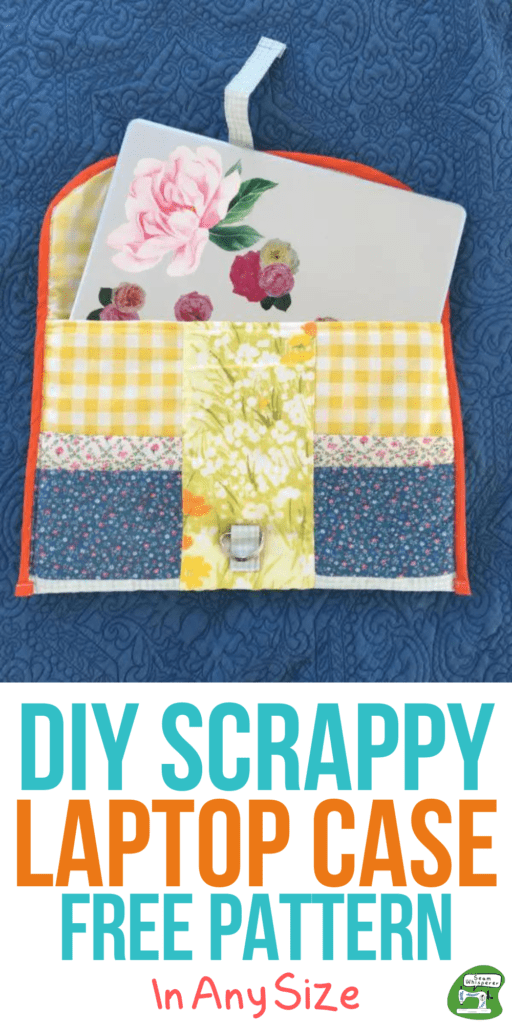
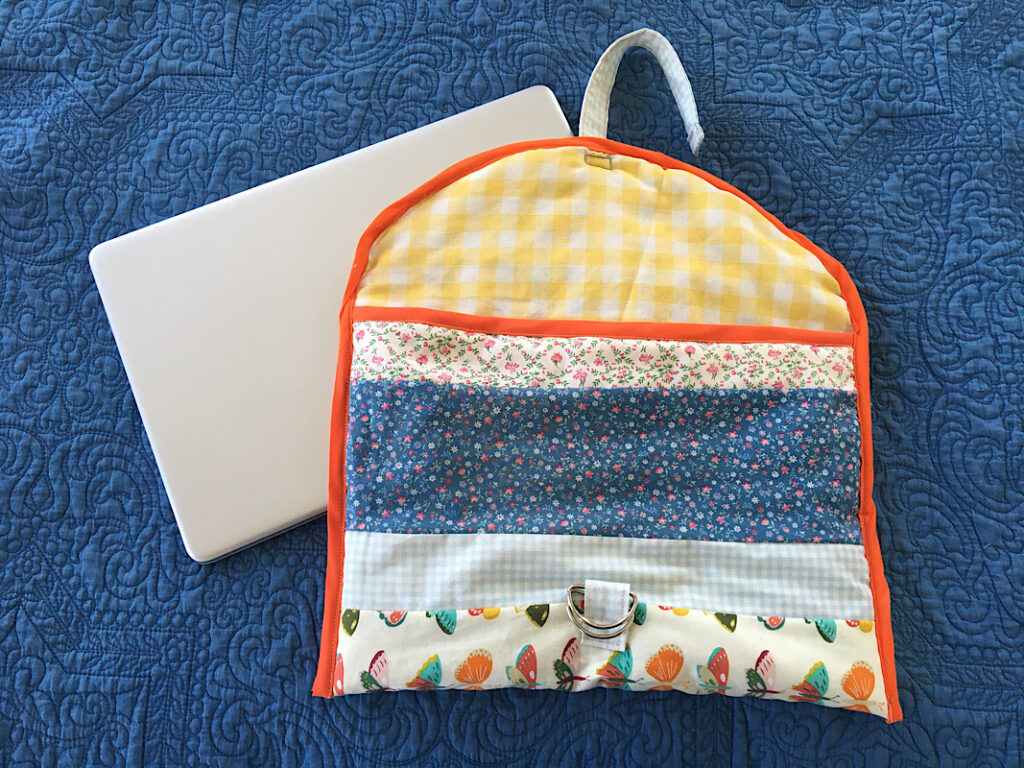
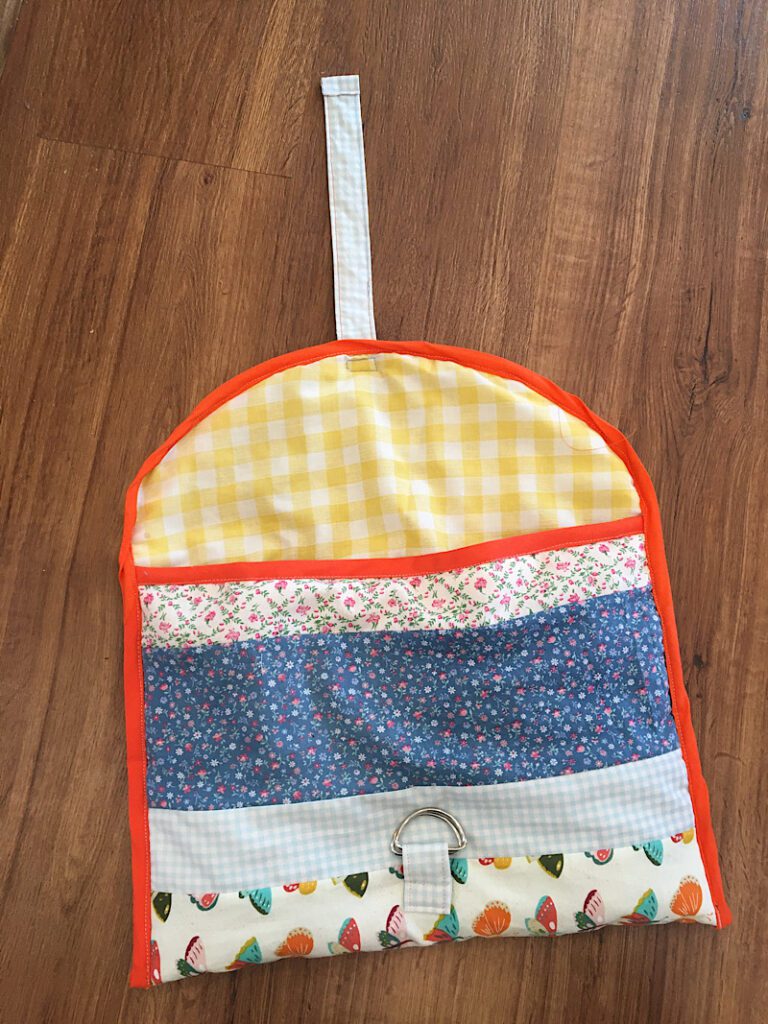
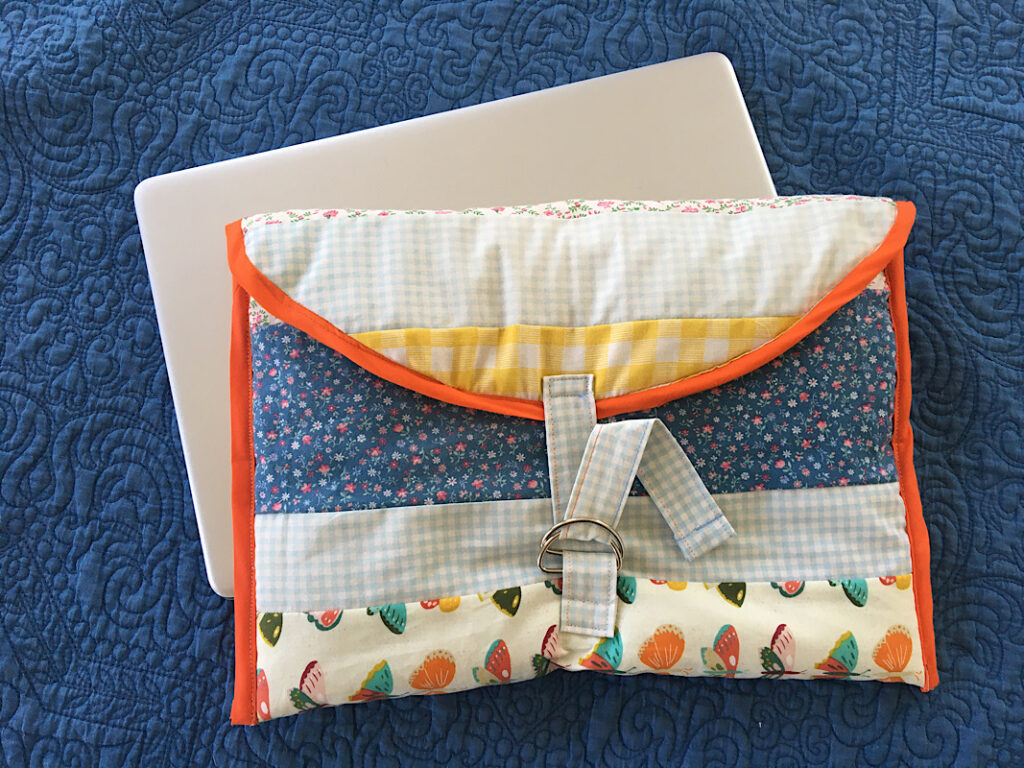
Here is what it should look like when it is done!
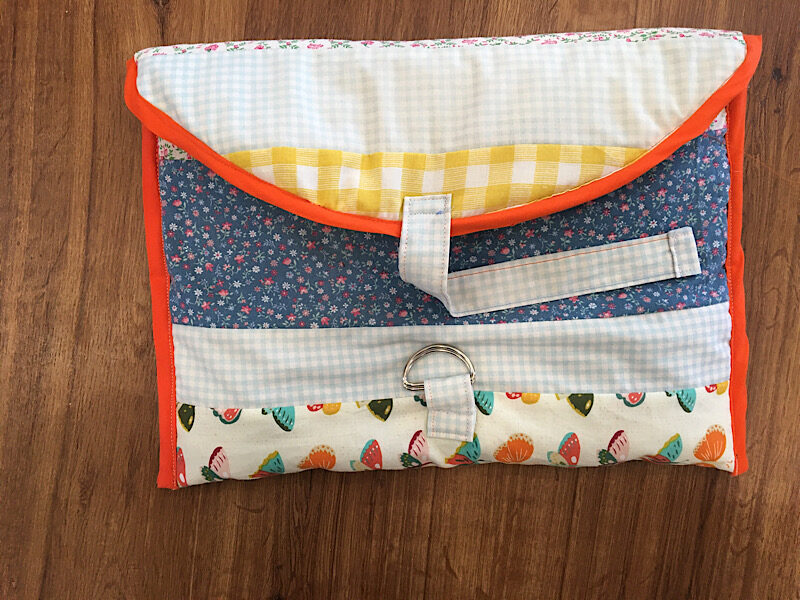
Alternatively, you can sew velcro, a button, ties, or whatever else you want as a closure!
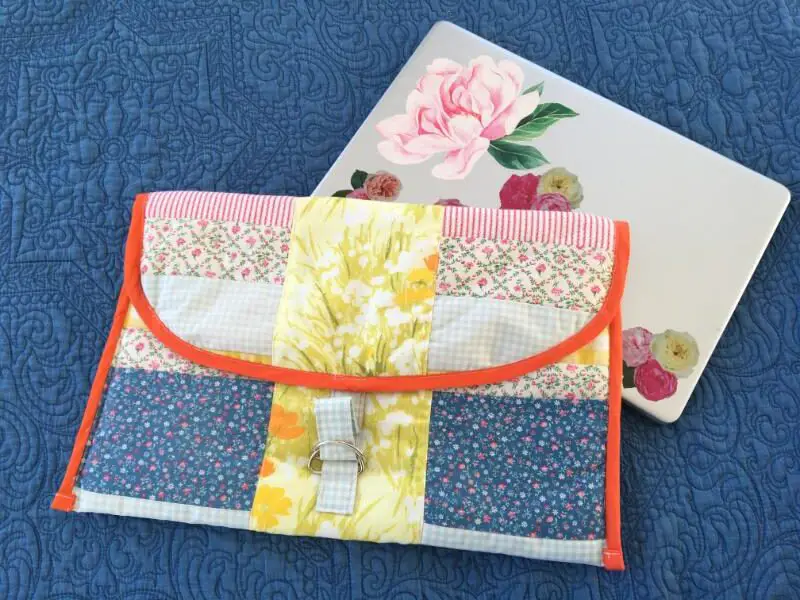
That’s all, you now have a totally cute scrappy quilted laptop sleeve! It turned out really sweet.
Here is what it looks like when it is open:
And here is is closed with the rings in action:
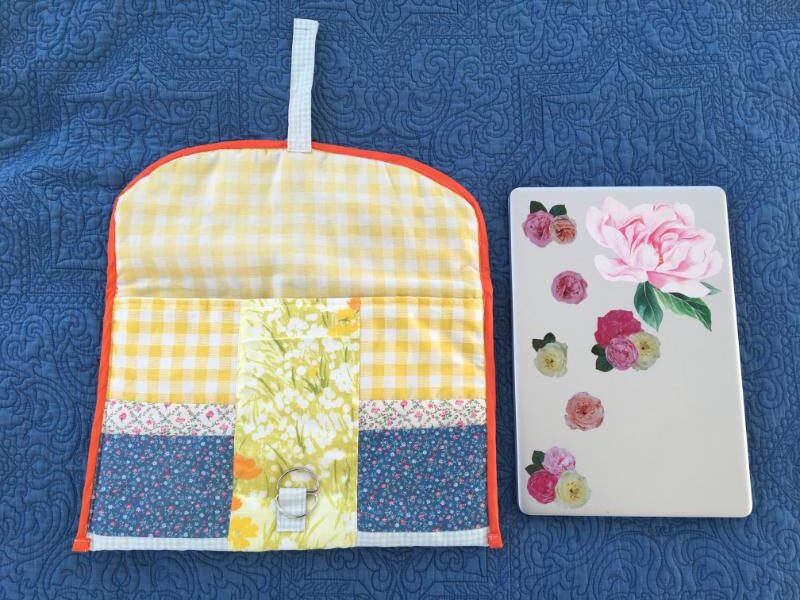
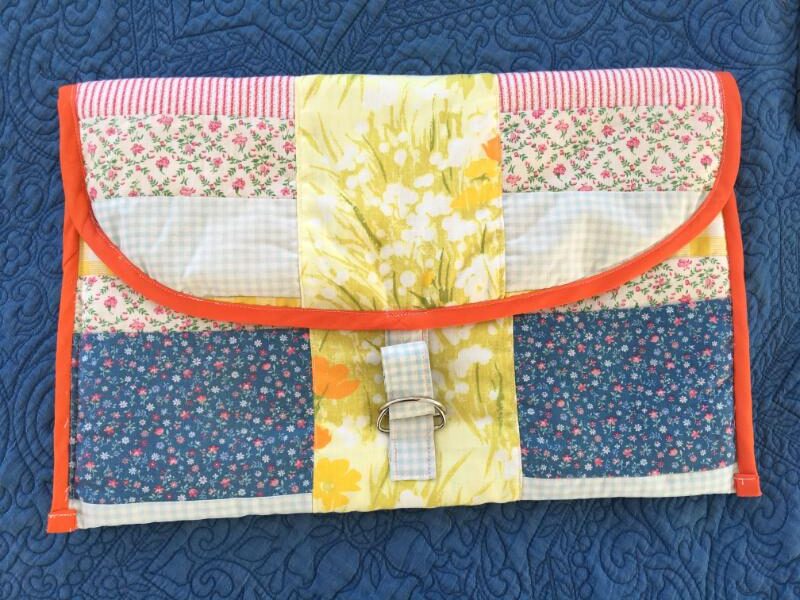
Here is another version of the same laptop case I made later, with the exact same fabrics. This time I added a center panel as well to add some interest:
I hope you liked this tutorial, if you need any help let me know! If you want to give me a big thank you, Pin this post to pinterest! It helps more sewers find my patterns.
If you make this laptop case, send me a photo so I can share it on the blog. Happy sewing!