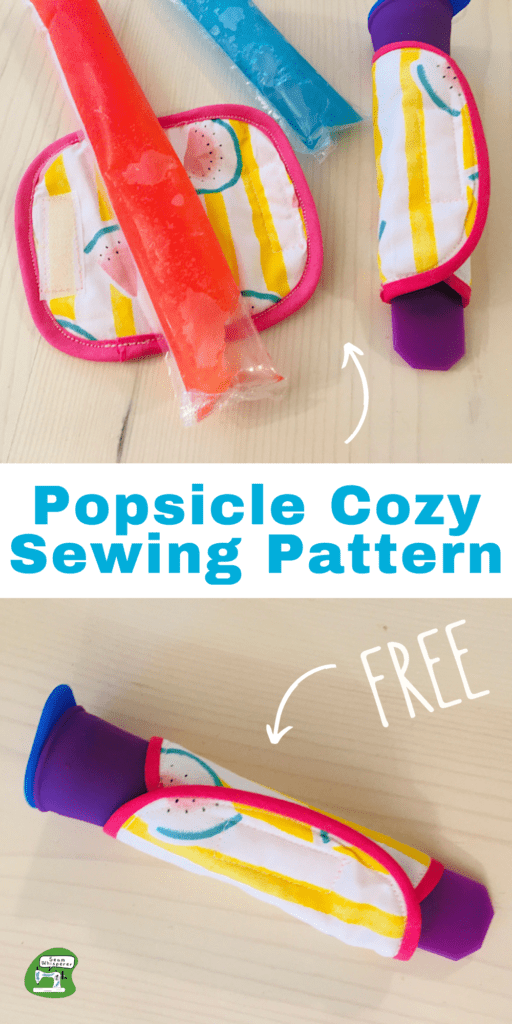
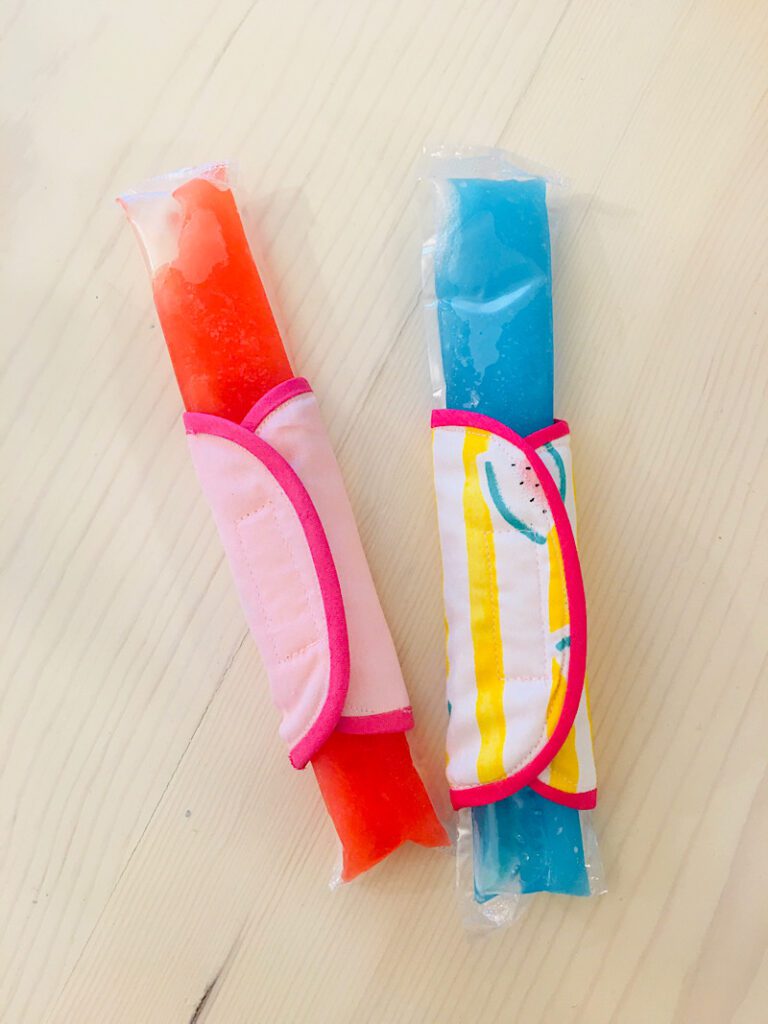
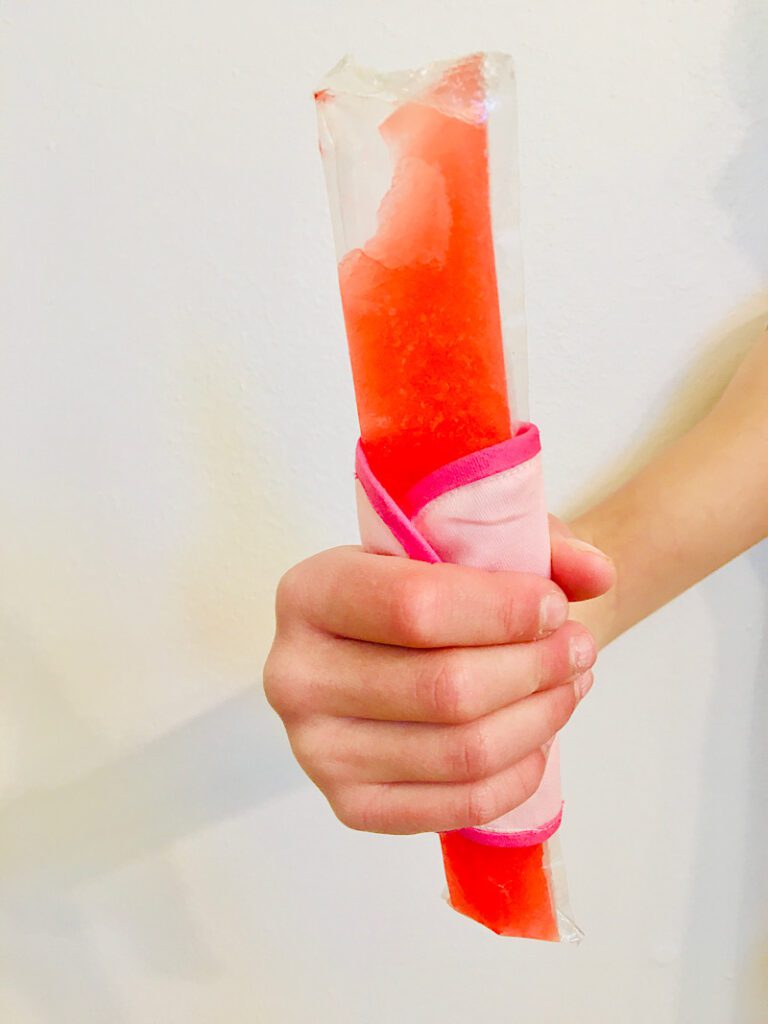
Do your little one’s get freezing cold hands when eating popsicles? These easy popsicle cozies are the perfect summer solution!
My bigger kids eat a popsicle faster than I can blink, but my littler ones take a while to munch it down and get freezing hands in the process! They requested that I make some kind of “sock” they can hold their treats with.
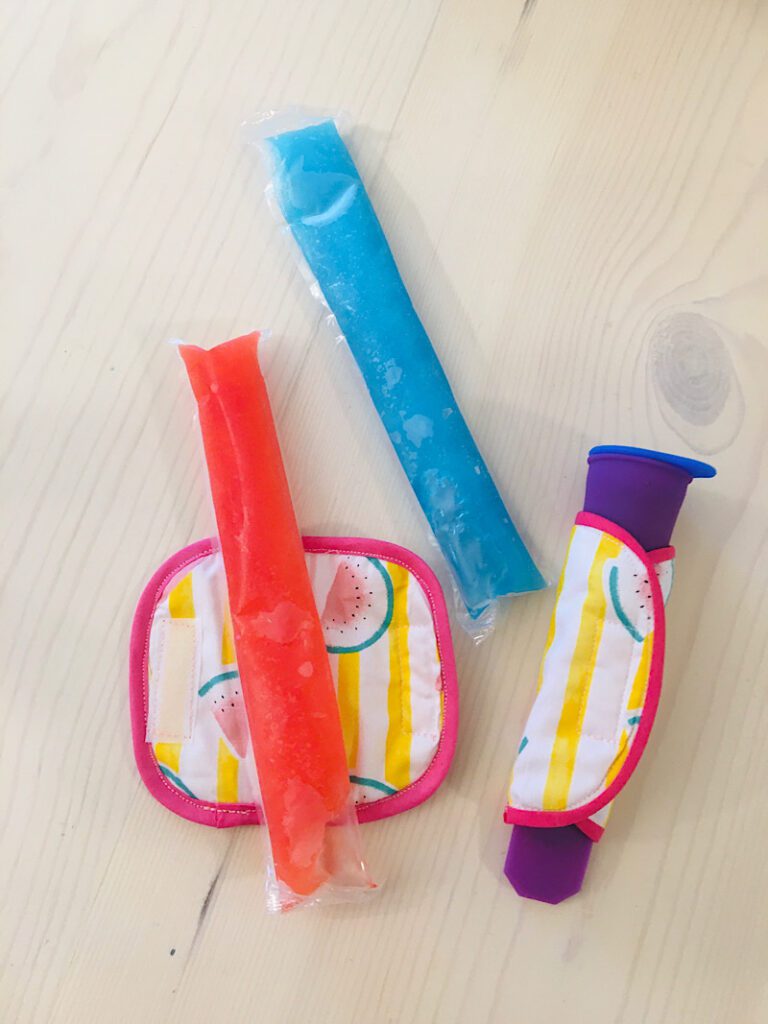
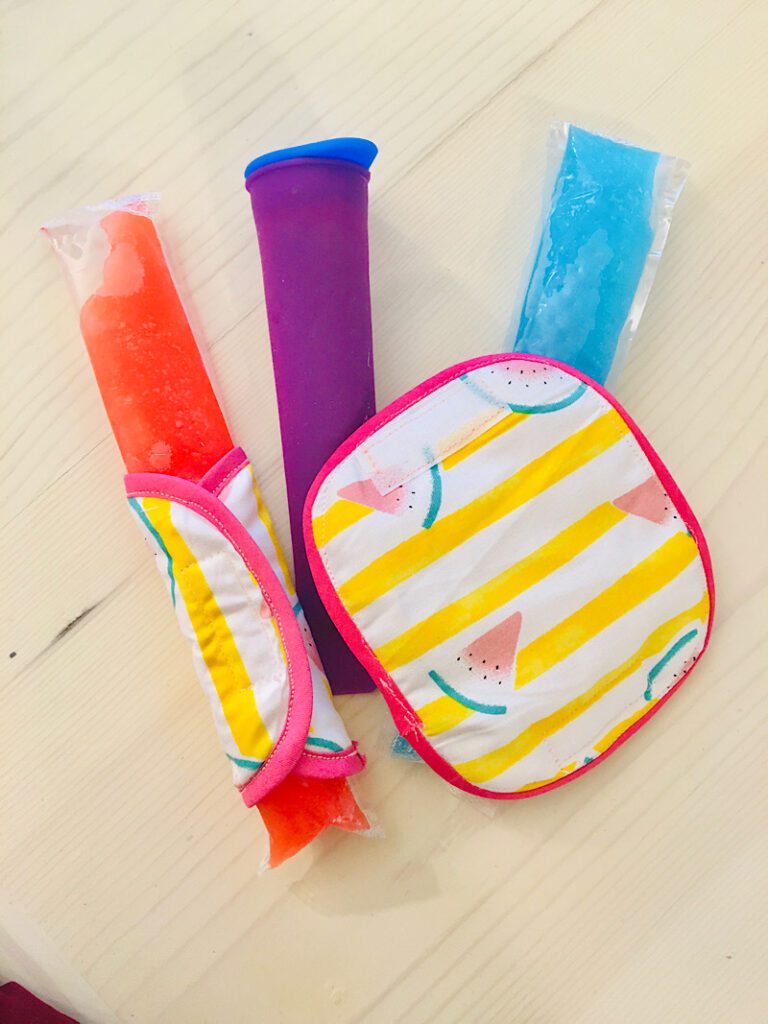
I came up with these little sleeves that work GREAT for ice-pop type popsicles (like Otter Pops) as well as reusable silicone ones (which we love to use to make smoothie pops!)
![kids popsicle sleeve sewing pattern](https://seamwhisperer.com/wp-content/uploads/2024/06/59853A8F-CC98-4E3F-A0B3-E8B6F63A9E30-768x1024.jpeg)
This is a quick summer sewing project that is SO useful and cute, you’re going to love it!
Ready for a hot summer of sewing? Make sure to try out these patterns too!
Supplies Needed
![Supplies needed to make popsicle sleeve cozy](https://seamwhisperer.com/wp-content/uploads/2024/06/0CEFB02E-E255-4922-B498-EEAE0090FDC0.jpeg)
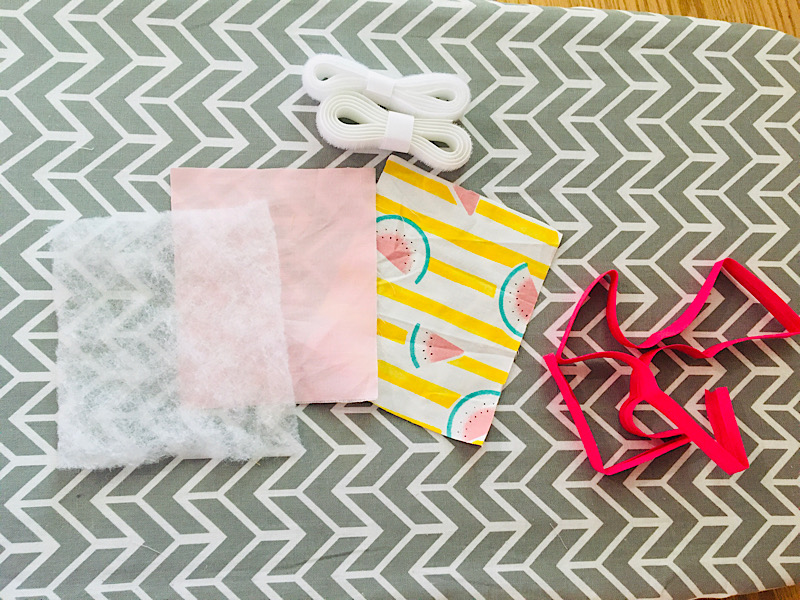
- 2 scraps of cotton fabric – 4″X5″ for back and front sides.
- 1 – 4″x5″ piece of thin quilt batting OR insul bright (or a thin towel or something to add a layer between)
- Double fold bias tape binding (1/4 inch or 3/8 inch will do! I used a very thin one which is more difficult to use but it is what I already had on hand)
- 1.5 inch length of Sew-In velcro or hook and loop
- Sewing Pins, scissors, iron, etc.
How To Make A Popsicle Sleeve Cozy!
![Ice pop sleeve free patterns](https://seamwhisperer.com/wp-content/uploads/2024/06/D5BA1BB1-63BE-472D-8B7F-0E8D9D1E53CA-768x1024.jpeg)
NOTE: these cozies fit my regular/small sized ice pops (both the store bought kind, and the silicone reusable kind) just fine, but if you have fat popsicles then you should measure around them first and make your cozies longer than 5 inches.
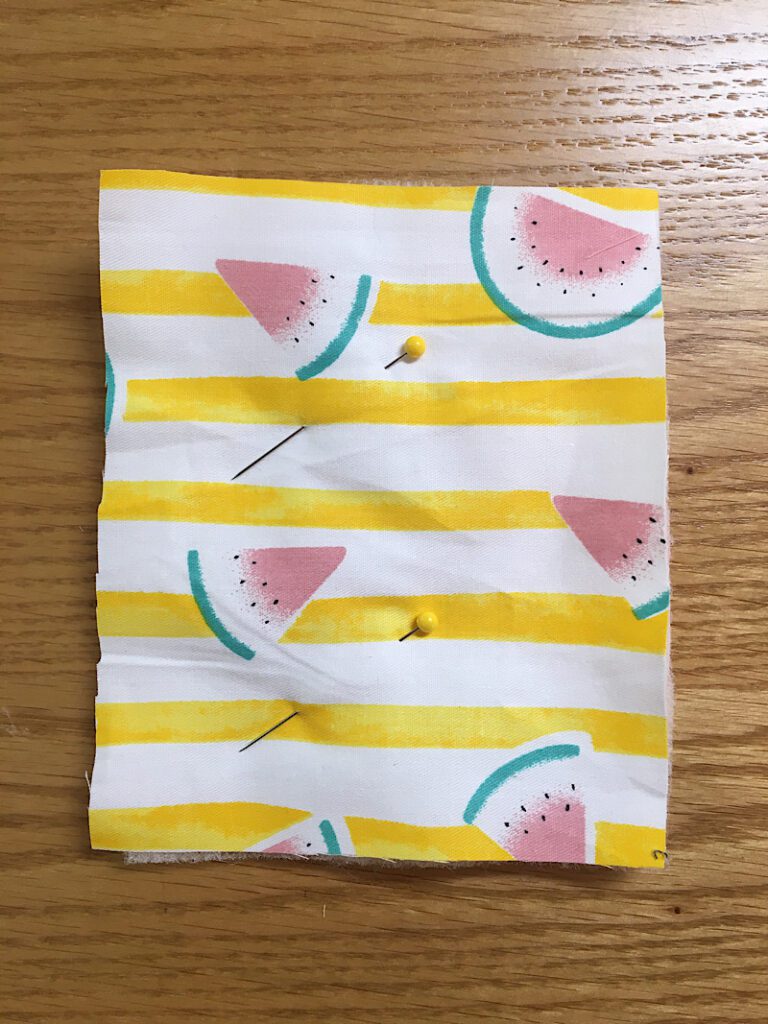
Step 1. Layer The Fabrics
Cut out a 4″x5″ Rectangle from two pieces of cotton fabric, and from the batting.
Lay one piece of cotton fabric down with the right side facing DOWN. Then place the batting on top. Then place the second piece of cotton on top, with the right side facing UP. This makes a “sandwich”.
Pin the pieces together.
![layering the cotton and batting into a sandwich](https://seamwhisperer.com/wp-content/uploads/2024/06/B5D1C120-9AB7-45FB-83B2-331A7875C999-768x1024.jpeg)
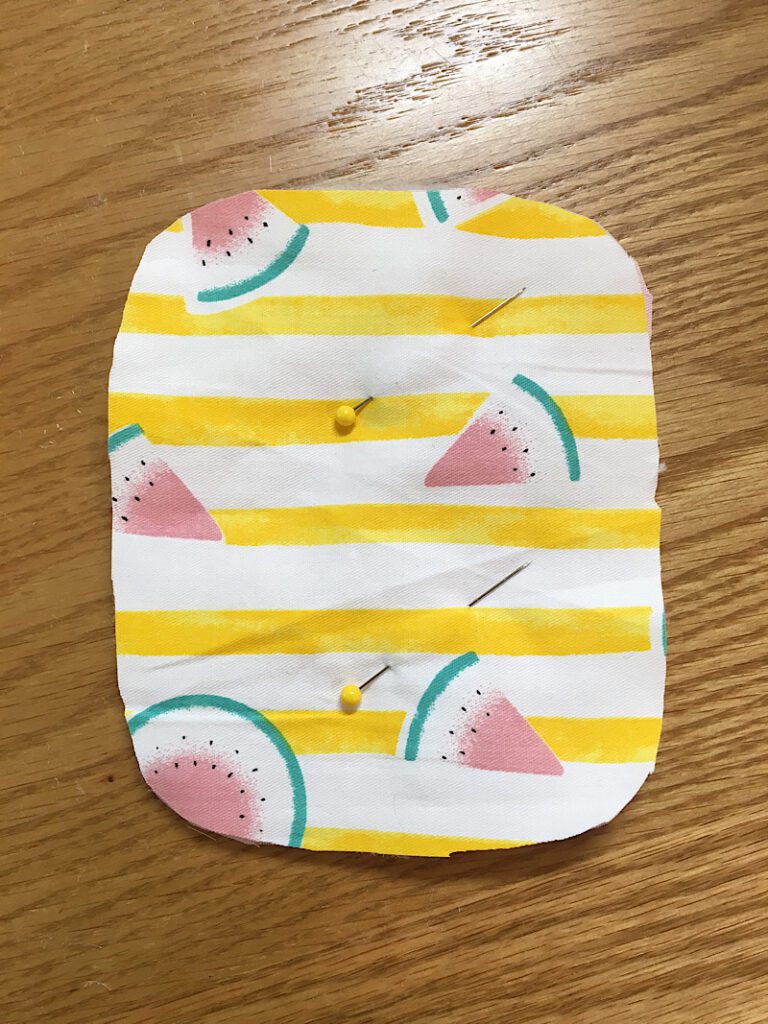
Next, round the corners of the three layers slightly with your scissors. I folded my “sandwich” in half so I could do two sides at a time to help them match better. Don’t cut too much off, you don’t want to end up with an oval shape, just a nice rounded rectangle.
If you don’t want to eyeball it, you can use something small and round like a craft glue-stick to trace in the corners with a pencil to cut along.
![round off corners](https://seamwhisperer.com/wp-content/uploads/2024/06/0DA817C5-05C9-4AA9-BD2E-E730FC6815EB-768x1024.jpeg)
Step 2. Sew On The Binding
Open up the binding and align the edge with the edge of the “sandwich”. Then pin it around.
![pin the binding around the edge of the sandwich](https://seamwhisperer.com/wp-content/uploads/2024/06/1DF2E908-9256-4B58-B5F1-CE2864B7B84A-768x1024.jpeg)
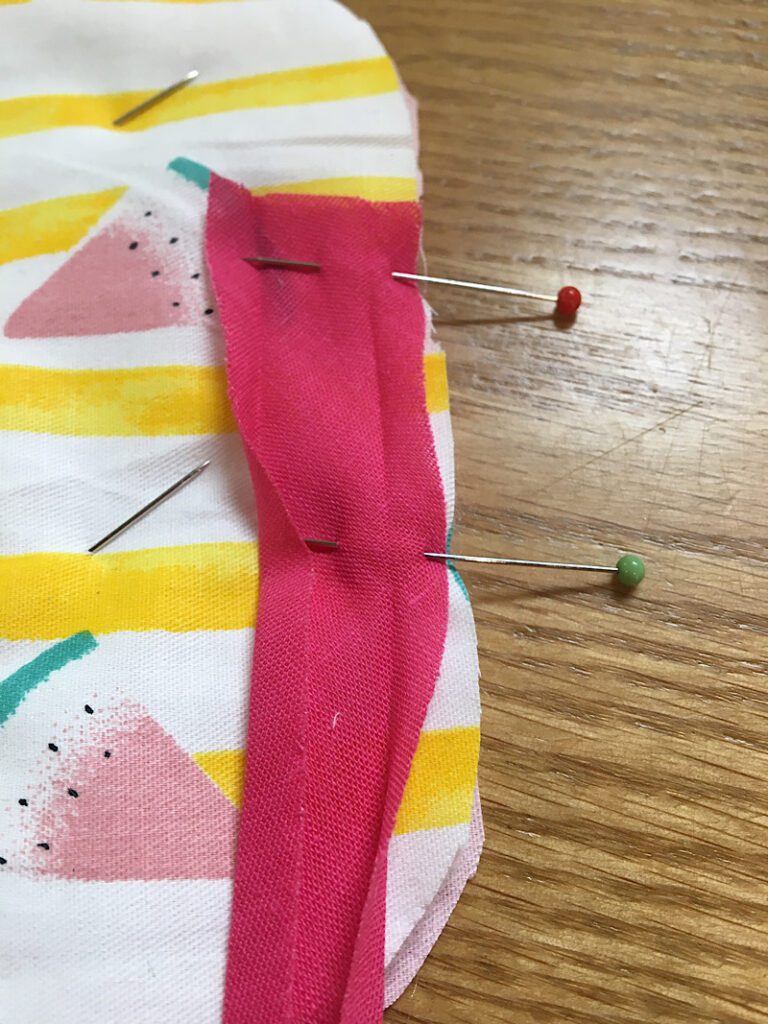
Next, attach the binding by sewing in the fold closest to the outside edge, all the way around. The end of the binding should overlap the beginning a bit.
![sew binding to popsicle cozy](https://seamwhisperer.com/wp-content/uploads/2024/06/D65F1244-5877-429E-871D-1C1A603F2B8F-768x1024.jpeg)
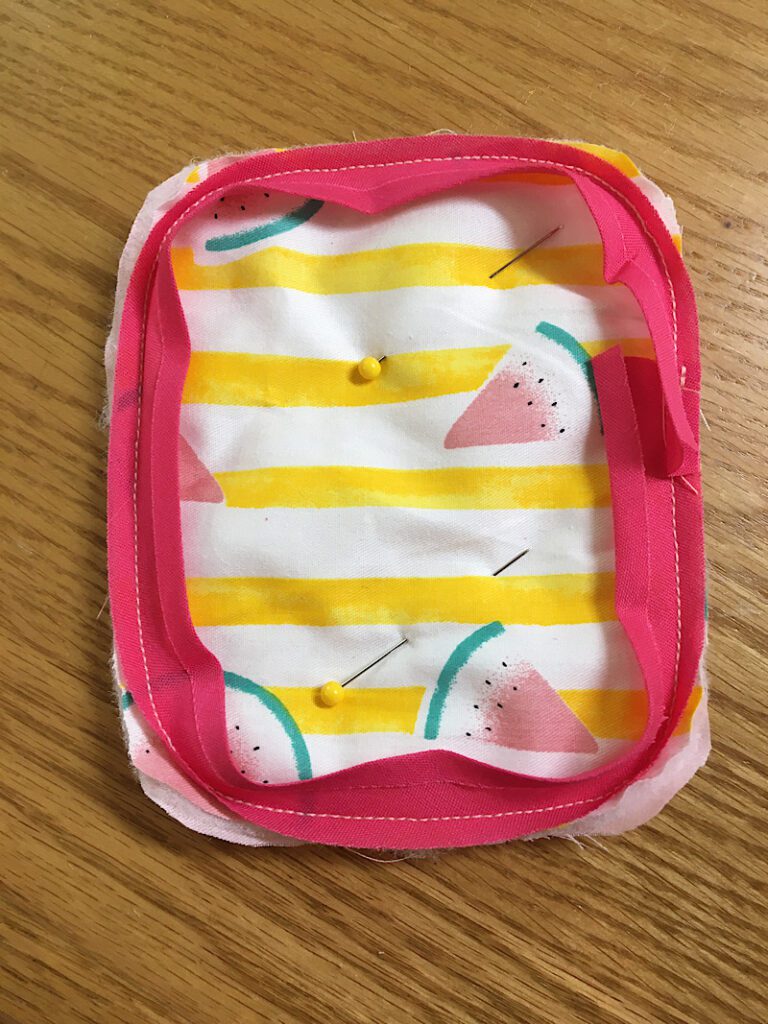
If you need to trim away a little bit of the batting and material, you can do so now to help the binding fold over better.
Next, wrap the binding over the raw edge of the cozy and pin it in place.
![pinning binding to cozy](https://seamwhisperer.com/wp-content/uploads/2024/06/2E74E84F-0459-4F4A-9071-607FB9AA7A58-768x1024.jpeg)
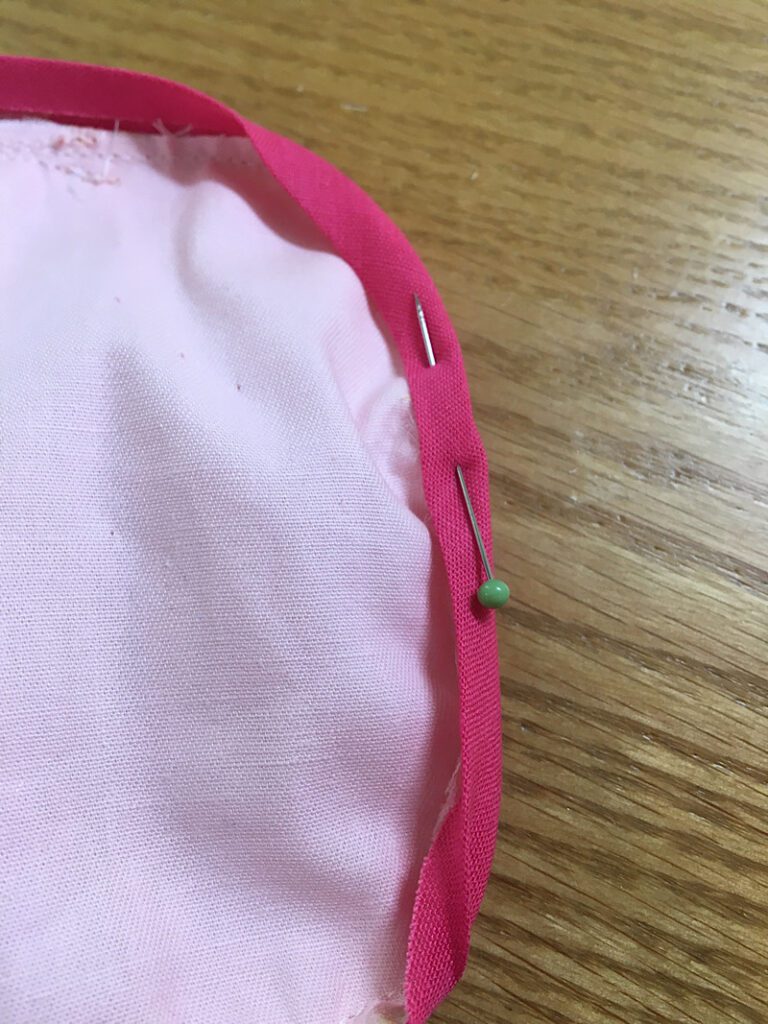
Finish the binding by sewing along the inner fold near the edge.
Mine isn’t perfect. Yours doesn’t need to be either.
![sewn binding on cozy](https://seamwhisperer.com/wp-content/uploads/2024/06/278832BD-282A-4BD6-ABFC-45A390335786-768x1024.jpeg)
![back of popsicle cozy](https://seamwhisperer.com/wp-content/uploads/2024/06/3995EB33-FBBF-4ABE-8FAA-D5650BA65BCB-768x1024.jpeg)
Step 3. Attach The Velcro
Cut about a 1.5 inch length of both sides of the Velcro.
Pin one piece to the short, right hand side of the front of the cozy.
![pinning velcro to popsicle cozy](https://seamwhisperer.com/wp-content/uploads/2024/06/3E31F253-BCB0-40E1-B47F-9017B3865483-768x1024.jpeg)
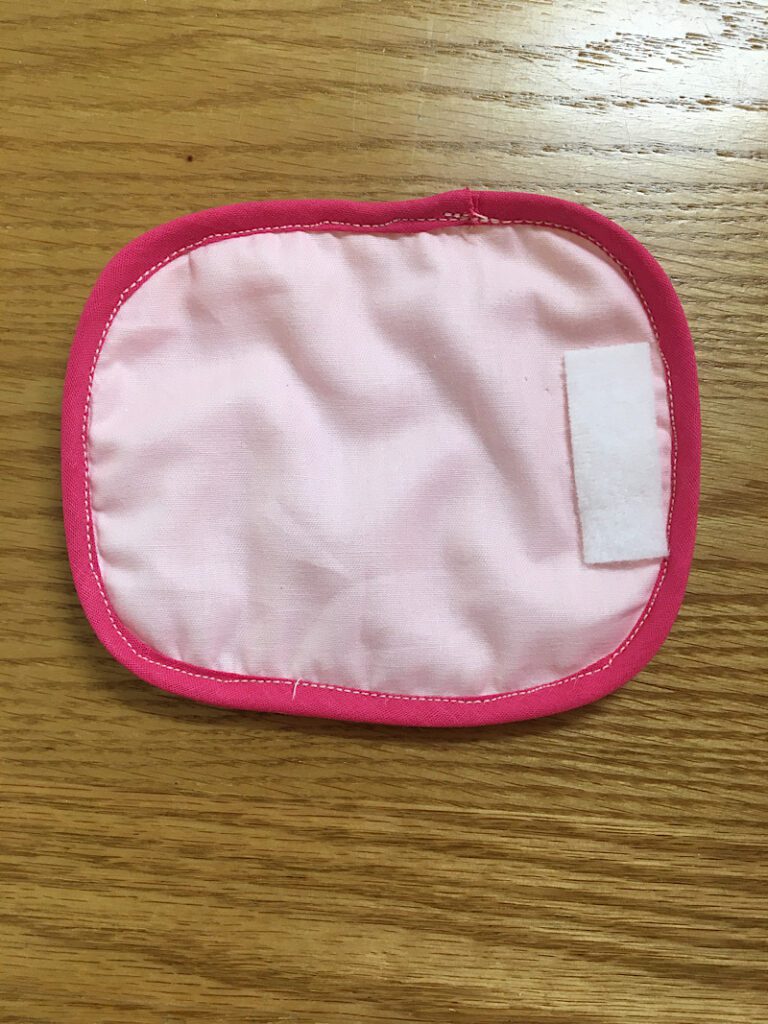
Sew it on by sewing around the perimeter of the Velcro.
![sewing on velcro](https://seamwhisperer.com/wp-content/uploads/2024/06/9A5150BD-5FAB-4B6C-BFCE-43AE7EFF46B4-768x1024.jpeg)
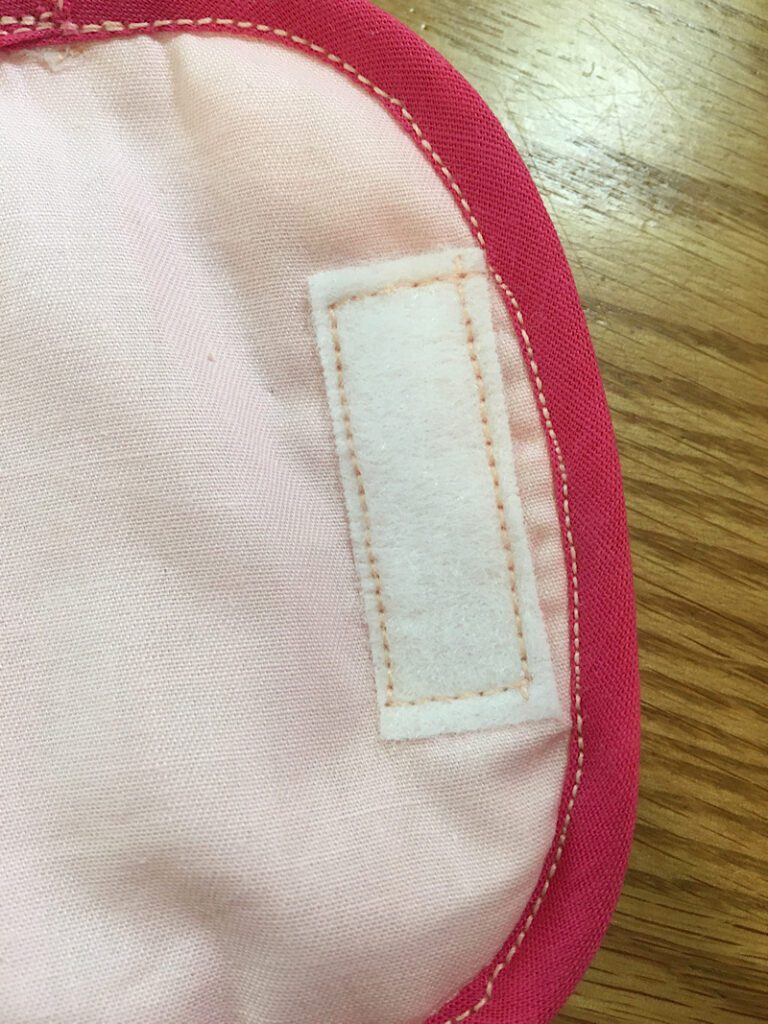
Flip the cozy over, and pin and sew the other piece of velcro to the ride hand side of the BACK of the cozy.
![pinning on velcro](https://seamwhisperer.com/wp-content/uploads/2024/06/591845E1-2607-4E7A-BDD4-E3BD5DE98FEC.jpeg)
![sewn velcro on popsicle sleeve](https://seamwhisperer.com/wp-content/uploads/2024/06/D7B1C37D-F04E-41A9-8B00-F89DA4EB1BCA-e1718319265710.jpeg)
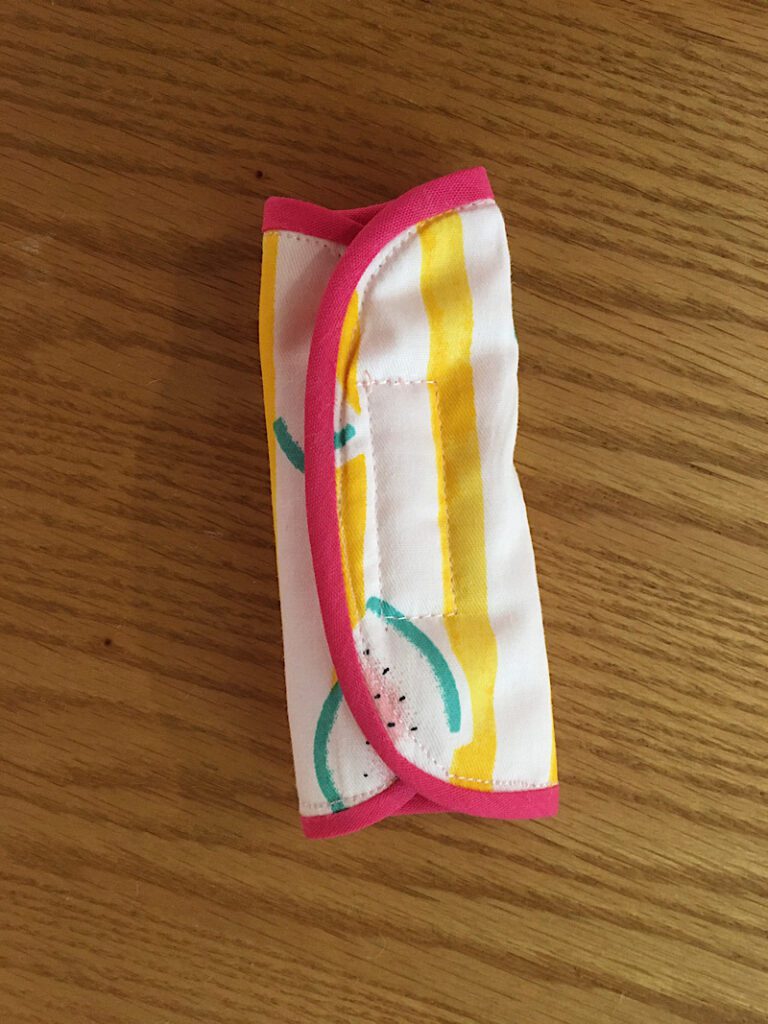
Now, when you connect the velcro pieces it will make the popsicle cozy into a loop/sleeve!
![completed popsicle sleeve free pattern](https://seamwhisperer.com/wp-content/uploads/2024/06/BE159A56-414F-48E1-8793-B4B25E25A6C7-768x1024.jpeg)
That is it! now you are done!
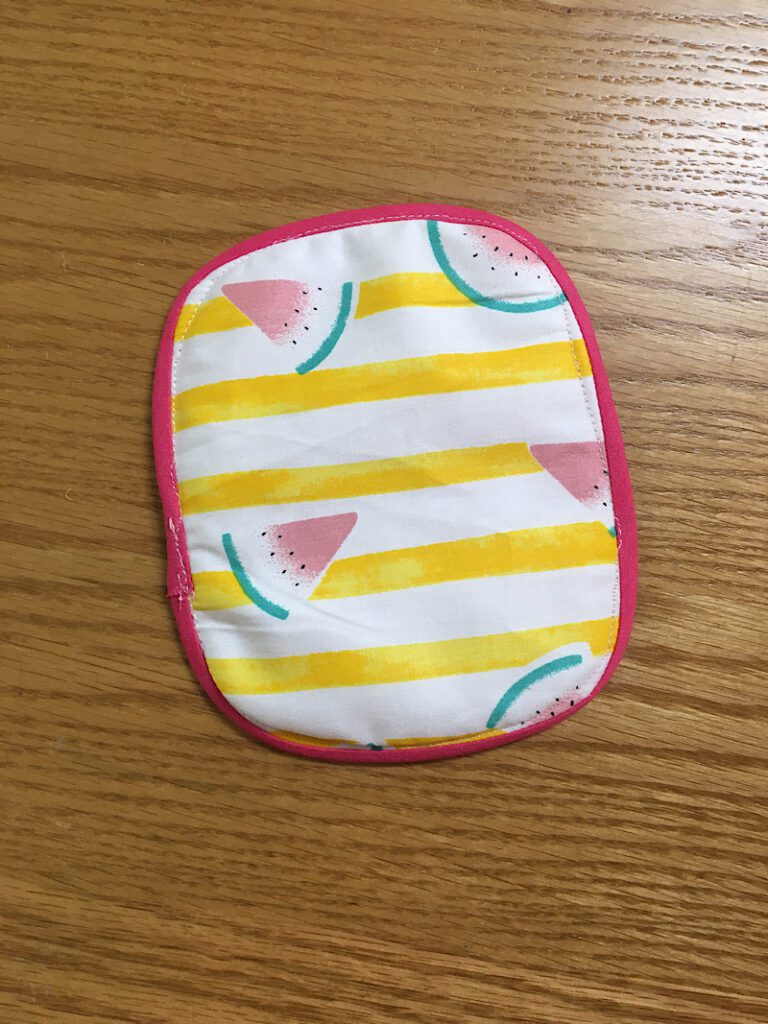
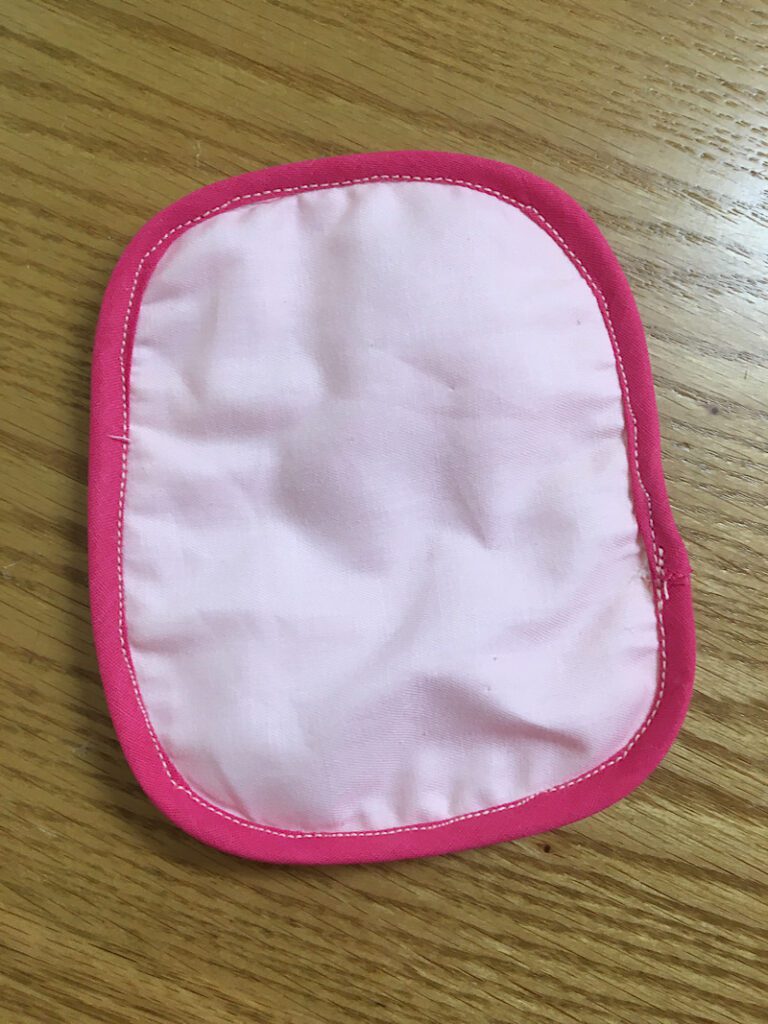
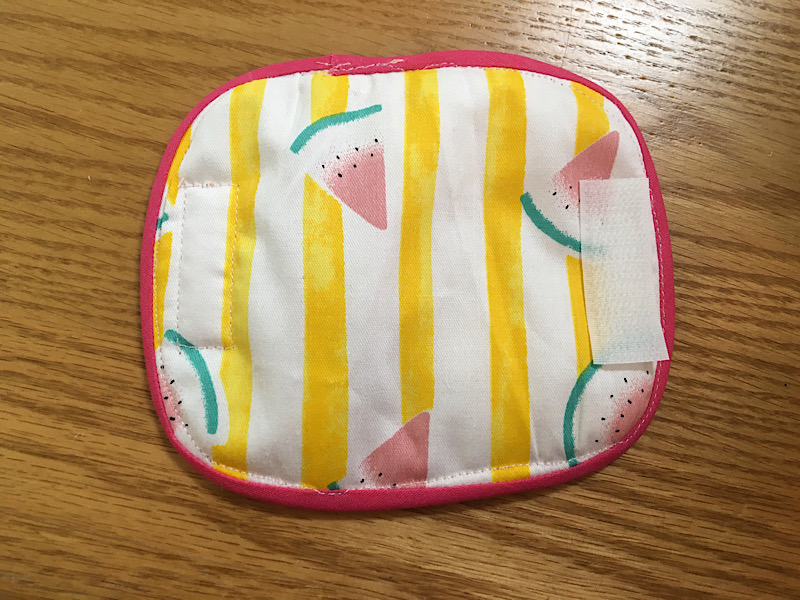
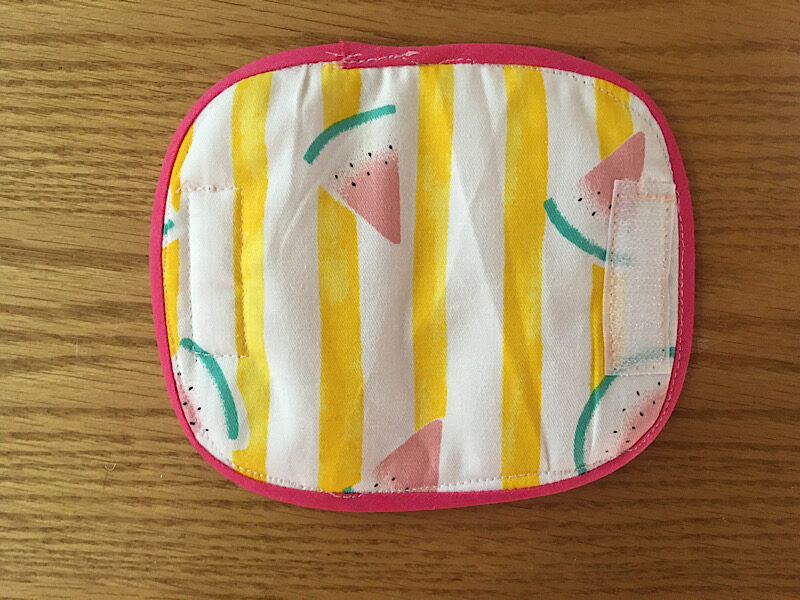
Make several so your kids can all use one! Here is what they look like open and closed!
![popsicle cozies](https://seamwhisperer.com/wp-content/uploads/2024/06/1BE502AA-DFBC-432B-935E-C8F8680385B4-768x1024.jpeg)
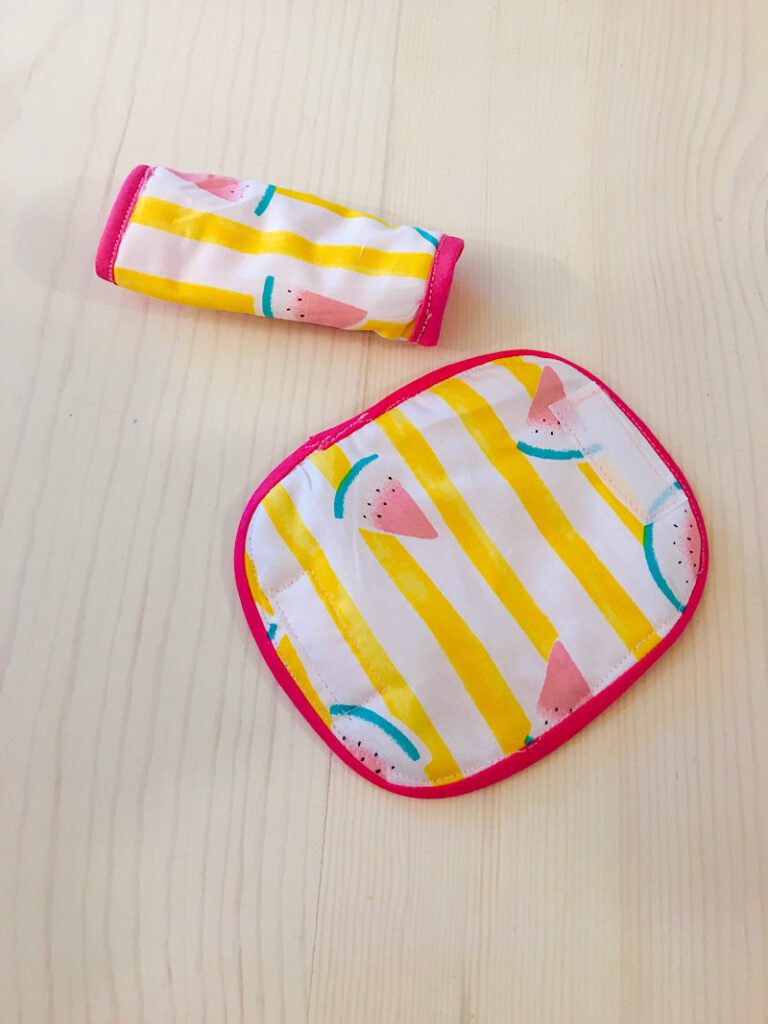
These are so cute and look like tiny pot holders. Which is what inspired them, since my kids were trying to use anything from pot holders to socks to hold their pops!
![ice pop cozy sleeve protect kids hands](https://seamwhisperer.com/wp-content/uploads/2024/06/3A273C73-08A1-4DBD-9B87-8E35DAA34DA3-768x1024.jpeg)
If you have any questions please let me know! I would also LOVE to see your finished photos and add them to this post, so email me!!
Pin this post to pinterest if you liked it, it is the best way to say thank you!
have fun!
![](https://seamwhisperer.com/wp-content/uploads/2024/06/DIY-512x1024.png)