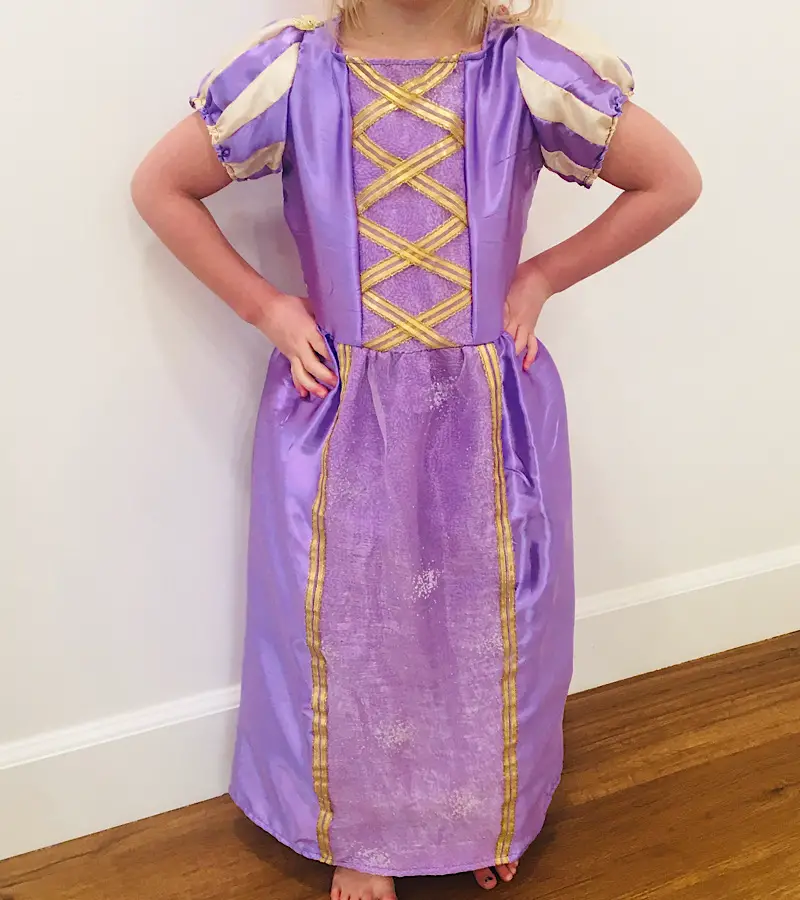
Learn how to make a simple purple Rapunzel dress with gold accents, in any size, with this step by step tutorial!
My daughter had her eyes and heart set on a Rapunzel dress up costume for months, and finally her birthday came and I was able to make her one!
This dress looks detailed, but is actually very easy to make, and can be made in any size!
Make sure to also look at my Sleeping Beauty dress tutorial that uses a very similar method.
This post may contain affiliate links. Read the full disclosure here.
About This Tutorial
To make this dress you will be tracing a non-stretchy top that fits you (or whoever the dress is for) to make your own pattern. I use this method to make all kinds of clothing, is is quick and fun!
This tutorial has lots of photos, so don’t be afraid to try it if you aren’t an advanced sewer.

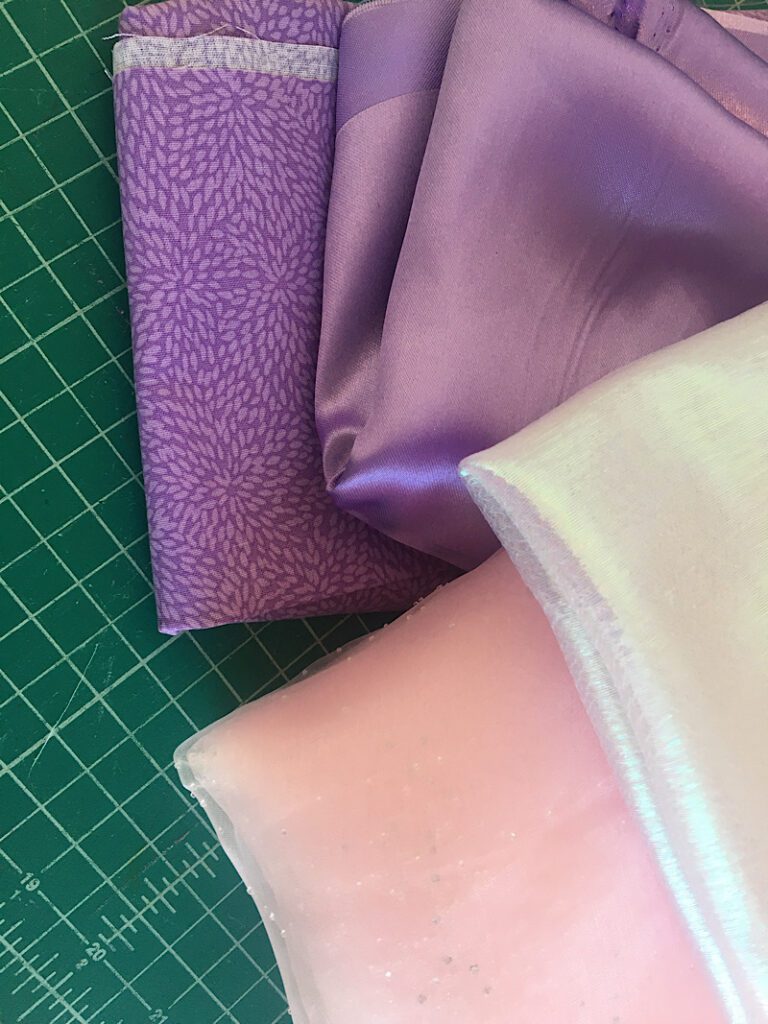
I used a costume satin in purple for the main material, and a patterned purple with a clear sparkly overlay for the “inside” pieces, and gold ribbons. You can use whatever colors you want. For the striped sleeves, if you can find striped material it would be easier than making the stripes manually like I did in this tutorial.
Finally, since this is a tutorial and not a pattern, and because I don’t know what size of dress you are making I can’t tell you exactly how much fabric you will need! I recomend making your pattern for the sleeves and bodice as I show below, as well as measuring for the skirt, and then figuring out how much fabric you will need by using my inches to yardage calculator!
Supplies Needed
- Sewing Machine
- Fabric Scissors
- Sewing Pins
- Rotary Cutter (These really make it easier), Mat, and Ruler
- Measuring Tape
- Paper and Pen to make your pattern with (you can use newspaper, wrapping paper, anything large enough to fit the bodice on)
Materials Needed
- A non-stretchy top or dress to trace
- Purple Costume Satin (For the main body of the dress) (Here is an inexpensive option, but I got mine from walmart)
- Pink Costume Satin (For the interior panels of the skirt and bodice)
- Gold Ribbon (Something simple like this would work great, or something with an edge like this if you want to go a little fancier
- Gold Costume Satin (For the stripes on the sleeves, optional, or you can use pink)
How To Make A Rapunzel Dress
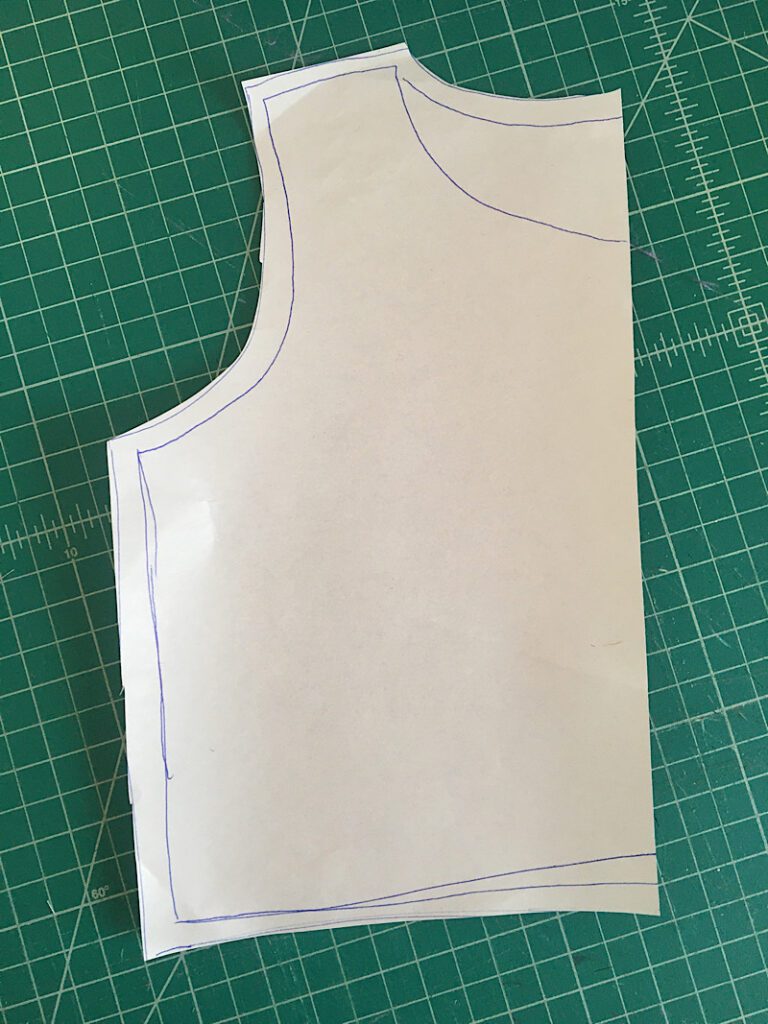
Step 1. Make The Bodice Pattern
To make the bodice pattern for the dress, you are simply going to trace the bodice of another dress or top that fits well to “copy” it.
Fold the garment you will trace in half and make sure all the sides and corners are well aligned. Flatten it out well.
Lay the garment on top of your pattern paper, with the fold of the garment on the edge of the paper.

Trace around the bodice, but not the sleeves. Make sure to trace the front neckline as well as the back neckline.
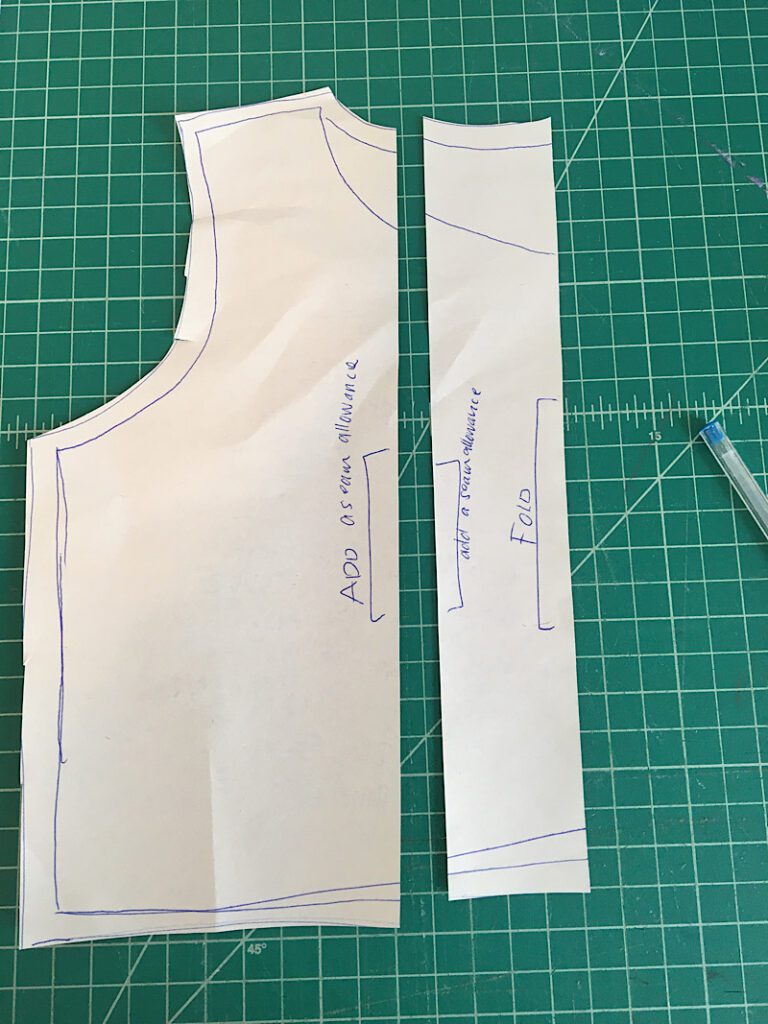
After tracing, add a 3/8ths inch seam allowance around the line you traced (except for the fold side), and cut it out.
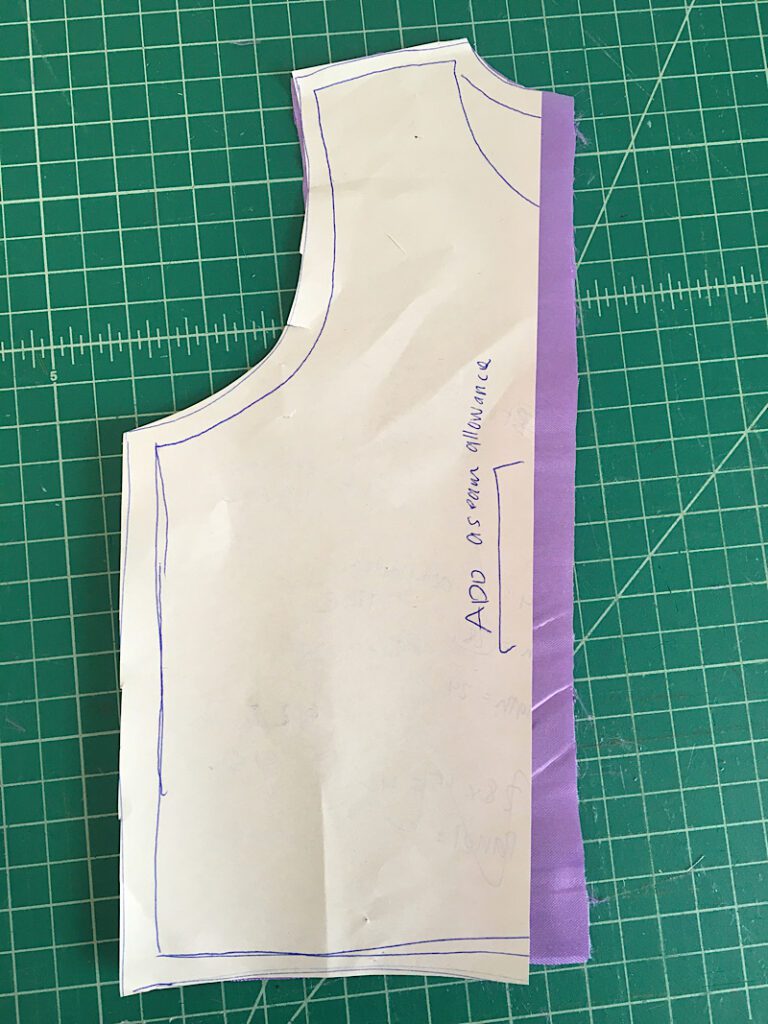
Now, you are going to slice the pattern so you can make the pattern for the inner panel of the bodice.
Lay the pattern on the table and make a line an inch in from the shoulder point.
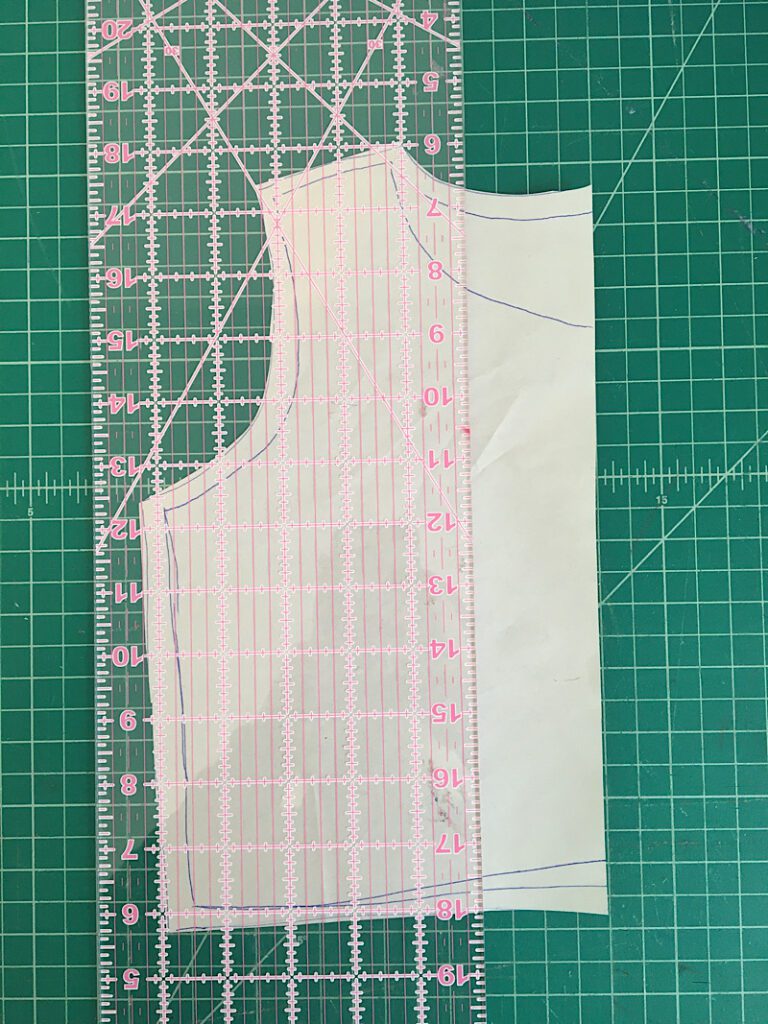
Then cut the bodice apart at that line.
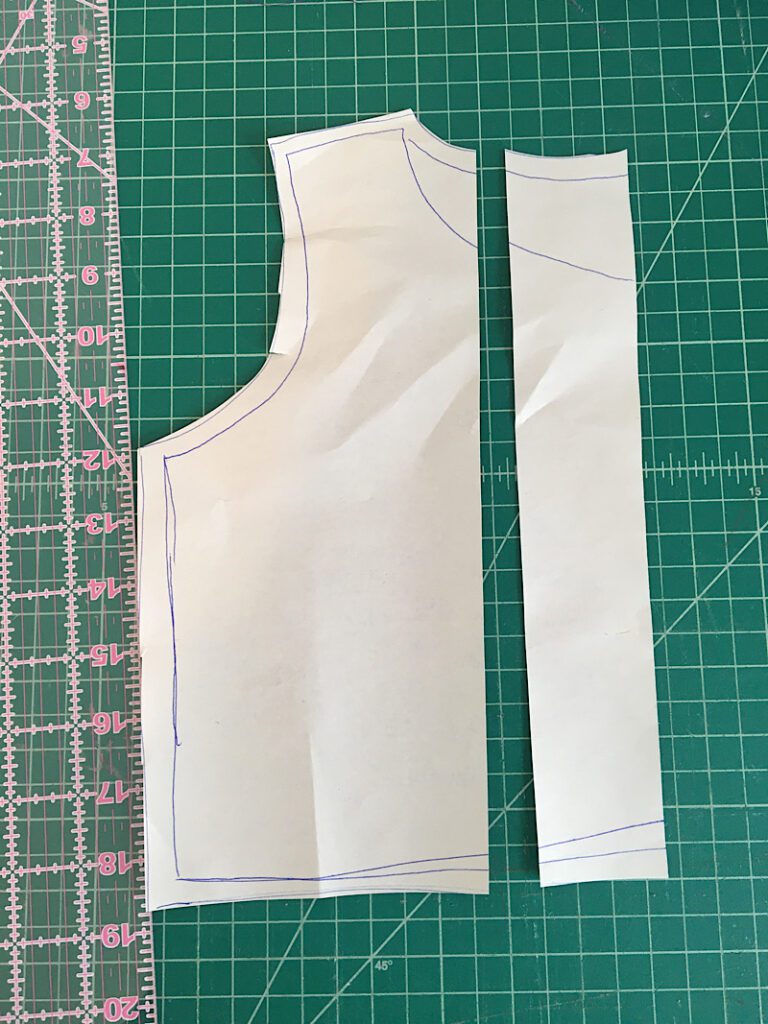
Then, mark the edge that is the “fold” edge, and write a reminder to add a seam allowance when cutting out the pieces.
Now you have a panel pattern piece, and together both piece make the full bodice pattern.
Set the bodice pattern aside for now.
Step 2. Make The Sleeve Pattern
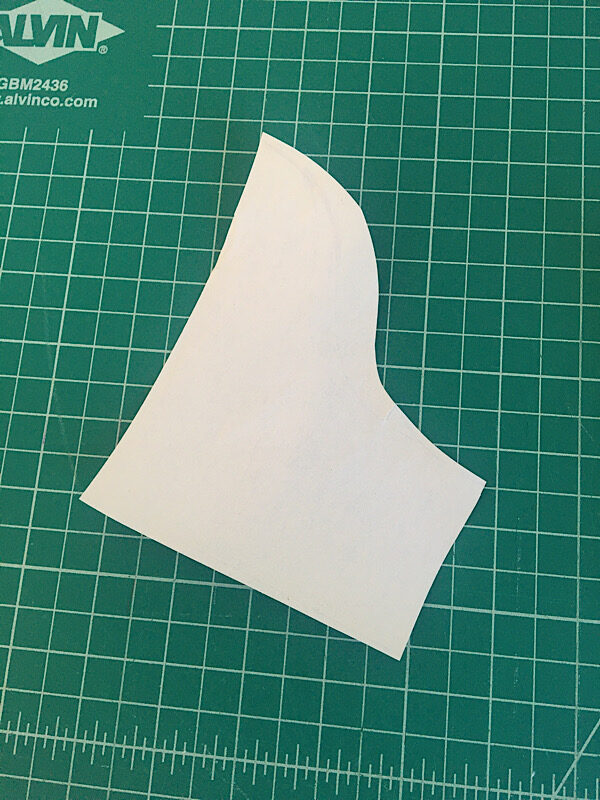
To make the the sleeve pattern, flatten out one of sleeves of the garment you are tracing, and place the folded edge of the sleeve on the edge of the pattern paper. Trace around it (make it a short sleeve if it is long). You don’t need to add a seam allowance yet.
Then, cut it out.
To make the sleeves a bit poofy, you are going to cut apart the sleeve pattern and expand it.
First, draw lines that are parallel to the “fold” edge of the pattern (perpenducular to the sleeves hem), down the sleeve about every inch.
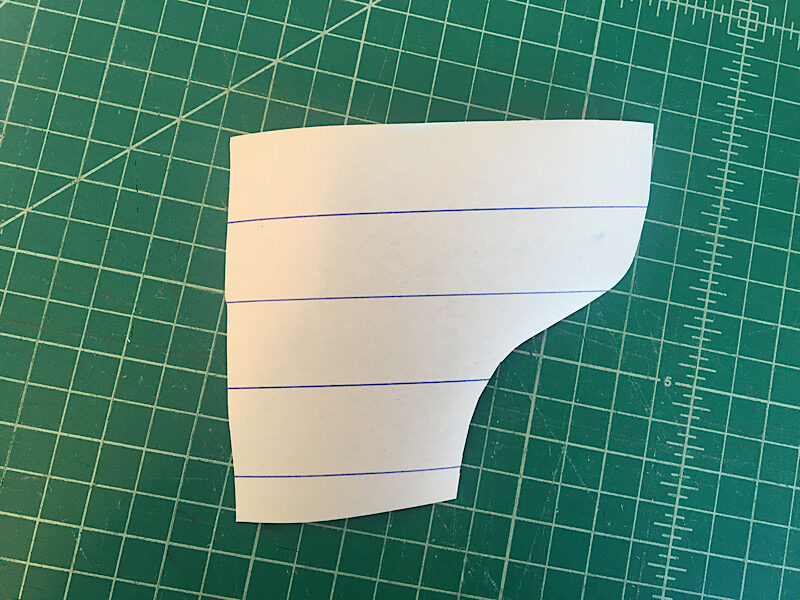
Number each space on the sleeve between lines so you know which order they go in. Cut the sleeve apart on the lines.
Next, grab another piece of pattern paper and lay the cut pieces of the sleeve on it, spacing them out about 1/2 an inch or an inch apart. You can glue or tape them down.
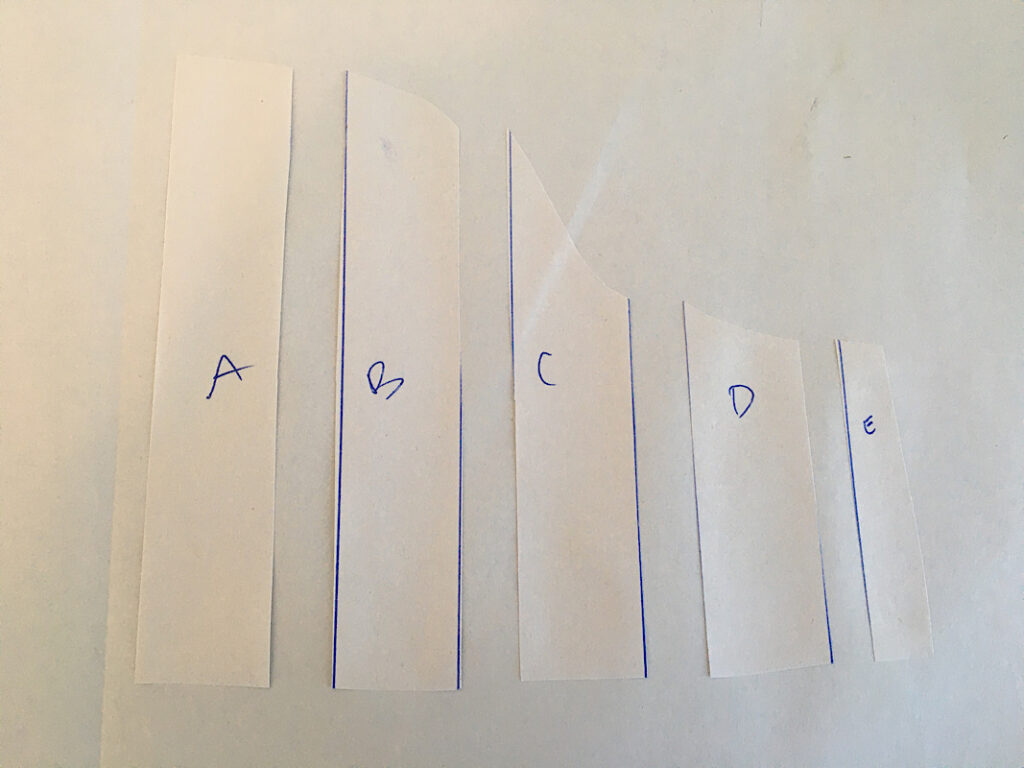
Then, trace around the perimeter of the new sleeve shape. Also add a seam allowance line all the way around.
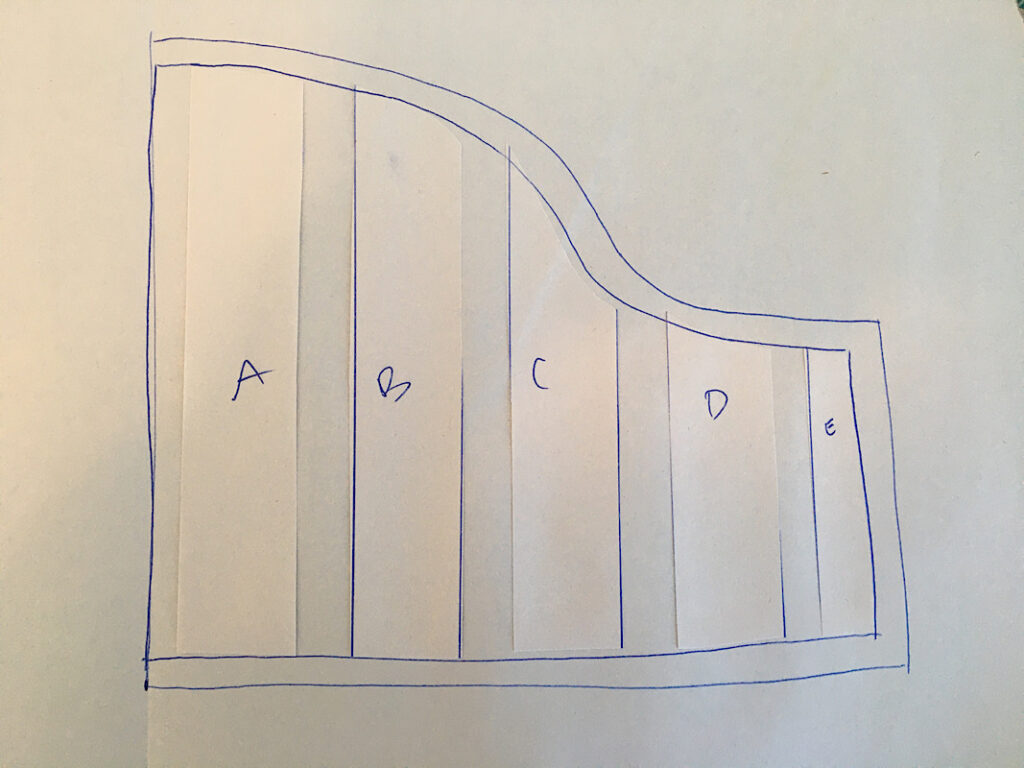
Then cut out the sleeve pattern, this will make your poody sleeves! Set it aside for now.
Step 3. Cut & Sew The Bodice
The bodice is made of two different fabrics, the main purple material and the complementary panel material.
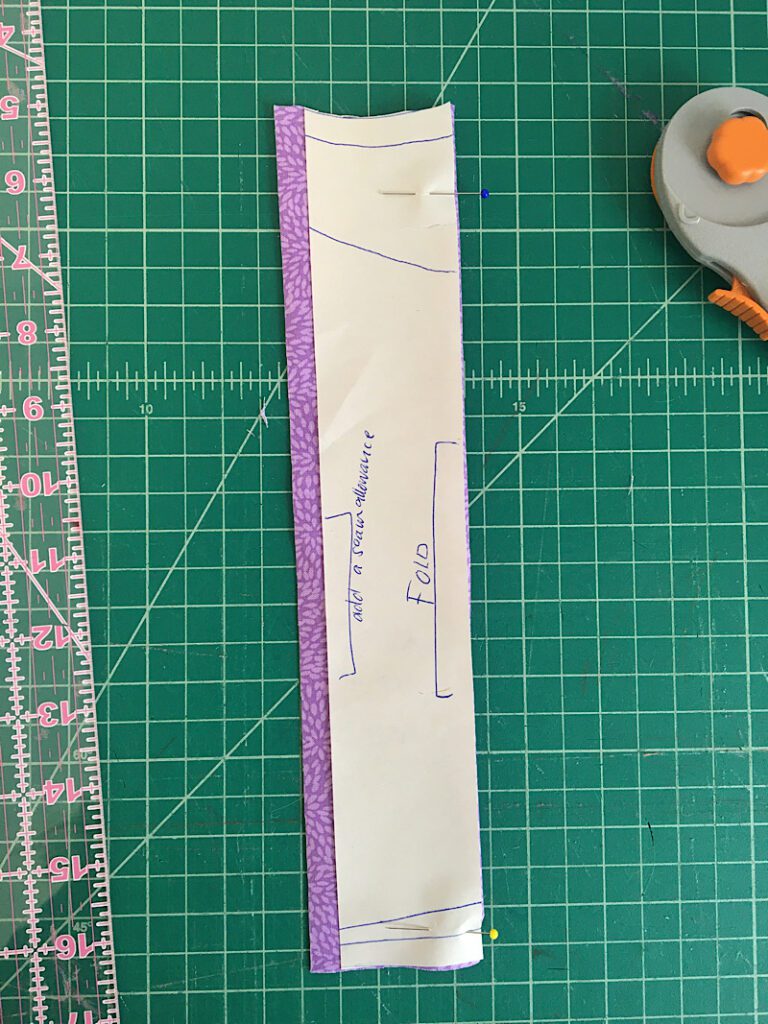
For the front, first cut out the panel material by lining up the panel pattern on the fold of your fabric.
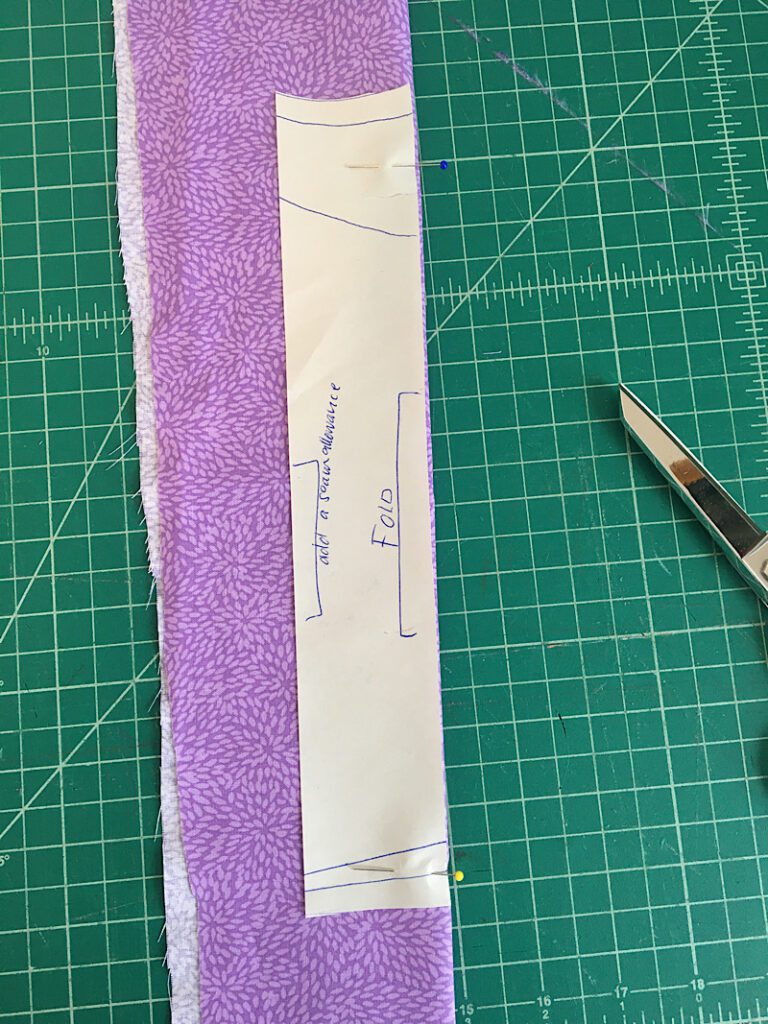
Remember to add the seam allowance around the left side when you cut it out.
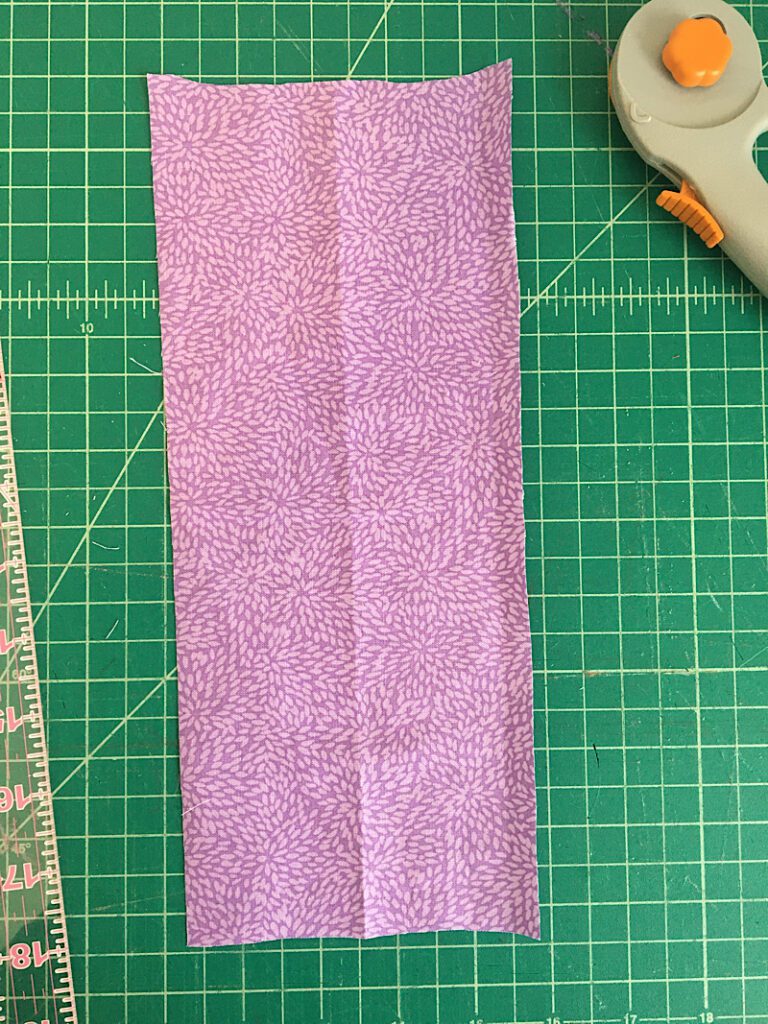
When you open the panel, it will look like this:
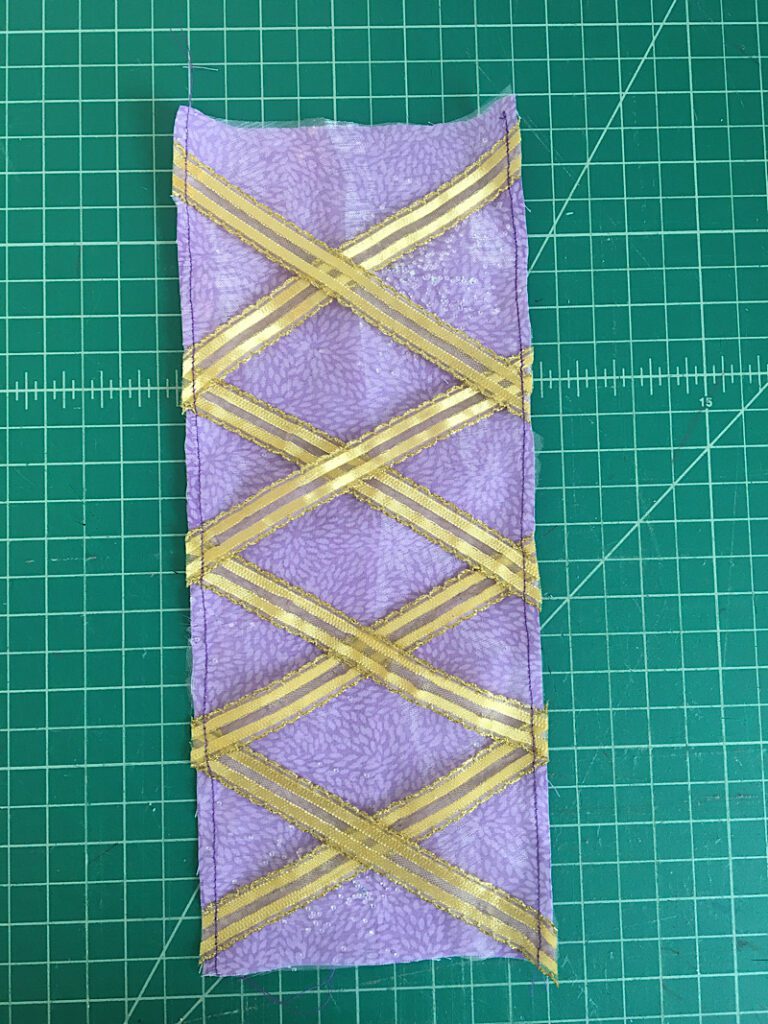
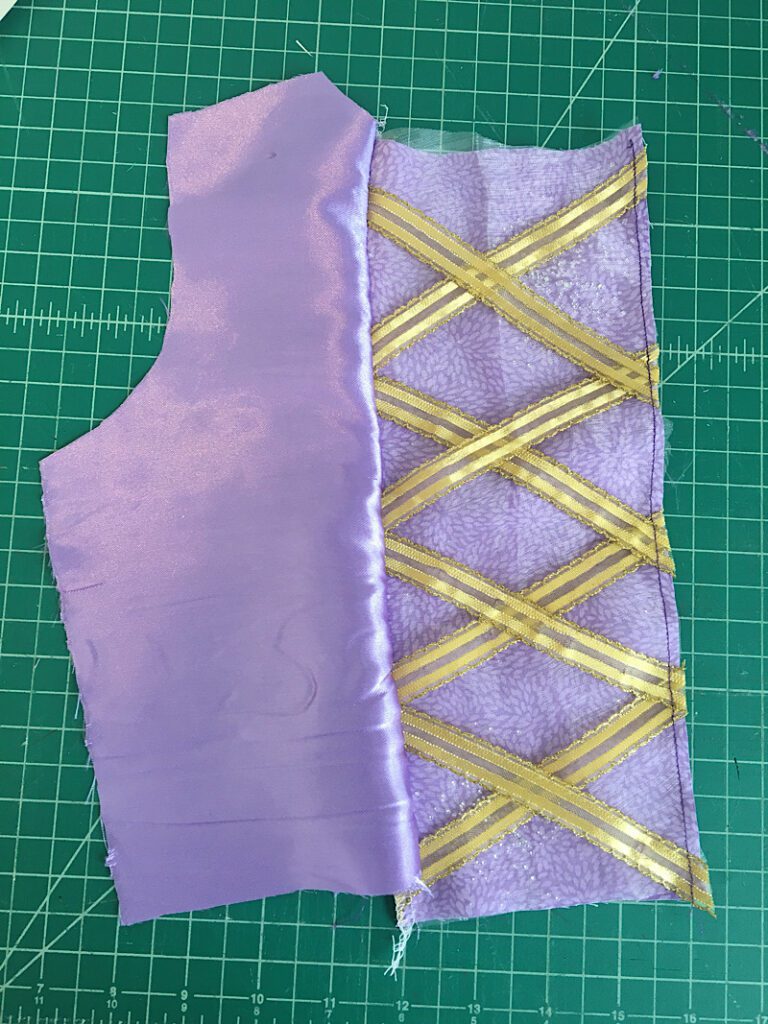
Now you will sew the decorativec ribbons to the panel. This is a fun part!
Arrange the ribbon into a few X shapes on the panel by cutting short sections of ribbon, and over lapping them. Make sure to pin the end of each ribbon in place.

The number of X’s you fit on your panel will depend on the size of dress you are making. I fit 4 X’s on the panel of this dress, but you can do more or less depending on how thick your ribbon is and how you want it to look.

Next, sew down both sides of the panel to secure the ribbons down. Sew with a 1/4th inch seam allownace if you can, so that it will be hidden later when you sew it to the bodice. Then trim the ends of the ribbons.
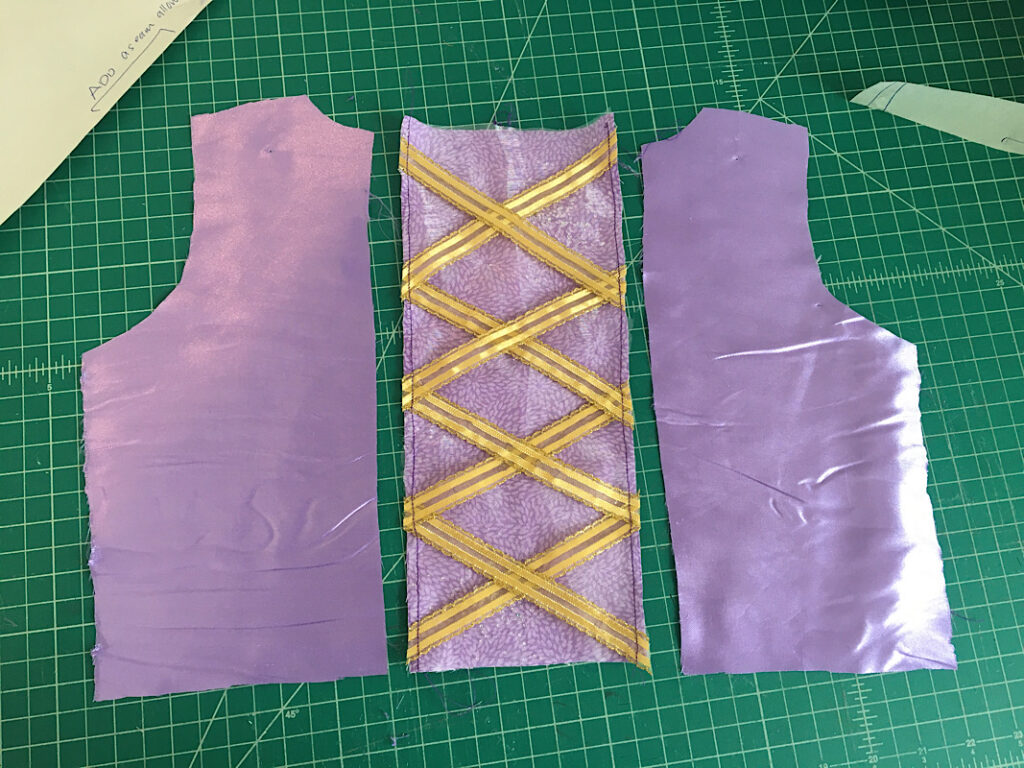
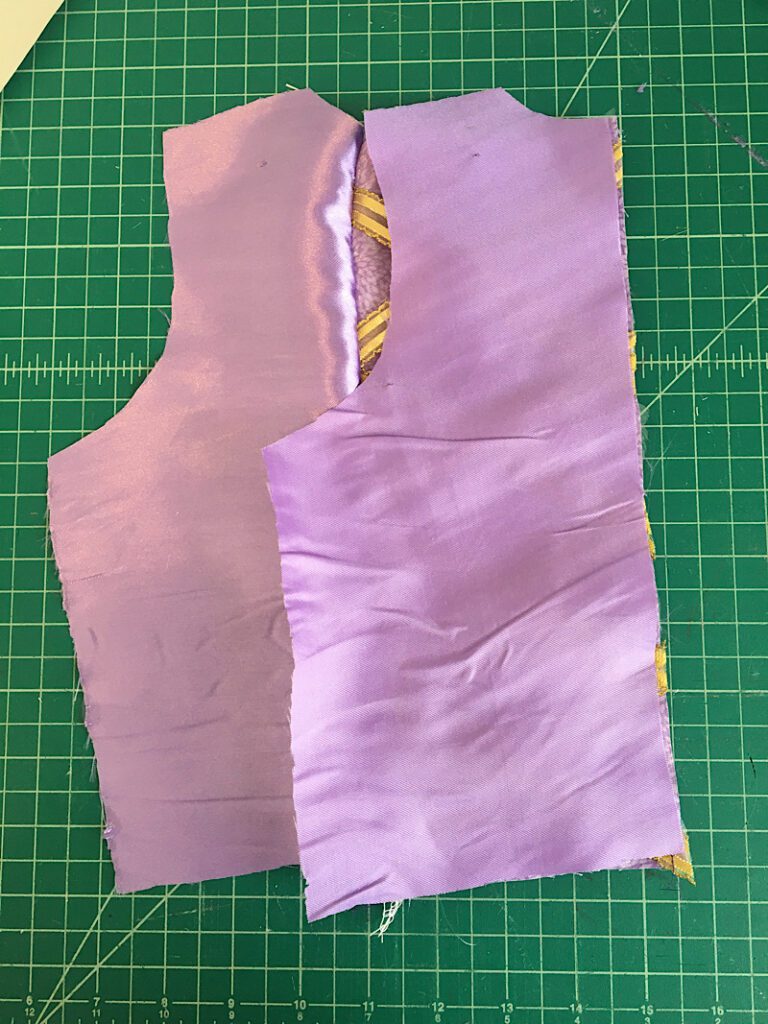
Next, you are going to cut out the main portion of the front of the bodice. Make sure to add that seam allowance to the edge where you cut the panel piece from.
Grab your pattern, and cut out two OPPOSITE pieces. Cut one out, then flip the pattern over and cut out another so that the right side of the fabric ends up on the front for both sides.
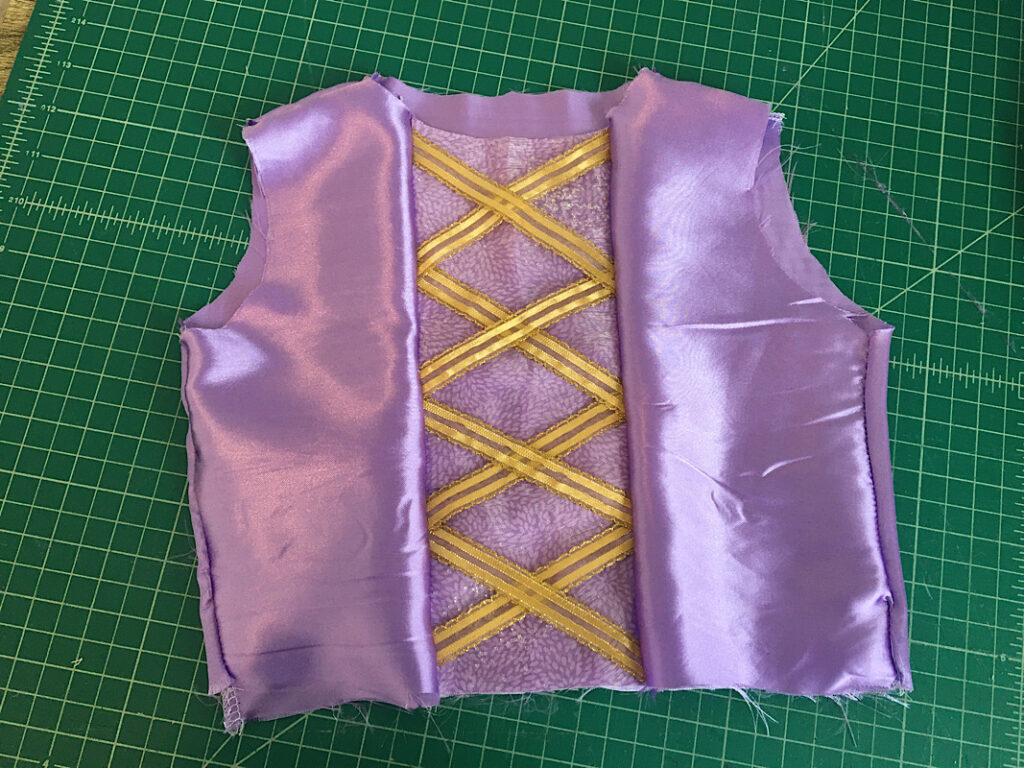
Now you will have your three pieces that make the front of the bodice.
Sew the three pieces together by laying the middle panel on top of the left side bodice piece with the right sides touching. Pin down the edge, and sew the seam with a 3/8ths inch seam allowance.
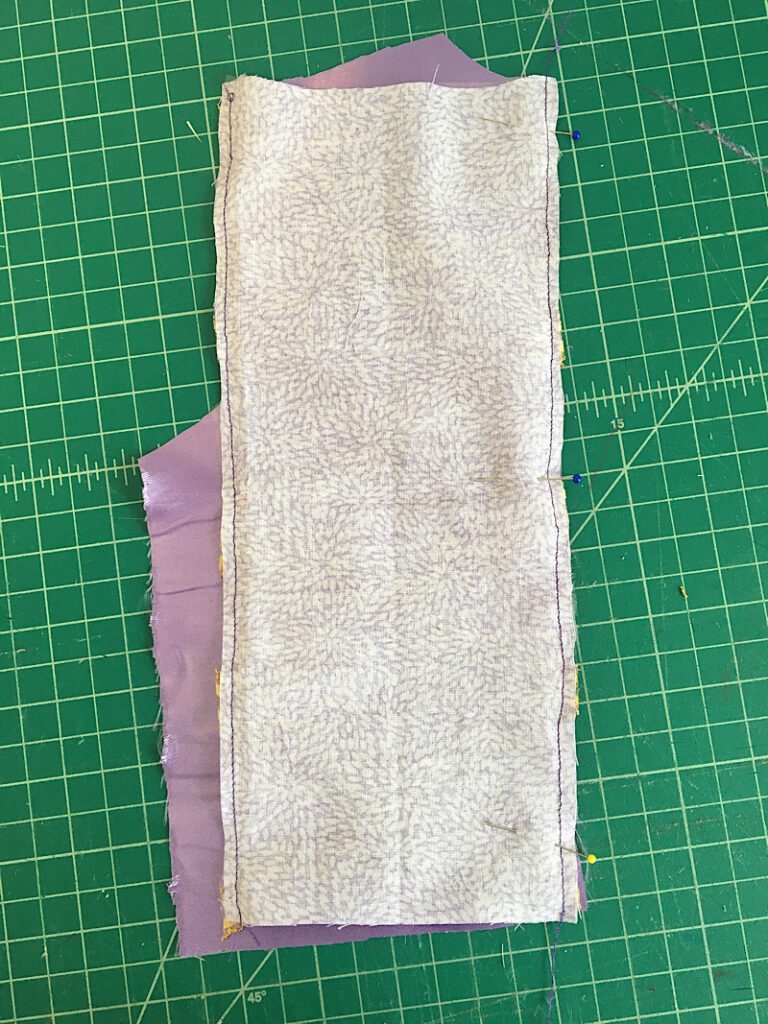
Do the same thing to sew the right side bodice piece. Lay the right bodice on top of the middle panel with right sides together, and pin the edge. Then sew down the seam.
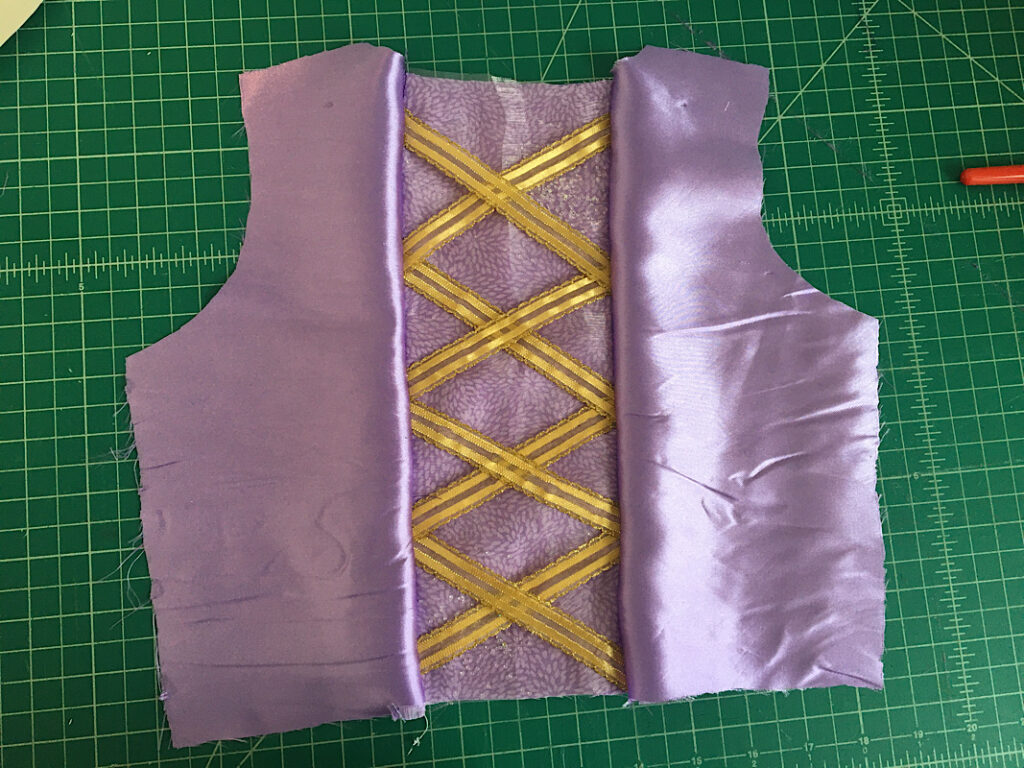
Sew a straight top stitch on both seams where the bodice attaches to the middle panel to keep it flat.
To cut the back bodice piece, lay the completed front piece on another section of fabric and trace and cut around it.
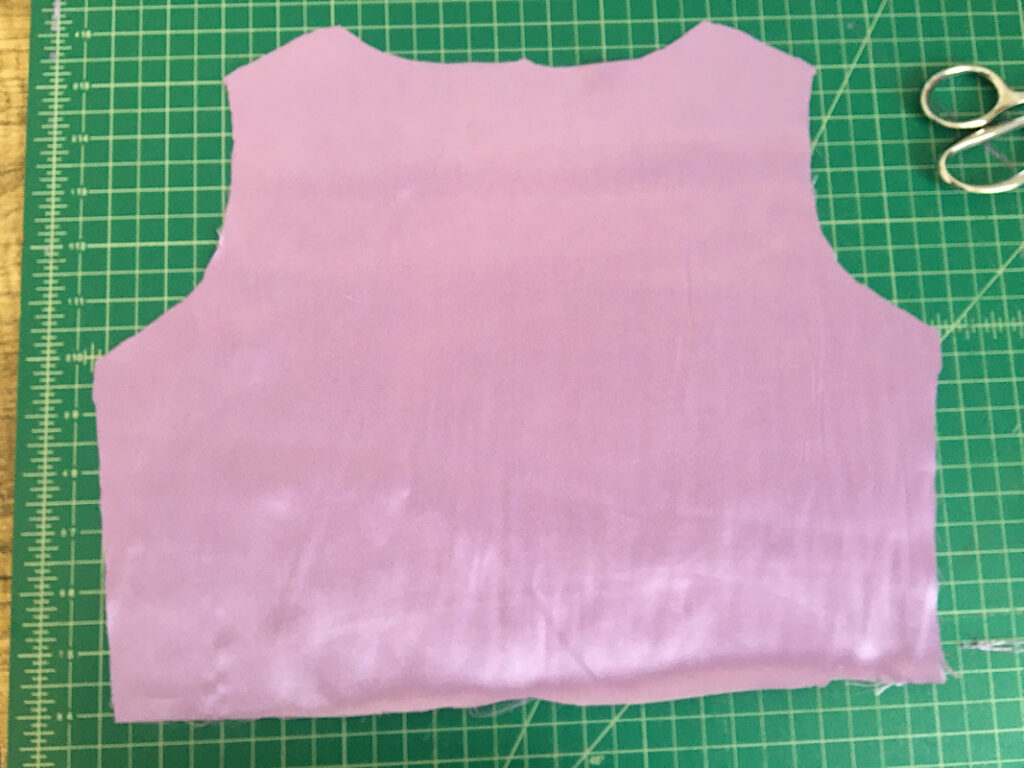
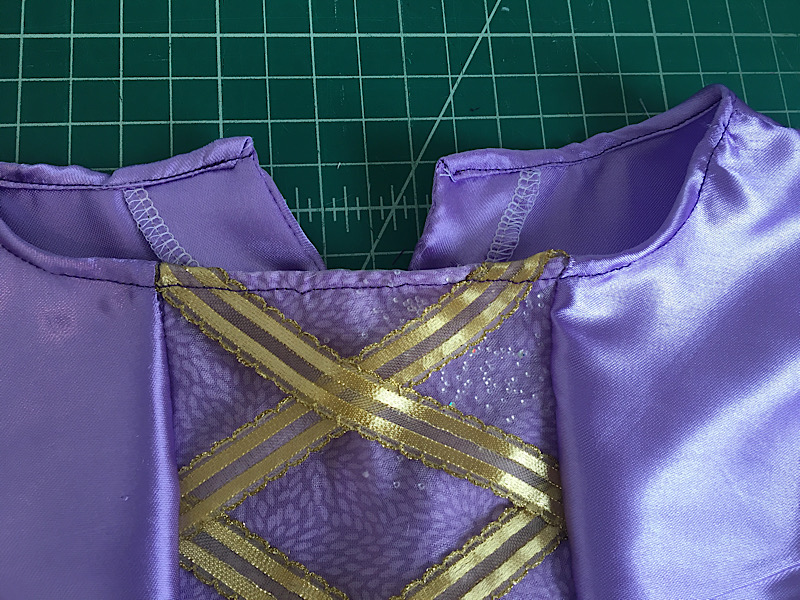
You’ll notice that both pieces have the same high neckline at this point. To make the front of the bodice have a lower neckline, fold it in half and cut a curved shape like the one on the pattern to lower it a bit.
Attach the front and back pieces by laying them on top of each other with right sides together. Then pin and sew the shoulder and side seams with a 3/8ths inch seam allowance. Serge or Zig Zag the edges.
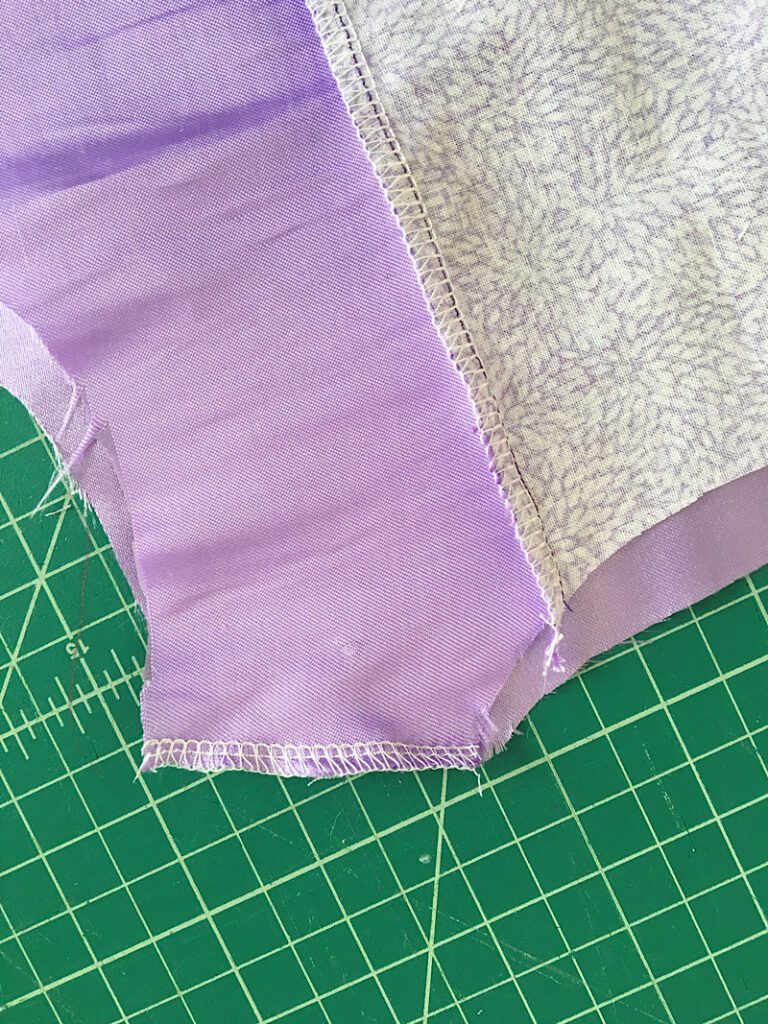
Then turn the bodice right side out.
To finish the neckine, turn the bodice inside out and fold the neckline towards the wrong side of the fabric twice, abotu 1/4 inch. Pin it down, and sew around it.
Step 4. Cut & Sew The Sleeves
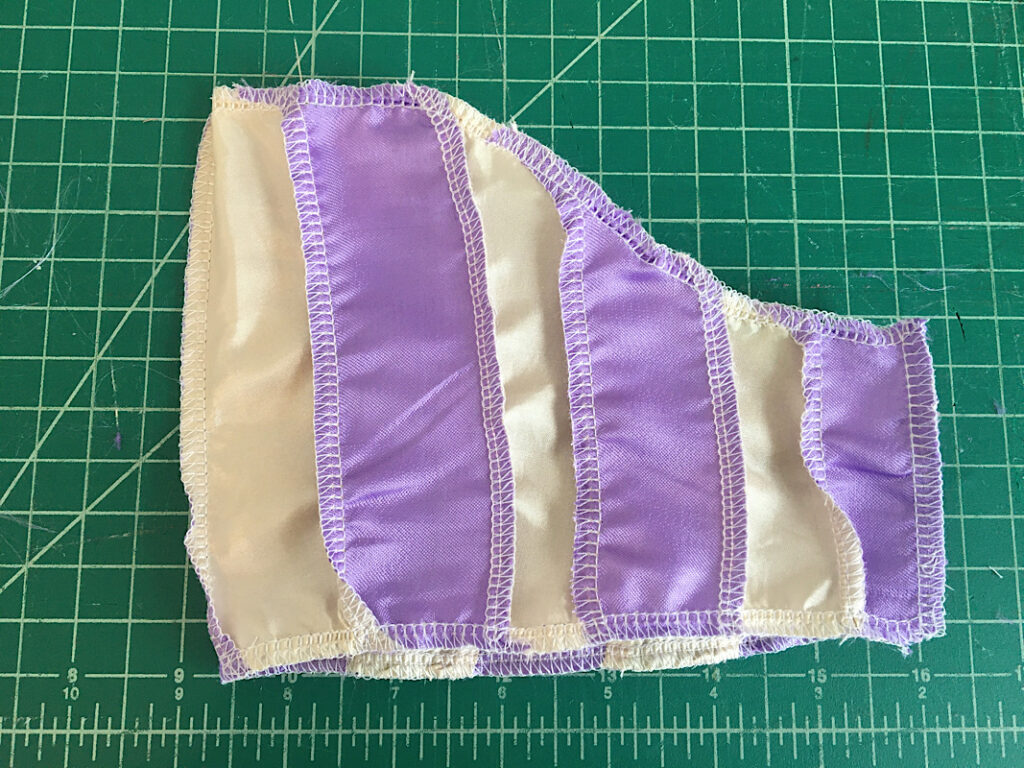
I wanted my sleeves to be striped but could not find any gold and purple striped fabric. So, I made my own! (You can skip this part if you want!)
To do this, I cut out strips of gold and purple fabric about 2 inches wide and a bit longer than my sleeve pattern. I sewed them all together into long panels of fabric.
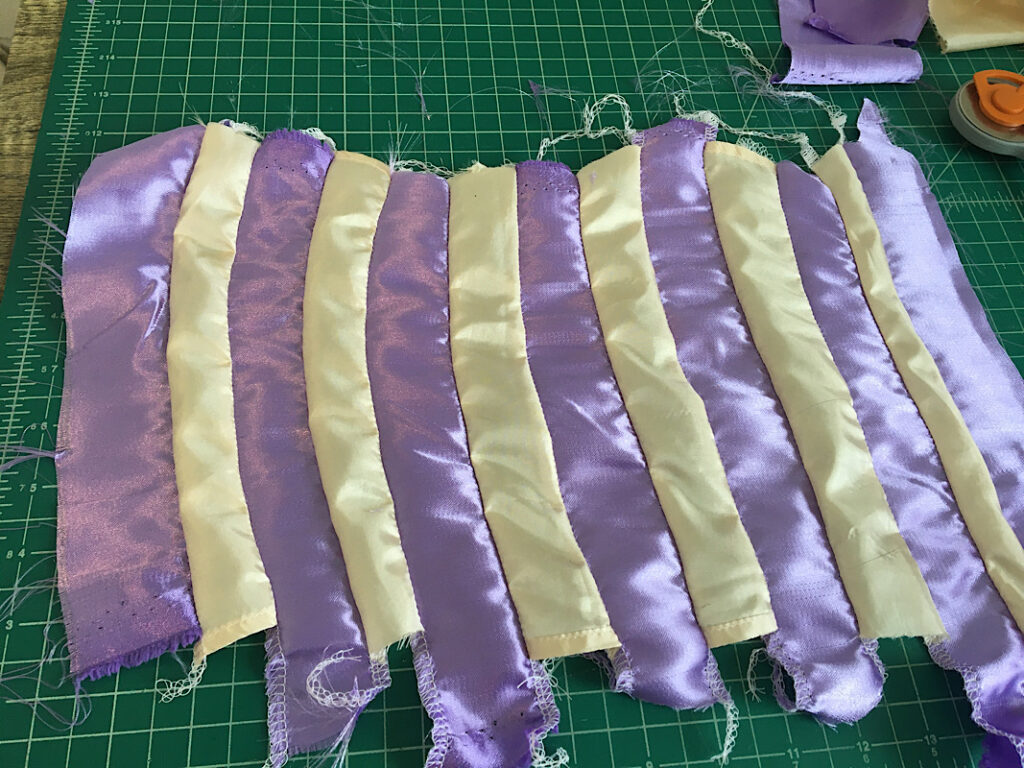
Then, I used this striped panel as if it was a regular piece of fabric. I folded it in half, and lined up my pattern on the fold and cut it out.

To reinforce the stripes, I serged along the top and bottom edges.

Now to make the sleeve, fold it in half with the right side facing in, and sew down the side seam to form the sleeve.
To gather the bottom of the sleeve, cut a piece of elastic that is the length of the original sleeve plus 3/4’s of an inch for seam allowance. Stretch it across the bottom hem of the sleeve by pinning the beginning, end, and middle. Overlap the ends a bit.
Sew it to the sleeve by stretching it to the sleeve’s length as you go. Use a zig zag stitch. After it is attached, fold the hem over once towards the inside and stretch it out and sew a long lengthed top stitch on top.
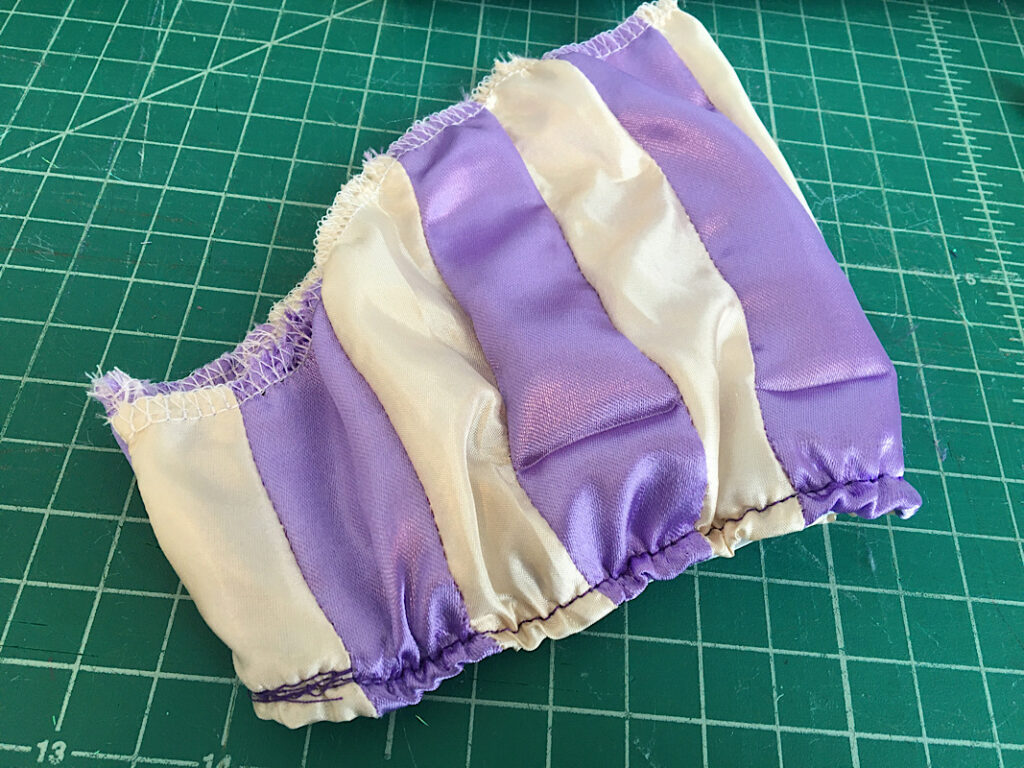
Now the sleeve is ready to be placed inside the bodice.
Step 5. Attach The Sleeves To The Bodice
Turn the bodice inside out, and make sure the sleeve is RIGHT side out. Set the sleeve into the armhold of the bodice and line up the side seams. Pin around the circumference of the armhole.

Then sew around the armhole to attach the sleeve. Make sure to finish the edge with a zig zag stitch.
Repeat these steps with the other sleeve as well.
Then turn it all inside out and the bodice portion is complete!
Step 6. Cut & Sew The Skirt
To make the skirt, measure the circumference of the bottom of the bodice (the waistline). Multiply this number by 2 to get your skirt width.
The front panel of the skirt should be 1/4th of the width of the skirt width, and the main part of the skirt should be 3/4ths of the skirt width.
For example, if the bodice circumference is 20, then the skirt width is 40. The front panel of the skirt will be 10 inches wide, and the main portion of the skirt will be 30 inches wide.
The length of the skirt should be the measurement from the waist to the floor.
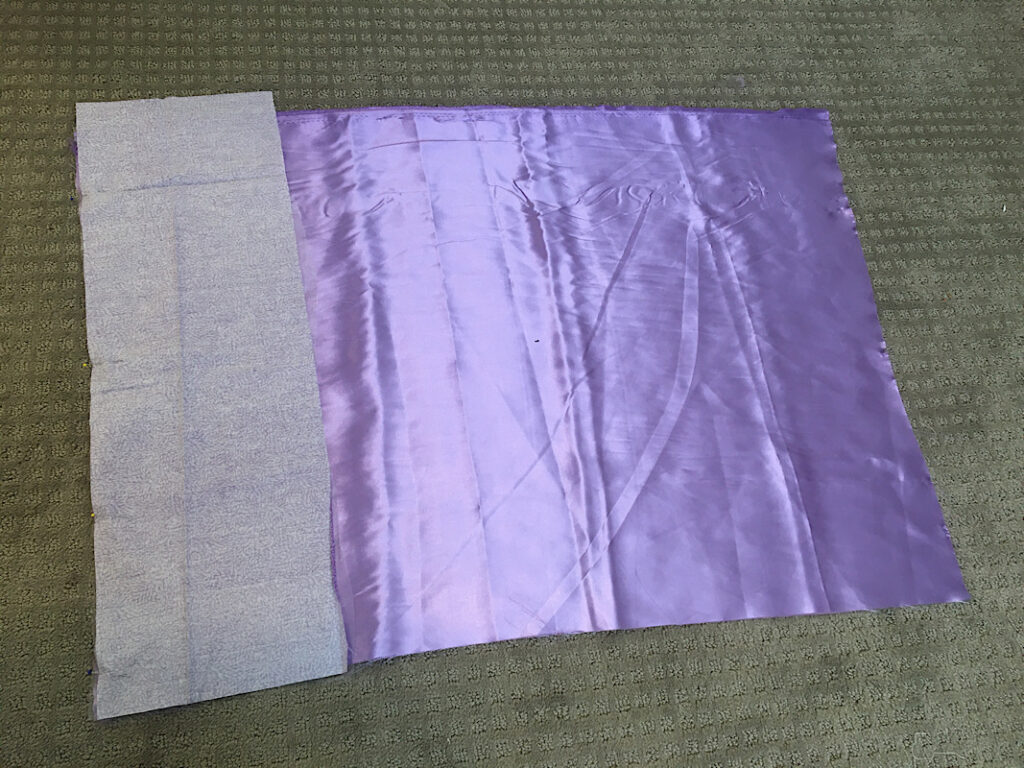
Cut out the main fabric and panel fabric equal to the measurements specific to the dress you are making.
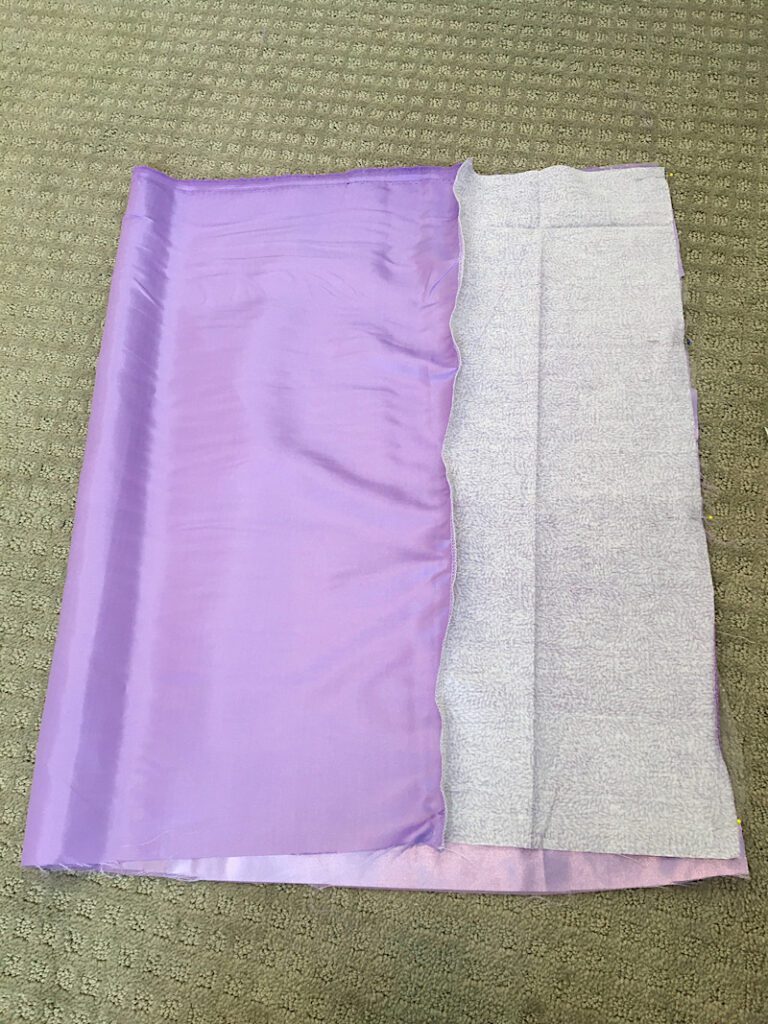
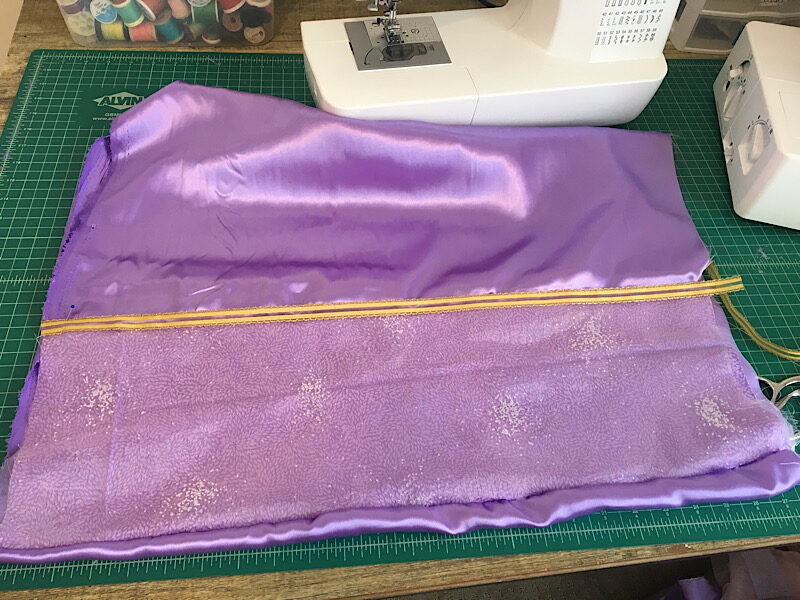
Sew the center panel to one side of the skirt by laying them together with right sides touching. Pin down the edge and sew them together, then finish the edge with a zig zag stitch.
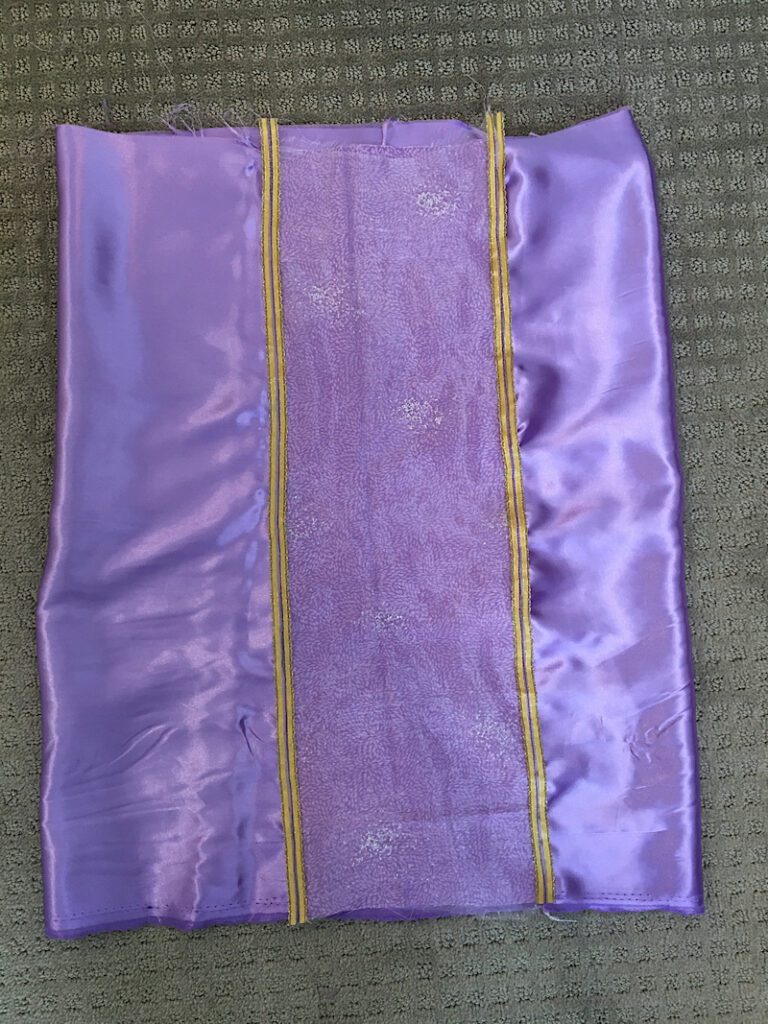
Then, attach the other side of the panel to the other side of the skirt by keeping the right sides together and lining up the edges, then pin and sew. you will now have a skirt in a loop

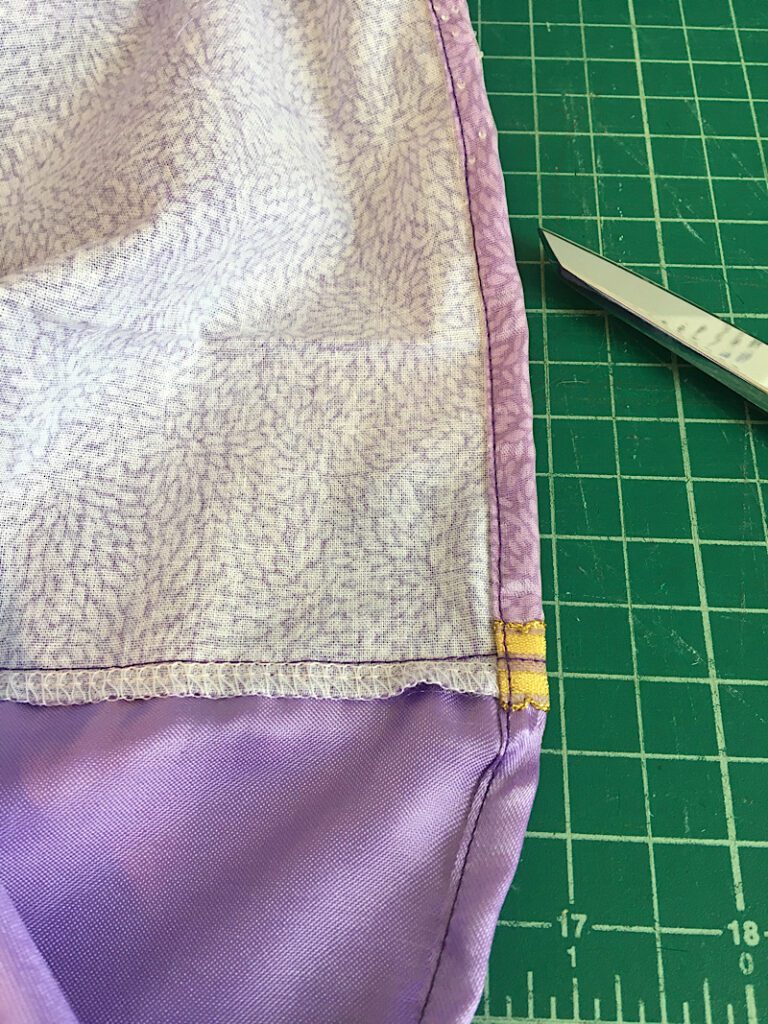
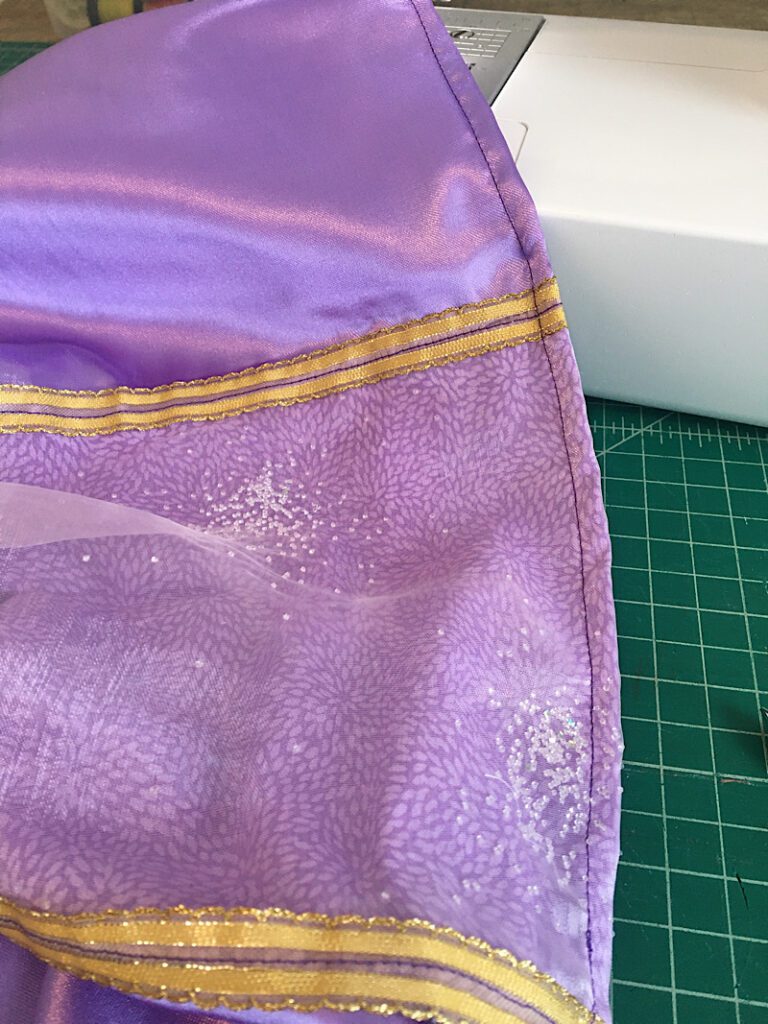
With the skirt inside out, cut a length of ribbon and pin it to the from seam where the panel attaches to the skirt. To sew it on, you will carefully have to move the bottom layer of the skirt out of the way to make sure you only sew to the front.
Do this with both sides.
Hem the skirt by folding over the bottom edge twice about 3/8ths of an inch, pinning and sewing around it.
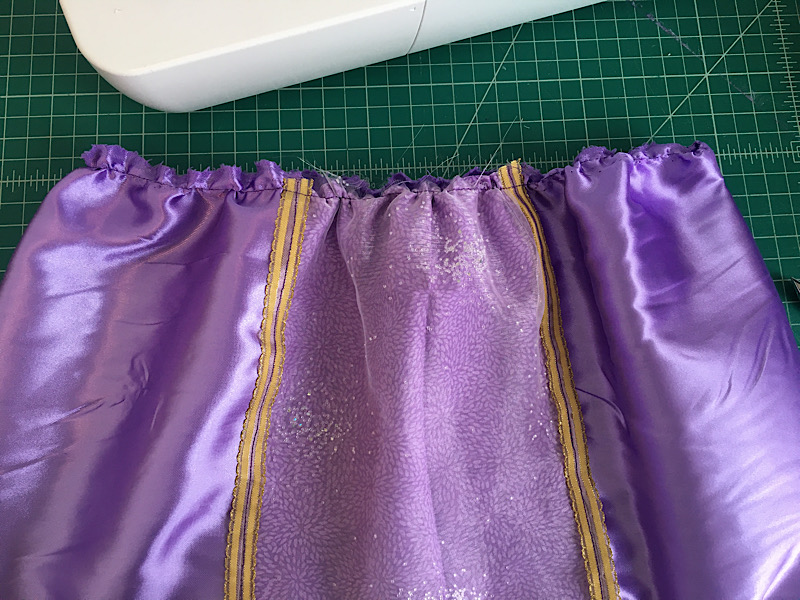
Finally, you will need to gather the skirt.
Adjust your stitch length to be the longest it can go. Sew a basting stitch around the top edge of the skirt with a 1/4 inch seam allowance, do not backstich the beginning or end.
Then, sew another basting stitch next to the first one in the same manner, making sure not to overlap them.
To gather the skirt, gently pull on the loose tails and move the gathers evenly around the skirt until it’s circumference matches the bodice. Tie the ends of the threads together so it doesnt un-gather.
Step 7. Attach The Skirt To The Bodice
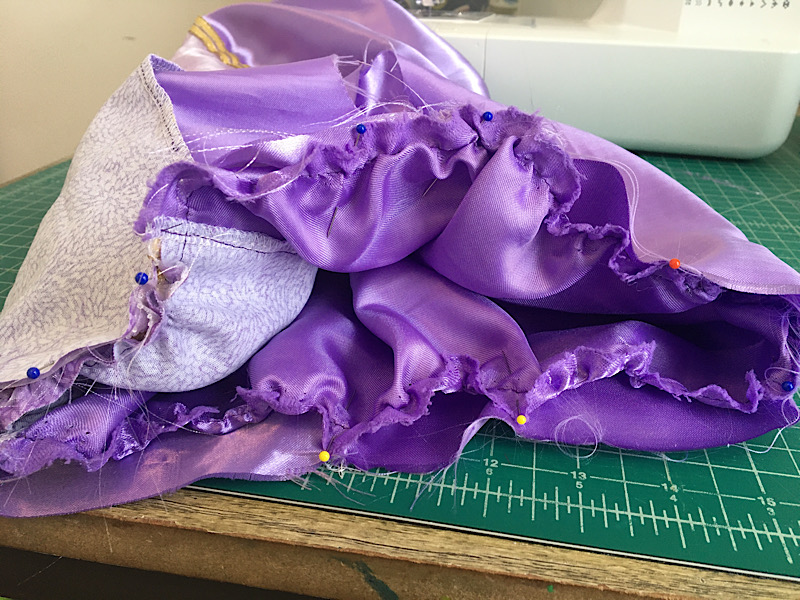
To attach the skirt to the bodice, run the bodice right side out, and the skirt inside out.
Place the skirt around the bodice and line up the raw edges. Make sure the panel of the skirt and the panel of the bodice are nicely centered.
Pin around the waistline to hold it together.
Then sew around the edge being careful not to un-gather it. Finish the edge with a zig zag stitch.
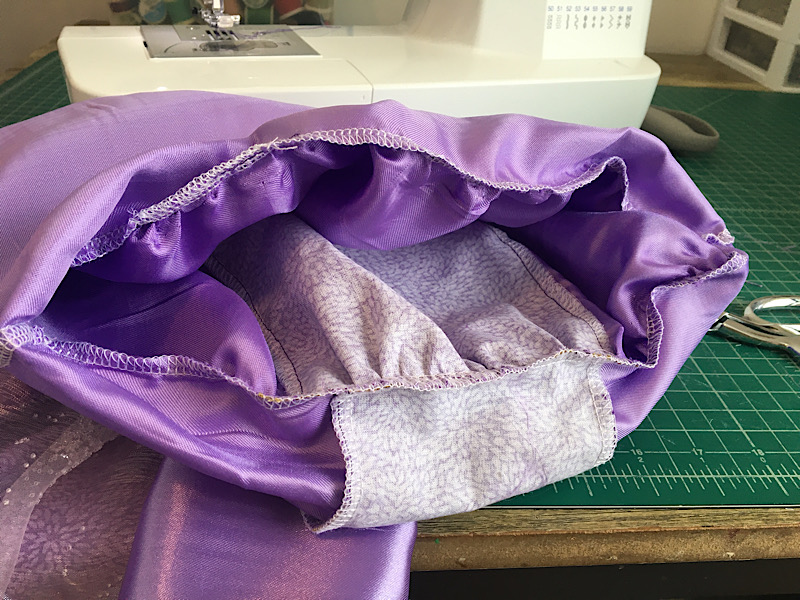
Turn it all right side out and you are done!
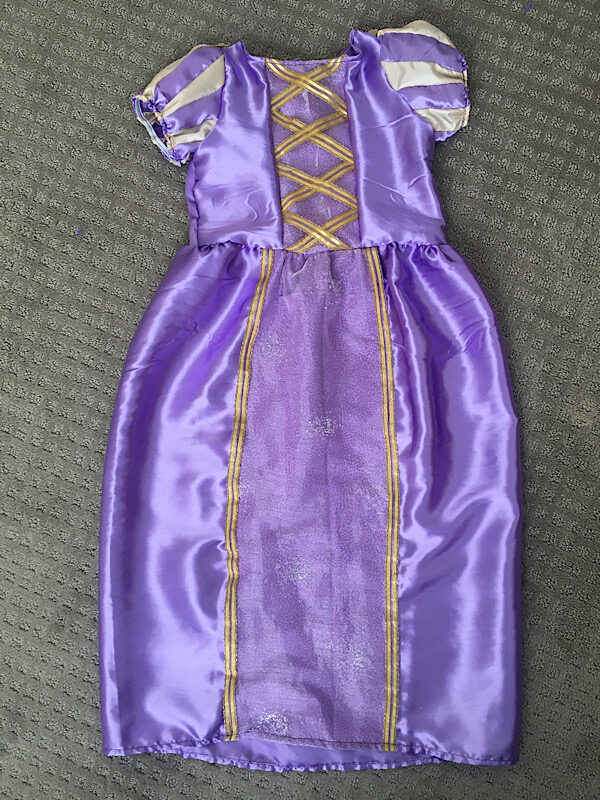
My daughter was so excited to wear the dress!

Conclusion
I hope you enjoyed peeking over my shoulder to see how I put together this Rapunzel costume dress for my toddler! You can make it in any size, and you can even add bows if you want.
All in all, it cost me between $20 and $30 (I just used cheap fabric since it’s a play dress up) and it only took me a couple hours.
If you need help following any steps, let me know.
Pin this post and sign up for my email list if you like these tutorials!