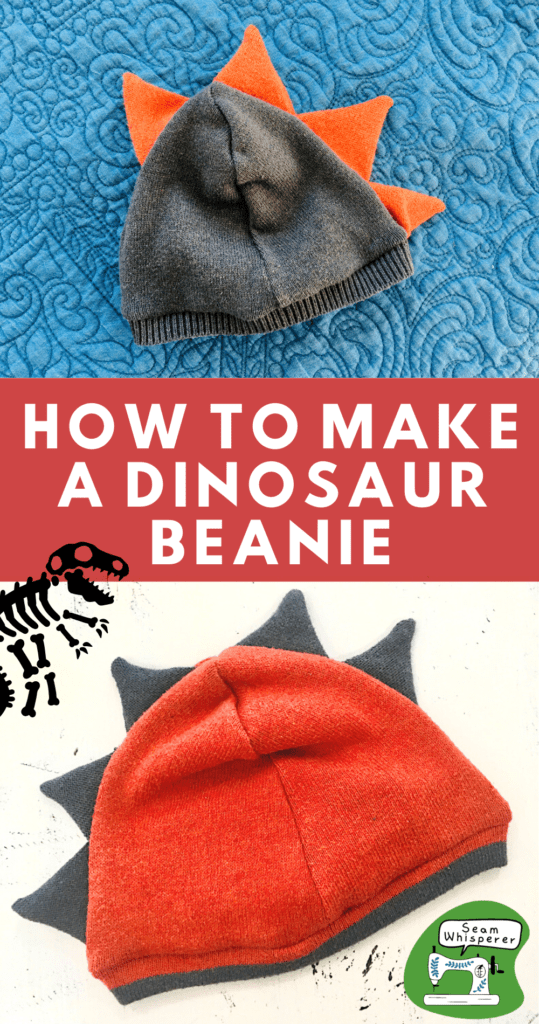
Learn how to sew your own Dinosaur beanie hat with this simple sewing tutorial. An old sweater works perfectly for this project, but you can use whatever stretchy material you want. These instructions will help you make any size of hat.
I’ve made my fair share of beanies with pom poms, bear ears, and even pumpkin “poms”, but this is the first time I’ve ever made a dinosaur spike hat!
It’s been so fun sewing for a baby boy after only having girls! The hat I made today is baby sized, but these instructions will work with any size!
If you want more dinosaur themed sewing projects, check out my huge list of free Dinosaur sewing patterns!
This post may contain affiliate links. Read the full disclosure here.
About The Dinosaur Beanie Tutorial
This project takes about 30 minutes, I made two in an hour or so! This is a beginner friendly project.
This tutorial will teach you how to make your own beanie pattern in any size you want, with no downloads needed. You can also make the spikes any size you want, but I provide my measurements also.
I used an upcycled sweater to make this hat, which was perfect! It was warm and stretchy. You can use any stretchy material you have around.
Since you will be sewing stretchy materials, I recommend using stretch stiches on your sewing machine if you don’t have a serger. You can also overlock the edges with your sewing machine using an overcasting stitch or a zig zag stitch.
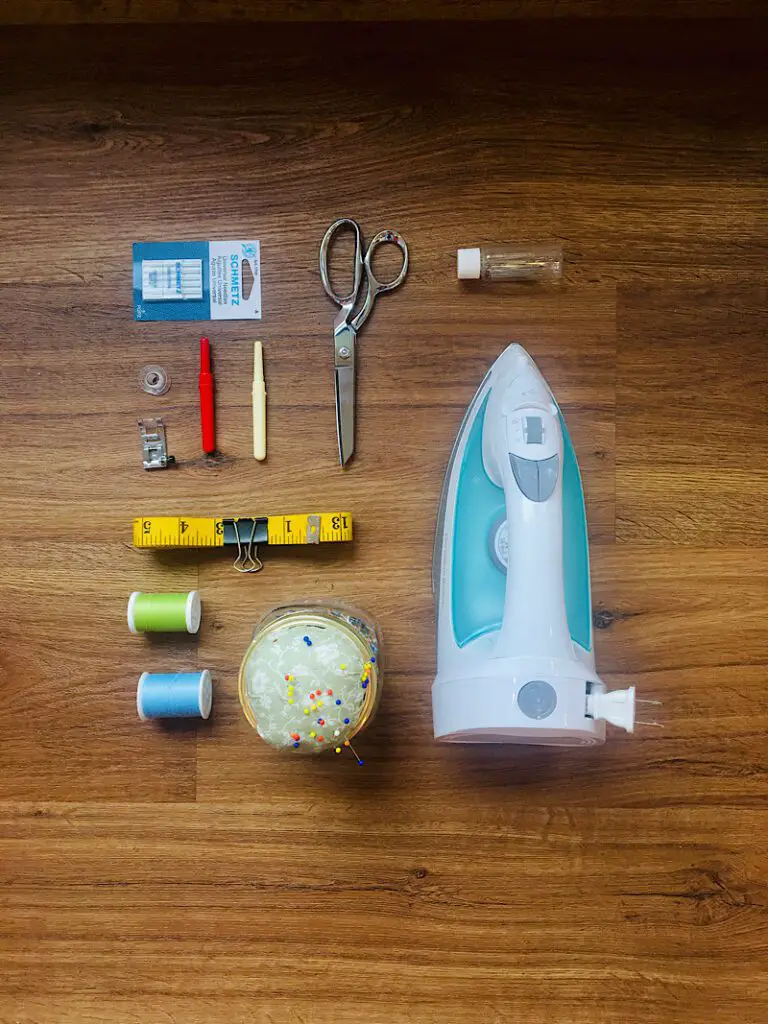
Supplies Needed
- Sewing Machine
- Serger (optional but recommended)
- Fabric Scissors
- Sewing Pins
- Measuring Tape
- Paper and Pen (You can use regular paper, a newspaper, wrapping paper, or anything you have around to make your pattern on.)
Materials Needed
- A Sweater to upcycle into the beanie (OR other stretchy material, 1/3 yard for the hat, and 1/8th for the spikes will do.)
- Matching Thread
How To Make a Dinosaur Beanie
Step 1. Get Your Measurements
Before making the beanie you will need to make yourself a pattern. You can measure the head of whoever the beanie is for for a perfect fit, or you can use my chart below.
To get your own measurements, measure around the head then divide it by two to find the width.
To find the length, measure the top curve of the head starting at the brow line, up over the head to the start of the neck, then divide it by two.
For example, by baby’s head circumference was 16, so the width will be 8. The total top curve measurement of his head was 12, so the length will be 6.
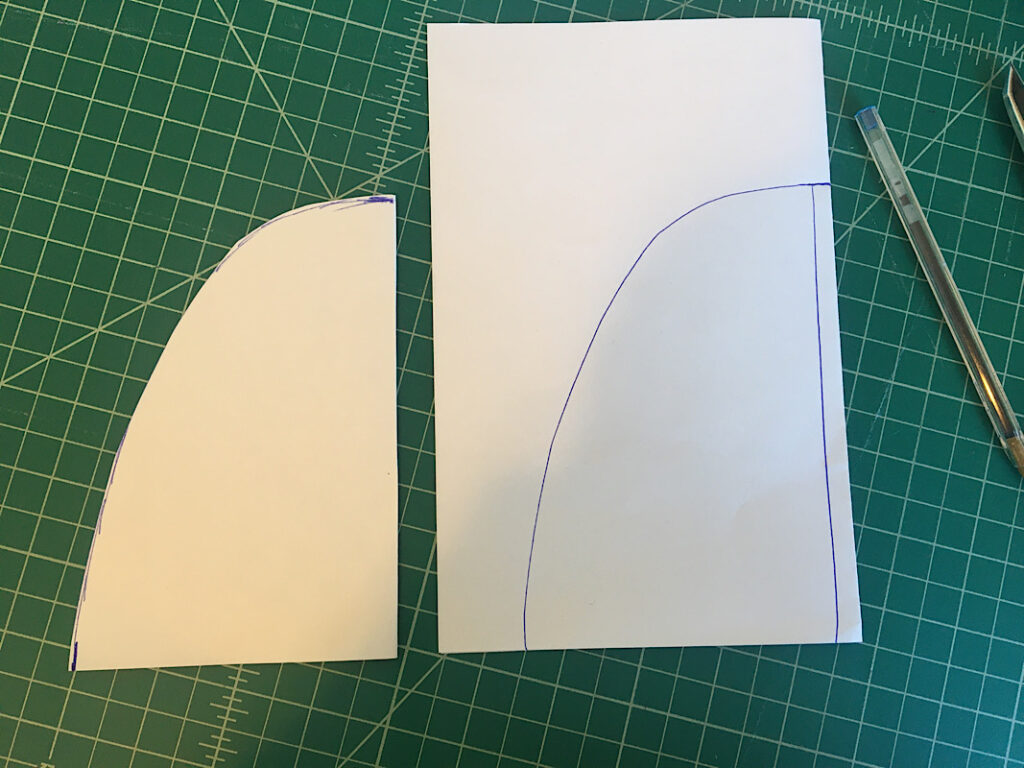
Step 2. Make The Beanie Pattern
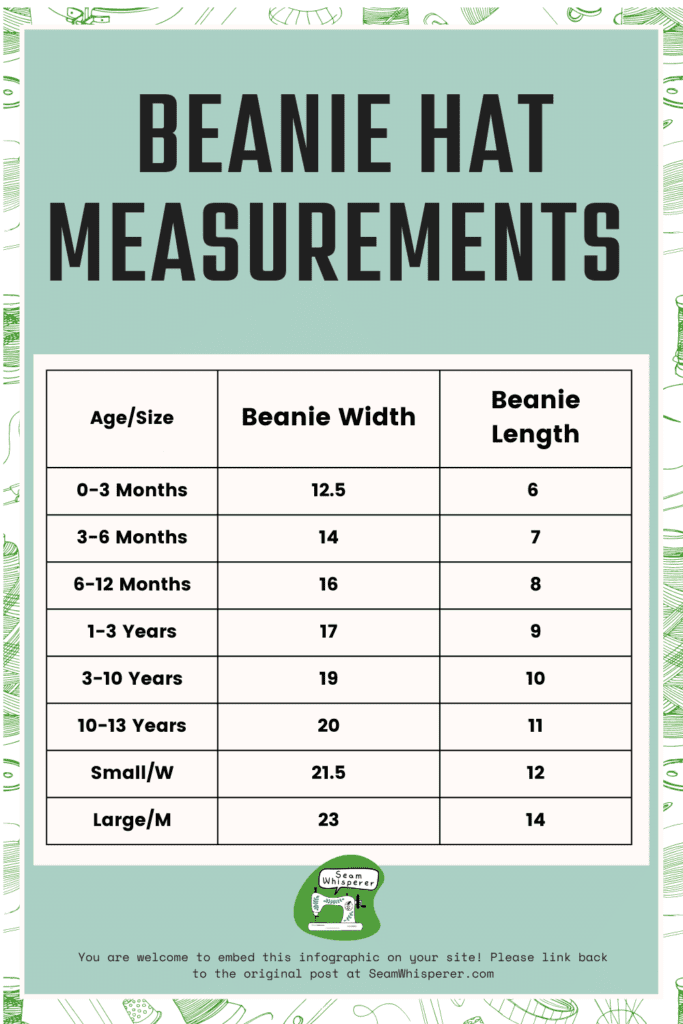
Fold a piece of paper in half. If you are making an adult sized beanie, you might need a larger paper like a newspaper, or two papers taped together.
Draw a line perpendicular to the fold that is equal to half your WIDTH measurement, and make a mark. (When you open the fold, it is the whole measurement.)
From that line, measure up the fold the LENGTH measurement and make a mark.
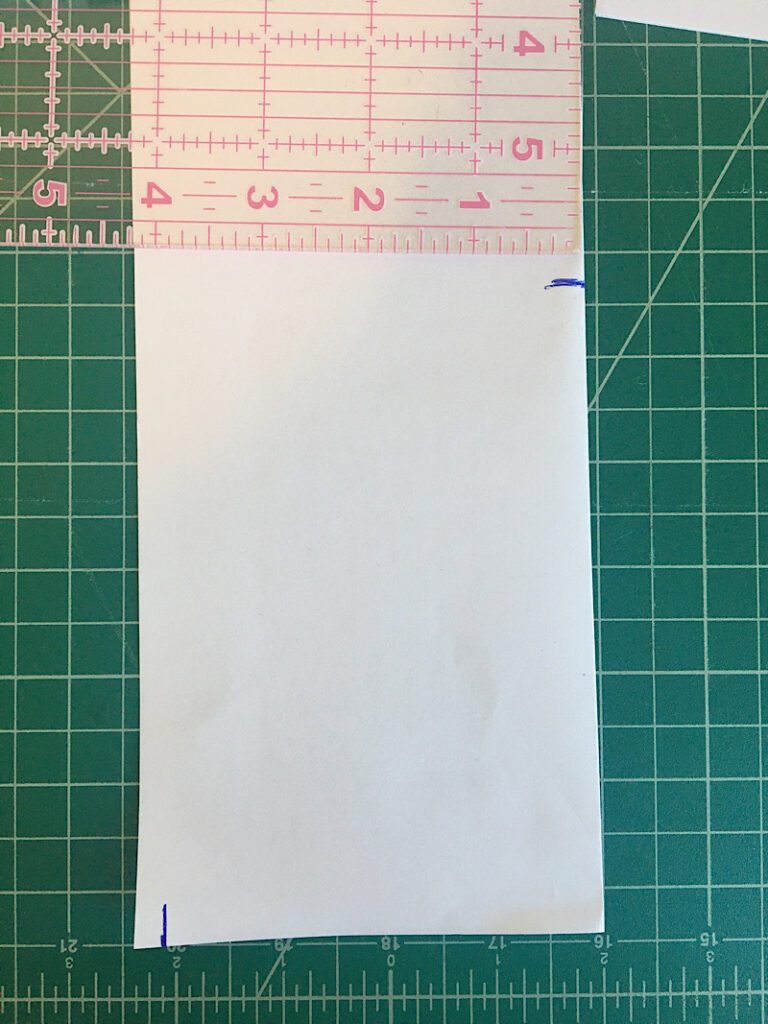
Draw a curved line from the top mark down to the side mark. You want the curve to be big and fat so the beanie is wide enough to wrap around the head. Don’t taper it in too thin.
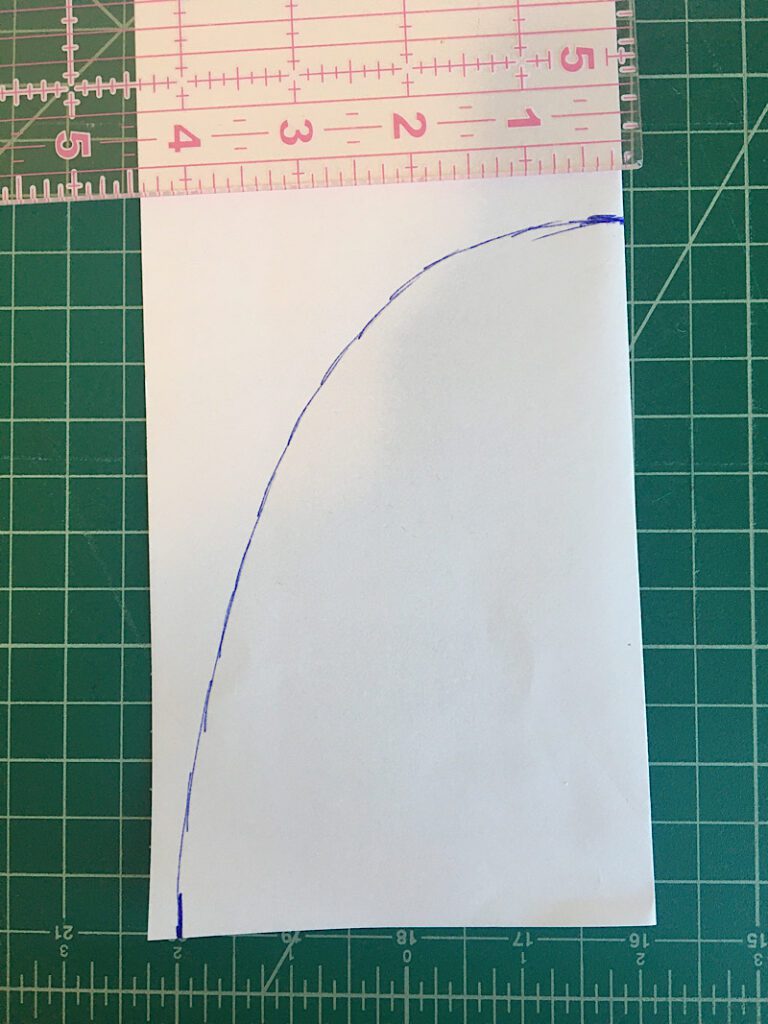
Cut your pattern out and write “FRONT” on it.
The back pattern is not the same as the front pattern.
To make the back patten, fold the front pattern in half again, and line the two straight edges on the corner of a piece of paper. Then, slide the front pattern piece away from the side edge 3/8ths of an inch. Now, trace the front pattern onto the paper below. This creates a seam allowance.
Cut out the pattern along the curve, then open it up and cut it in half down the fold to make two back pieces, and write “BACK” on them.
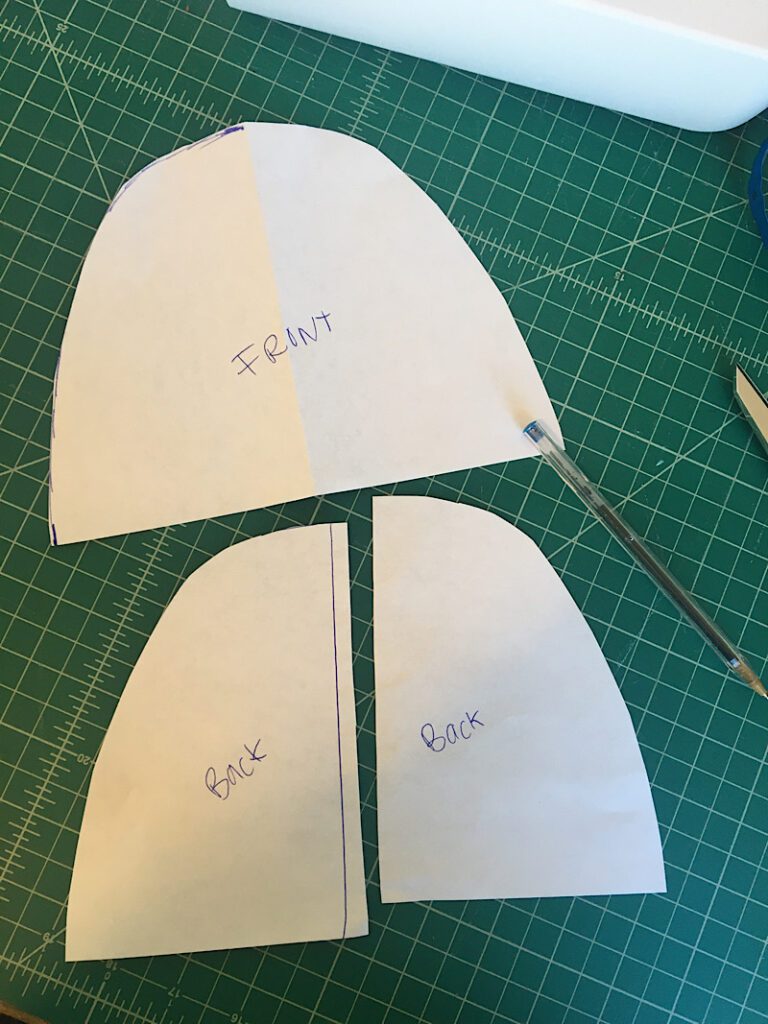
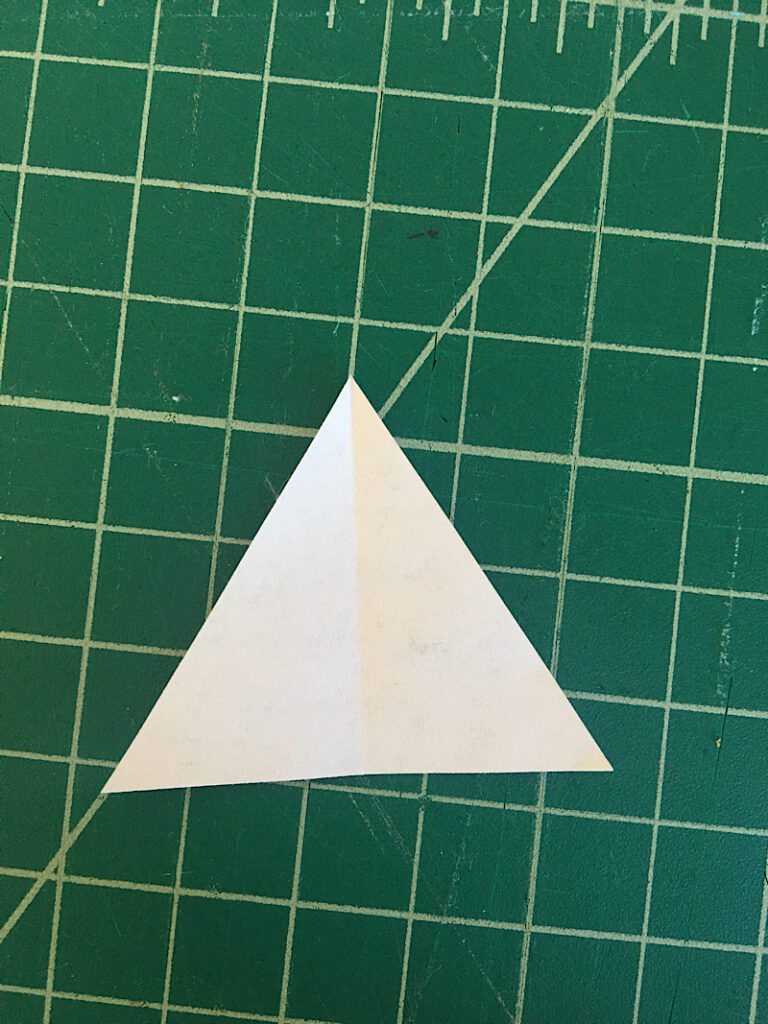
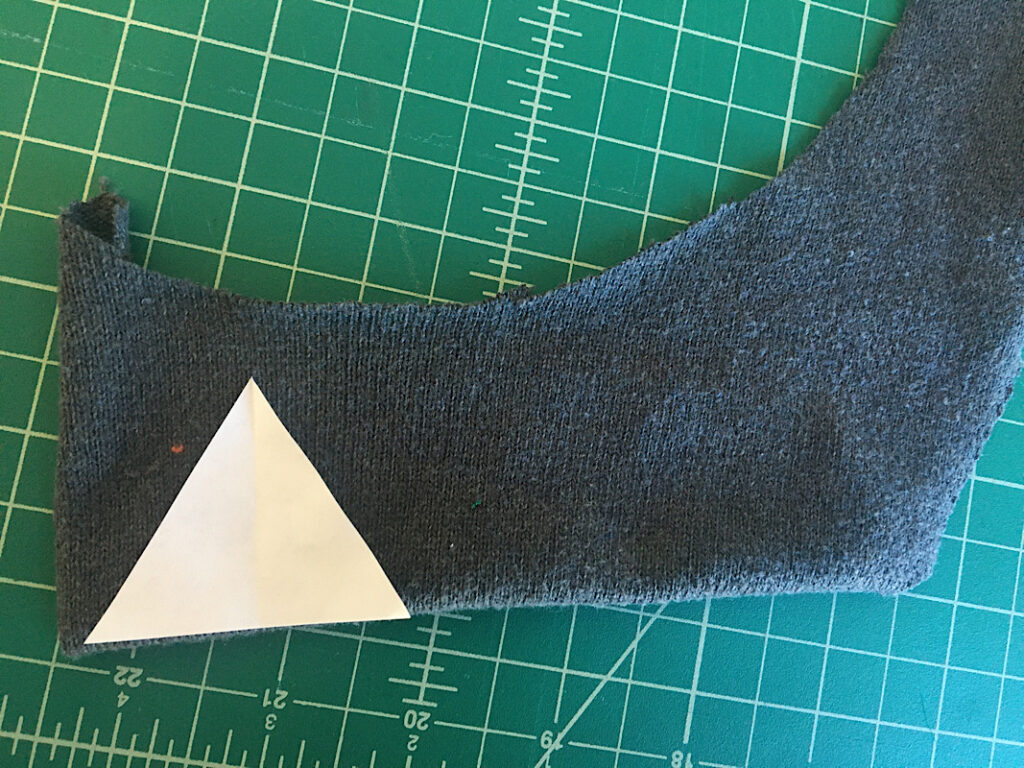
Step 3. Make The Spike Pattern
You will also need to draw the pattern for the spikes on the dinosaur beanie. They can be as big or small as you like.
The size I preferred was a 2.5 inch equilateral triangle. (Each side was 2.5 inches long.)
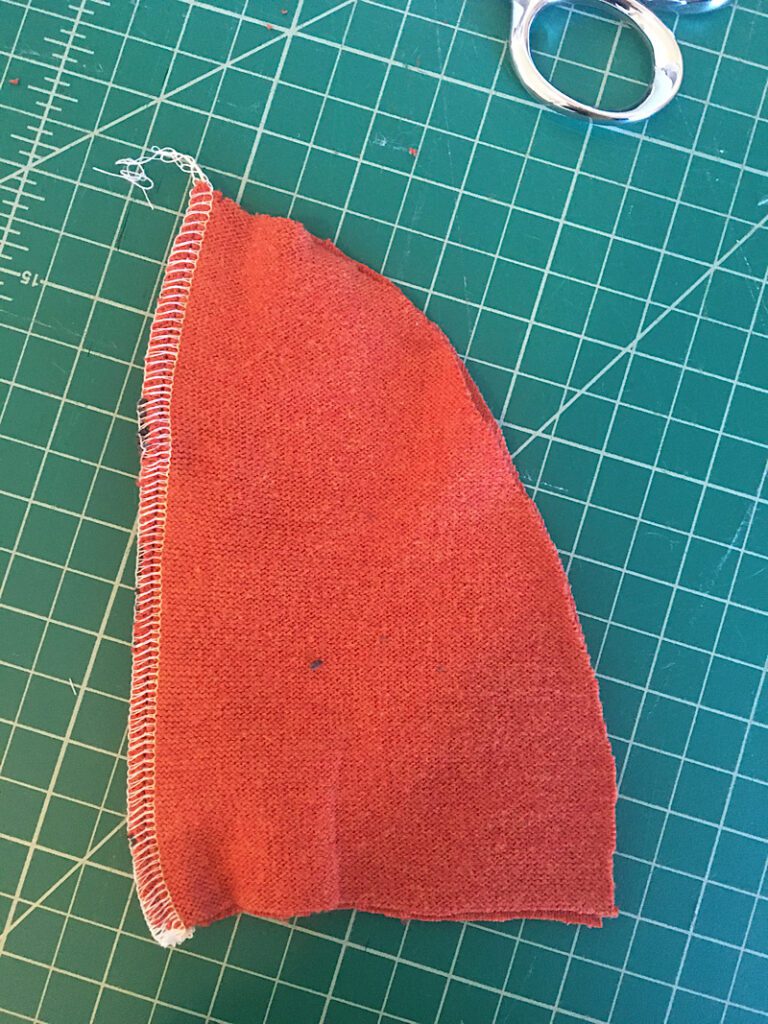
Step 4. Cut Out The Material
Lay your patten pieces out on your material. I used my husbands old sweater to make the beanie, but any stretchy material will work.
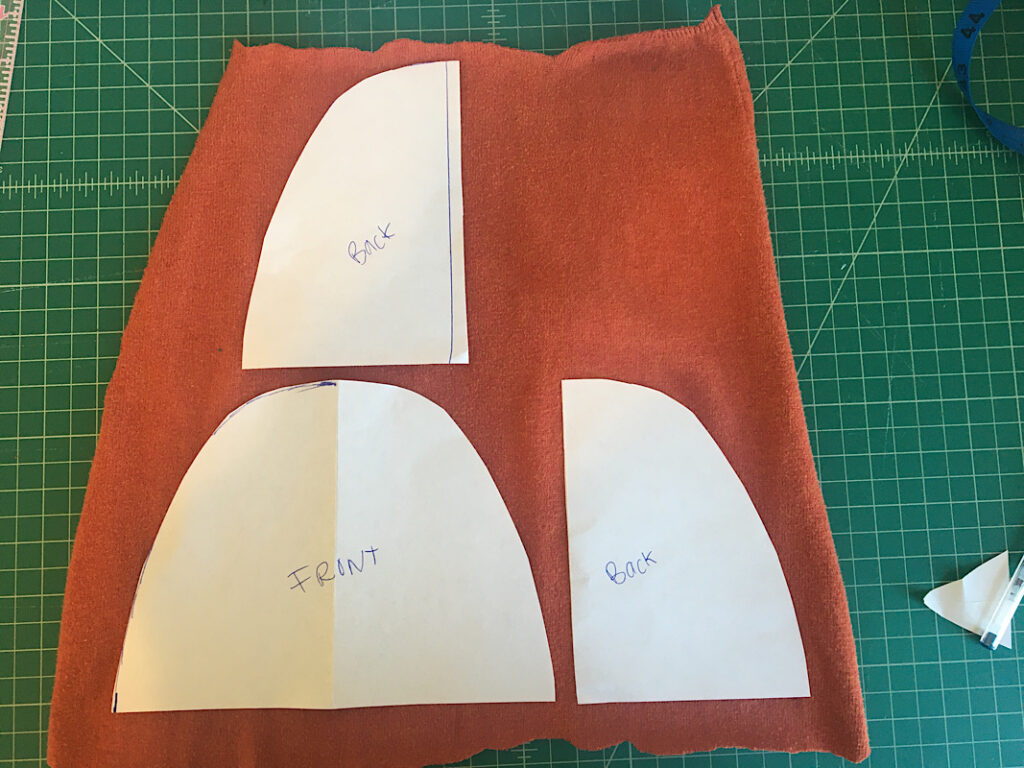
Cut out the pieces.
The front piece needs one additional cut. Fold it in half and cut a straight line along the fold, from the top of the beanie to about 3 inches down

Step 5. Cut & Assemble the Dinosaur Spikes
Fold the material in half, and place the triangle on the fold. Cut out the material. When it opens, it looks like a diamond.
Cut out as many of these spikes as will fit on the back seam and front cut of your hat. I used 4-5 for a baby hat.
To assemble the spikes, fold the diamond in half and sew down one of the open sides with a 3/8ths inch seam allowance.
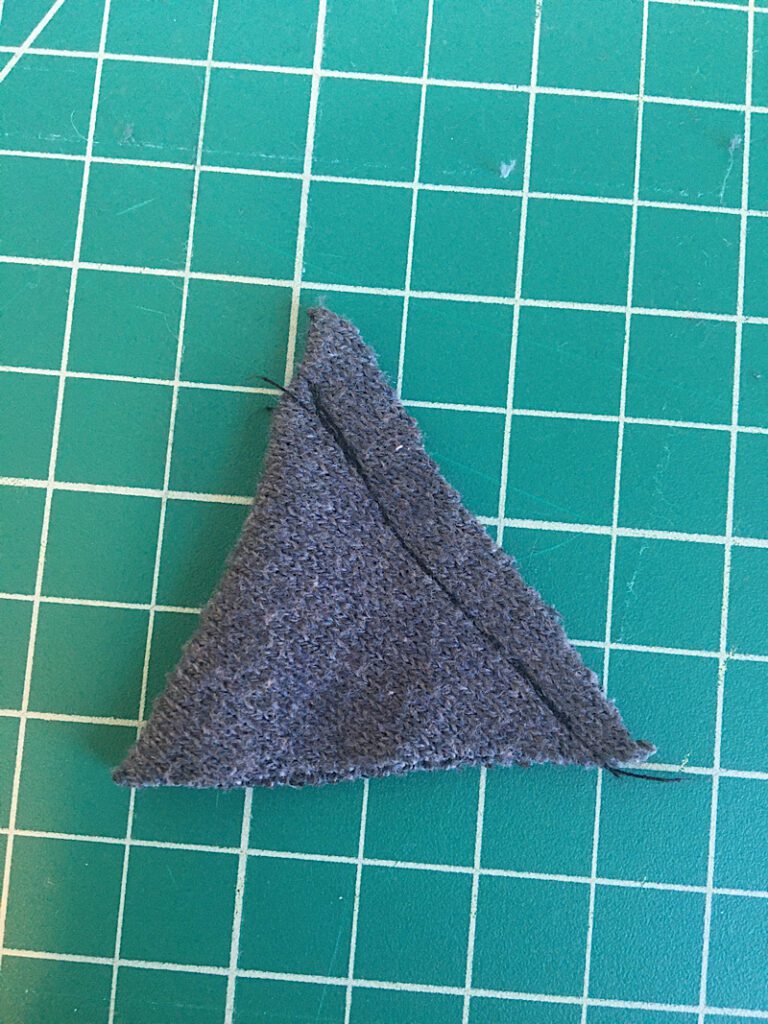
Trim off the top of the triangle without cutting into the seam.
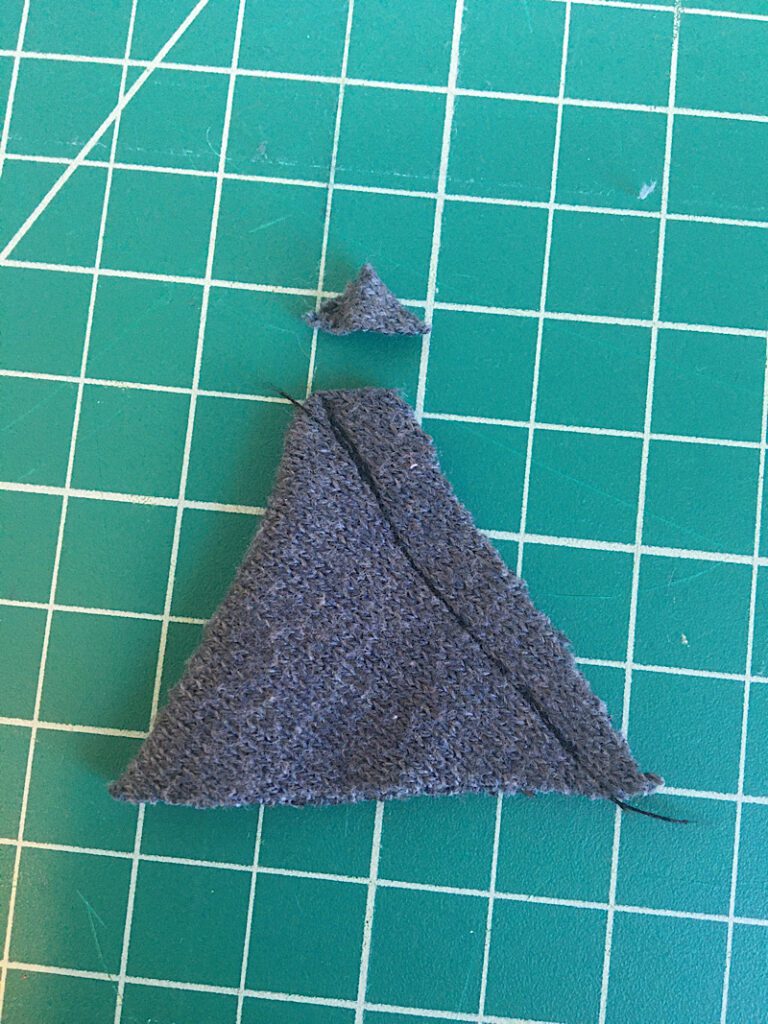
Then, turn the triangle inside out and flatten it well with your fingers.

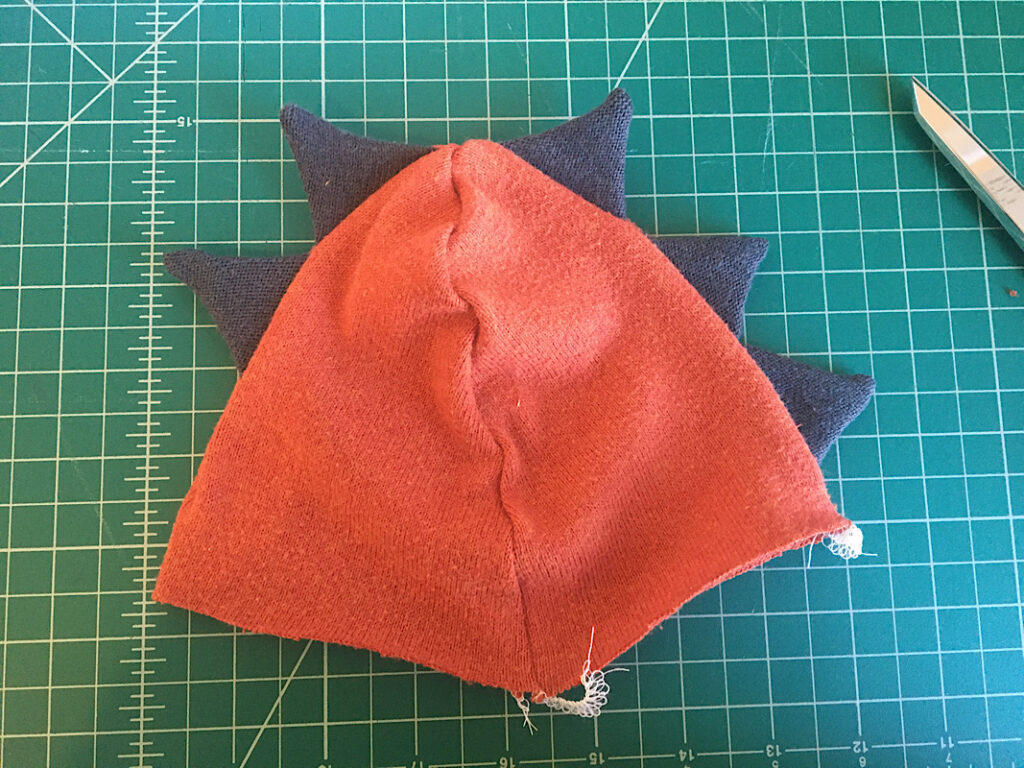
Step 6. Sew Spikes to the Back Side of the Beanie
Lay one of the back pieces of the beanie on the table with the right side facing up. Align some of the spikes down the flat side of the piece.
Make sure to keep the spikes at least 3/8ths inch away from the top and bottom edges.
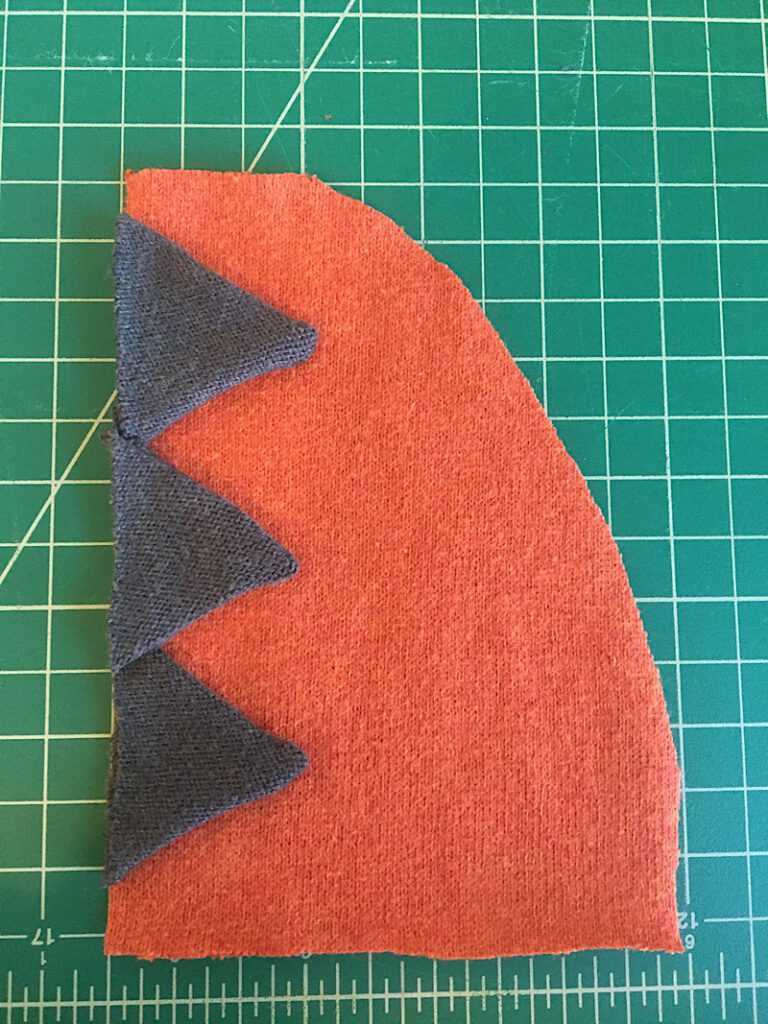
You can overlap the spikes a little bit to make them fit if you need too. If there is not enough room, leave space at the bottom of the hat, not the top. it will still look good.
Lay the other piece of the hat on top with the ride side facing down. Pin it all together to hold the spikes in place.

Then sew down the straight edge with an 3/8ths inch seam allowance.
I serged mine, but you can sew it however you like. I recommend at least using a stretchy stitch.
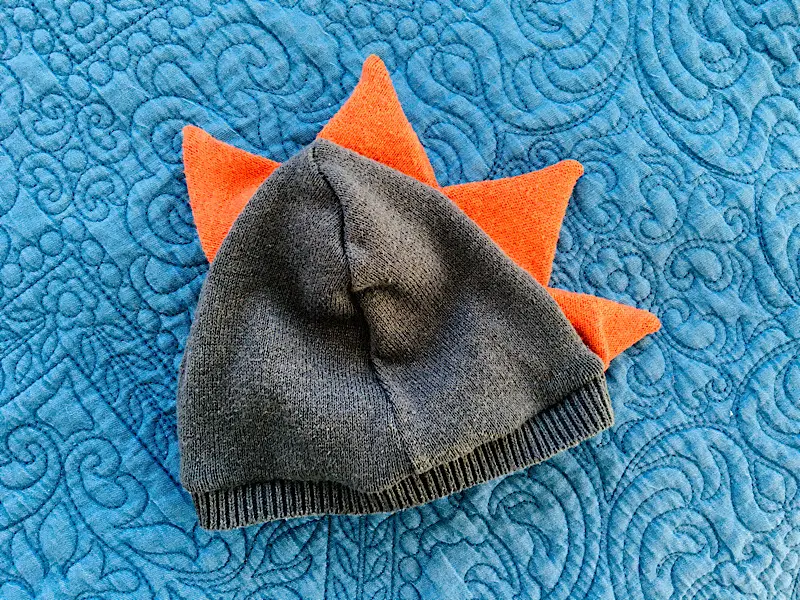
When you open it up, it should look something like this:
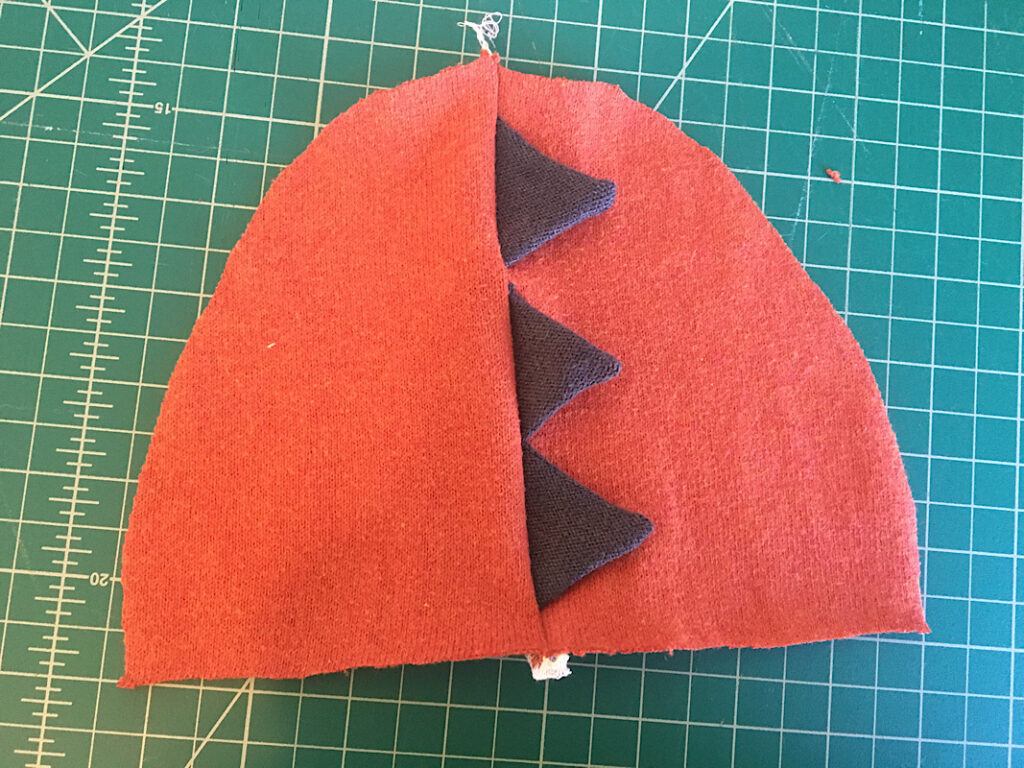
Step 7. Sew the Spikes To The Front of the Beanie
On the right side of the front piece of the beanie, lay one of the spikes with the raw edges aligned with the raw edge of the cut you made down the center.
*Important! Keep the spike 3/8ths inch away from the top edge of the hat.
You may have enough room to place two spikes if they are small or your hat is large. You can overlap them slightly to make them fit, or cut the line a little longer.

Carefully fold the other side of the hat over the side with the spikes, and pin them in place.
Sew down the raw edge of that center line with a 3/8ths inch seam allowance. Taper the seam once you get to the end of the cut line to the center of the hat.
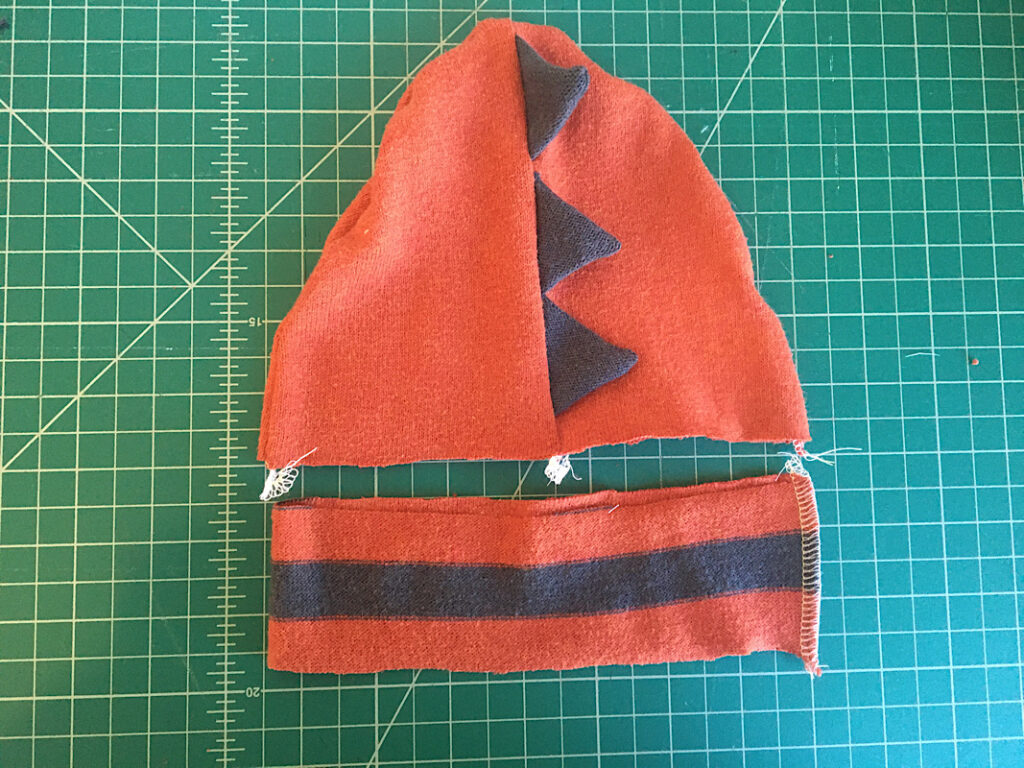
When the front piece is complete, lay it on top of the completed back piece with right sides together. Pin them together.
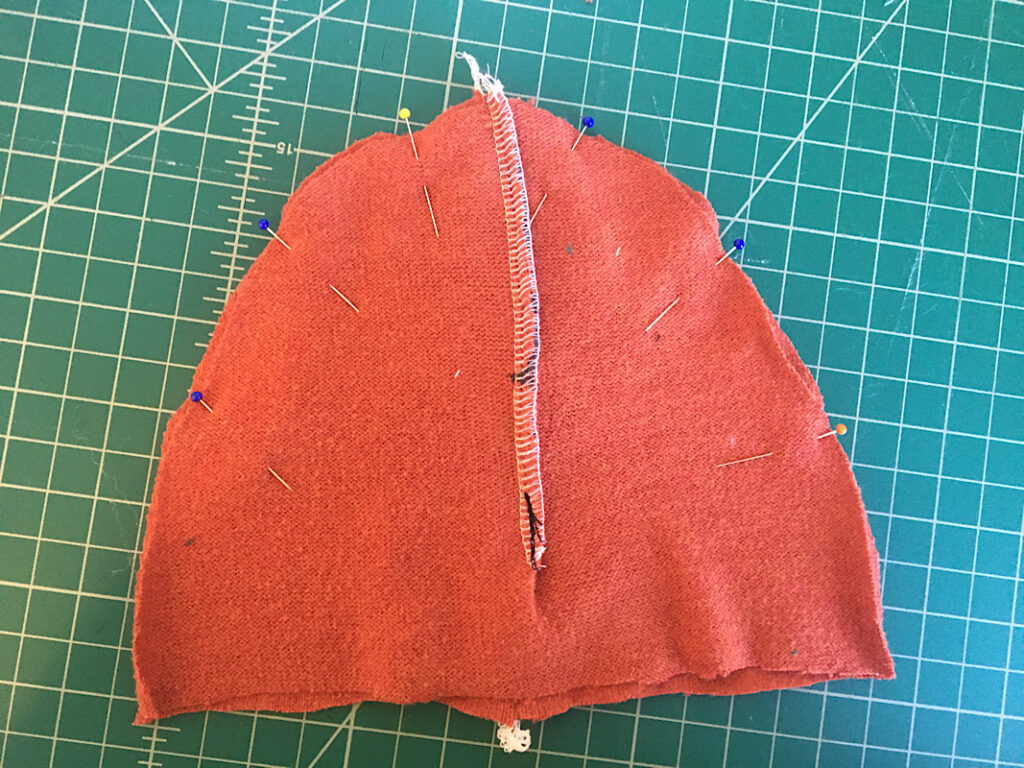
Sew the two pieces together by sewing along the entire top curve. Make sure not to sew through any of the spikes
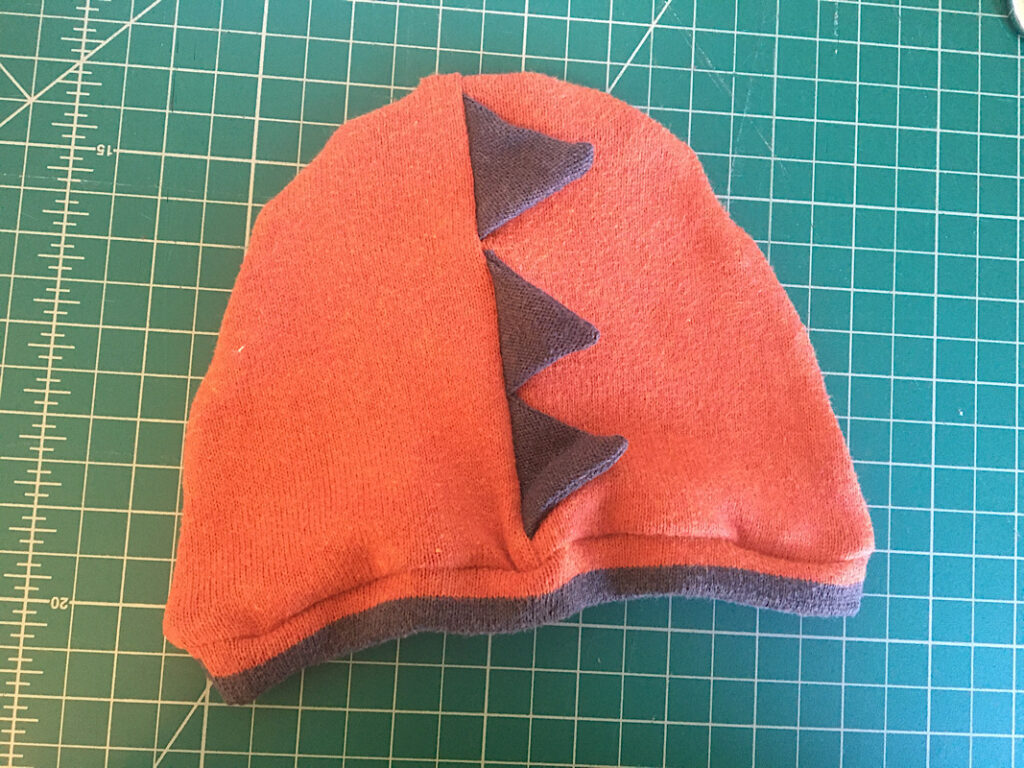
When you turn it inside out, it is starting to look like a dinosaur beanie! Here is the front side:
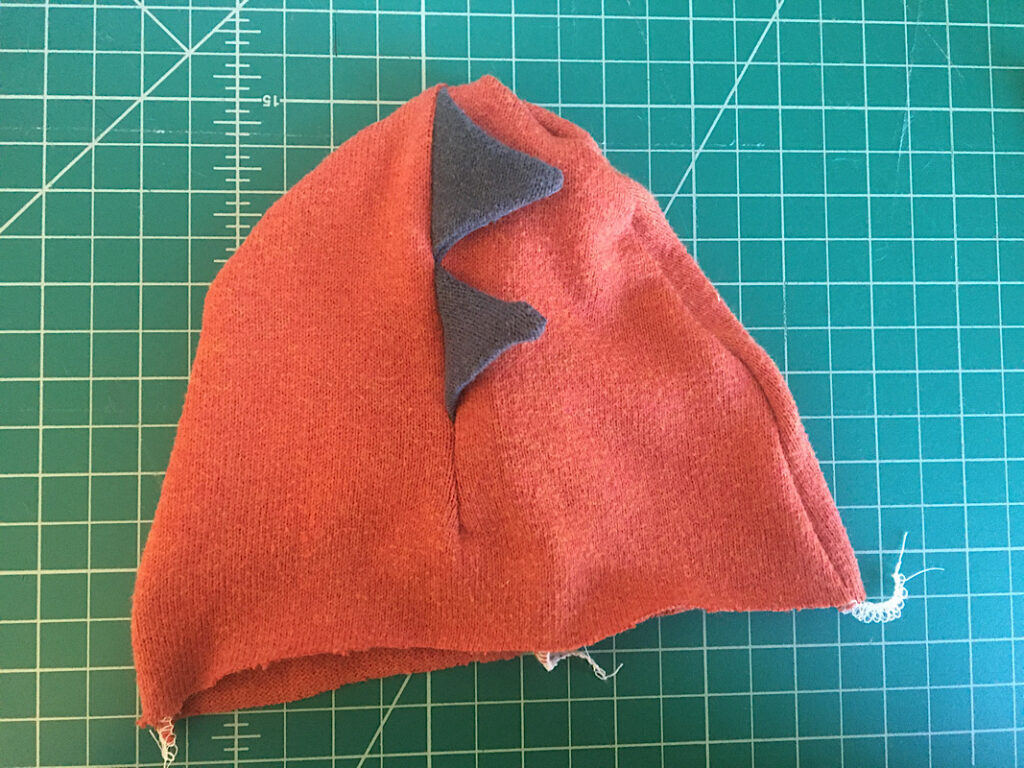
Here is what it looks like so far from the side view:
You only have one more step!
Step 8. Attach A bottom cuff to the Beanie
There are two ways to hem the bottom of the beanie. If you are using a sweater you can utilize part of the neckline or hem line to make a cuff. I did this on the grey hat I made and it looked really nice.
If you don’t want to do that, or aren’t using a sweater, you can make a simple folded cuff. I will show you how.
Cut a strip of fabric 3 inches wide and as long as the circumference of your hat. Fold it in half with right sides facing, and sew the two short ends together.
Fold the cuff in half with the right sides facing out to hide the side seam inside. The two raw edges should be aligned.
Place the cuff around the beanie with the raw edges facing down, aligned with the bottom raw edge of the beanie.
Pin it to the beanie, you will have to stretchy it slightly to fit.
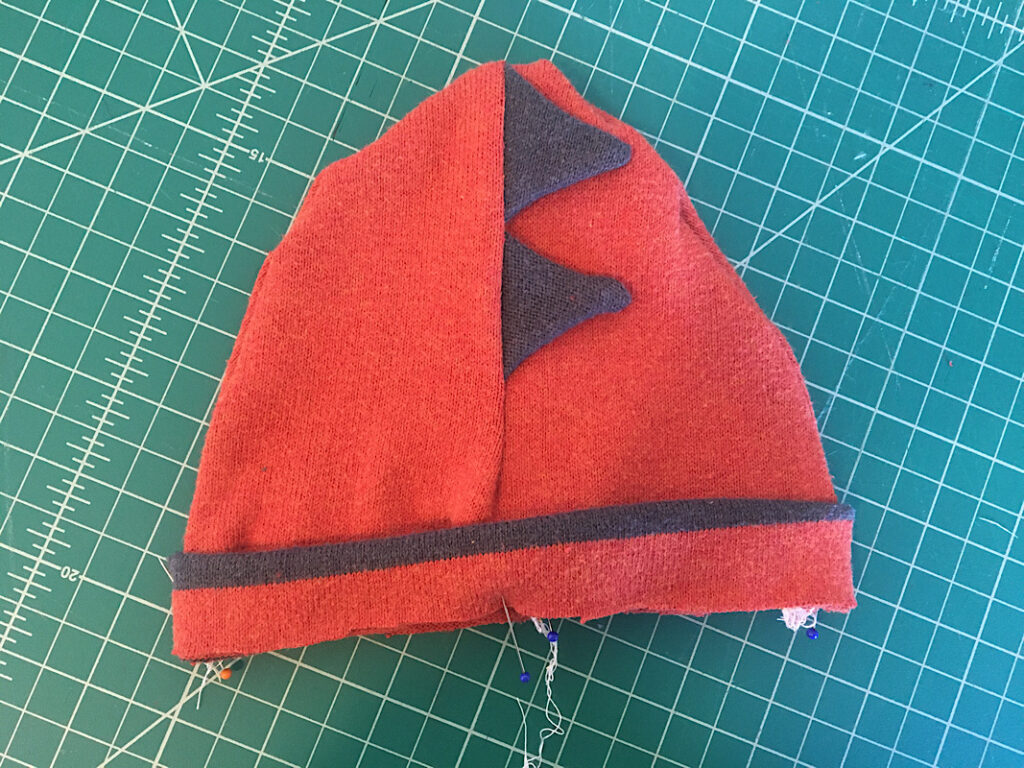
Sew around the raw edge to attach.
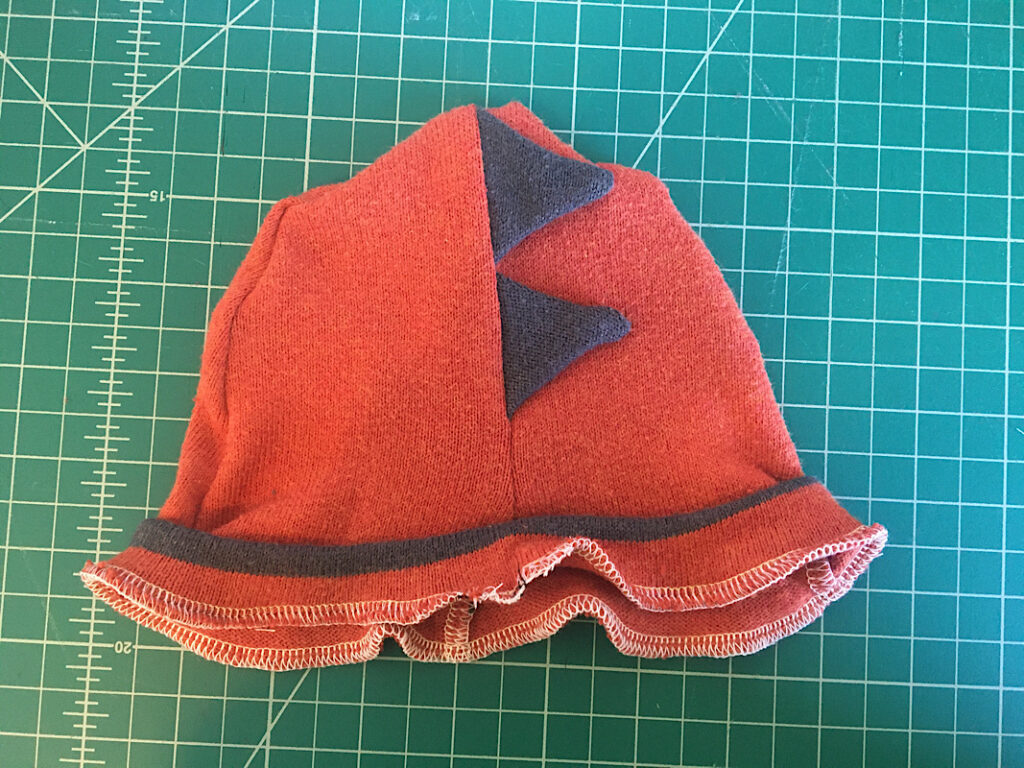
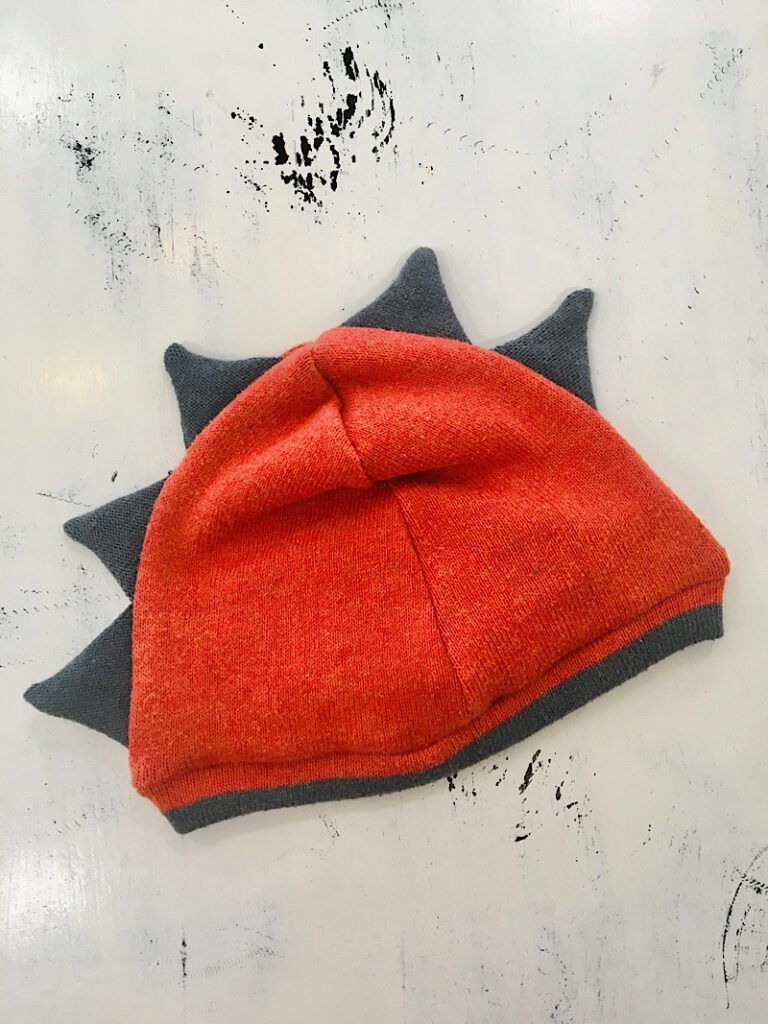
Finally, flip the cuff down to see your completed hat!
You are done! Now you have an awesome dinosaur beanie. Here are some photos of how mine turned out.
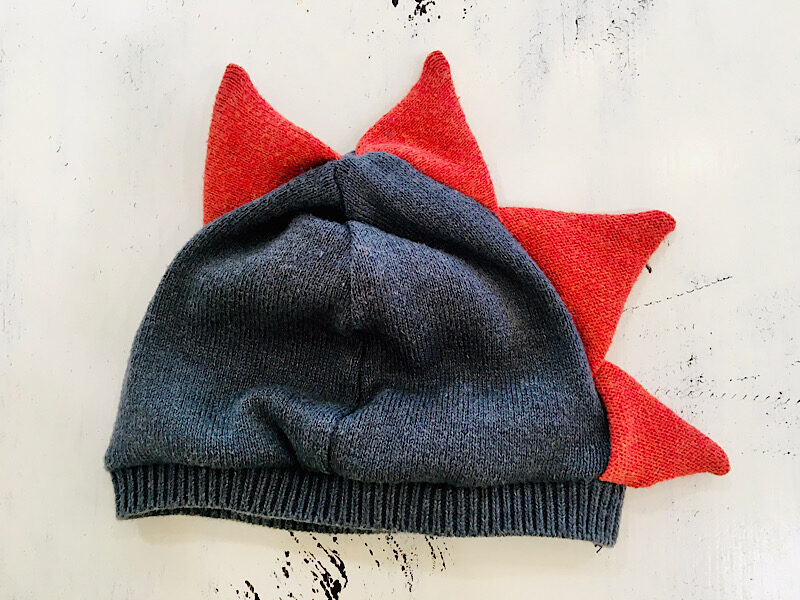
And here is the smaller grey version I made. I made this one with larger spikes:
Not too hard! Super fun. I think making scalloped “spikes” might be a fun alternative as well.
If you have questions about this project, let me know in the comments and I will love to help!
Please pin this post so others can find this tutorial too. And sign up for my email list if you liked this project.
Have fun with your new dinosaur beanie!