This simple kitty cat finger puppet can be made in a matter of minutes by any beginning sewist. Perfect for hand sewing practice, as well as machine optional sewing practice. All you need is some felt and embroidery floss!
I have been loving all these felt projects lately. Today I whipped up the cutest little cat finger puppet, and I can’t wait to share it with you!
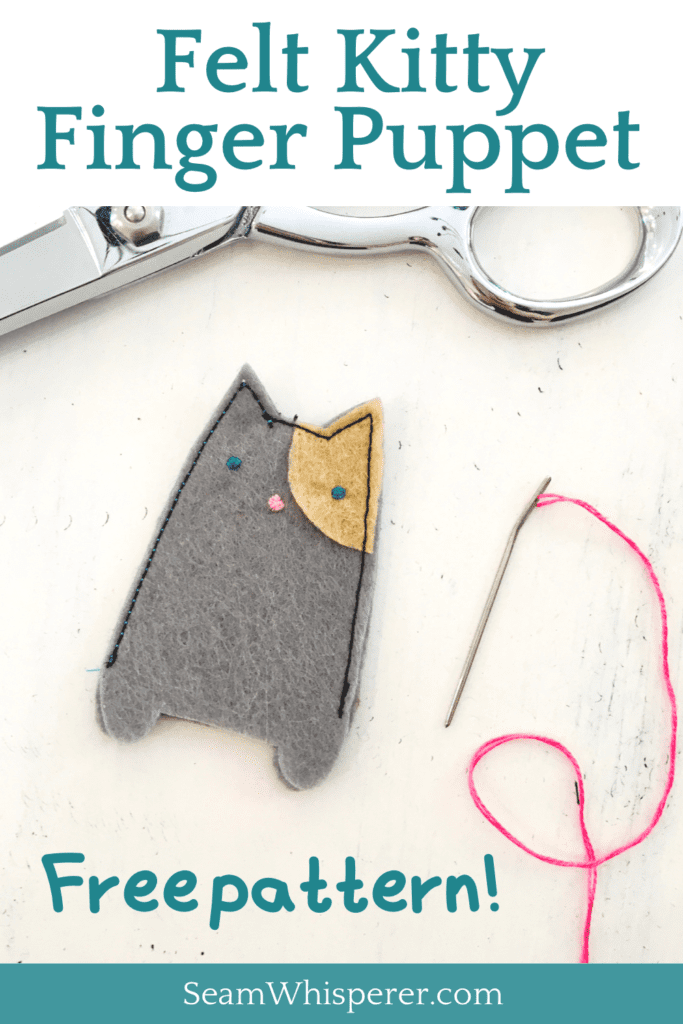
My preschooler recommended I make a pink cat, but still thought it was super cute when I chose the grey and tan for a more realistic color palette.
This post may contain affiliate links. Read the full disclosure here.
About The Cat Finger Puppet Pattern
This sewing pattern is suitable for beginners. For kids, I recommend ages 8-14.
The sewist must have developed fine motor skills to hand sew the eyes as well as sew the front and back of the cat together (which can be done by hand, or by machine. I finished mine by machine.)
This felt cat can be customized in a few different ways. The patch over it’s eye is optional, but I think it is adorable! It can be placed over the left or right eye. The look of the cat can be changed depending on what colors of felt you use.
I chose to make the eyes blue and the nose pink, but feel free to use whatever colors of embroidery floss you have at home for the cat’s face. You might even choose to do more detailed embroidering than I did, perhaps make some pink ears, a smile, or some tiger stripes.
I can’t wait to see what you come up with!
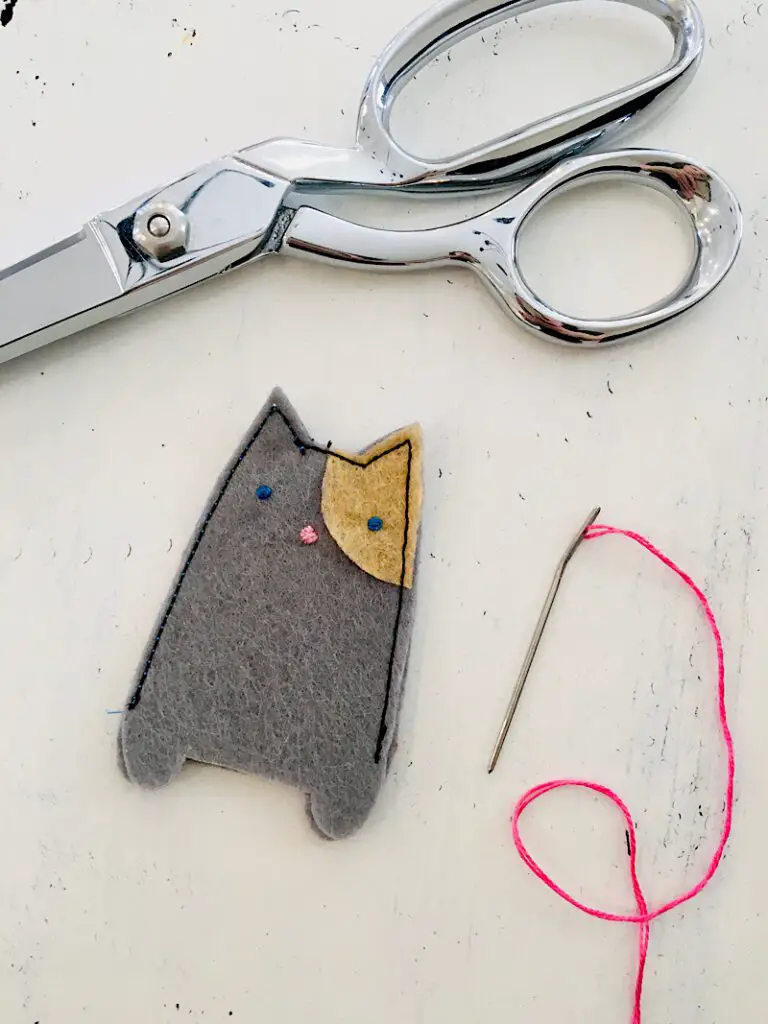
Supplies Needed
- Sewing Scissors
- Sewing Pins
- Hand Sewing Needle (Embroidery Needle)
- Pen
Materials Needed
- 1 piece of felt at least 3×4 inches in size for the cats body (I used grey colored felt)
- 1 piece of felt at least 1.5×1.5 inches in size for the patch around the cat’s eye (I used Tan colored felt)
- Pink Embroidery Floss
- Blue Embroidery Floss
How To Download The Pattern
This pattern is a PDF printable. To download it, please enter your email below and the pattern will instantly be sent to your inbox.
To print the pattern, make sure you print it at 100% scaling so the puppet is the right size when completed. The pattern includes a “1 inch test square” you can measure to make sure you printed it correctly.
Step 1. Cut Out the Cat Pattern
After printing the pattern, cut out the pieces.
Carefully trace the pieces onto the felt with a pen. Make sure to trace the patten on the WRONG side of the felt so the pen marks are hidden inside the puppet. Especially keep this in mind when tracing the eye patch.
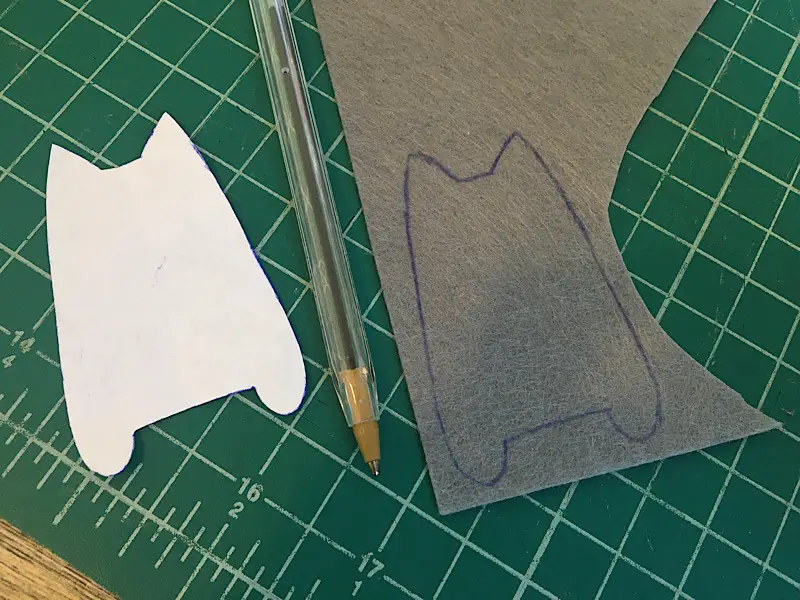
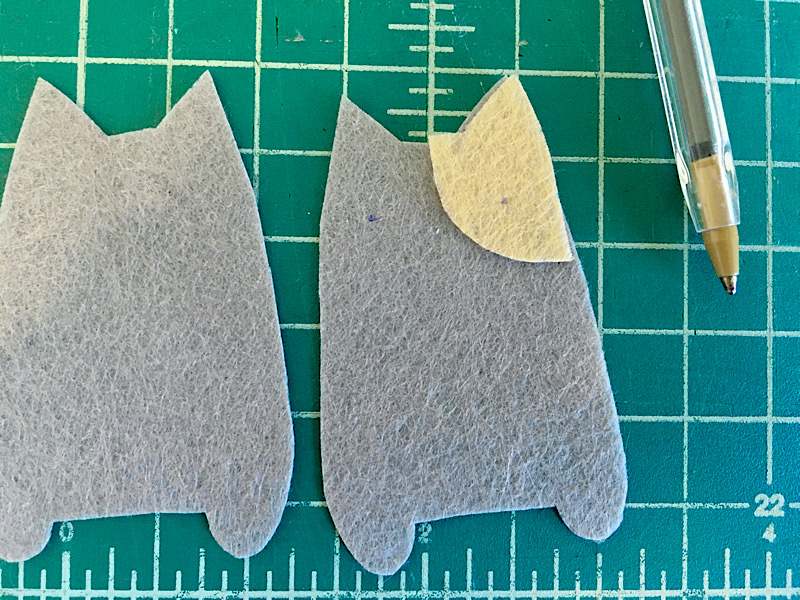
You should have two cat pieces, and one eye patch piece.
Step 2. Embroider The Cat’s Eyes
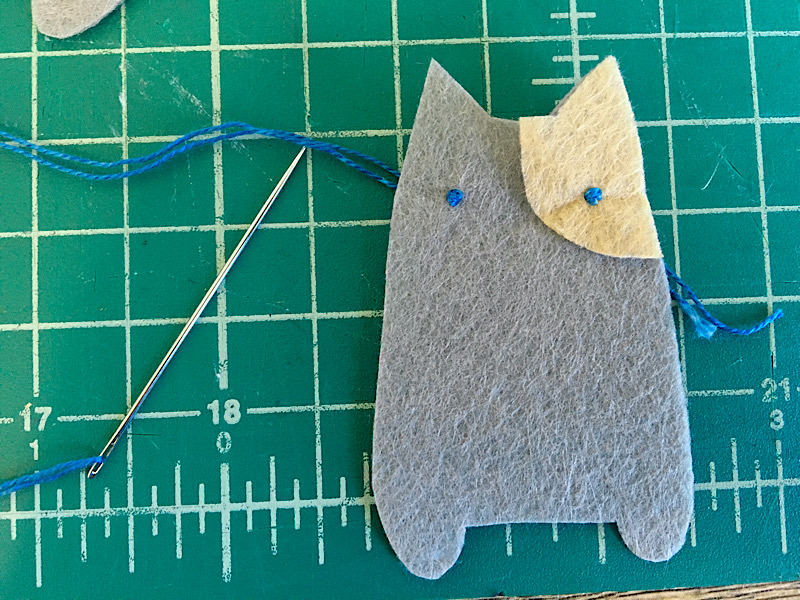
Place the eye patch onto the front piece of the cat. (Leave the back piece set aside for now.)

With your pen, make two little dots where you want the eyes to be. One dot on the eye patch, and one on the other side of the face.
Cut a piece of blue embroidery floss 30 inches long and thread your needle, knotting the tail end.
Start with your needle on the back of the cat, and poke it up though the first dot that is on the eye patch. Then, poke the needle back down again very close t— but not through–the first hole you made. Repeat this step 2 more times to make the eye a little bigger.
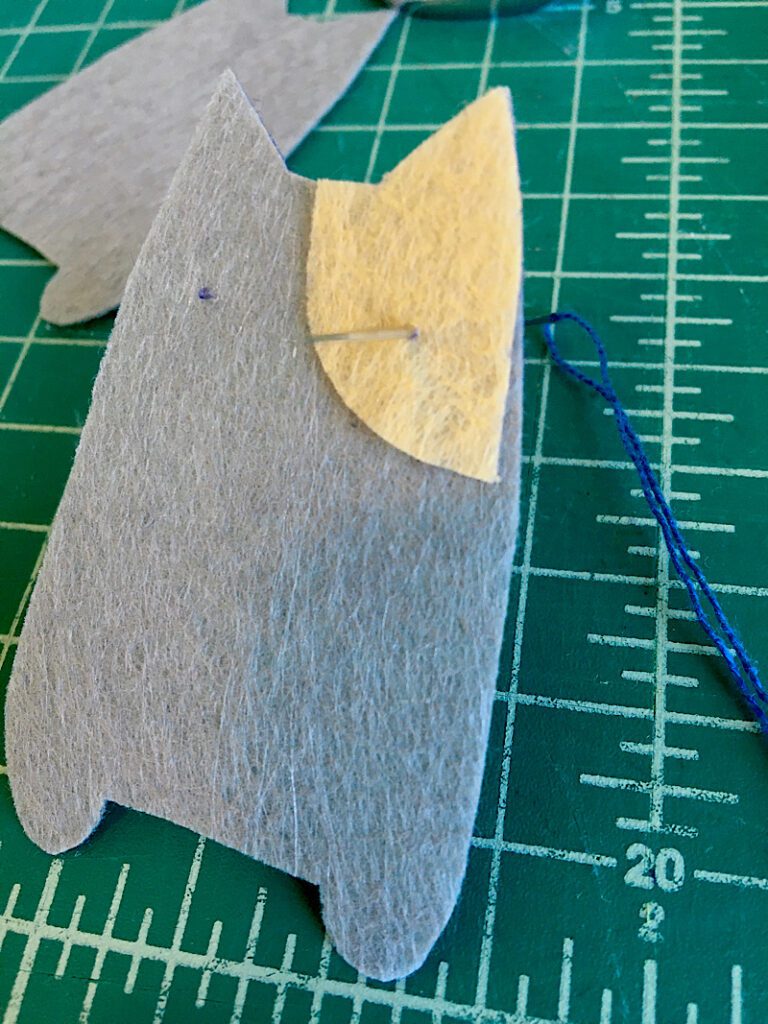
Don’t cut your embroidery floss yet, you can continue on with the second eye the same as before. Start from the back, and make three very close stitches to make a little dot.
Once you have stitched the eyes, tie a knot on the back to secure the threads and trim away the excess floss.
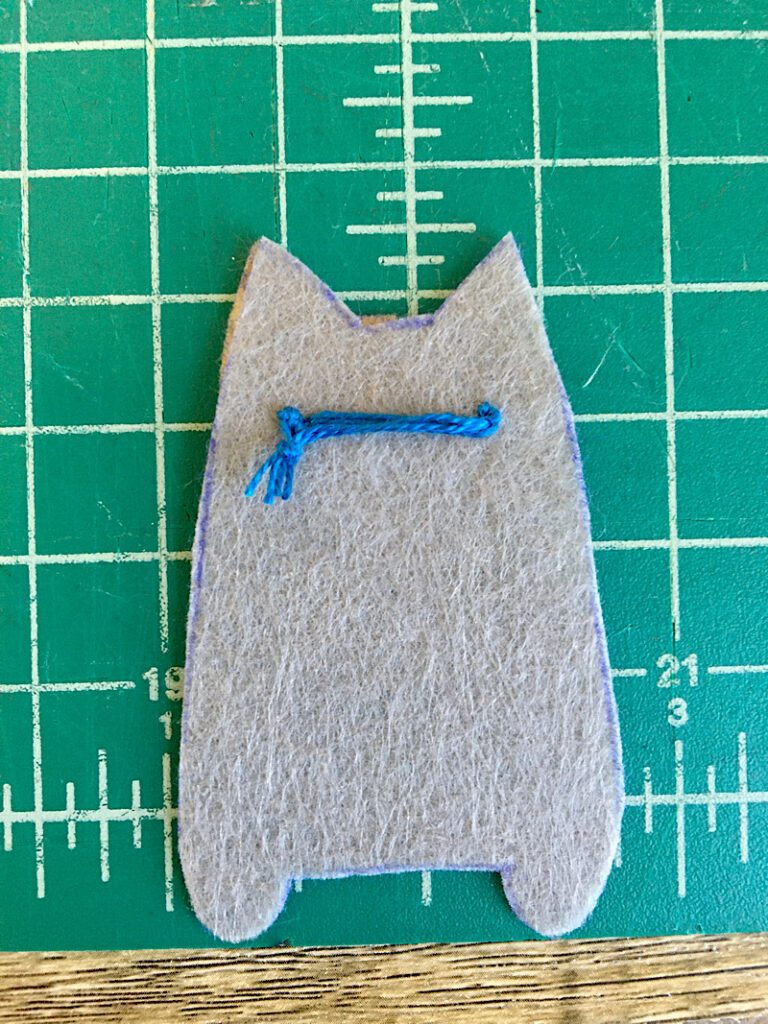
This completes the eyes!
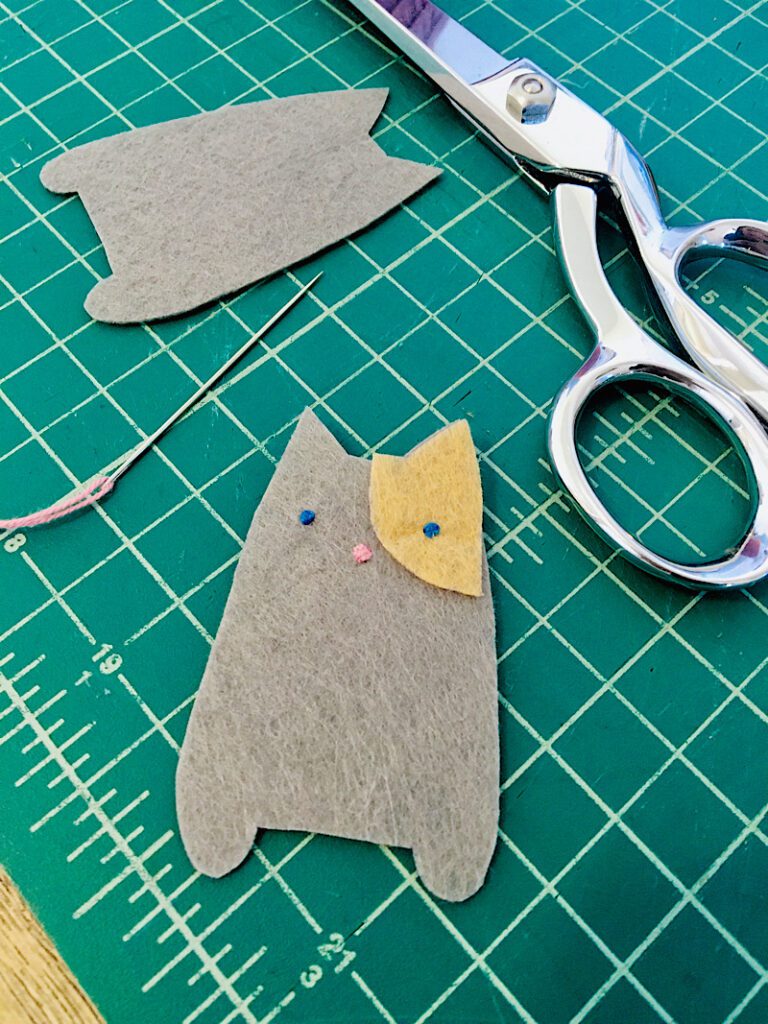
Step 3. Embroider the Cat’s Nose
The nose is made in the exact manner as the eyes.
Draw a dot below the eye line in the middle of the face to mark the nose.
Embroider the nose as large as you think looks cute! I made mine the same size as the eyes.
Tie a knot on the back of the cat, and trim the excess threads. This completes the nose!
Step 4. Sew Together the Cat’s body
Lay the finished front piece of the cat onto the back piece of felt, and pin it together to hold it in place.
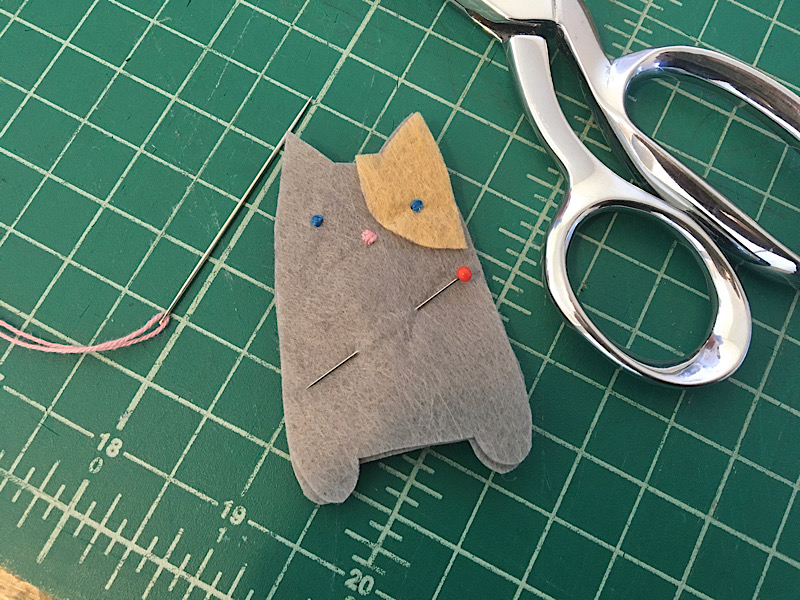
To sew the body of the cat, you will simply sew up and around the top curve of the body, including the ears, ending above the feet on both sides.
You can choose to hand sew the cat together, or machine sew it. I chose to machine sew it.
When machine sewing the ears, be very careful when sewing the ears. Sew up to the tip, then stop sewing, lift the presser foot, and pivot the puppet so you can sew down the other side of the ear.
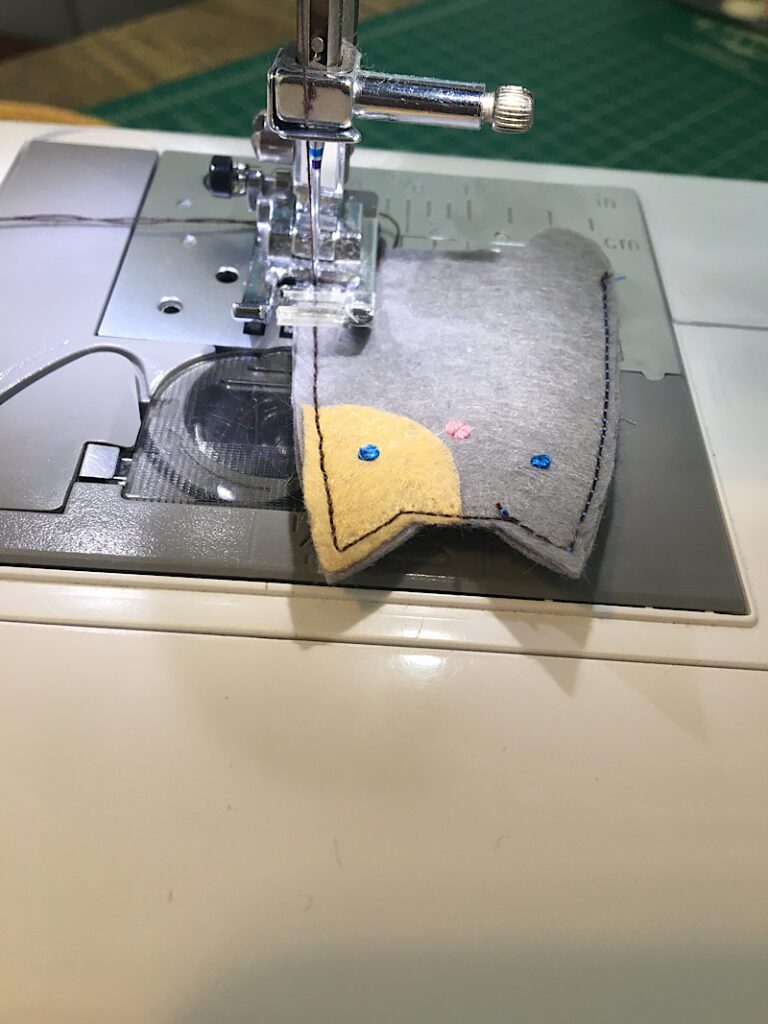
Be especially careful that the eye patch stays aligned over the ear as you sew.
Once you have sewn the front and back pieces together, you are done!
Your cat finger puppet is now complete!
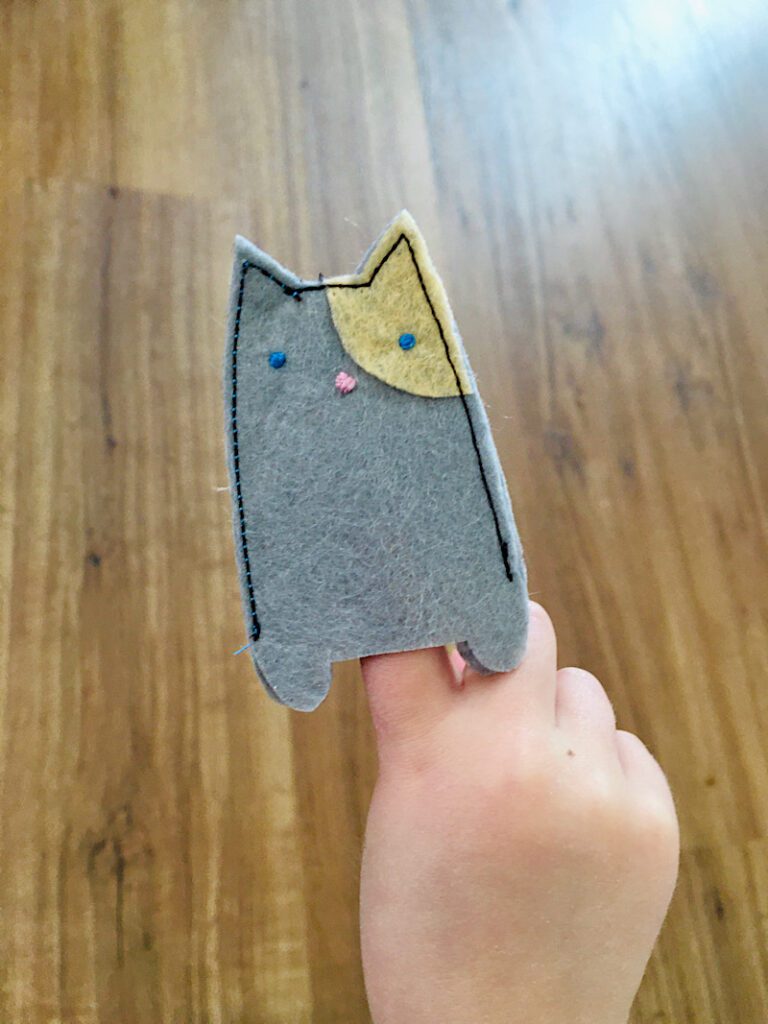
I just love how this turned out. Felt is so easy and fun to work with!
I think I am going to have to make a whole cat family of different colors and styles. What about you?
Let me know in the comments below if any steps to this tutorial confused you, I am happy to help!
Please share this post on Pinterest if you enjoyed it. It helps me reach other sew-ers who might like this project too!