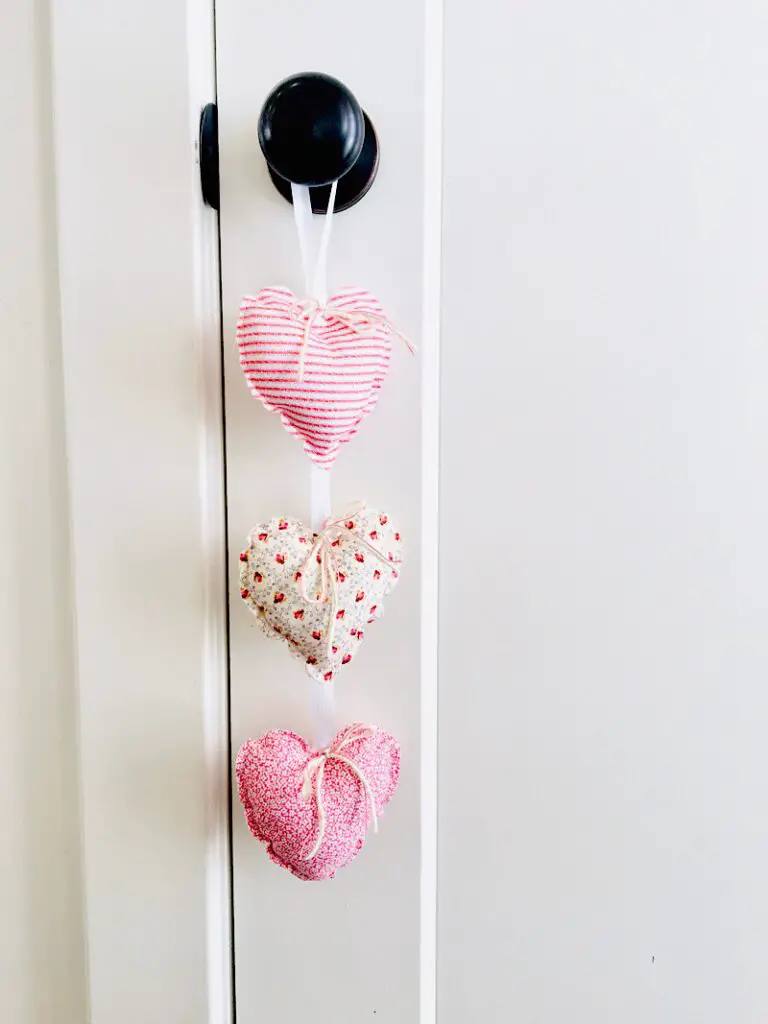
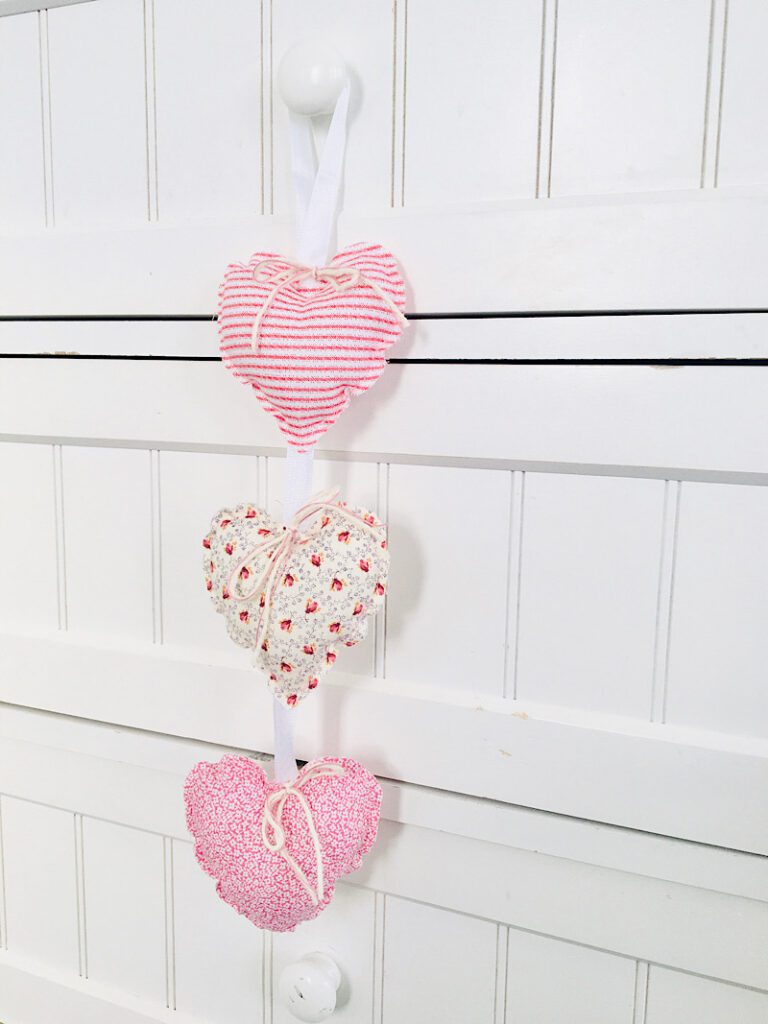
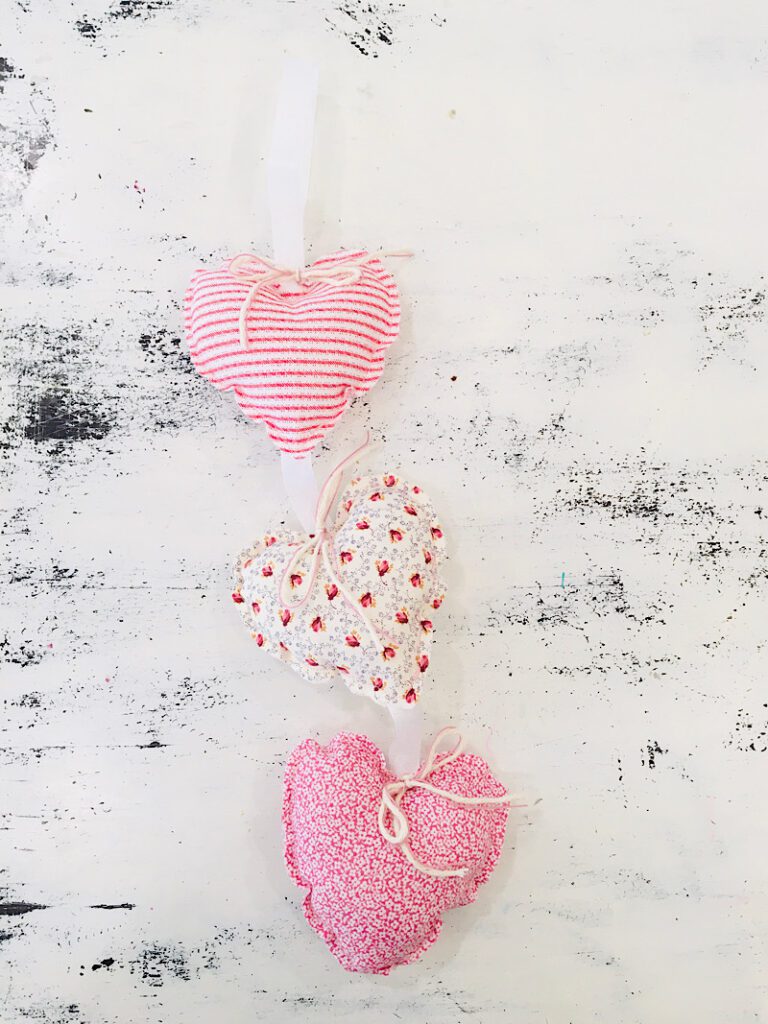
You will fall in love with how fast this stuffed heart decoration is to make! Perfect for a farmhouse Valentine’s Day.
This post may contain affiliate links. Read the full disclosure here.
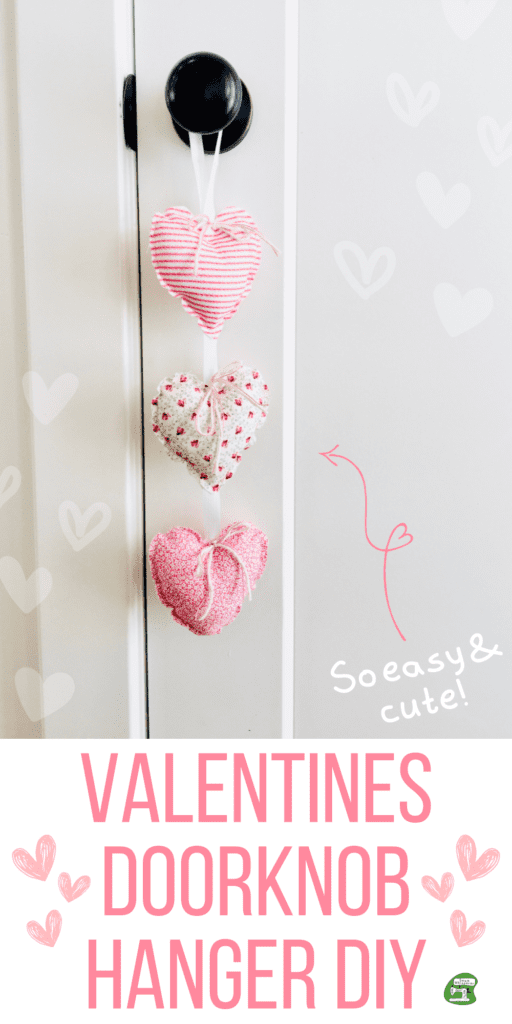
These stuffed hearts are inspired by a similar decoration my mother had in our house when I was growing up! I thought it was so cute I wanted to hang it up all the time. (Hint, you totally can!)
Customize the size & shape of the hearts, the colors, and more with this simple Valentine’s sewing project!
Supplies Needed
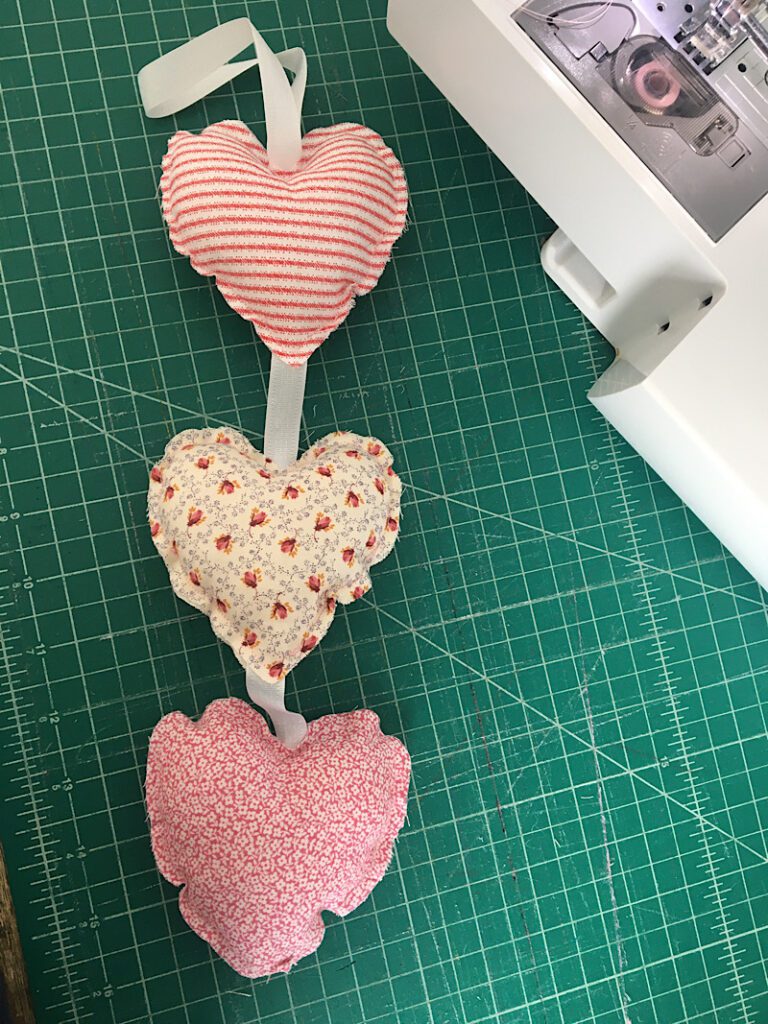
- Scrap fabric in Valentine’s colors, at least 4″x8″ for each heart. (I made three hearts for mine with three different fabrics)
- 20 inches of ribbon, at least 1/2 an inch wide. (White, pink, red, etc)
- Polyfil or wool stuffing
- Matching thread
- Coordinating colors of string for accent bows
- Pins, Scissors, etc.
How To Make A Heart Doorknob Decoration
Step 1. Cut Out The Materials
For each heart on the doorknob hanger, you should cut out two fabric pieces, a front and a back. Cut them out as opposites so the wrong sides are facing.
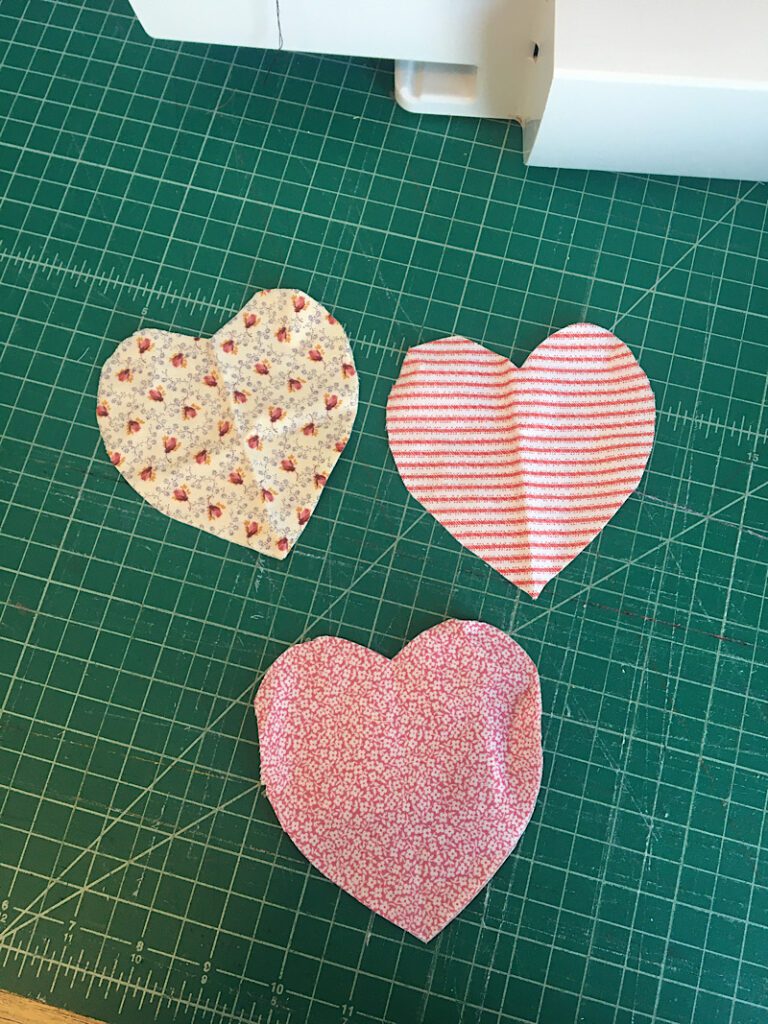
I just freehanded mine by cutting half a heart on the fold. You can also print a heart template by searching for a heart shape to print, or drawing a heart on some paper. Or you could trace a heart cookie cutter if you have one!
My hearts were all the same size and shape, about 4×4.5 inches in size.
You can make yours whatever size you want, they would also look cute with each heart getting smaller!
Step 2. Pin the Hearts To The Ribbon
Cut a 10 inch piece of ribbon, and fold it in half to make the hanging loop. Place the hanging loop at the top of one of the heart pieces, on the wrong side, and pin it in place.
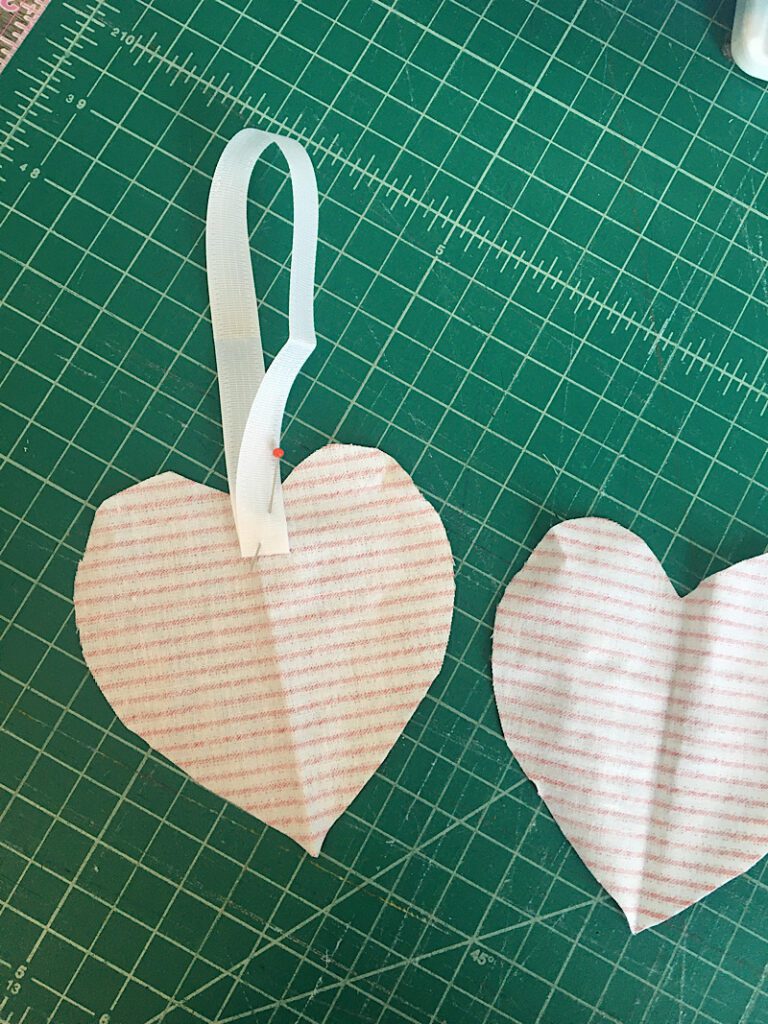
Next, cut a 3-4 inch piece of ribbon and pin it to the bottom of the same heart, sticking straight down.
Finally, place the front heart piece on top, and pin around the edges.
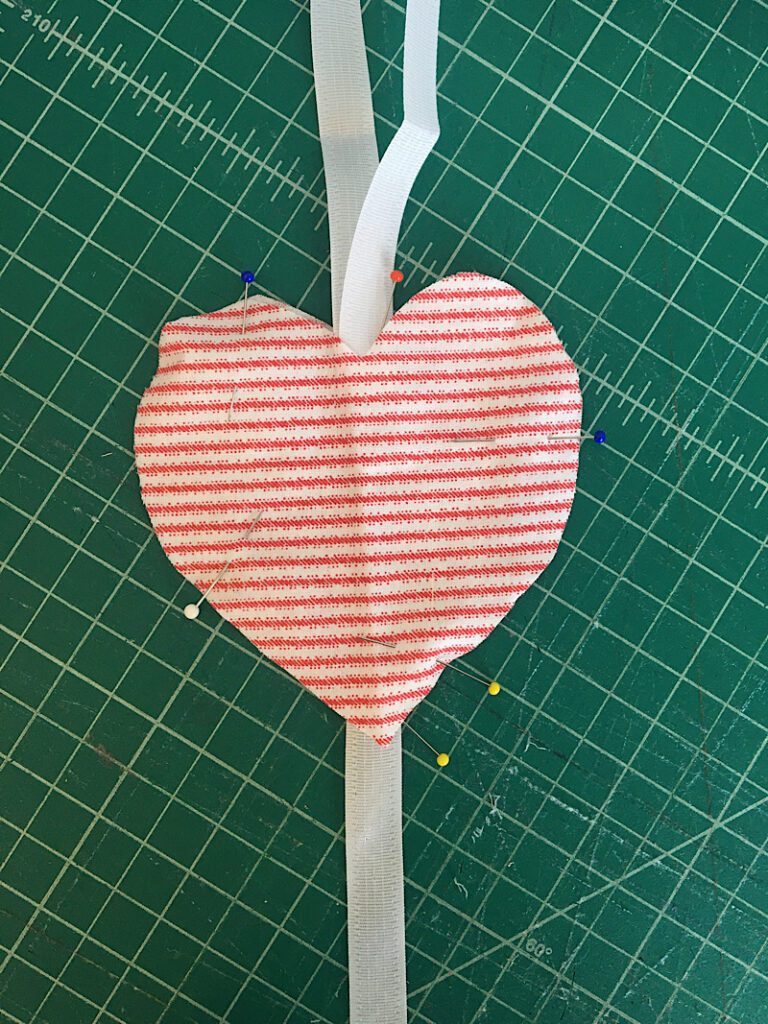
Sew a ling around the perimeter of the heart, with a 1/4 inch seam allowance. Make sure to leave a 2 inch gap on one flat side of the heart. Also make sure you sew through the top and bottom ribbons.
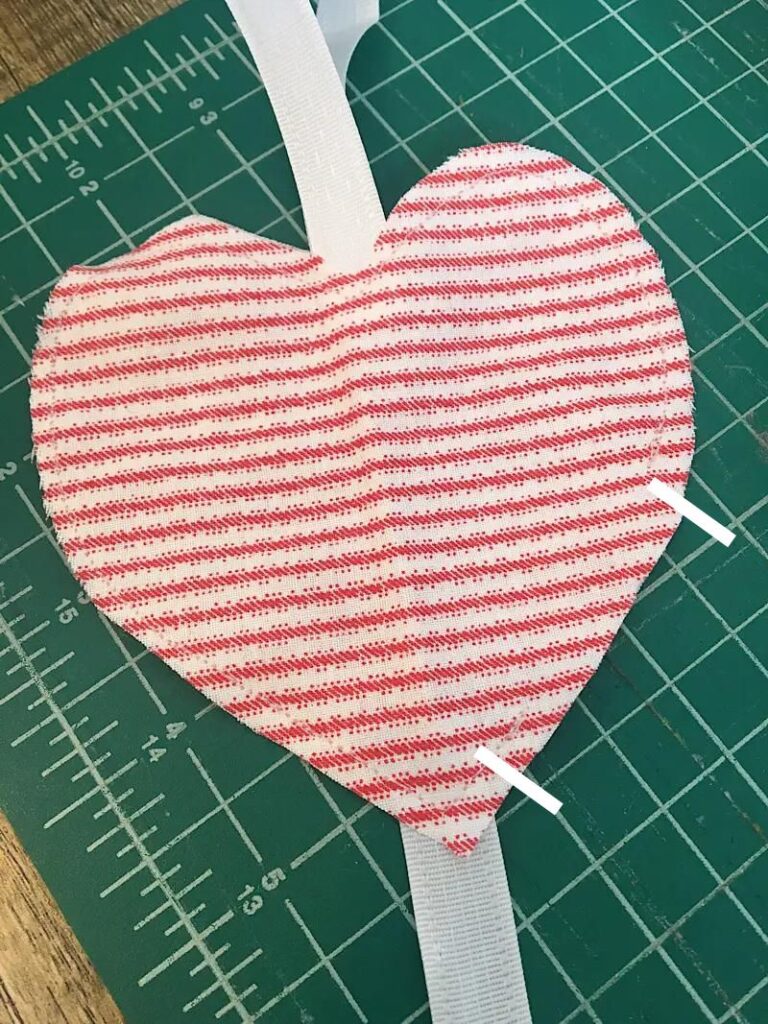
You can see where I left a gap in mine as illustrated below:
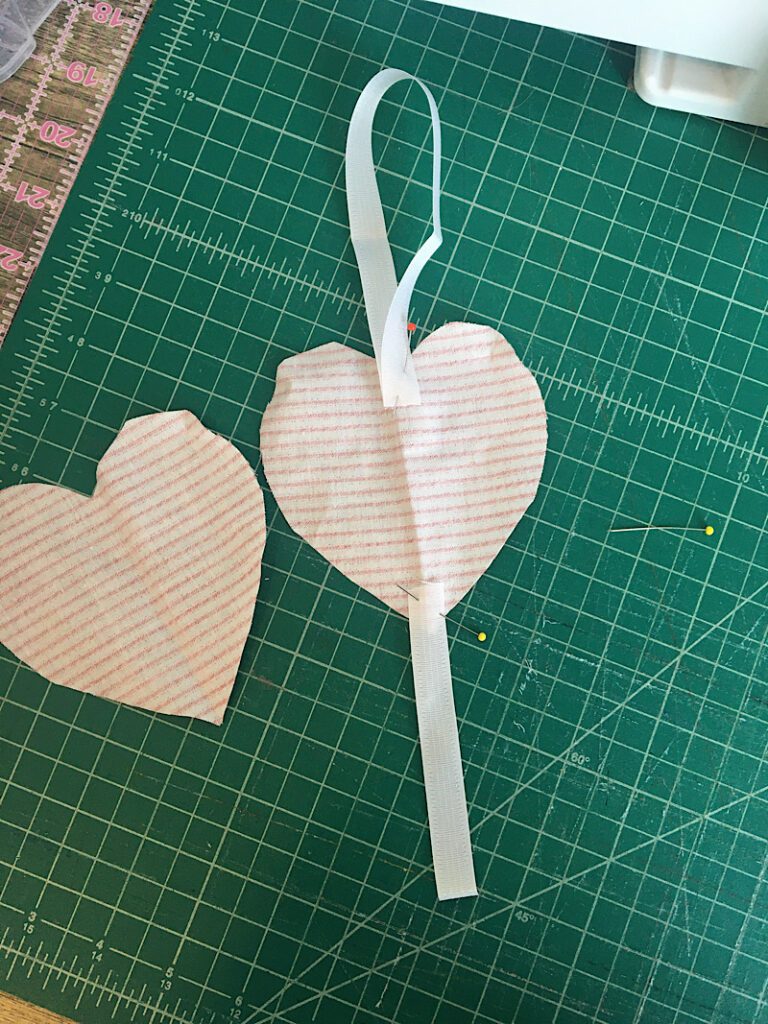
Next, pin the second heart to the ribbon that is sticking out the bottom of the first heart. Then pin another ribbon to the bottom of that heart, and pin on the final heart at the very bottom.
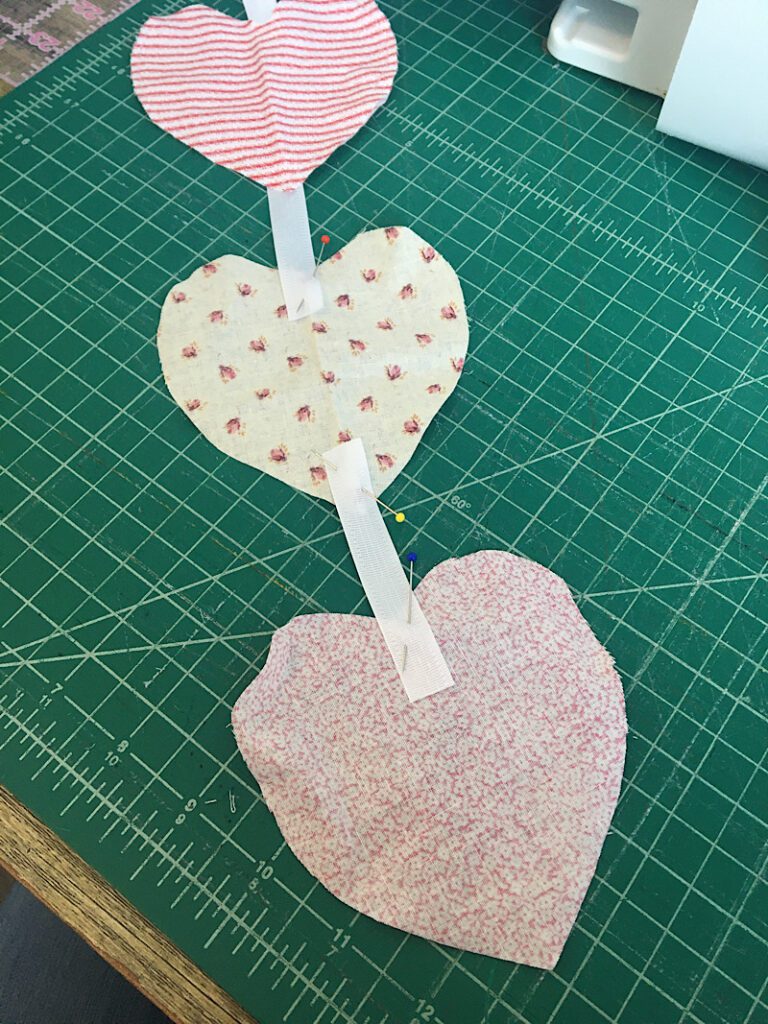
Make sure the spacing of each heart is even. I left about an inch and a half spacing between each.
Place the heart front pieces on, pin them, and then sew around them leaving a gap just like you did with the first heart.

If you want, you can use pinking shears around the edges, but I like the look of the hem left raw.
Step 3. Stuff The Hearts
Use the polyfil to stuff each heart until it is as full as you like.
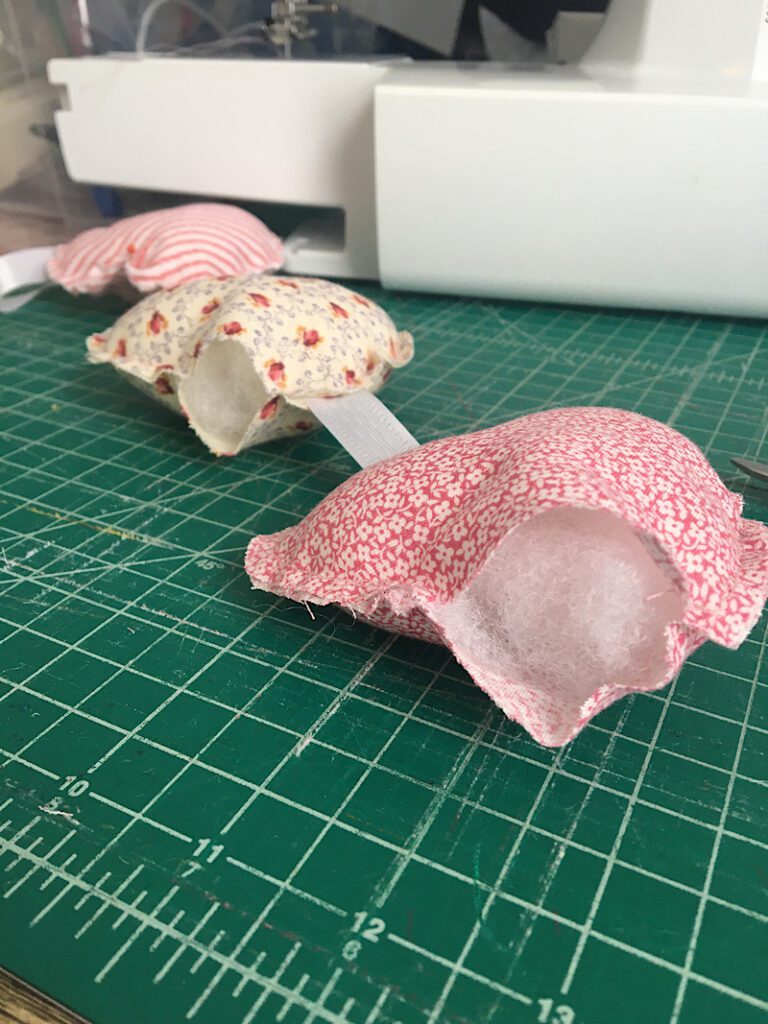
Pin the gap on each heart shut, then sew it closed.
Step 4. Add The Accent Bows
Finally, cut some string about 10 inches long (I used a white piece and a pink piece) and sew it to the top of each heart.
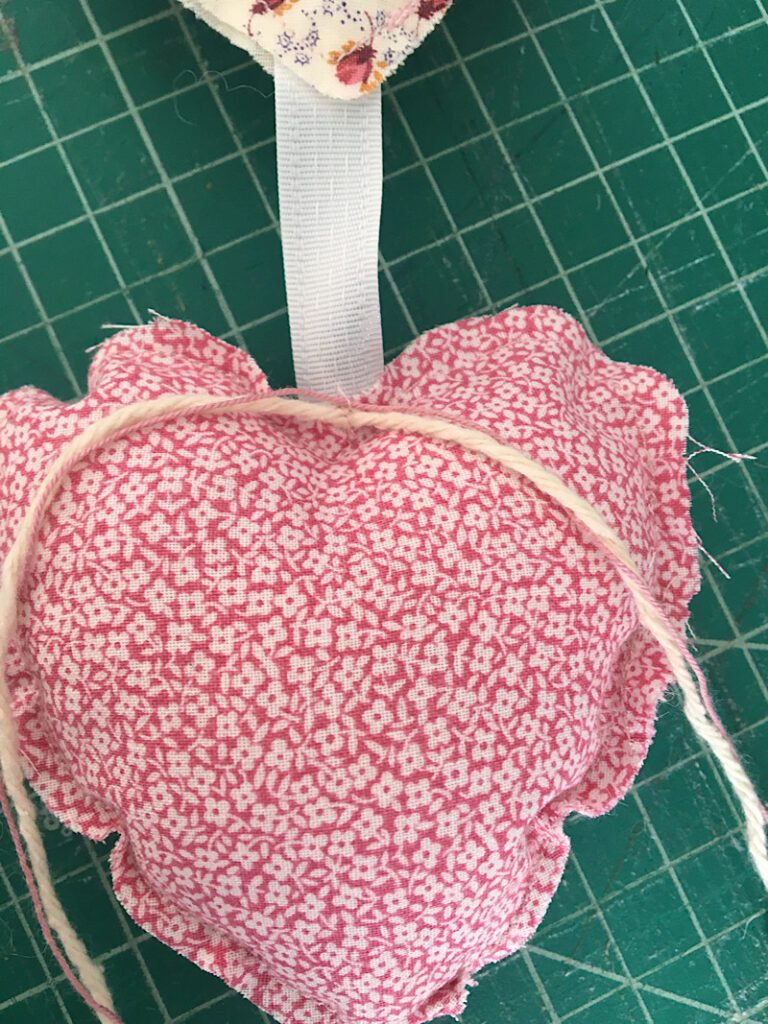
Then tie the string into a bow!
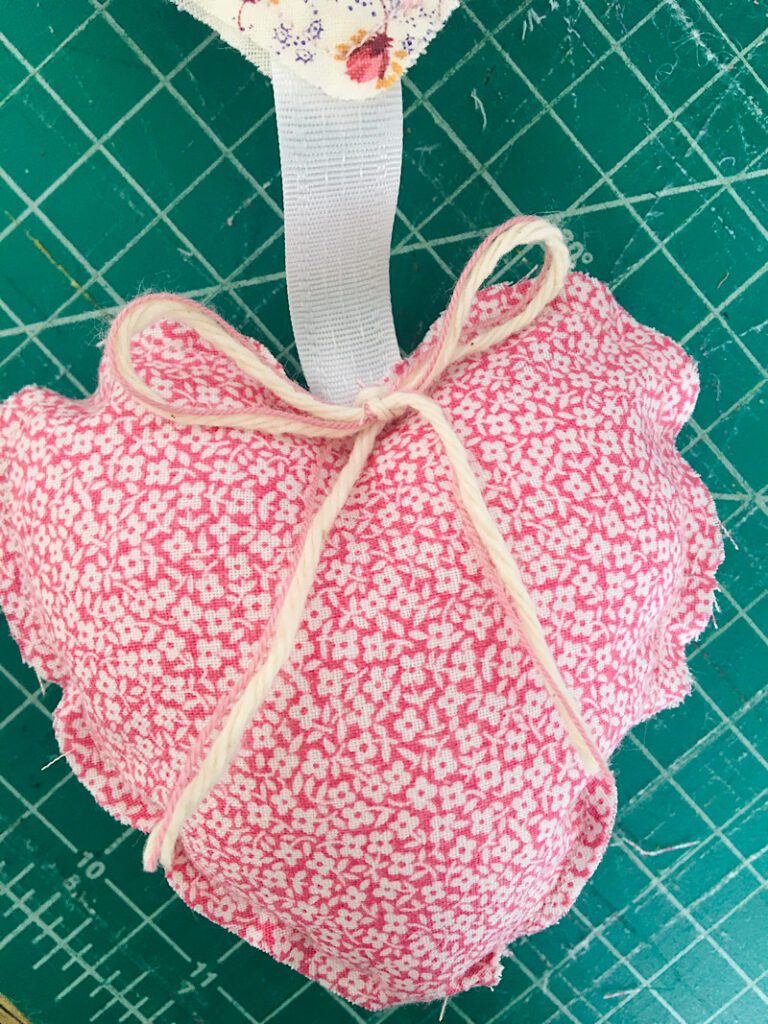
Then you are done!
Here are some more shots of how mine turned out!
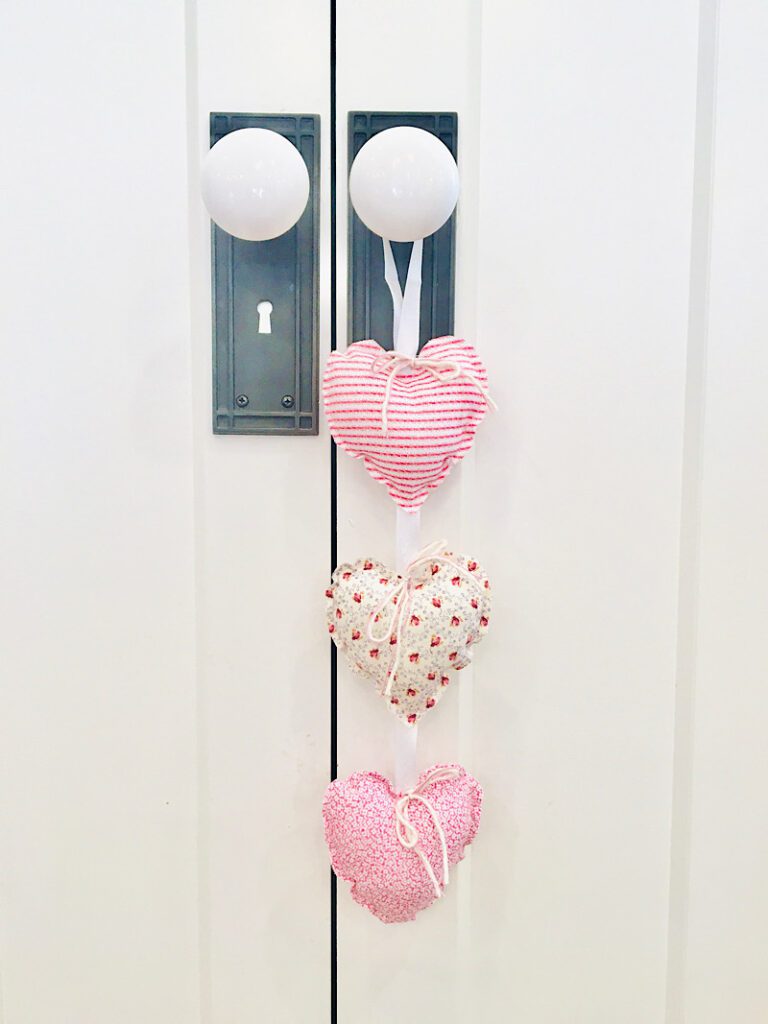
I love how fast this was to make my kid’s are finding a place to hang these hearts right now!
If you have questions, leave a comment to let me know. Pin this post to Pinterest if you liked it, it helps me a LOT!
Happy Valentine’s Day!
Check out these other Valentine’s Day sewing projects: