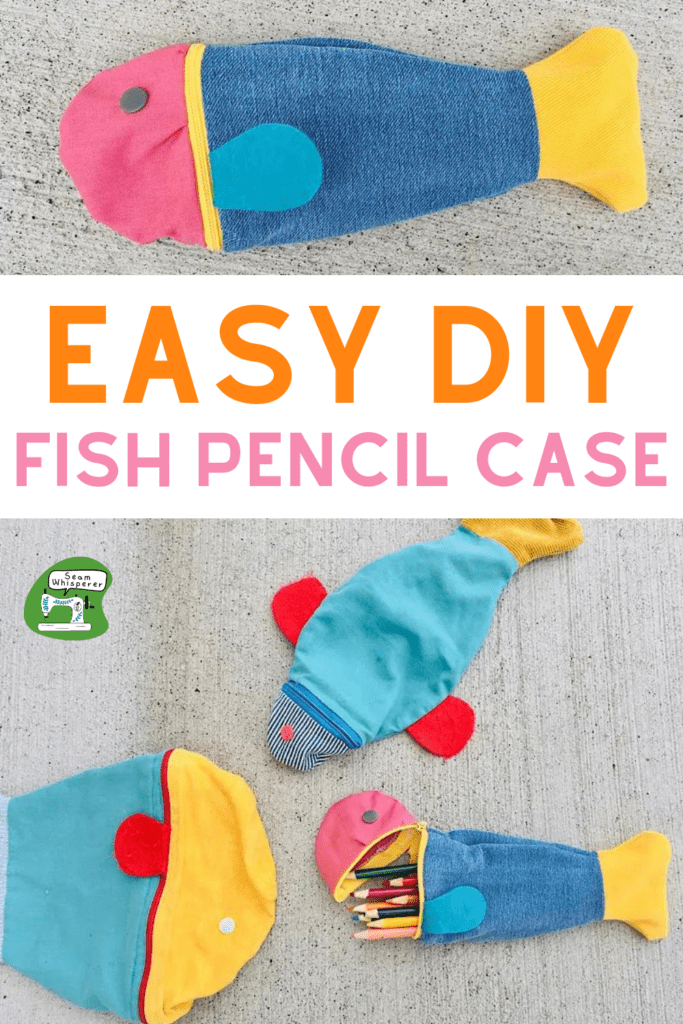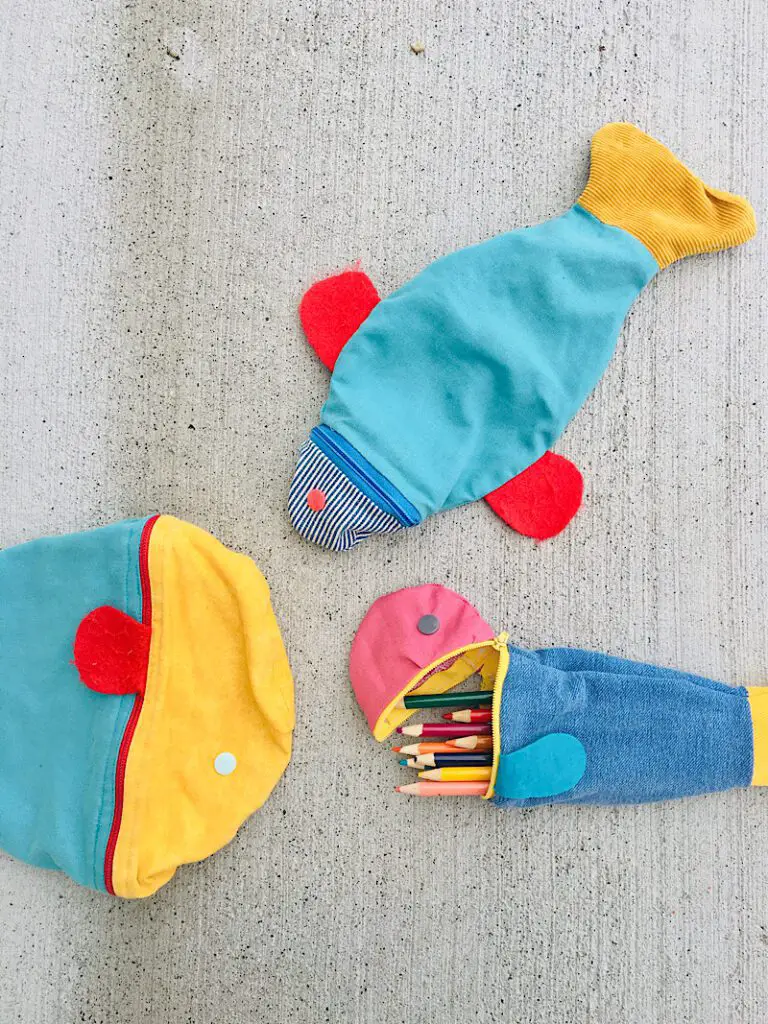
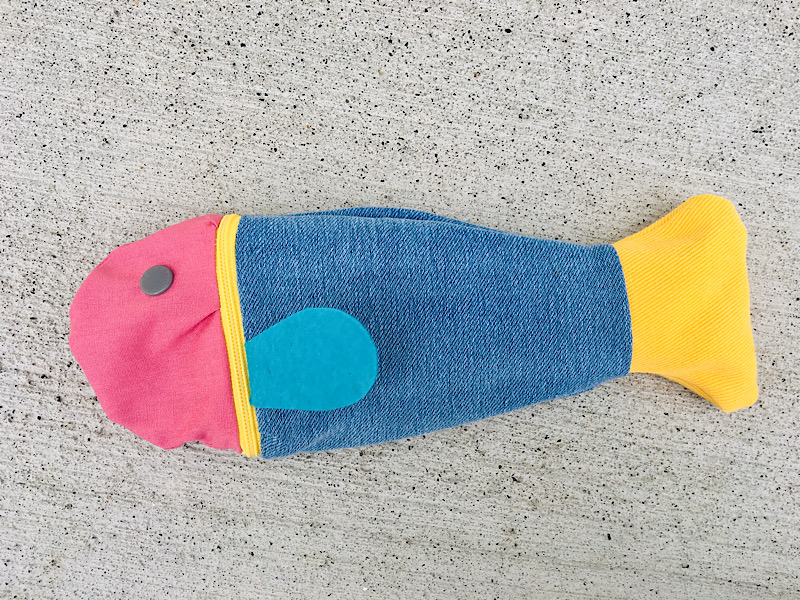
These fish shaped fabric pencil cases are as silly as they are cute! They only take a few minutes to sew but will forever be a conversation starter…
I’ve seen some pretty interesting fish shaped pencil cases out there, but the un-zippable head on this design steals the show!
Once you have learned how to make one, you will be able to make your own pattern to make other sizes, shapes, and customize your fish even more.
This post may contain affiliate links. Read the full disclosure here.
Supplies Needed
- Three colors of scrap fabric, medium weight (think thicker cotton, denim, or duck)
- 2 scraps of felt for the fins
- 7 inch zipper
- Buttons for the eyes (alternatively you can use plastic snaps, googly eyes, or embroidery)
- Matching Thread
- Zipper Presser Foot
- Sewing Pins, Fabric Scissors, Etc
- The Fish Pattern Download
How To Make A Fish Pencil Case
Download The Pattern
The pattern for this fish pencil case is a 1 page PDF available for FREE for all my email subscribers. Sign up below and I will email it to you right away!
When you print the pattern, measure the “1 inch test square” to make sure it is the right size.
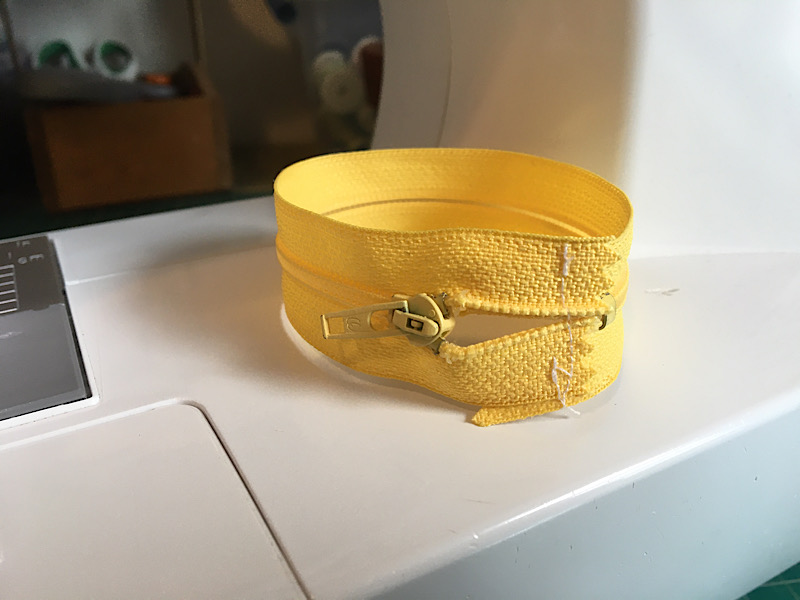
Step 1. Prepare The Zipper
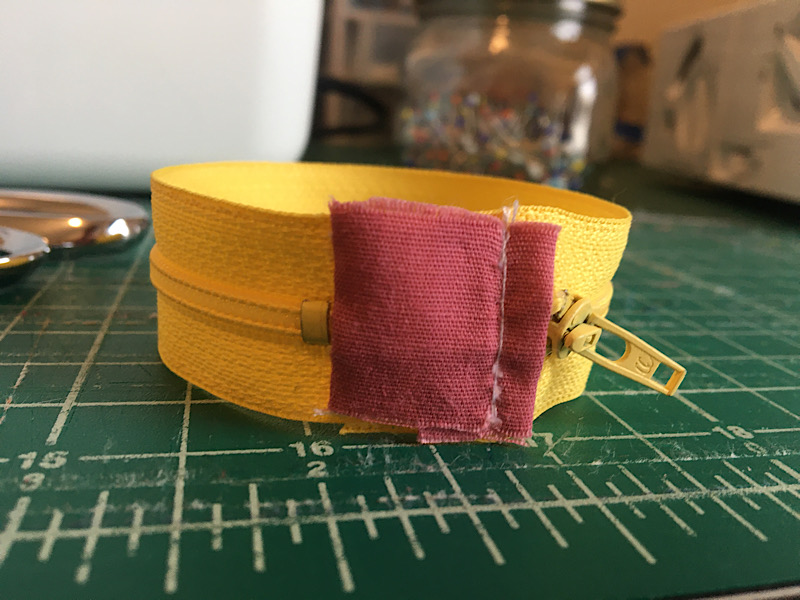
Take your zipper and overlap the ends so that it forms a loop. Then sew a line down the ends to hold it in place.
When you flatten the zipper loop, it should be about 3.75 inches wide.
Next, you are going to cover up the overlapped-ends with a piece of scrap fabric.
Cut a scrap piece of fabric to be 1″x1.5″ in size. Lay the scrap with 3/8th’s inch of it is behind the zipper stop, and the rest of the fabric is over the zipper. Then sew a line right behind the zipper stop like in the image below.
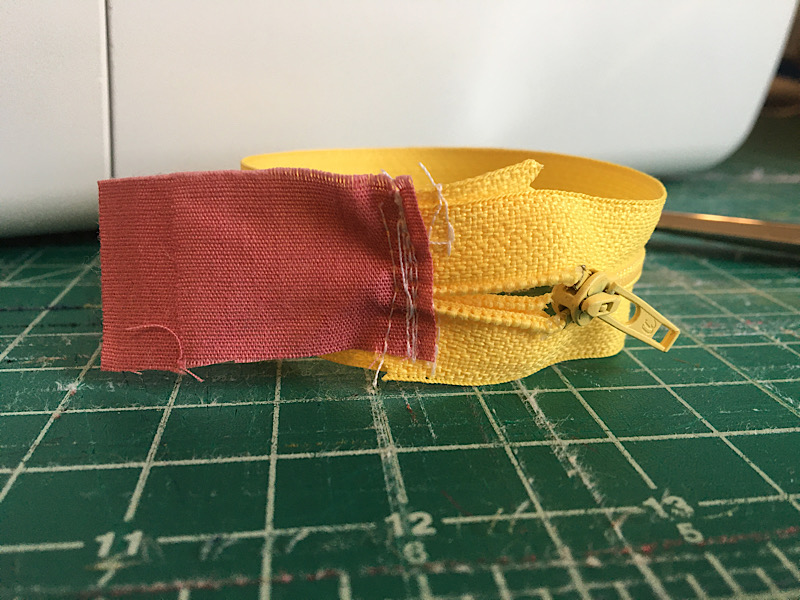
Now fold the scrap fabric over the line you just sewed, so it lays over the overlapped-ends.
Eyeball how large the scrap needs to be to cover the ends, and fold it over so the fold ends before the start of the zipper.
Then pin it in place, and sew a line down the fold.

Step 2. Cut Out The Fish
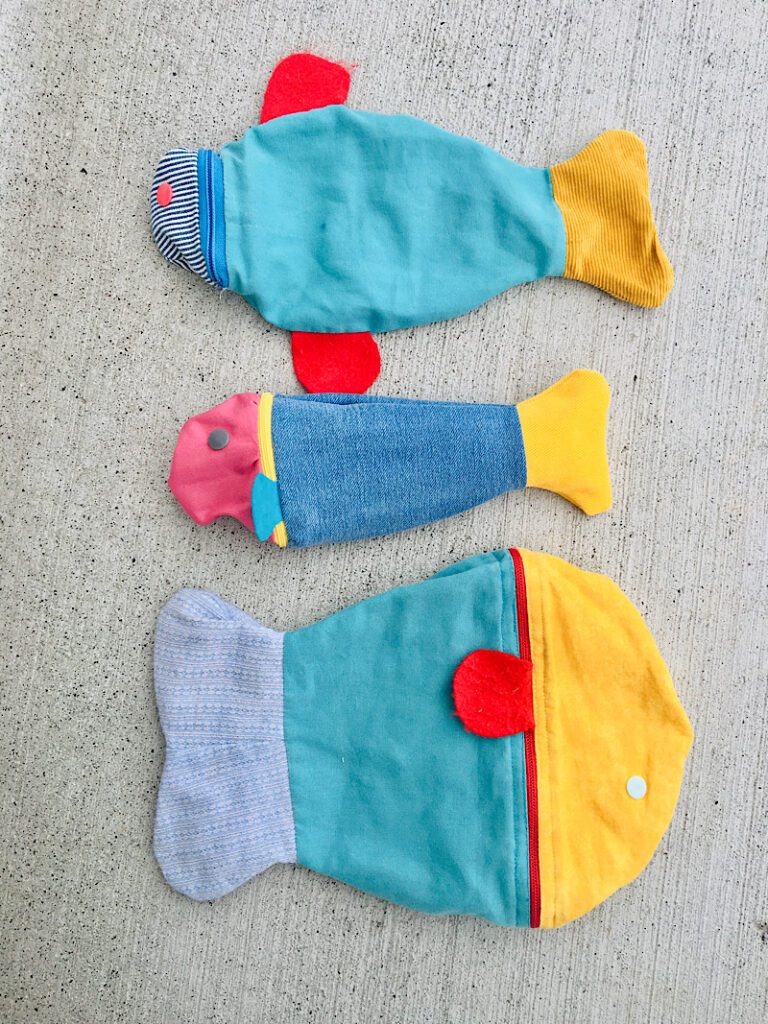
Cut out your pattern if you haven’t already and use it to cut out the fish pieces. The head, tail, and body should be different colors for the best look.
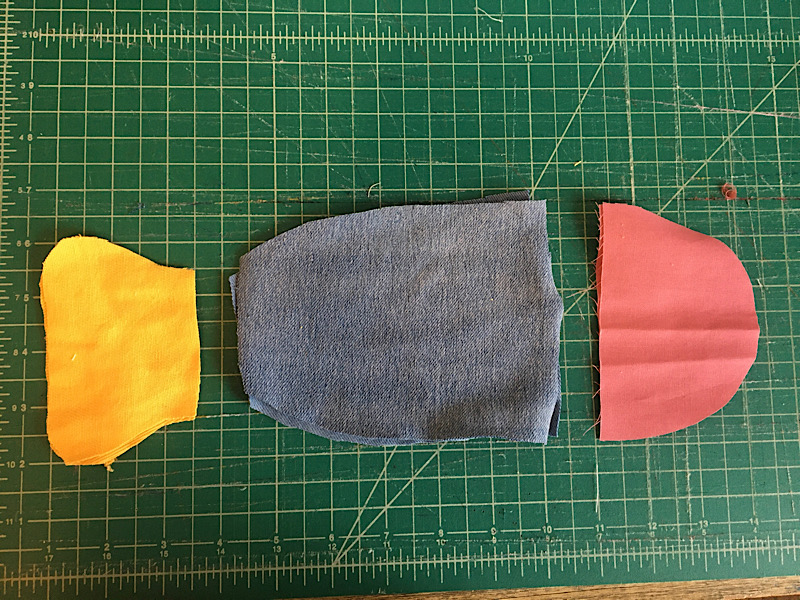
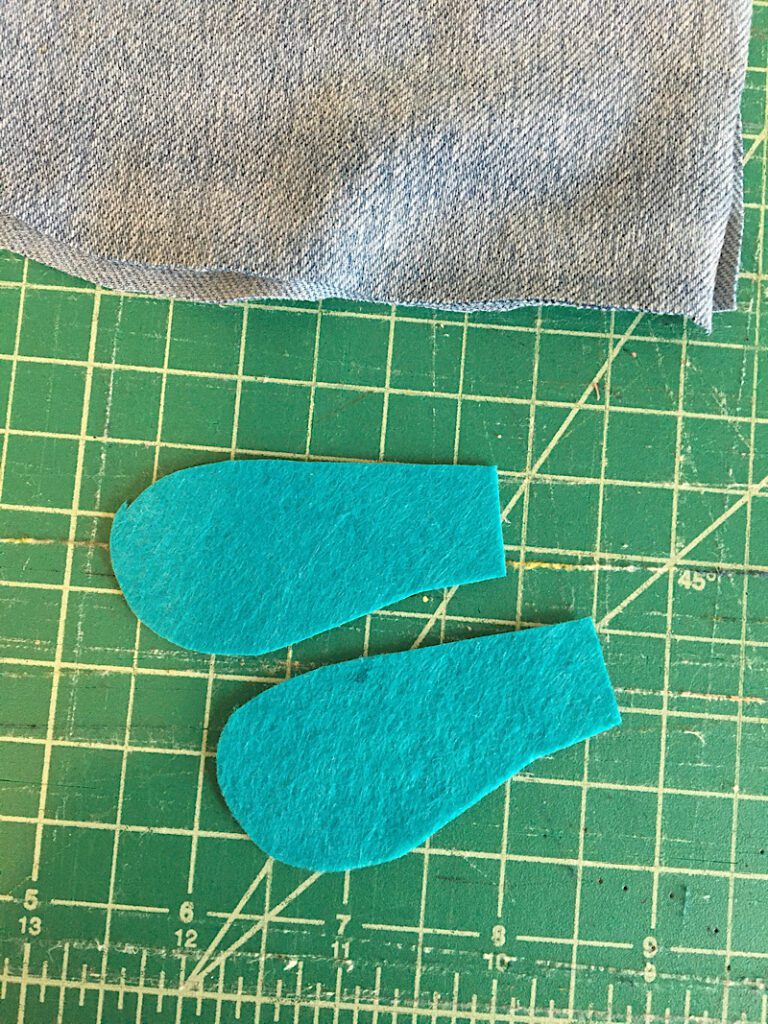
Also cut out some felt to make two fins. There isn’t a pattern for this, so make them however you want!
Step 3. Assemble The Fish Body
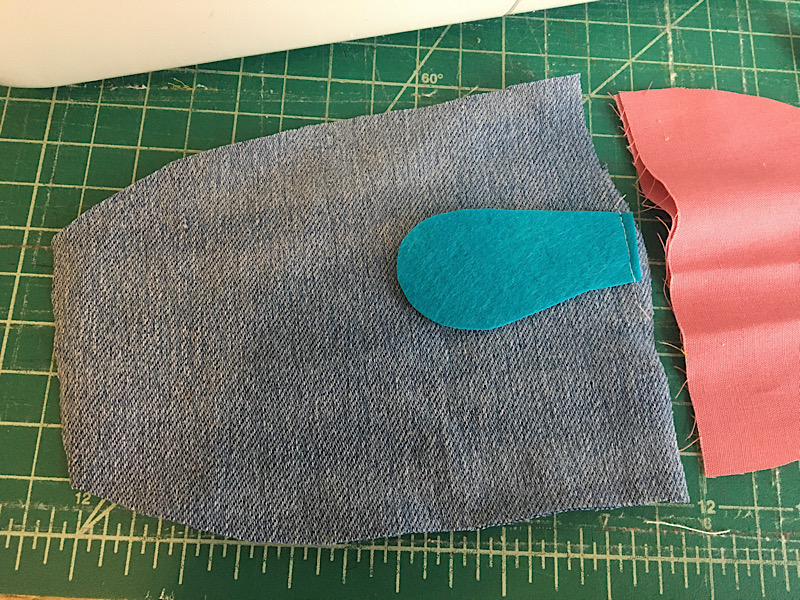
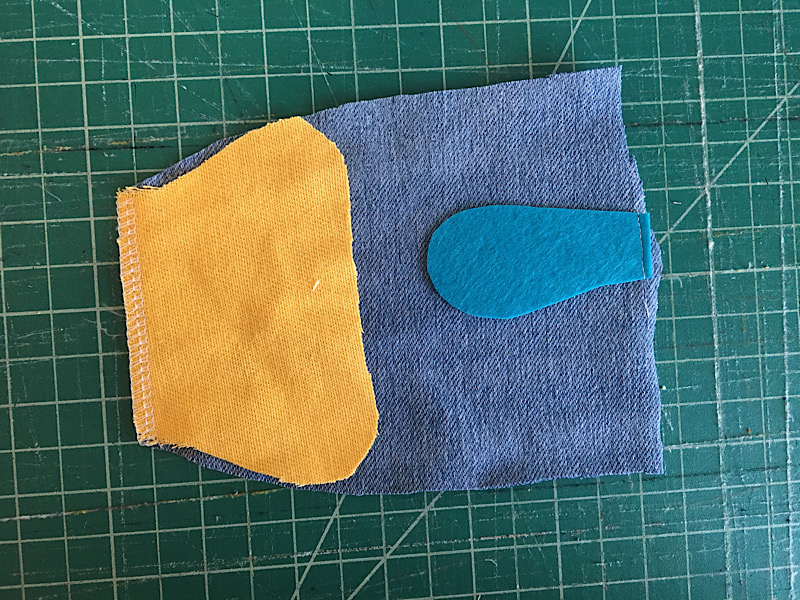
Choose how you are going to attach the fins to the fish’s body. You can either have them sticking straight out of the top and bottom seams, or coming from the side near the zipper.
(Take a look at the first picture on this post to see which fin placement you think is cuter!)
For this fish I made the fins coming out of the side by the zipper.
Line up the end of the fin with the flat, fatter side of the fish body, and sew it in place.
Do this on the other side as well.
Next, line up the flat edge of the tail with the smaller flat edge of the fish’s body, with the right sides facing. Then serge them together (Or you can sew and zig zag them).
Then open up the fish to see how it looks.
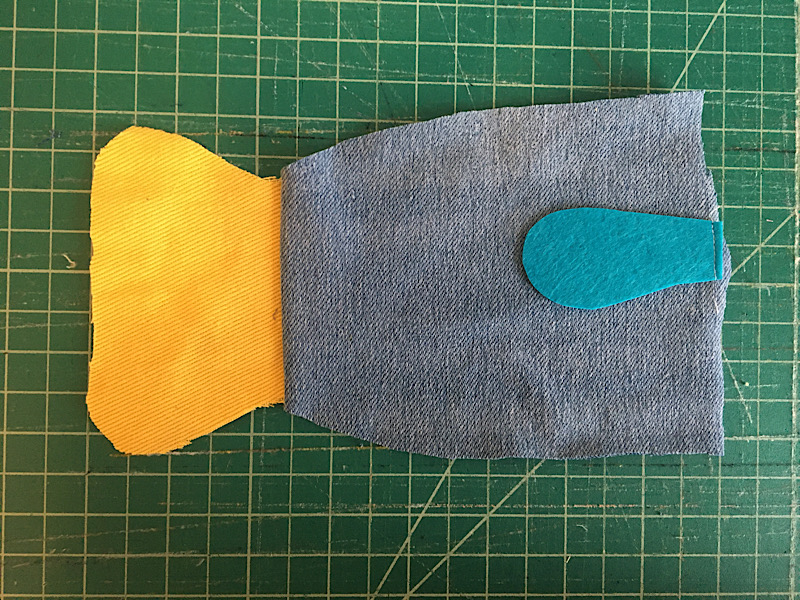
Repeat this with the other half of the body before moving on.
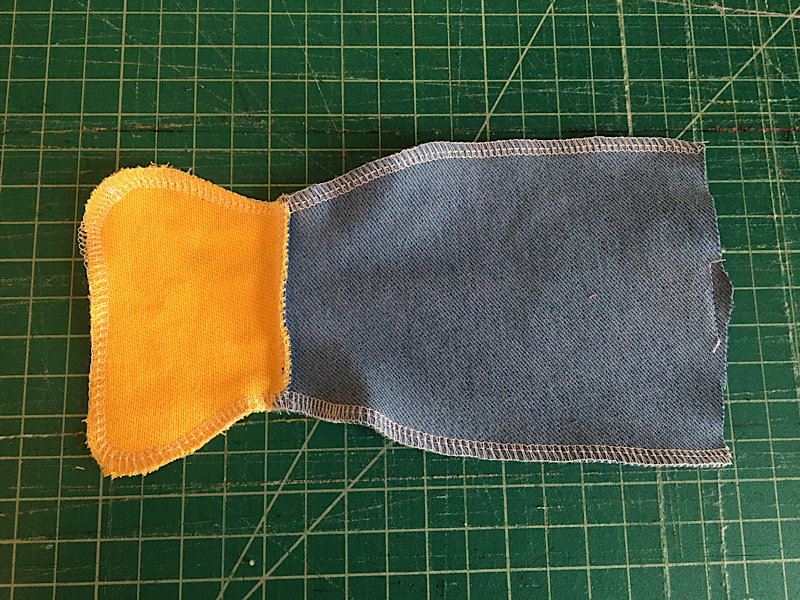
Now, you will stack the two halves of the fish body on top of each other with the right sides facing.
Serge or sew them together around the perimeter, leaving the flat side open.
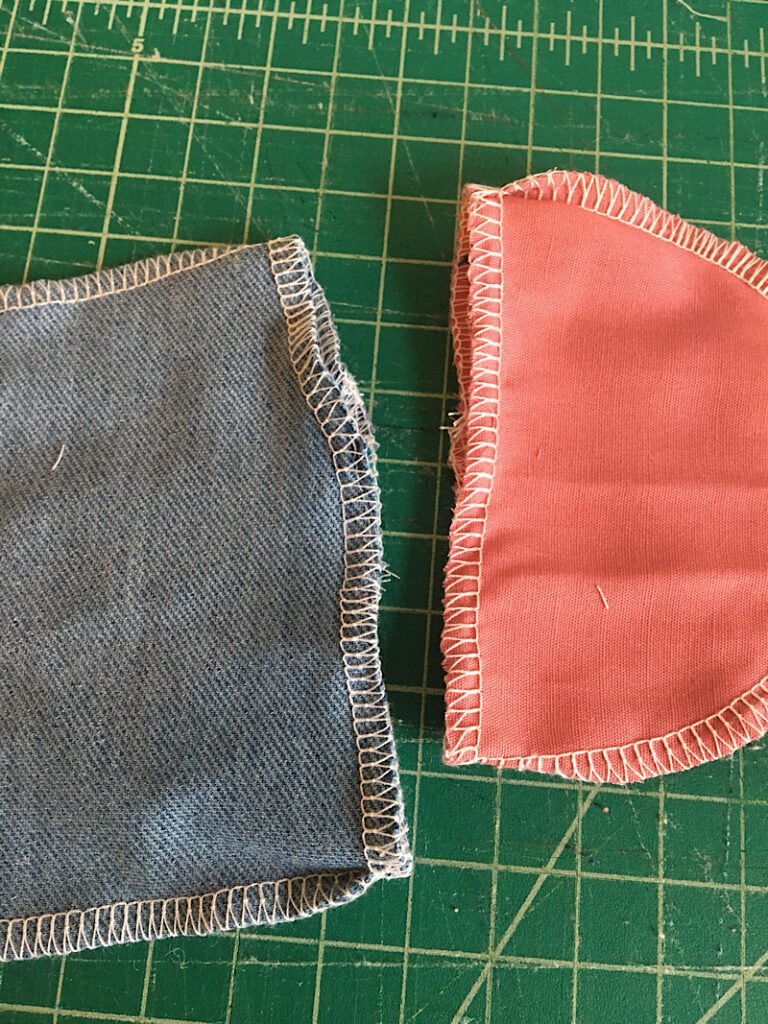
Align the two fish head pieces together with the right sides facing, and sew around the curve leaving the flat side open.
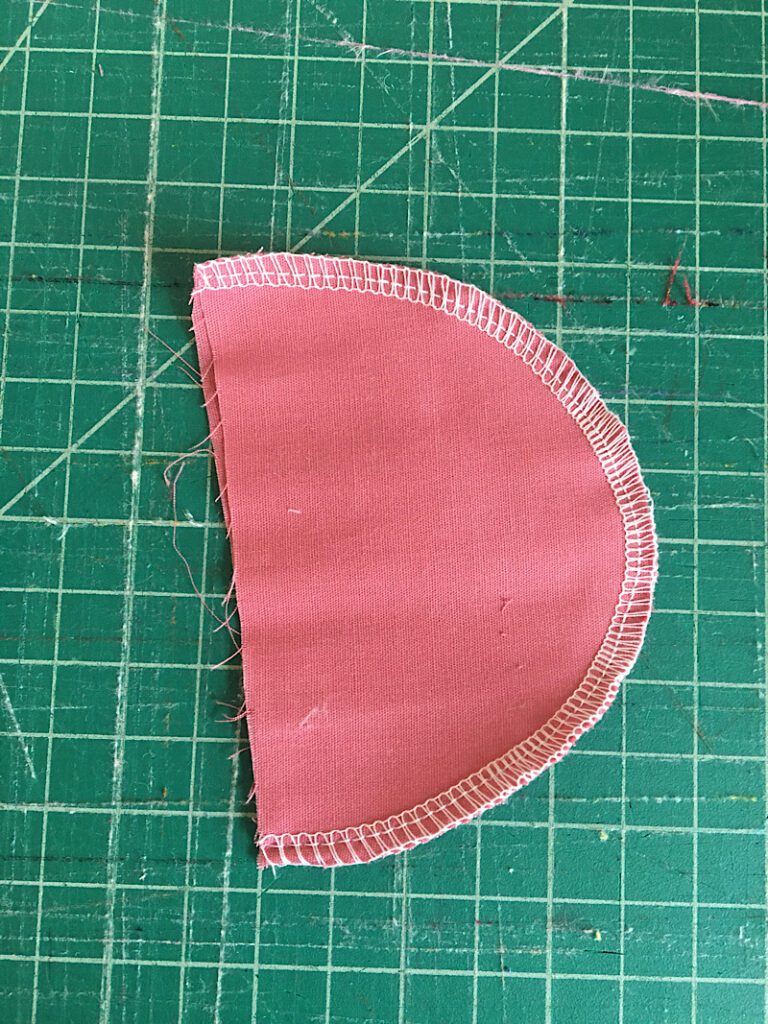
Finally, serge or zig zag around the entire circular opening to hem the edge of the body and the head.
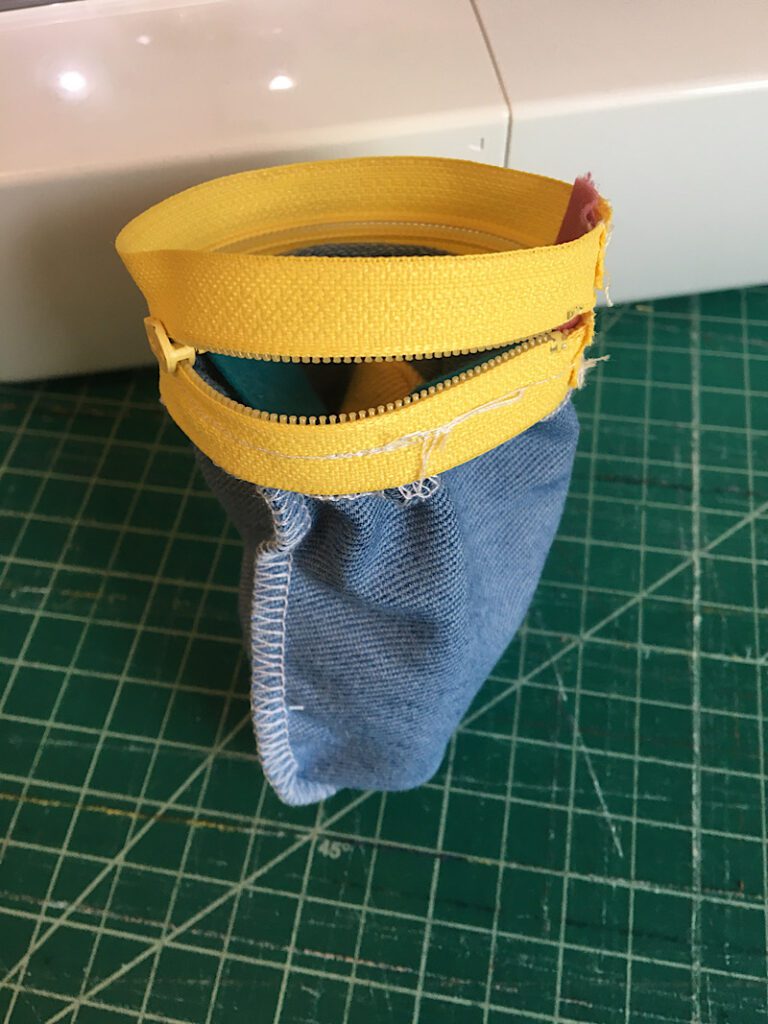
Step 4. Sew In The Zipper
Take the zipper loop, and make sure it has the right side facing out.
Make sure the fish body is inside out, and place the zipper inside the opening, lining up the top edges and pinning it in place.
It doesn’t really matter how the zipper is oriented, but if you want to align the start of the zipper where you covered the ends with fabric, with the side seam of the fish, you can.
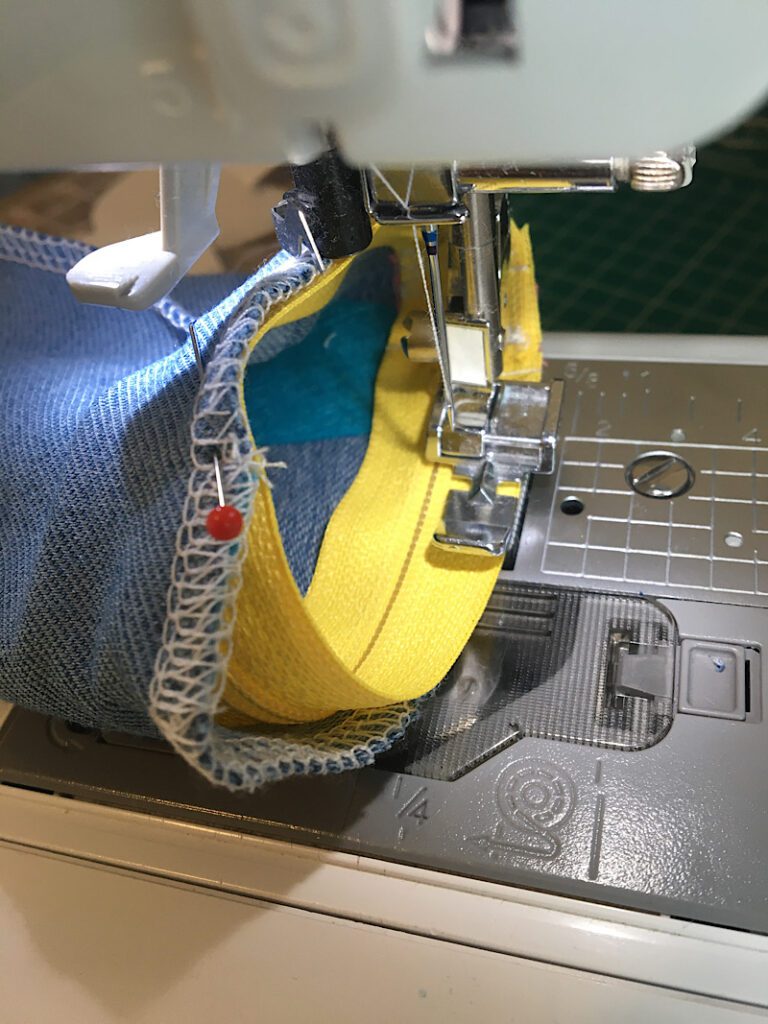
Use your zipper presser foot to sew around the zipper and attach it to the fish’s body.
This is a small space to sew in, so sew a little bit, then stop and readjust, and sew again, etc.
Now turn it inside out to see how it looks.
Step 5. Attach The Head
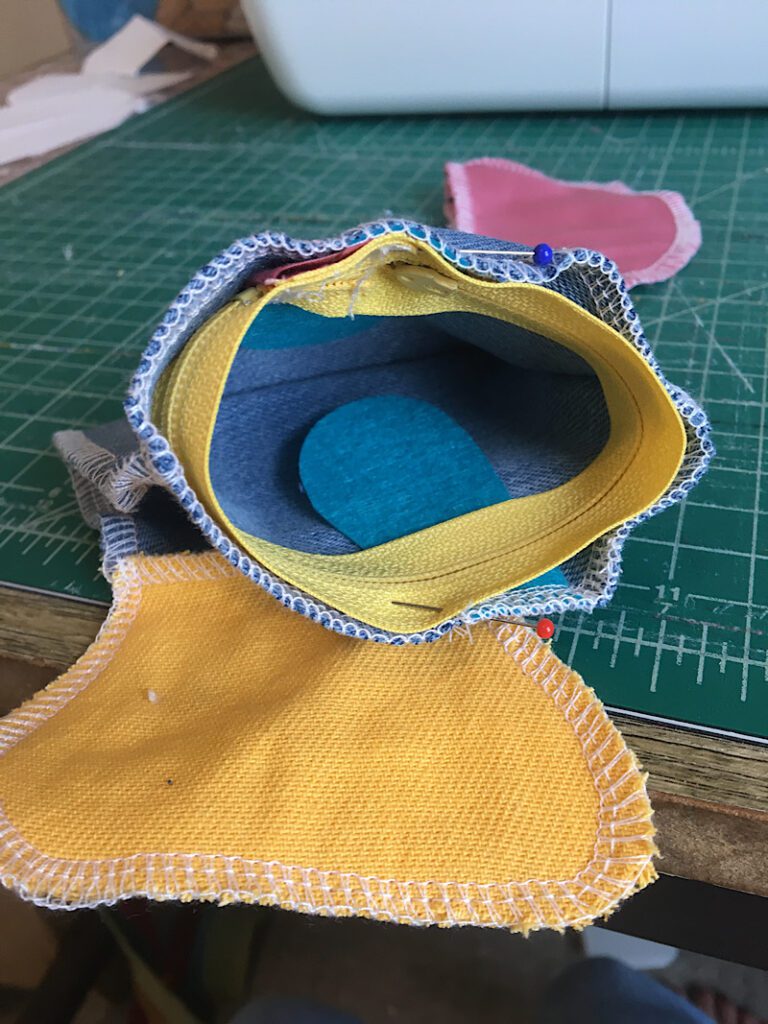
Now unzip the zipper about halfway, and turn the fish inside out again.
Turn the fish head inside out, and place it down into the zipper. Make sure the side seams of the head are aligned with the side seams of the body, and pin it in place.
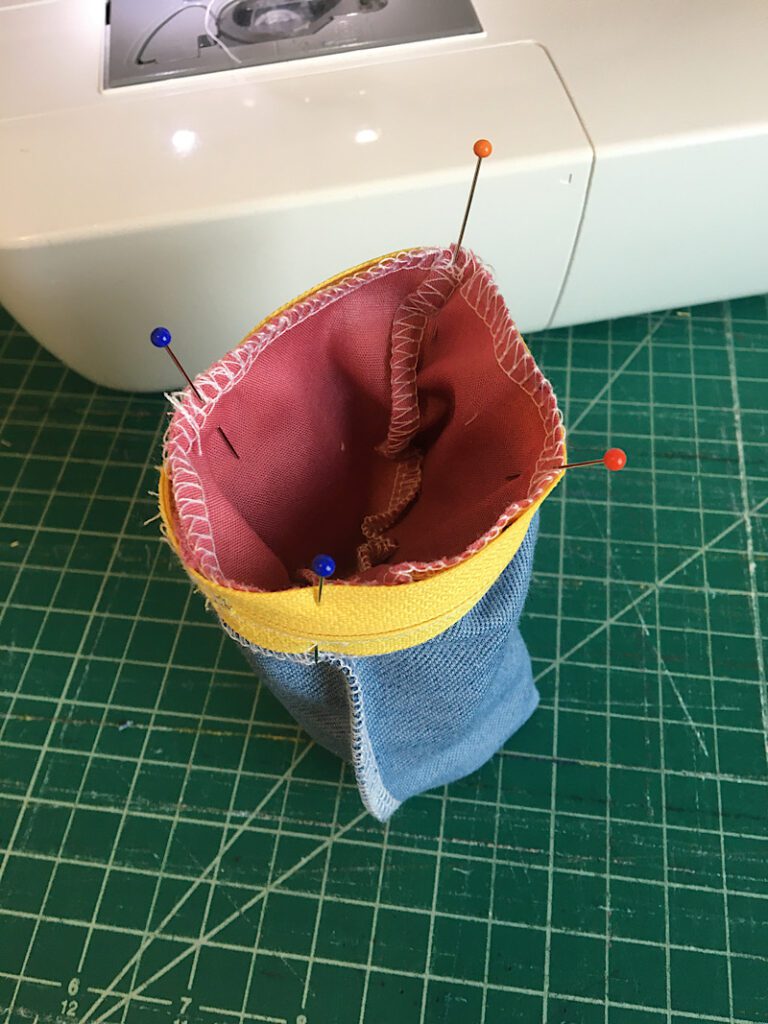
Then sew the head to the zipper like you did before.
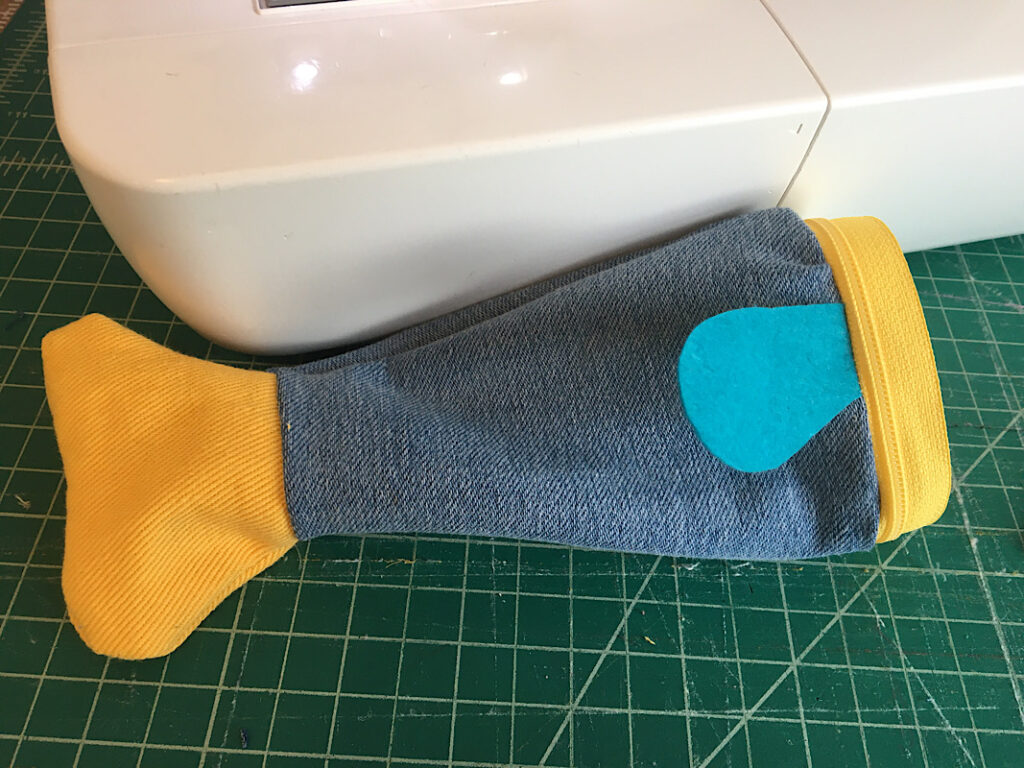
Then turn it all right side out through the open zipper.
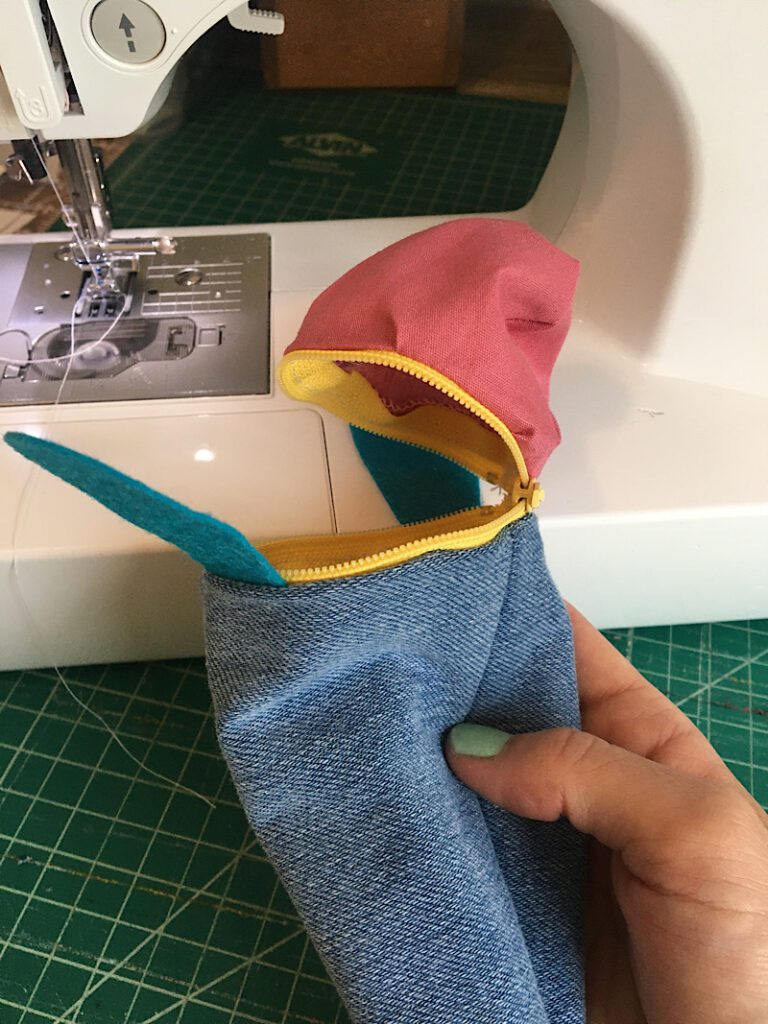
Stick a capped pen into the fish’s tail to shape it.
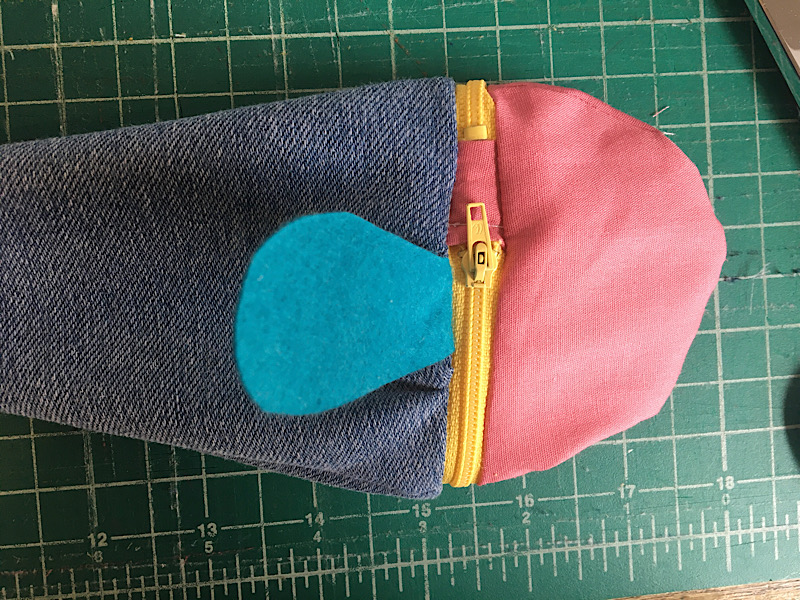
It is looking awesome!

Here is the back view:
Step 6. Add Fish Eyes
The last step is to add eyes!
There are lots of ways you can do this. You can use plastic snaps like I did (just one side of the snap), sew on buttons, embroider some little “X” eyes, or use googly eyes!
Then you are finished with your fish!
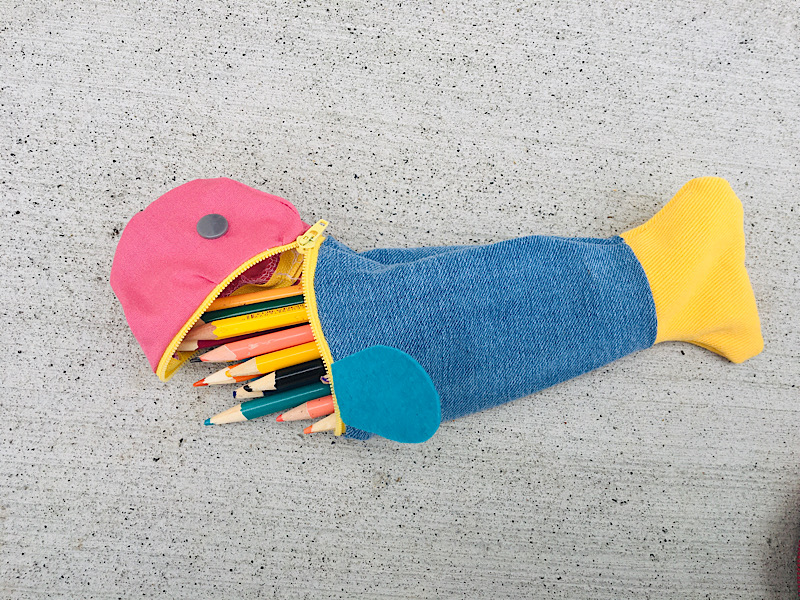
Now you can stuff it with some pencils and it is ready for “school”. You’ll need to make it some friends!
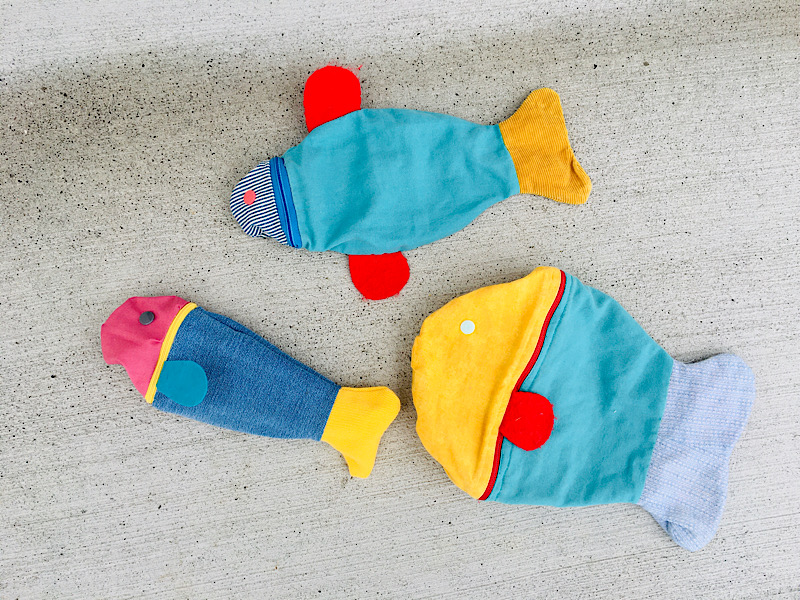
I made a few variations here, a fat fish, and one with fins on the sides. I like them all!
If you have any questions, let me know! And I would love to see your creations so I can add them to this post to “show and tell!”
Pin this to pinterest so that others can find it too.