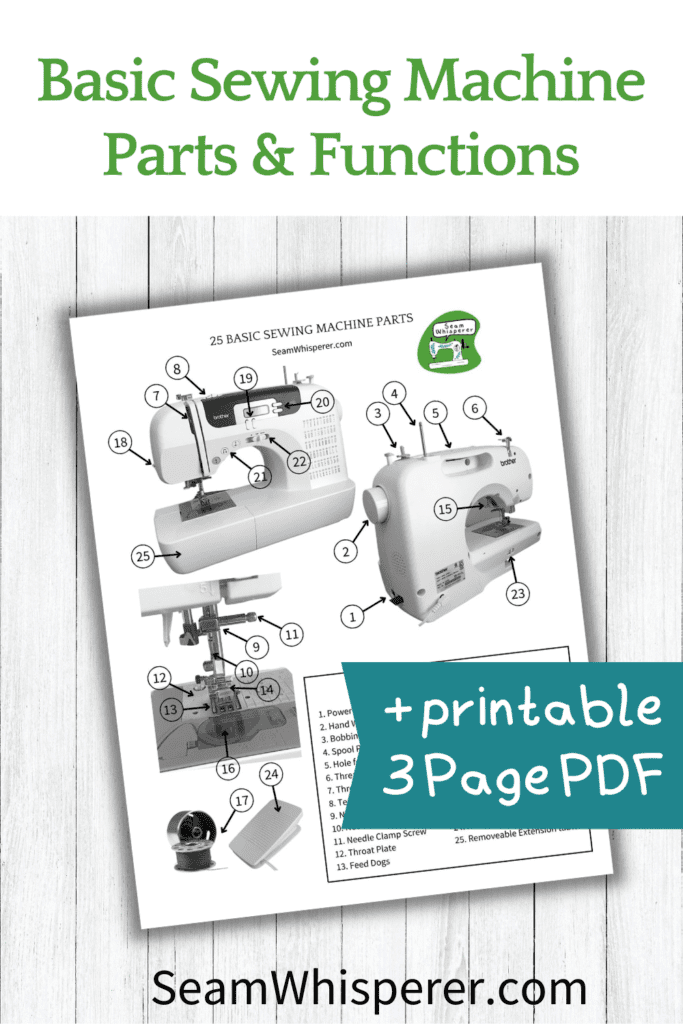
Learning to sew? I have compiled a handy list of the 25 basic parts of a sewing machine, as well as their functions. Use this list of names to quickly identify the parts of your machine, and print out the labelled PDF worksheet to refer to or teach with!
There are a lot of sewing machine parts you need to know if you want to learn to sew. The best way to learn is to jump right in and practice!
You might not be quizzed on these parts and their names, but for the DIY sewer it is a good idea to try to learn them, especially if you aren’t able to take a sewing class. (Although, lots of sewing classes have worksheets just like this one!)
As you get more familiar with your machine your skill and speed will increase!
Printable List of Sewing Machine Parts
The printable is a labeled diagram/picture that points to each part of the sewing machine and numbers them. On the bottom of the page is a key that gives each numbered part a name.
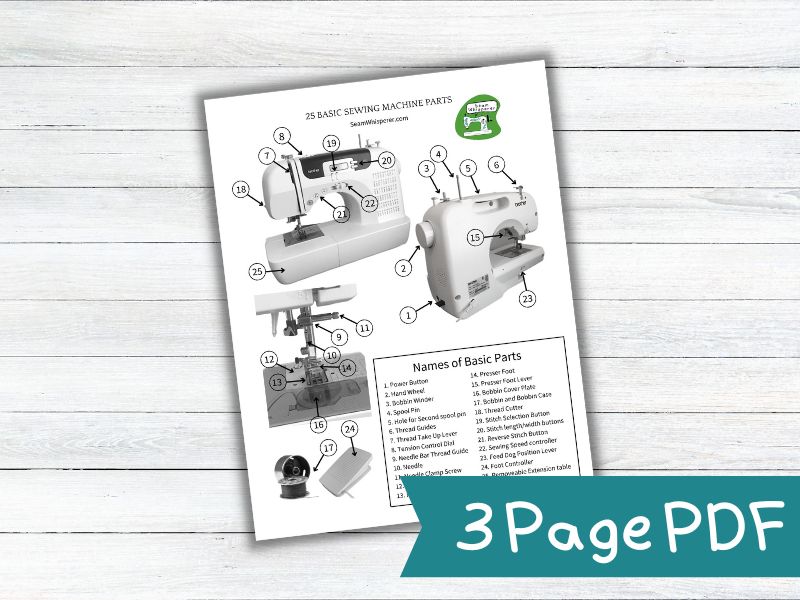
I have also included an EXTRA printable that lists each part’s name and their functions for you to study. (It is basically just this blog post, but a shortened printable version.)
I hope this helps you learn about your sewing machine, and what each part is for!
To download your printable, sign up your email below and I will send you the file!
Also, feel free to use this printable for whatever you want, such as to teach others with! (But no reselling it or claiming it as your own).
Keep reading the rest of this post to learn even more about each basic sewing machine part!
**Note: Make sure you also grab your copy of my free sewing machine practice printable sheets that will teach you some essential beginner skills!
Basic Sewing Machine Parts, Names, and Functions
1. Power Button
The power button is located on the side or back of your sewing machine, usually near where the cords plug into the machine. The power button turns on the machine, as well as turning on the light bulb.
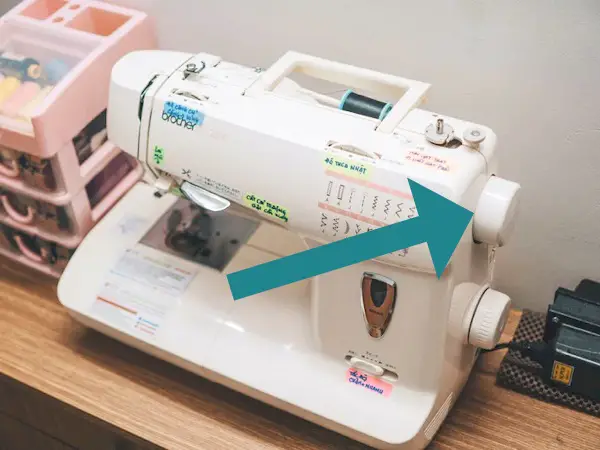
2. Hand Wheel
The hand wheel, also called a flywheel or balance wheel manually controls the needle. Turn the hand wheel to raise or lower the needle and manually move the feed dogs as well.
Some handwheels have a mark you can line up that helps you know when the needle is raised at it’s highest point, which allows you to thread the machine and needle.
The handwheel should always be turned towards you (counterclockwise), otherwise you might risk messing up the timing of the machine.
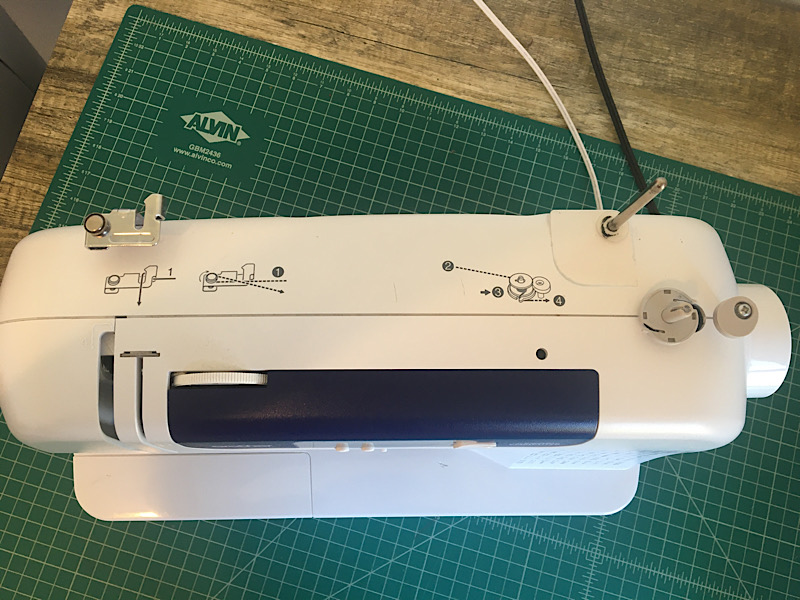
3. Bobbin Winder
On most sewing machines the bobbin winder toggles from left to right. Switch the winder to the ‘right’ position and it will spin when you press down on the foot pedal.
The bobbin winder winds thread onto your bobbin, which you will then remove and place in the bobbin case to use as the lower thread.
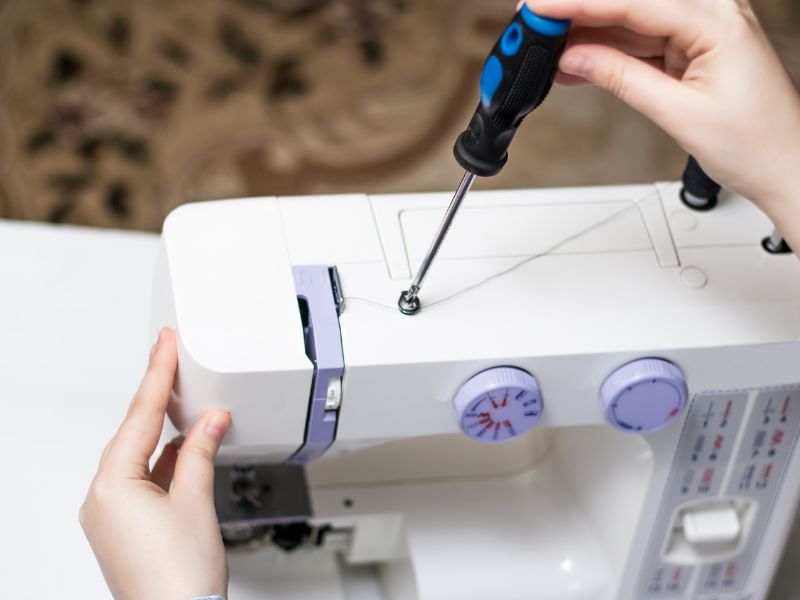
4. Spool Pin
The spool pin holds the spool of thread (the upper thread) that threads through the machine into the needle.
On some machines the spool pin’s height can be adjusted by manually raising and lowering it to account for different spool heights.
Depending on your sewing machine model, the spool pin may be vertical or horizontal.
5. Hole for Second spool pin
On top of many sewing machines is a small hole for attaching a second spool pin, which will hold additional thread needed for sewing with two needles (a twin needle).
6. Thread Guides
Thread guides are used when winding the bobbin, as well as when threading the machine. They guide the threads in the correct direction to ensure they won’t get tangled.
7. Thread Take Up Lever
The thread take up lever is an arm that carries the thread from the top of the machine down to the needle. It moves in and up and downward motion to assist the thread in unwinding from the spool.
When threading your machine, start on the right side of the take up lever shaft, and follow it towards the left, winding the thread down to the needle.
8. Tension Control Dial
The tension control wheel (or dial) controls the tension of the upper thread. Many machines will mark the recommended tension with a line or other symbol on the dial.
The tension of your thread may need to be adjusted depending on the type of thread or fabric you use. An incorrect tension will cause thread to pull or loop, and can make fabric pucker.
9. Needle Bar Thread Guide
The needle bar thread guides is a very small bar on the front of your needle which guides the thread to it’s correct position.
When using a single thread, the thread should go behind the thread guide. When sewing with a twin needle, your sewing machine manual may instruct you to leave the second thread in front of the thread guide.
10. Needle
The type of sewing machine needle you use differs based on the type of fabric you are sewing with. Thinner materials generally will use a thinner needle. Thick material such as denim and leather have specialty needles that have a hollowed back to allow the needle to puncture through.
In addition, some needles are sharply pointed or rounded depending on the material they will pierce through. Using the wrong needle can leave holes in your project, and cause needles to break.
11. Needle Clamp Screw
The needle clamp screw is what holds the needle in place on the machine. Turn it to loosen or tighten the clamp, and the needle will hold or release. Turning the screw is how you change out your needle.
12. Throat Plate
The throat plate or needle plate is the metal plate under the sewing needle. It is often marked with lines and numbers to help you measure your seams and keep them straight while sewing.
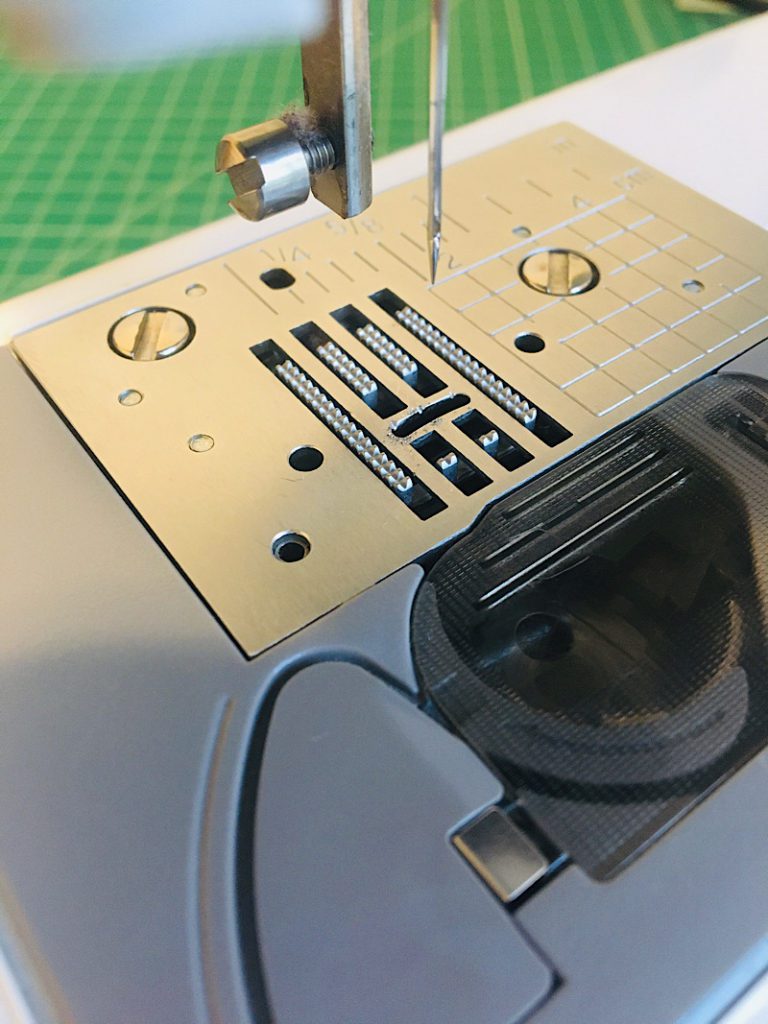
The throat plate can be removed to access the feed dogs below.
13. Feed Dogs
Feed dogs are toothed metal bars that grab and feed the fabric through the machine.
You can read more about what feed dogs are, including why they are called feed dogs and how to troubleshoot problems in my Feed Dog Guide.
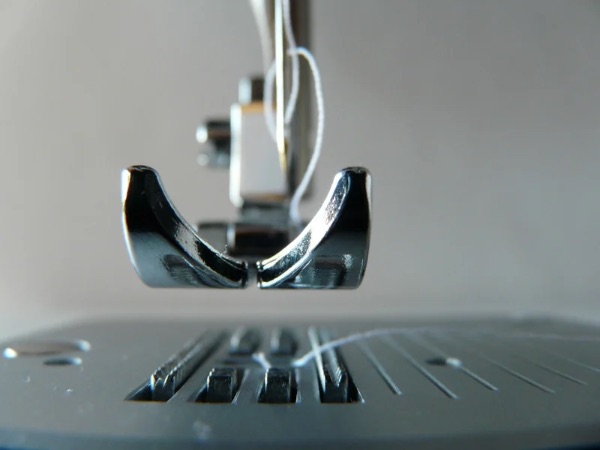
14. Presser Foot
The presser foot is used to apply pressure to the fabric as you sew. This helps the feed dogs to be able to consistently grip the fabric.
Different presser feet are used for different stitches. For example, when sewing a buttonhole a specialty buttonhole foot is used to make a perfectly sized hole.
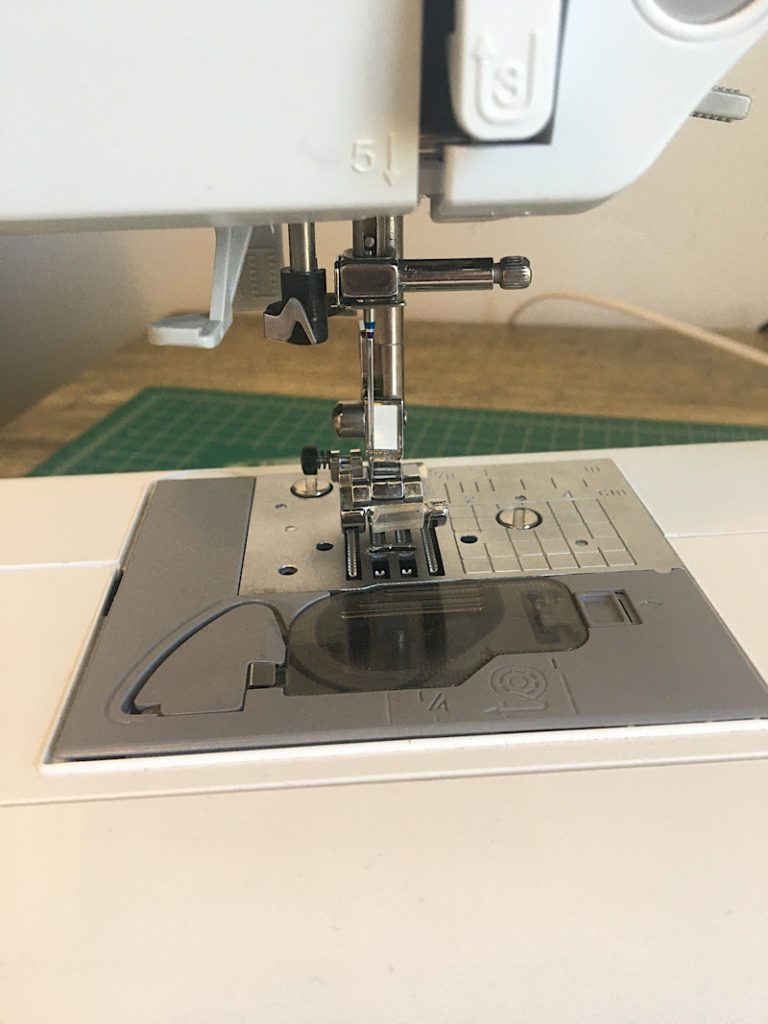
15. Presser Foot Lever
The presser foot lever is usually located on the right side of the needle housing. It holds the presser foot in place. Push the lever to release the presser foot and replace it with another.
16. Bobbin Cover Plate
The plastic cover plate can easily open to access the bobbin and bobbin case. This is located near the needle plate or on the lower front of your machine, depending on the model.
17. Bobbin and Bobbin Case
The bobbin is the tiny spool used to wind the lower thread. Some bobbins are placed in a bobbin case before being set into the machine, and some bobbin cases are built into the machine itself.
Depending on your machine, your bobbin may be a quick set type that allows you to start sewing wthout pulling up the lower thread.
18. Thread Cutter
On the left side of many sewing machines is a thread cutter. This tiny sharp blade allows you to quickly wrap your thread over it and cut it short, saving you the hassle of grabbing your scissors every time you need to trim your threads.
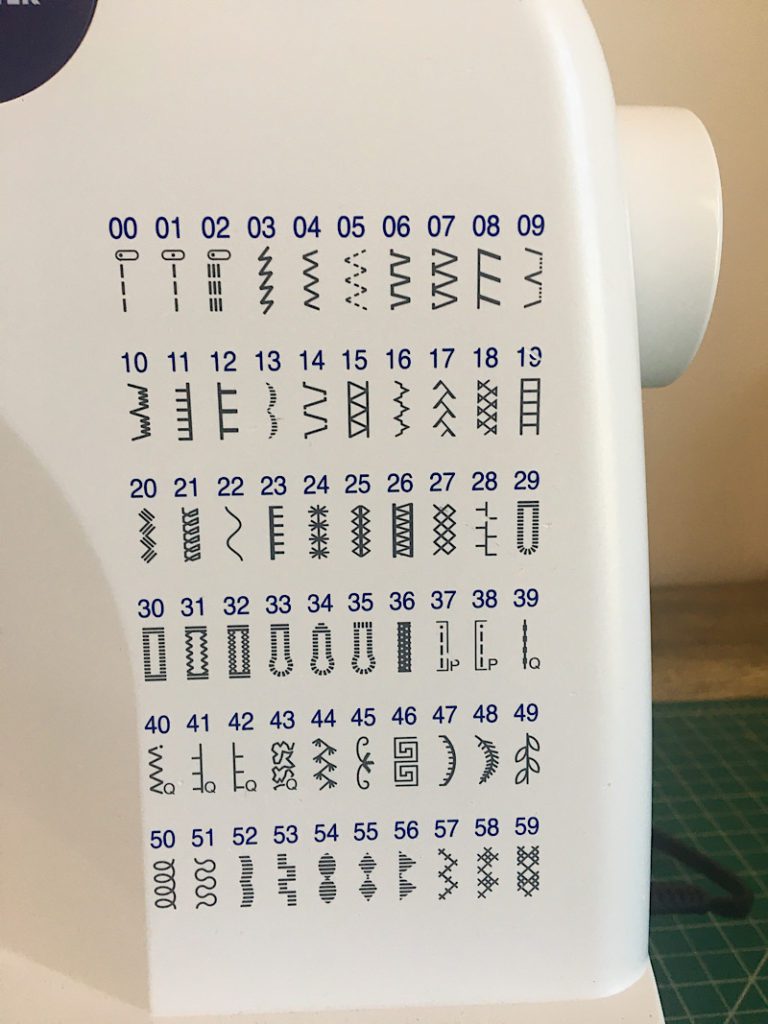
19. Stitch Selection Button
Use the stitch selection buttons to choose which stitch you want to sew with.
Most sewing machines have a handy chart of the stitch options printed right onto the sewing machine.
20. Stitch length and width buttons
Use the stitch length and width buttons to adjust your stitches to be shorter, longer, or wider or thinner.
The stitch size you need will depend on the fabric you are using as well as the technique or look you are trying to achieve.
21. Reverse Stitch Button
The reverse button (also called the backstitch button) sews backwards, which helps lock stitches in place so they don’t unravel.
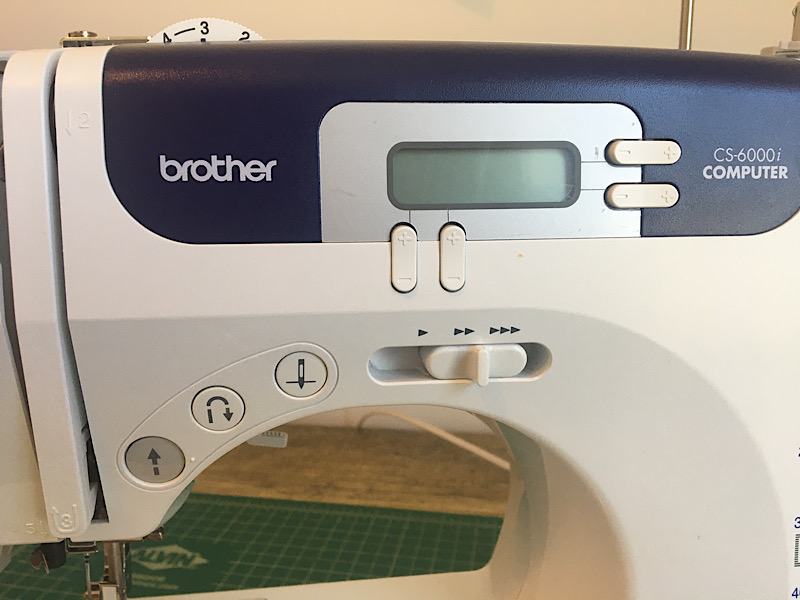
On many machines you hold down the reverse button for as long as you want to sew in reverse. Some machines require that you click it once, then click it again to stop sewing in reverse.
22. Sewing Speed controller
Some sewing machines are equipped with a sewing speed controller which adjusts how fast the maximum speed of the machine will be when you press the foot pedal.
23. Feed Dog Position Lever
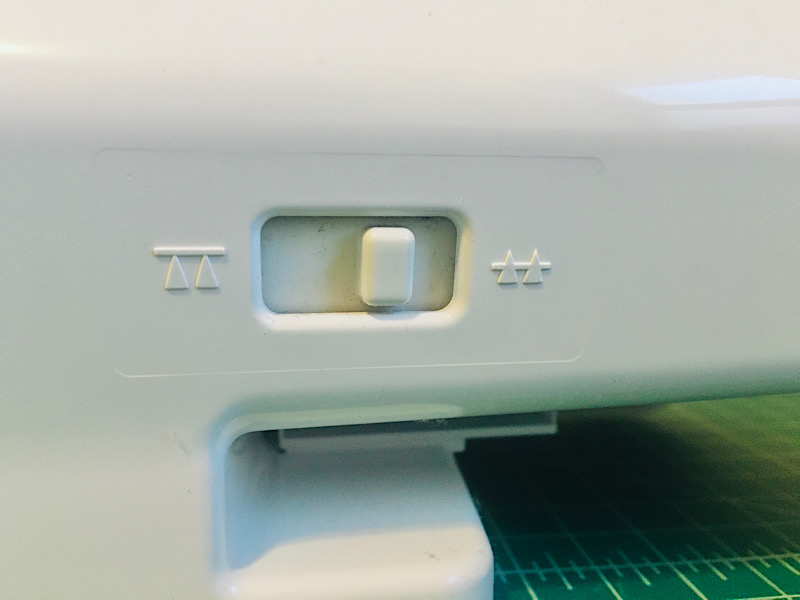
Located on the back of many sewing machines, the feed dog position lever is a switch that either raises or drops the feed dogs.
Raise the feed dogs to engage them so they can pull your fabric through. Drop them to disengage the feed dogs for free motion sewing and other uses.
24. Foot Controller
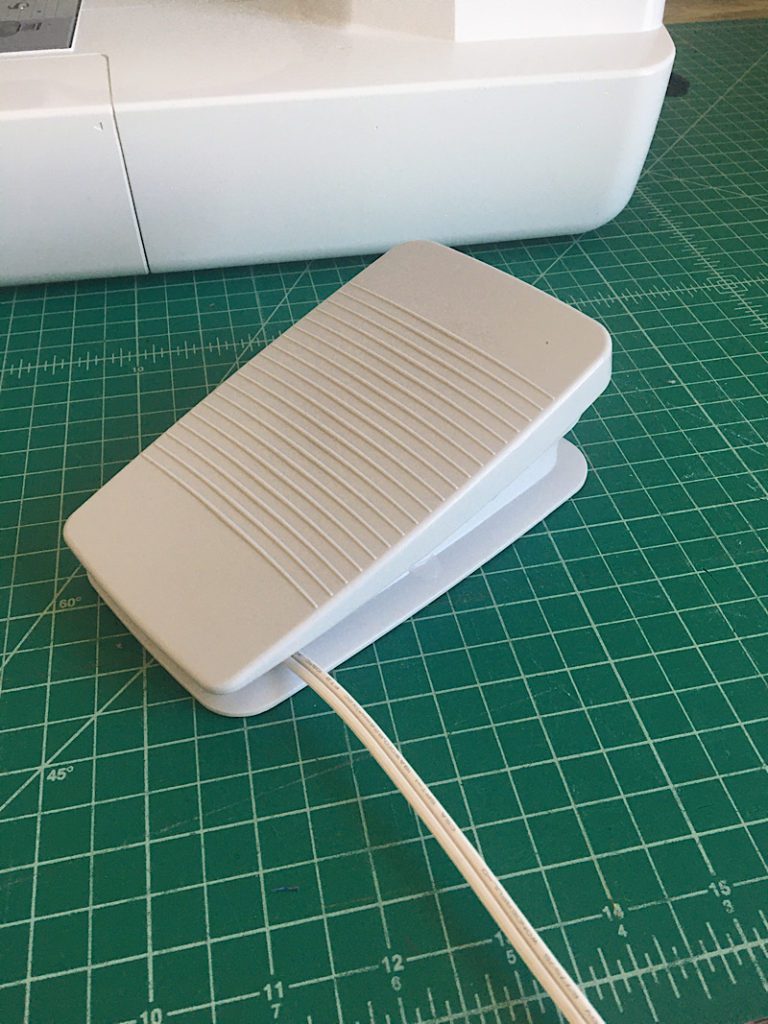
The foot controller or foot pedal plugs into the sewing machine, and is placed on the floor by your feet. Push on the pedal to sew.
The foot pedal controls the speed of stitches, press harder and you will sew faster.
25. Removeable Extension table
Most home sewing machines have a removeable “table” on the bed of the machine in front of the needle plate.
This extension table slides off towards the left, and allows you to easily maneuver the fabric around the machine to sew things such as arm cuffs, pant legs, and other tight spaces.
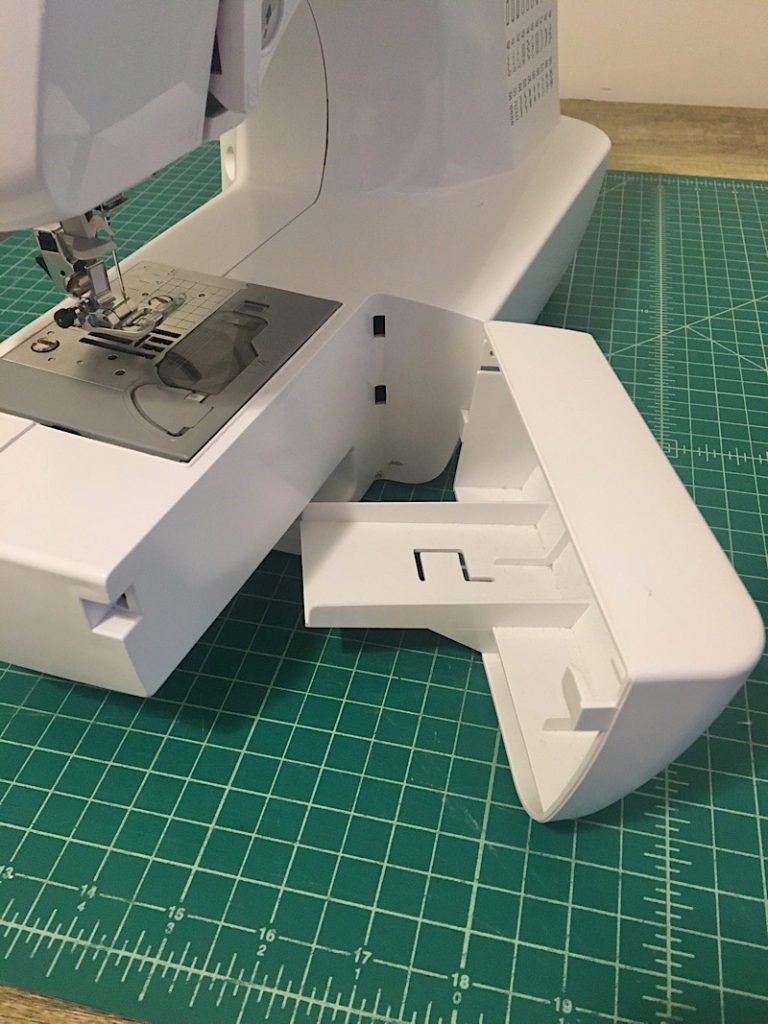
Oftentimes the extension table is hollow and can double as an extra storage space.
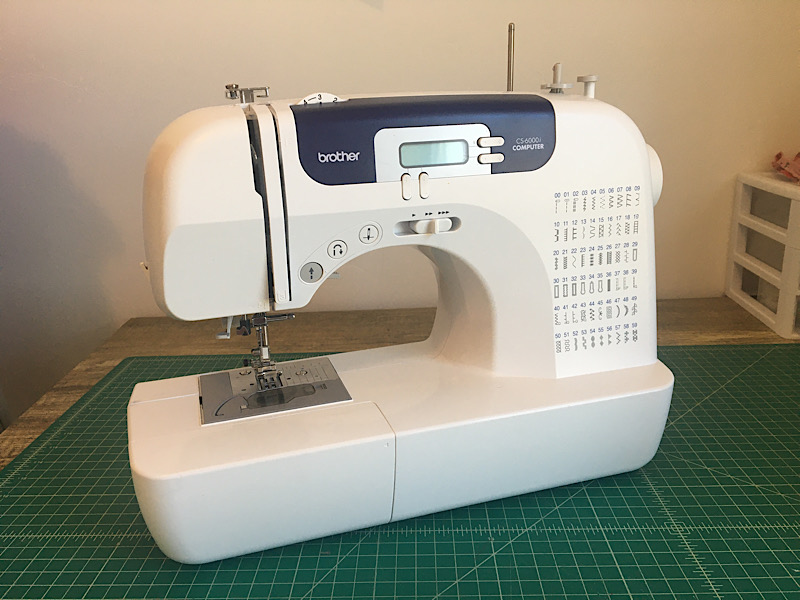
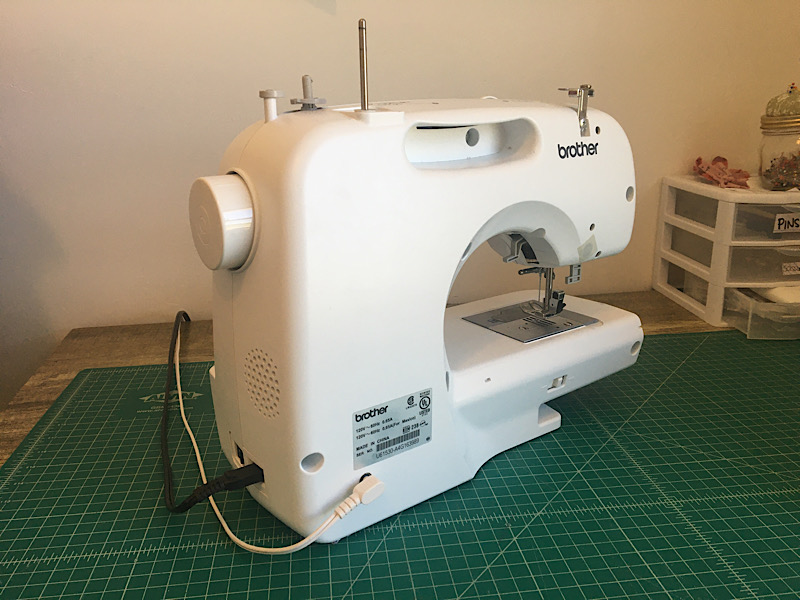
I hope this post was helpful! Although I use a brother cs6000i machine in my photos, most of the parts in the diagram are the same or similar to other machines!
I also made a printable poster sized version of this chart, which you can download for free!
What other sewing machine parts are you looking for? Make sure you download your PDF Printable by entering your email below!
Hello very cool web site!!.. Beautiful .. Wonderful .
Thank you!