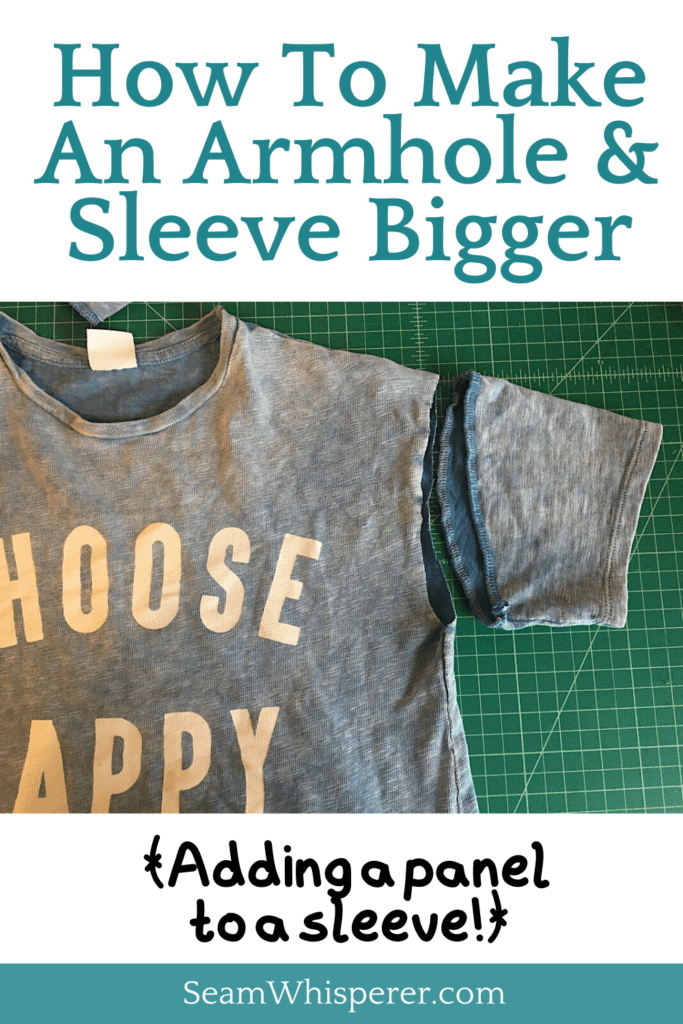
Do you have a shirt that fits in the torso but not in the armhole? This tutorial will show you how to lower the armscye to make the armhole and sleeve bigger!
I found this cute t shirt at my friend’s garage sale, but when I took it home and tried it on the armholes and sleeves were way too small! It was so strange, the proportions of the shirt didn’t seem right at all…
Luckily I know how to sew! It fits great now!
This tutorial is part of my “shirt alterations” series in which I teach you how to tailor different parts of shirts to make them fit better! Check out the other posts in the series here!
- How To Lower A T Shirt Neckline
- How To Tighten Sweatshirt Cuffs
- How To Add A Diamond Underarm Gusset
- How To Sew a Triangle Gusset To A Sleeve
This post may contain affiliate links. Read the full disclosure here.
About This Alteration
This alteration is suitable for advanced beginners. I use a serger to sew my shirt, but you can simply overlock the edges or leave them unfinished if your shirt is knit. (Knits don’t fray.)
Lowering the armhole on your shirt involves cutting off material from your shirt, so make sure to go slow so you don’t ruin your shirt!
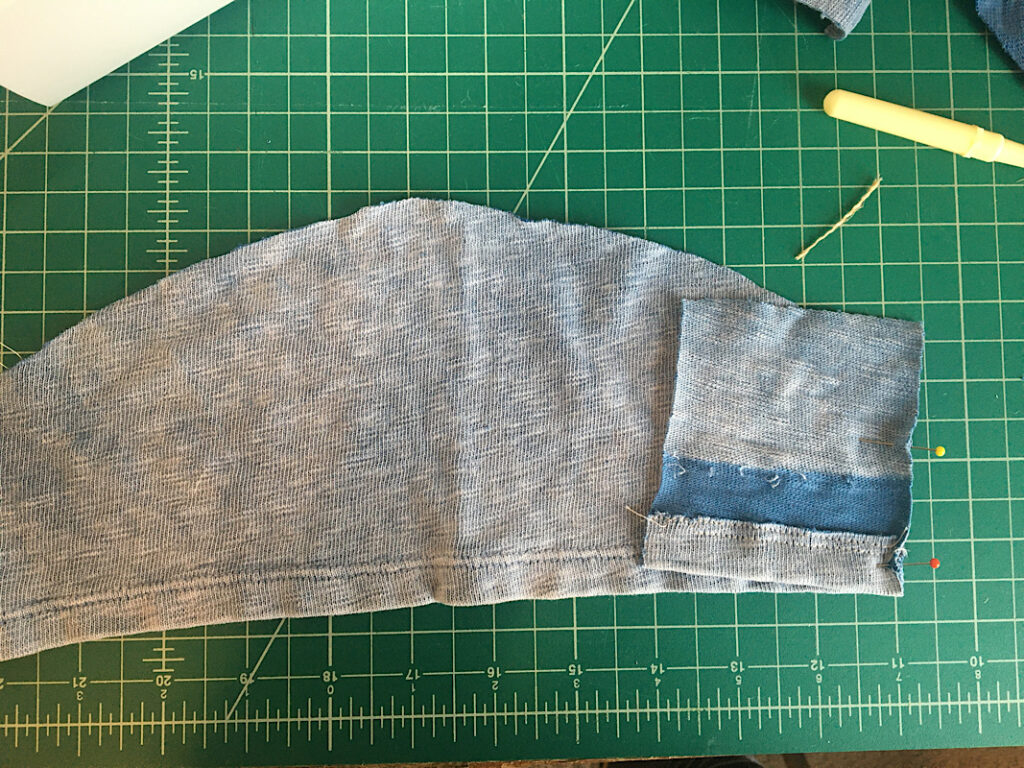
To make your sleeve bigger, you will need to insert additional fabric. I used excess fabric from when I hemmed my shirt so it matched, however you can also use a contrasting fabric for an interesting look.
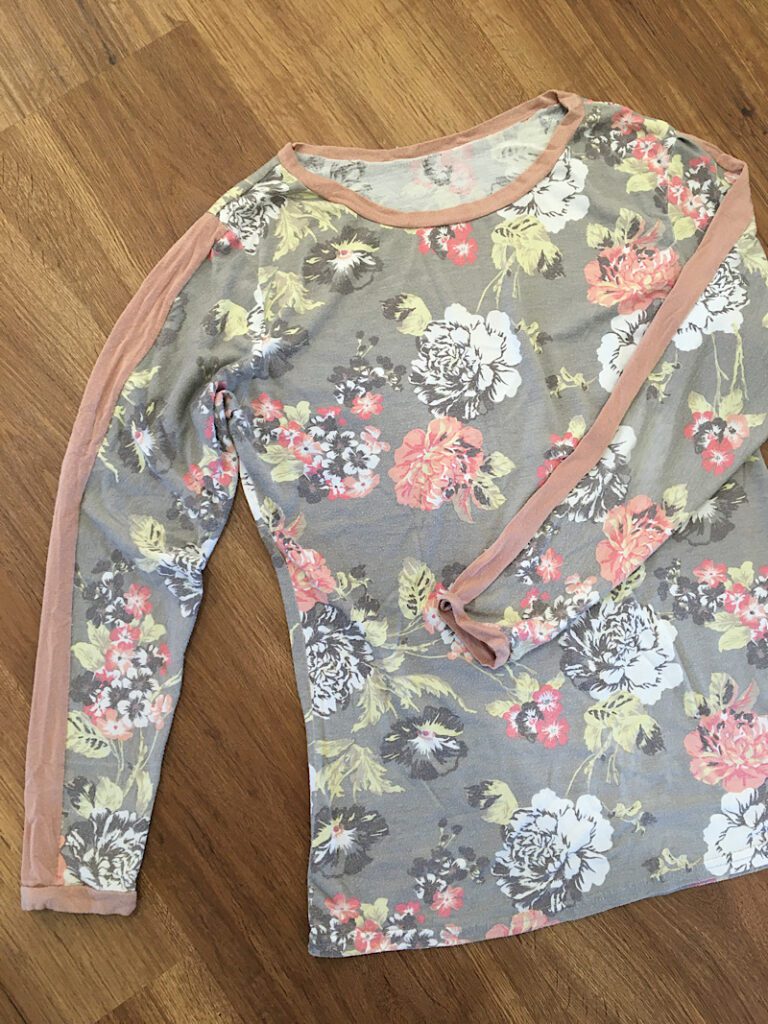
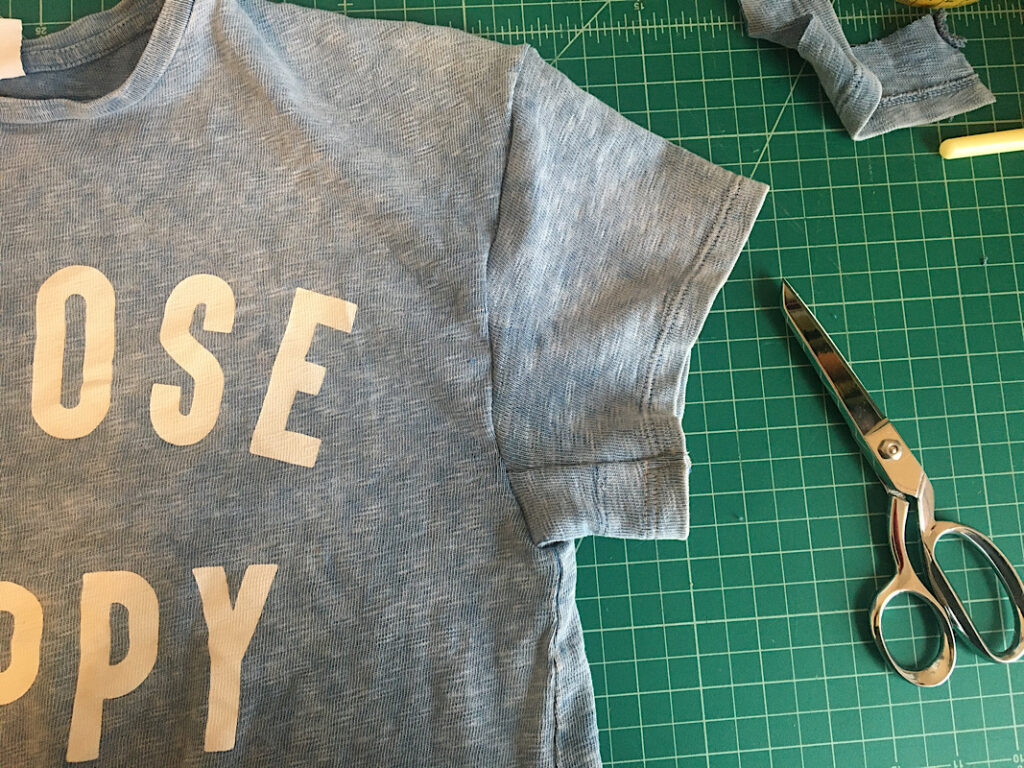
You can add the fabric panel to the top of the sleeve, like I did on the grey shirt in the image below, or on the bottom of the sleeve like I did in this tutorial. The method is the same, but instead of cutting the slit on the bottom of the sleeve, you would of course cut it on the top.
Use a 3/8ths inch seam allowance.
Supplies Needed
- Sewing Machine
- Sewing Pins
- Fabric Scissors
- Measuring Tape
Materials Needed
- Shirt to alter
- Fabric scraps to make sleeve panels
- Matching Thread
How to Make Armhole And Sleeve Bigger
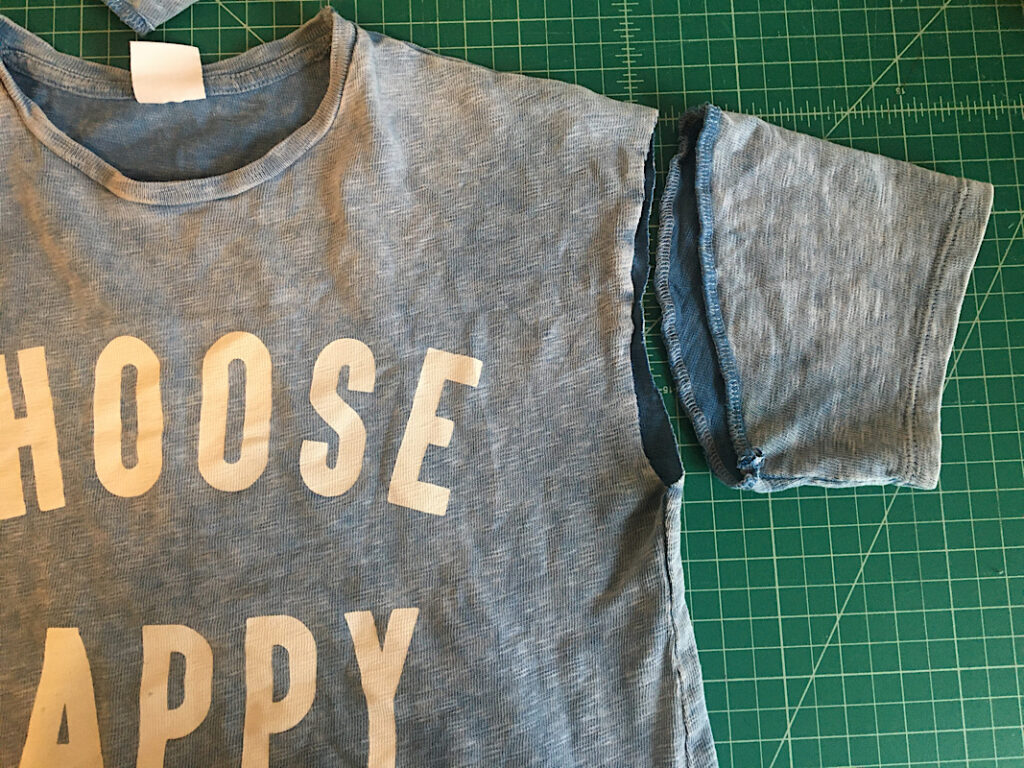
Step 1. Remove The Sleeves
To remove your sleeves from the shirt, you either need to carefully unpick the seam with a seam ripper, or cut very close to the seam to cut it off.
Cutting it off is much faster, but you will lose the seam allowance, as well as a little bit of length from the shoulder and the sleeve. If you don’t want to lose this bit of length, then unpick it. If you don’t care about losing about 3/4ths an inch of length, you can cut it off.
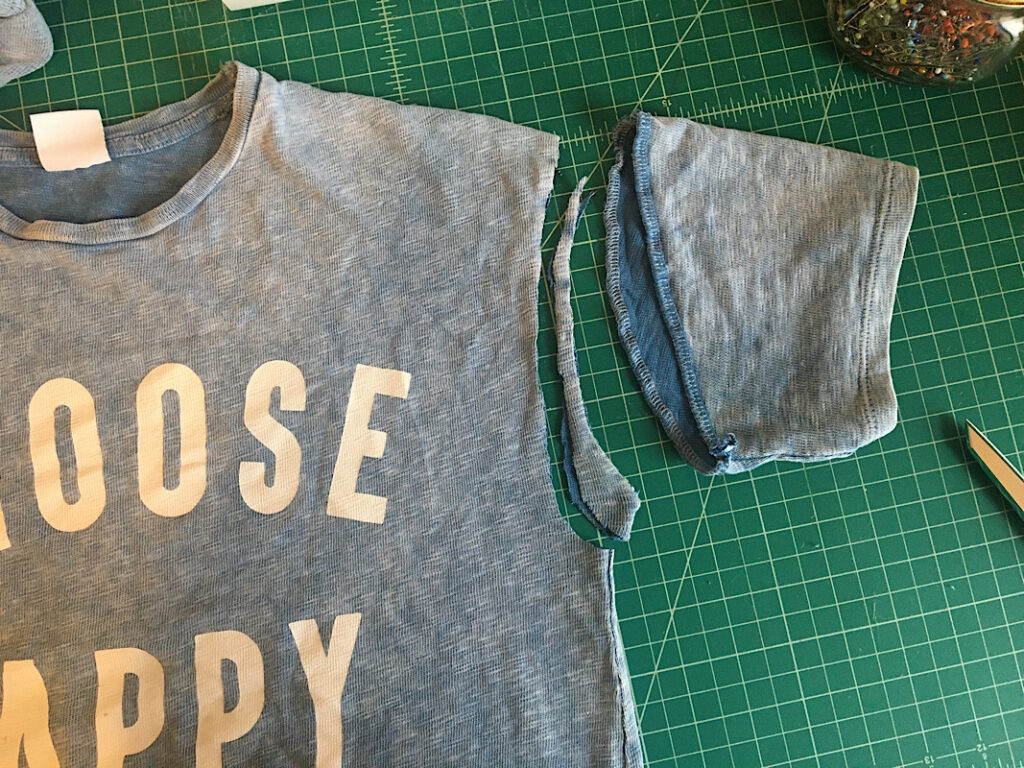
Step 2. Determine How Much You Will Lower Sleeve
After removing both sleeves, try on the shirt and determine how much lower you want the armhole to be.
Make a small mark or measure down the side seam how low you want the sleeve to end up. Mine needed to be lowered about an inch.
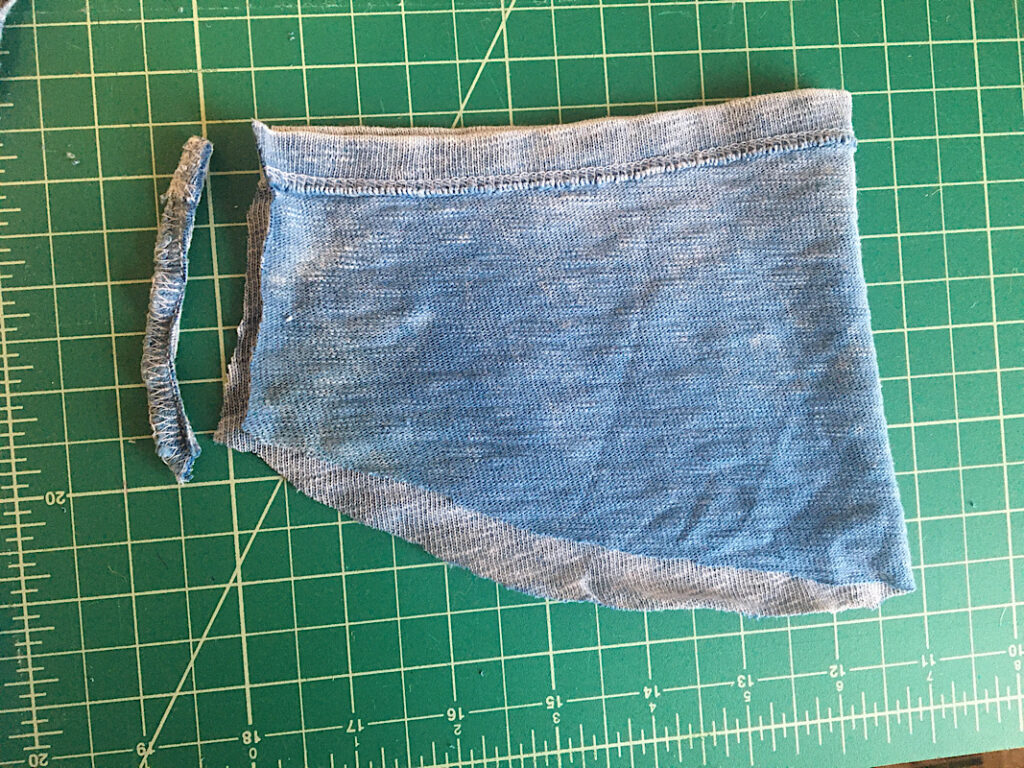
Take off the shirt, and lay it flat on the table. You will cut a curved line from the new lower measurement on the side seam, and gradually ease it into the original shoulder cut line.
Tapering the cut into the original shoulder line is important. If you cut off too much at the shoulder, it will look weird.
You can use the cut off piece to measure the other side, or fold the shirt in half and use the cut side to measure the other side. You want to make sure they are both the same.
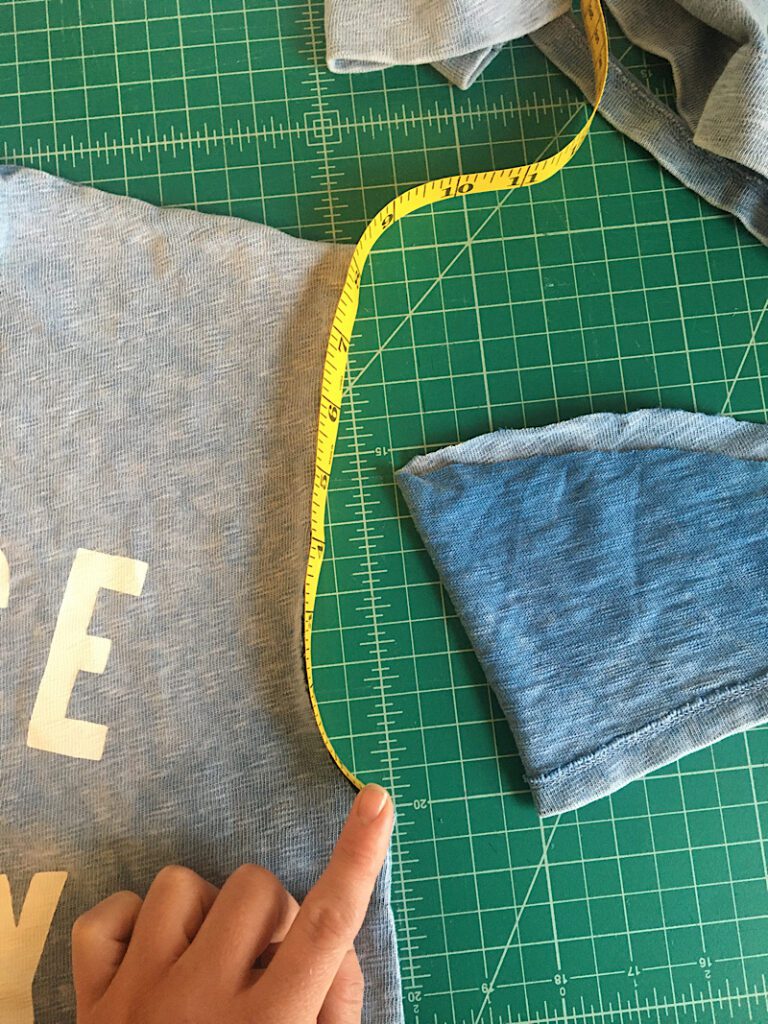
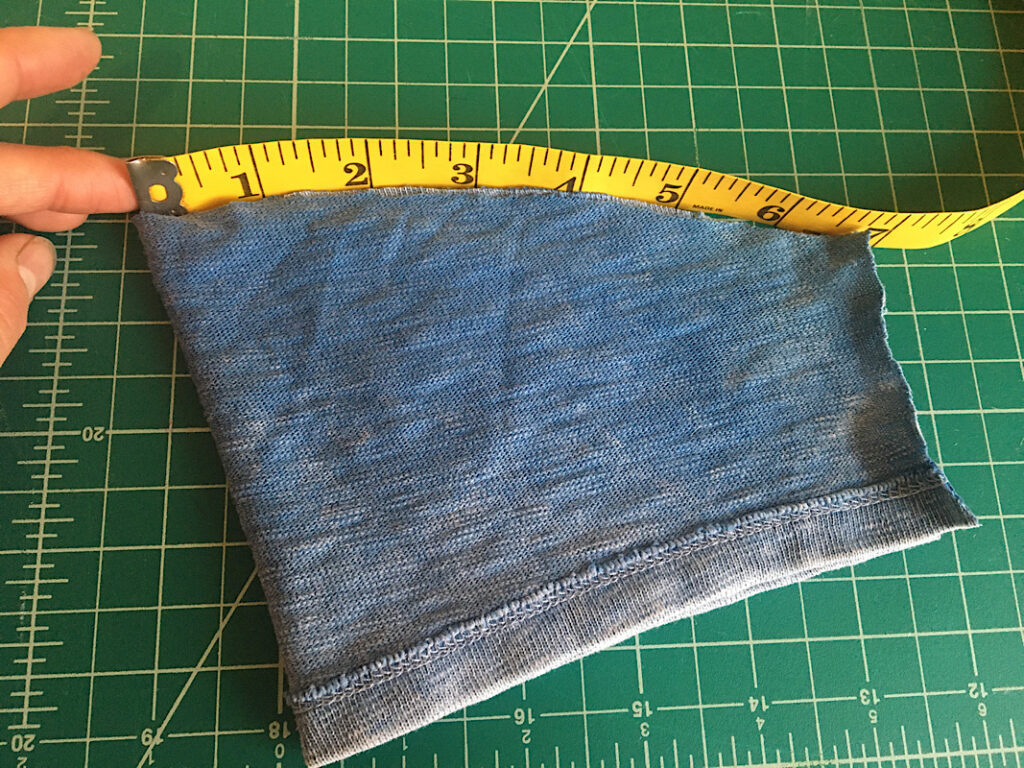
Step 3. Measure The New Armhole
Use a soft measuring tape to measure the new curve of the armhole while it is laying flat. (You don’t need to measure it’s whole circumference, but you can if you want.)
Take note of this measurement. Mine was 8.5 Inches.
Step 4. Measure The Sleeve
Cut off the seam allowance around the circumference of your sleeve if you haven’t already (or unpick it if you wish.)
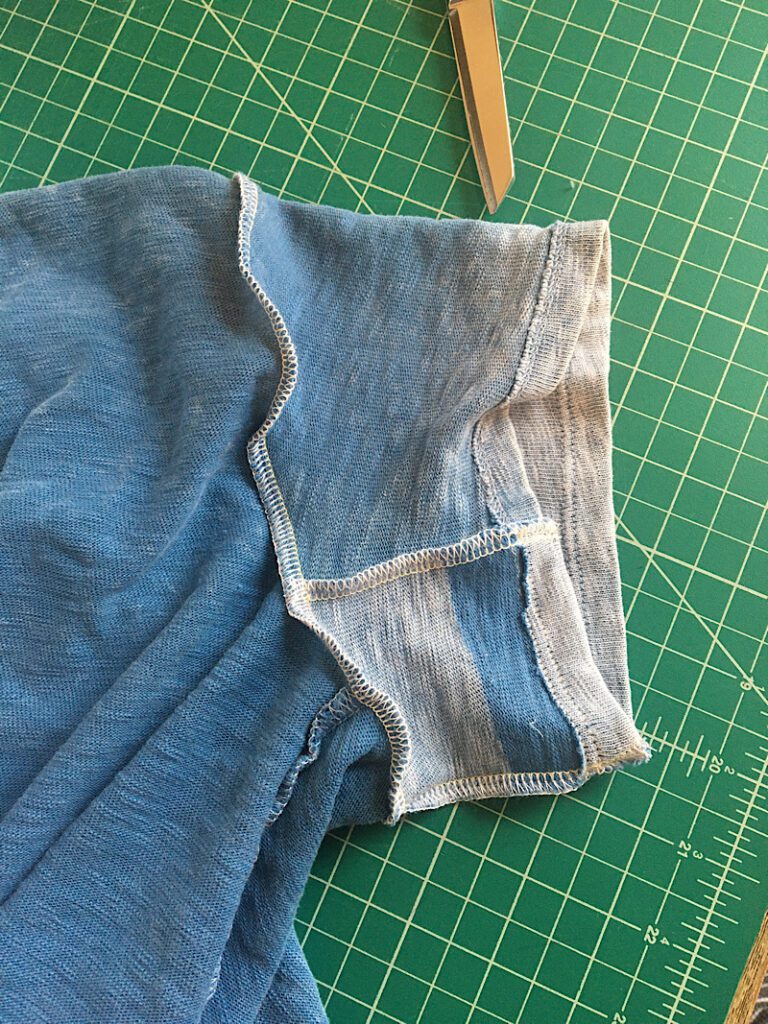
Then, if you are going to add the panel to the bottom of the sleeve, unpick or cut off the side seam allowance.
OR, if you are going to add the panel to the TOP of the sleeve, leave the side seam intact and cut a new slit on the fold of the sleeve all the way through.
Measure the curve of your sleeve, then subtract .75 inch for the seam allowance. (3/8ths + 3/8ths seam allowance on both sides = 3/4 or .75 of an inch.)
Mine was 6.5 inches, subtract .75 to equal 5.75 inches.
Next, determine how wide the panel needs to be to make the sleeve as wide as the new armhole, and add .75 inches for the seam allowance of the panel.
Lastly, add 1 inch. Sleeves need about an inch or extra ease to set into the armhole correctly.
I needed my sleeve to be 9.5 inches around to for into the 8.5 inch hole, so I needed to cut a 3.75 inch wide panel.
Step 5. Make The Sleeve Panel
Using a scrap of fabric, cut a panel that is the width you calculated in the last step, and a few inches longer than the slit where you will insert it.
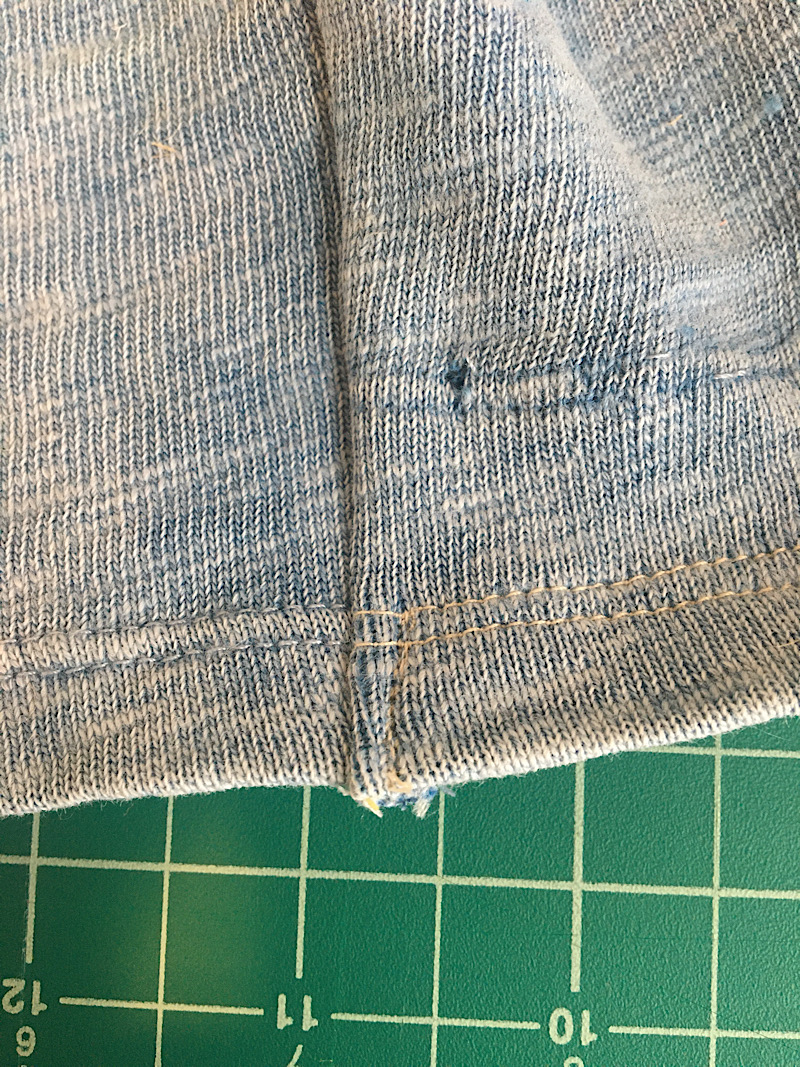
Pre hem the panel to match the hem of the sleeve as best as you can.
The original sleeve on my shirt was a coverstitched hem with two lines. I don’t have a coverstitch machine so I just sewed two straight lines to try to make it match.
Once your sleeve panel is hemmed, pin it to the sleeve with right sides together.
Sew down the pinned edge and finish the seam if you wish.
Then, pin the other side of the panel to the other side of the sleeve, and sew it as well.
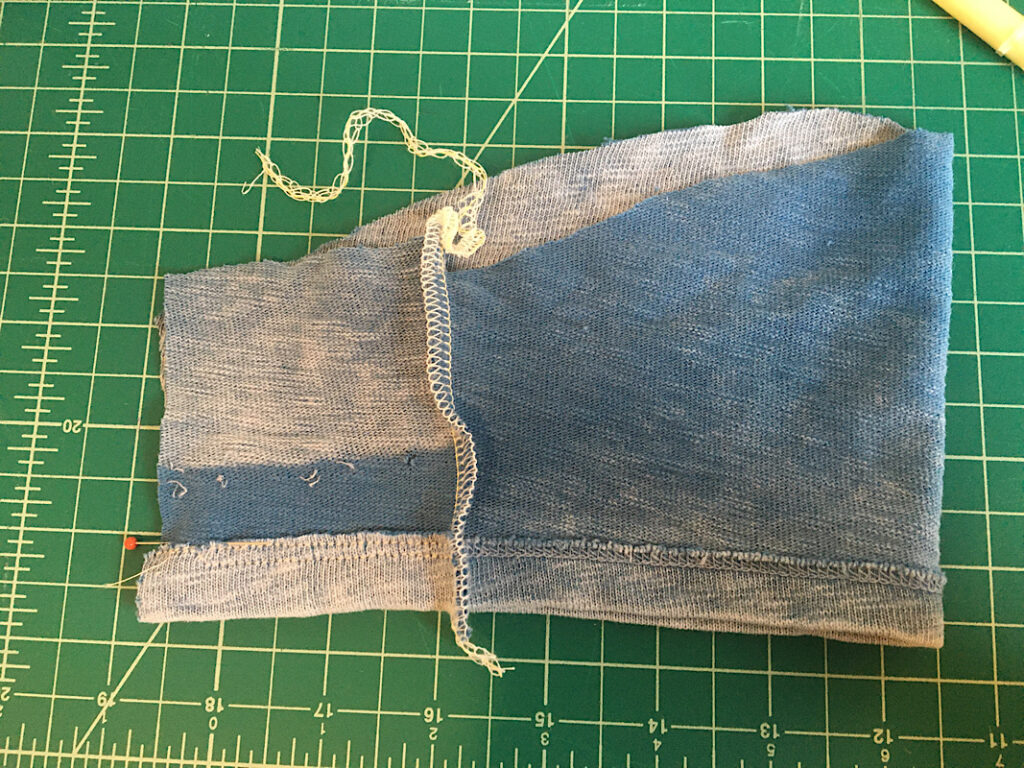
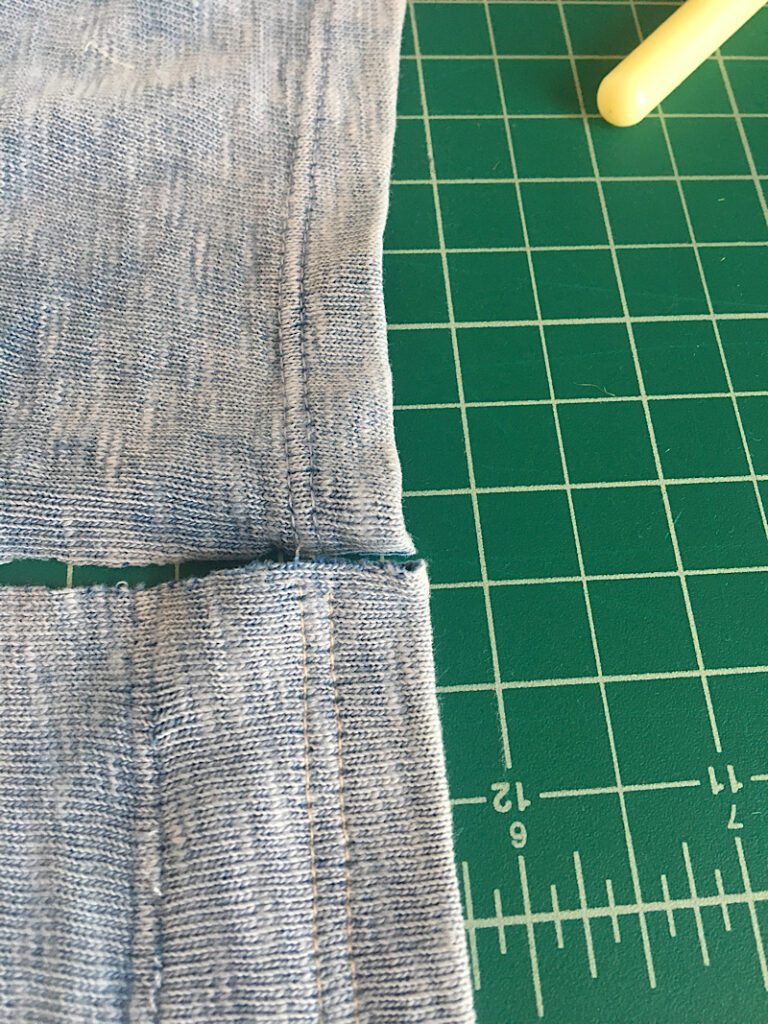
The sleeve panel has now been inserted. Turn the sleeve right side out, and trim away any excess fabric from the panel if you need to.
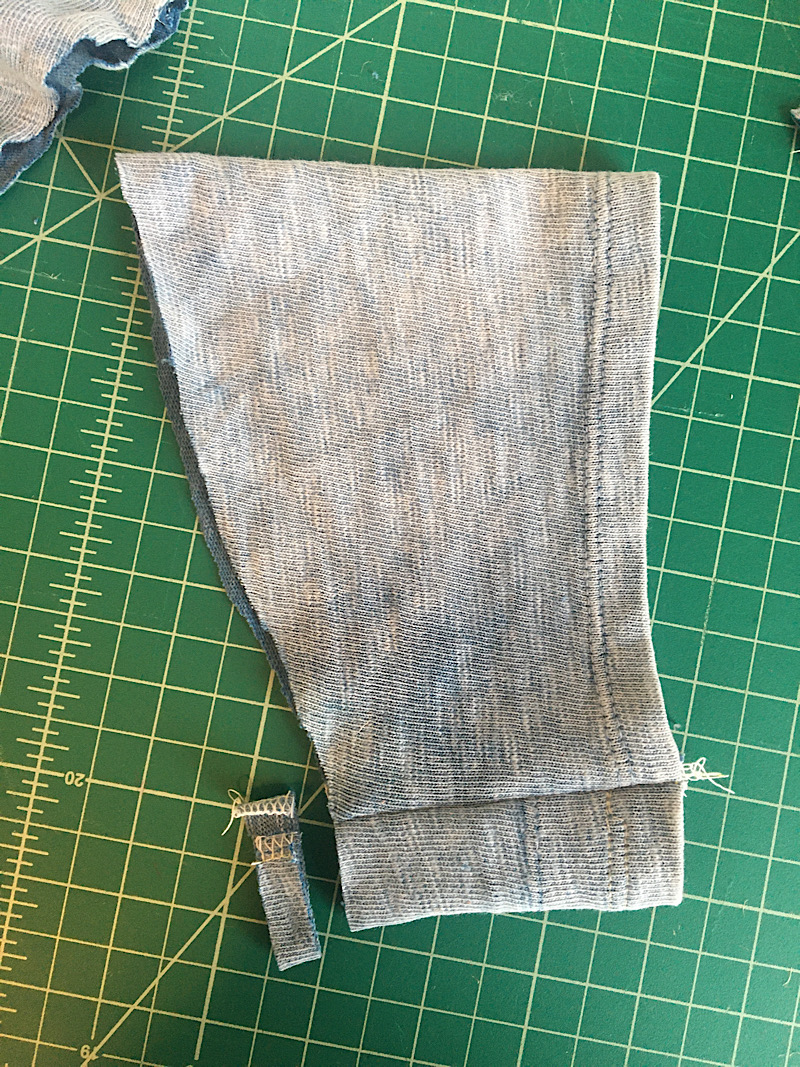
You will notice that the two seams on the panel kind of stick out. If you think it will bother you, you can sew a half inch long stitch near the hem right through the center of the seams to lay them flat.
Step 6. Insert The Sleeve Into The New Armhole
Turn the shirt inside out, and leave the sleeve right side out. Insert the sleeve into the new armhole and line up the top fold of the sleeve with the sounder seam of the shirt.
Pin it in place.
Then sew around the hole to attach the sleeve to the shirt. You can also finished the edge. I serged mine.
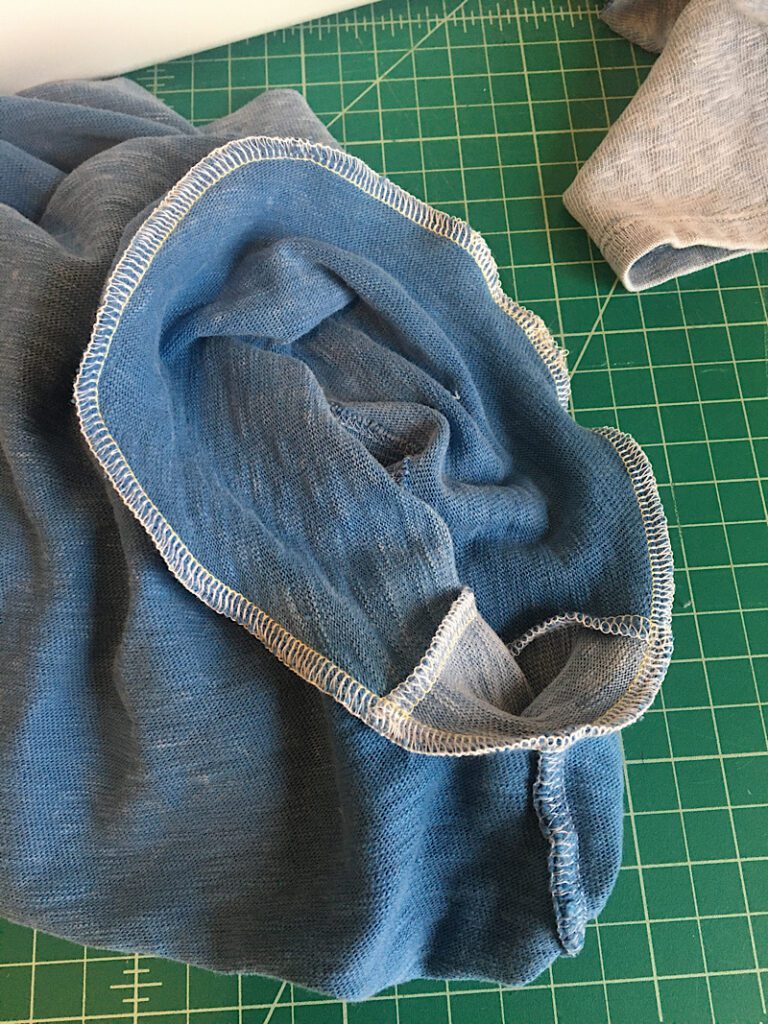
Pull the sleeve out to see what it looks like now….
Looks awesome!
Repeat all these steps with the other sleeve, and you are done!
Turn the shirt inside out and try it on. Mine fits SO much better now, in fact I am wearing it as I type this! Yay!
This completes the t shirt transformation!
Conclusion
I hope this tutorial helped you make your armhole and sleeve bigger! Lowering the armscye on a finished garment is not too hard, and the panel can even add an interesting touch if you use a contrasting fabric. Or you can hide the seam under your arm like I did with this t shirt.
If this tutorial isn’t quite what you are looking for, make sure to read my post about 5 different methods to fix sleeves!
Pin this post if it was helpful to you, and sign up for my email list to stay connected!