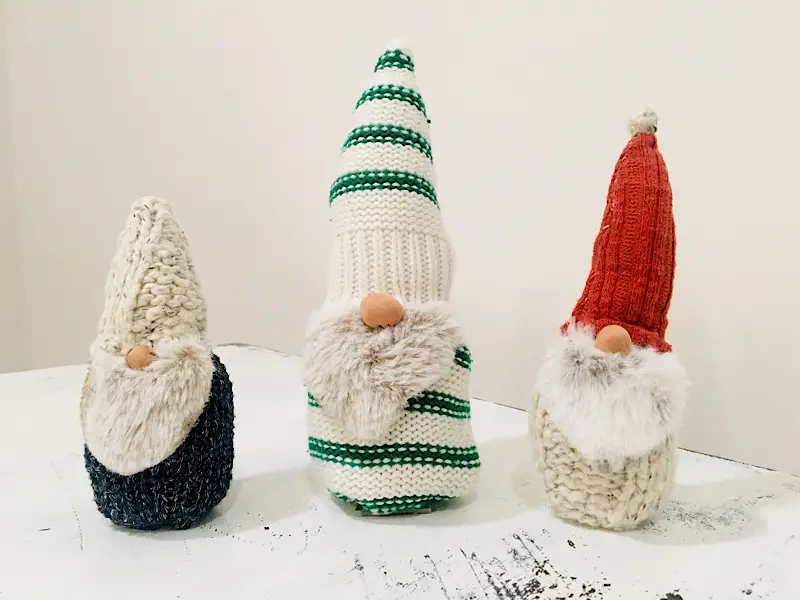
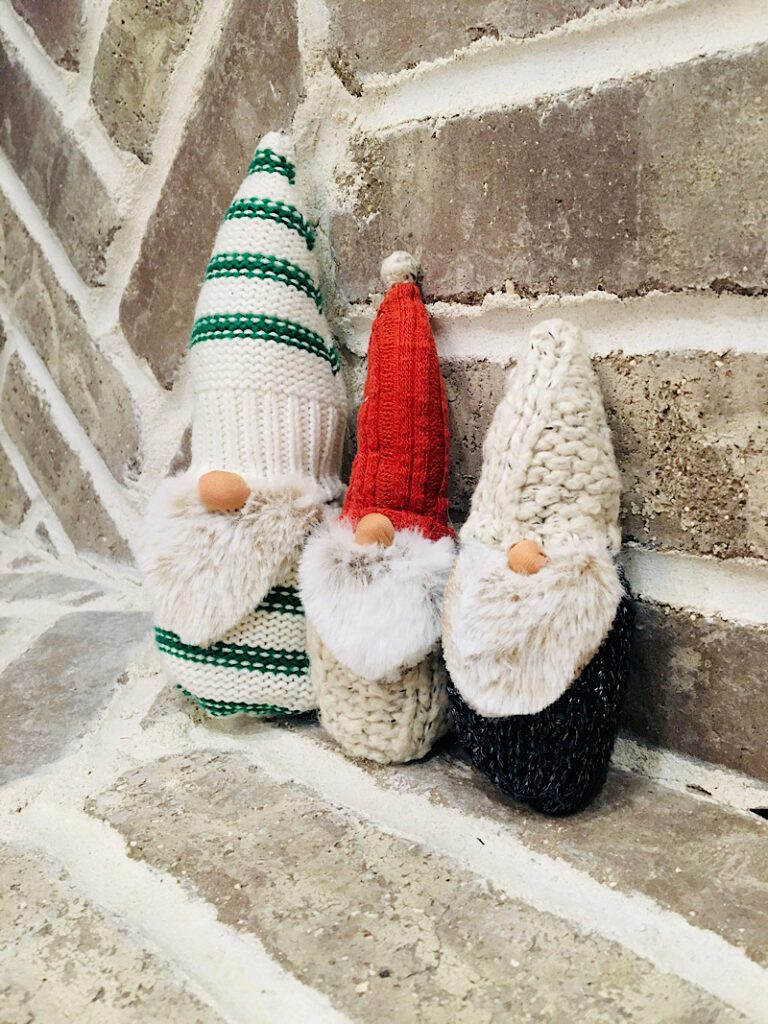
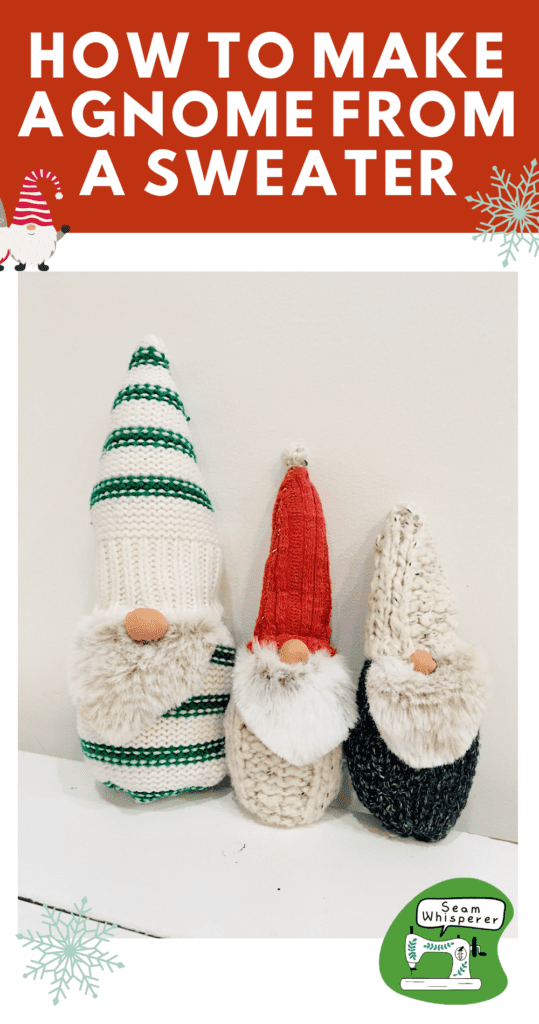
Sweaters are the perfect material to make Christmas gnomes from! Each sweater can fit many gnomes, making this a great and easy project for gifts!
I’ve seen a lot of very cute Gnome crafts but none made from sweaters, and lucky me, I have lots of old sweaters!
I didn’t know Christmas gnomes could be so cute, but here I am sewing up a whole bunch!
My mother in law wants a few, so I guess I’m going to have to make another batch… Let me show you how!
This post may contain affiliate links. Read the full disclosure here.
About This Tutorial
This is a beginners tutorial that can be done entirely by hand or you can also use machine for some parts.
There are many ways to vary these gnomes. Here are a few ideas:
- You can make them with no arms or legs, for a minimalistic look
- Make them with two arms
- Add arms as well as long dangling legs so they can “sit” on a shelf.
- Use felt to cut out a beard shape of you don’t have fur material
- Add a Pom Pom to the tip of the hat
- Make the hat droopy instead of sticking straight up
- Add some little eyes to the gnome
- Make the gnome into an ornament by adding some string!
I give measurements for the gnome I made but they can be made any size (as long as your sweater is big enough!)
I used one sweater sleeve to make one gnome in this project. But if you want to make a different colored hat then you will need two sweaters or a sweater with multiple colors.
Supplies Needed
- Hand Sewing Needle
- Sewing machine (optional)
- Fabric scissors
- Measuring tape
- Sewing Pins
Materials Needed
- Sweater
- Matching Thread
- Faux fur material or felt for the beard
- Flesh colored knit fabric for the nose (or can just cut a circle from felt)
- Fiber fill or Wool Stuffing (to stuff the body. you could also stuff it with grocery sacks or anything else that is stuffy!)
- Plastic poly beads (optional, adds weight to the gnome. You could just put a rock in the bottom!)
How to Make A Gnome From A Sweater
Step 1. Cut Out The Gnome’s Body
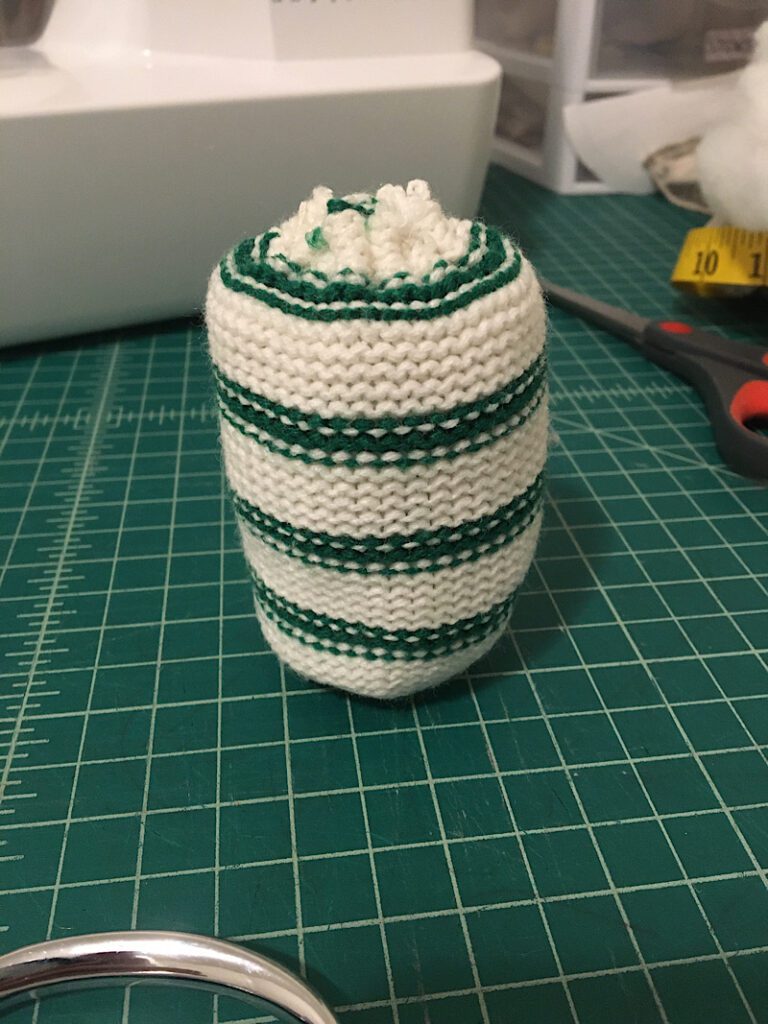
Cut out a rectangle piece of sweater about 4×6 inches in size for the gnomes body.
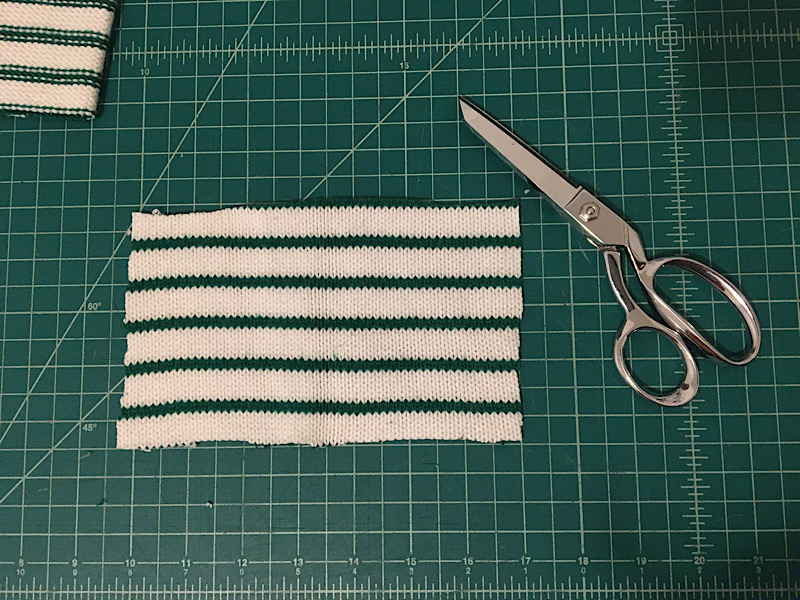
You can get creative with the placement of any designs on the sweater, but keep in mind that the top and bottom 1.5 inches or so will not be visible.
Step 2. Sew and Stuff The Gnome’s Body
Fold the rectangle sweater piece in half so the short sides line up, then sew down the side seam with about a 3/8ths inch seam allowance.
If you are hand sewing, a simple running stitch will do. (A running stitch goes up and down, up and down through the fabric.)
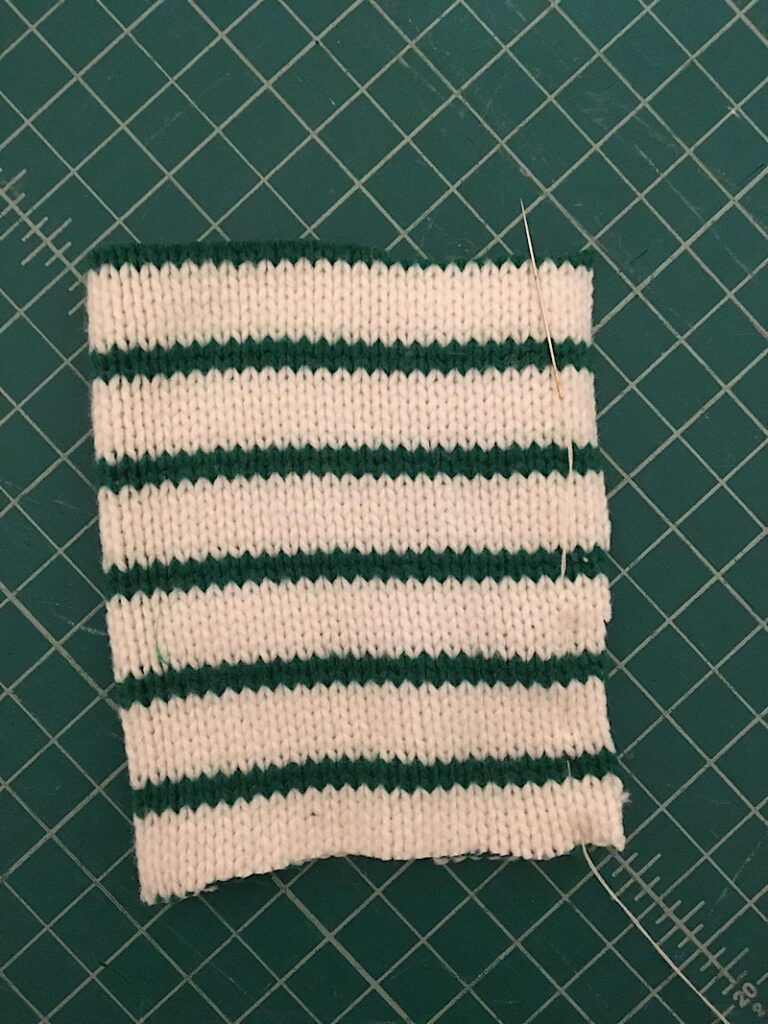
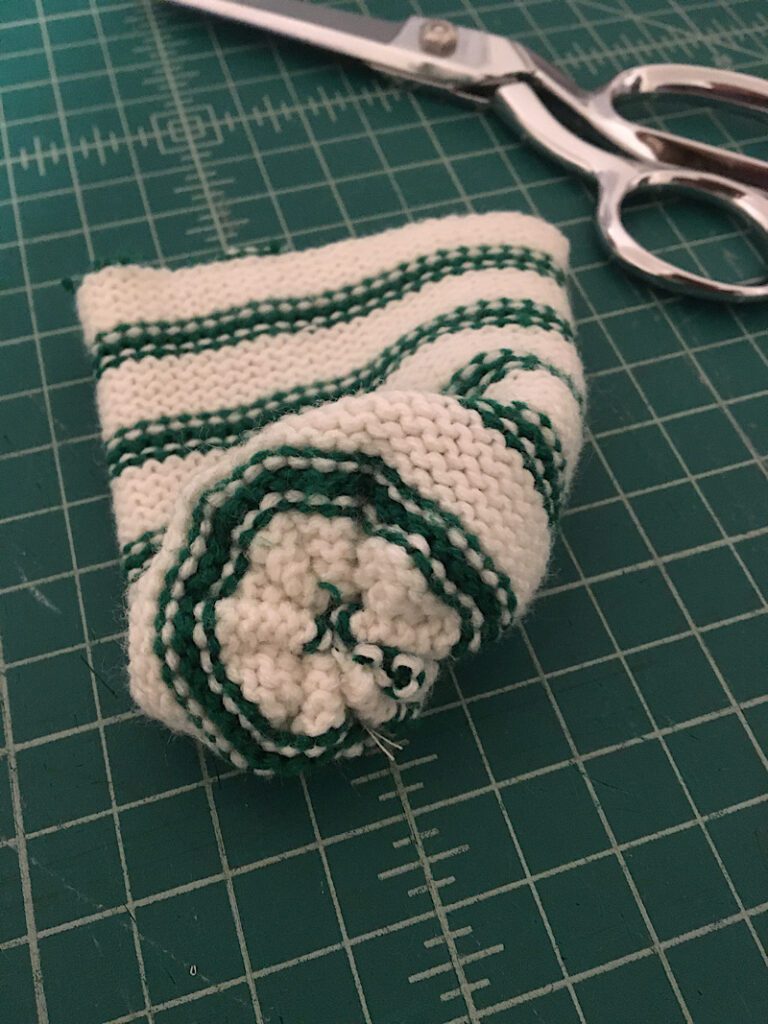
After sewing the side seam, your rectangle is now a cylinder shape.
Next sew a running baste stitch around the circumference of the bottom of the cylinder, and tighten it. Then tie the threads and knot them.
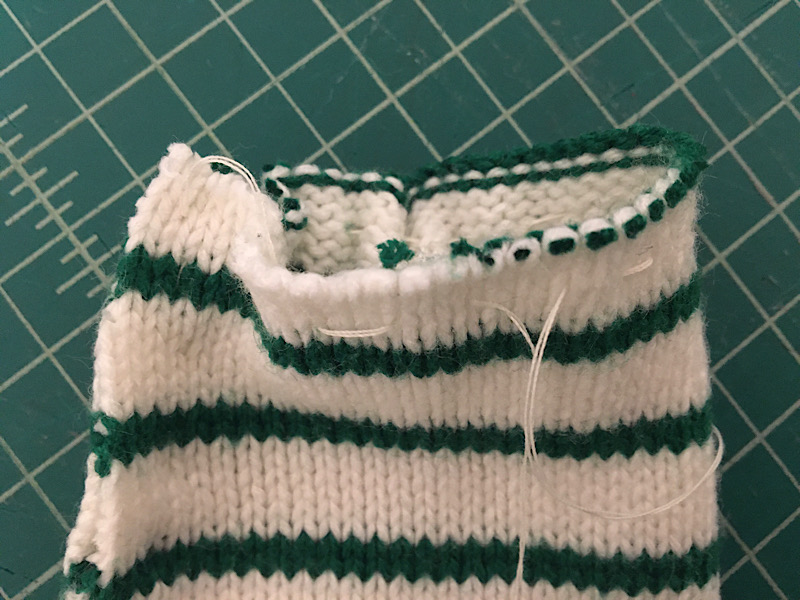
Turn it inside out.
Fill the body with whatever you are going to fill it with. Add a rock to the bottom to help it stand up better if you want.
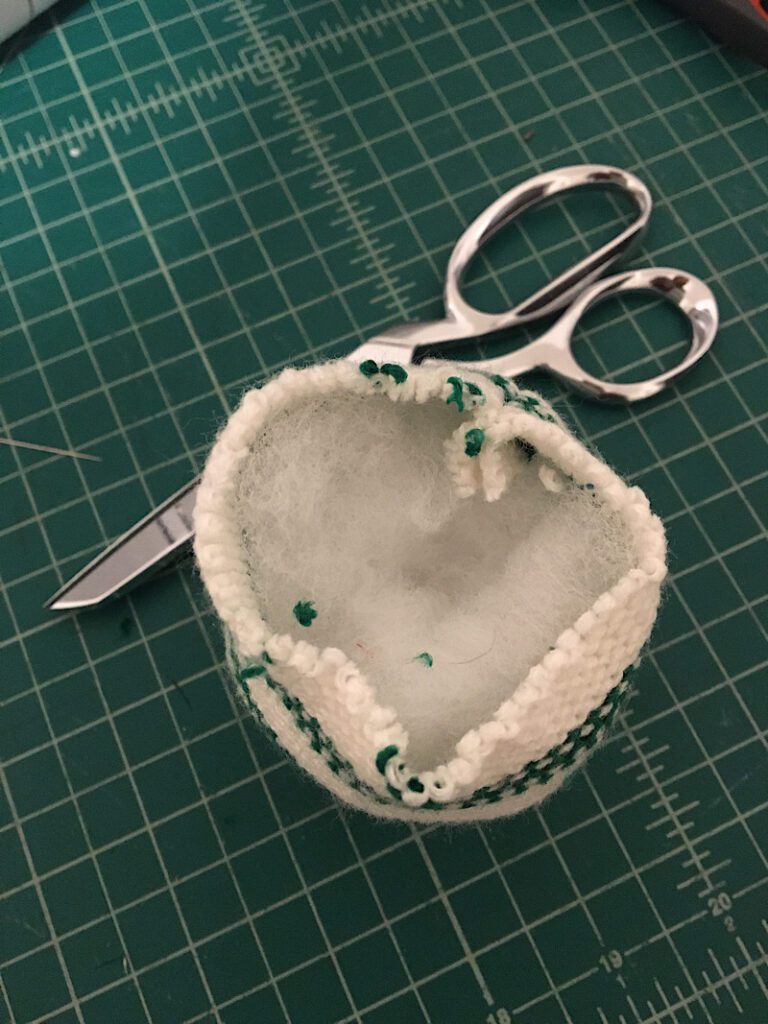
Once the body is stuffed, sew another running baste stitch along the top edge.
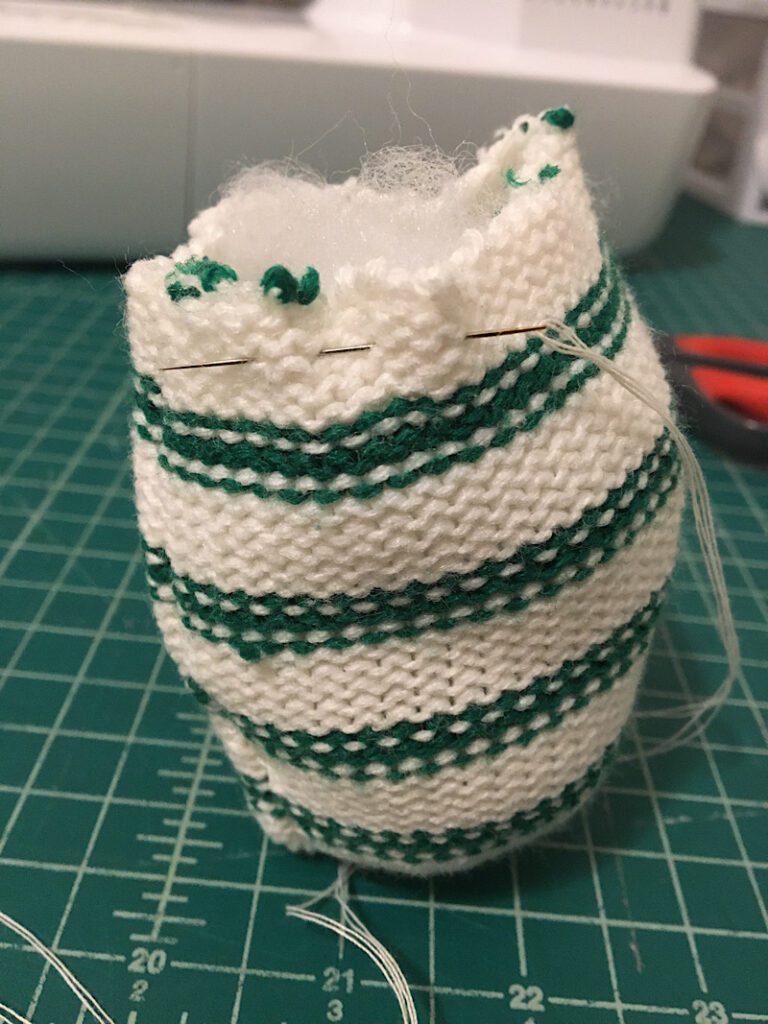
Then pull the threads right and tie it closed.
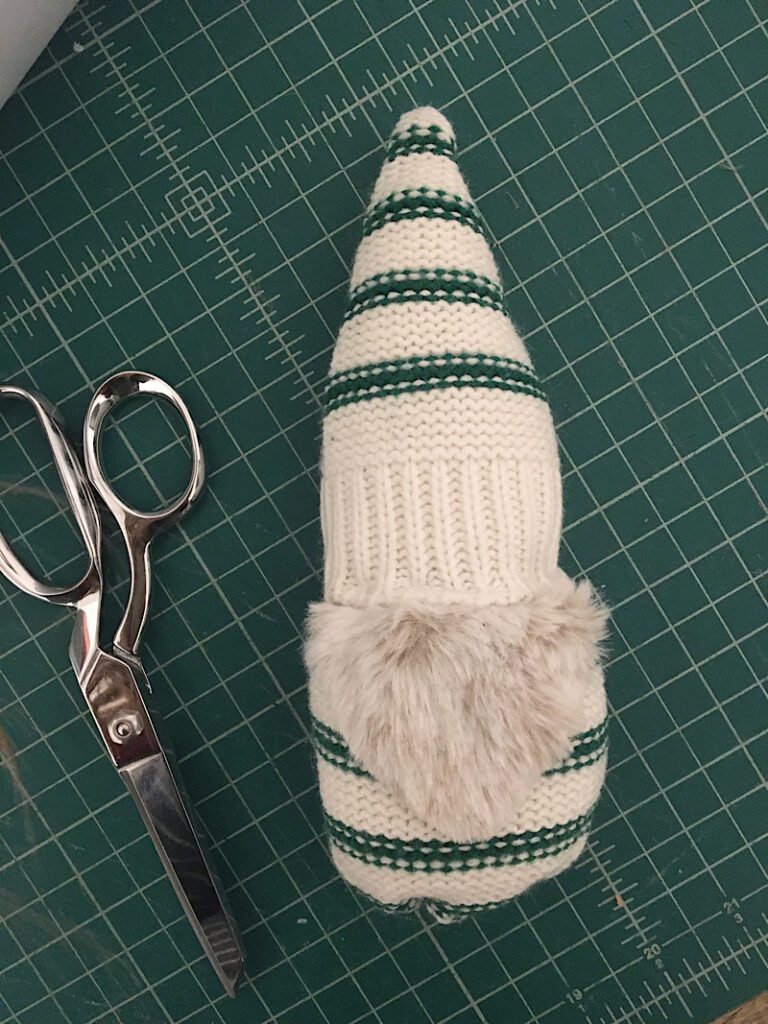
Step 3. Make the Gnome’s Beard
Observe which way your fur material brushes downwards, and make sure to cut the beard in the right direction.
I cut a rounded triangle piece of the fur material and held it up to the gnome to see if it was the right size, then cut it down a little smaller until it was right.
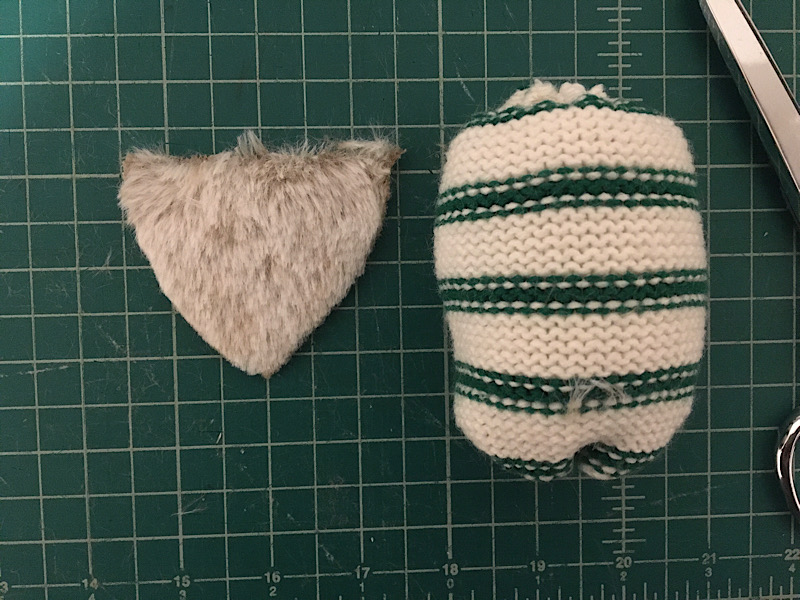
It ended up being about 3 inches wide and 2.5 inches tall.
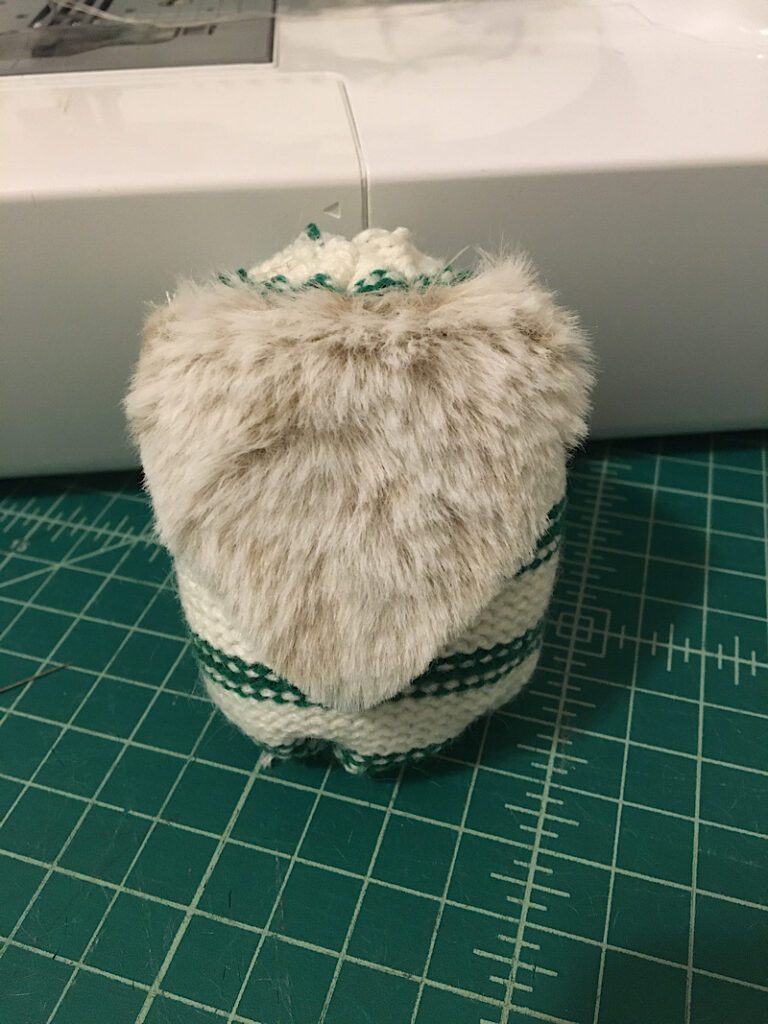
Place the beard onto the front of the gnome, with the top of the beard aligned with the top of the body.
Stitch the beard in place by sewing the top edge of the beard to the body.
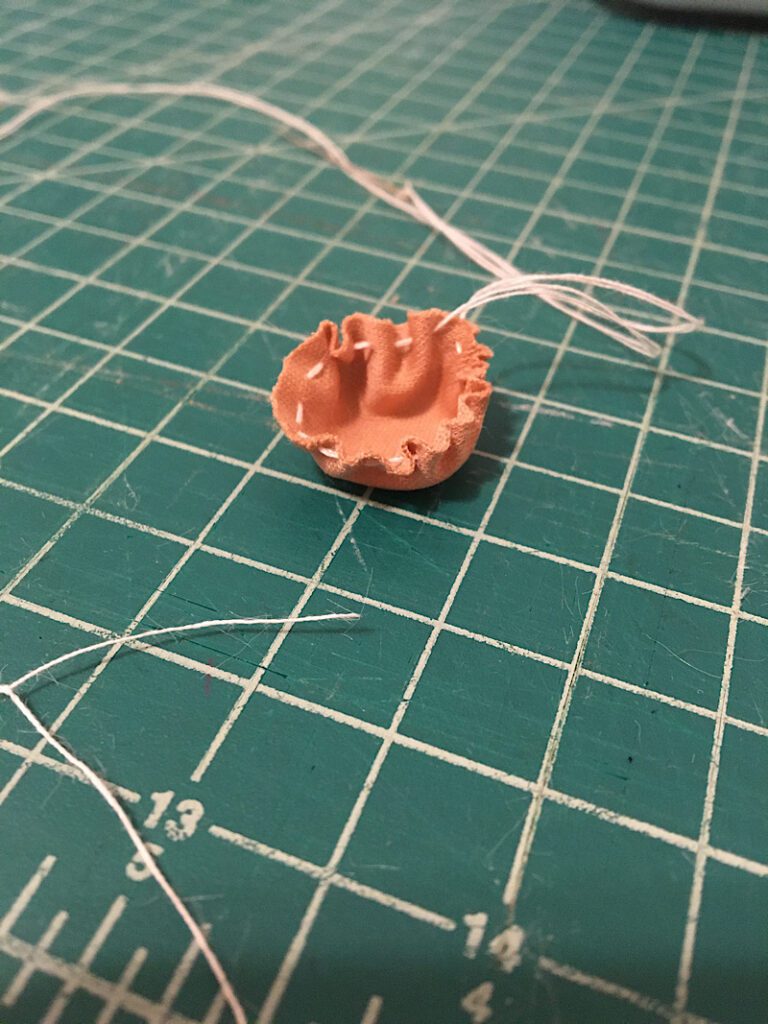
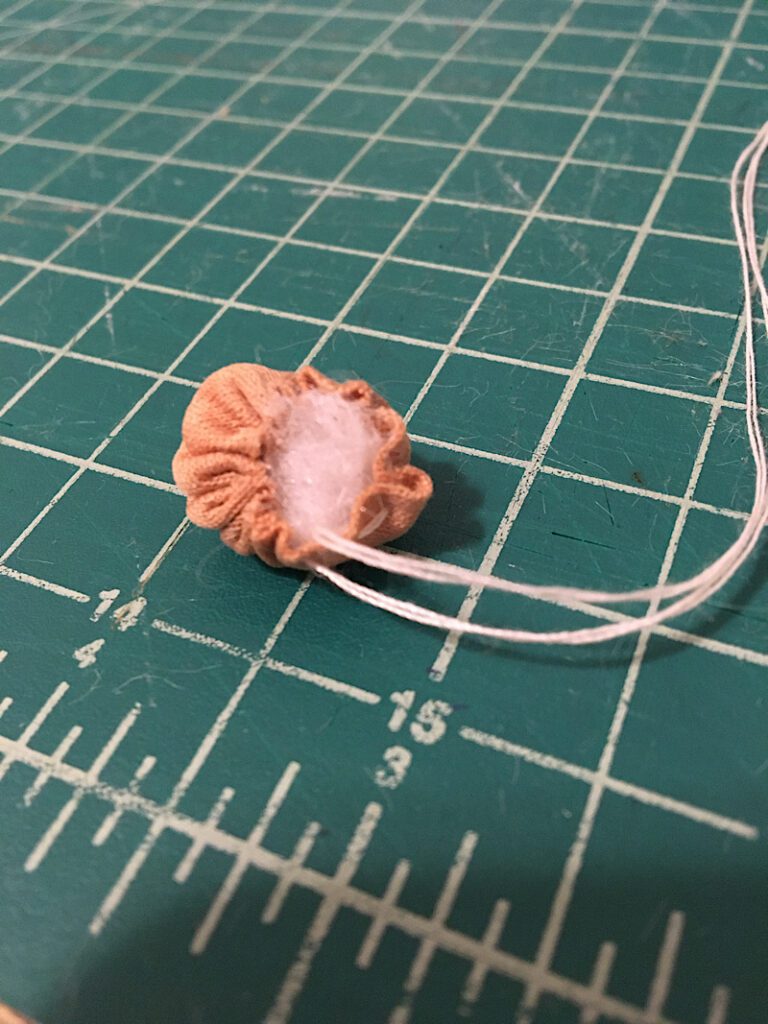
Step 4. Make The Nose
Cut out a 1.5 inch circle from the flesh colored knit fabric.
Sew a basting stitch around the entire edge of the circle.
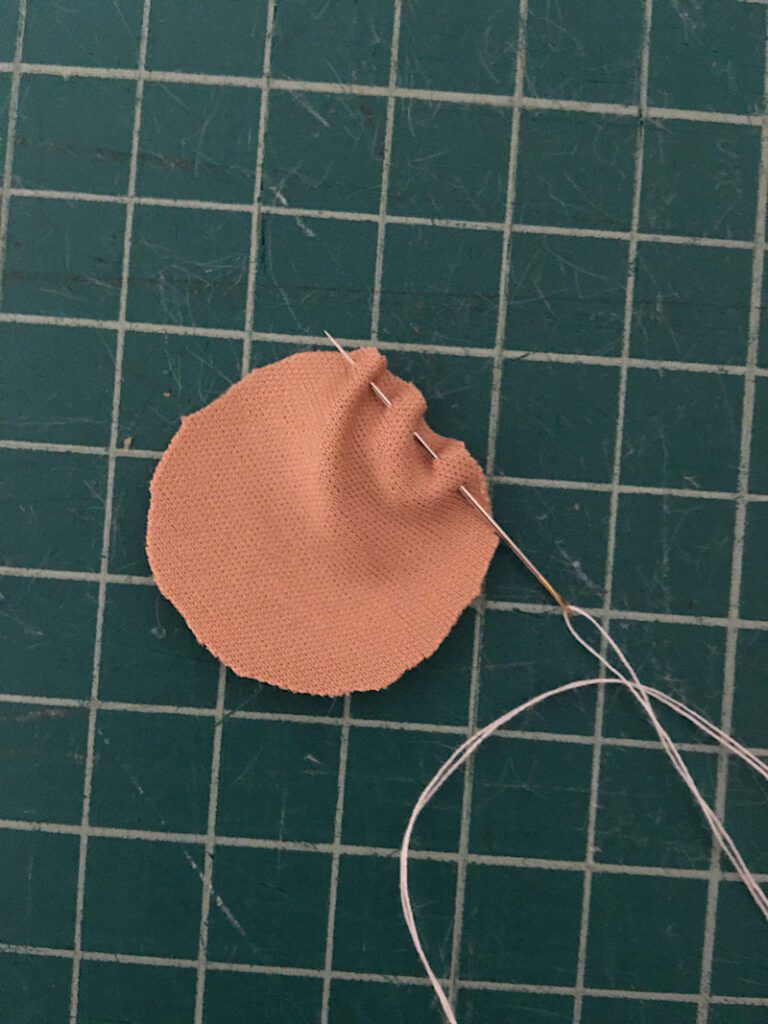
Pull it closed it just little bit so it makes a bowl shape.
Then stuff the nose, and pull the threads right to close it, than tie a knot.
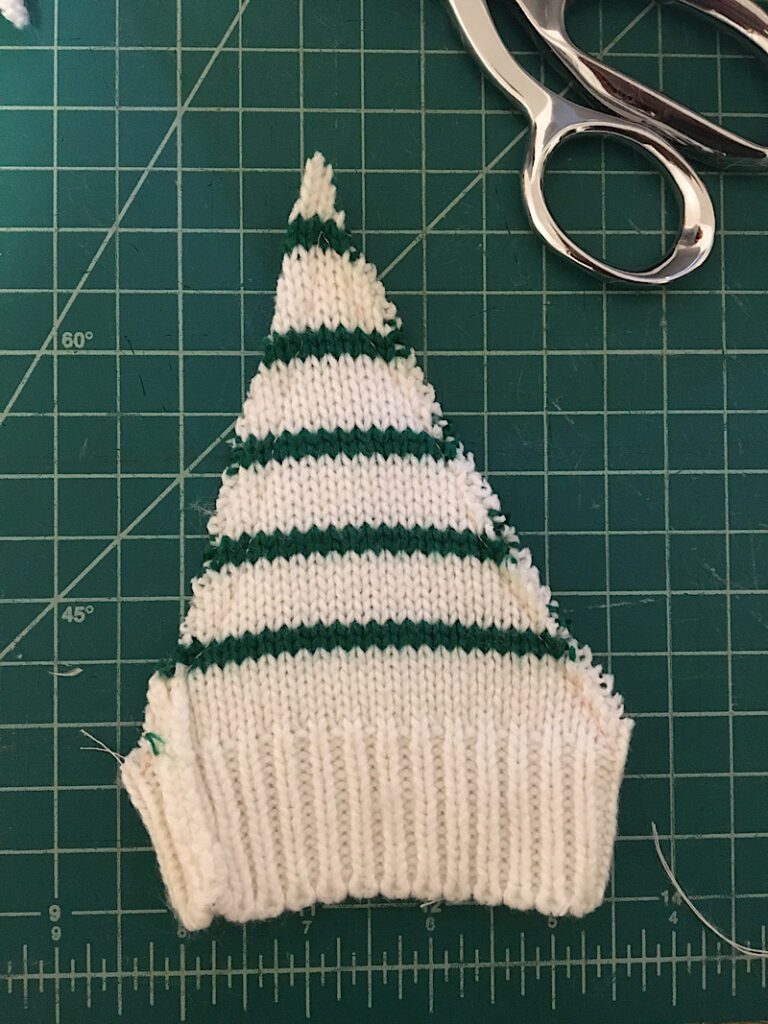
Step 5. Make the Hat
Utilize the hem of one of the sweaters sleeves, or the hem of the bottom of the sweater to make the bottom of the hat so it looks nice and doesn’t fray.
(You could also use the neckline hem.)
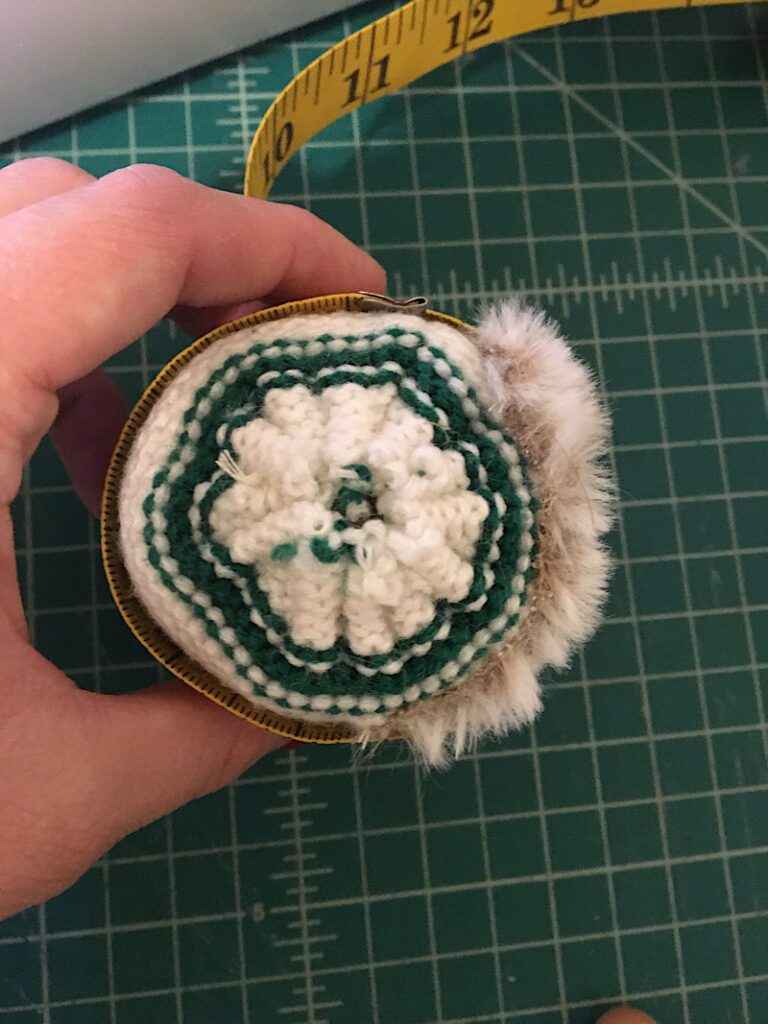
Measure around your gnome with a tape measure to determine the size the hat needs to be.
Each half of the hat (the front and the back) should have a width equal to half of the circumference of the gnome, plus about an inch for seam allowance.
Make the triangles as tall as you want your gnome hat to be, plus about a half inch for seam allowance.
I think the hats are cutest when they are at least as long as the body, or longer. But I made a short one too and it also worked.
Cut two triangles out of the sweater with the hem of the sweater being the bottom of the triangle. Notice that I cut the bottom bit of my triangle straight down instead of pointed corners, to make it more of a hat shape.
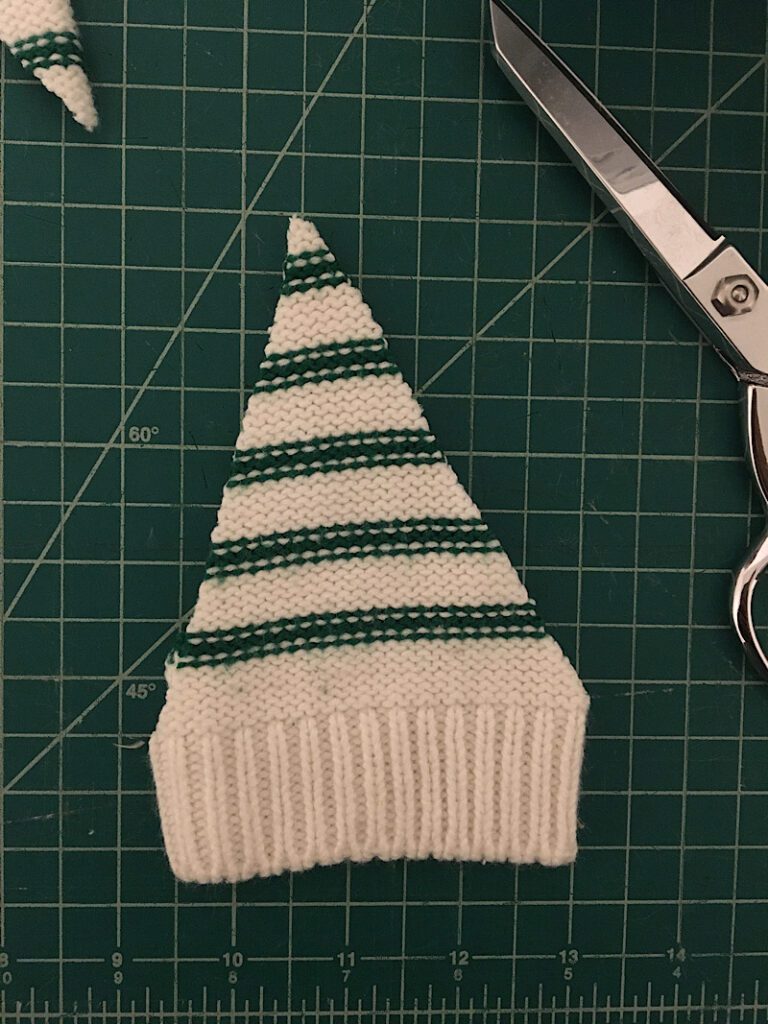
Place the two triangles on top of each other with the right sides facing, and sew the two sides with a 3/8ths seam allowance.
Then turn the hat right side out, then stuff it with some fiber fill.
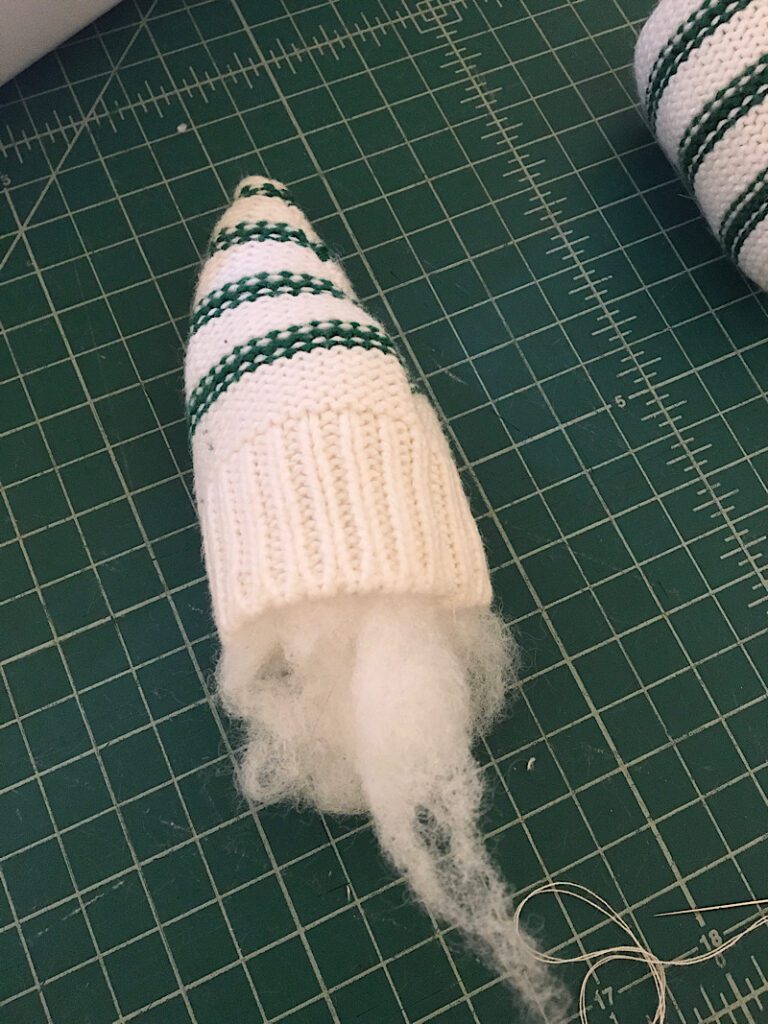
Place the hat on top of the home with the two side seams on the two sides of the body. Pull the bottom edge of the hat over the top of the beard and pin it in place.
Then sew the hat around the gnome about 1/4 inch away from the bottom of the hat (so the nose can tuck under it later) using thread that matches the hat so you can’t see it. I just used a running stitch again.
Step 6. Sew on the Nose
Line the nose up with the top center of the beard, slightly below the bottom edge of the hat.
Sew it onto the gnome by stitching through the back of the nose and into the body, then back through the nose several times. The more stitches around the nose you place, the better you will be able to hide the back of it.
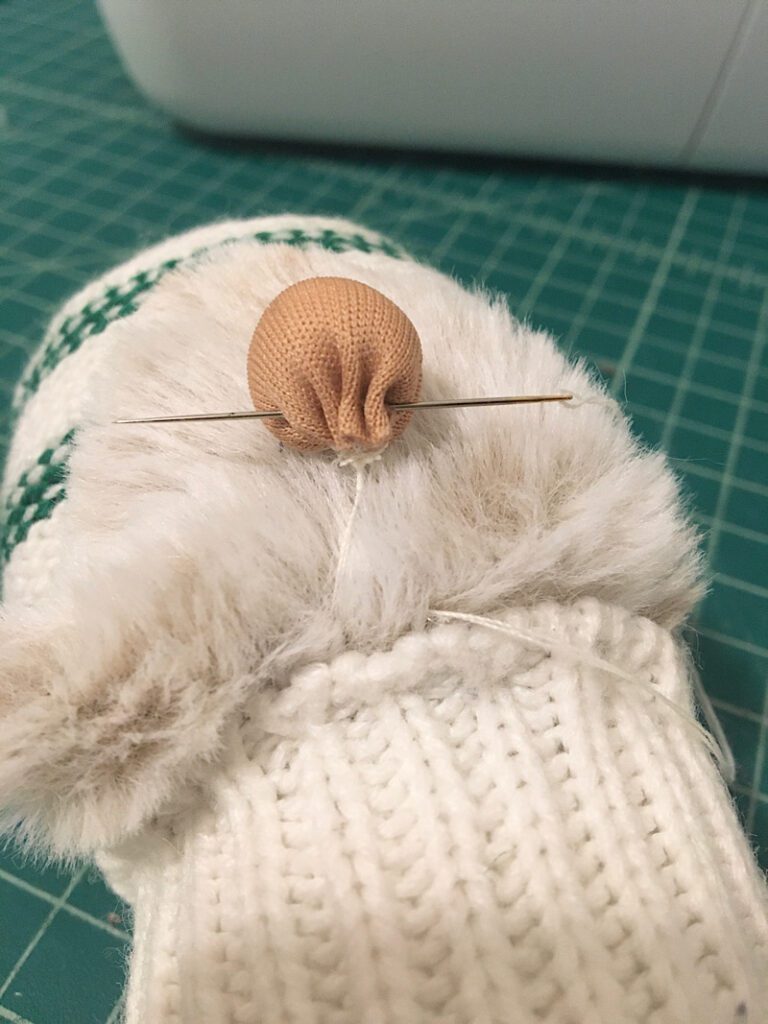
Make sure you sew through the beard AND the body of the gnome, not just the beard.
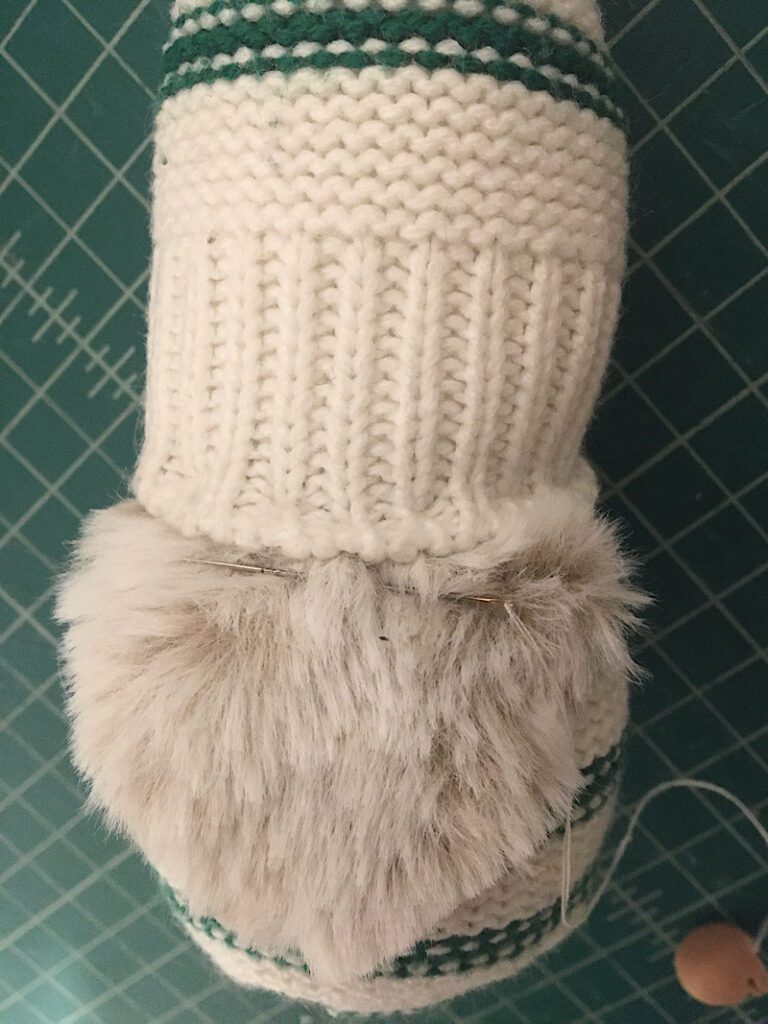
You want the nose to be slightly tucked under the hat.
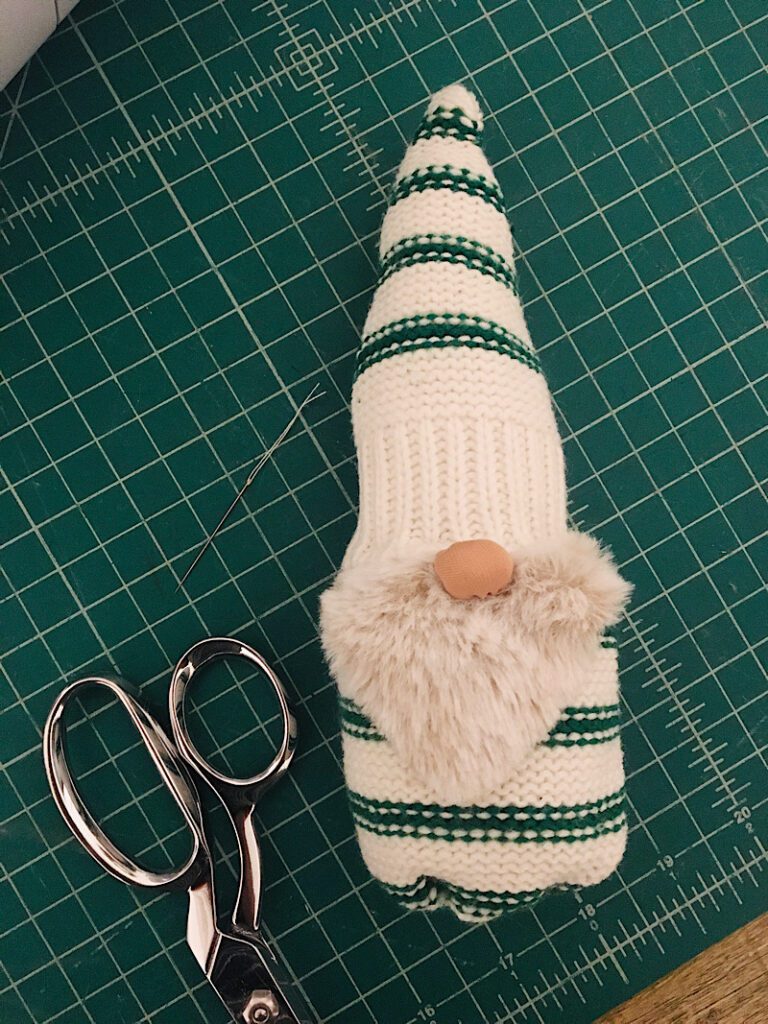
Step 7. Shape the Gnome
Last of all, use your hands to squish or roll the hat and body to shape your sweater gnome until it looks perfect. I like to make the hats nice and straight, but you can make them more floppy too.
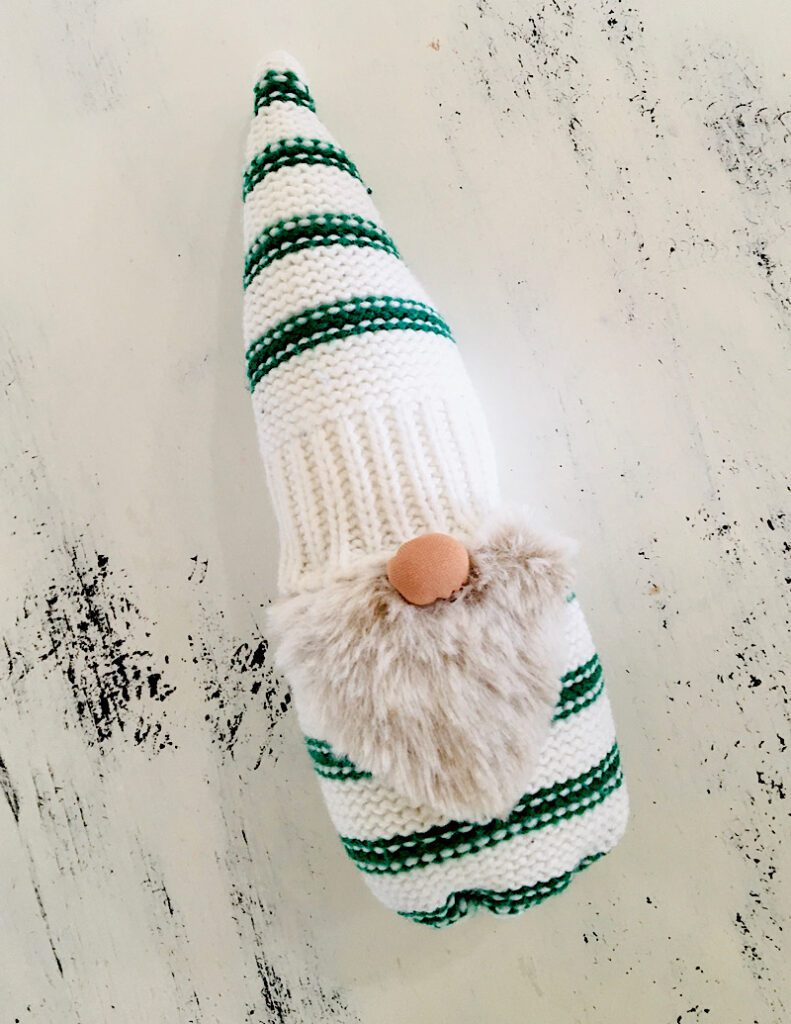
Then you are done, and you have time to make another!
Conclusion
I hope you had as much fun as I did making these little gnomes. They are so customizable and cute. Even my husband thinks they are fun. (Well, he thinks they look like rockets…)
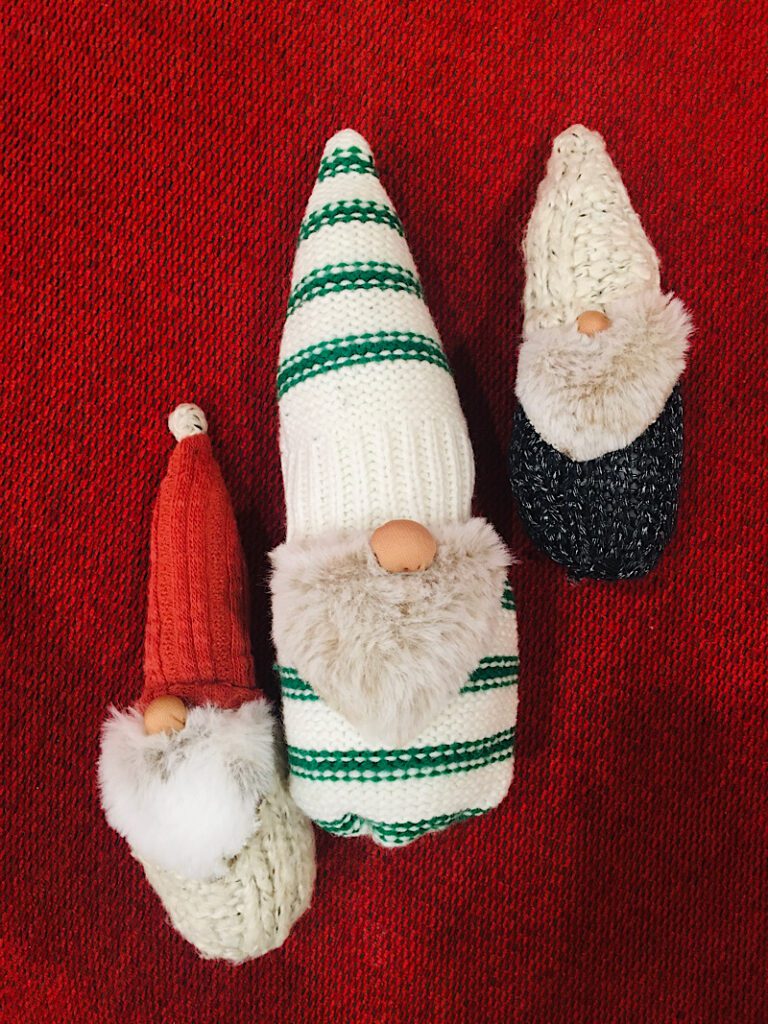
I bet making a huge Christmas sweater gnome could be so cute. Like a throw pillow size! Or maybe a very tiny one.
If you have questions about any step please let me know. Pin this post to Pinterest to share it and help me out a ton. Also subscribe to my email list for more sewing crafts.
We have been searching for gnome-themed ideas for our office party and…
here we are. Bonus, here they are. Now to round up a few good sweaters
which could add to the fun.
Great find. Thank you!