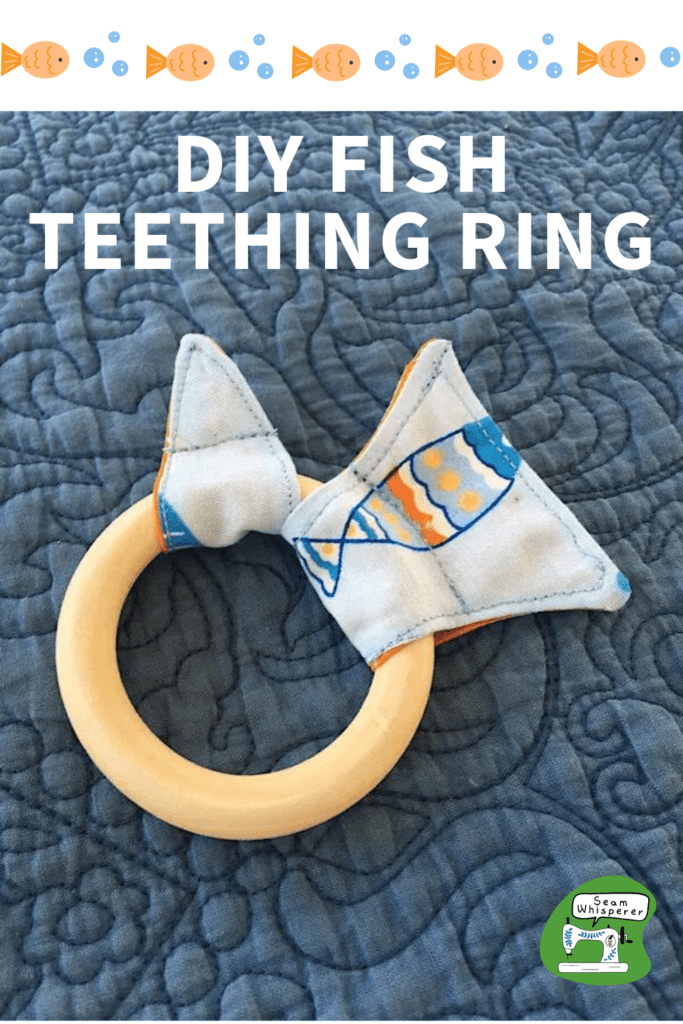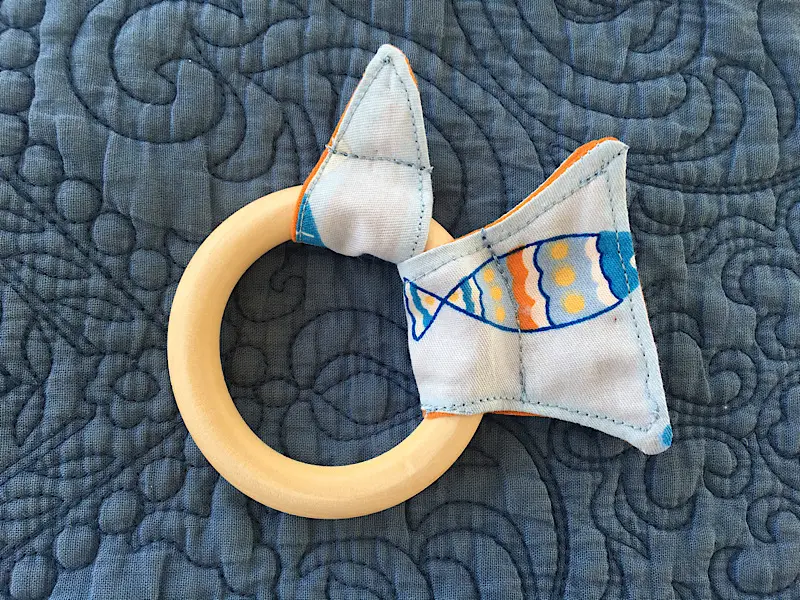
This little fishy teething rings are so fun to make for baby showers and baby gifts! They are quick to make, colorful and useful.
I made several teething rings for my friends this week who are about to have babies. I have seen bunny/bear ear teething rings, but never a fish! I wanted to try something new.
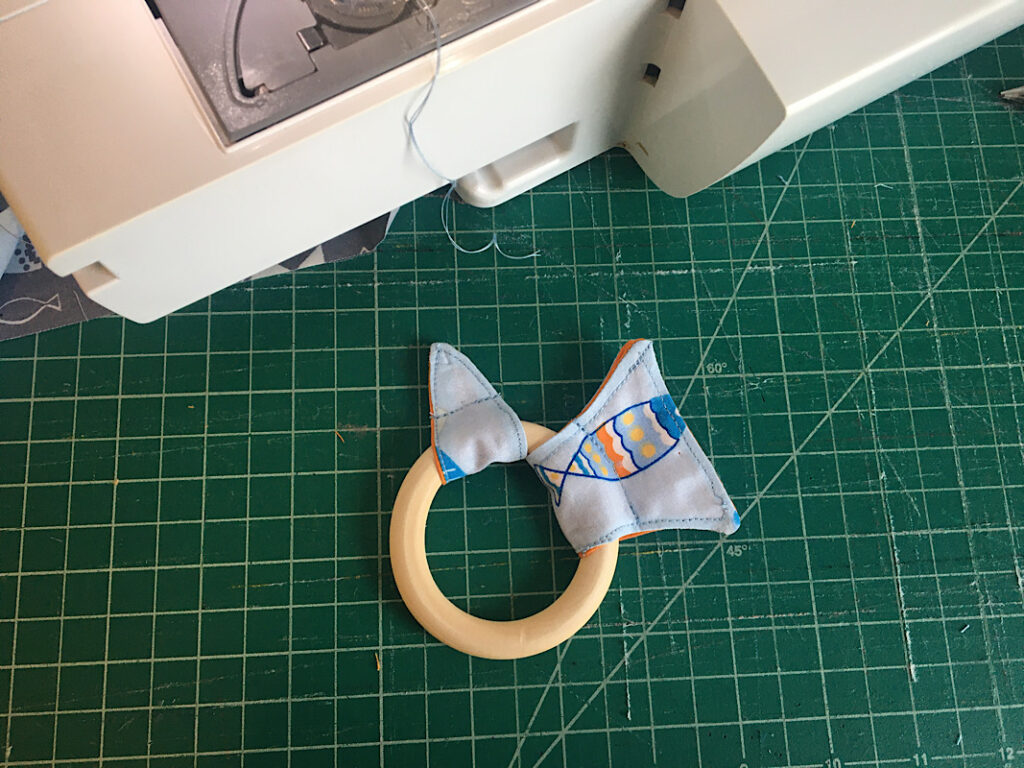
I like this pattern because the fabric doesn’t come off the ring like it would if you tied it, and there is NO glue. Just cotton!
Note: any baby pattern made from a tutorial on my website has NOT been safety tested, and is to be used at your own risk.
Supplies Needed
- Natural wood teething ring
- 100% cotton fabric in two colors/prints (organic is best since this will probably be sucked on!)
- Matching cotton thread
- fish teething ring template (download below)
- Iron and Ironing board
How To Make A Fish Teething Ring
Step 1. Download The Template
You can draw your own pieces or you can use my free template by signing up for my email list below.
The template is a pdf file that should be printed at 100% scaling, you can measure the “1 inch test square” to make sure it printed correctly.
Step 2. Cut Out The Pieces
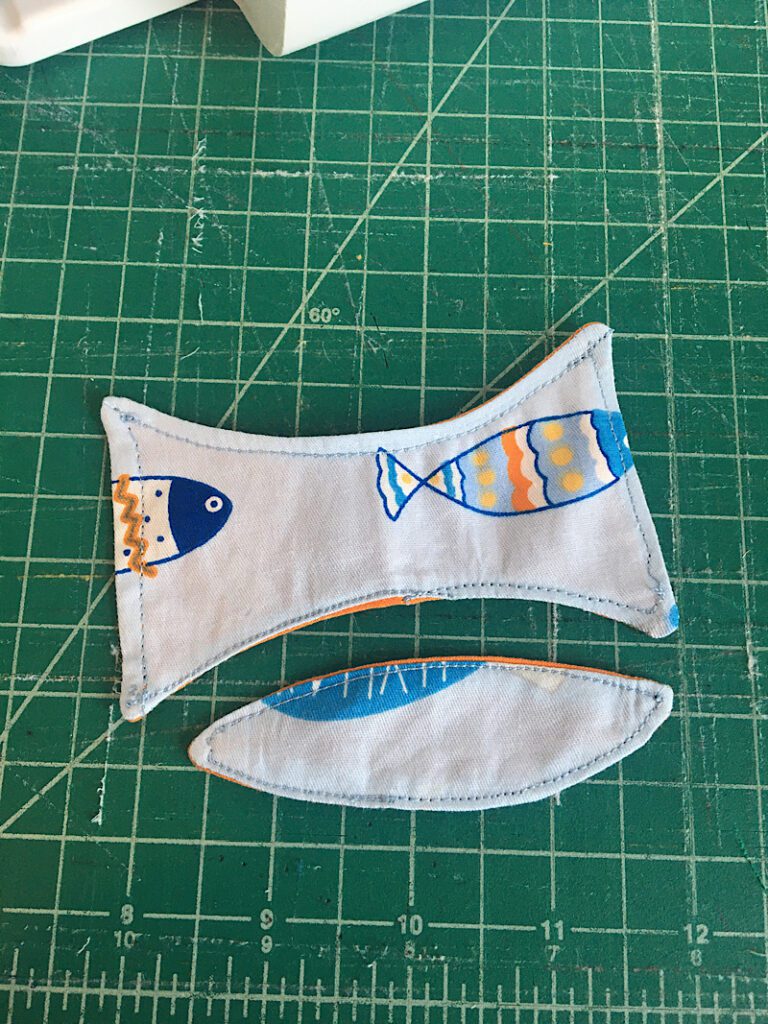
You will need to cut 2 tails and 2 fins from the template. Fold your fabric and align the template on the fold as indicated.
I chose to use two colors of fabric for the front and back of each piece.
Step 3. Assemble The Tail & Fin
Place the two tail pieces on top of each other with the right sides facing.
Sew around the perimeter with a 1/4th inch seam allowance. Leave a 1.5 inch gap at the bottom or side so that you can turn it later.
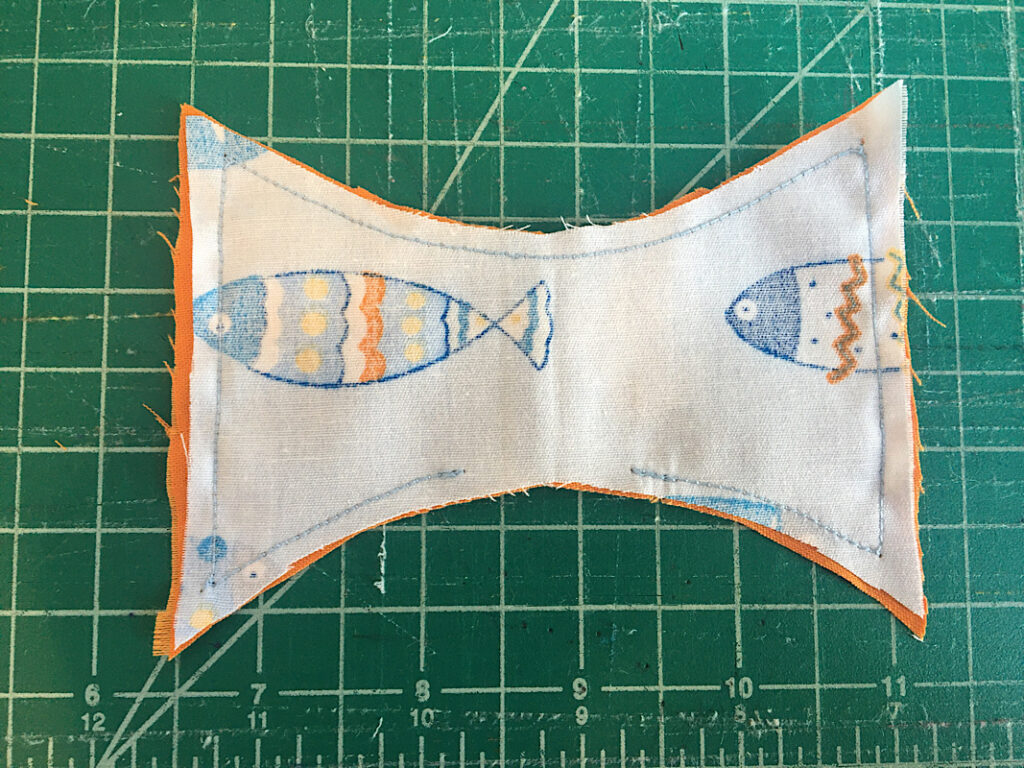
Clip the corners to remove the excess fabric.
Repeat these steps with the fin. Layer them with right sides together, sew around the edge leaving a small gap, and clip the corners.
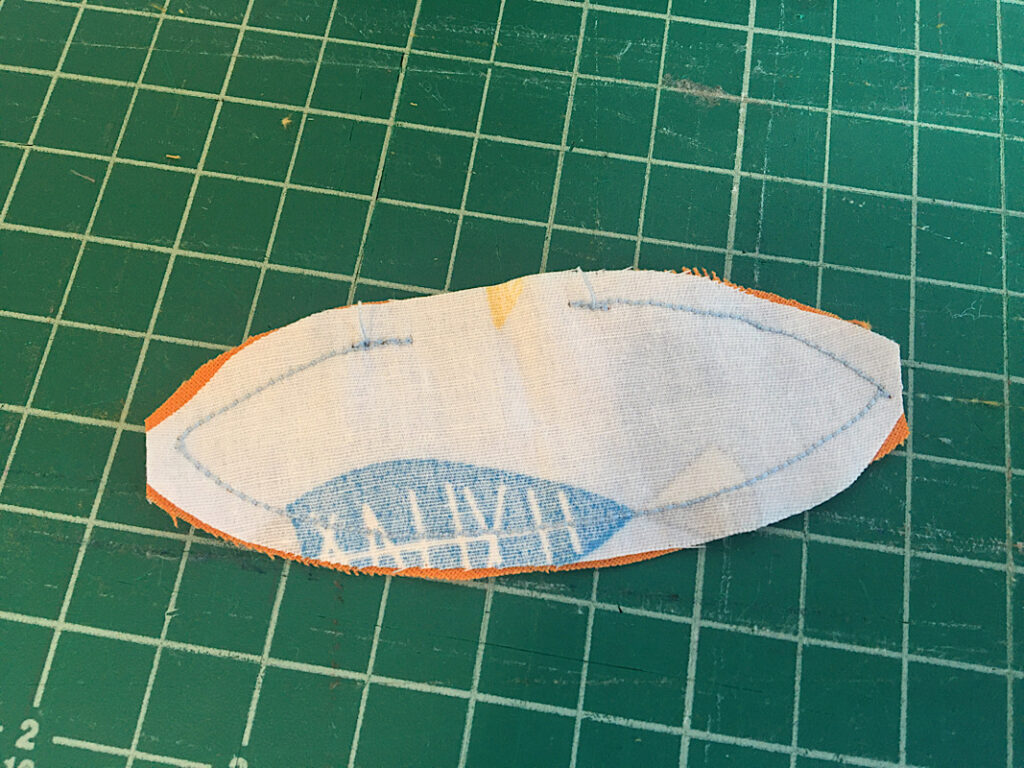
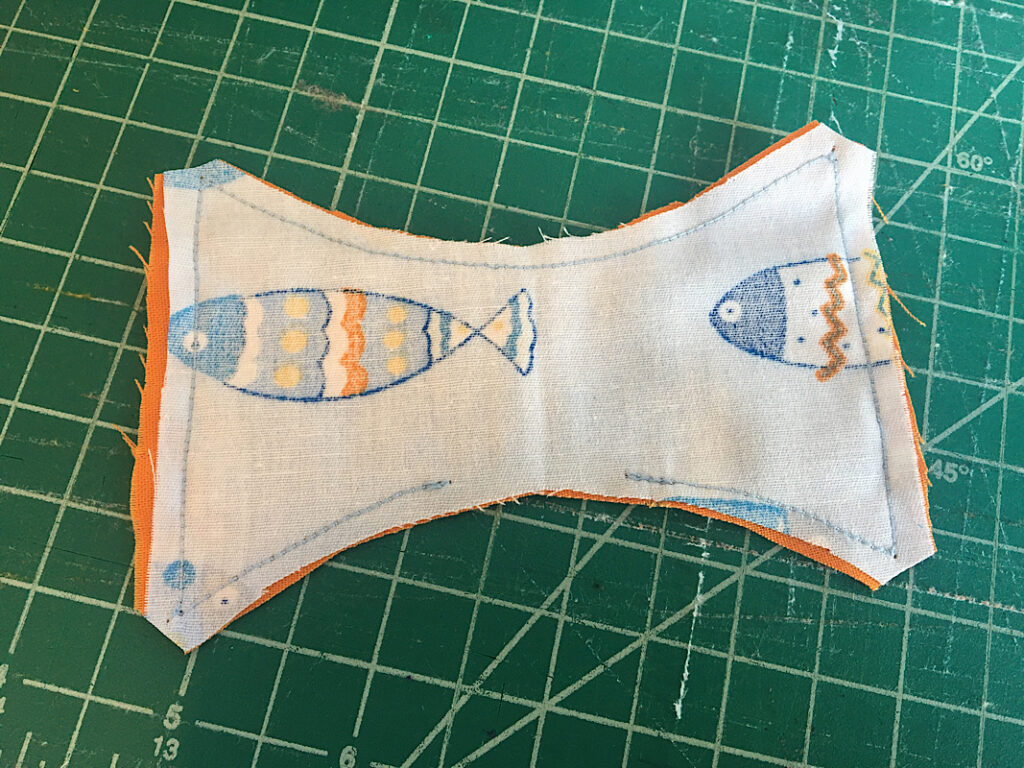
Step 4. Turn & Press
Turn the tail and fin right side out, and push the corners out carefully with a pen to shape them.
Fold the raw edges at the opening inside 1/4th inch, pinning if you need to.
Then, give them a good press with your iron.
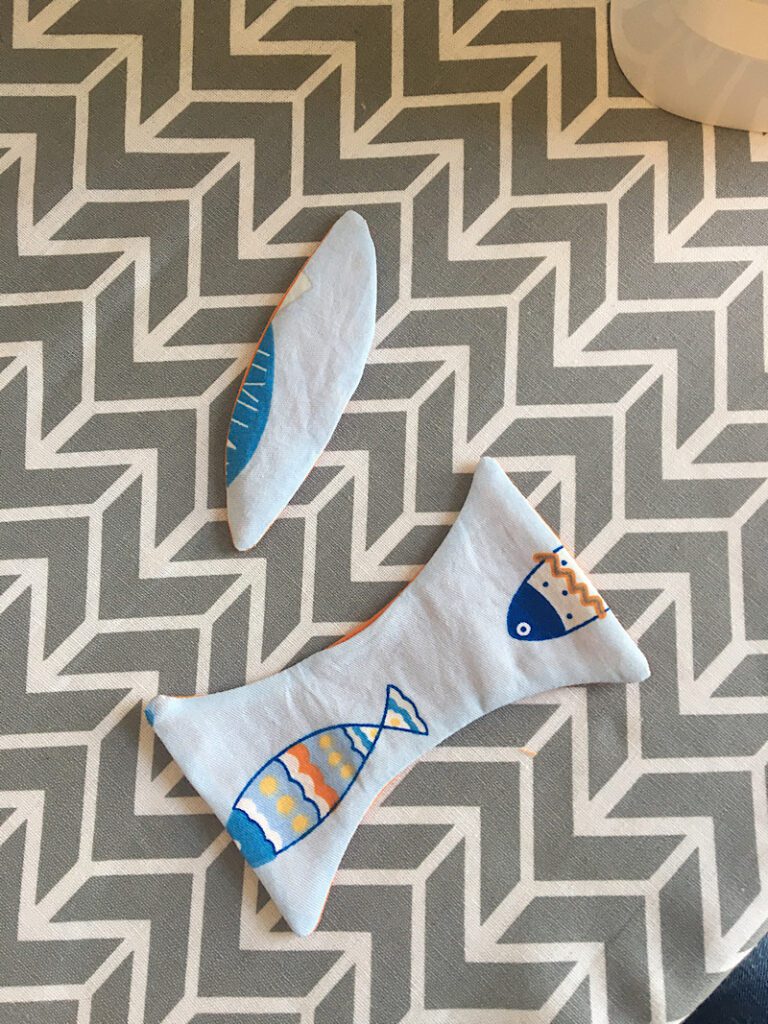
Finally, sew a top stitch around the perimeter of the fin and tail as close to the edge as you can, making sure to catch both layers and close the gap.
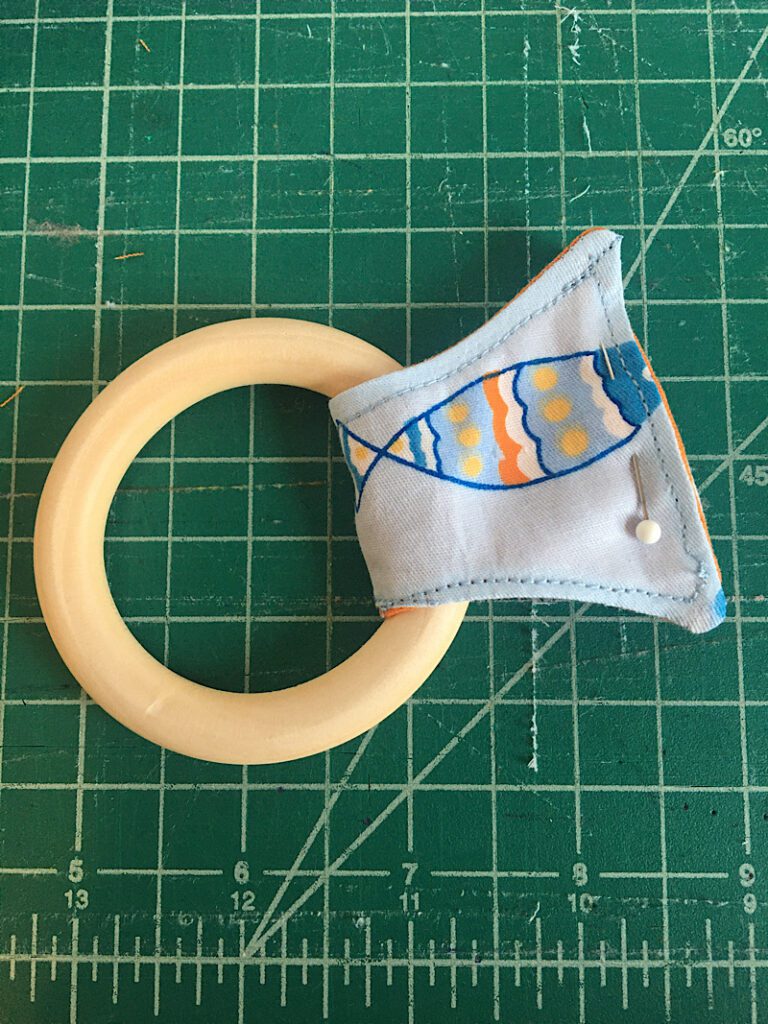
Step 5. Attach To The Ring
Wrap the tail around the teething ring and align the end of the tail fin evenly. Pin it in place.
With your needle in the right most position, and the teething ring on the right side of your presser foot (or where there are no knobs in the way), sew a line through the layers of the tail, following the curve of the ring as tight as you can.
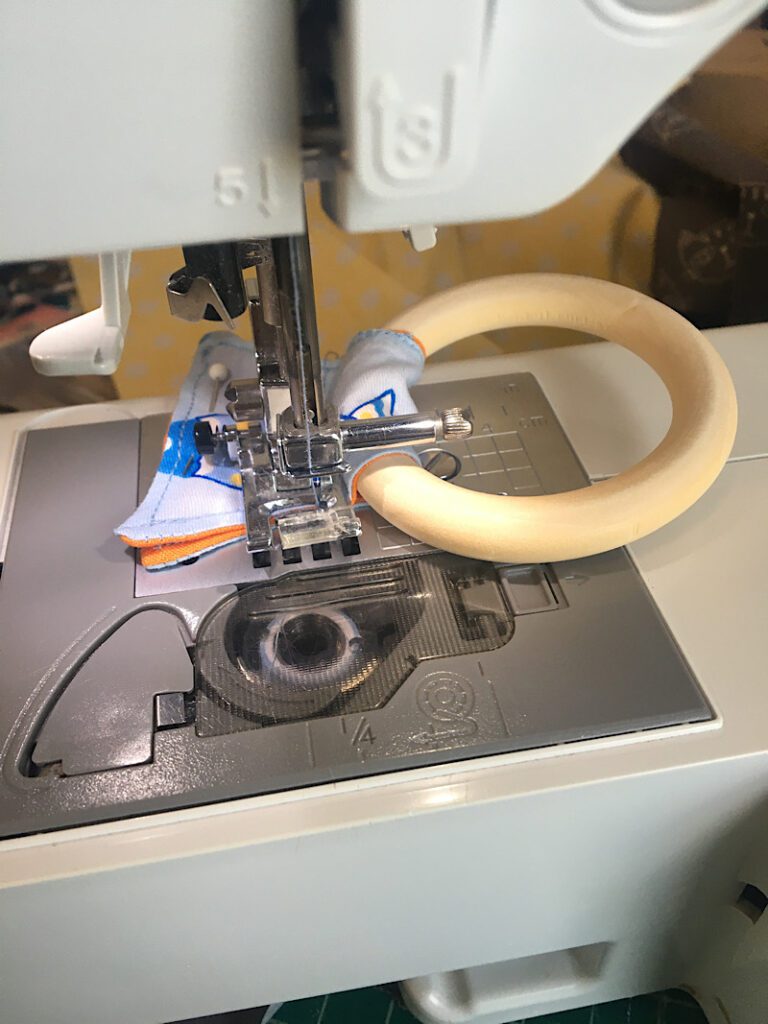
Then, sew the fin to the top of the teething ring in the same way.
When it is done, you will be able to slide the fin and tail around to place them where you like!
Now you are done!
This fish teething ring can be customized a lot of ways, you can make two fins, you can change the size or shape of the tail, etc.
If you have any questions, let me know! (And if you make this project, send my a picture and I will share it on the blog!)