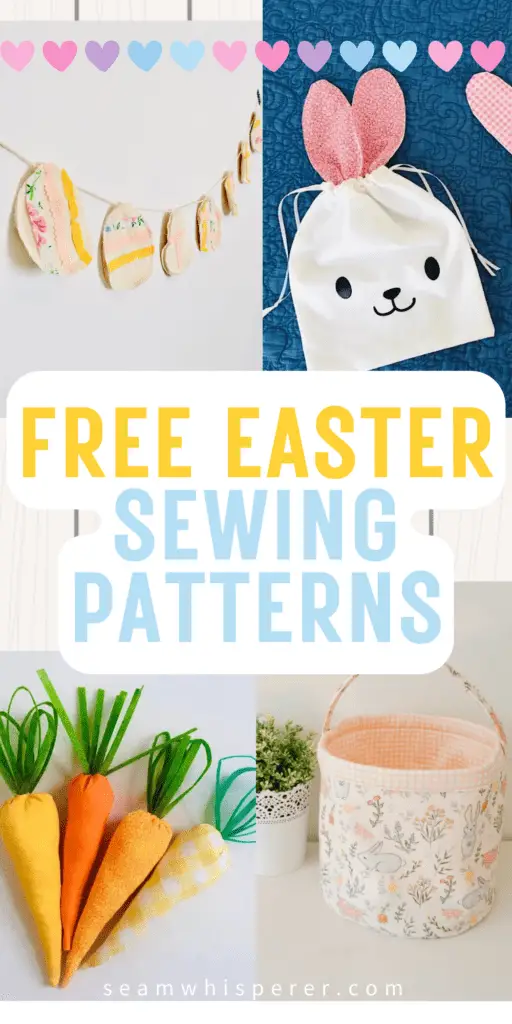
Make your own reusable and fillable fabric easter eggs with this free pattern. You will not BELIEVE how easy and quick they are! Three size options.
When I first heard the idea of reusable, fillable fabric Easter eggs, I KNEW I needed to make my own! These are right up my alley, and I think you will love them too!
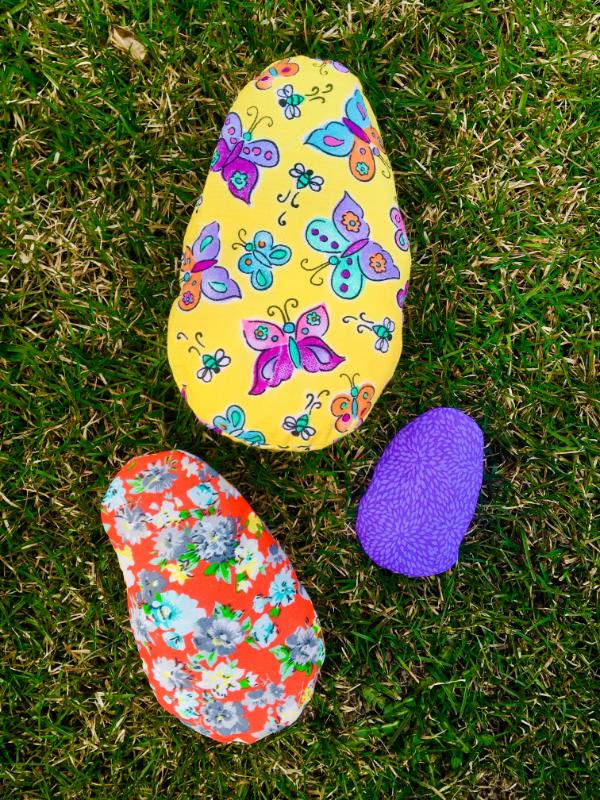
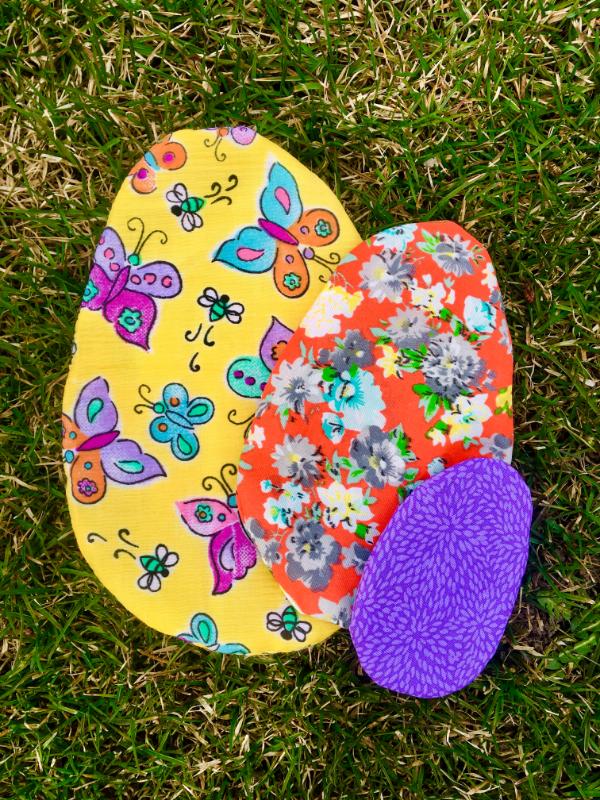
The free template for the eggs comes with three size options:
- small (4 inches tall)
- medium (6 inches tall)
- large (8 inches tall)
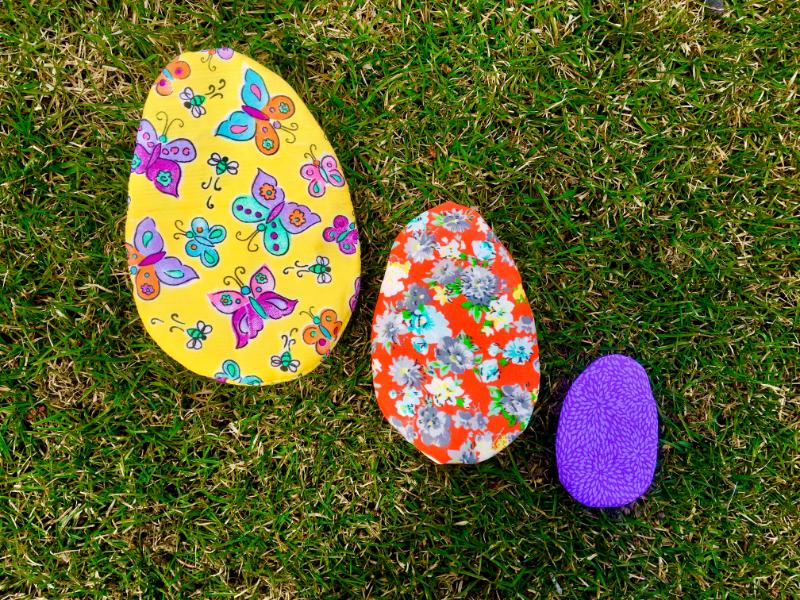
They are perfect for stuffing with little toys, Easter gifts, or candies.
You can make them scrappy or cohesive. Quilting cotton is perfect and comes with lots of Easter egg color options!
Make sure you check out these other free Easter sewing projects, too!
This post may contain affiliate links. Read the full disclosure here.
Supplies Needed
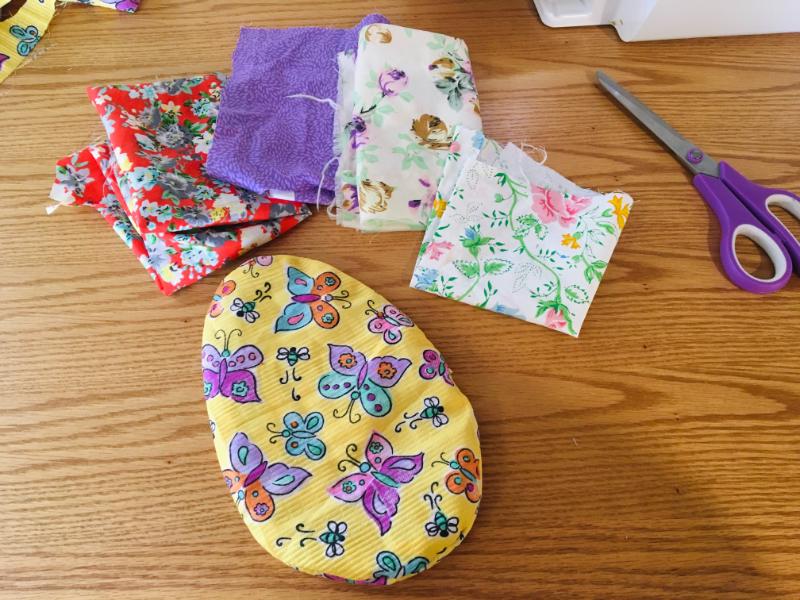
- Medium weight fabric for each egg (7″ x 12″ for size Small, 10″ x 17″ for size Medium 12″x22″ for size Large.)
- Matching Thread
- Pinking Shears (optional)
- Fusible Interfacing (Optional, can make them more sturdy, I did not use it.)
- Sewing Pins or Clips
- Free Template, Download Below!
Download The Free Easter Egg Template
This template is free for my email subscribers. Sign up below and I will send you the template right away.
I send out weekly sewing emails and I get lots of photos from my readers of their finished projects, it is SO much fun! So make sure you send me a photo when you are done with this project! You can share photos in our Facebook group too!
Prefer to watch the tutorial? I just made a quick video showing how easy it is to make these eggs! Watch it below!
How To Make Fabric Easter Eggs
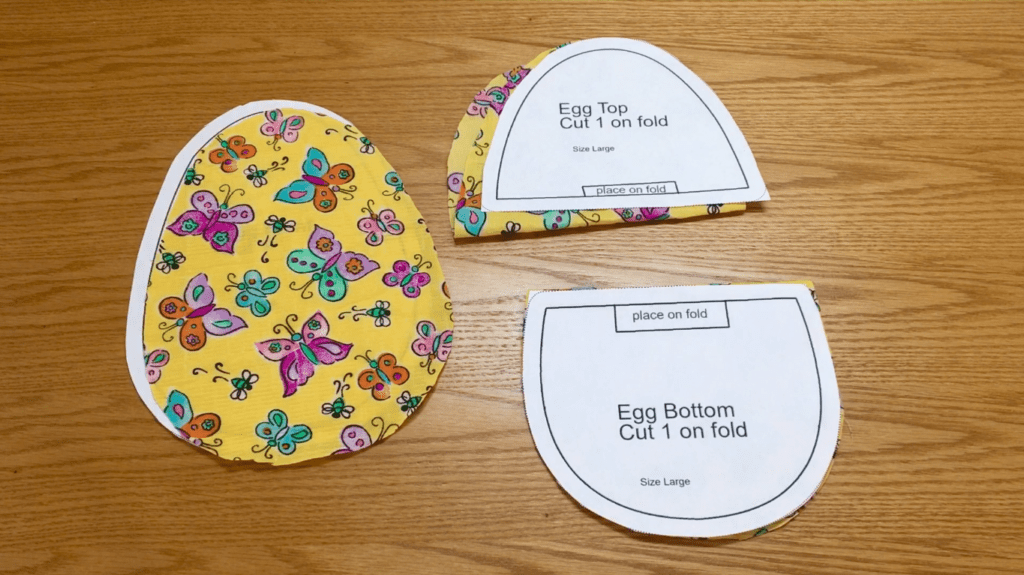
Step 1. Cut Out The Fabric
Cut out the templates in the size of egg you want to make. I am making a size Large for this tutorial.

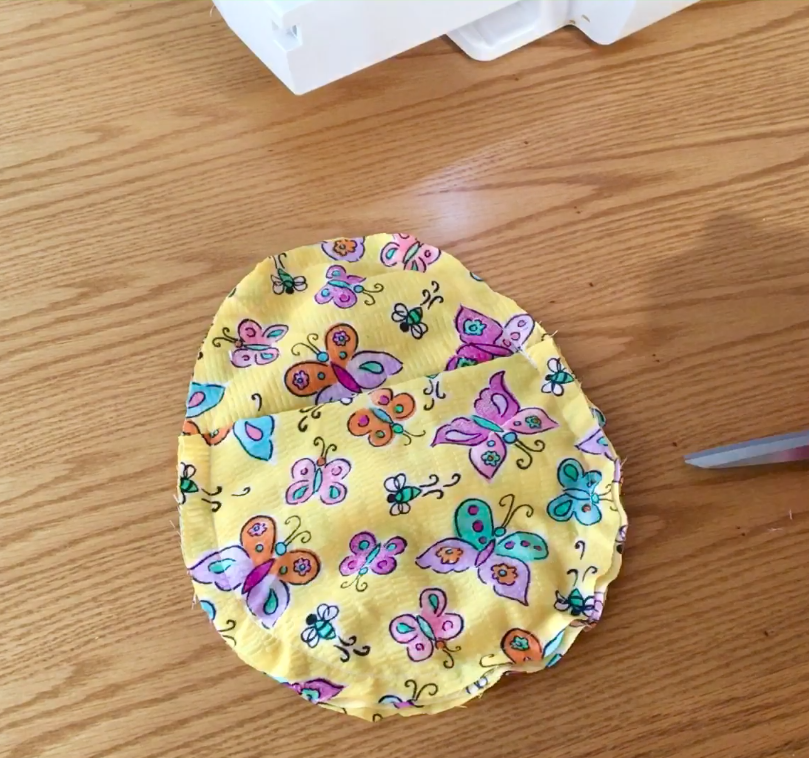
Each easter egg has three fabric pieces: the front, and two back pieces that are cut on the fold and will become an “envelope” to open the egg from.
If your fabric has a directional print, keep that print in mind as you fold and cut your pieces.
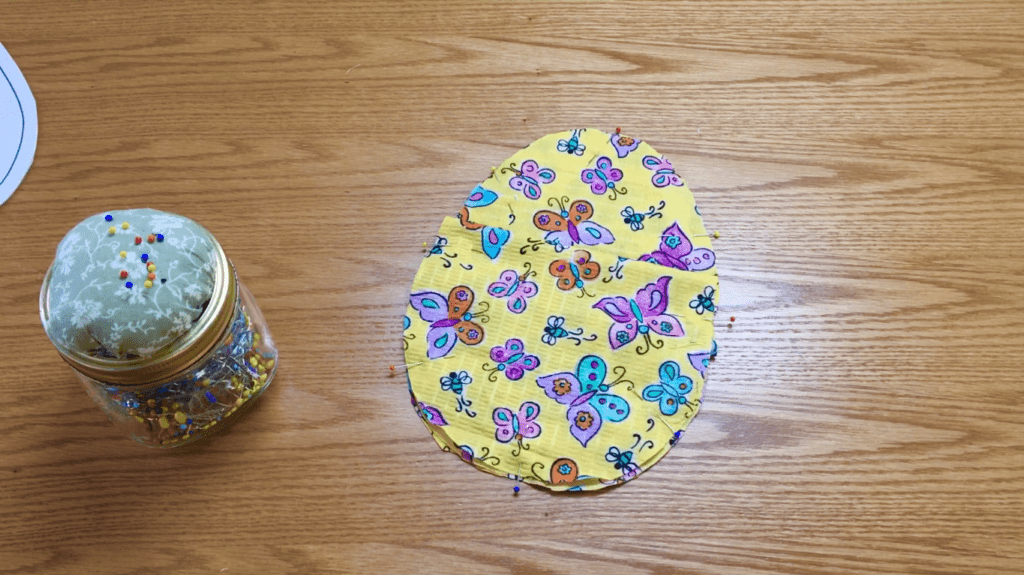
Step 2. Pin the Pieces Together
Lay the “Egg Front” fabric piece on the table with the right side facing up.
Then lay the folded “Egg Top” piece on top with the right side facing down, aligning the top curves of both pieces. Pin them together.
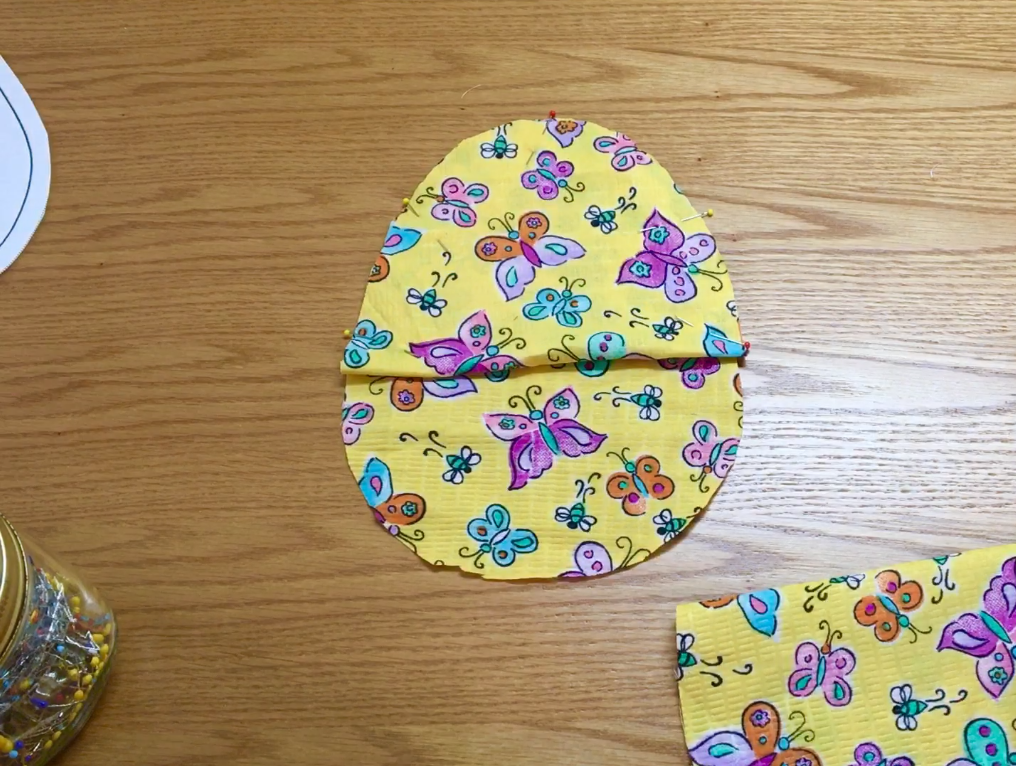
Next place the folded “Egg Bottom” onto the bottom of the egg aligning the bottom curve, and pin in place.
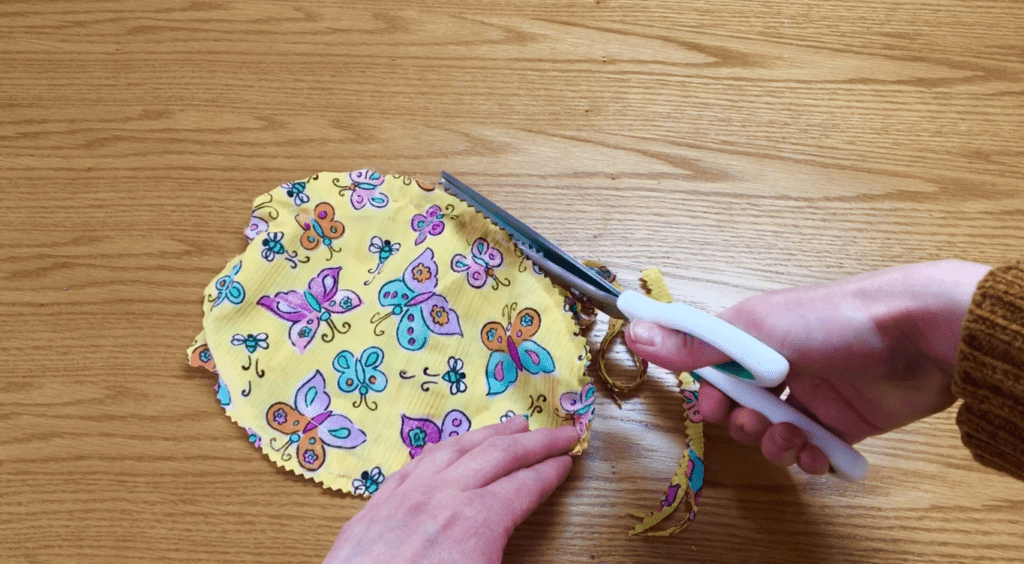
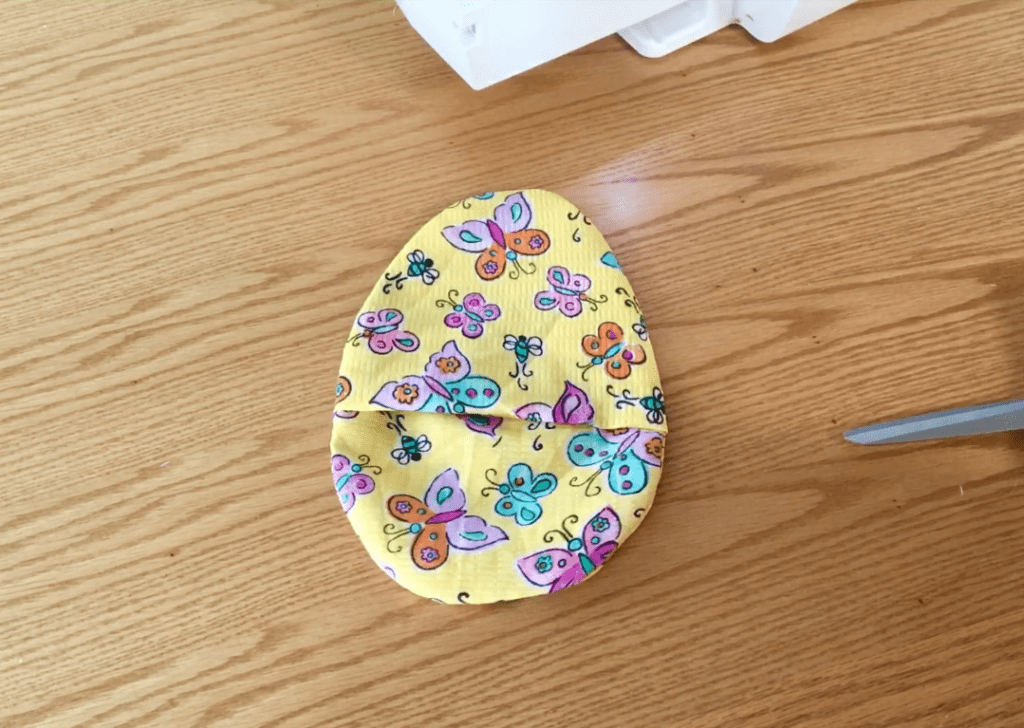
Step 3. Sew Around The Egg
Sew around the perimeter of the egg with a 3/8ths inch seam allowance. Take care as you sew over the folds that they stay flat.
You can finish the edges if you like to help it be more durable, or just leave them as is since they will be turned to the inside. For the small sized egg, I would at least clip the curves to help turn it.
You can serge the edges, zig zag, or just pink them like I did with pinking shears.
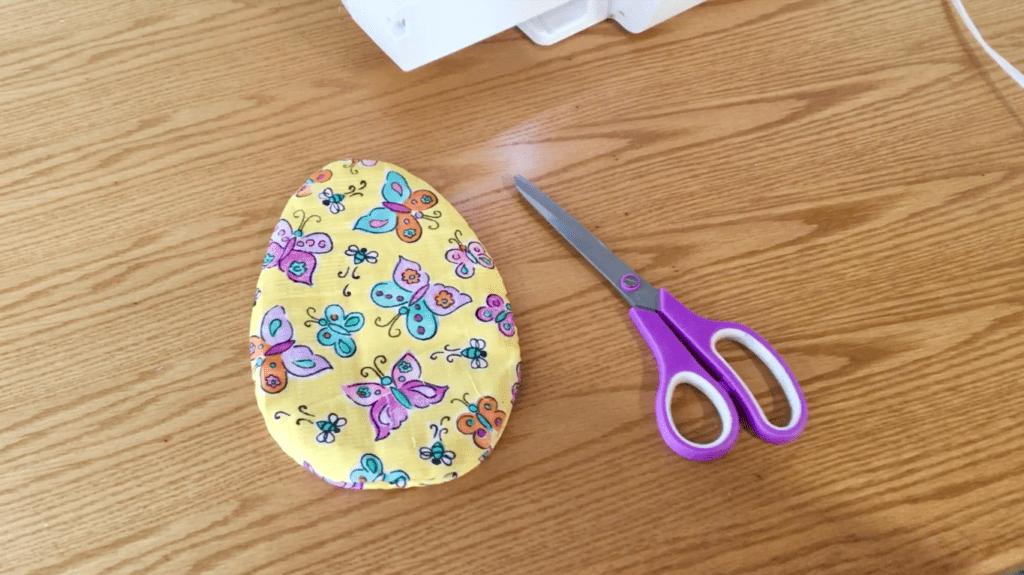
Step 4. Turn The Egg Right Side Out
Finally, turn the egg right side out through the envelope! You can use an iron or your hands to press it flat. You might need to stick something blunt inside to help shape the curves.
Here is what the back looks like:
Now you are done! See how easy that was! You could easily make an assembly line process to cut all the eggs, pin them all, sew them all, turn them all and make a set in no time!
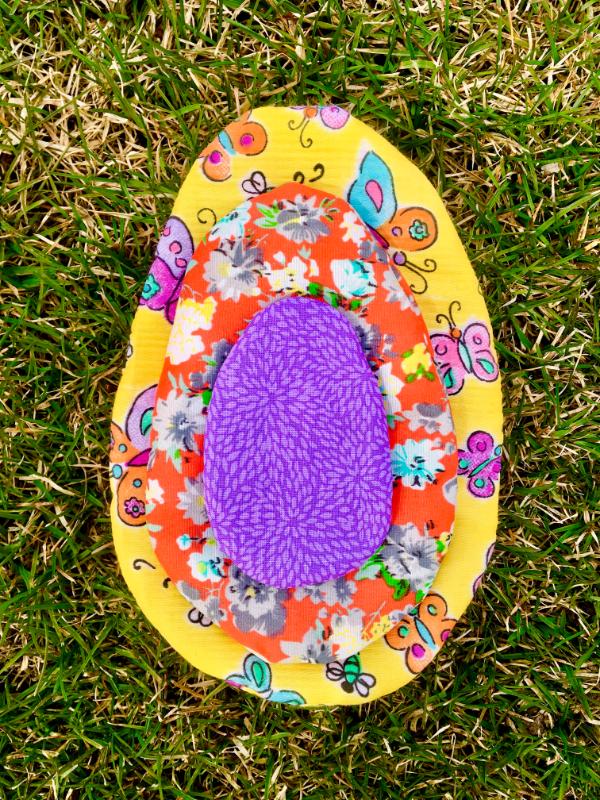
I made one of each size to see which size I liked best. The small size is a traditional plastic Easter egg size. The medium and large would be good for candy bars or little toys, or just more jelly beans! (You can put the jelly beans in a zippy bag before putting them into the egg to make sure they don’t fall out when the kids are hunting for it!)
If you liked this tutorial, it would help me so much if you Pinned it to Pinterest so others can find it too!