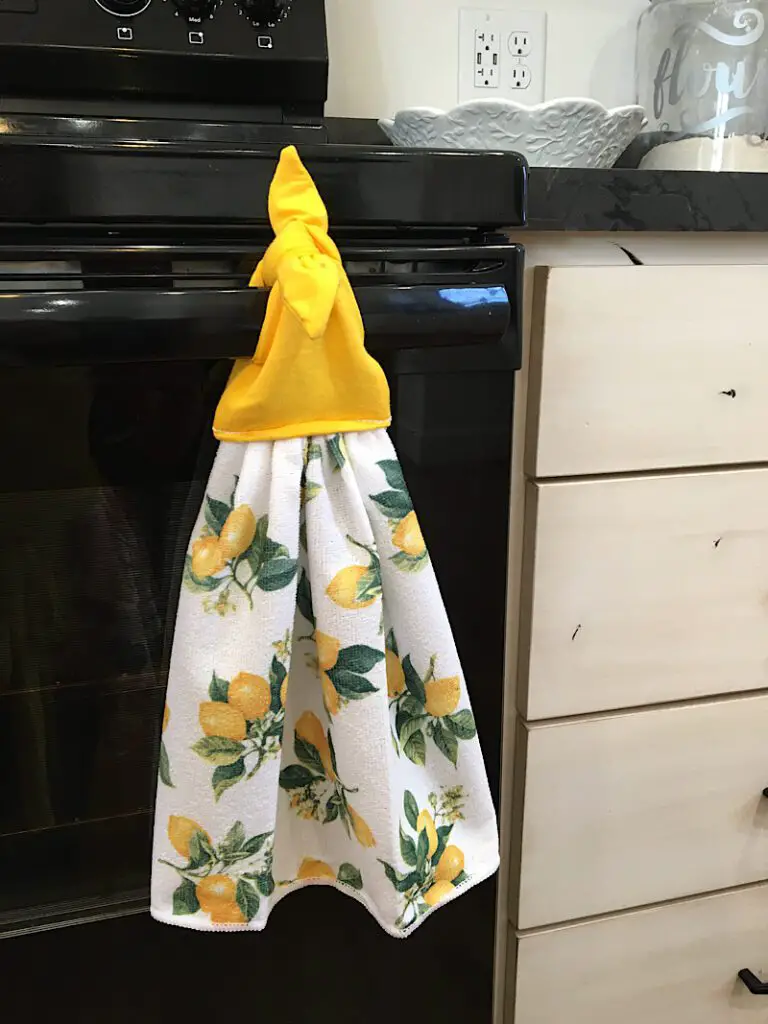
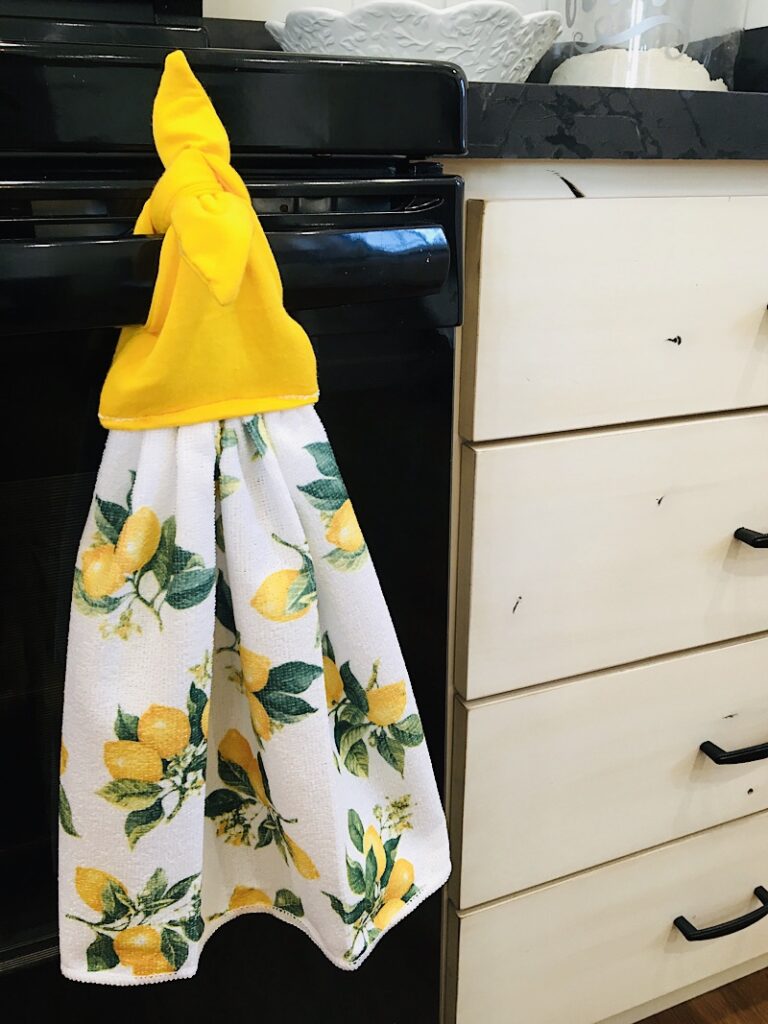
Hanging a kitchen towel over the oven handle is so convenient, except when it falls off! Try these super cute hanging towels with a tie-top feature, that shouts spring!
I like to hang towels on my kitchen oven but my kids like to pull them down, so I tend to modify them to have a snap or button on top.
This time, I opted to make a fabric ties on the top in place of a button, and I LOVE how it turned out! It is knotty, cute, and very spring/summer-y!
Use the free pattern to make your ties quick, or you can even draw your own.
This post may contain affiliate links. Read the full disclosure here.
Supplies Needed
- Kitchen Towel, hand towel, tea towel, dish cloth, etc. (One regular sized towel cut in half can make two hanging towels.)
- Coordinating fabric for the ties. I used a stretchy material, but a cotton would work great too!
- Fusible Interfacing and Iron (used to stabilize the fabric ties, not strictly necessary but nice for thinner and stretchy materials)
- Matching Thread
- Sewing Pins, Scissors, etc
- The free template, scroll below to download!
Download The Free Pattern
The free tie top template is available for all those on my email list! Sign up below and I will email it to you right away. Email me a photo when you are done, I would love to add it to this post and show it off to my other readers!
Print the pattern at 100% scaling, and measure the “1 inch test square” to make sure it printed correctly.
The template is the printable portion of the pattern. The instructions are right here in this blog post!
How To Make A Tie On Kitchen Towel
Step 1. Cut Out The Pieces
If you hand a standard sized kitchen towel, it should be big enough for two of these tying towels. I got mine at the Dollar Tree, folded it in half with the short sides together, then cut it in half down the center fold.
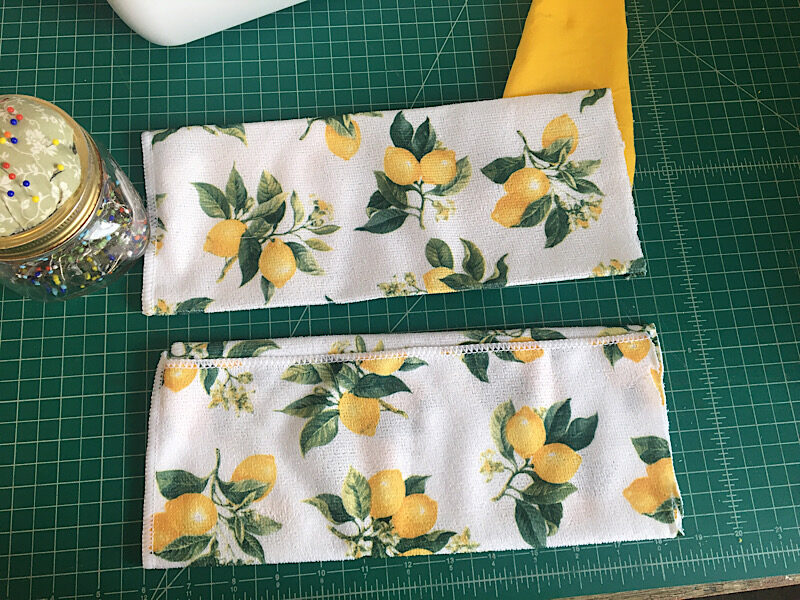
Cut out the template pieces, and tape them together to align the Seam Whisperer logo. Then use it to cut out the fabric. You should cut one piece on the fold on the UPPER line, and two pieces NOT on the fold on the LOWER line, as shown below.
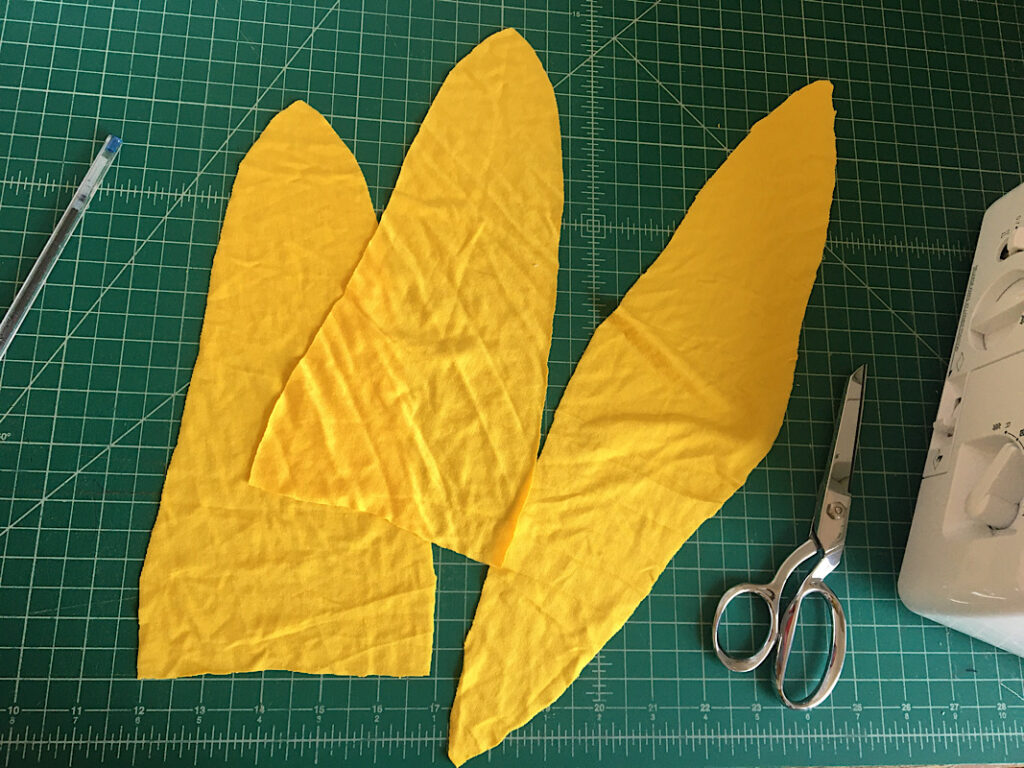
The two identical pieces will become the OUTSIDE tie pieces, and the long folded one will become the INSIDE or LINING piece. You can even make the inside/lining piece a different color!
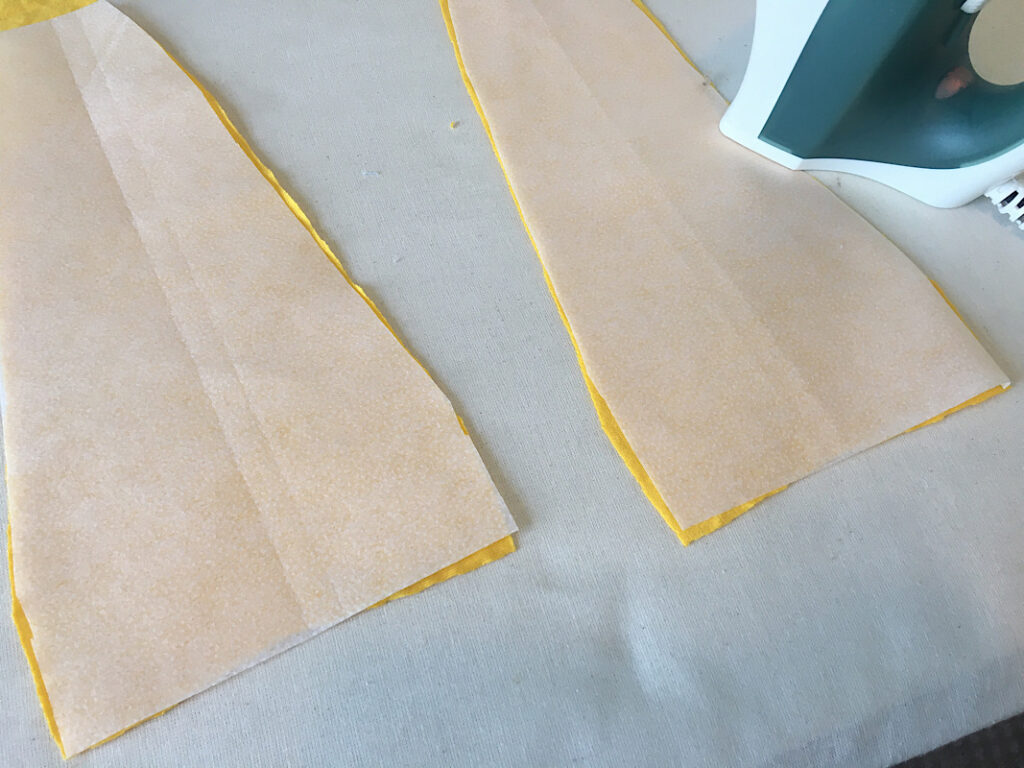
Next, if you have a particularly thin or stretchy material that you want to strengthen, you can iron some interfacing to the back. Use the template to cut the interfacing shapes. This is optional, and I wouldn’t do it unless needed.
Step 2. Pin The Pieces Together
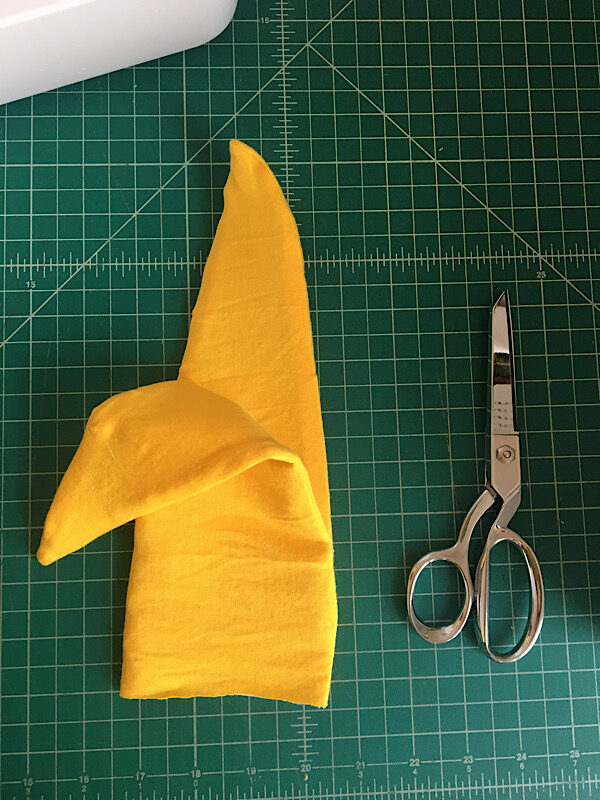
Lay one of the outside tie pieces down with the right side up. Then, place the long lining piece on top, aligning the tips. Start pinning down the two sides until you get just above the halfway point on the lining piece.
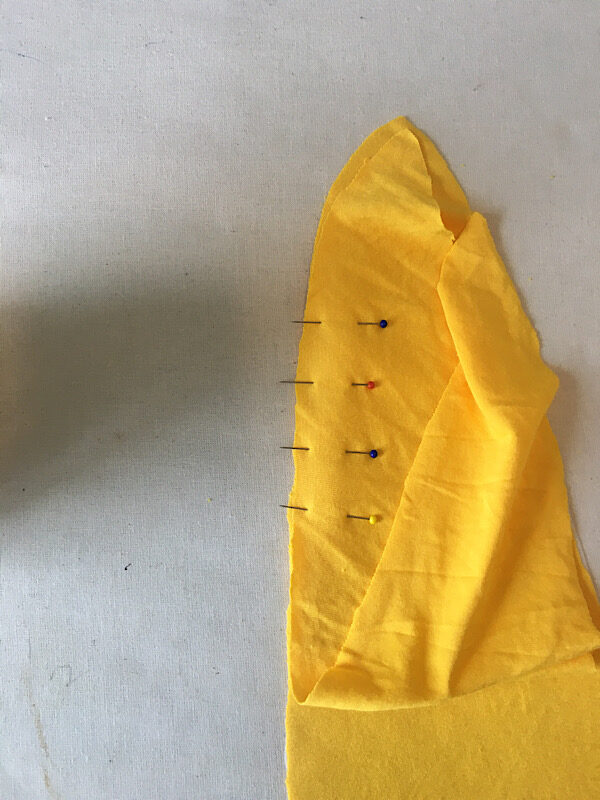
Now pin the other side of the folded lining piece to the second exterior tie piece the same way, as shown below. The inside lining should lie flat on top of the two exterior pieces, which will be folded slightly together at the base to fit.
Pin down the right and left sides.
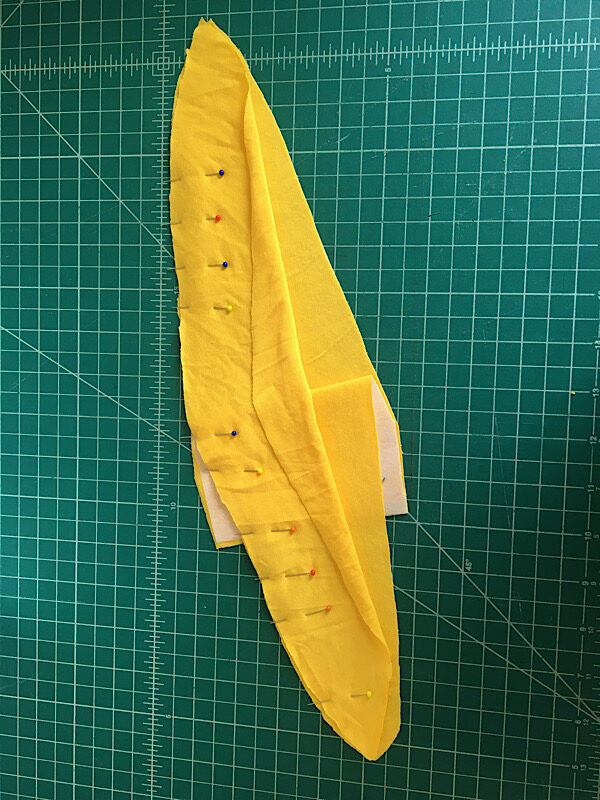
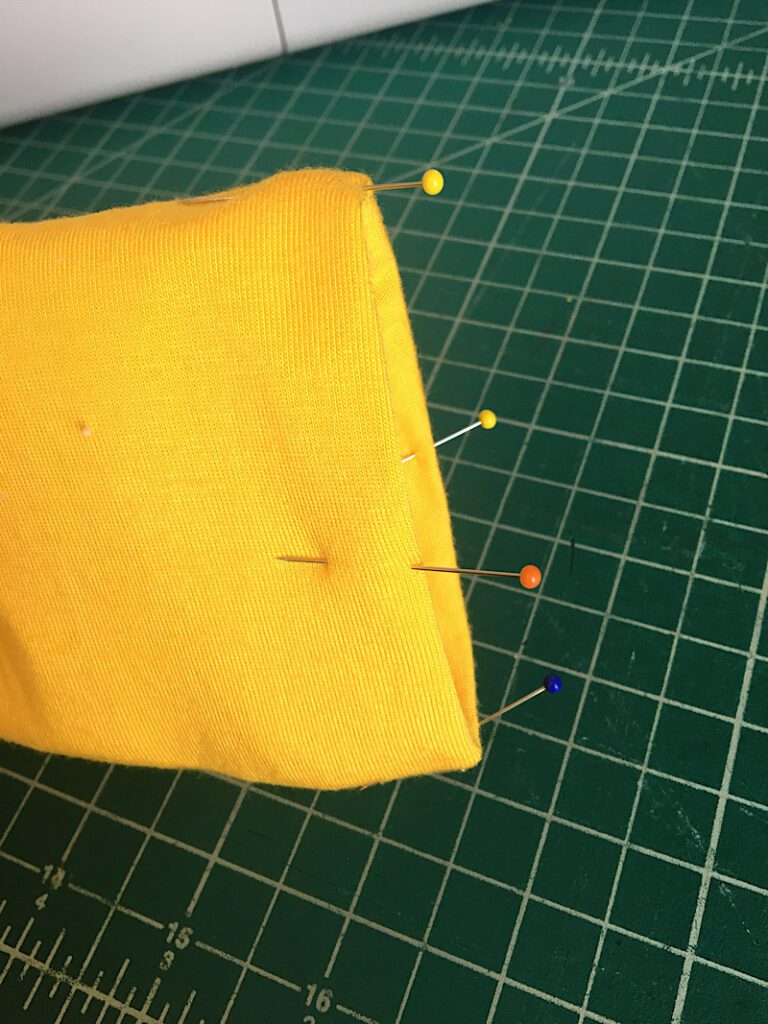
Now, you will sew around the perimeter of the ties with a 1/2 inch seam allowance. You don’t want to sew through the base underneath that is not pinned. Sew starting at the line where the two exterior pieces meet, and around the curve and back down. Then, fold the base towards the other side and sew the other side of the ties the same way.
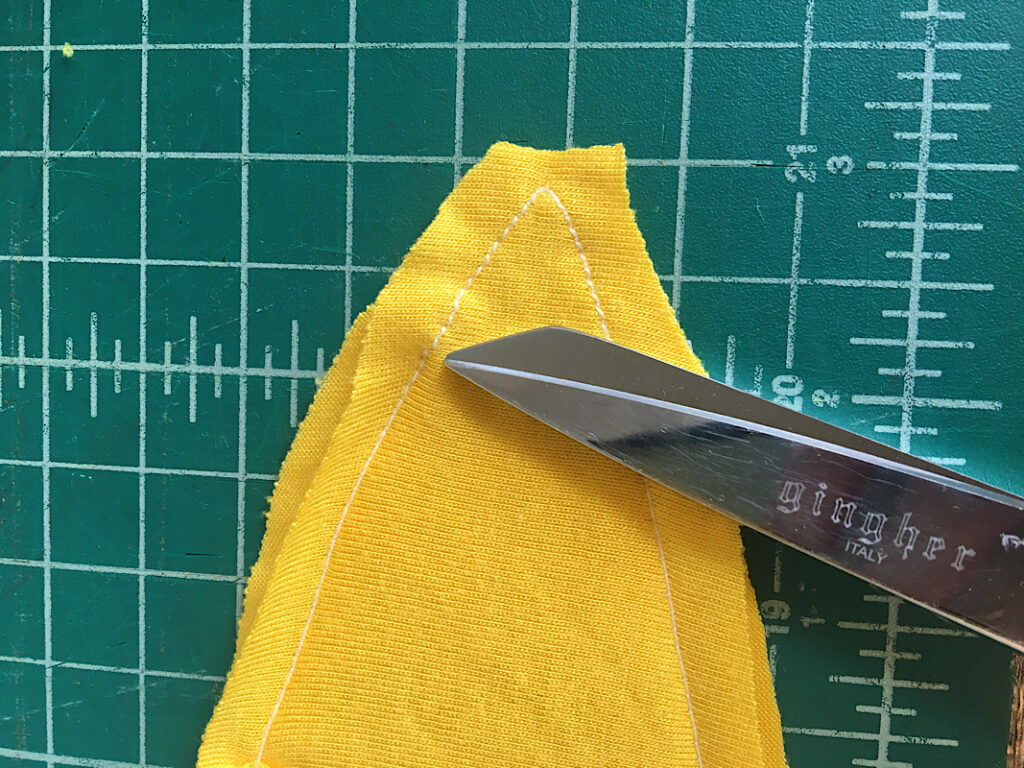
After sewing, clip the excess fabric off each tip of the ties.
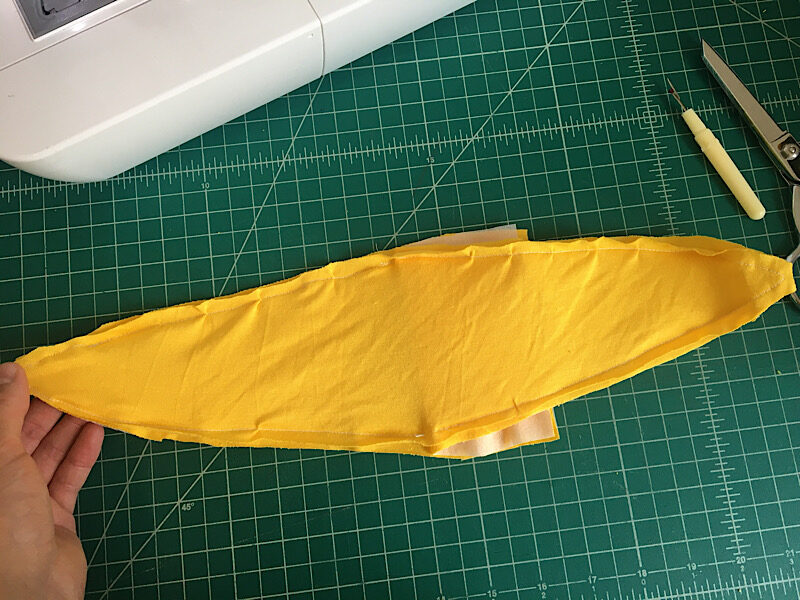
Turn the ties inside out, and press them.
Now you will have a base with an open gap at the bottom, and two ties that look like bunny ears on the top!
Step 3. Attaching The Towel
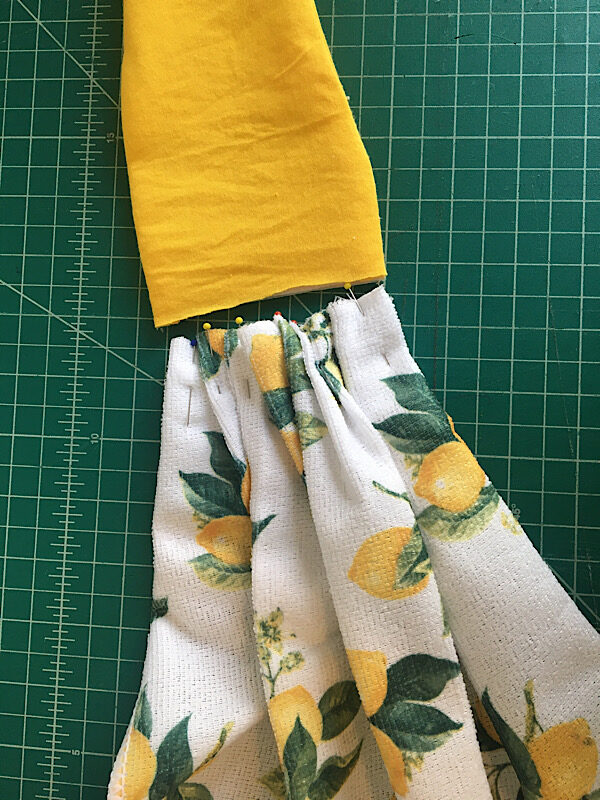
At the open end of the ties, fold the raw edge up into the inside all the way around 1/2 an inch, and pin it in place.
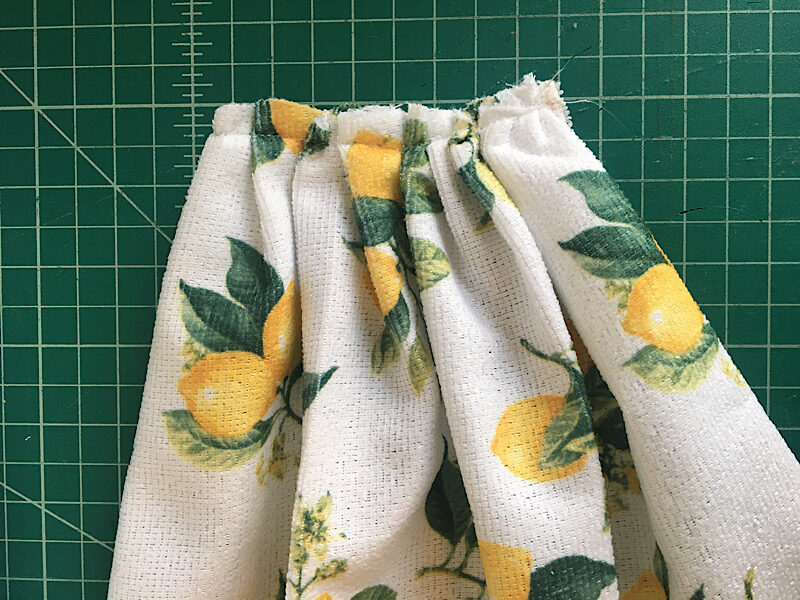
Pleat or gather the top cut edge of the towel, until it is the same size as the opening of the ties.
Then sew it down to hold the pleats/gathers in place.
Place the gathered end into the opening of the ties.
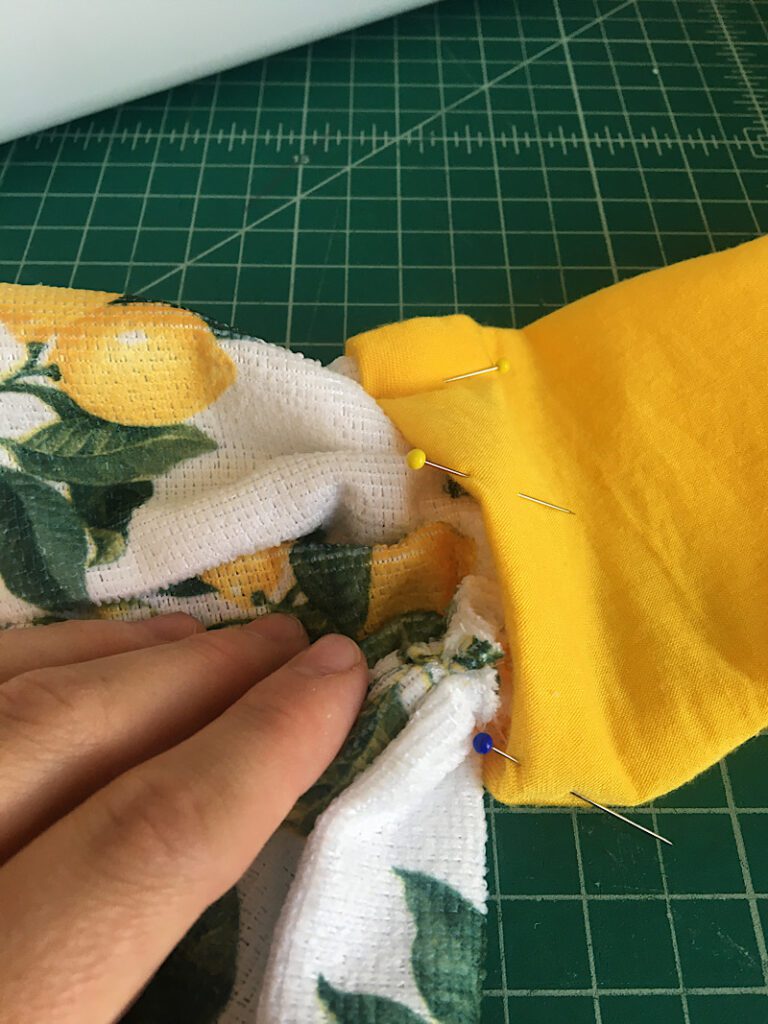
Pin it all together. Check the back to make sure the pins have gone all the way through, and that the back and front of the base of the tie are as aligned as you can.
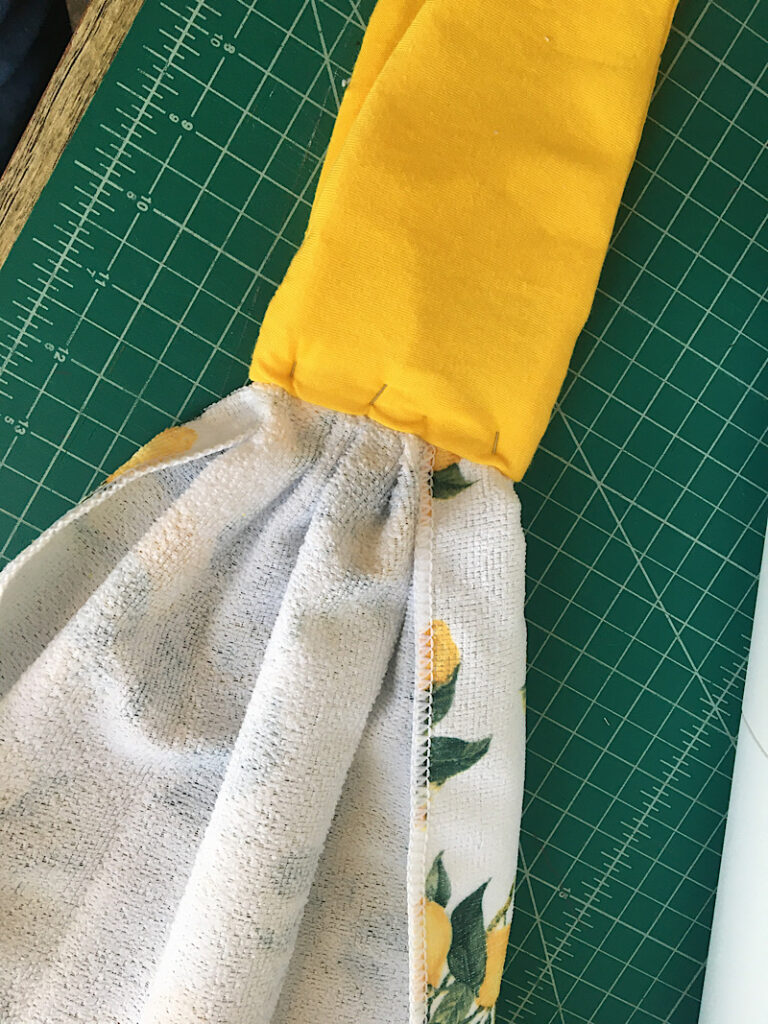
Finally, sew a top stitch along the bottom edge of the tie, making sure to catch the bottom layer as well.
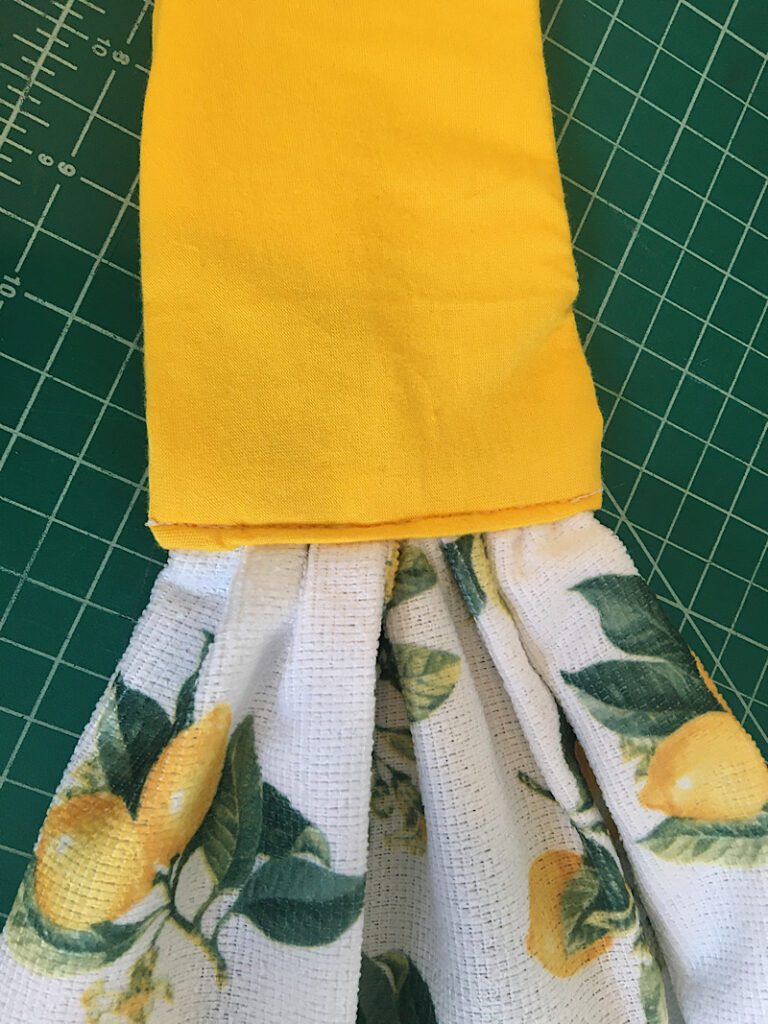
Then you are done!
Now you can tie it to the oven!
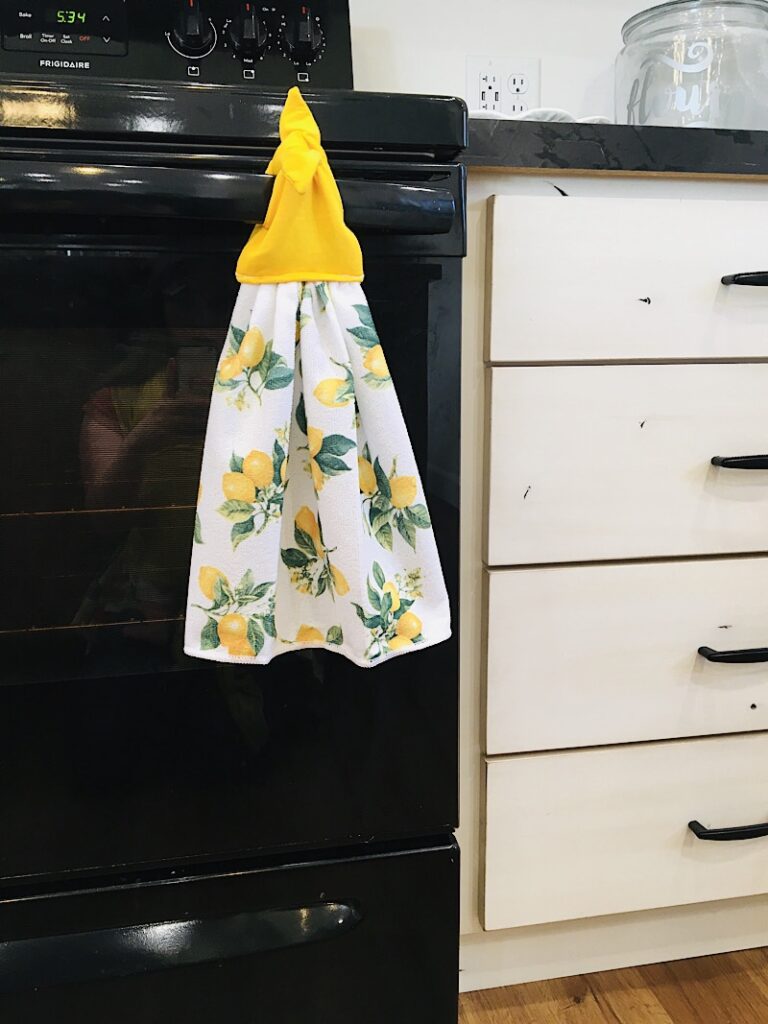
It turned out so cute!
I hope you liked this free tutorial to make a tie on hanging kitchen towel, my way! If you have any questions, please let me know in the comments below. And be sure to share your finished project in our Seam Whisperer facebook group!