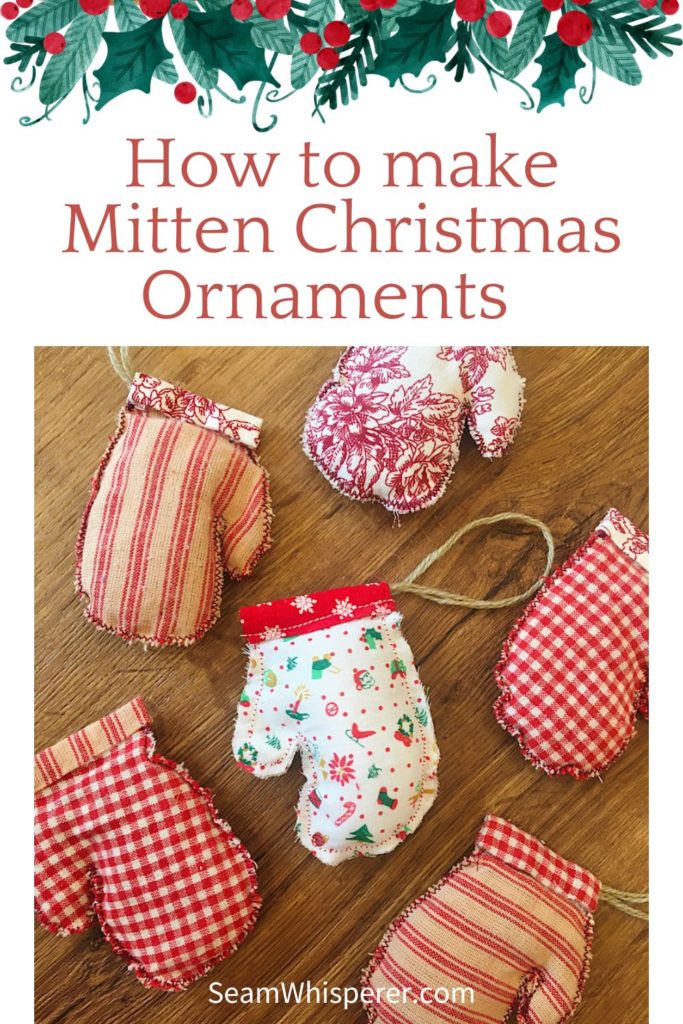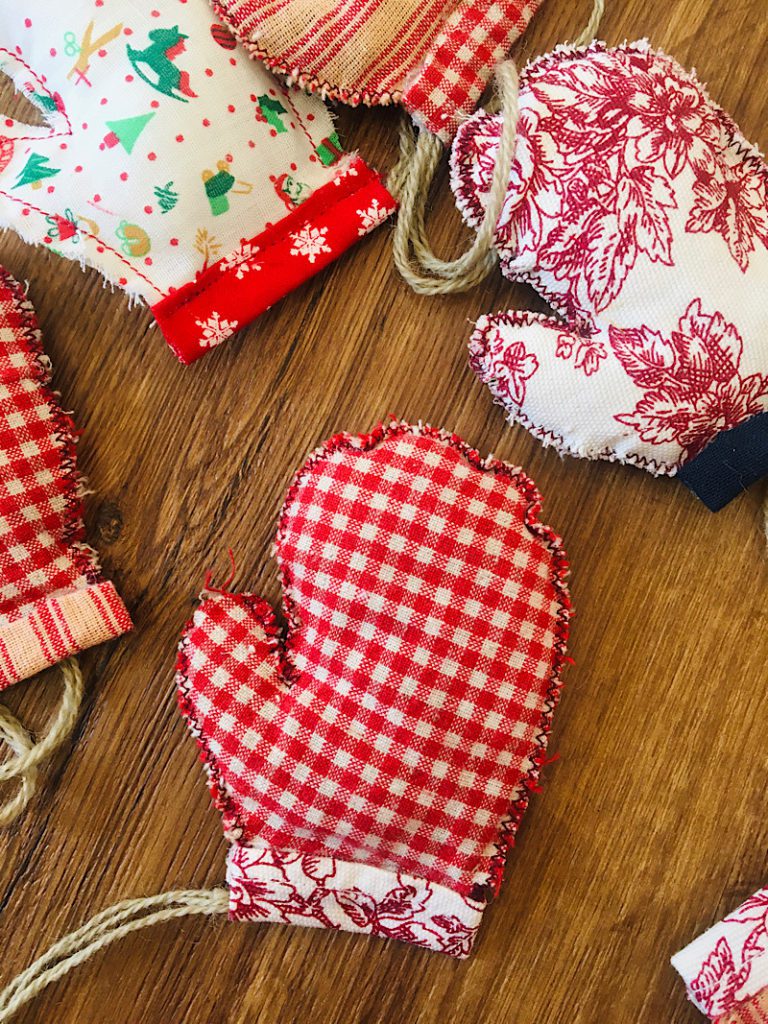
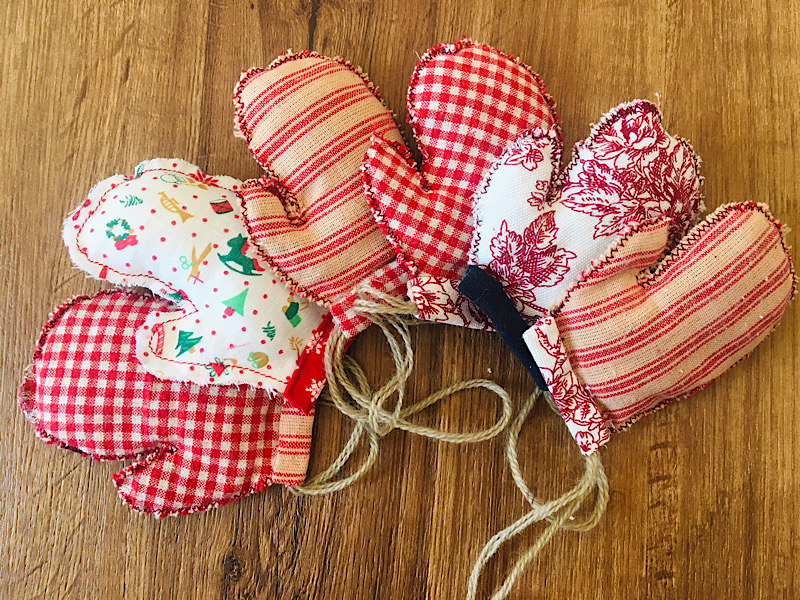
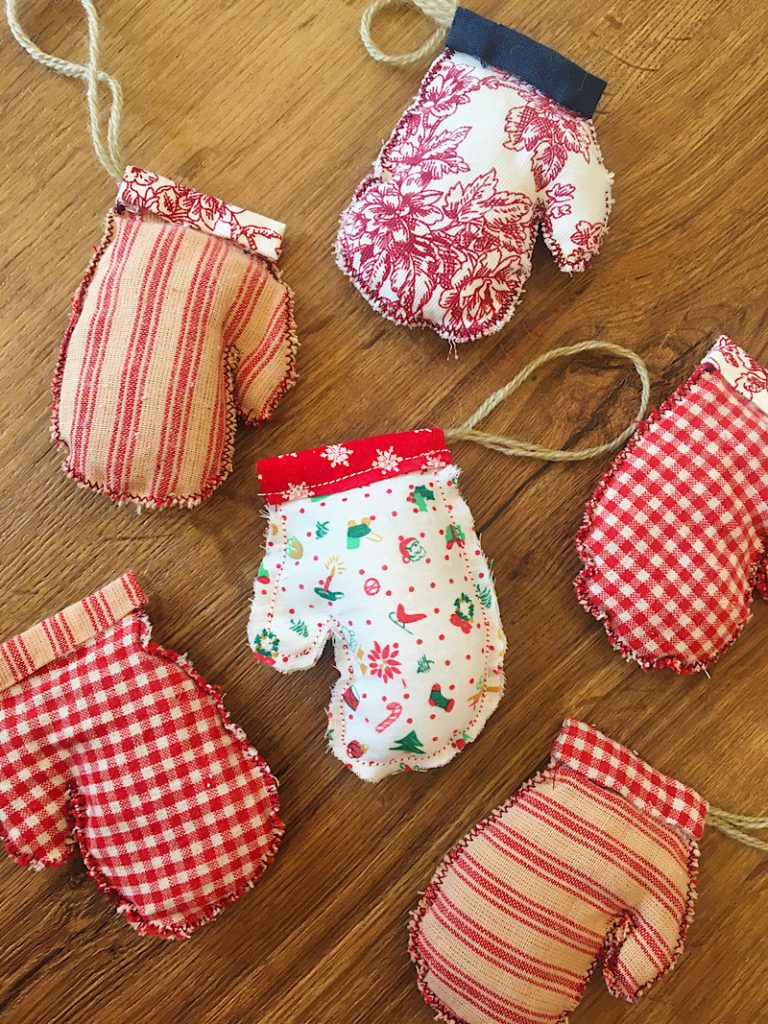
Make a tiny set of decorative mittens to hang on your Christmas tree this year! These tiny mitten ornaments are endlessly customizable, rustic, and add a pop of playfulness. This is a great sewing project for scraps!
I remember by first real Christmas tree in my first real house… We were so low on money I had to make all our Christmas Decorations by hand! But that was one of my favorite years. The tree was filled with photographs, little hats, bells, and tons of these tiny little mittens!
Make sure to look at my other rustic and cute Christmas sewing tutorials!
- Modern Farmhouse Tree Skirt Tutorial
- Rustic Christmas Tree Bunting Free Pattern
- Fabric Christmas Countdown Chain
- Patriotic American Flag Christmas Stocking
This post may contain affiliate links. Read the full disclosure here.
About the Pattern
This is a beginner pattern. As you can see from the list of customizing options above, you can make it as simple or custom as you like.
To make this pattern, you either need to draw your own mitten shape on a piece of paper, or you can use the pattern I prepared for you by entering your email below. When you sign up, I will send the printable PDF pattern to your inbox so you can use it again and again!
What I like about these mittens is how customizable they are. You can go plain, go fancy, go modern, go rustic. Here are some ideas of how you can make these mittens your own:
- Use decorative stitches on the hem
- Embroider on the mitten
- Sew the mittens with right sides facing, then turn them for a clean seam
- Sew the mittens with wrong sides facing, for frayed rustic edges (like in this tutorial!)
- Zig zag around the edges, or not.
- Add a bow near the base of the string
- Add a little jingle bell
- Use pinking shears to trim around the mittens to reduce fraying and add some texture
- Add tiny pom poms under the hem
- Make the mittens look quilted by sewing straight stitches through the fabric before you sew both sides together
- Upcycle a sweater or scarf to make the mittens look more real!
- Print the mittens at different sizes to make larger and smaller ones
- Turn these ornaments into a garland!
What kind of fabric is best for this mitten craft?
I used quilting cotton for these mittens, and that is what I recommend.
However, if you have leftover sweaters, they could upcycled and made into these tiny mittens for a more authentic look!
Can I sell ornaments made with this pattern?
Yes you can! Thanks for asking. Have fun!
Please don’t redistribute or sell the actual pattern though. Thank you!
Looking for ideas for Homemade Christmas Gifts? You need to read my list of free and cheap Christmas Gift sewing patterns!
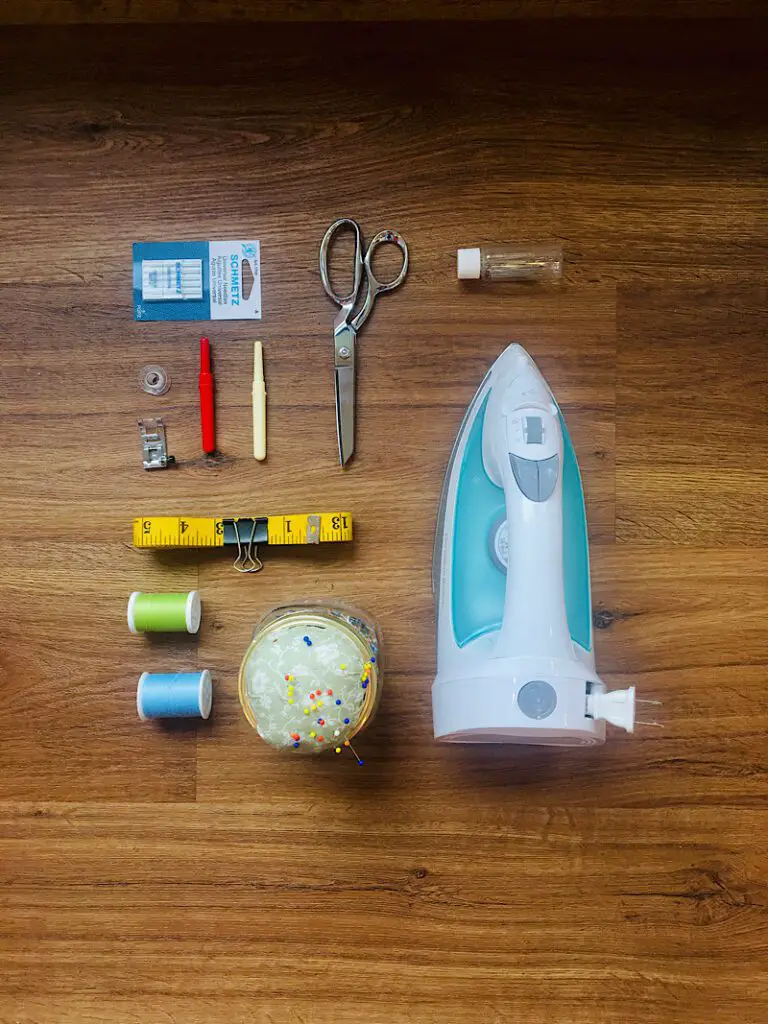
Equipment Needed
- Sewing Machine
- Sewing Scissors
- Iron & Ironing board (Optional but recommended)
- Sewing Pins or clips
Materials Needed
- Two pieces of 3.5″x4.5″ fabric per mitten (For a set of 12 mittens, 1/3 yard of 44 inch wide fabric will work)
- One piece of 2″x3″ coordinating fabric per mitten (For a set of 12 mittens, an 8th or fat 8th of a yard will work)
- Fiberfill, batting, or even fabric scraps or plastic grocery sacks to stuff the mittens with.
- Matching thread
- 10 Inches of complimentary colored yarn or cotton string per mitten (For a set of 12 mittens, you will need 120 inches/10 feet/3.5 yards)
How to Make Mitten Christmas Ornaments
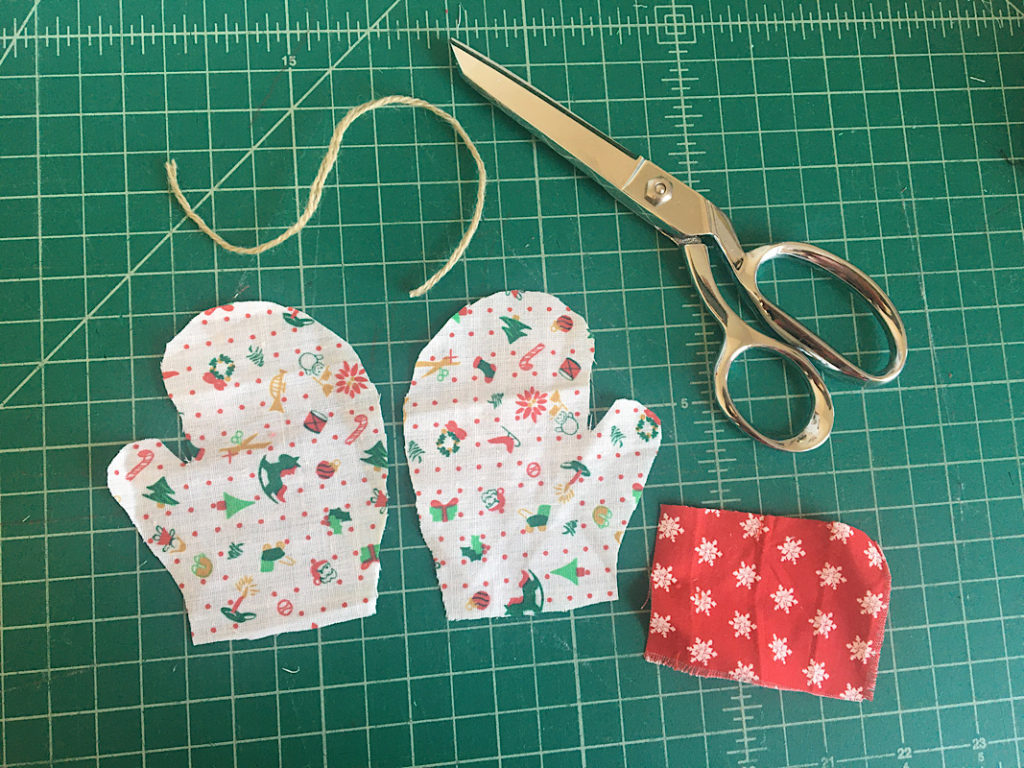
Step 1. Cut out the pattern pieces
Print the sewing pattern out at 100% scaling and test the “1 inch test square” to make sure it is printed correctly.
Cut out the pattern pieces and lay them on your fabric. Cut one 2″x3″ rectangle per mitten, (this will be the cuff of the mitten).
Cut out two mitten pieces per mitten you want to make. Make sure to cut them facing in opposite directions, so there is a front and a back with the right side of the fabric.
Cut 10 inches of yarn per mitten
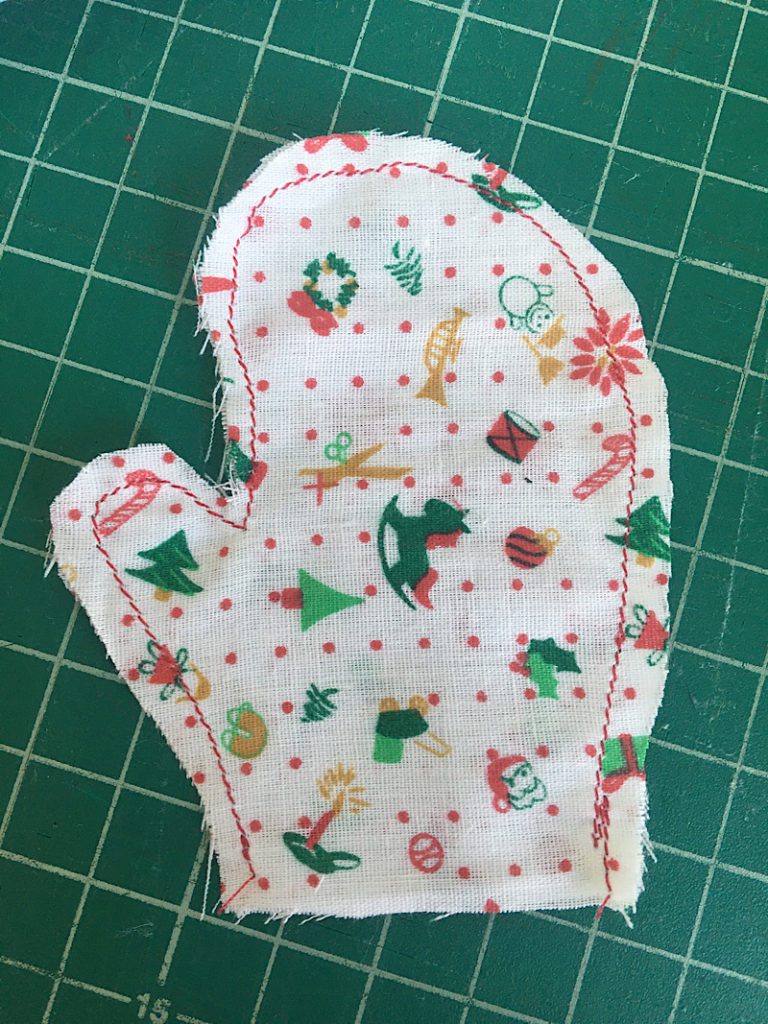
Step 2. Sew the mitten pieces together
Lay both mitten pieces on top of each other with wrong sides facing together. Sew around the edge with a 1/4 inch seam allowance.
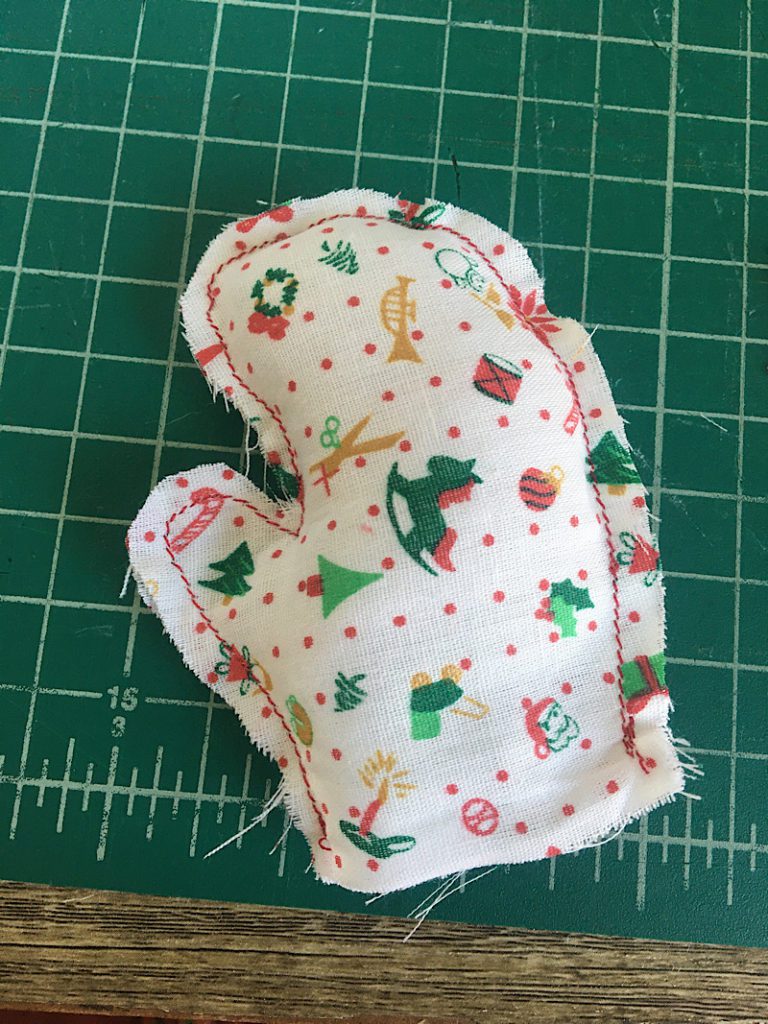
Step 3. Stuff the mittens
Using fiberfill, plastic sacs, or whatever you have around, stuff the mitten until it is plump. Make sure to get stuffing in the thumb portion as well.
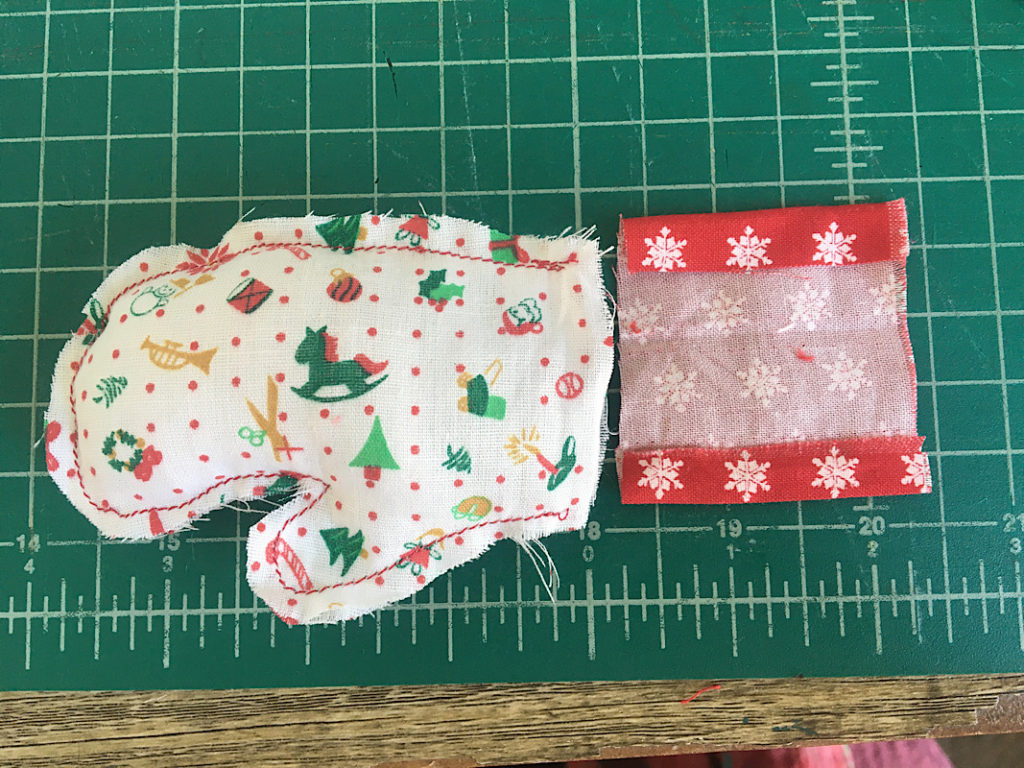
Step 4. Fold and attach the mitten cuff
Take the 2″x3″ rectangle and fold the two short ends down 1/2 inch to make a 2″x2″ square. Use an iron or your fingers to press the folds flat.
Then fold the other two sides into the center. Use your fingers or an iron to press flat.
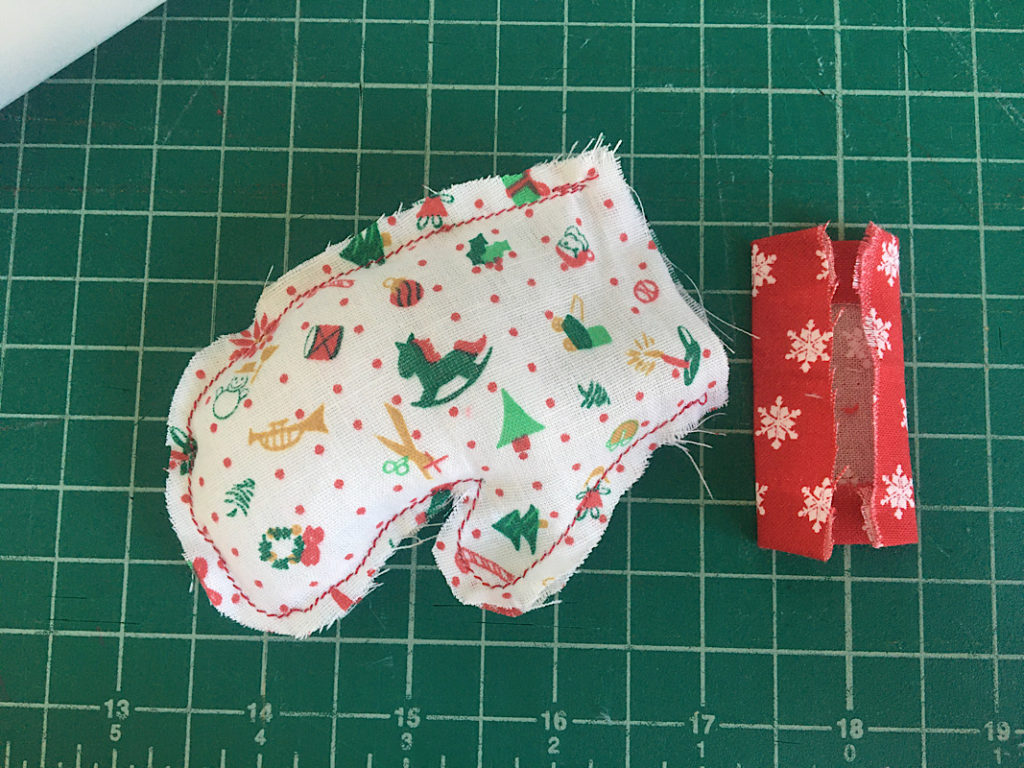
Place the open edge of the mitten onto the center line of the folded cuff.
Grab a piece of string and fold it in half. Stick the ends of the string into the cuff, then fold the cuff up over the edge of the mitten so it is even on both sides. Pin it in place.
Sew along the top edge of the cuff, making sure to catch the back side as well. Also make sure you sew through the strings to attach them to the mitten.
This completes your mitten ornament!
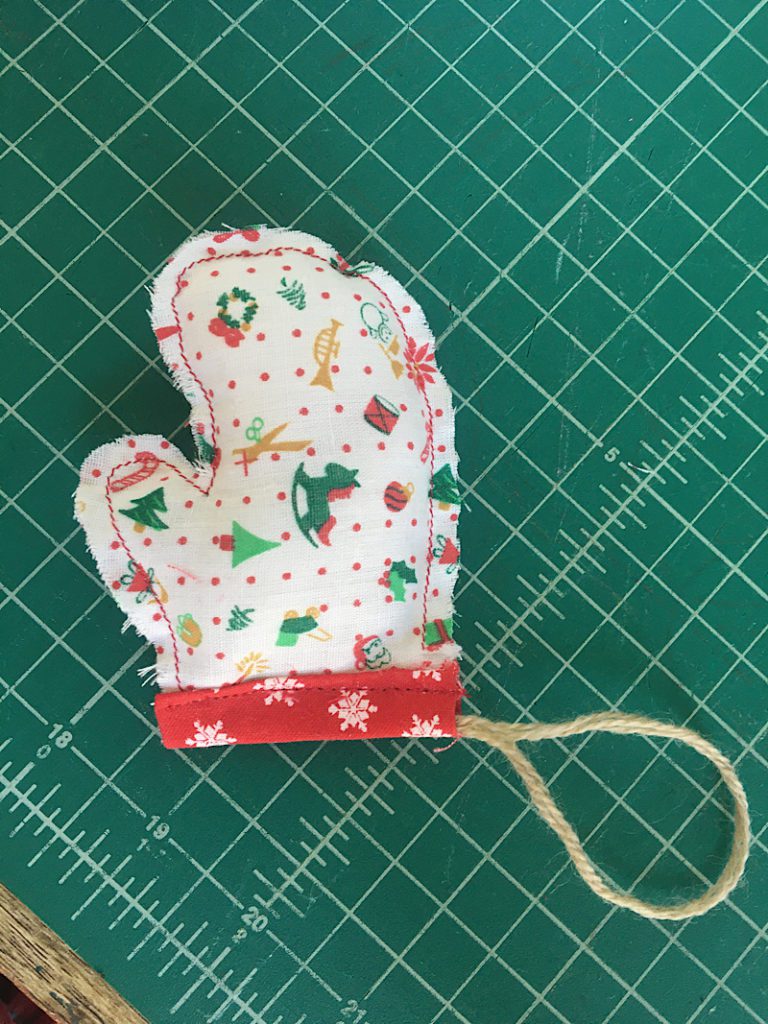
Once you have sewn one, the rest become much faster and easier. They are going to look great on your rustic Christmas tree!
Don’t miss my post full of free and cheap Christmas Gift Sewing Patterns for ideas this year!
Make sure to pin this post if you like this project, it is so helpful to me! Let me know if you have any questions or comments below.