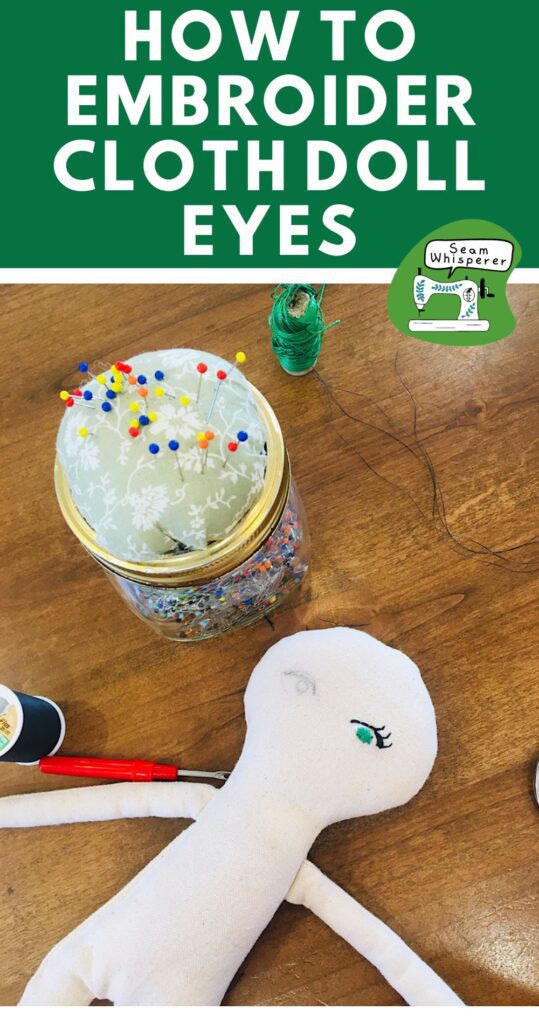
Are you looking for an easy but cute way to embroider eyes on your rag doll? Today I will teach you a very minimal but pretty cloth doll eye that’s colorful, has lashes, but is simple enough for beginners!
Cloth doll eyes can be as complex or simple as you want them to be. You can paint with your embroidery floss, or you can so cute little dots.
It all depends on the style of cloth doll you are making! Is is a fantasy creature, or a raggedy Ann?
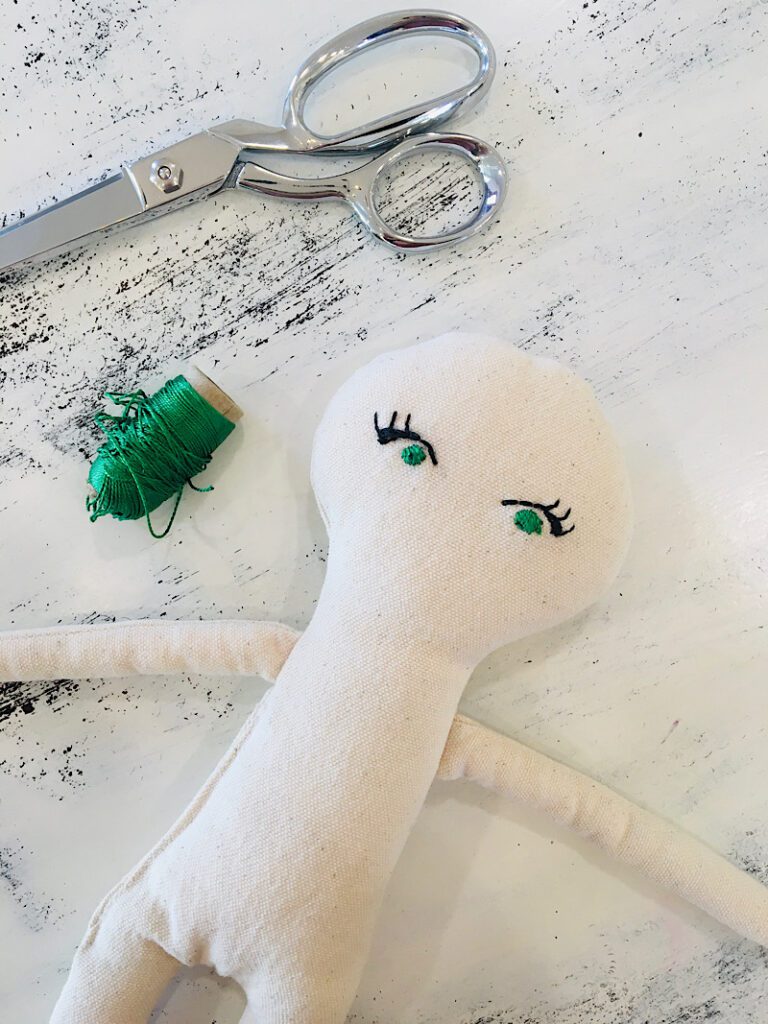
Today I embroidered two very simple but pretty green eyes for my newest cloth doll, and my child said “those are the prettiest eyes I’ve ever seen!”
That’s all you need to know!
This post may contain affiliate links. Read the full disclosure here.
About This Tutorial
I want to emphasize again that there is NO one right way to embroider eyes on a doll. There are literally endless possibilities!
If you want to try a different look than the one I show in this tutorial, make sure you download my free collection of cloth doll face templates so you can try out any eyes you like!
I prefer to embroider doll eyes before cutting and sewing the doll. For me, it is easier to make the eyes perfect when the material is in an embroidery hoop, and I can knot on the back. Plus, I can trace any face template perfectly onto the doll instead of having to draw the face on freehand.
But today I will show you how to embroider on a finished doll.
Supplies Needed
- Sewing Scissors or Thread Snips
- Embroidery Needles (Or hand Sewing Needles)
- A pencil or washable fabric marker
Materials Needed
- Embroidery Floss, Black for the outline and a color for the iris.
- Finished doll to embroider (Get my free cloth doll body pattern here!)
How To Embroider Eyes On A Cloth Doll
Step 1. Draw The Eyes
While you can certainly freehand-embroider the eyes onto your doll, I recommend marking the doll by drawing eyes on.
Determine where you want the eyes on the doll to be. Remember that eyes are about halfway down the face. On a real person, the face is about 5 eye-widths wide. On your doll, you can place and size the eyes how you wish.
You might want to practice drawing the eyes on paper first.
With a pencil or disappearing ink fabric pen, draw two circles on your doll’s face that will be the iris (colored part of the eye). I made mine about a quarter inch large, but bigger would be great too.
Above each iris, draw a gently curved rainbow shape for the eyelid.
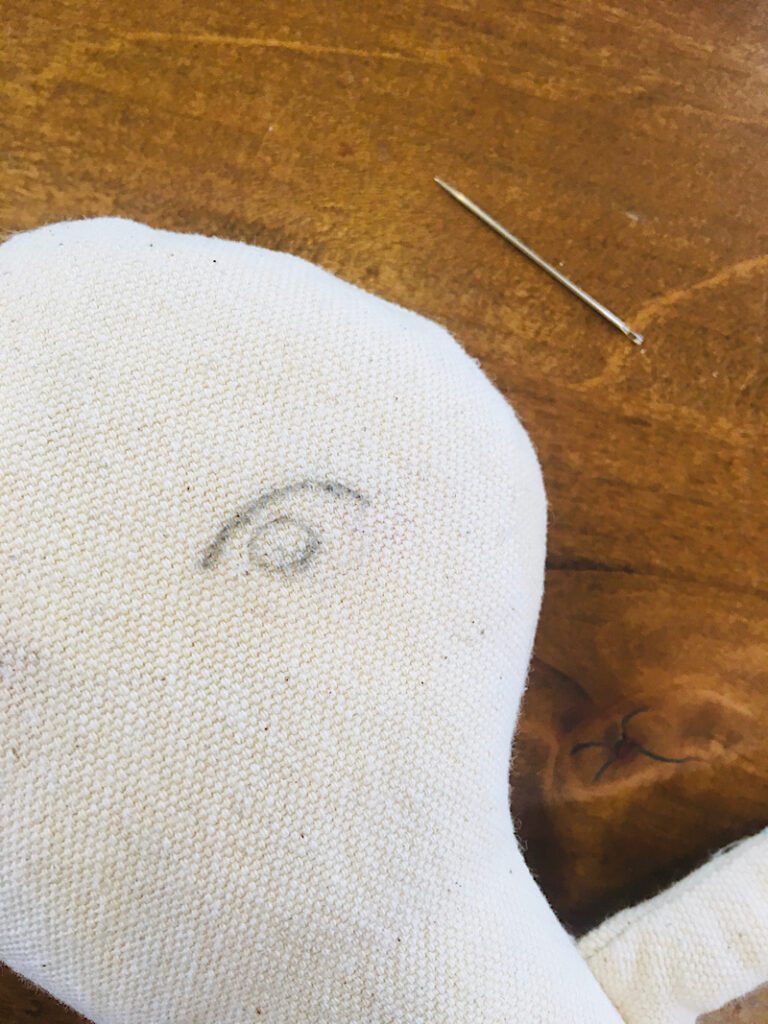
This will be the base outline for your eyes.
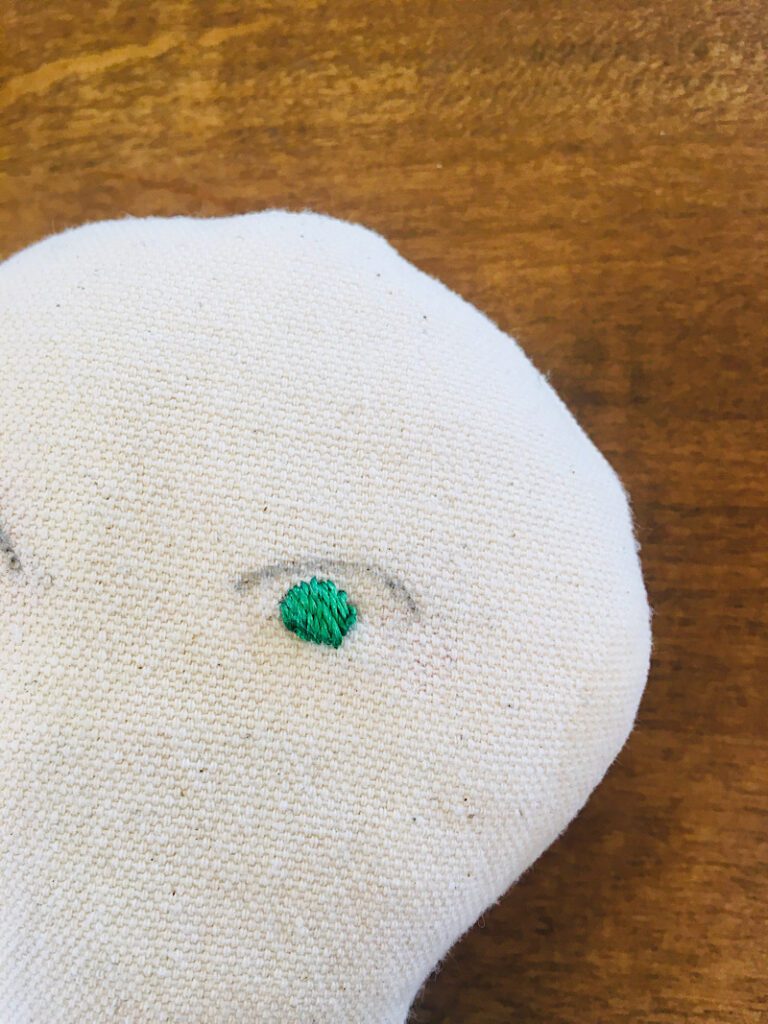
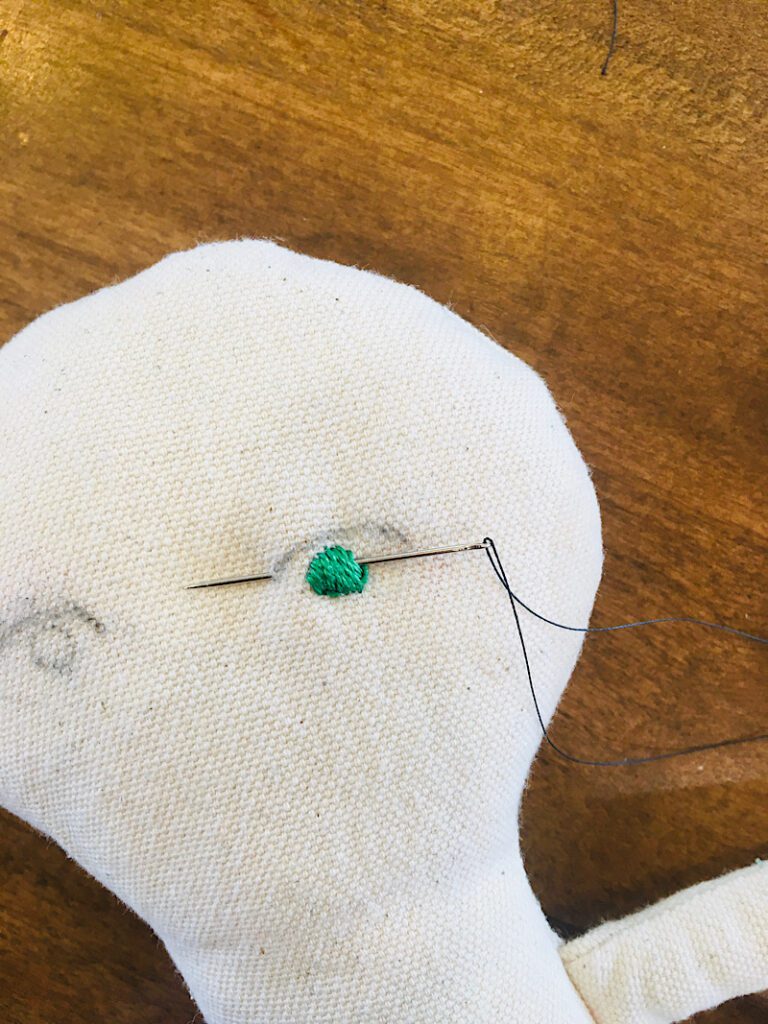
Step 2. Embroider The Iris
Thread your needle with a long piece of the colored embroidery floss (perhaps 20 inches). It is better to be too long than too short!
I like to embroider with one thread, so instead of pulling the needle to the middle of the floss and tying the two ends, I pull it only a few inches down the floss and hold onto the short piece while I embroider to keep the needle securely on the floss.
The iris will be embroidered with a satin stitch. The satin stitch makes vertical lines across the shape.
Insert the needle at the bottom left on the edge of the outline of the circle you drew. Exit the needle straight above on the top edge of the circle outline.
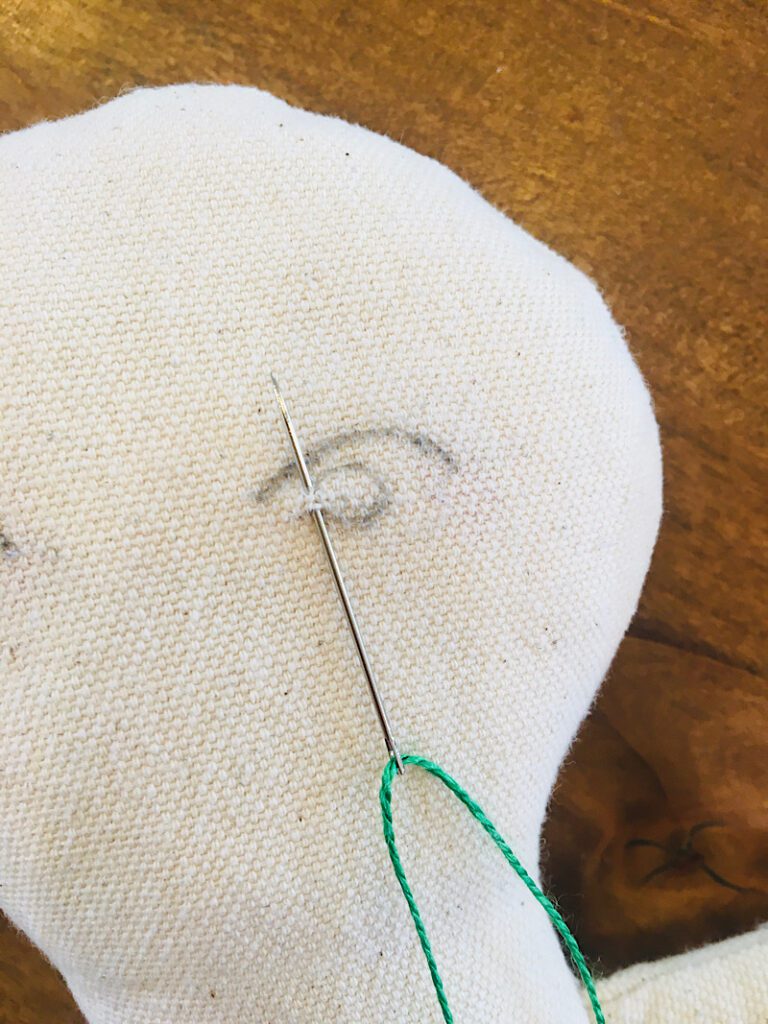
Pull the thread through, but leave about an inch or 2 hanging out the front.
Then, start the next stitch by inserting the needle at the bottom of the circle right next to the first stitch, and exit at the top right next to the first stitch.
When you pull the thread through, you will have made your first line!
Now, you repeat this step to make satin stitches across the entire circle shape. As you work, keep the tail end of the floss pointing sideways so your stitches are wrapping around it and holding it down behind the iris.
Make sure to insert and exit your needle right on (or even slightly outside of) the line you drew to maintain that circle shape.
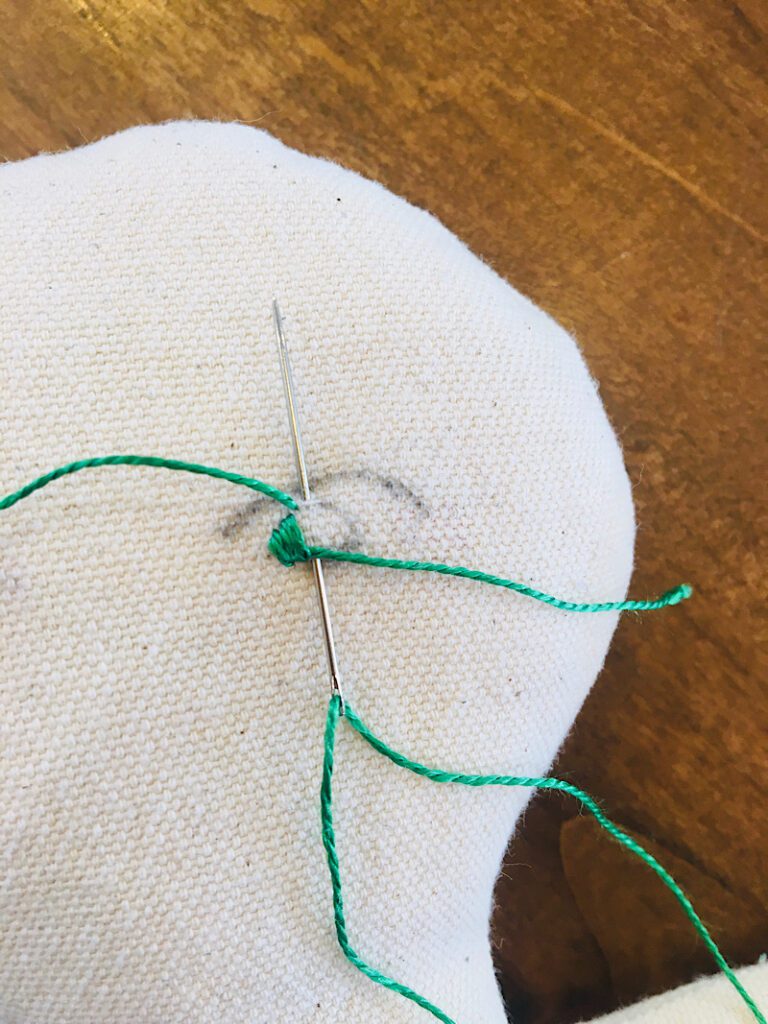
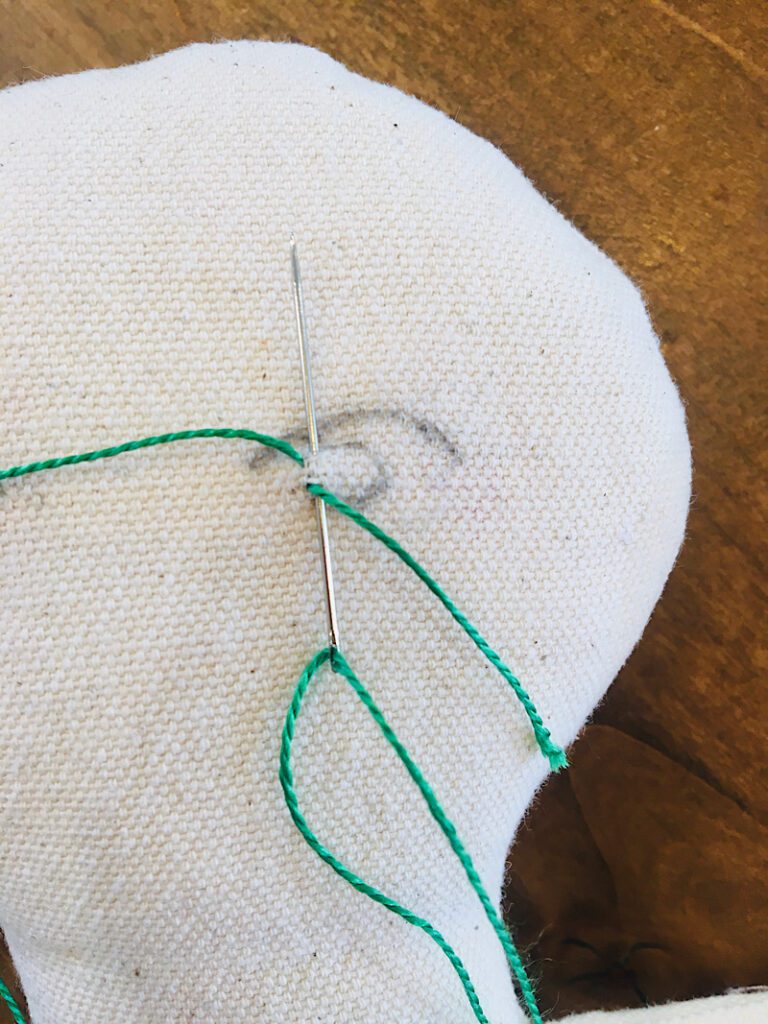
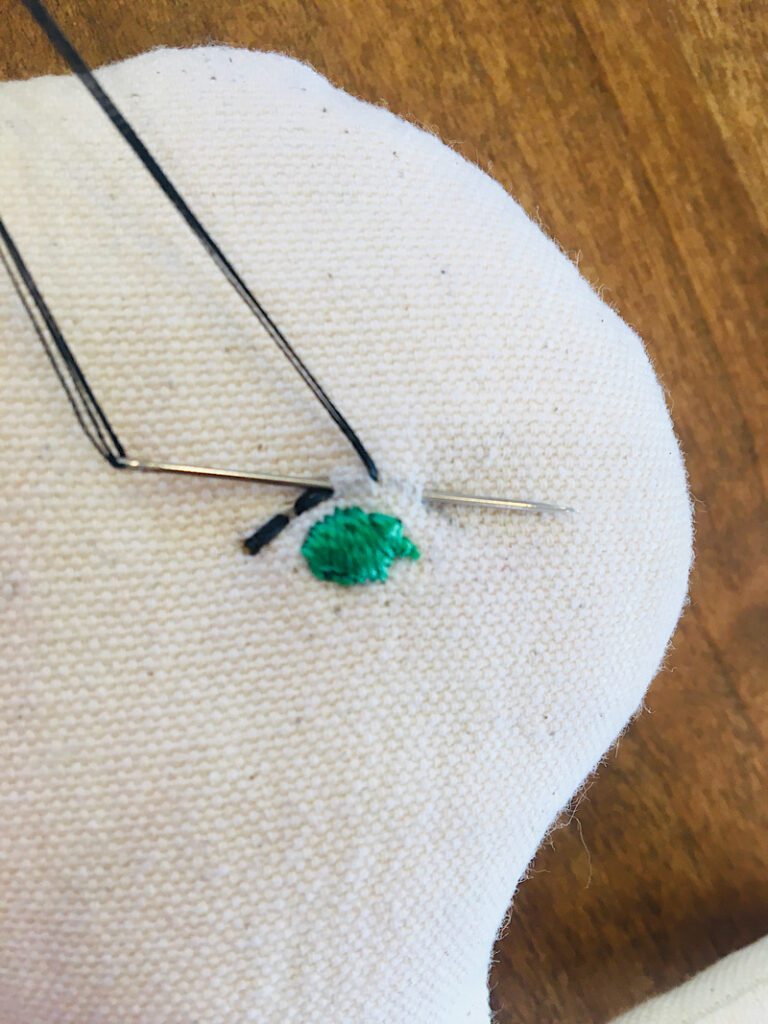
Step 3. Tie A Knot Behind The Eye
You should have ended with your needle on the same side as the tail thread, which is sticking out of the side of the finished eye.
Insert the needle behind the satin stitches and through the other side of the eye, but don’t pull it all the way through yet.

Wrap the loose tail thread twice through the loop you made with the needle, then pull the needle all the way through. This will make a knot.
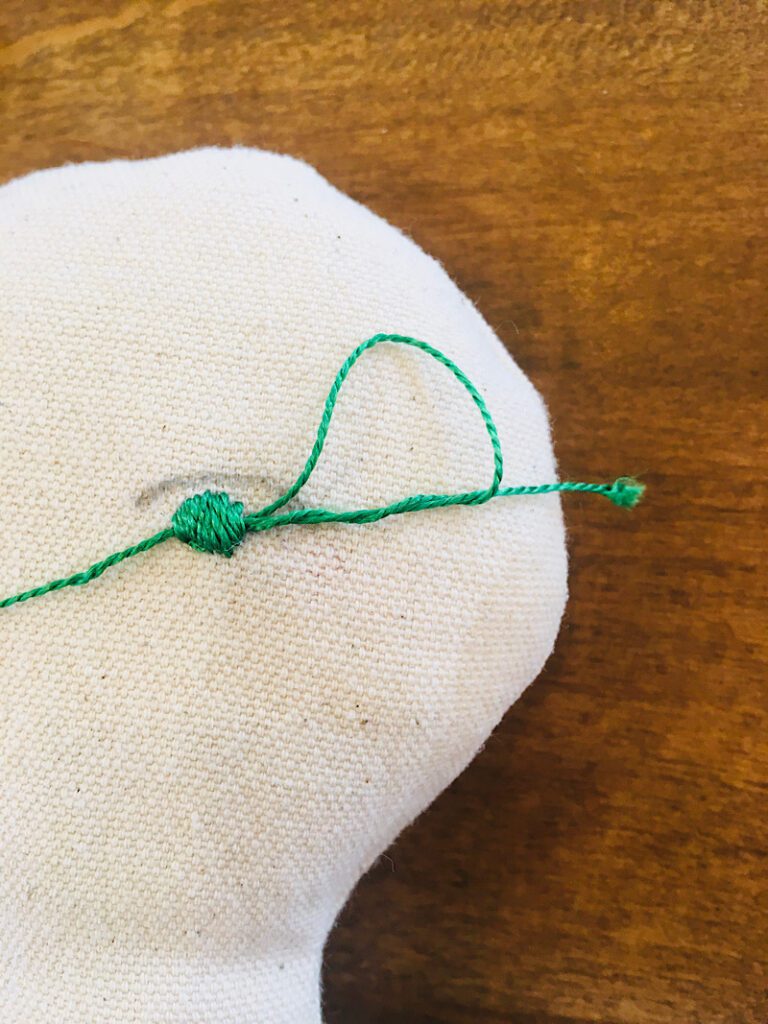
Pull the knot into the middle behind the eye, then pull on both threads to tighten it up.
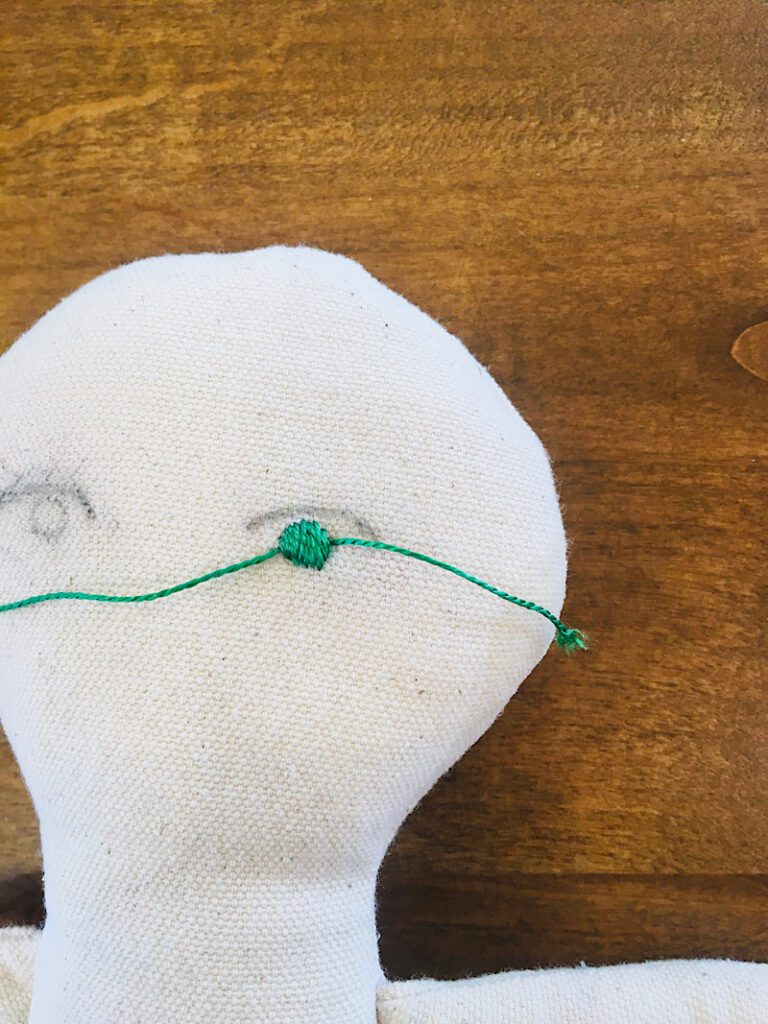
Then, clip the threads carefully so you don’t snip any of the satin stitch.
If you want to do the other iris at this point, you can. Or you can do one entire eye, then the other. It doesn’t matter!
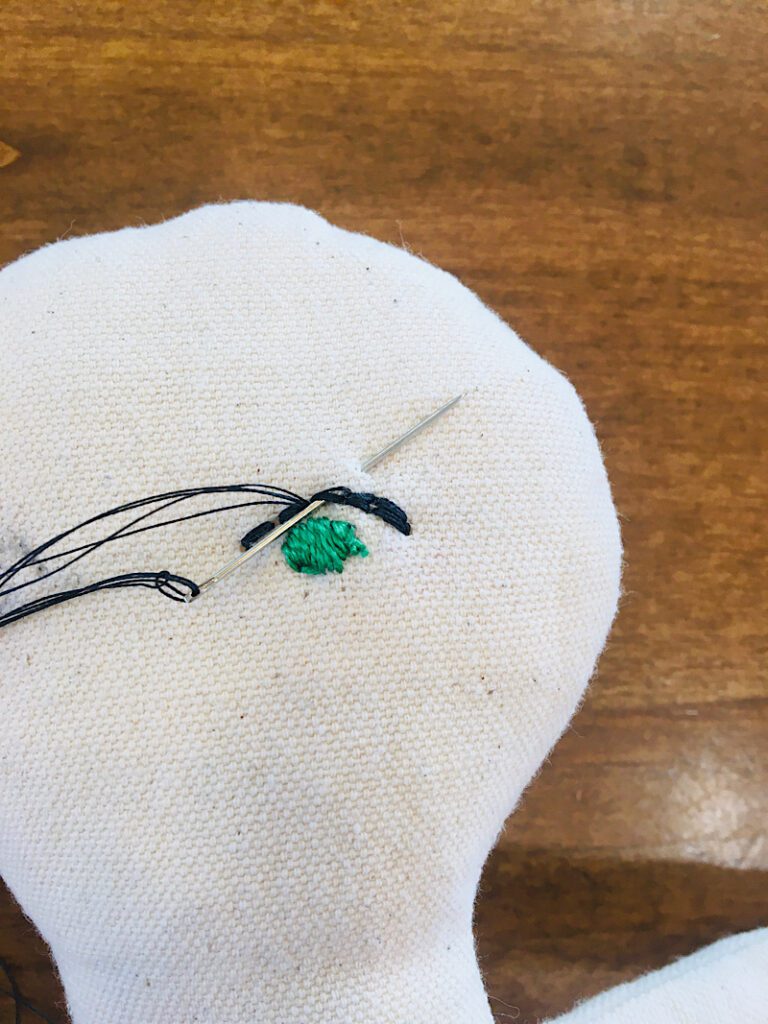
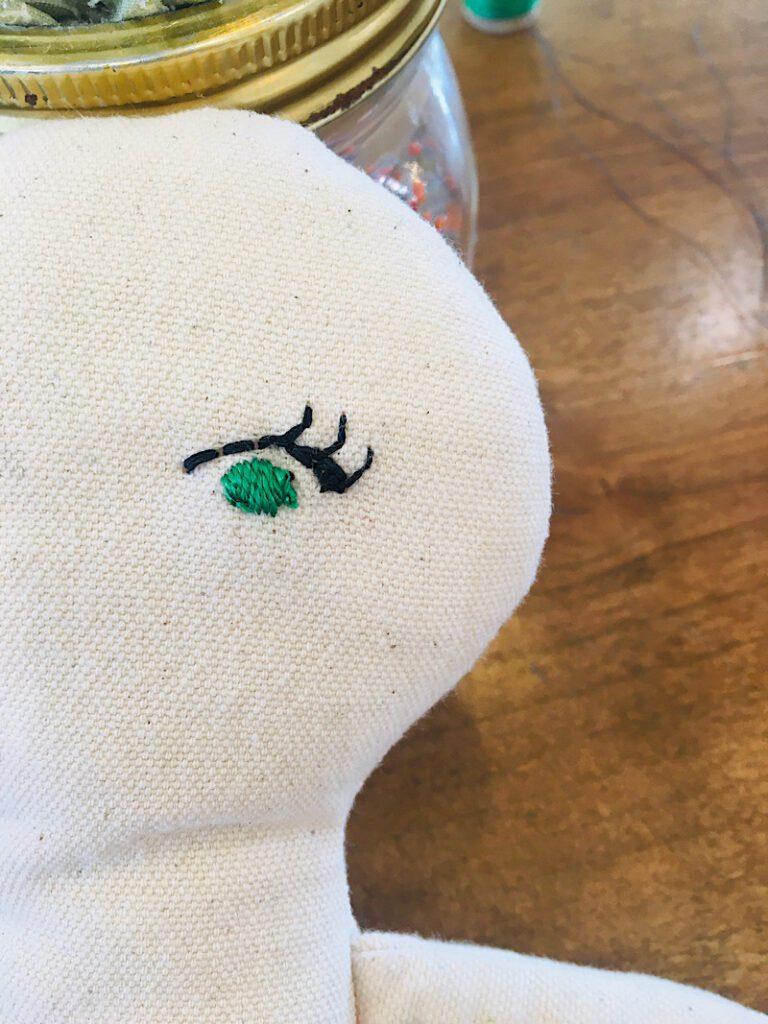
Step 4. Embroider the Eyelid
Thread a long length of black embroidery floss onto your needle. Tie a knot onto the end and clip the excess as close to the knot as you can.
(Note: I used regular black thread for this part because I ran out of black embroidery floss! But I would have done it with a single embroidery thread like I did with the green, instead of doubled up. Since I had to use thin thread, I had to double it up.)

We are going to hide the knot of the eye lid behind the iris. Insert the needle through the outer edge of the iris, and behind the satin stitches but NOT through the doll’s head fabric.
Once the needle is behind the iris, then insert it down into the doll’s head fabric, and bring it up at the inside corner of the eyelid to start your stitch line.
You may have to carefully tuck the knot down underneath the satin stitches. I used a pin to do this.
This will hide the knot behind the eye!
Backstitch across the eyelid line once. If you need a reminder, a backstitch is inserted at point “1” (the top hole of the last backstitch) and then you exit the needle at an imaginary point “3”.
Once you have backstitched across the eyelid, backstitch again back the other way, but only to the middle of the eyelid. This will thicken up just the outside line of the eye to give it some dynamics, as if the doll is wearing makeup.
You will now make the eyelashes. Each eyelash is made with two backstitches, one longer one, and one shorter one on top that curves a little bit.
To make the first eyelash, insert the needle through the eyelid line and exit the needle diagonally to the side, where you can imagine a lash extending.
Make a backstitch to the second stitch in the lash, but don’t make this stitch continue straight from the first stitch. This time, exit the needle a little bit to the left to give the lash a bit of a curved shape.
You can see in the image below that to finish the second stitch in the lash, I am inserting the needle back into the top hole of the last stitch, like I would a back stitch, but then I exit the needle at the point I want to start the next lash from.
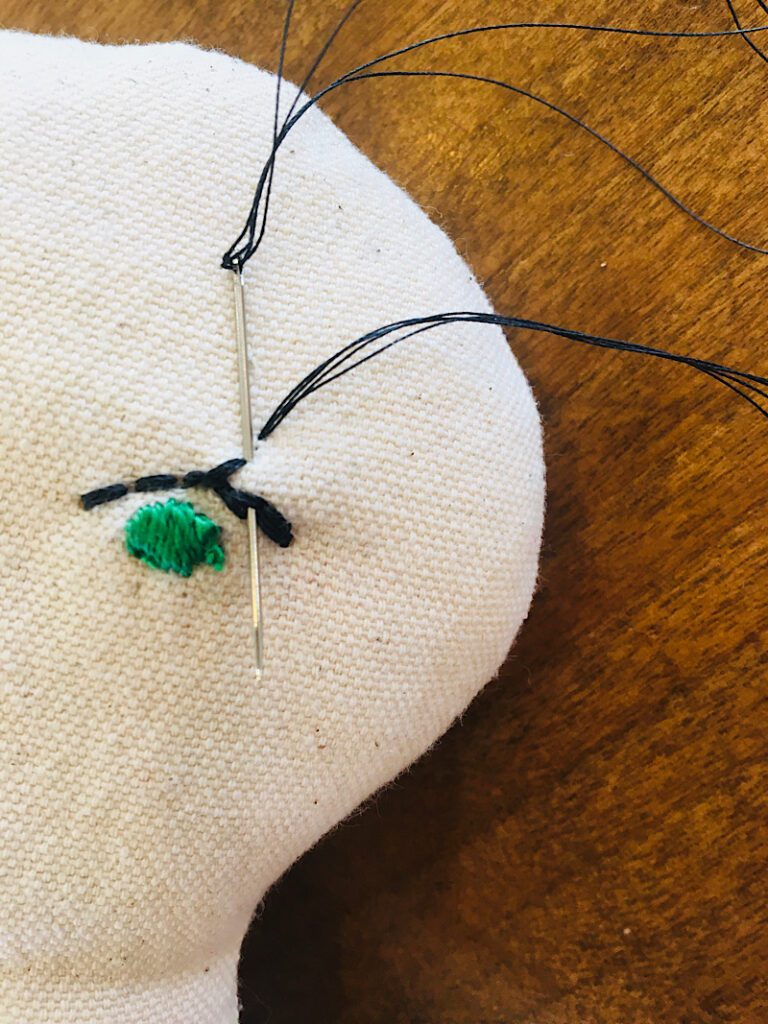
When you pull the thread through it will finish the first lash and start the second.
Repeat these steps for the second and third eyelashes!
When you are finished, you can hide your finishing knot two ways. You can try to hide it behind the eye again, or you can make a few stitches right on tip of each other in the corner of the eye and hope it doesn’t unravel, or you can push the needle through the back of the head and tie a knot there, where it will later be covered up by hair.
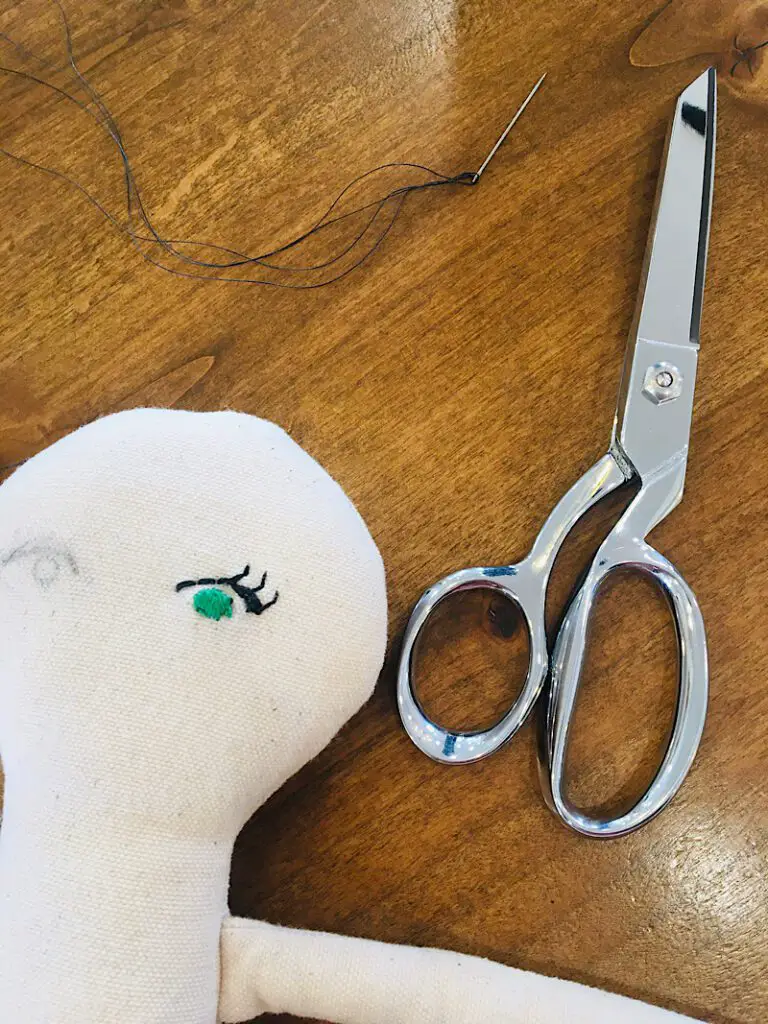
This completes the doll’s embroidered eye!
You just have to repeat these steps for the other eye and your doll eyes are complete!
Show & Tell
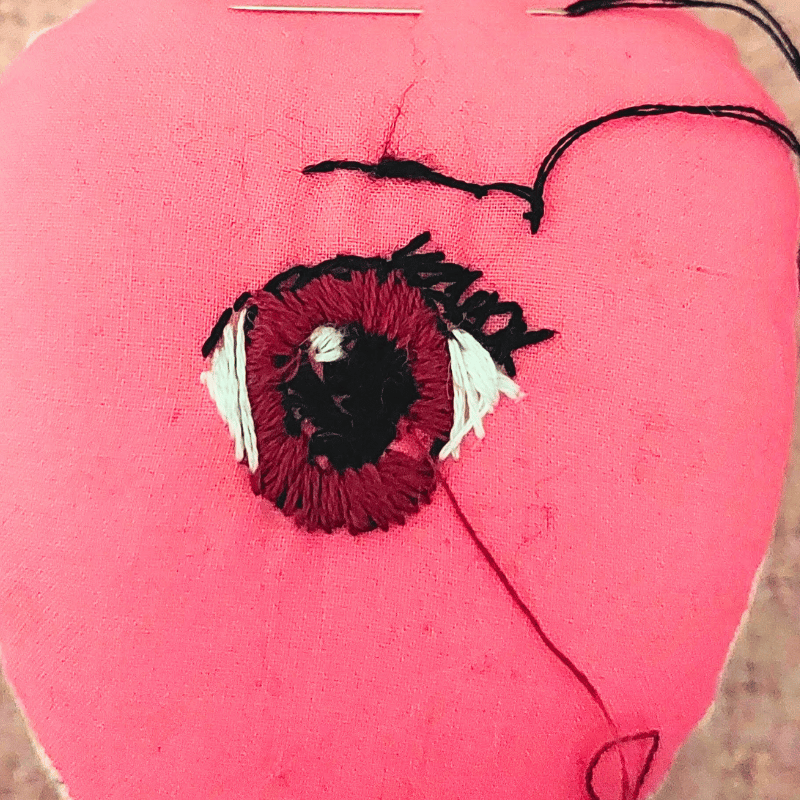
Arlene sent me this photo of her take on this tutorial!
She says: “Thank you for the free download (dolls faces). They gave me an idea so I have practised embroidering an eye for my rag doll.”
Very creative, thanks for sharing! That is so good for a “practice” attempt!
Conclusion
I hope you enjoyed this simple cloth doll eye embroidery tutorial! As you can now see, it results in a very minimalistic eye shape but is still detailed enough to be pretty and have some personality. The pop of color makes it stand out.
From this base eye you can add a pupil, bottom lashes, a bigger iris, whatever you want! Now that you have the technique down, experimenting becomes the fun part.
Let me know if you need help with any steps! Pin this post to reference later, and sign up for emails if you want to see more doll and sewing content.