Use this free sewing pattern to make a play diaper for a baby doll, using either snaps or velcro!
I have made my girls all kinds of doll accessories from dresses, hats, boots, scarves, and even cloth dolls themselves, but never have I ever made them a diaper!
My youngest daughter really wanted to pretend to be a mommy, and requested that I made her a diaper for her baby doll.
This pattern is SO easy to whip up, with multiple variations of how to make it:
- Serged/zig-zagged edges OR Hemmed edges (you’ll have to turn the diaper inside out, super easy!)
- Snap closures OR Velcro closures
- Inside and outside same color OR different colors.
This diaper will fit a small baby doll with a waist circumference of about 9-11 inches or so.
This post may contain affiliate links. Read the full disclosure here.
Supplies Needed
- Two 8″x10″ pieces of cotton fabric (can be colored, white, or one of each)
- Matching Thread
- Plastic snaps (I used a set like this kind) & applicator OR Sew-in hook and loop (Velcro)
- Sewing machine, fabric scissors, etc
- Serger (optional)
- Free Diaper Pattern (Below)
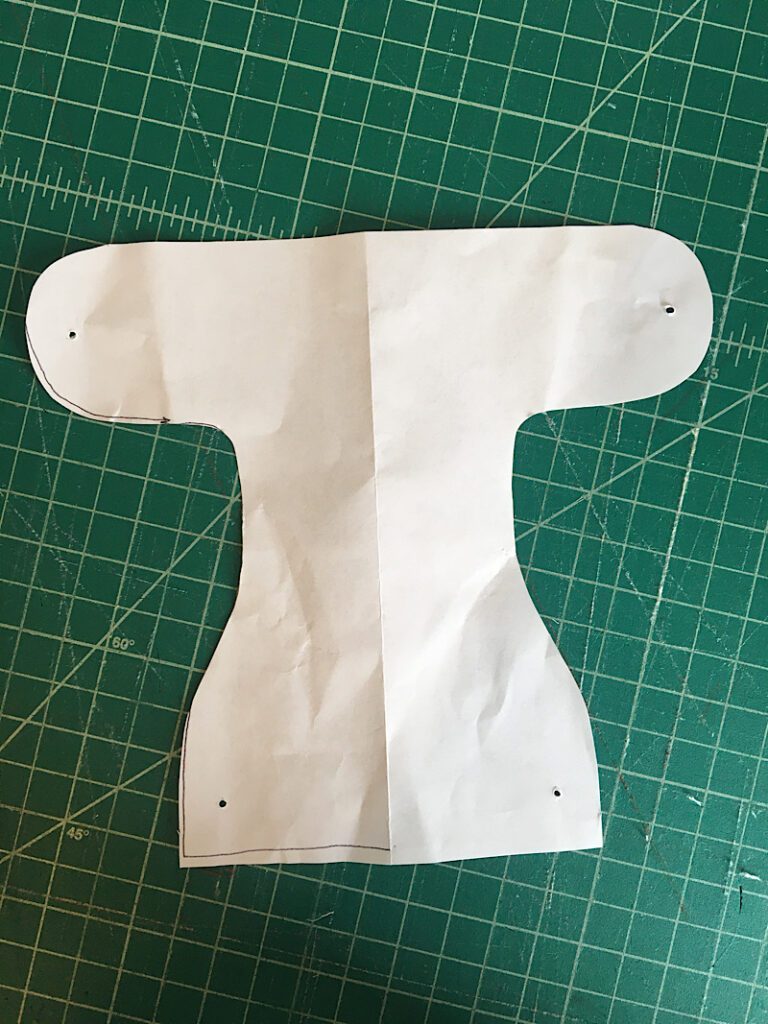
Download The Pattern
To get your copy of the free pattern by entering your email below! The pattern is free for members of my newsletter.
The pattern is a single page PDF. Print it at 100% scaling to make sure it is the right size.
(The lower flat edge of the diaper pattern (the part the ends up being across the doll’s belly) should measure 2.5 inches when printed correctly.
How To Make A Baby Doll Diaper
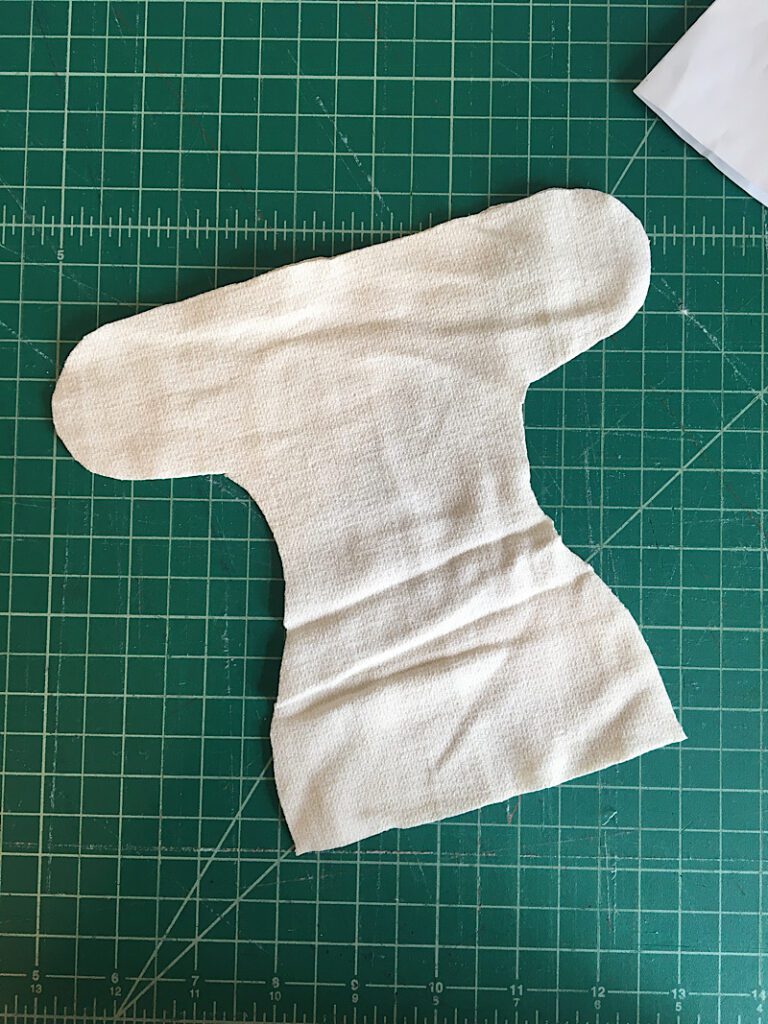
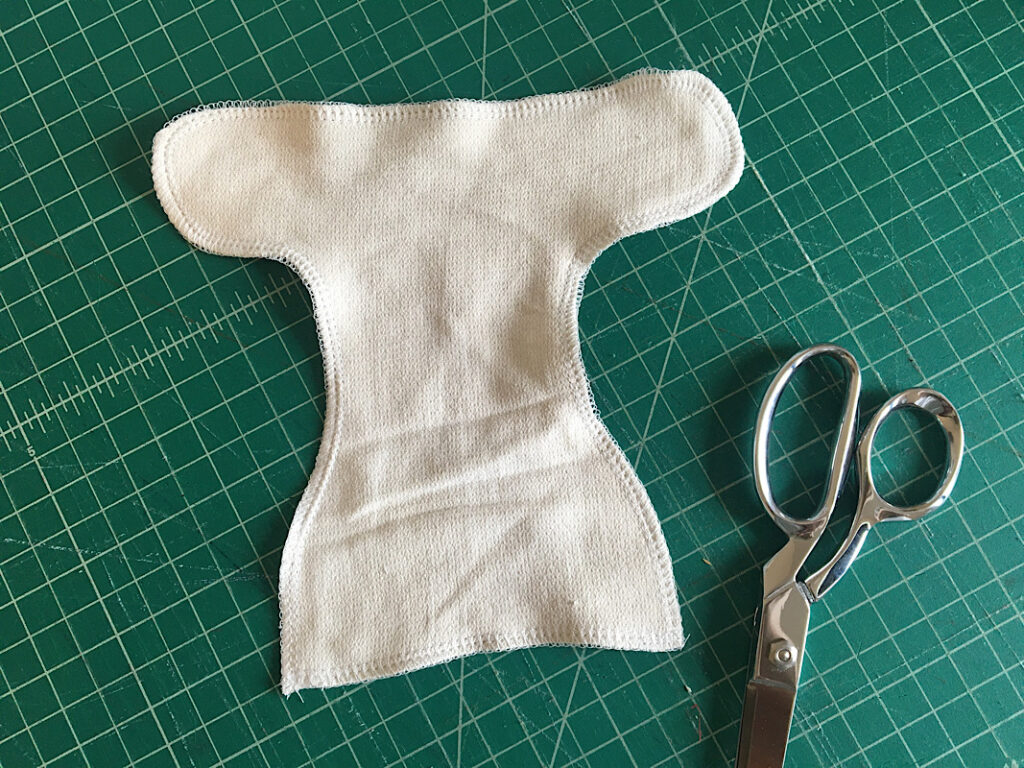
Step 1. Cut Out The Pattern
Print your pattern and measure it to make sure it is the right size.
Fold both pieces of cotton fabric in half, and align the pattern on the folded edge.
Then, cut out the diaper in each of the two fabrics. (I did two cream colored ones, made from actual diaper cloth so it looked real!)
Step 2. Finish The Edges Of Your Diaper
There are two ways to finish the edges of your diaper. Serging (or zig zagging), or turning it out.
Serging the edges is faster, but turning it out looks very professional.
Serge The Edges
To serge the edges of your diaper, lay both pieces of fabric on top of each other with the wrong sides facing. Then pin around the perimeter.
Carefully place the diaper under the serger, and serge around the entire edge, trimming only a tiny bit off as you go.
You can also just zig zag around the edge with your sewing machine.
Turning It Inside Out
To finish the edges by turning it out, layer both pieces of fabric together with the right sides facing. Sew around the entire diaper with a 1/4 inch seam allowance, leaving a 2 inch gap on the very top so you can turn it inside out.
After sewing, turn the diaper inside out and use a long blunt object to poke out all the edges.
Press the diaper flat and make sure it is shaped well.
Then, fold in the seam allowance where you left the gap, and pin it closed.
Finally sew a top stitch along the entire edge, with a 1/8ths inch seam allowance.
Step 3. Add The Closures
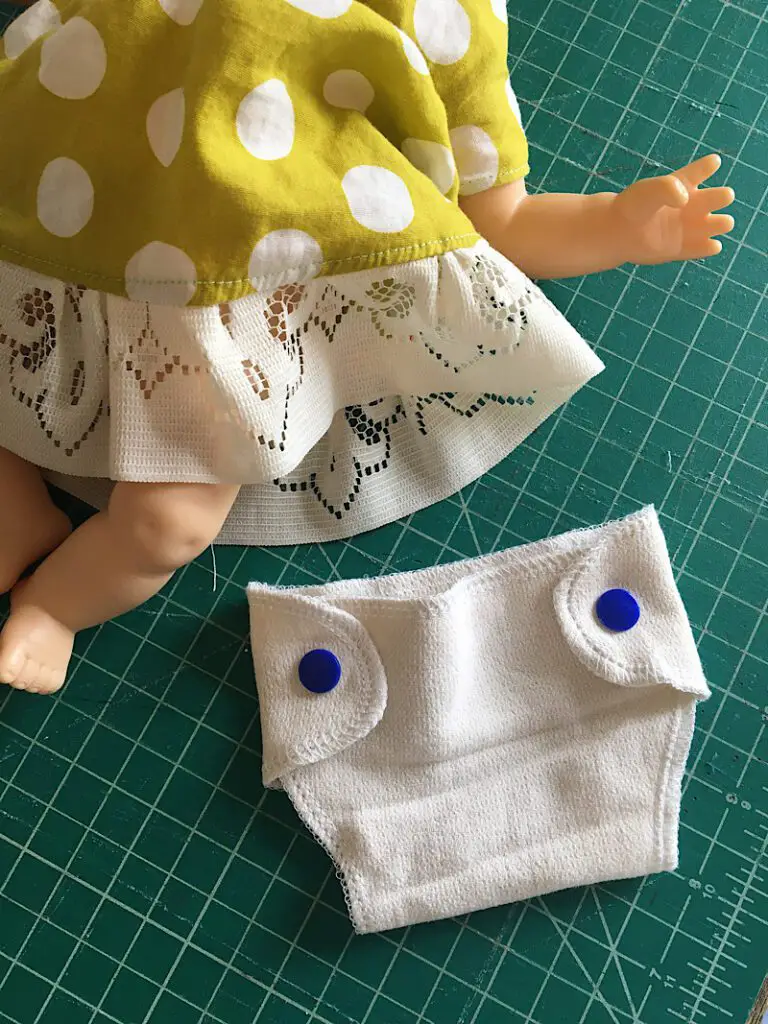
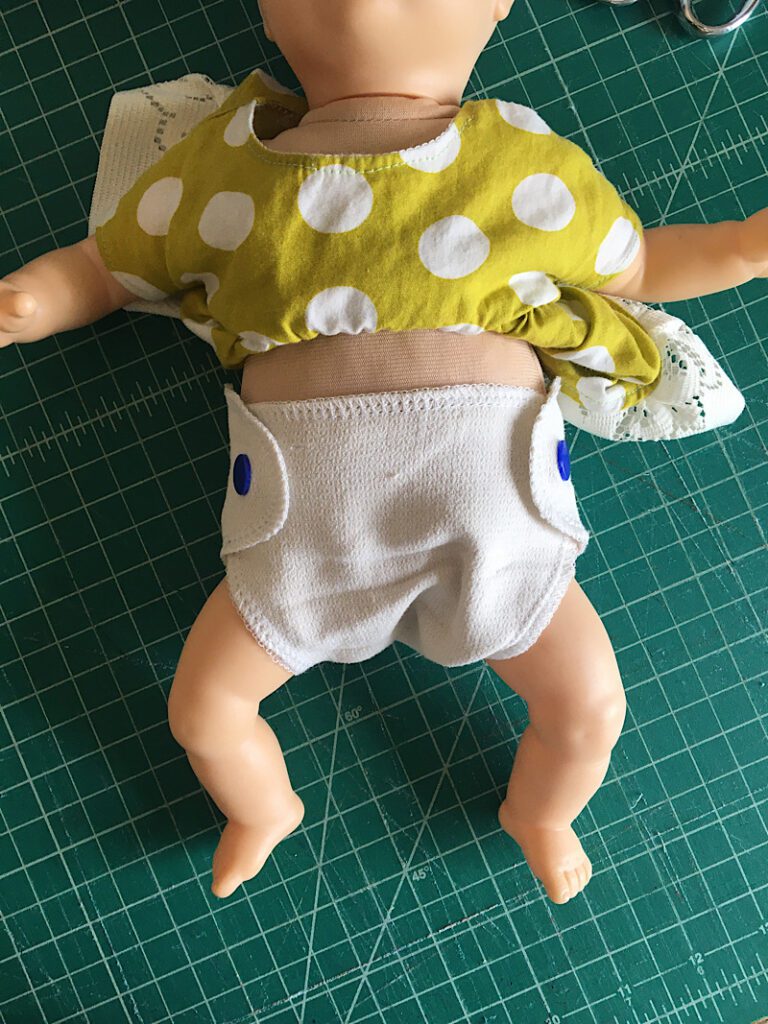
There are two ways to add closures. Hook and loop (Velcro) or Snaps. I used snaps.
Snap Closure
Lay your paper pattern on top of your fabric diaper, and use an awl or sharp object to pierce through the paper on the black dots, to mark the spots where the buttons will be attached.
Then, using a button snap applicator, attach the buttons to each location.
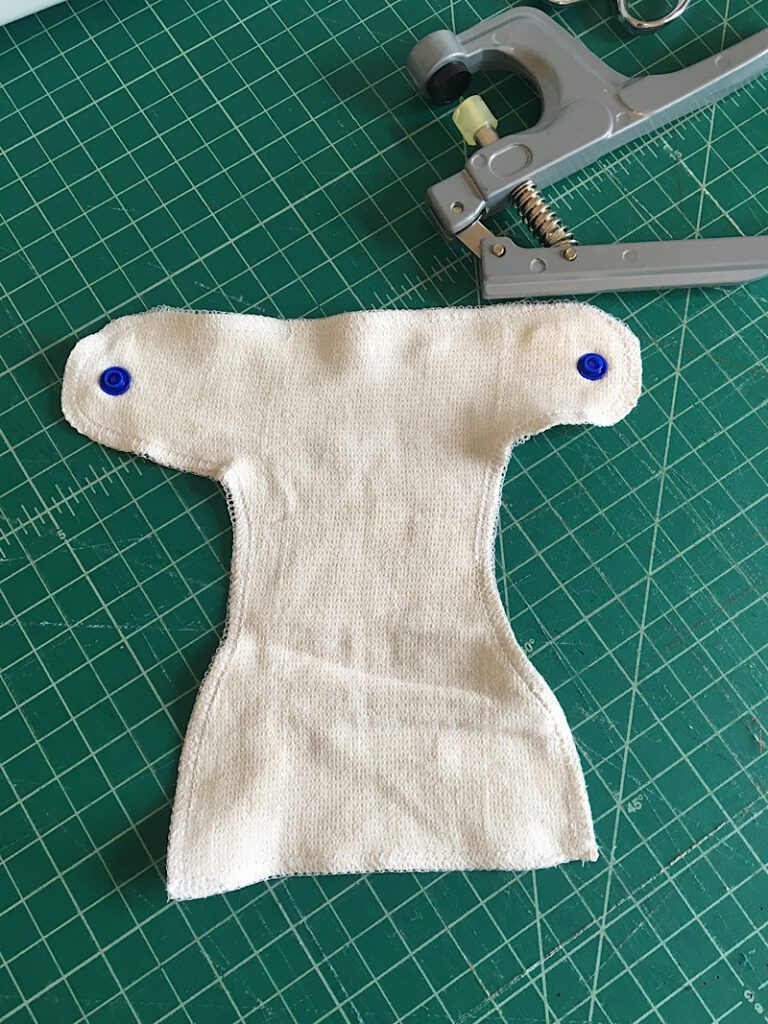
Make sure they are facing the correct way as in the image below.
(The two snaps on the flaps should have the snap side UP, and the snaps on the front belly portion should have the smooth side up.)
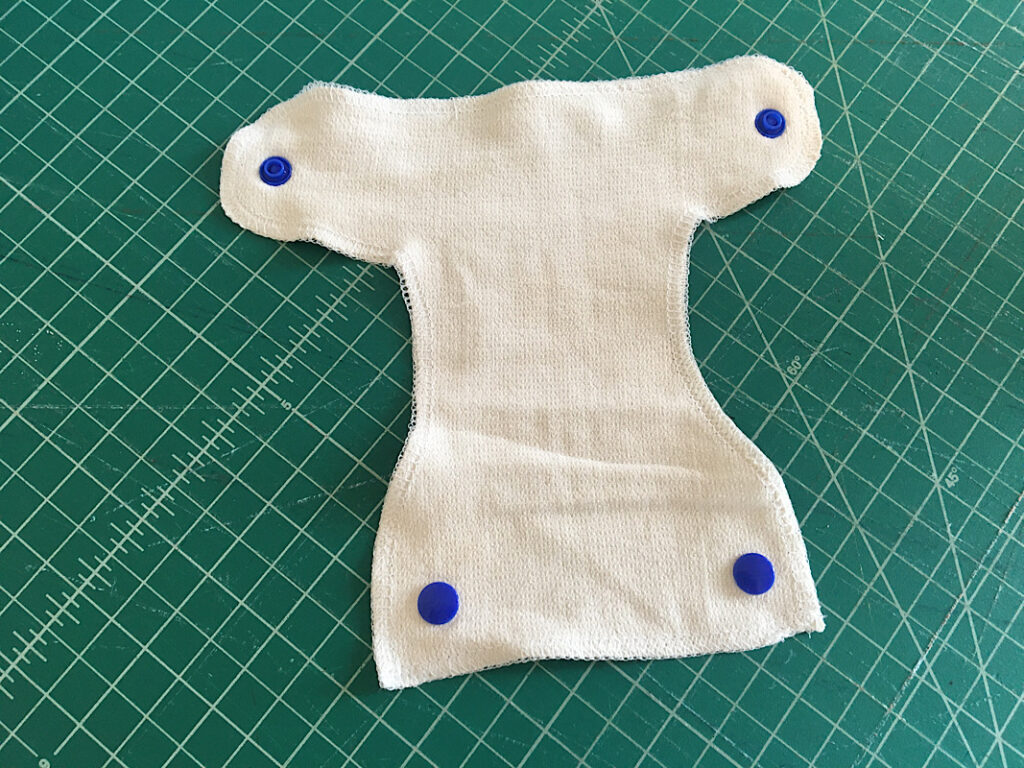
I chose to only attach two snaps on the front of the diaper, but you can attach multiple to make the diaper size adjustable.
Hook and Loop Closure
To attach hook and loop, cut small pieces of each side of the hook and loop, and glue or sew it to the correct locations on the diaper.
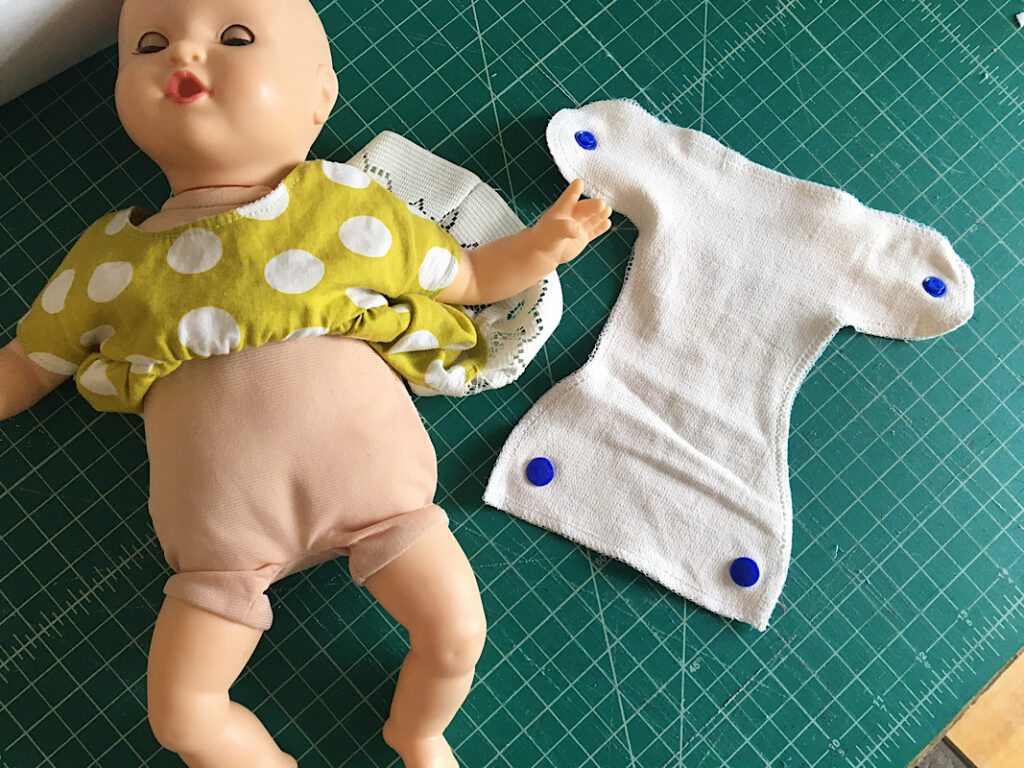
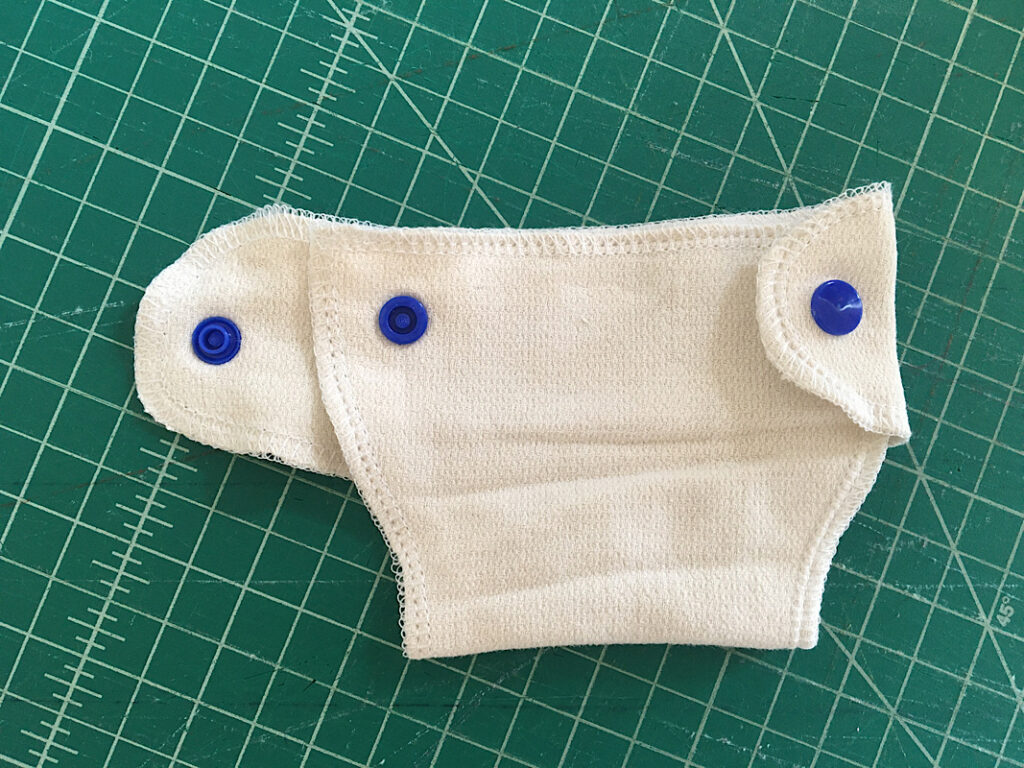
Then try the diaper on the baby doll, and you are done!
If you have a different size of baby doll, feel free to trace this pattern and try to make it bigger or smaller!
See how quick and easy that was? Now you can make a few in different colors!
If you have questions about this tutorial, don’t hesitate to leave a comment below.

Want more doll patterns? Check out my doll making guides:
Cute idea!
Thanks Annabelle!