Are you tired of your envelope pillowcase having floppy ends from being too big? I will teach you how to easily resize it to fit a smaller pillow in no time!
A client (who happens to be my mother in law) brought by 4 envelope style pillow shams for me to alter down to a smaller size. They were king sized pillowcases, and she needed them to be standard size.
It only took a few minutes to fix these for her, and the results look SO much better.
Let me show you how I did it!
This post may contain affiliate links. Read the full disclosure here.
About The Tutorial
This is a super easy beginner alteration. You only have to sew 2 straight lines. You can serge the ends as well if you like, or zig zag the edges.
Since the seam is inside the pillowcase, you won’t ever see it so it doesn’t have to be perfect.
Unlike resizing a regular pillow, an envelope pillowcase has to have length taken off evenly from both sides so that the envelope opening stays centered on the pillow.
Use a 3/8ths inch seam allowance.
Supplies Needed
- Sewing Machine
- Fabric Scissors
- Sewing Pins
- Measuring Tape
- Rotary Cutter, Mat, and Acrylic Ruler (Optional but recommended)
Materials Needed
- Pillowcase to be altered
- Pillowcase or pillow of the correct size, to measure
- Matching Thread
How To Make An Envelope Pillowcase Smaller
Step 1. Measure The Pillowcases
Measure the pillow or pillowcase that is the size you want your too-large pillowcase to be.
I wanted my pillowcase to be a standard size which is about 20”x28”.
Then, measure the pillowcase you are going to alter. Mine was a king size which is about 20”x36”.
Next, subtract the desired length from the original length to get the total length you need to remove from your pillowcase.
In my case it was 36” – 28” = 8”.
To keep the envelope opening in the center of the pillow, you will have to take off the excess length evenly from both sides of the pillowcase.
Divide the total length you will remove by 2 to find how much you will need to cut off from each side.
For me it was 8” / 2 = 4 inches.
Finally, subtract 3/8ths of an inch to get your final cut measurement.
My final cut measurement was 3 and 5/8ths inches.
Step 2. Cut The Pillowcase To Size
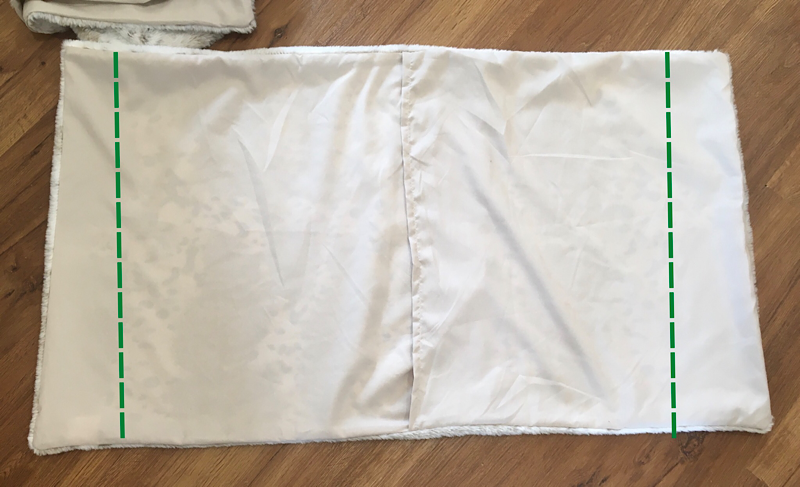
Turn your pillowcase inside out and smooth it flat.
When cutting the lengths off of each side, make sure you are measuring from the seam, not from the very edge of the pillowcase
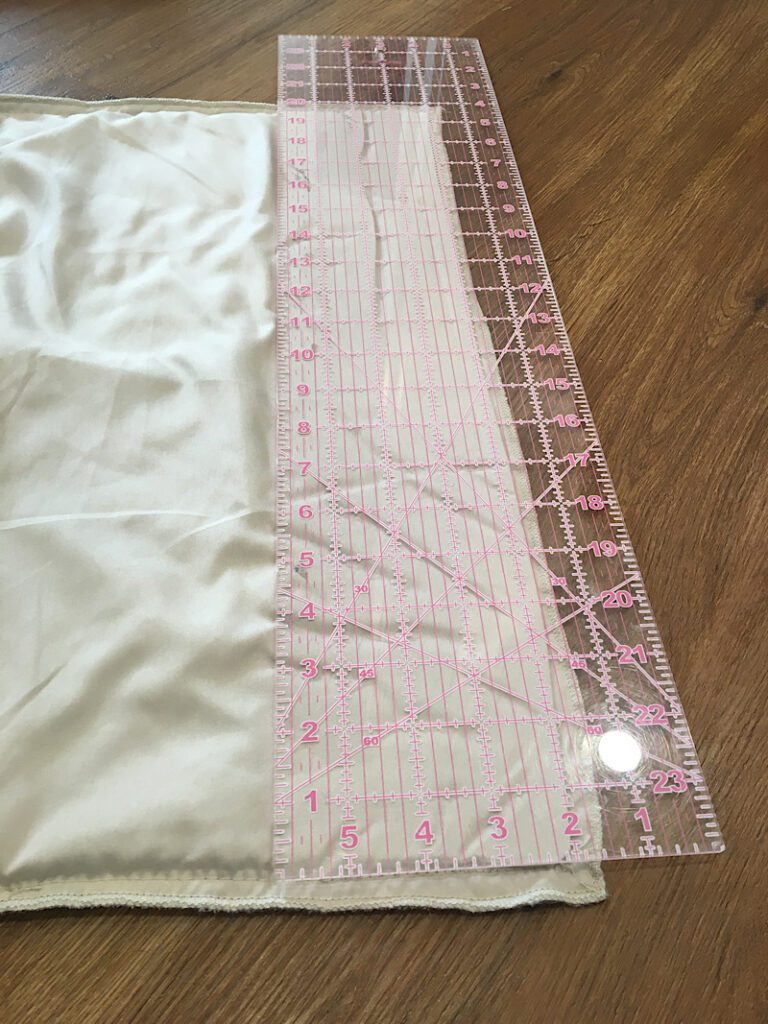
If you are using scissors, measure the cut line and mark it with pins or a pen, then carefully cut it straight.
After the edges are cut off, pin the openings closed with your pins.
Step 3. Sew The New Seams
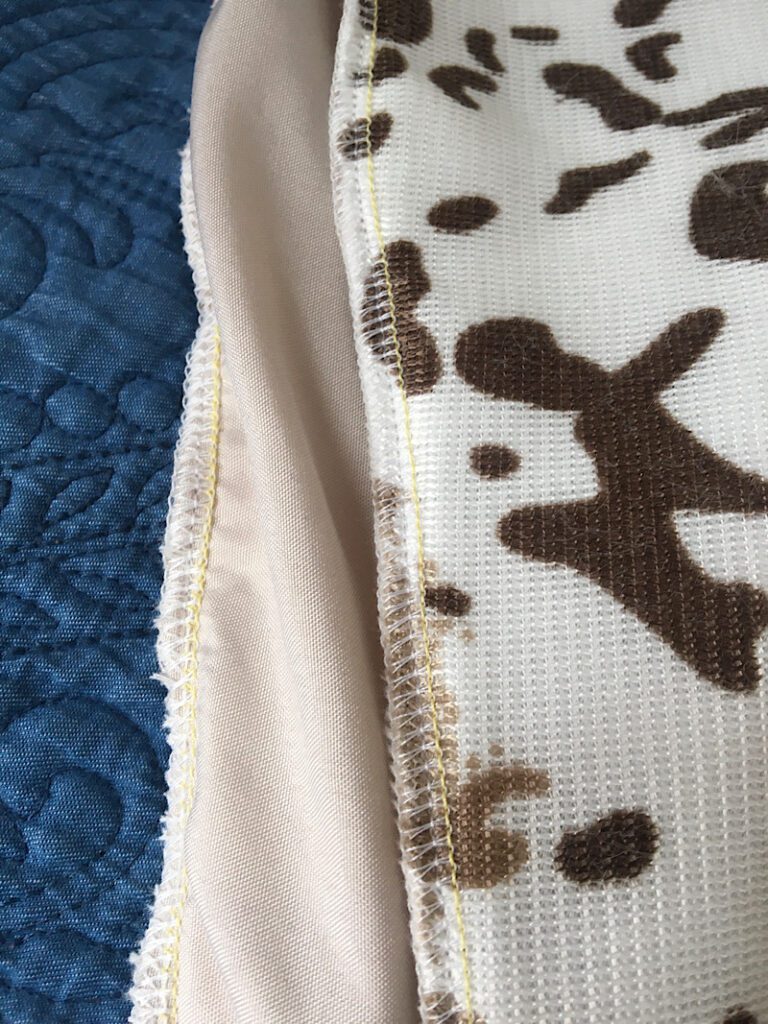
Sew both openings closed with a straight stitch. Then, hem the edge with a zag zag stitch so it doesn’t fray. (Or you could cut it with pinking shears to prevent fraying).
I serged mine.
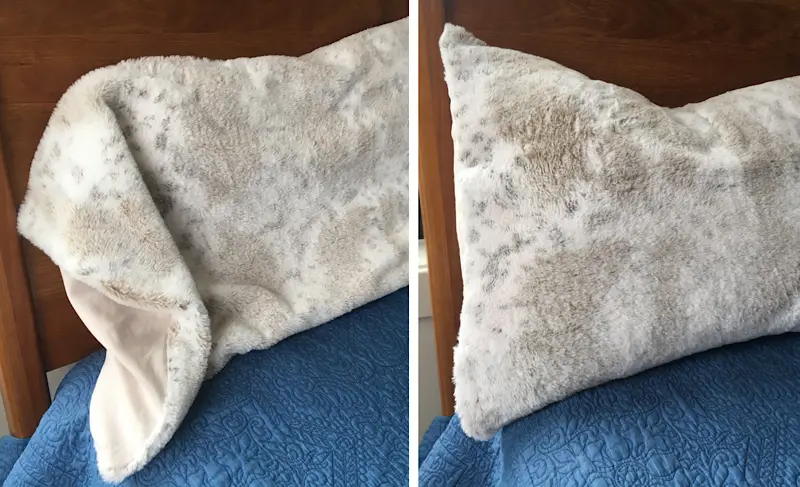
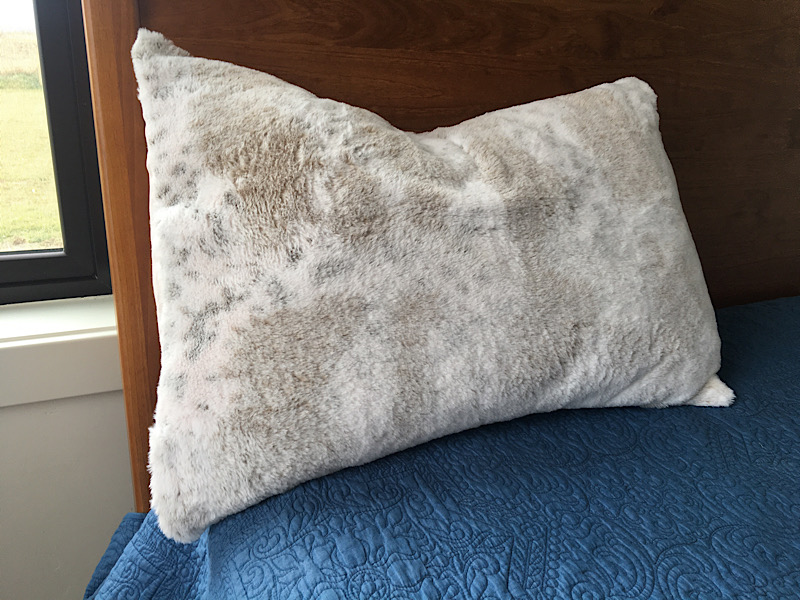
Finally, turn the pillow case inside out and you’re done!
They should fit so much better now, try it on a pillow and see.
Say goodbye to those floppy edges you are tired of folding over!
Conclusion
I hope this walk through was helpful, despite being so simple! Nothing looks better than a well fitted pillow case!
Pin this post if you liked it, and sign up for my email list for more tips!