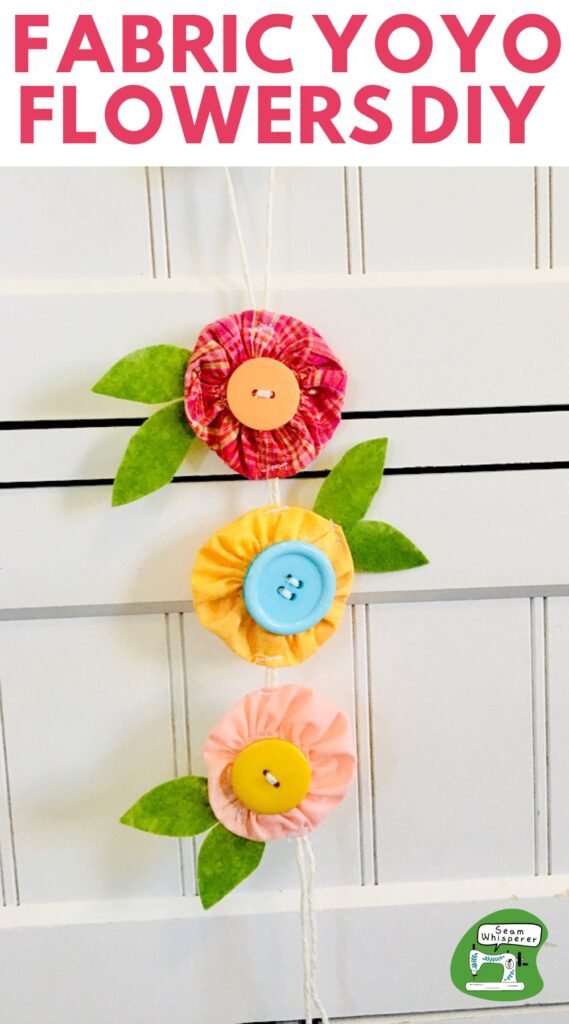
Learn how to sew a yoyo flower from scrap fabric to make a fun summery decoration to hang on your doorknob!
This post may contain affiliate links. Read the full disclosure here.
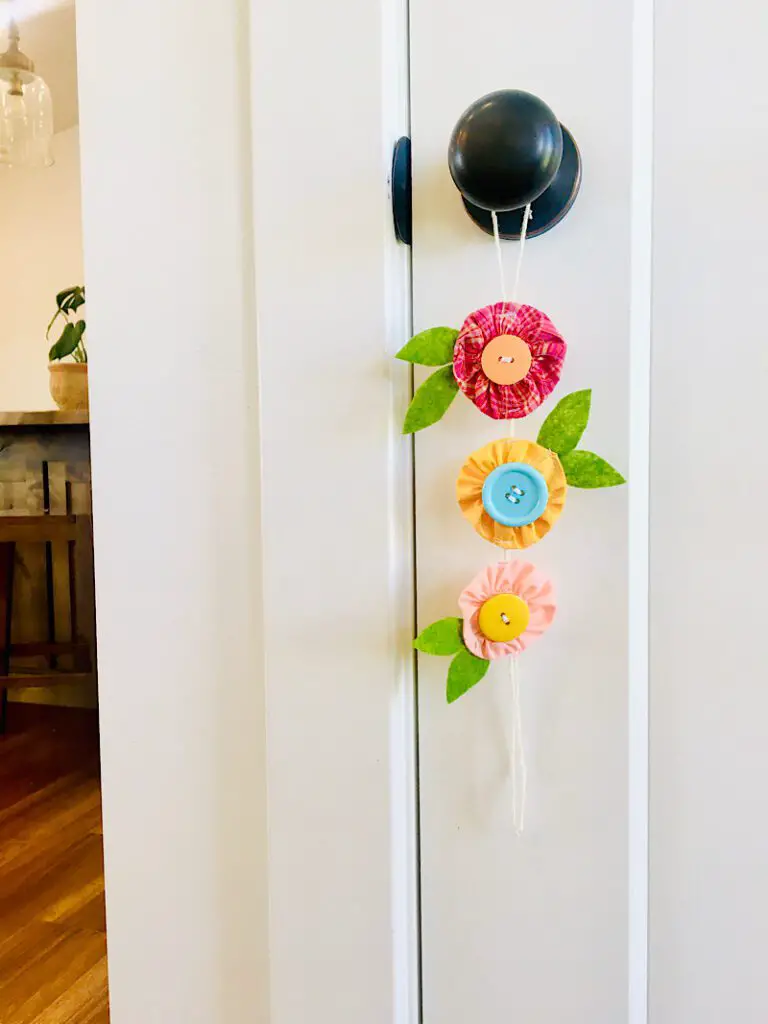
One way I love to decorate for the changing holidays and seasons is to make a simple doorknob-hanger. They are quick to whip up, subtle and sweet, and easy to store. Doorknob hanging decor makes it easy and fun to add a little bit of the seasons to the room without overwhelming the space!
Today I came up with these super cute, buttoned yo-yo flowers that are perfect for spring and summer! They only took about a half hour to make! You could totally sell them too, they are that easy and cute!
How To Make Fabric Yoyo Flowers
Supplies Needed
- Scrap fabric (quilting cotton is perfect)
- Matching Thread
- Large Buttons (Here are some cute ones)
- Felt for the leaves (Here is a good option that lets you pick the colors)
- Cotton string or ribbon to hang the flowers on
- Hand sewing needle or button presser foot to attach buttons
- Sewing machine, fabric scissors, etc.
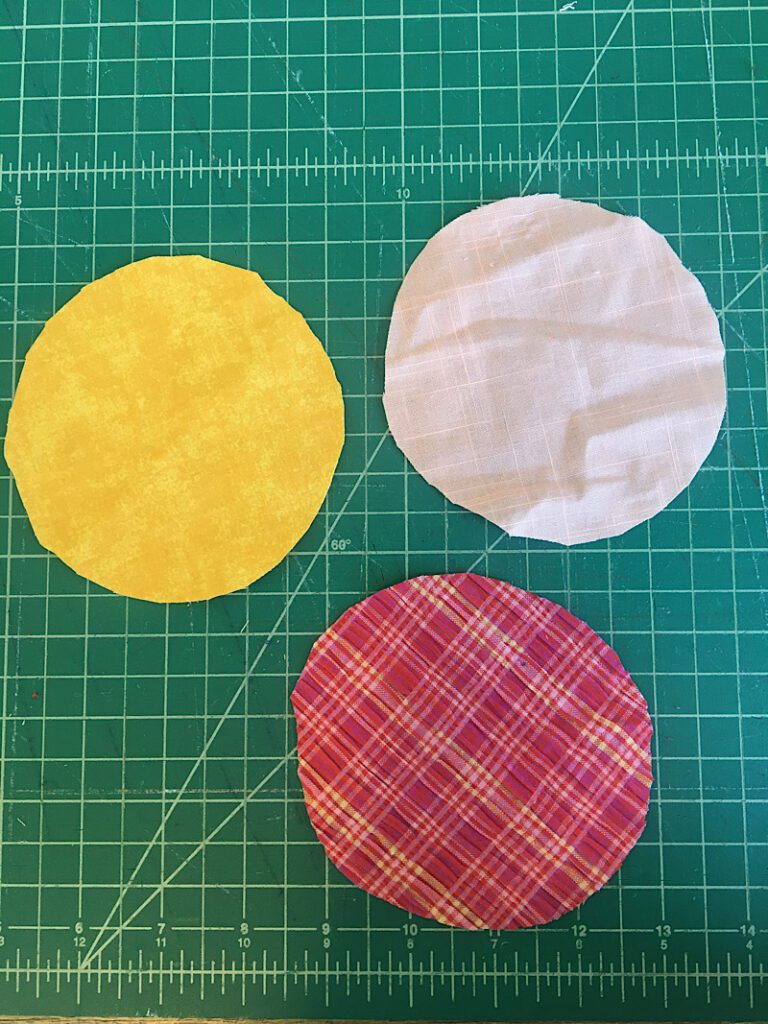
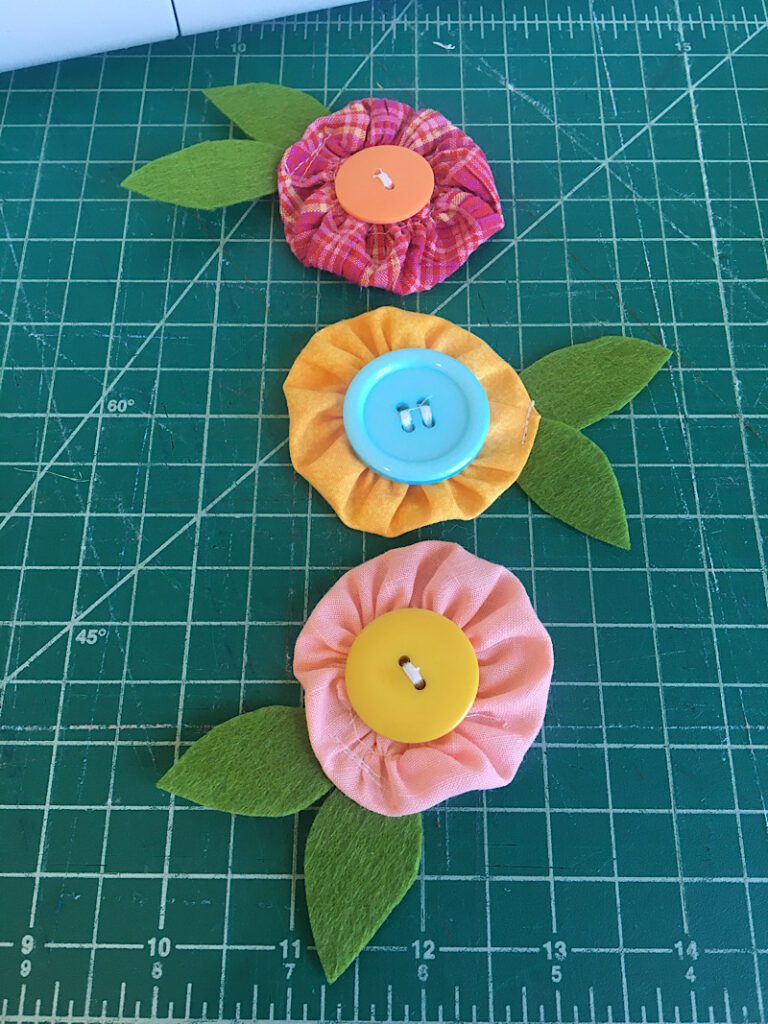
Step 1. Make The Fabric Yoyos
Fabric yoyos are so easy to make!
First you need to find a circle shaped object like a cup or a bowl to trace onto the fabric. The circles I drew were about 4.5 inches wide.
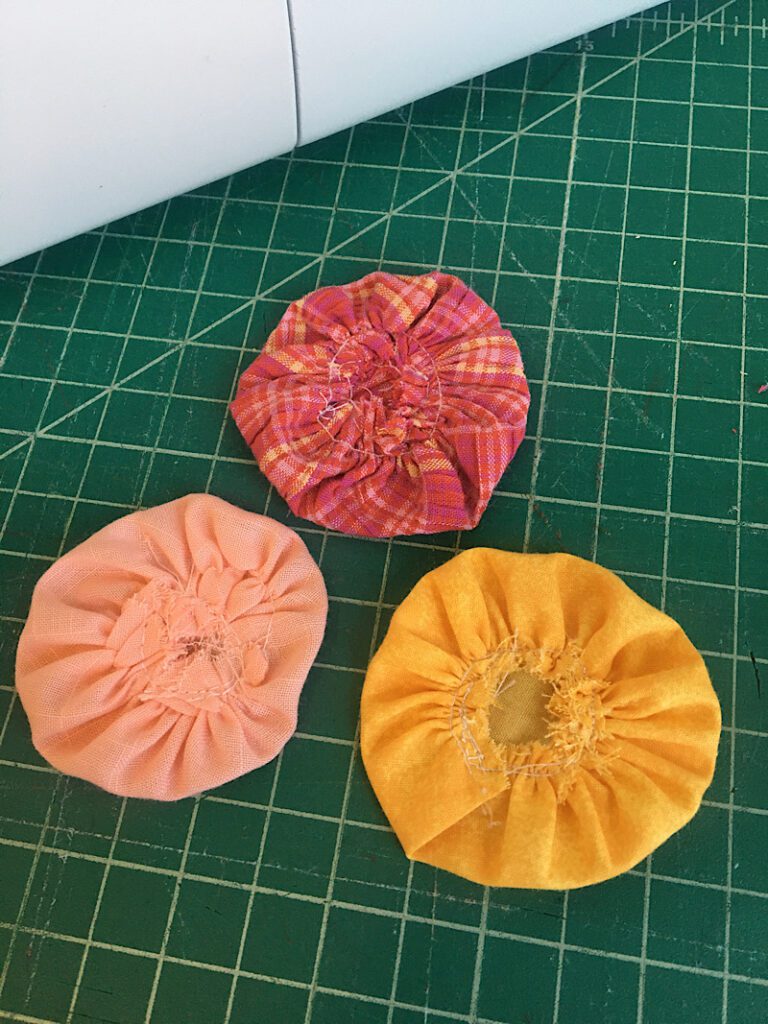
Trace and cut out three circles from your fabric.
After the circles are cut out, sew a basting stitch around the perimeter of each one with the longest stitch length you can, and a 1/4 inch seam allowance.
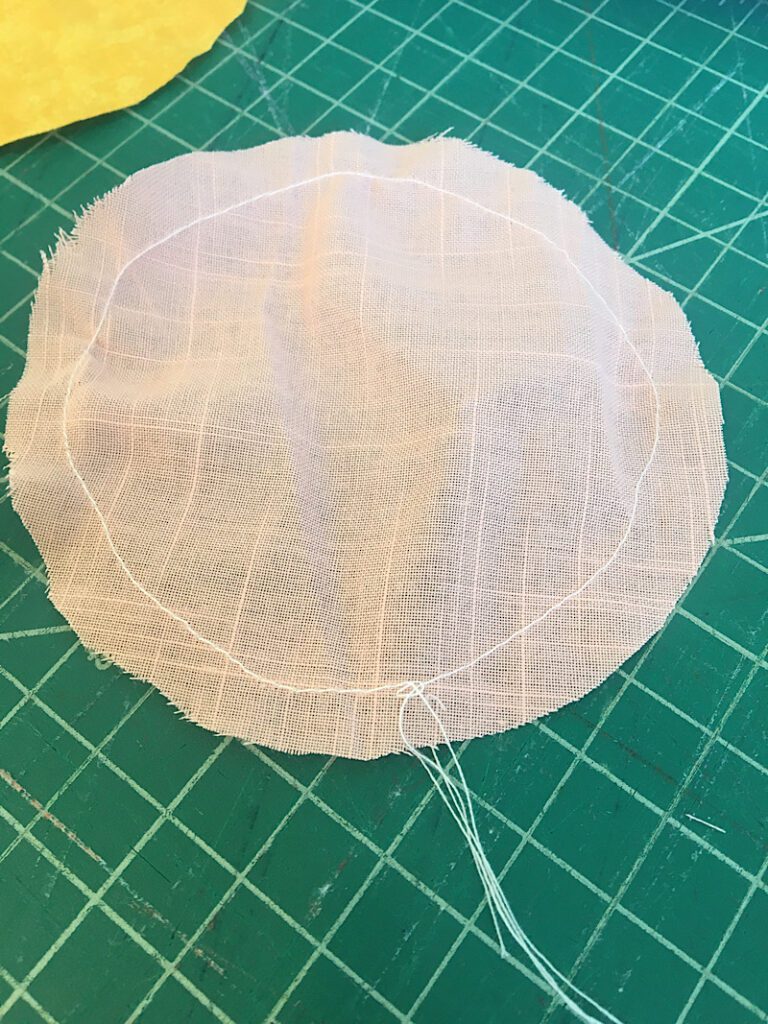
Pull on the top thread tail to gather the fabric all the way around the circle.
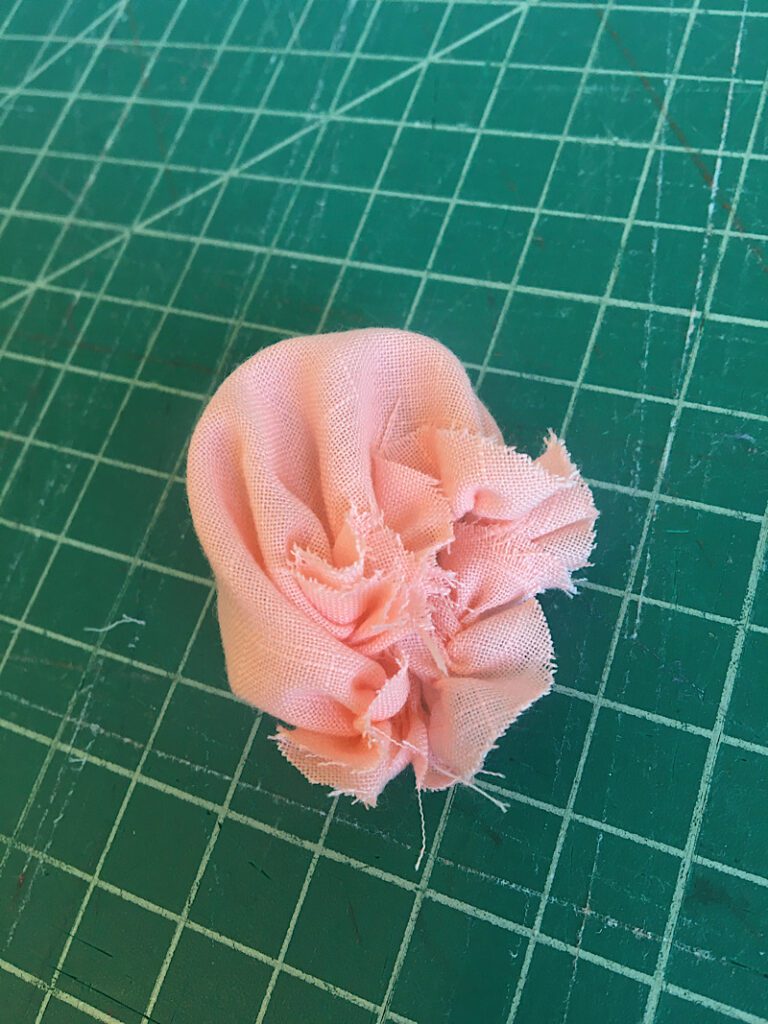
Once the fabric is totally gathered, tie the thread tails together so it cannot un-gather itself.
Then, flatten out the yoyo so the gathered edges are in the center and it makes a little circle.
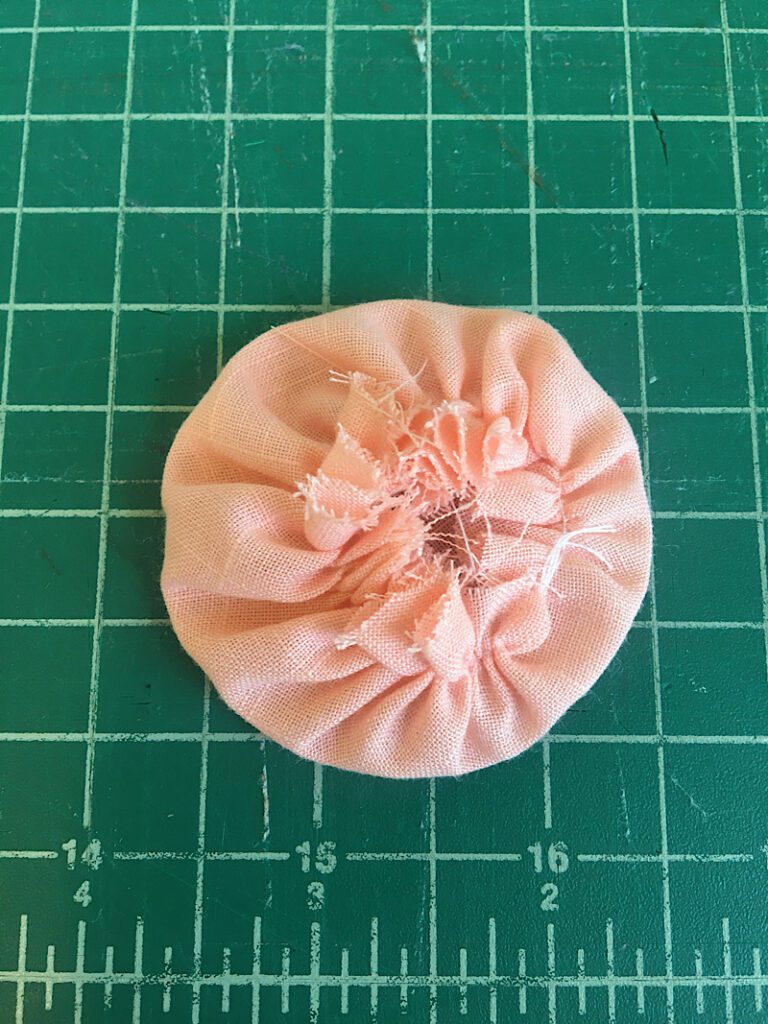
Take a moment to shape the yoyo well, then sew a little circle in the center to hold the raw edges down.
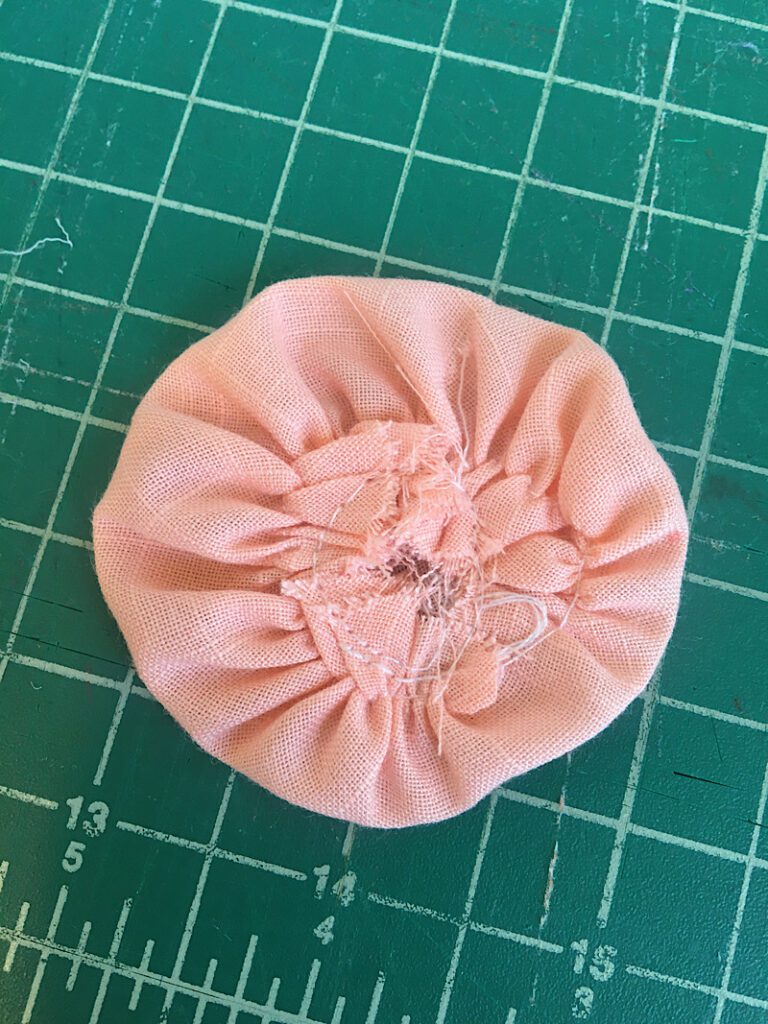
You now have a fabric yoyo!
Repeat these steps with the other two pieces of fabric before moving onto the next step.
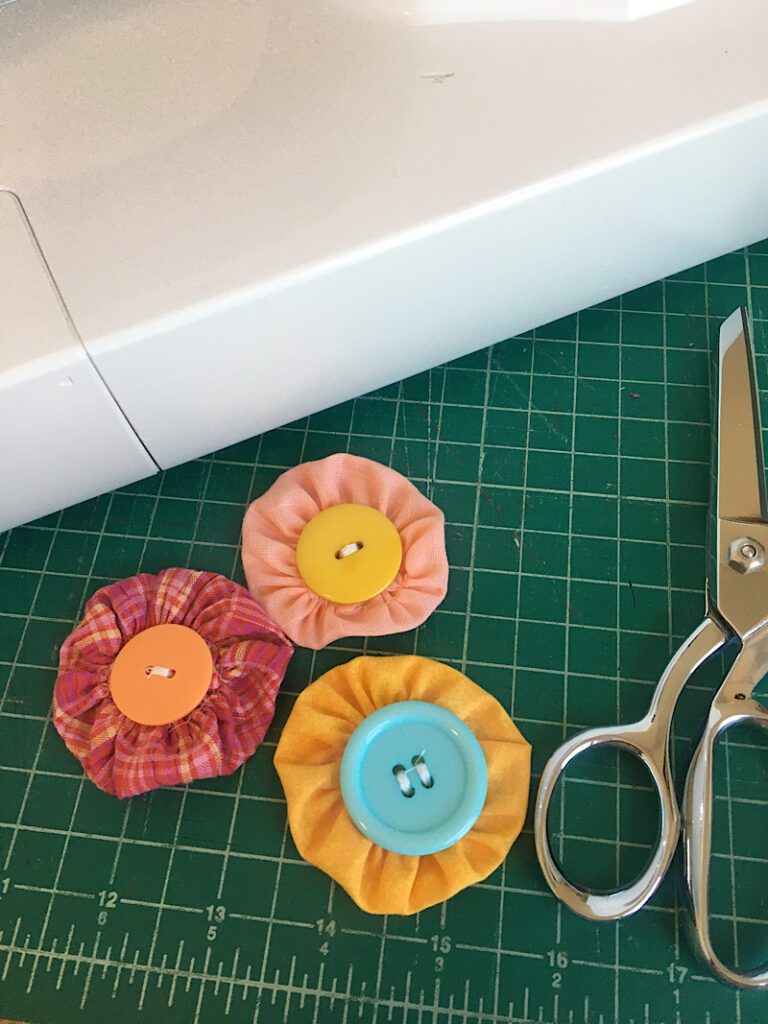
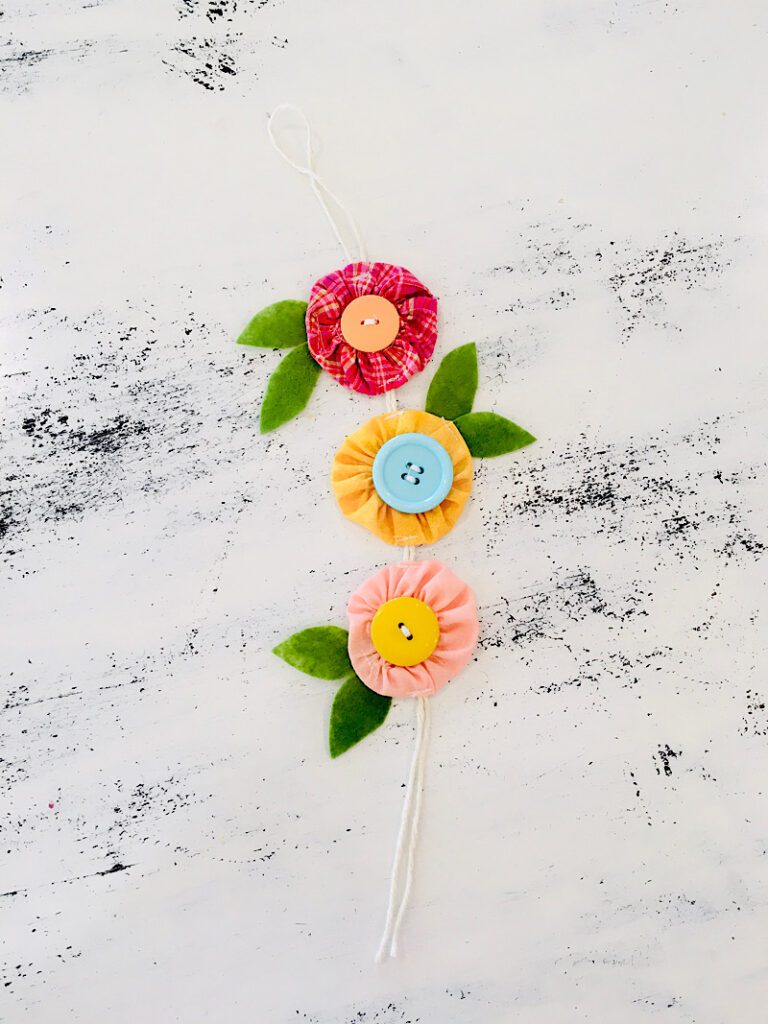
Step 2. Add Buttons
Center a button over each of the fabric yoyos.
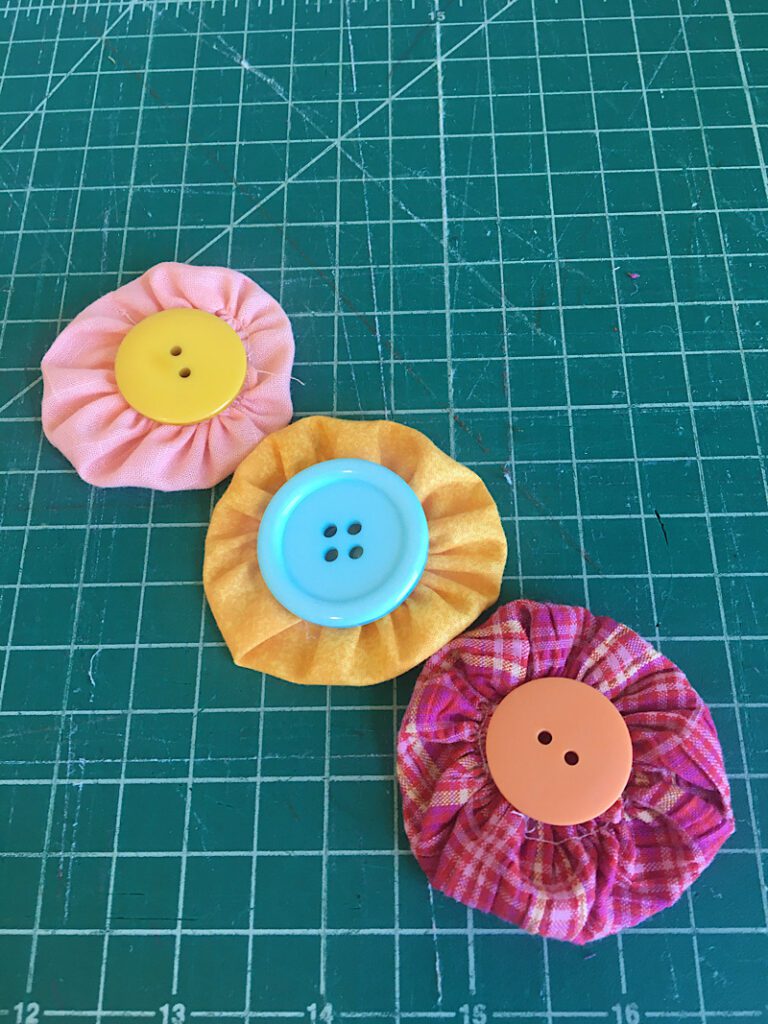
Then, using either a hand sewing needle or your sewing machine and a button foot, sew the buttons to the yoyos.
(If you have never used a button foot before, you can see what it looks like in this post all about presser feet.)
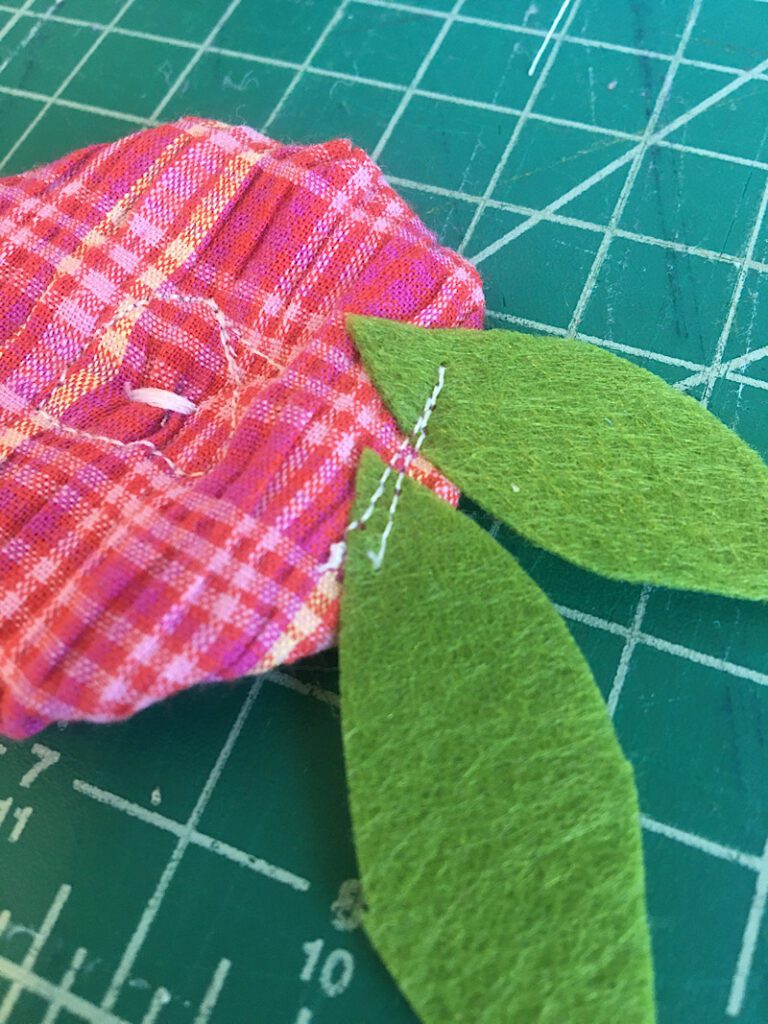
Step 3. Make The Leaves
For each flower, cut two leaf shapes from green felt.
The leaves I cut were about 3/4 inch wide and 2 inches long.
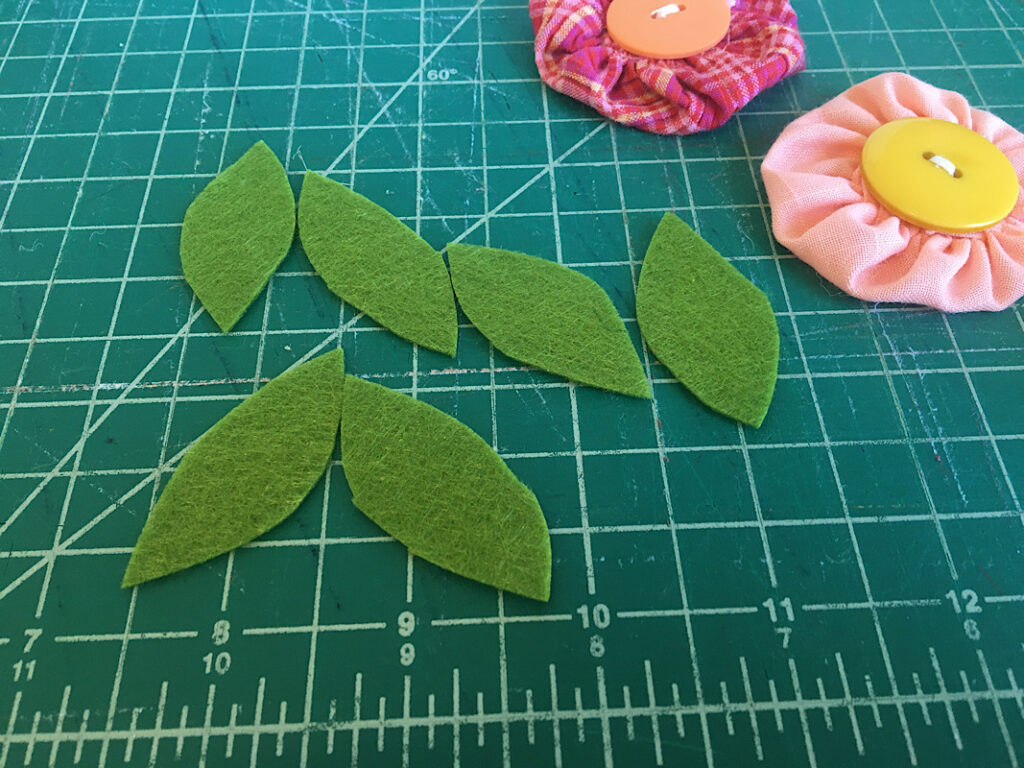
Before sewing on the leaves, arrange the leaves and the yoyo flowers so you know how you want them to be. One end of the leaves should be tucked under the flowers.
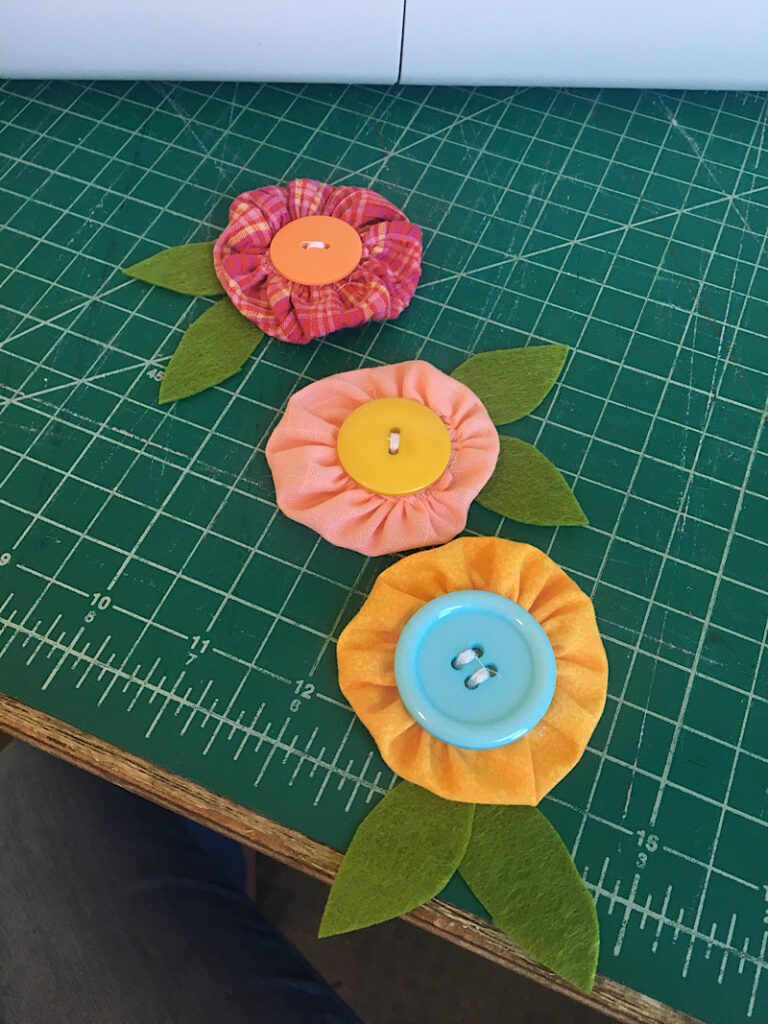
Sew the leaves to the back of each flower with a small straight stitch.
Then you are ready to sew the flowers to a string.
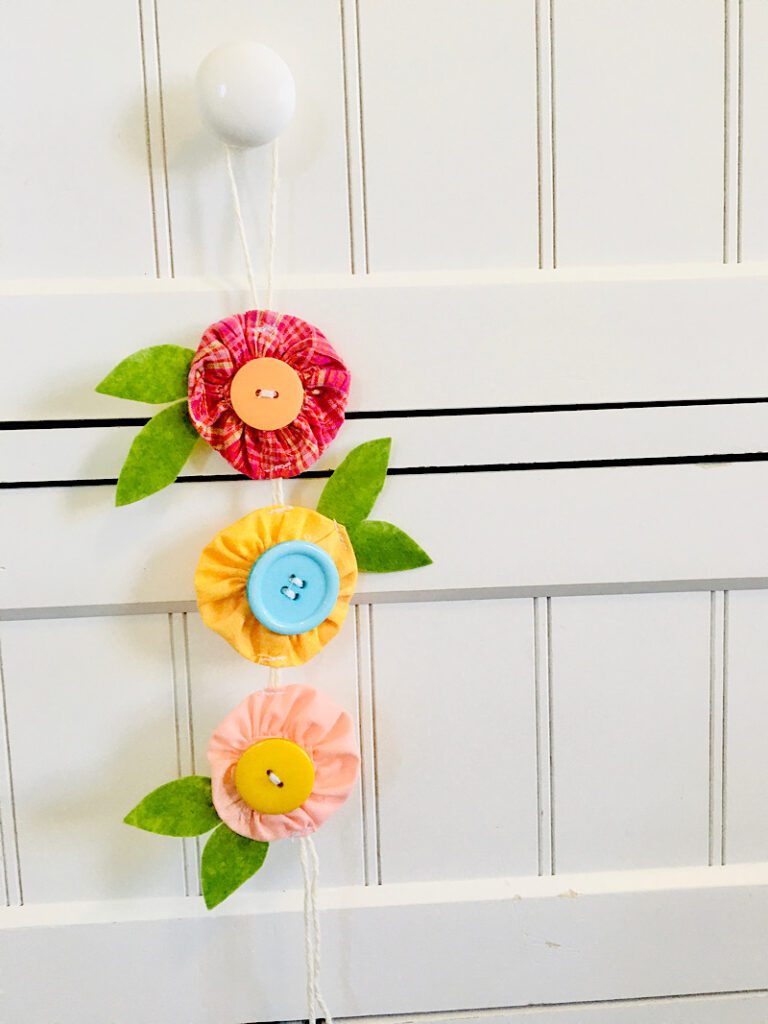
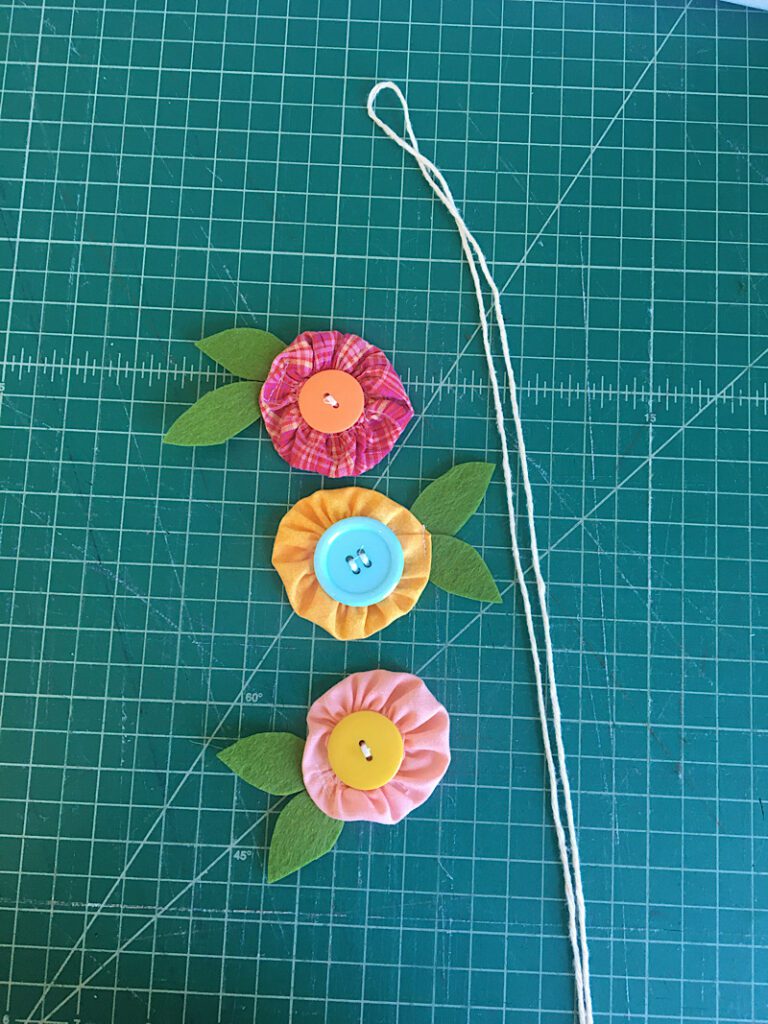
Step 4. Sew The Yoyo Flowers To A String
Line your flowers up how you want them to hang on the string.
Cut a length of string that when folded in half is as long as your flowers, plus extra on the bottom and enough on the top to fit over the doorknob. (Mine was about 50-60 inches long).
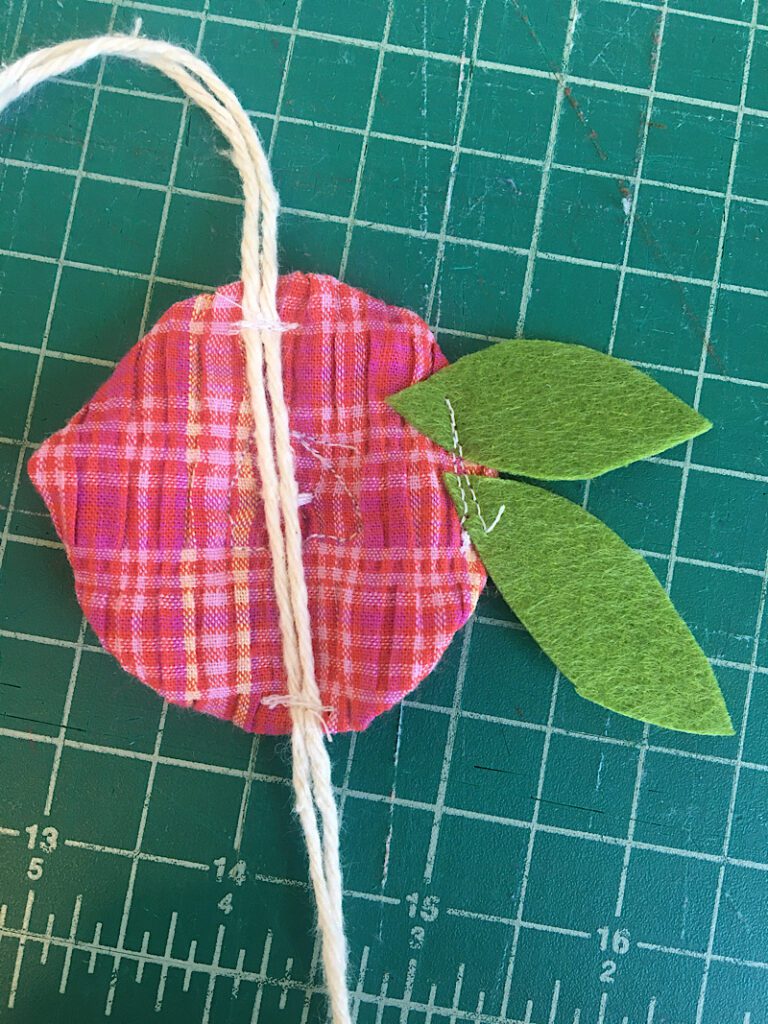
Sew the first, topmost flower to the string where the loop is, making sure to leave a big enough loop for the doorknob.
Sew the flower to the string by stitching the string to the top and bottom edge of the flower.
Attach the other two flowers the same way.
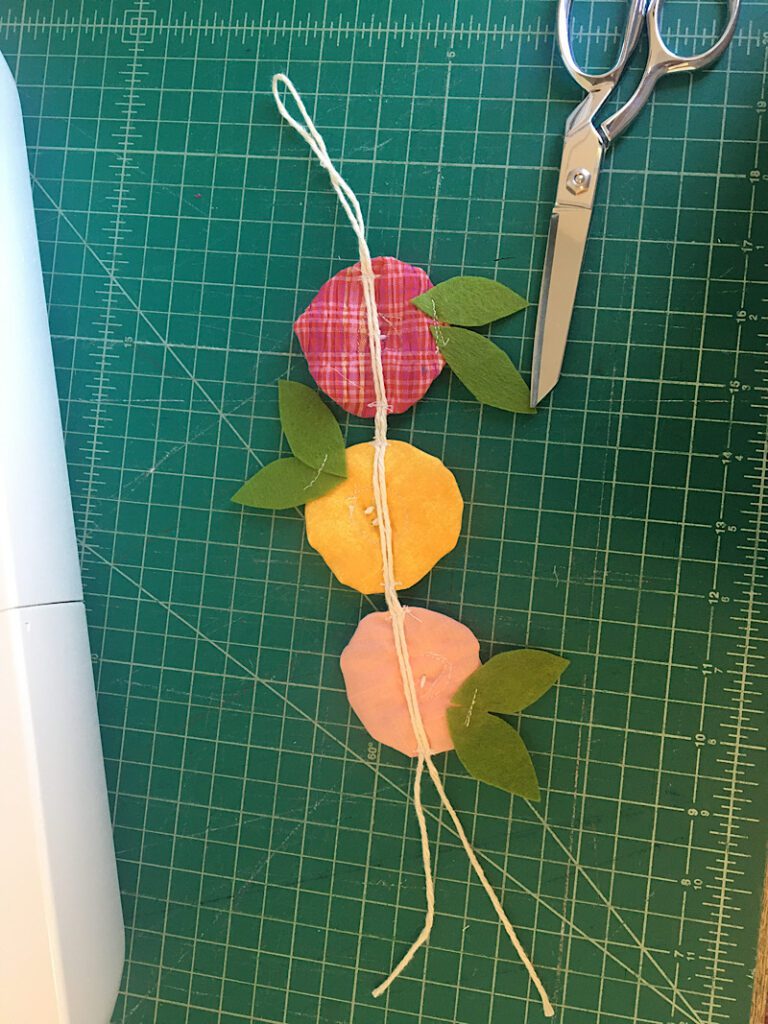
Trim off the excess string at the bottom so it looks neat. I left just a few inches.
Then your project is complete!
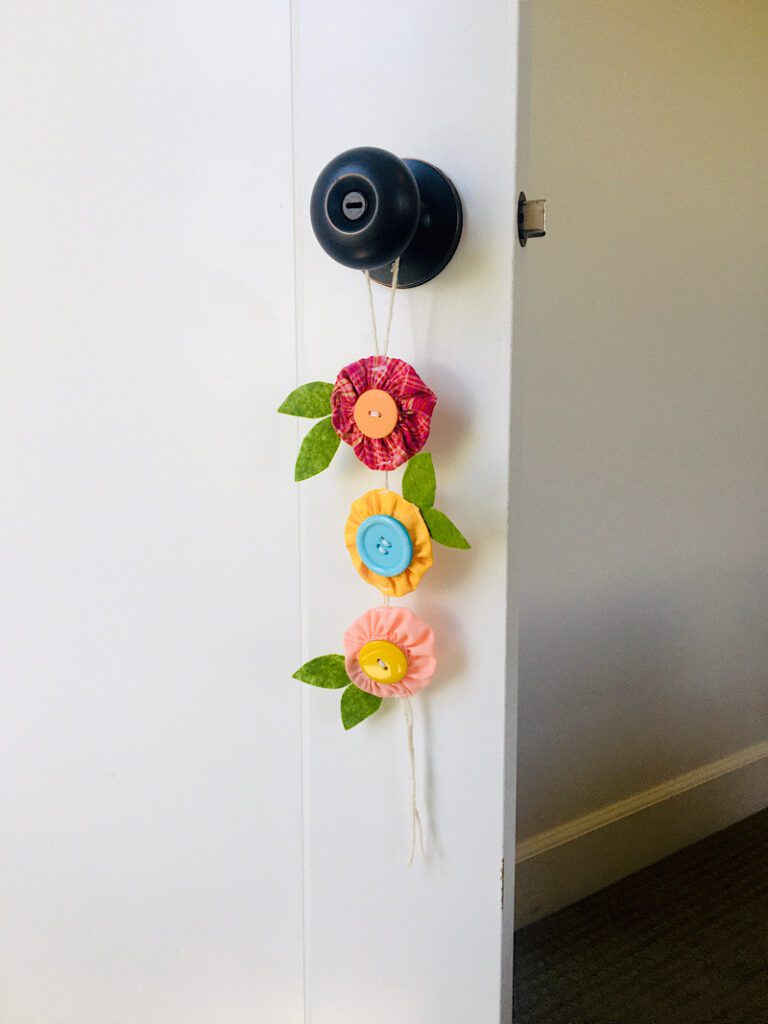
I hung my flowers up on the coat closet door in our living room, and I love the little pop of bright color it brings in!
These little fabric yoyo flowers would also look really cute as a garland, or as a pillow applique.
To make some more cute holiday doorknob and wall hangers, check out these tutorials!
- Rustic Pumpkin Doorknob hanger
- Snowflake Doorknob Banner
- Patriotic Scrappy Flag Hanging
- Rustic Christmas Tree Garland
- Easter Egg Garland
- Decorative Kite Wall Hanging
If you loved this project, share it on Pinterest!
hi. love this tutorial. going to make a few now. how large should the fabric be in relationship to the button? your circle was cut at 4.5” so was your button about one inch? i have 2” buttons and i’m trying to estimate how large i should cut my circles.
thank you
Hi Sharon! yes my buttons were about one inch, but in truth I didn’t measure them, I just eyeballed it. I would cut the circles at LEAST 6 inches. Maybe make a test one with some fabric you don’t care about wasting!