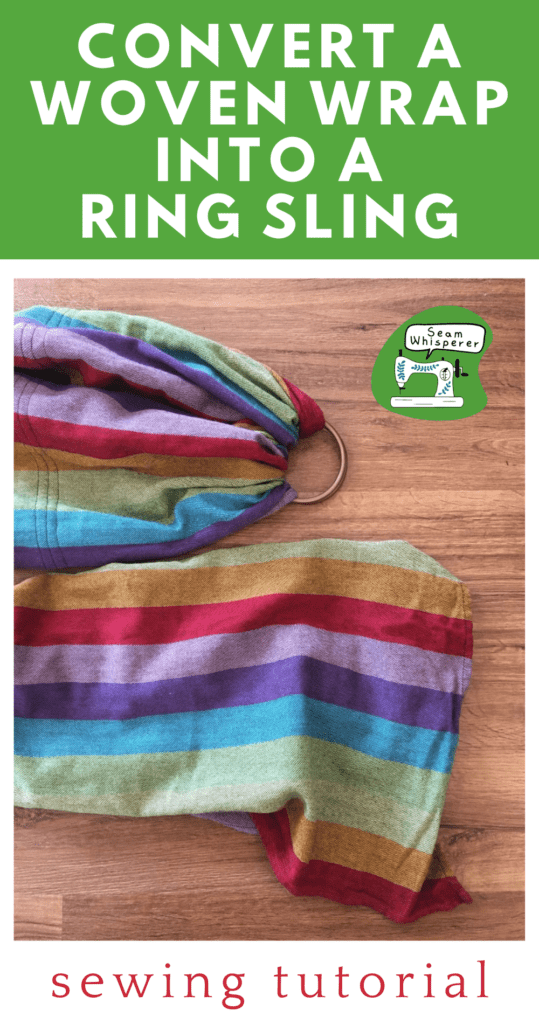
Do you have a woven wrap you haven’t used in a while? This tutorial will show you how to repurpose it into a brand new ring sling baby carrier!
The first woven wrap I ever owned was this gorgeous colorful striped wrap from Little Frog. It is buttery soft and very warm.
However, after a few years and many wraps later, I decided that my favorite woven wraps are made from a thinner material, so the little frog wrap sadly sat unused in a drawer. (It pains me to admit that!)
Today I repurposed the woven wrap into a ring sling, and I am so excited at how easy it was to give it new life!
Converting a woven wrap into a ring sling is easy. In simple terms, to turn your woven wrap into a ring sling, cut off a 90 inch (2.5 yard) long piece, place the rings around the cut end of the wrap, then fold the edge over 10 inches and sew it down a few times.
Ready? Lets get to the detailed instructions!
This post may contain affiliate links. Read the full disclosure here.
About This Tutorial
Since a ring sling is meant to carry a baby, it is important that you sew carefully and use rings that are meant for making ring slings. Real sling rings are tested to stay strong when tugged, pulled, and holding heavy weight.
This how-to tutorial is just informational. I do not offer any safety guarantees for these items you make yourself, and your DIY baby carriers are your own responsibility. You can read more about my disclaimer here.
That being said, I have enjoyed making my own baby carriers of various kinds and am happy to share my process! Babywearing is an essential daily practice that allows me to sew!
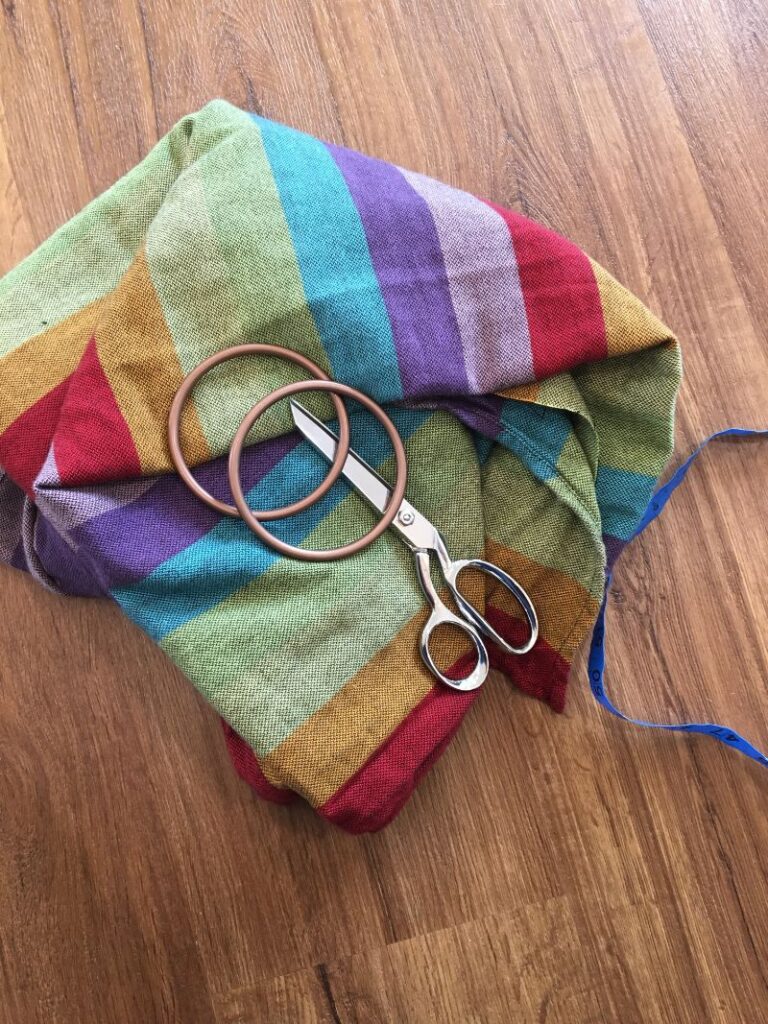
Supplies Needed
- Sewing Machine
- Fabric Scissors
- Sewing Pins
- Measuring Tape
- Large Sling Rings (You can also get some from slingrings.com)
- Pen or fabric chalk or marker
- Heavy Duty Sewing Needle (Optional– May be needed if your wrap is thick)
Materials Needed
- Woven Wrap at least 2.5 yards (90 inches) long
- Matching Thread
How To Convert A Woven Wrap Into A Ring Sling
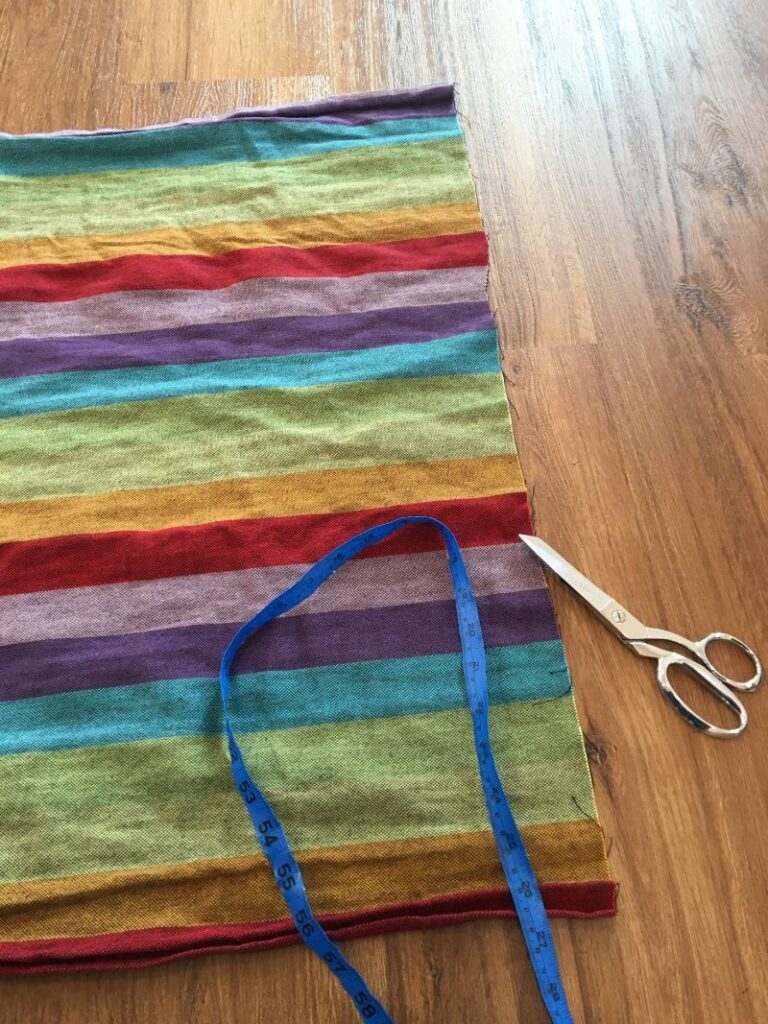
Step 1. Cut The Woven Wrap
Lay your woven wrap on the floor and straighten it out.
Along the top rail of the wrap, measure 90 inches in from one of the short sides of the wrap, and mark it with a pin.
To make sure your cut line will be straight, measure again on the bottom rail, and in the middle of the wrap as well.
(If your wrap has tapered ends, measure on one rail only, then fold the wrap in half so the top and bottom rails touch, then use your first pin to make additional marks for your cut line.)
Make a straight cut through the wrap on the 90 inch line you made with your pins. Make it as straight as you can. You can also do this with a rotary cutter and mat if you want.
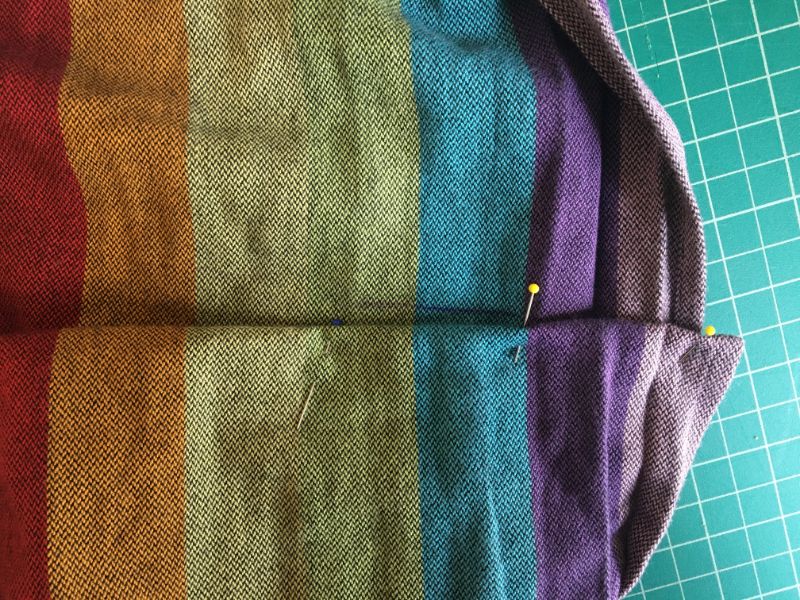
Step 2. Fold & Mark The Hem
On the side you just cut, fold over the raw edge once, ½ inch and pin it in place.
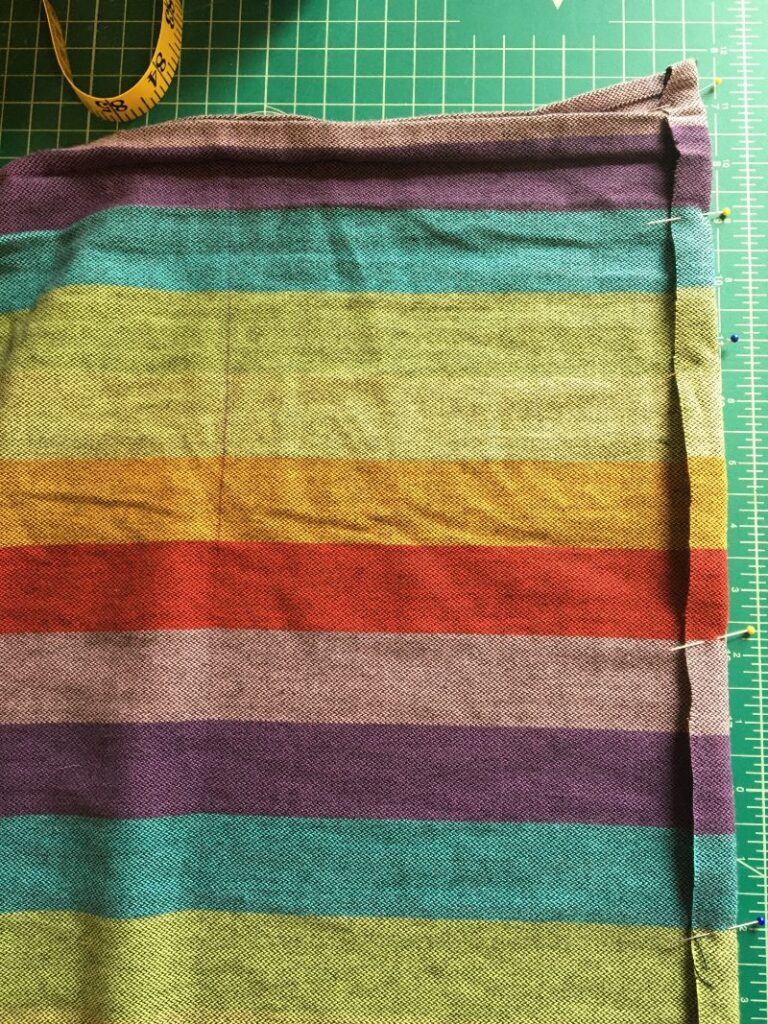
Use a pen or other marking tool, to make a line across the wrap 20 inches away from the hem you just folded and pinned. I did this by folding the edge of the wrap up 10 inches and smoothing it flat, then using the folded edge to trace the line.
When you sew, you will cover up the line so don’t worry. The line is essential for making sure it is pinned straight.
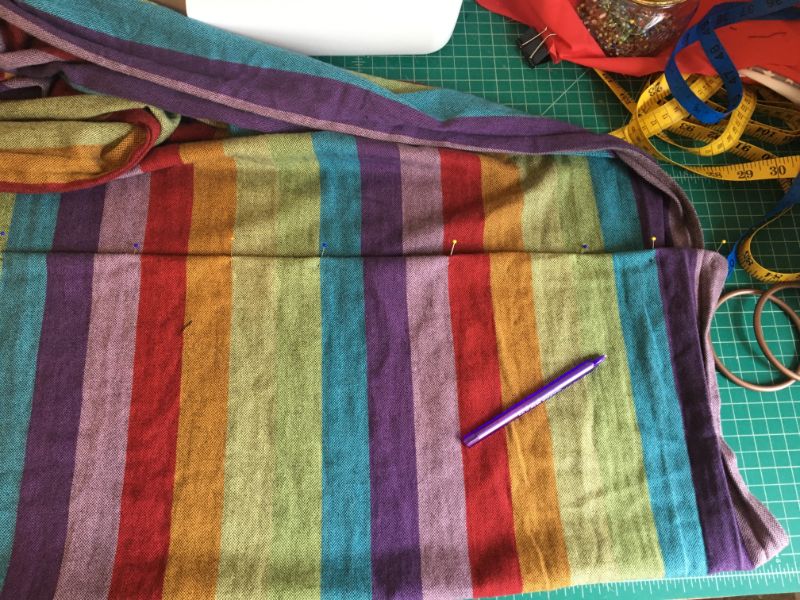
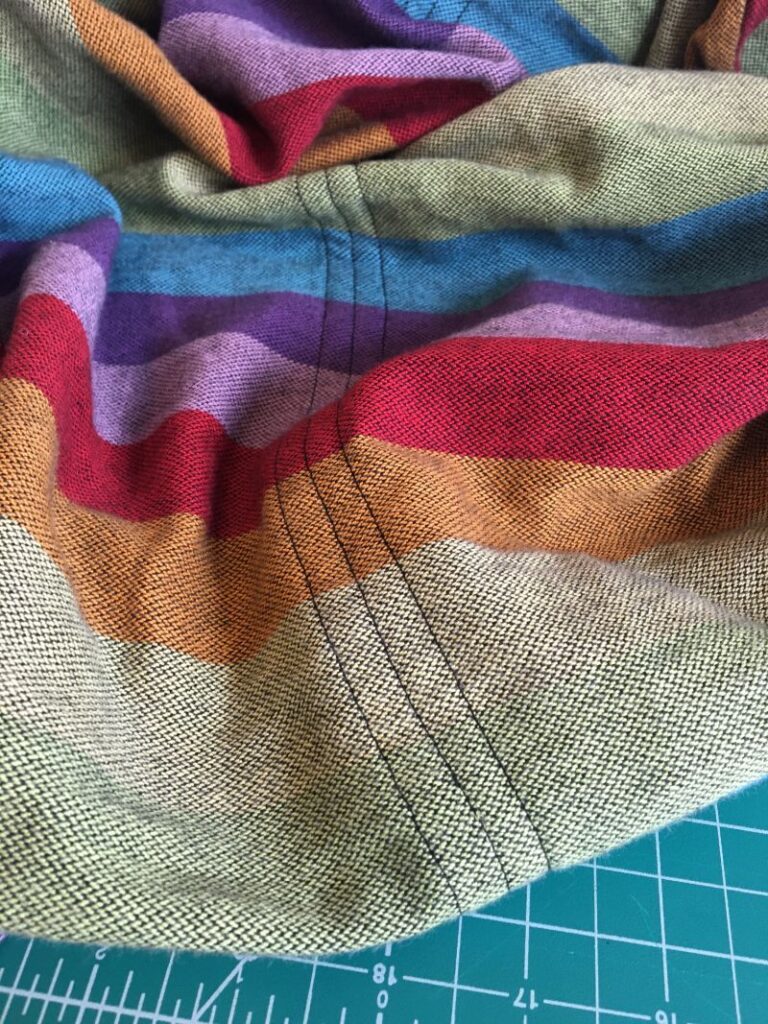
Step 3. Place The Sling Rings
Gather the pinned edge of the wrap and very carefully put both sling rings onto the wrap.
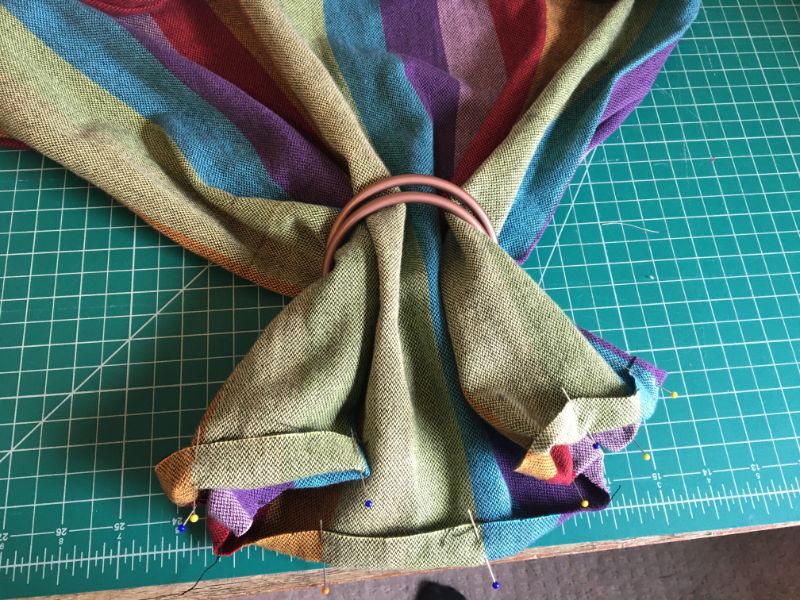
Then, fold the wrap over the rings and align the pinned edge with the pen line you drew in the last step. You can cover the line slightly with the pinned edge to hide it.
Pin the folded edge to the bottom layer of the wrap.
Step 4. Sew The Gathered Shoulder
Sew down the folded edge about 1/8th inch away from the edge, making sure to backstitch well on both sides.
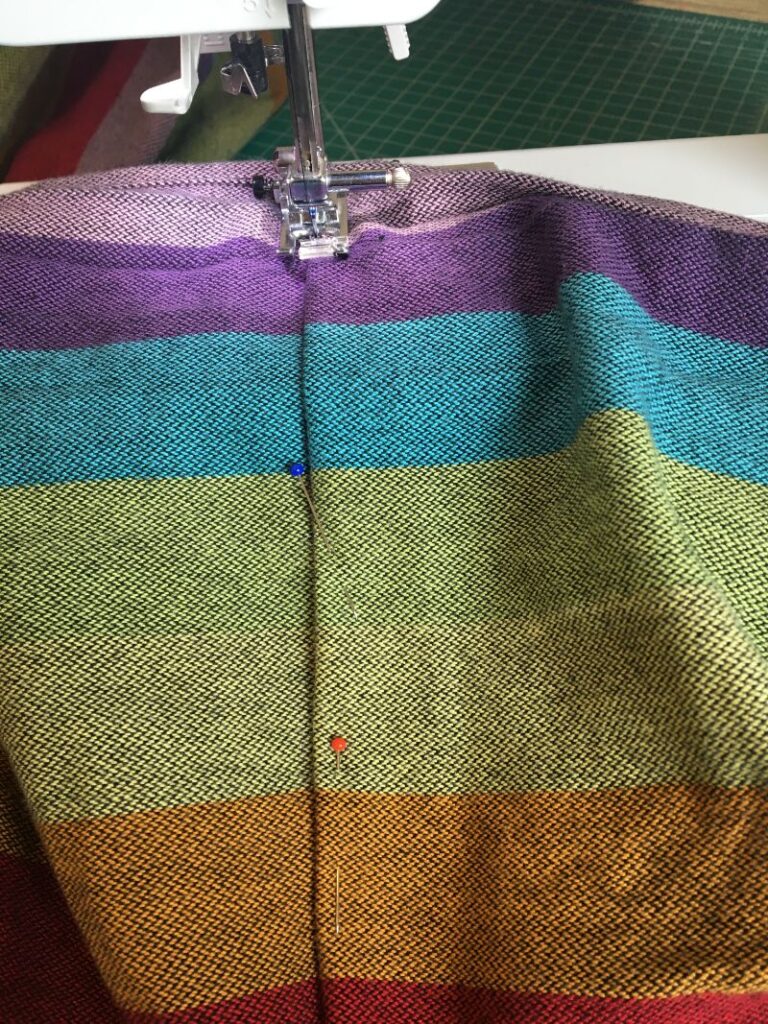
As you sew, you will have to keep straightening the fabric since it is now bunched into the rings. It’s okay to go slow, just make sure it is straight!
Then, sew down the sling again right along side the first stitch line, about 3/8ths inch away.
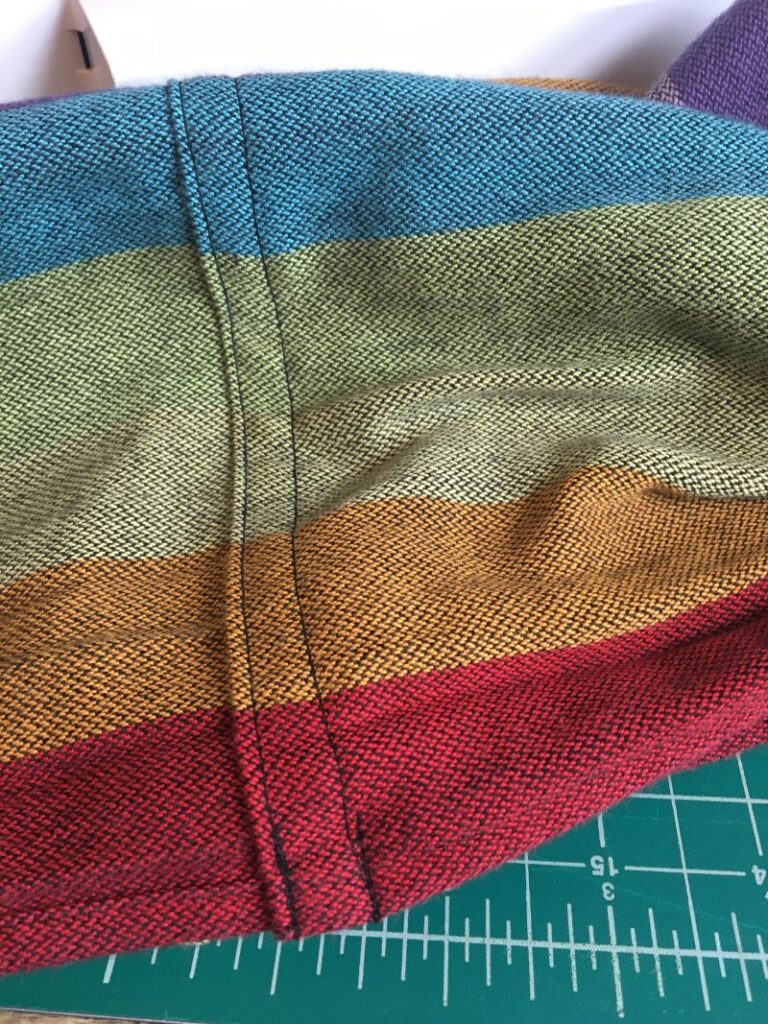
Finally, sew a third stitch next to the first two stitches. You can sew it in between them, or add another 3/8ths inch away again.
This ensures that if any stitches pop, there is multiple lines of backup to hold it together.
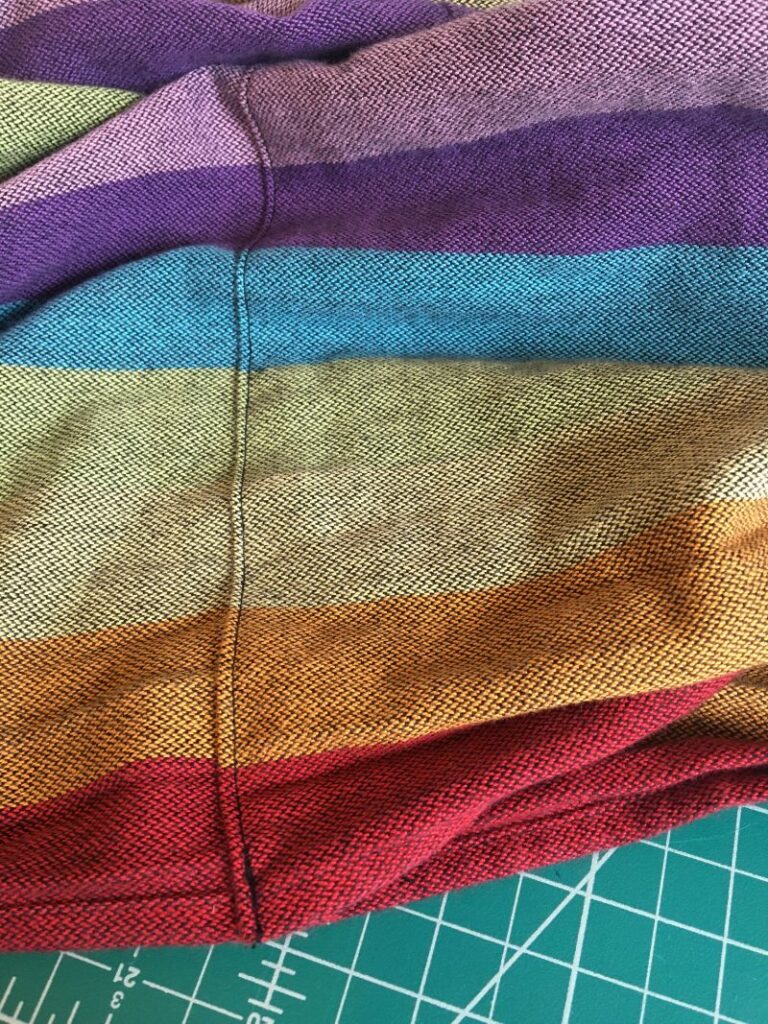
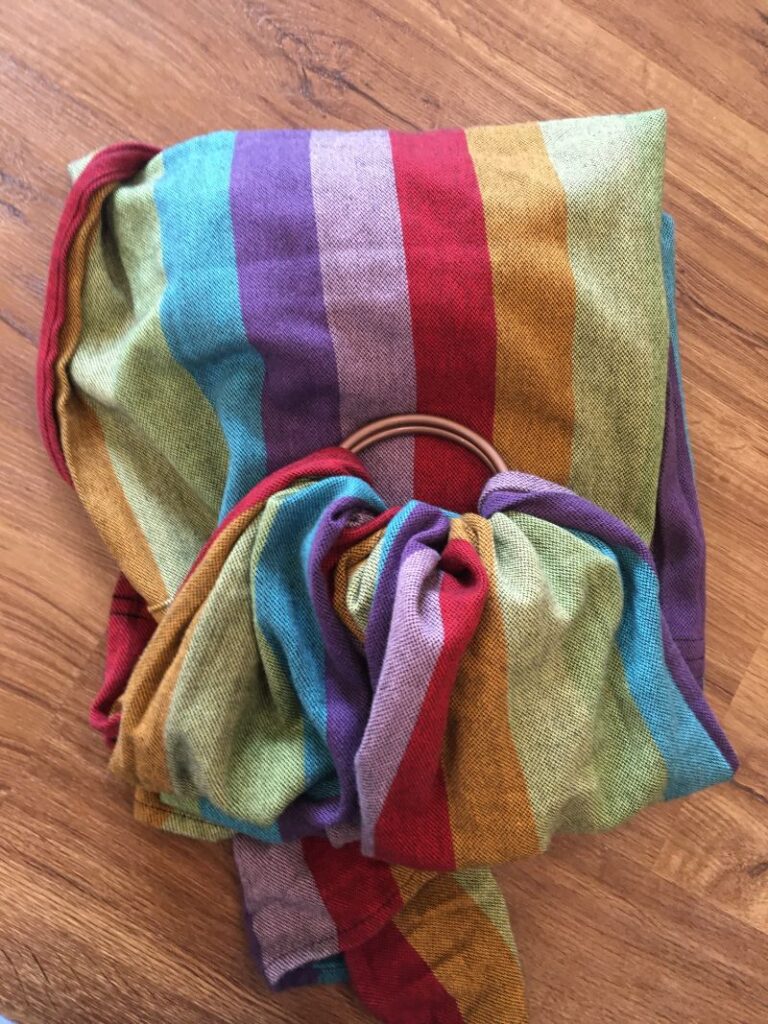
This completes the ring sling!
Using a woven wrap repurposed and converted into a ring sling is a great idea because you don’t have to hem any of the other 3 sides! You can use the original hems from the woven wrap, and even keep the tapered edge.
I can’t wait to wear my baby and tell everyone who asks “where did you get that sling?” that I made it!
Conclusion
This woven wrap to ring sling conversion is very quick and I love the results. I am so happy to be able to use this soft beautiful wrap in a new way. Since the ring sling is one layer, the thicker warmer fabric suits it well, and I won’t have to deal with any huge knots when I wear my baby!
There is more than an entire half of a wrap left, which I converted into a very simple rectangle shaped Wrap-Tai (Meh Dai with thicker straps.)
If you have any questions about this tutorial, leave a comment below. Also pin this post and sign up for my email list to stay in touch.